✨Spring Boot整合Thymeleaf
📃个人主页: 不断前进的皮卡丘
🌞博客描述: 梦想也许遥不可及,但重要的是追梦的过程,用博客记录自己的成长,记录自己一步一步向上攀登的印记
🔥网站推荐:千里之行,始于足下。每天坚持刷题,巩固所学知识,也为将来找工作,面试做好准备----- 刷题神器
各大互联网大厂面试真题。基础题库到进阶题库等各类面试题应有尽有!
牛客网面经合集,满足大厂面试技术深度,快速构建Java核心知识体系大厂面试官亲授,备战面试与技能提升,主要考点+主流场景+内功提升+真题解析
<dependency>
  <groupId>org.springframework.boot</groupId>
  <artifactId>spring-boot-starter-thymeleaf</artifactId>
</dependency>
Thymeleaf默认的视图路径是:/ resources/templates,在这个目录下面创建html并引入thymeleaf
<html lang="en" xmlns:th="http://www.thymleaf.org">
xmlns:th=“http://www.thymleaf.org”>
${域属性名}:获得request域中的域属性值并显示
${session.域属性名}: 获得session域中的域属性值并显示
< p th:text="${name}">aaa</p>
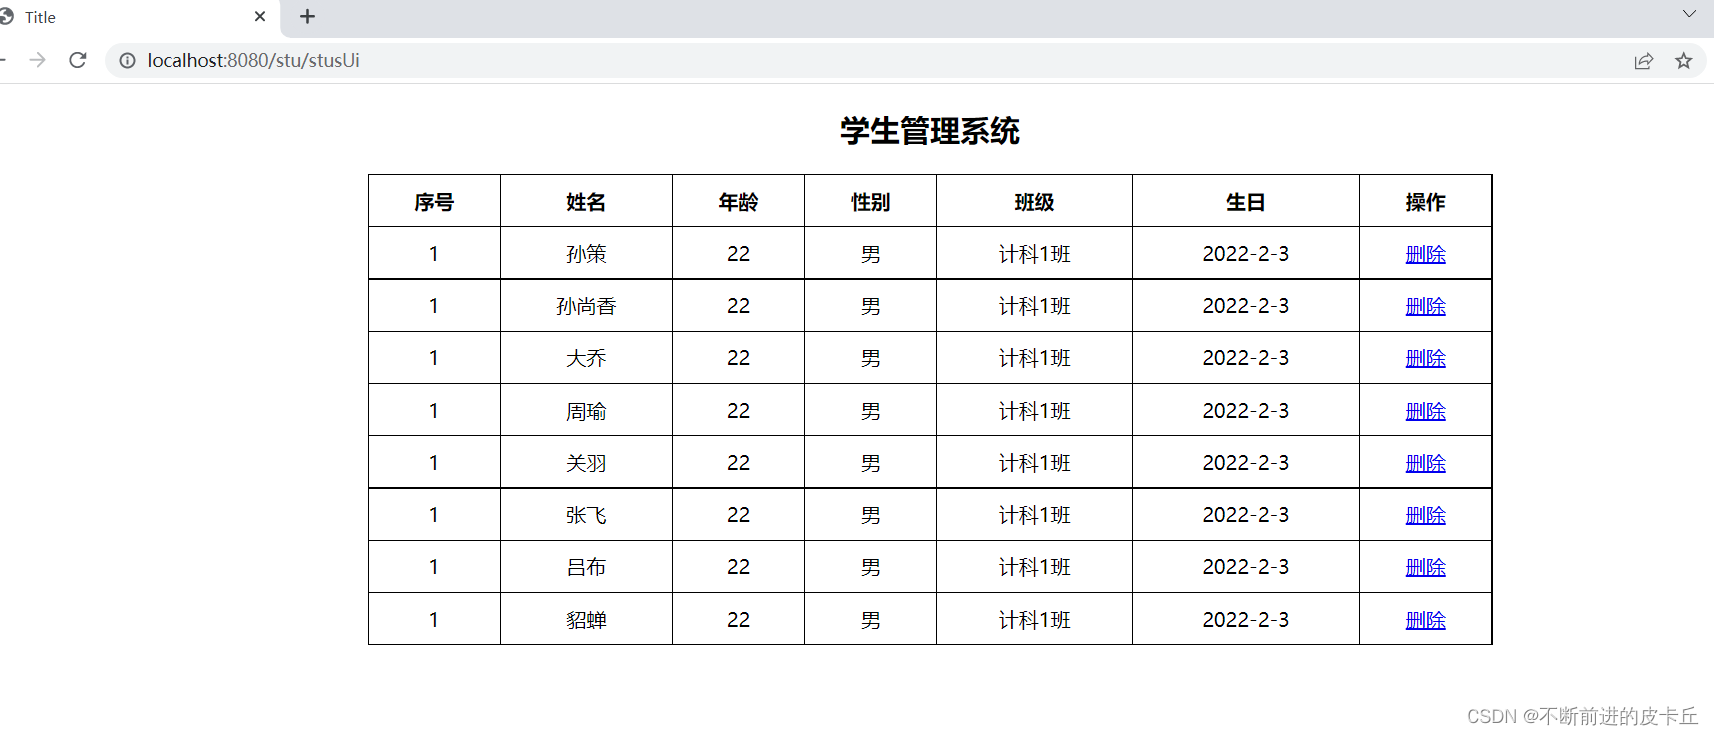
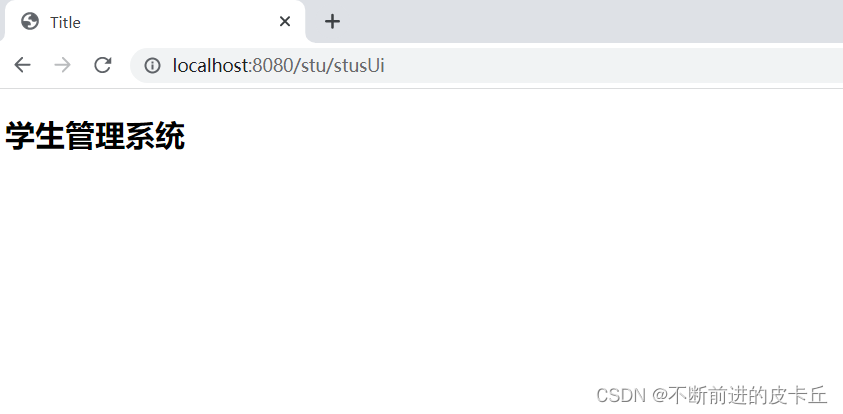
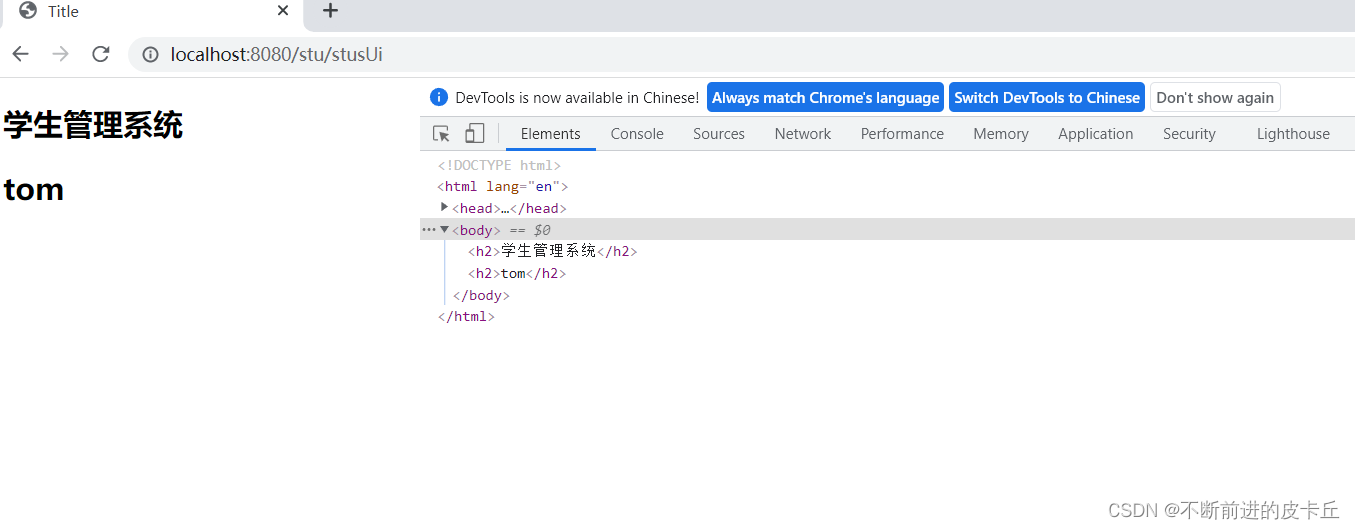
如果取得到数据的话,就会渲染成动态画面,否则就渲染成静态画面(只显示学生管理系统只显示学生管理系统这几个字)

<span th:text="${user.name}">Tom</span>
使用th:if和th:unless属性进行条件判断,th:unlessth:unless刚好相反,只有表达式条件不成立才会显示内容
<h2 th:if="${age>=18}">成年</h2>
<h2 th:unless="${age>=18}">未成年</h2>
<!DOCTYPE html>
<html lang="en" xmlns:th="http://www.thymleaf.org">
<head>
    <meta charset="UTF-8">
    <title>Title</title>
    <style>
        .tb-stus{
            width: 900px;
            margin: 0 auto;
            border: black 1px solid;
            border-collapse: collapse;
        }
        .tb-stus th,td{
            padding: 10px;
            text-align: center;
            border:1px solid black;
        }
    </style>
</head>
<body>
    <h2 align="center">学生管理系统</h2>
    <table class="tb-stus">
        <thead>
            <tr>
                <th>序号</th>
                <th>姓名</th>
                <th>年龄</th>
                <th>性别</th>
                <th>班级</th>
                <th>生日</th>
                <th>操作</th>
            </tr>
        </thead>
        <tbody>
            <tr th:each="stu:${stuList}">
                <td>1</td>
                <td th:text="${stu.name}">aa</td>
                <td>22</td>
                <td>男</td>
                <td>计科1班</td>
                <td>2022-2-3</td>
                <td>
                    <a href="#">删除</a>
                </td>
            </tr>
        </tbody>
    </table>
</body>
</html>
IDEA使用Thymeleaf输入 th: 没有智能提示的全新解决办法
<!--http://localhost:8080/stu/10 -->
<a th:href="${'/stus/'+ stu.id}">编辑学生1</a>

<!--http://localhost:8080/stu?id=10 -->
<a th:href="@{/stus(id=${stu.id})}">编辑学生2</a>

<!--http://localhost:8080/stu?id=10&name=abc -->
<a th:href="@{/stus(id=${stu.id},name=${stu.name})}">编辑学生3</a>
<div th:switch="${stu.role}">
  <h2 th:case="banzhang">班长</h2>
  <h2 th:case="tuanzhishu">团支书</h2>
  <h2 th:case="${data}">学委</h2>
  <h2 th:case="*">其他</h2>

</div>
如果没有显示设置状态变量,thymeleaf会默认给一个变量名+Stat的状态
<tr th:each="stu: ${stus}">
  <td th:text="${stuStat.index}"></td>
  <td th:text="${ stu.name}"></td>
  <td th:text="${ stu.age}"></td>
</tr>
th:object可以定义对象属性
*{}可以和th:object配合使用,可以取出对象中的属性#dates.format()可以用来格式化日期格式
 <form th:object="${stu}">
        编号:<input type="text" name="id" th:value="*{id}"><br>
        姓名:<input type="text" name="name" th:value="*{name}"><br>
        年龄:<input type="text" name="age" th:value="*{age}"><br>
        性别:<input type="radio" name="gender" value="true" th:checked="*{gender}">男<br>
        性别:<input type="radio" name="gender" value="true" th:checked="*{not gender}">女<br>
        生日:<input type="text" name="birth" th:value="*{#dates.format(birth,'yyyy-MM-dd')}"><br>
        <input type="submit" value="编辑">
    </form>
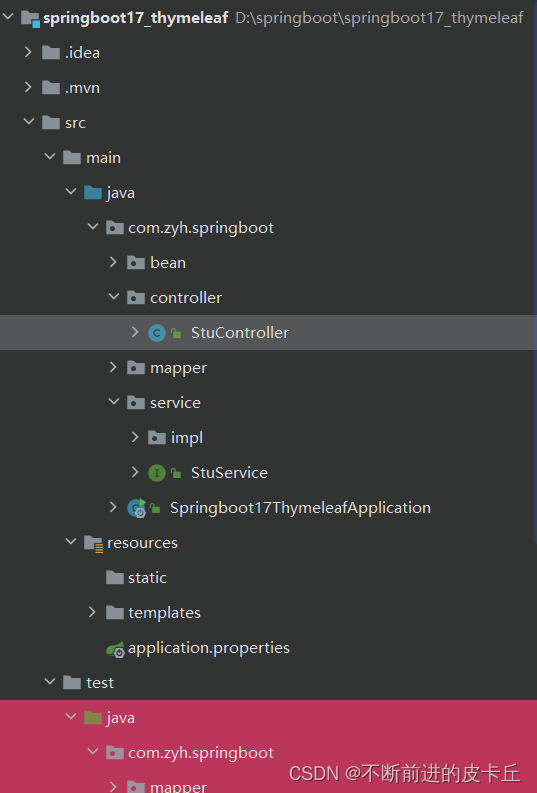
创建项目的时候,记得在模板引擎中勾选Thymeleaf
在pom.xml中把MySQL驱动的作用域删除
然后我们这里使用druid连接池,所以需要在pom文件导入相关依赖
 <dependency>
            <groupId>com.alibaba</groupId>
            <artifactId>druid-spring-boot-starter</artifactId>
            <version>1.2.11</version>
        </dependency>
然后我们需要在全局配置文件application.properties中进行相关配置
# 指定Mybatis的Mapper接口的xml映射文件的路径
mybatis.mapper-locations=classpath:mapper/*xml
# MySQL数据库驱动
#这个驱动也可以省略,可以根据使用的MySQL自动加载相应的驱动
spring.datasource.driver-class-name=com.mysql.cj.jdbc.Driver
# 数据源名称
spring.datasource.name=com.alibaba.druid.pool.DruidDataSource
# 数据库连接地址
spring.datasource.url=jdbc:mysql://localhost:3306/school?serverTimezone=UTC&zeroDateTimeBehavior=convertToNull
# 数据库用户名和密码
spring.datasource.username=root
spring.datasource.password=a87684009.
# 设置日志级别
logging.level.com.zyh.springboot=debug
# 开启mybatis驼峰命名规则自动转换功能
mybatis.configuration.map-underscore-to-camel-case=true
@Data
public class Stu {
    private Integer id;
    private String name;
    private Integer age;
    private Boolean gender;
    private Integer cid;
    @DateTimeFormat(pattern = "yyyy-MM-dd")
    private Date birth;
}
Mapper
@Mapper
public interface StuMapper {
    /**
     * 查询所有学生信息
     * @return
     * @throws Exception
     */
    @Select("select * from stu")
     List<Stu> queryAllStu() throws Exception;
}
Service
public interface StuService  {
    /**
     * 查询所有学生信息
     * @return
     */
    List<Stu> queryAllStu() throws Exception;
}
Service的实现类
@Service
public class StuServiceImpl implements StuService {
    @Autowired
    private StuMapper stuMapper;
    @Override
    public List<Stu> queryAllStu() throws Exception {
         return stuMapper.queryAllStu();
    }
}
thymeleaf
<!DOCTYPE html>
<html lang="en" xmlns:th="http://www.thymleaf.org">
  <head>
    <meta charset="UTF-8">
    <title>Title</title>
  </head>
  <body>
    <h2>学生管理系统</h2>
    <h2 th:text="${name}">aaaa</h2>
  </body>
</html>
Controller
@Controller
@RequestMapping("/stu")
public class StuController {
@Autowired
private StuService stuService;
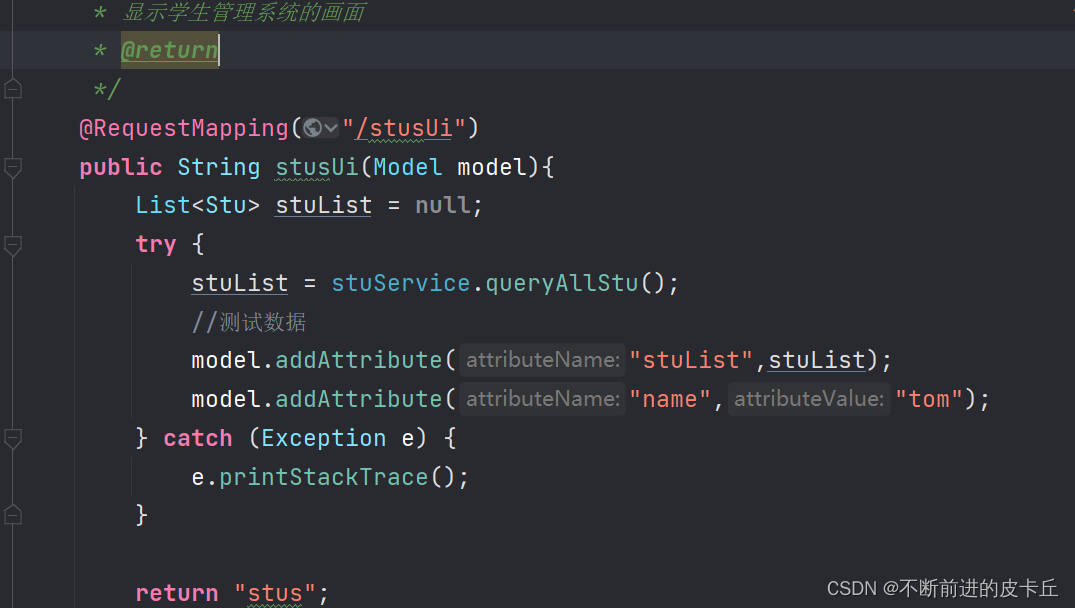
/**
* 显示学生管理系统的画面
* @return
*/
@RequestMapping("/stusUi")
public String stusUi(){
return "stus";
}
}
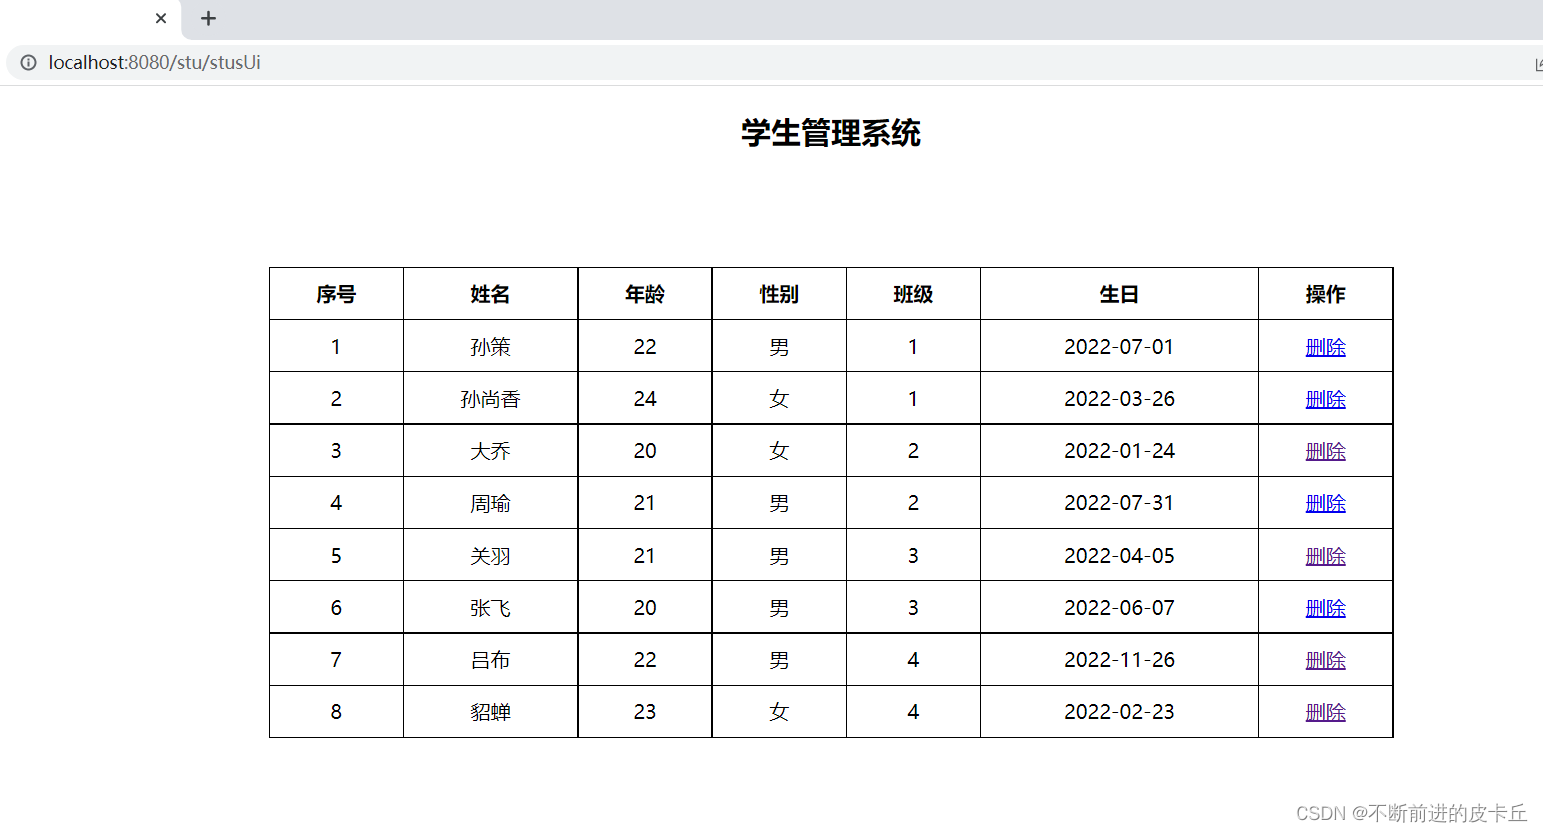
然后我们先准备好页面
<!DOCTYPE html>
<html lang="en"  xmlns:th="http://www.thymeleaf.org">
<head>
    <meta charset="UTF-8">
    <title>Title</title>
    <style>
        .tb-stus{
            width: 900px;
            margin: 0 auto;
            border: black 1px solid;
            border-collapse: collapse;
        }
        .tb-stus th,td{
            padding: 10px;
            text-align: center;
            border:1px solid black;
        }
    </style>
</head>
<body>
<h2 align="center">学生管理系统</h2>
<table class="tb-stus">
    <thead>
    <tr>
        <th>序号</th>
        <th>姓名</th>
        <th>年龄</th>
        <th>性别</th>
        <th>班级</th>
        <th>生日</th>
        <th>操作</th>
    </tr>
    </thead>
    <tbody>
    <tr th:each="stu,status: ${stuList}">
        <td th:text="${status.index+1}">1</td>
        <td th:text="${stu.name}">aa</td>
        <td th:text="${stu.age}">22</td>
<!--        gender的属性值为1表示性别为男-->
        <td th:if="${stu.gender}">男</td>
        <td th:unless="${stu.gender}">女</td>
        <td th:text="${stu.cid}">计科1班</td>
       <td th:text="${#dates.format(stu.birth,'yyyy-MM-dd')}">2022-2-3</td>
        <td>
            <!--http://localhost:8080/stu/delete?id=10-->
            <a th:href="@{/stu/delete(id=${stu.id})}">删除</a>
        </td>
    </tr>
    </tbody>
</table>
</body>
</html>
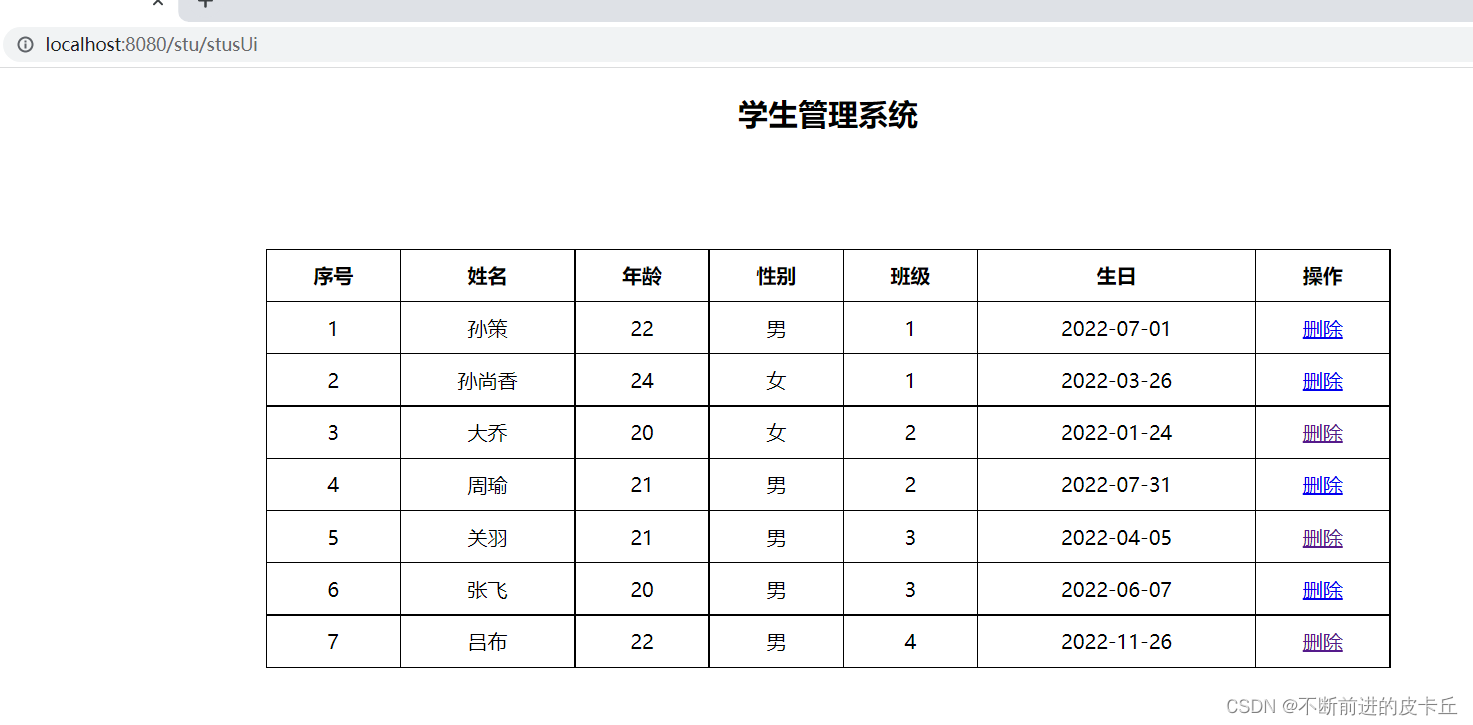
当我们点击删除的时候,后端要根据前端传过来的id来从数据库中删除对应的数据。这里我们先按照我们之前学的时候,熟悉的方法来完成,到后面的时候,会详细讲前后端分离开发
Controller(之前的方法这里没有粘贴出来,不然代码太多了)
@Controller
@RequestMapping("/stu")
public class StuController {
    @Autowired
    private StuService stuService;

    /**根据id删除数据
     * http://localhost:8080/stu/delete?id=10
     * @return
     */
    @RequestMapping("/delete")
    public String deleteById(@RequestParam("id") Integer id){
        try {
            stuService.deleteByid(id);
        } catch (Exception e) {
            e.printStackTrace();
        }
        System.out.println(id);
        return "redirect:/stu/stusUi";
    }


  }
Service
public interface StuService  {
    /**
     * 查询所有学生信息
     * @return
     */
    List<Stu> queryAllStu() throws Exception;

    void deleteByid(Integer id);
}
Service实现类
@Service
public class StuServiceImpl implements StuService {
    @Autowired
    private StuMapper stuMapper;
    @Override
    public List<Stu> queryAllStu() throws Exception {
         return stuMapper.queryAllStu();
    }

    /**
     * 根据id删除数据
     * @param id
     */
    @Override
    public void deleteByid(Integer id) throws Exception {
        stuMapper.deleteById(id);
    }
}
Mapper
@Mapper
public interface StuMapper {
    /**
     * 查询所有学生信息
     * @return
     * @throws Exception
     */
    @Select("select * from stu")
     List<Stu> queryAllStu() throws Exception;
    @Delete("delete from stu where id=#{id}")
    void deleteById( Integer id);
}
把编号为8的数据删除
页面stus.html
<!DOCTYPE html>
<html lang="en"  xmlns:th="http://www.thymeleaf.org">
<head>
    <meta charset="UTF-8">
    <title>Title</title>
    <style>
        .tb-stus{
            width: 900px;
            margin: 0 auto;
            border: black 1px solid;
            border-collapse: collapse;
        }
        .tb-stus th,td{
            padding: 10px;
            text-align: center;
            border:1px solid black;
        }
    </style>
</head>
<body>
<h2 align="center">学生管理系统</h2>
<table class="tb-stus">
    <thead>
    <tr>
        <th>序号</th>
        <th>姓名</th>
        <th>年龄</th>
        <th>性别</th>
        <th>班级</th>
        <th>生日</th>
        <th>操作</th>
    </tr>
    </thead>
    <tbody>
    <tr th:each="stu,status: ${stuList}">
        <td th:text="${stu.id}">1</td>
        <td th:text="${stu.name}">aa</td>
        <td th:text="${stu.age}">22</td>
<!--        gender的属性值为1表示性别为男-->
        <td th:if="${stu.gender}">男</td>
        <td th:unless="${stu.gender}">女</td>
        <td th:text="${stu.cid}">计科1班</td>
         <td th:text="${#dates.format(stu.birth,'yyyy-MM-dd')}">2022-2-3</td>
        <td>
<!--            localhost:8080/stu/delete/8-->
<!--            <a th:href="${'/stu/delete/'+stu.id}">删除</a>-->
            <!--http://localhost:8080/stu/delete?id=10-->
            <a th:href="@{/stu/delete(id=${stu.id})}">删除</a>
            <a th:href="@{/stu/edit(id=${stu.id})}">编辑</a>
        </td>
    </tr>
    </tbody>
</table>

</body>
</html>
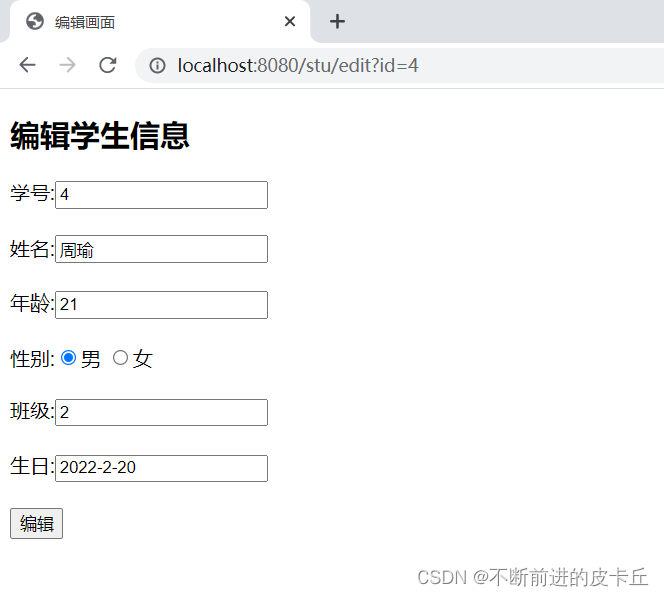
页面 stu-edit.html
<!DOCTYPE html>
<html lang="en" xmlns:th="http://www.thymeleaf.org">
  <head>
    <meta charset="UTF-8">
    <title>编辑画面</title>
  </head>
  <body>
    <h2 >编辑学生信息</h2>
    <form action="" method="post" th:object="${stu}">
      学号:<input type="text" name="id" th:value="*{id}"  ><br><br>
      姓名:<input type="text" name="name"  th:value="*{name}"><br><br>
      年龄:<input type="text" name="age"  th:value="*{age}"><br><br>
      性别:<input type="radio" name="gender"    th:checked="*{gender}"  >男
      <input type="radio" name="gender"   th:checked="*{!gender}" >女<br><br>
      班级:<input type="text" name="cid" th:value="*{cid}"><br><br>
      生日:<input type="text" name="birth" th:value="*{#dates.format(birth,'yyyy-MM-dd')}"><br><br>
      <input type="submit" value="编辑">
    </form>
  </body>
</html>
Controller
/**
     * 根据id来修改数据
     * 我们首先得先根据id把数据查询出来,然后把数据展示出来
     * 用户再进行编辑,用户编辑完并且提交以后,跳转到学生管理系统画面,展示所有数据
     * @return
     */
    @RequestMapping("/edit")
    public String edit(@RequestParam("id") Integer id,Model model){
        System.out.println("id"+id);
        try {
            Stu stu=stuService.queryById(id);
            model.addAttribute("stu",stu);
        } catch (Exception e) {
            e.printStackTrace();
        }

        return "stu-edit";
    }
Service
public interface StuService  {
    /**
     * 查询所有学生信息
     * @return
     */
    List<Stu> queryAllStu() throws Exception;

    /**
     * 根据id来删除学生信息
     * @param id
     * @throws Exception
     */
    void deleteByid(Integer id) throws Exception;

    /**
     * 根据id来查询对应学生信息
     * @param id
     * @return
     * @throws Exception
     */
    Stu queryById(Integer id) throws Exception;
}
Service实现类
@Service
public class StuServiceImpl implements StuService {
    @Autowired
    private StuMapper stuMapper;
    @Override
    public List<Stu> queryAllStu() throws Exception {
         return stuMapper.queryAllStu();
    }

    /**
     * 根据id删除数据
     * @param id
     */
    @Override
    public void deleteByid(Integer id) throws Exception {
        stuMapper.deleteById(id);
    }

    @Override
    public Stu queryById(Integer id) throws Exception {
        return stuMapper.queryById(id);
    }
}
Mapper
@Mapper
public interface StuMapper {
    /**
    * 查询所有学生信息
    * @return
    * @throws Exception
    */
    @Select("select * from stu")
    List<Stu> queryAllStu() throws Exception;
    @Delete("delete from stu where id=#{id}")
    void deleteById( Integer id);
    @Select("select * from stu where id=#{id}")
    Stu queryById(Integer id) throws Exception;
}
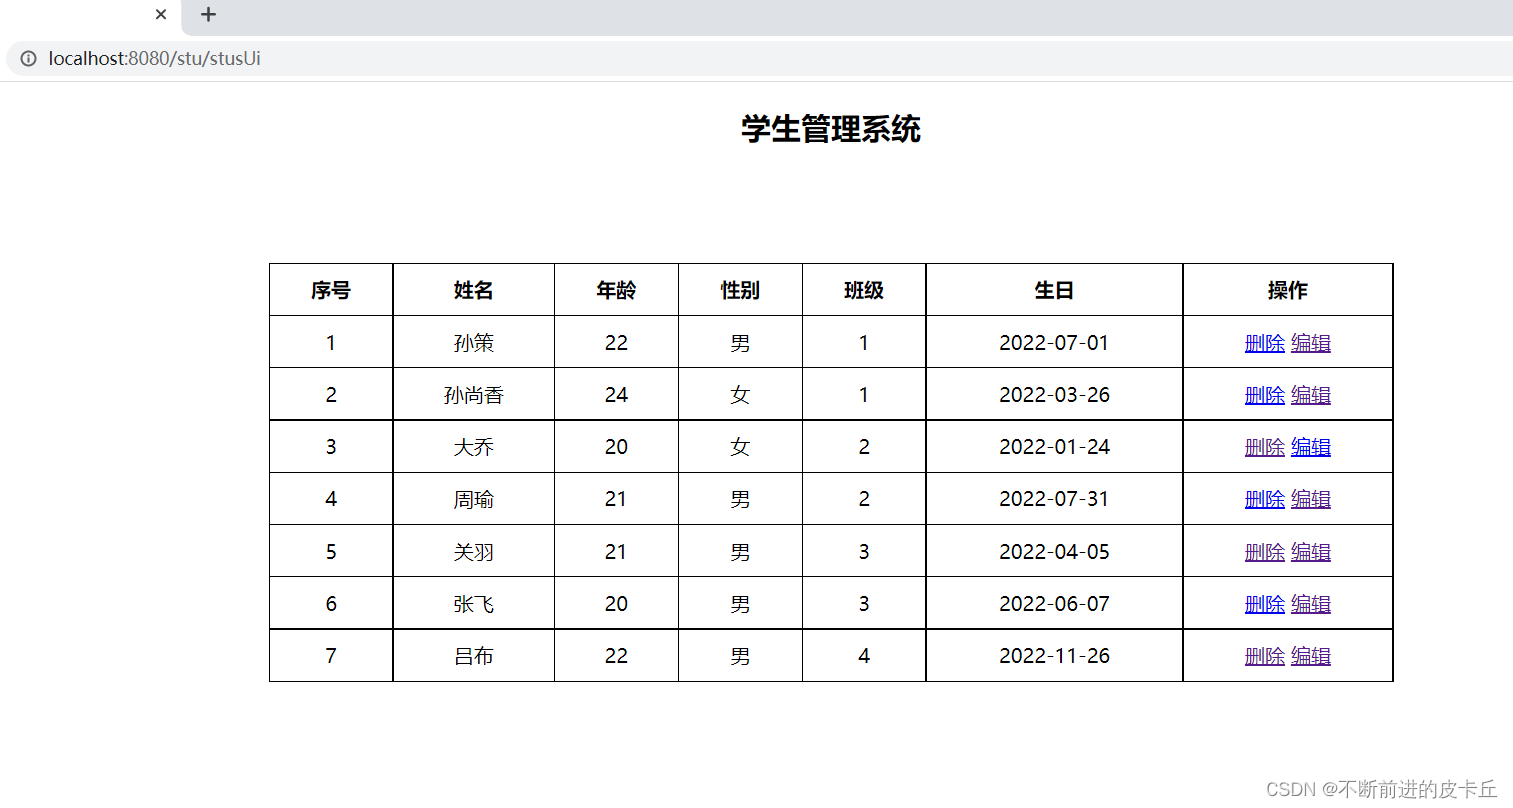
比如在序号为4中,点击编辑
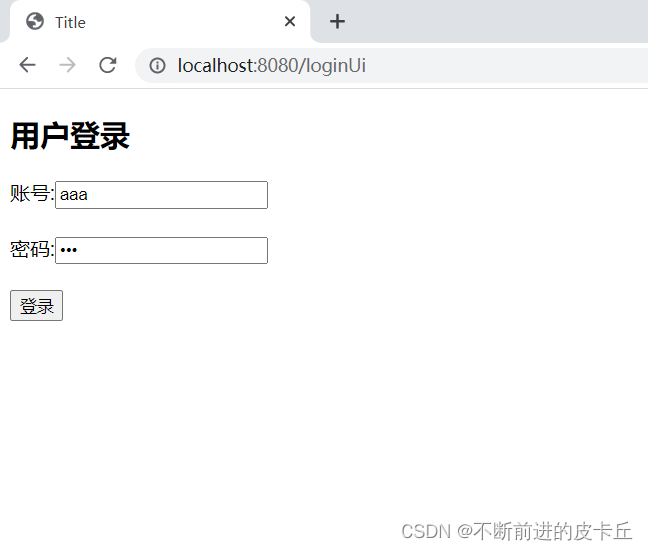
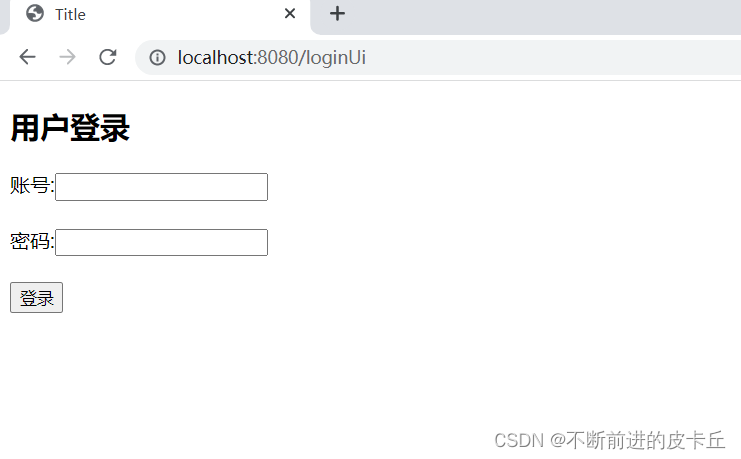
登录页面
<!DOCTYPE html>
<html lang="en">
<head>
    <meta charset="UTF-8">
    <title>Title</title>
</head>
<body>
    <h2>用户登录</h2>
    <form action="/login" method="post">
        账号:<input type="text" name="username"><br><br>
        密码:<input type="password" name="password"><br><br>
        <input type="submit" value="登录">
    </form>


</body>
</html>
因为需要判断用户是否存在,这是从数据库进行查询的,所以要准备对应的管理员表
# 创建管理员表
CREATE TABLE admin(
	id INT PRIMARY KEY AUTO_INCREMENT,
	username VARCHAR(20),
	`password` VARCHAR(20)
);

INSERT INTO admin VALUES
	(DEFAULT,'aaa',111),
	(DEFAULT,'bbb',222),
	(DEFAULT,'ccc',333);
# 查询测试
SELECT * FROM admin;
准备对应的实体类
@Data
public class Admin {
    private String username;
    private String password;
}
Controller
@Controller
@SessionAttributes(names = {"admin"})
public class AdminController {
    @Autowired
    private AdminService adminService;

    /**
     * 显示登录页面
     * @return
     */
    @RequestMapping(value = "/loginUi")
    public String loginUi(){
        return "login";
    }
    @RequestMapping(value = "/login",method = RequestMethod.POST)
    public String login(String username, String password, Model model){
        try {
            Admin admin = adminService.login(username, password);
            //用户名存在说明登录成功
            if (admin!=null){
                //存放到session域中
                model.addAttribute("admin",admin);
                return "redirect:/stu/stusUi";
            }
        } catch (Exception e) {
            e.printStackTrace();
        }
        return "redirect:/loginUi";
    }

}
Service
public interface AdminService {
    Admin login(String username,String password) throws Exception;
}
Service对应的实现类
@Service
public class AdminServiceImpl implements AdminService {
    @Autowired
    private AdminMapper adminMapper;
    @Override
    public Admin login(String username, String password) throws Exception {
        return adminMapper.queryByUsernameAndPassword(username,password);
    }
}
Mapper
@Mapper
public interface AdminMapper {
    @Select("select * from admin where username=#{username} and password=#{password}")
    Admin queryByUsernameAndPassword(@Param("username") String username, @Param("password") String password);
}

<!DOCTYPE html>
<html lang="en"  xmlns:th="http://www.thymeleaf.org">
<head>
    <meta charset="UTF-8">
    <title>Title</title>
    <style>
        .tb-stus{
            width: 900px;
            margin: 0 auto;
            border: black 1px solid;
            border-collapse: collapse;
        }
        .tb-stus th,td{
            padding: 10px;
            text-align: center;
            border:1px solid black;
        }
    </style>
</head>
<body>
    <h2 align="center">学生管理系统</h2>
    <h2 th:if="${session.admin!=null}" th:text="${session.admin.username}">用户名</h2>
    <a th:unless="${session.admin!=null}" href="/loginUi">登录</a>
    <a th:if="${session.admin!=null}" href="/logout">注销用户</a>
<table class="tb-stus">
    <thead>
    <tr>
        <th>序号</th>
        <th>姓名</th>
        <th>年龄</th>
        <th>性别</th>
        <th>班级</th>
        <th>生日</th>
        <th>操作</th>
    </tr>
    </thead>
    <tbody>
    <tr th:each="stu,status: ${stuList}">
        <td th:text="${stu.id}">1</td>
        <td th:text="${stu.name}">aa</td>
        <td th:text="${stu.age}">22</td>
<!--        gender的属性值为1表示性别为男-->
        <td th:if="${stu.gender}">男</td>
        <td th:unless="${stu.gender}">女</td>
        <td th:text="${stu.cid}">计科1班</td>
        <td th:text="${#dates.format(stu.birth,'yyyy-MM-dd')}">2022-2-3</td>
        <td>
<!--            localhost:8080/stu/delete/8-->
<!--            <a th:href="${'/stu/delete/'+stu.id}">删除</a>-->
            <!--http://localhost:8080/stu/delete?id=10-->
            <a th:href="@{/stu/delete(id=${stu.id})}">删除</a>
            <a th:href="@{/stu/edit(id=${stu.id})}">编辑</a>
        </td>
    </tr>
    </tbody>
</table>

</body>
</html>
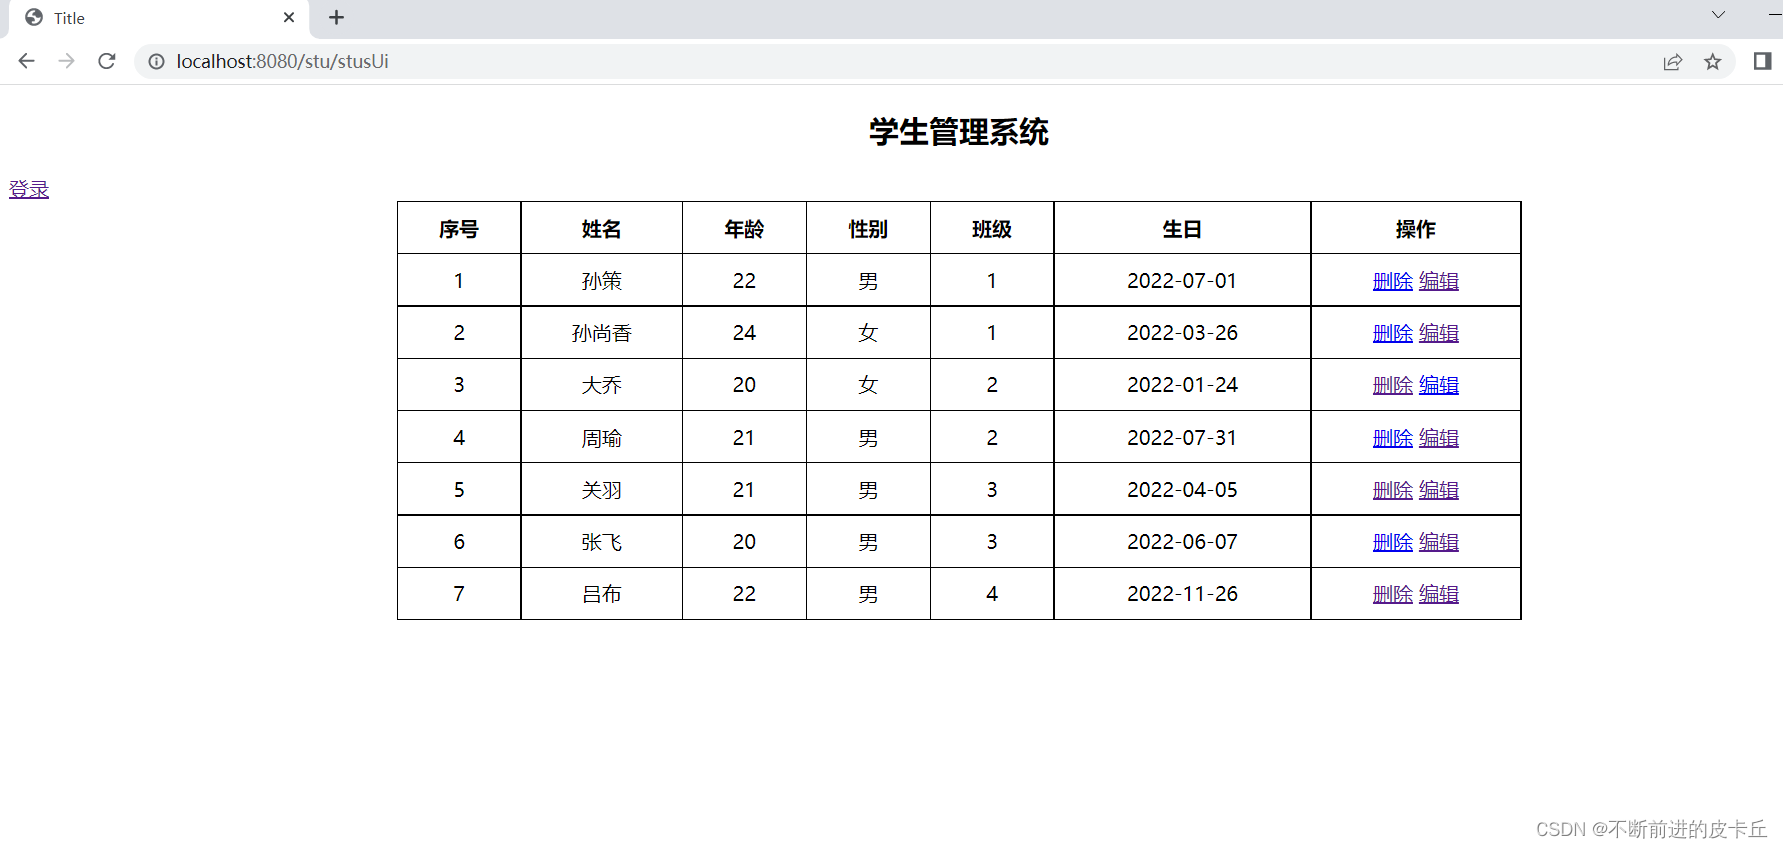

注销的话,我们把session域中的用户对象取消,然后这个时候就得重新登录,应该要跳转到登录画面
@RequestMapping("/logout")
    public String logout(HttpSession session){
        session.removeAttribute("admin");
        return "redirect:/loginUi";
    }

点击注销用户

如果您希望在Spring中启用定时任务功能,则需要在主类上添加 @EnableScheduling 注解。这样Spring才会扫描 @Scheduled 注解并执行定时任务。在大多数情况下,只需要在主类上添加 @EnableScheduling 注解即可,不需要在Service层或其他类中再次添加。以下是一个示例,演示如何在SpringBoot中启用定时任务功能:@SpringBootApplication@EnableSchedulingpublicclassApplication{publicstaticvoidmain(String[]args){SpringApplication.ru
软件特点部署后能通过浏览器查看线上日志。支持Linux、Windows服务器。采用随机读取的方式,支持大文件的读取。支持实时打印新增的日志(类终端)。支持日志搜索。使用手册基本页面配置路径配置日志所在的目录,配置后按回车键生效,下拉框选择日志名称。选择日志后点击生效,即可加载日志。windows路径E:\java\project\log-view\logslinux路径/usr/local/XX历史模式历史模式下,不会读取新增的日志。针对历史文件可以分页读取,配置分页大小、跳转。历史模式下,支持根据关键词搜索。目前搜索引擎使用的是jdk自带类库,搜索速度相对较低,优点是比较简单。2G日志全文搜
1.依赖导入org.springframework.bootspring-boot-starter-weborg.springframework.bootspring-boot-starter-validation2.validation常用注解@Null被注释的元素必须为null@NotNull被注释的元素不能为null,可以为空字符串@AssertTrue被注释的元素必须为true@AssertFalse被注释的元素必须为false@Min(value)被注释的元素必须是一个数字,其值必须大于等于指定的最小值@Max(value)被注释的元素必须是一个数字,其值必须小于等于指定的最大值@D
我正在尝试找到一种更好的方法将IRB与我的常规ruby开发集成。目前我很少在我的代码中使用IRB。我只用它来验证语法或尝试一些小的东西。我知道我可以将我自己的代码加载到ruby中作为一个require'mycode'但这通常不符合我的编程风格。有时我要检查的变量超出范围或在循环内。有没有一种简单的方法可以启动我的脚本并在IRB内的某个点卡住?我想我正在寻找一种更简单的方法来调试我的ruby代码而不破坏我的F5(编译)键。也许有经验的ruby开发者可以和我分享一个更精简的开发方法。 最佳答案 安装ruby-debugg
我开始了一个小型网络项目并使用Drupal来构建它。到目前为止,还不错:您可以快速建立一个不错的面向CMS的网站,通过模块添加社交功能,并且您有一个广泛的API可以在一个架构良好的平台中进行自定义。现在问题来了:网站的增长超出了最初的计划,我发现自己正处于认真开始为它编写代码的境地。由于Drupal项目,我对PHP有了新的认识,但我想用Ruby来做。我会感觉更舒服,以后维护起来更容易,我可以在其他Ruby/Rails应用程序中重用它。随着时间的推移,我想我会用Ruby重写Drupal中的现有部分。基于此,问题是:是否有人将两者(成功或失败的故事)结合起来?这是一个相当大的决定,但我在G
Iparking停车收费管理系统-可商用介绍Iparking是一款基于springBoot的停车收费管理系统,支持封闭车场和路边车场,支持微信支付宝多种支付渠道,支持多种硬件,涵盖了停车场管理系统的所有基础功能。技术栈Springboot,MybatisPlus,Beetl,Mysql,Redis,RabbitMQ,UniApp功能云端功能序号模块功能描述1系统管理菜单管理配置系统菜单2系统管理组织管理管理组织机构3系统管理角色管理配置系统角色,包含数据权限和功能权限配置4系统管理用户管理管理后台用户5系统管理租户管理多租户管理6系统管理公众号配置租户公众号配置7系统管理操作日志审计日志8系统
一、Elasticsearch简介实际业务场景中,多端的查询功能都有很大的优化空间。常见的处理方式有:建索引、建物化视图简化查询逻辑、DB层之上建立缓存、分页…然而随着业务数据量的不断增多,总有那么一张表或一个业务,是无法通过常规的处理方式来缩短查询时间的。在查询功能优化上,作为开发人员应该站在公司的角度,本着优化客户体验的目的去寻找解决方案。本人有幸做过Tomcat整合solr,今天一起研究一下当前比较火热的Elasticsearch搜索引擎。Elasticsearch是一个非常强大的搜索引擎。它目前被广泛地使用于各个IT公司。Elasticsearch是由Elastic公司创建。它的代码位
我正在尝试使用SpringMvc4进行资源版本控制。我使用thymeleaf模板引擎。但不适用于以下代码。加载页面时,我在查看页面源代码时看不到新版本的Url。那么我的问题是什么代码?我想念什么?@OverridepublicvoidaddResourceHandlers(finalResourceHandlerRegistryregistry){registry.addResourceHandler("/static/theme*//**").addResourceLocations("/resources/static/theme/").setCacheControl(CacheC
场景在SpringBoot项目中需要对接三方系统,对接协议是TCP,需实现一个TCP客户端接收服务端发送的数据并按照16进制进行解析数据,然后对数据进行过滤,将指定类型的数据通过mybatis存储进mysql数据库中。并且当tcp服务端断连时,tcp客户端能定时检测并发起重连。全流程效果 注:博客:霸道流氓气质的博客_CSDN博客-C#,架构之路,SpringBoot领域博主实现1、SpringBoot+Netty实现TCP客户端本篇参考如下博客,在如下博客基础上进行修改Springboot+Netty搭建基于TCP协议的客户端(二):https://www.cnblogs.com/haolb
一、SpringBoot是什么SpringBoot是依赖于Spring的,比起Spring,除了拥有Spring的全部功能以外,SpringBoot无需繁琐的Xml配置,这取决于它自身强大的自动装配功能;并且自身已嵌入Tomcat、Jetty等web容器,集成了SpringMvc,使得SpringBoot可以直接运行,不需要额外的容器,提供了一些大型项目中常见的非功能性特性,如嵌入式服务器、安全、指标,健康检测、外部配置等,其实Spring大家都知道,Boot是启动的意思。所以,SpringBoot其实就是一个启动Spring项目的一个工具而已,总而言之,SpringBoot是一个服务于框架的