整个过程是个漫长的试错过程,如有需要可私信,下载本人编译好的基础版docker离线镜像,还可以定制更多功能哦。
一、准备工作
1、准备一台ubuntu16.04版64位的计算机。
建议使用国内开源地址如:浙江大学下载地址
http://mirrors.zju.edu.cn/ubuntu-releases/16.04/ubuntu-16.04.7-desktop-amd64.iso
2、升级软件ubuntu软件 可用图形界面直接升级或使用指令 apt-get update
3、安装升级gcc7
下载并安装gcc编译安装包
sudo add-apt-repository ppa:ubuntu-toolchain-r/test
sudo apt-get update
sudo apt-get install gcc-7
sudo apt-get install g++-7
将gcc7,g++7设置作为默认选项
sudo update-alternatives --install /usr/bin/gcc gcc /usr/bin/gcc-7 100
sudo update-alternatives --config gcc
sudo update-alternatives --install /usr/bin/g++ g++ /usr/bin/g++-7 100
sudo update-alternatives --config g++
4、安装升级node npm 本人使用的node是16.15.1 npm 8.12.1
安装
apt nodejs升级
npm cache clean -f //清除npm缓存,执行命令
npm install -g n //n模块是专门用来管理nodejs的版本,安装n模块
n 16.15.1 // 指定node安装版本
npm install -g npm@8.12.1 // 指定npm安装版本
node -v //查看node版本
npm -v //查看npm版本
5、配置代理(强烈建议使用梯子,如果不能建议离开)
sudo vim /etc/profile添加如下内容
export HTTP_PROXY=http://127.0.0.1:8080
export HTTPS_PROXY=http://127.0.0.1:8080
使配置生效
source /etc/profile6、配置npm
sudo npm config set proxy http://127.0.0.1:8080
sudo npm config set https-proxy http://127.0.0.1:8080
sudo npm config set registry https://registry.npmjs.org/   //这两个二选一就行
npm config set registry https://registry.npm.taobao.org   //这两个二选一就行建议选国内的
二、下载onlyoffice编译工具
sudo apt-get install -y python git
git clone https://github.com/ONLYOFFICE/build_tools.git
三、开始运行(顺利的话需要好几个小时)
cd build_tools/tools/linux
./automate.py server
四、破解 修改20人同时编辑功能
到/server/Common/sources/constants.js
exports.LICENSE_CONNECTIONS = 20;#将此处修改你想要的连接数
修改build_tools/tools/linux/automate.py 文件
build_tools_params = ["--branch", branch,
                      "--module", modules,
                      "--update", "0", #此处修改为0,否则会覆盖你修改的文件
                      "--qt-dir", os.getcwd() + "/qt_build/Qt-5.9.9"]
再次执行编译
cd build_tools/tools/linux
./automate.py server
成功后在build_tools会生成out文件夹大概3G左右
五、安装(可参考官方网页Compiling ONLYOFFICE Docs for a local server - ONLYOFFICE)
本人建议使用windows下面的docker安装,生成docker镜像。
安装vim工具,及NGINX:
sudo apt-get install -y vim nginx删除nginx默认配置
sudo rm -f /etc/nginx/sites-enabled/default新建配制文件
vim /etc/nginx/sites-available/onlyoffice-documentserver

//内容如下:

map $http_host $this_host {
  "" $host;
  default $http_host;
}
map $http_x_forwarded_proto $the_scheme {
  default $http_x_forwarded_proto;
  "" $scheme;
}
map $http_x_forwarded_host $the_host {
  default $http_x_forwarded_host;
  "" $this_host;
}
map $http_upgrade $proxy_connection {
  default upgrade;
  "" close;
}
proxy_set_header Host $http_host;
proxy_set_header Upgrade $http_upgrade;
proxy_set_header Connection $proxy_connection;
proxy_set_header X-Forwarded-Host $the_host;
proxy_set_header X-Forwarded-Proto $the_scheme;
server {
  listen 0.0.0.0:80;
  listen [::]:80 default_server;
  server_tokens off;
  rewrite ^\/OfficeWeb(\/apps\/.*)$ /web-apps$1 redirect;
  location / {
    proxy_pass http://localhost:8000;
    proxy_http_version 1.1;
  }
}
增加连接
sudo ln -s /etc/nginx/sites-available/onlyoffice-documentserver /etc/nginx/sites-enabled/onlyoffice-documentserver重新启动nginx
nginx
sudo nginx -s reload
6.安装和配制 PostgreSQL
//安装
sudo apt-get install postgresql

//启动
service postgresql start

//新建数据库用户等 密码为onlyoffice
sudo -i -u postgres psql -c "CREATE DATABASE onlyoffice;"
sudo -i -u postgres psql -c "CREATE USER onlyoffice WITH password 'onlyoffice';"
sudo -i -u postgres psql -c "GRANT ALL privileges ON DATABASE onlyoffice TO onlyoffice;"

//配制需要输入密码 onlyoffice
psql -hlocalhost -Uonlyoffice -d onlyoffice -f /out/linux_64/onlyoffice/documentserver/server/schema/postgresql/createdb.sql
7.安装和启动 RabbitMQ
//安装
sudo apt-get install rabbitmq-server

//启动
service rabbitmq-server start
8.创建字体
cd /out/linux_64/onlyoffice/documentserver/
mkdir fonts
LD_LIBRARY_PATH=${PWD}/server/FileConverter/bin server/tools/allfontsgen \
  --input="${PWD}/core-fonts" \
  --allfonts-web="${PWD}/sdkjs/common/AllFonts.js" \
  --allfonts="${PWD}/server/FileConverter/bin/AllFonts.js" \
  --images="${PWD}/sdkjs/common/Images" \
  --selection="${PWD}/server/FileConverter/bin/font_selection.bin" \
  --output-web='fonts' \
  --use-system="true"
9.创建模板
cd /out/linux_64/onlyoffice/documentserver/
LD_LIBRARY_PATH=${PWD}/server/FileConverter/bin server/tools/allthemesgen \
  --converter-dir="${PWD}/server/FileConverter/bin"\
  --src="${PWD}/sdkjs/slide/themes"\
  --output="${PWD}/sdkjs/common/Images"
10.运行服务
//启动FileConverter service服务:
cd /out/linux_64/onlyoffice/documentserver/server/FileConverter
LD_LIBRARY_PATH=$PWD/bin \
NODE_ENV=development-linux \
NODE_CONFIG_DIR=$PWD/../Common/config \
./converter
//启动 DocService service:
cd /out/linux_64/onlyoffice/documentserver/server/DocService
NODE_ENV=development-linux \
NODE_CONFIG_DIR=$PWD/../Common/config \
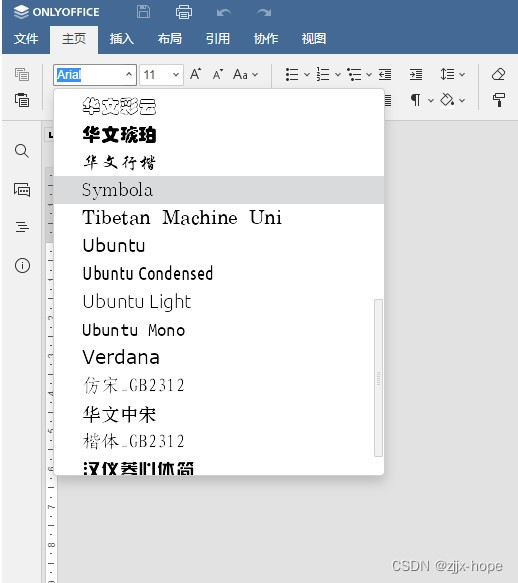
./docservice最后放几张效果图吧

本人还重新修改了字体,加入了常用的10几种字体
我正在学习如何使用Nokogiri,根据这段代码我遇到了一些问题:require'rubygems'require'mechanize'post_agent=WWW::Mechanize.newpost_page=post_agent.get('http://www.vbulletin.org/forum/showthread.php?t=230708')puts"\nabsolutepathwithtbodygivesnil"putspost_page.parser.xpath('/html/body/div/div/div/div/div/table/tbody/tr/td/div
总的来说,我对ruby还比较陌生,我正在为我正在创建的对象编写一些rspec测试用例。许多测试用例都非常基础,我只是想确保正确填充和返回值。我想知道是否有办法使用循环结构来执行此操作。不必为我要测试的每个方法都设置一个assertEquals。例如:describeitem,"TestingtheItem"doit"willhaveanullvaluetostart"doitem=Item.new#HereIcoulddotheitem.name.shouldbe_nil#thenIcoulddoitem.category.shouldbe_nilendend但我想要一些方法来使用
类classAprivatedeffooputs:fooendpublicdefbarputs:barendprivatedefzimputs:zimendprotecteddefdibputs:dibendendA的实例a=A.new测试a.foorescueputs:faila.barrescueputs:faila.zimrescueputs:faila.dibrescueputs:faila.gazrescueputs:fail测试输出failbarfailfailfail.发送测试[:foo,:bar,:zim,:dib,:gaz].each{|m|a.send(m)resc
我正在尝试设置一个puppet节点,但rubygems似乎不正常。如果我通过它自己的二进制文件(/usr/lib/ruby/gems/1.8/gems/facter-1.5.8/bin/facter)在cli上运行facter,它工作正常,但如果我通过由rubygems(/usr/bin/facter)安装的二进制文件,它抛出:/usr/lib/ruby/1.8/facter/uptime.rb:11:undefinedmethod`get_uptime'forFacter::Util::Uptime:Module(NoMethodError)from/usr/lib/ruby
我想了解Ruby方法methods()是如何工作的。我尝试使用“ruby方法”在Google上搜索,但这不是我需要的。我也看过ruby-doc.org,但我没有找到这种方法。你能详细解释一下它是如何工作的或者给我一个链接吗?更新我用methods()方法做了实验,得到了这样的结果:'labrat'代码classFirstdeffirst_instance_mymethodenddefself.first_class_mymethodendendclassSecond使用类#returnsavailablemethodslistforclassandancestorsputsSeco
我在我的项目中添加了一个系统来重置用户密码并通过电子邮件将密码发送给他,以防他忘记密码。昨天它运行良好(当我实现它时)。当我今天尝试启动服务器时,出现以下错误。=>BootingWEBrick=>Rails3.2.1applicationstartingindevelopmentonhttp://0.0.0.0:3000=>Callwith-dtodetach=>Ctrl-CtoshutdownserverExiting/Users/vinayshenoy/.rvm/gems/ruby-1.9.3-p0/gems/actionmailer-3.2.1/lib/action_mailer
设置:狂欢ruby1.9.2高线(1.6.13)描述:我已经相当习惯在其他一些项目中使用highline,但已经有几个月没有使用它了。现在,在Ruby1.9.2上全新安装时,它似乎不允许在同一行回答提示。所以以前我会看到类似的东西:require"highline/import"ask"Whatisyourfavoritecolor?"并得到:Whatisyourfavoritecolor?|现在我看到类似的东西:Whatisyourfavoritecolor?|竖线(|)符号是我的终端光标。知道为什么会发生这种变化吗? 最佳答案
在MRIRuby中我可以这样做:deftransferinternal_server=self.init_serverpid=forkdointernal_server.runend#Maketheserverprocessrunindependently.Process.detach(pid)internal_client=self.init_client#Dootherstuffwithconnectingtointernal_server...internal_client.post('somedata')ensure#KillserverProcess.kill('KILL',
我已经从我的命令行中获得了一切,所以我可以运行rubymyfile并且它可以正常工作。但是当我尝试从sublime中运行它时,我得到了undefinedmethod`require_relative'formain:Object有人知道我的sublime设置中缺少什么吗?我正在使用OSX并安装了rvm。 最佳答案 或者,您可以只使用“require”,它应该可以正常工作。我认为“require_relative”仅适用于ruby1.9+ 关于ruby-主要:Objectwhenrun
我有一个具有一些属性的模型:attr1、attr2和attr3。我需要在不执行回调和验证的情况下更新此属性。我找到了update_column方法,但我想同时更新三个属性。我需要这样的东西:update_columns({attr1:val1,attr2:val2,attr3:val3})代替update_column(attr1,val1)update_column(attr2,val2)update_column(attr3,val3) 最佳答案 您可以使用update_columns(attr1:val1,attr2:val2