ChatGPT for unity插件地址: GitHub - sunsvip/ChatGPTForUnity: ChatGPT for unity
用法:
————————————————————————————————————
几个资本大佬花钱让一群程序员研发出了AI,砸了程序员的大锅。尤其是ChatGPT 4.0发布后,认识的同事朋友们都在恐慌AI的发展,甚至有不少人开始抗拒。我的观点是:人工智能是大势所趋,势不可挡,那就驾驭它吧!
我司已经在商业项目中实际使用了AI, 包括Stable Diffusion及其扩展插件,当然也有爆火的ChatGPT。
Midjourney + Stable Diffusion + ControlNET + Lora以及Photoshop Stable Diffusion 等插件的结合使用已经强大到基本取代初中级原画师;
ChatGPT 4.0势头已经咄咄逼人,据说下一代会进化到运行时处理功能,比如对磁盘的读写等。用户让ChatGPT“创建一个cs代码”,它就能在电脑硬盘里创建一个代码文件。个人觉得任重道远,功能越强责任越大,如果没有有效解决安全问题之前,这一步很难到来。
ChatGPT已经能全面应用到游戏开发的各个环节了,策划的剧情设定、技术的代码编写优化、测试的测试用例等。我从去年12月开始使用ChatGPT,完全把它当成了一个搜索引擎,自从有了它几乎没使用多少次谷歌百度。4.0的到来彻底激发了我对ChatGPT实际应用的思考。
首先第一步肯定是先把ChatGPT接入Unity,先建立起通讯,以此为基础各种应用功能才能百花齐放。
工具效果预览:
用UnityWebRequest实现一个与ChatGPT通讯的类,之后的各种功能基于此类。
ChatGPT提供了开放接口,仅需一个个人版的API Key就可以接入ChatGPT, API Key获取入口:https://platform.openai.com/account/api-keys

ChatGPT URL: https://api.openai.com/v1/chat/completions
上行数据结构如下:
{
  "messages": [
    {
      "role": "user",
      "content": "你是机器人吗"//要发送的问题
    }
  ],
  "model": "gpt-3.5-turbo",//AI数据模型
  "temperature": 0.7 //默认是1, 数值越大结果随机性越高
}
下行数据结构如下:
{
  "id": "chatcmpl-xxxxxxxxxxxxxxxxxx",
  "object": "chat.completion",
  "created": 1678987654,
  "model": "gpt-3.5-turbo-0301",
  "usage": {
    "prompt_tokens": 14,
    "completion_tokens": 23,
    "total_tokens": 37
  },
  "choices": [
    {
      "message": {
        "role": "assistant",
        "content": "\n\n是的,我是一个AI语言模型,也可以被称为机器人。" //得到的回复
      },
      "finish_reason": "stop",
      "index": 0
    }
  ]
}
使用UnityWebRequest发送Post请求:
private IEnumerator Request(string input, Action<bool, string> onComplete, Action<float> onProgressUpdate)
        {
            var msg = new Message()
            {
                role = UserId,
                content = input,
            };
            requestData.AppendChat(msg);
            messageHistory.Add(msg);

            using (webRequest = new UnityWebRequest(ChatgptUrl, "POST"))
            {
                var jsonDt = UtilityBuiltin.Json.ToJson(requestData);
                Debug.Log(jsonDt);
                byte[] bodyRaw = Encoding.UTF8.GetBytes(jsonDt);
                webRequest.uploadHandler = new UploadHandlerRaw(bodyRaw);
                webRequest.downloadHandler = new DownloadHandlerBuffer();
                webRequest.SetRequestHeader("Content-Type", "application/json");
                webRequest.SetRequestHeader("Authorization", $"Bearer {this.ApiKey}");
                //webRequest.certificateHandler = new ChatGPTWebRequestCert();
                var req = webRequest.SendWebRequest();
                while (!webRequest.isDone)
                {
                    onProgressUpdate?.Invoke((webRequest.downloadProgress + webRequest.uploadProgress) / 2f);
                    yield return null;
                }

                if (webRequest.result != UnityWebRequest.Result.Success)
                {
                    Debug.LogError($"---------ChatGPT请求失败:{webRequest.error}---------");
                    onComplete?.Invoke(false, string.Empty);
                }
                else
                {
                    var json = webRequest.downloadHandler.text;
                    Debug.Log(json);
                    try
                    {
                        ChatCompletion result = UtilityBuiltin.Json.ToObject<ChatCompletion>(json);
                        int lastChoiceIdx = result.choices.Count - 1;
                        var replyMsg = result.choices[lastChoiceIdx].message;
                        replyMsg.content = replyMsg.content.Trim();
                        messageHistory.Add(replyMsg);
                        onComplete?.Invoke(true, replyMsg.content);
                    }
                    catch (System.Exception e)
                    {
                        Debug.LogError($"---------ChatGPT返回数据解析失败:{e.Message}---------");
                        onComplete?.Invoke(false, e.Message);
                    }
                }
                webRequest.Dispose();
                webRequest = null;
            }
        }
以上就是向ChatGPT发送请求并接受回复的核心代码,非常简单。然而不出意外的话会出现请求报错:Cert verify failed: UNITYTLS_X509VERIFY_FLAG_CN_MISMATCH, https证书验证失败。
所以还需要自定义验证类,直接跳过验证返回true:
class ChatGPTWebRequestCert : UnityEngine.Networking.CertificateHandler
    {
        protected override bool ValidateCertificate(byte[] certificateData)
        {
            //return base.ValidateCertificate(certificateData);
            return true;
        }
    }
然后为UnityWebRequest势力指定验证Handler:
webRequest.certificateHandler = new ChatGPTWebRequestCert();再次运行就能正常接收数据了。
完整代码:
using System;
using System.Collections;
using System.Collections.Generic;
using System.Text;
using System.Threading.Tasks;
using Unity.EditorCoroutines.Editor;
using UnityEditor;
using UnityEngine;
using UnityEngine.Networking;

namespace UnityGameFramework.Editor.AIAssistant
{
    public class ChatGPT
    {
        const string ChatgptUrl = "https://api.openai.com/v1/chat/completions";
        const string DefaultAPIKey = "替换自己的ChatGPT API Key";
        const string DefaultModel = "gpt-3.5-turbo";
        const float DefaultTemperature = 0;
        const string DefaultUserId = "user";
        string ApiKey;
        string UserId;
        List<Message> messageHistory;
        public List<Message> MessageHistory => messageHistory;
        ChatGPTRequestData requestData;
        UnityWebRequest webRequest;
        public float ChatGPTRandomness { get => requestData.temperature; set { requestData.temperature = Mathf.Clamp(value, 0, 2); } }
        public bool IsRequesting => webRequest != null && !webRequest.isDone;
        public float RequestProgress => IsRequesting ? (webRequest.uploadProgress + webRequest.downloadProgress) / 2f : 0f;
        public ChatGPT(string apiKey = DefaultAPIKey, string userId = DefaultUserId, string model = DefaultModel, float temperature = DefaultTemperature)
        {
            this.ApiKey = apiKey;
            this.UserId = string.IsNullOrWhiteSpace(userId) ? DefaultUserId : userId;
            messageHistory = new List<Message>();
            requestData = new ChatGPTRequestData(model, temperature);
        }
        /// <summary>
        /// 接着上次的话题
        /// </summary>
        public void RestoreChatHistory()
        {
            var chatHistoryJson = EditorPrefs.GetString("ChatGPT.Settings.ChatHistory", string.Empty);
            var requestDataJson = EditorPrefs.GetString("ChatGPT.Settings.RequestData", string.Empty);
            if (!string.IsNullOrEmpty(chatHistoryJson))
            {
                var jsonObj = UtilityBuiltin.Json.ToObject<ChatGPTRequestData>(requestDataJson);
                if (jsonObj != null)
                {
                    requestData.messages = jsonObj.messages;
                }
            }
            if (!string.IsNullOrEmpty(requestDataJson))
            {
                var jsonObj = UtilityBuiltin.Json.ToObject<List<Message>>(chatHistoryJson);
                if (jsonObj != null)
                {
                    messageHistory = jsonObj;
                }
            }
        }
        public void SaveChatHistory()
        {
            var chatHistoryJson = UtilityBuiltin.Json.ToJson(messageHistory);
            var requestDataJson = UtilityBuiltin.Json.ToJson(requestData);
            EditorPrefs.SetString("ChatGPT.Settings.ChatHistory", chatHistoryJson);
            EditorPrefs.SetString("ChatGPT.Settings.RequestData", requestDataJson);
        }
        public void Send(string message, Action<bool, string> onComplete = null, Action<float> onProgressUpdate = null)
        {
            EditorCoroutineUtility.StartCoroutine(Request(message, onComplete, onProgressUpdate), this);
        }

        public async Task<string> SendAsync(string message)
        {
            bool isCompleted = false;
            string result = string.Empty;
            Action<bool, string> onComplete = (success, str) =>
            {
                isCompleted = true;
                if (success) result = str;
            };

            EditorCoroutineUtility.StartCoroutine(Request(message, onComplete, null), this);
            while (!isCompleted)
            {
                await Task.Delay(10);
            }
            return result;
        }
        private IEnumerator Request(string input, Action<bool, string> onComplete, Action<float> onProgressUpdate)
        {
            var msg = new Message()
            {
                role = UserId,
                content = input,
            };
            requestData.AppendChat(msg);
            messageHistory.Add(msg);

            using (webRequest = new UnityWebRequest(ChatgptUrl, "POST"))
            {
                var jsonDt = UtilityBuiltin.Json.ToJson(requestData);
                Debug.Log(jsonDt);
                byte[] bodyRaw = Encoding.UTF8.GetBytes(jsonDt);
                webRequest.uploadHandler = new UploadHandlerRaw(bodyRaw);
                webRequest.downloadHandler = new DownloadHandlerBuffer();
                webRequest.SetRequestHeader("Content-Type", "application/json");
                webRequest.SetRequestHeader("Authorization", $"Bearer {this.ApiKey}");
                webRequest.certificateHandler = new ChatGPTWebRequestCert();
                var req = webRequest.SendWebRequest();
                while (!webRequest.isDone)
                {
                    onProgressUpdate?.Invoke((webRequest.downloadProgress + webRequest.uploadProgress) / 2f);
                    yield return null;
                }

                if (webRequest.result != UnityWebRequest.Result.Success)
                {
                    Debug.LogError($"---------ChatGPT请求失败:{webRequest.error}---------");
                    onComplete?.Invoke(false, string.Empty);
                }
                else
                {
                    var json = webRequest.downloadHandler.text;
                    Debug.Log(json);
                    try
                    {
                        ChatCompletion result = UtilityBuiltin.Json.ToObject<ChatCompletion>(json);
                        int lastChoiceIdx = result.choices.Count - 1;
                        var replyMsg = result.choices[lastChoiceIdx].message;
                        replyMsg.content = replyMsg.content.Trim();
                        messageHistory.Add(replyMsg);
                        onComplete?.Invoke(true, replyMsg.content);
                    }
                    catch (System.Exception e)
                    {
                        Debug.LogError($"---------ChatGPT返回数据解析失败:{e.Message}---------");
                        onComplete?.Invoke(false, e.Message);
                    }
                }
                webRequest.Dispose();
                webRequest = null;
            }
        }
        public void NewChat()
        {
            requestData.ClearChat();
            messageHistory.Clear();
        }
        public bool IsSelfMessage(Message msg)
        {
            return this.UserId.CompareTo(msg.role) == 0;
        }
    }

    class ChatGPTRequestData
    {
        public List<Message> messages;
        public string model;
        public float temperature;

        public ChatGPTRequestData(string model, float temper)
        {
            this.model = model;
            this.temperature = temper;
            this.messages = new List<Message>();
        }

        /// <summary>
        /// 同一话题追加会话内容
        /// </summary>
        /// <param name="chatMsg"></param>
        /// <returns></returns>
        public ChatGPTRequestData AppendChat(Message msg)
        {
            this.messages.Add(msg);
            return this;
        }
        /// <summary>
        /// 清除聊天历史(结束一个话题), 相当于新建一个聊天话题
        /// </summary>
        public void ClearChat()
        {
            this.messages.Clear();
        }
    }

    class ChatGPTWebRequestCert : UnityEngine.Networking.CertificateHandler
    {
        protected override bool ValidateCertificate(byte[] certificateData)
        {
            //return base.ValidateCertificate(certificateData);
            return true;
        }
    }
    class Usage
    {
        public int prompt_tokens;
        public int completion_tokens;
        public int total_tokens;
    }

    public class Message
    {
        public string role;
        public string content;
    }

    class Choice
    {
        public Message message;
        public string finish_reason;
        public int index;
    }

    class ChatCompletion
    {
        public string id;
        public string @object;
        public int created;
        public string model;
        public Usage usage;
        public List<Choice> choices;
    }
}
使用方法一, 同步获取结果:
var ai = new ChatGPT();
var str = await ai.SendAsync("你好");
Debug.Log(str);
使用方法二, 异步获取结果:
new ChatGPT().Send("你好", (success, message) => { if (success) Debug.Log(message); }, requestProgress => { Debug.Log($"Request progress:{requestProgress}"); });为什么要写个聊天窗口:
1. https://chat.openai.com/chat 网页版登陆锁IP,禁止大陆IP登录,并且会验证时区,如果用美国的节点时区时间对不上拒绝登录,所以每次只能用台湾省的节点登录。
2. 虽然登录成功后不科学也能用,但是同一话题很快就会超时无法应答,刷新界面或新建话题才能正常使用,总之非常鸡肋。
而通过开放接口就没有这些问题,API请求会更加爽快。
聊天窗口功能设计:
1. 需要一个滚动列表展示双方对话记录,对话文本内容支持选择复制。
2. 问题输入框和发送按钮、新建话题(清除话题对话)
3. 对话历史存档。
代码实现,比较简单就不解释了,直接上源码:
using System;
using UnityEditor;
using UnityEngine;

namespace UnityGameFramework.Editor.AIAssistant
{
    [EditorToolMenu("AI助手/ChatGPT", 5)]
    public class ChatGPTWindow : EditorToolBase
    {
        public override string ToolName => "ChatGPT";

        Vector2 scrollPos = Vector2.zero;

        ChatGPT ai;
        private bool settingFoldout = false;
        string message;
        const string aiRoleName = "AI";
        private float chatBoxWidthRatio = 0.85f;
        private float iconSizeRatio = 0.6f;
        private float chatBoxPadding = 20;
        private float chatBoxEdgePadding = 10;

        GUIStyle myChatStyle;
        GUIStyle aiChatStyle;

        GUIStyle aiIconStyle;
        GUIStyle myIconStyle;
        GUIStyle txtAreaStyle;

        GUIContent chatContent;

        bool isEditorInitialized = false;
        private float scrollViewHeight;

        private void OnEnable()
        {
            EditorApplication.update += OnEditorUpdate;
            ai = new ChatGPT(AppBuildSettings.Instance.ChatGPTKey);
            ai.ChatGPTRandomness = AppBuildSettings.Instance.ChatGPTRandomness;
            chatContent = new GUIContent();
            ai.RestoreChatHistory();
        }

        private void OnEditorUpdate()
        {
            if (EditorApplication.isCompiling || EditorApplication.isUpdating)
            {
                return;
            }
            try
            {
                InitGUIStyles();
                isEditorInitialized = true;
                EditorApplication.update -= OnEditorUpdate;
            }
            catch (Exception)
            {

            }
        }

        private void InitGUIStyles()
        {
            aiChatStyle = new GUIStyle(EditorStyles.selectionRect);
            aiChatStyle.wordWrap = true;
            aiChatStyle.normal.textColor = Color.white;
            aiChatStyle.fontSize = 18;
            aiChatStyle.alignment = TextAnchor.MiddleLeft;

            myChatStyle = new GUIStyle(EditorStyles.helpBox);
            myChatStyle.wordWrap = true;
            myChatStyle.normal.textColor = Color.white;
            myChatStyle.fontSize = 18;
            myChatStyle.alignment = TextAnchor.MiddleLeft;


            txtAreaStyle = new GUIStyle(EditorStyles.textArea);
            txtAreaStyle.fontSize = 18;

            aiIconStyle = new GUIStyle();
            aiIconStyle.wordWrap = true;
            aiIconStyle.alignment = TextAnchor.MiddleCenter;
            aiIconStyle.fontSize = 18;
            aiIconStyle.fontStyle = FontStyle.Bold;
            aiIconStyle.normal.textColor = Color.black;
            aiIconStyle.normal.background = EditorGUIUtility.FindTexture("sv_icon_dot5_pix16_gizmo");

            myIconStyle = new GUIStyle(aiIconStyle);
            myIconStyle.normal.background = EditorGUIUtility.FindTexture("sv_icon_dot2_pix16_gizmo");
        }

        private void OnDisable()
        {
            ai.SaveChatHistory();
        }
        private void OnGUI()
        {
            if (!isEditorInitialized) return;
            EditorGUILayout.BeginVertical();
            {
                scrollPos = EditorGUILayout.BeginScrollView(scrollPos);
                {
                    scrollViewHeight = 0;
                    foreach (var msg in ai.MessageHistory)
                    {
                        var msgRect = EditorGUILayout.BeginVertical();
                        {
                            EditorGUILayout.BeginHorizontal();
                            {
                                bool isMyMsg = ai.IsSelfMessage(msg);
                                var labelStyle = isMyMsg ? myChatStyle : aiChatStyle;
                                chatContent.text = msg.content;
                                float chatBoxWidth = this.position.width * chatBoxWidthRatio;
                                float iconSize = (this.position.width - chatBoxWidth) * iconSizeRatio;
                                float chatBoxHeight = Mathf.Max(iconSize, chatBoxEdgePadding + labelStyle.CalcHeight(chatContent, chatBoxWidth - chatBoxEdgePadding));
                                if (isMyMsg) { GUILayout.FlexibleSpace(); }
                                else
                                {
                                    EditorGUILayout.LabelField(aiRoleName, aiIconStyle, GUILayout.Width(iconSize), GUILayout.Height(iconSize));
                                }
                                EditorGUILayout.SelectableLabel(msg.content, labelStyle, GUILayout.Width(chatBoxWidth), GUILayout.Height(chatBoxHeight));
                                if (!isMyMsg) { GUILayout.FlexibleSpace(); }
                                else
                                {
                                    EditorGUILayout.LabelField(msg.role, myIconStyle, GUILayout.Width(iconSize), GUILayout.Height(iconSize));
                                }
                                EditorGUILayout.EndHorizontal();
                            }
                            EditorGUILayout.EndVertical();
                        }
                        EditorGUILayout.Space(chatBoxPadding);
                        scrollViewHeight += msgRect.height;
                    }
                    EditorGUILayout.EndScrollView();
                }

                if (ai.IsRequesting)
                {
                    var barWidth = position.width * 0.8f;
                    var pBarRect = new Rect((position.width - barWidth) * 0.5f, (position.height - 30f) * 0.5f, barWidth, 30f);
                    EditorGUI.ProgressBar(pBarRect, ai.RequestProgress, $"请求进度:{ai.RequestProgress:P2}");
                }
                GUILayout.FlexibleSpace();
                if (settingFoldout = EditorGUILayout.Foldout(settingFoldout, "展开设置项:"))
                {
                    EditorGUILayout.BeginVertical("box");
                    {
                        EditorGUILayout.BeginHorizontal();
                        {
                            EditorGUILayout.LabelField("ChatGPT API Key:", GUILayout.Width(170));
                            AppBuildSettings.Instance.ChatGPTKey = EditorGUILayout.TextField(AppBuildSettings.Instance.ChatGPTKey);
                            EditorGUILayout.EndHorizontal();
                        }

                        EditorGUILayout.BeginHorizontal();
                        {
                            EditorGUILayout.LabelField("结果随机性:", GUILayout.Width(170));
                            ai.ChatGPTRandomness = AppBuildSettings.Instance.ChatGPTRandomness = EditorGUILayout.Slider(AppBuildSettings.Instance.ChatGPTRandomness, 0, 2);
                            EditorGUILayout.EndHorizontal();
                        }
                        EditorGUILayout.EndVertical();
                    }

                }
                //EditorGUILayout.LabelField(scrollPos.ToString());
                EditorGUILayout.BeginHorizontal();
                {
                    message = EditorGUILayout.TextArea(message, txtAreaStyle, GUILayout.MinHeight(80));

                    EditorGUI.BeginDisabledGroup(ai.IsRequesting);
                    {
                        if (GUILayout.Button("发送消息", GUILayout.MaxWidth(120), GUILayout.Height(80)))
                        {
                            if (!string.IsNullOrWhiteSpace(message))
                            {
                                ai.Send(message, OnChatGPTMessage);
                            }
                        }
                        if (GUILayout.Button("新话题", GUILayout.MaxWidth(80), GUILayout.Height(80)))
                        {
                            ai.NewChat();
                        }
                        EditorGUI.EndDisabledGroup();
                    }

                    EditorGUILayout.EndHorizontal();
                }
                EditorGUILayout.EndVertical();
            }
        }

        private void OnChatGPTMessage(bool arg1, string arg2)
        {
            scrollPos.y = scrollViewHeight;
            if (arg1)
            {
                message = string.Empty;
            }
            Repaint();
        }
    }
}
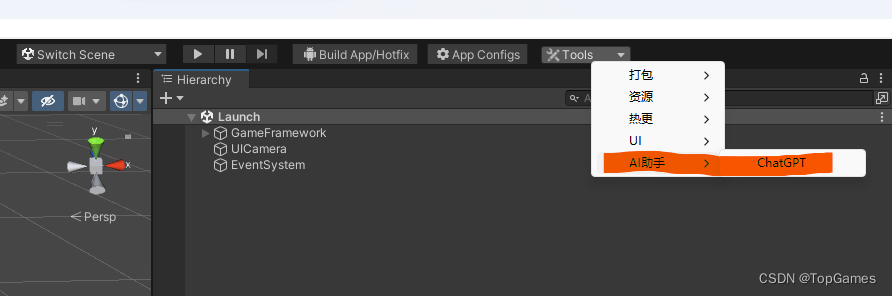
添加代码后,Toolbar的Tools工具栏会自动识别这个工具菜单,点击即可打开ChatGPT对话窗口:
下一步就是为ChatGPT赋予双手,添加各种指令Handler。比如生成json文件、生成语言国际化Excel文件、修改优化代码、生成代码文件、生成Shader、一键拼UI等等。
分为两个模块:
1. 描述文本(发送给ChatGPT)
2. 结果解析。得到目标结果,使用Handler解析ChatGPT返回结果,达成某种功能。
最终就可以不用写程序,只写问题的描述文本,确保能从ChatGPT得到满意答案就可以实现某项功能。想要新增新的工具,扩展新的功能只需要在文件中添加修改问题描述文本即可。
比如语言国际化,我通过问题描述让ChatGPT从工程代码中扫描所有语言本地化函数GF.Localization.GetText()传入的国际化文本,并且把文本翻译成中文,把结果以key,value键值对保存输出json文件。最后我得到了ChatGPT返回的诸如{"Hello":”你好“}的所有国际化文本和翻译结果。
然后我只需要解析ChatGPT返回结果,生成语言国际化文件到工程中就完成了AI自动处理语言国际化的问题。
给定这段代码defcreate@upgrades=User.update_all(["role=?","upgraded"],:id=>params[:upgrade])redirect_toadmin_upgrades_path,:notice=>"Successfullyupgradeduser."end我如何在该操作中实际验证它们是否已保存或未重定向到适当的页面和消息? 最佳答案 在Rails3中,update_all不返回任何有意义的信息,除了已更新的记录数(这可能取决于您的DBMS是否返回该信息)。http://ar.ru
对于具有离线功能的智能手机应用程序,我正在为Xml文件创建单向文本同步。我希望我的服务器将增量/差异(例如GNU差异补丁)发送到目标设备。这是计划:Time=0Server:hasversion_1ofXmlfile(~800kiB)Client:hasversion_1ofXmlfile(~800kiB)Time=1Server:hasversion_1andversion_2ofXmlfile(each~800kiB)computesdeltaoftheseversions(=patch)(~10kiB)sendspatchtoClient(~10kiBtransferred)Cl
我正在编写一个包含C扩展的gem。通常当我写一个gem时,我会遵循TDD的过程,我会写一个失败的规范,然后处理代码直到它通过,等等......在“ext/mygem/mygem.c”中我的C扩展和在gemspec的“扩展”中配置的有效extconf.rb,如何运行我的规范并仍然加载我的C扩展?当我更改C代码时,我需要采取哪些步骤来重新编译代码?这可能是个愚蠢的问题,但是从我的gem的开发源代码树中输入“bundleinstall”不会构建任何native扩展。当我手动运行rubyext/mygem/extconf.rb时,我确实得到了一个Makefile(在整个项目的根目录中),然后当
我构建了两个需要相互通信和发送文件的Rails应用程序。例如,一个Rails应用程序会发送请求以查看其他应用程序数据库中的表。然后另一个应用程序将呈现该表的json并将其发回。我还希望一个应用程序将存储在其公共(public)目录中的文本文件发送到另一个应用程序的公共(public)目录。我从来没有做过这样的事情,所以我什至不知道从哪里开始。任何帮助,将不胜感激。谢谢! 最佳答案 无论Rails是什么,几乎所有Web应用程序都有您的要求,大多数现代Web应用程序都需要相互通信。但是有一个小小的理解需要你坚持下去,网站不应直接访问彼此
我尝试运行2.x应用程序。我使用rvm并为此应用程序设置其他版本的ruby:$rvmuseree-1.8.7-head我尝试运行服务器,然后出现很多错误:$script/serverNOTE:Gem.source_indexisdeprecated,useSpecification.Itwillberemovedonorafter2011-11-01.Gem.source_indexcalledfrom/Users/serg/rails_projects_terminal/work_proj/spohelp/config/../vendor/rails/railties/lib/r
刚入门rails,开始慢慢理解。有人可以解释或给我一些关于在application_controller中编码的好处或时间和原因的想法吗?有哪些用例。您如何为Rails应用程序使用应用程序Controller?我不想在那里放太多代码,因为据我了解,每个请求都会调用此Controller。这是真的? 最佳答案 ApplicationController实际上是您应用程序中的每个其他Controller都将从中继承的类(尽管这不是强制性的)。我同意不要用太多代码弄乱它并保持干净整洁的态度,尽管在某些情况下ApplicationContr
我是一个Rails初学者,但我想从我的RailsView(html.haml文件)中查看Ruby变量的内容。我试图在ruby中打印出变量(认为它会在终端中出现),但没有得到任何结果。有什么建议吗?我知道Rails调试器,但更喜欢使用inspect来打印我的变量。 最佳答案 您可以在View中使用puts方法将信息输出到服务器控制台。您应该能够在View中的任何位置使用Haml执行以下操作:-puts@my_variable.inspect 关于ruby-on-rails-如何在我的R
我已经在Sinatra上创建了应用程序,它代表了一个简单的API。我想在生产和开发上进行部署。我想在部署时选择,是开发还是生产,一些方法的逻辑应该改变,这取决于部署类型。是否有任何想法,如何完成以及解决此问题的一些示例。例子:我有代码get'/api/test'doreturn"Itisdev"end但是在部署到生产环境之后我想在运行/api/test之后看到ItisPROD如何实现? 最佳答案 根据SinatraDocumentation:EnvironmentscanbesetthroughtheRACK_ENVenvironm
我们的git存储库中目前有一个Gemfile。但是,有一个gem我只在我的环境中本地使用(我的团队不使用它)。为了使用它,我必须将它添加到我们的Gemfile中,但每次我checkout到我们的master/dev主分支时,由于与跟踪的gemfile冲突,我必须删除它。我想要的是类似Gemfile.local的东西,它将继承从Gemfile导入的gems,但也允许在那里导入新的gems以供使用只有我的机器。此文件将在.gitignore中被忽略。这可能吗? 最佳答案 设置BUNDLE_GEMFILE环境变量:BUNDLE_GEMFI
这似乎非常适得其反,因为太多的gem会在window上破裂。我一直在处理很多mysql和ruby-mysqlgem问题(gem本身发生段错误,一个名为UnixSocket的类显然在Windows机器上不能正常工作,等等)。我只是在浪费时间吗?我应该转向不同的脚本语言吗? 最佳答案 我在Windows上使用Ruby的经验很少,但是当我开始使用Ruby时,我是在Windows上,我的总体印象是它不是Windows原生系统。因此,在主要使用Windows多年之后,开始使用Ruby促使我切换回原来的系统Unix,这次是Linux。Rub