文章目录
| 系列内容 | 参考链接 |
|---|---|
| 基于 Vue3.x + Vant UI 的多功能记账本(一) | 项目演示,涉及知识点 |
| 基于 Vue3.x + Vant UI 的多功能记账本(二) | 搭建开发环境 |
| 基于 Vue3.x + Vant UI 的多功能记账本(三) | 开发导航栏及公共部分 |
Vue3 + Vant UI_多功能记账本
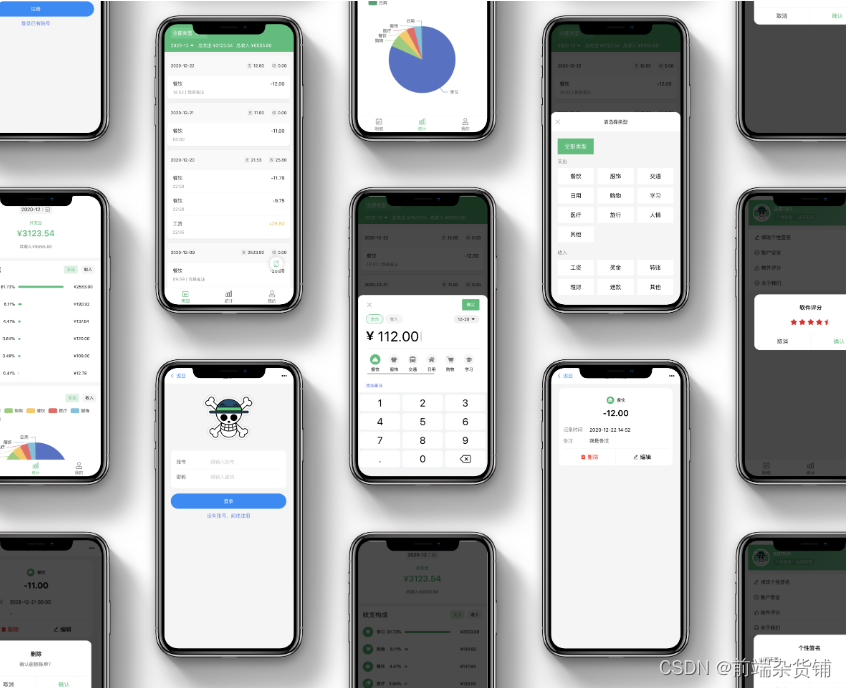
页面设计,页面跳转
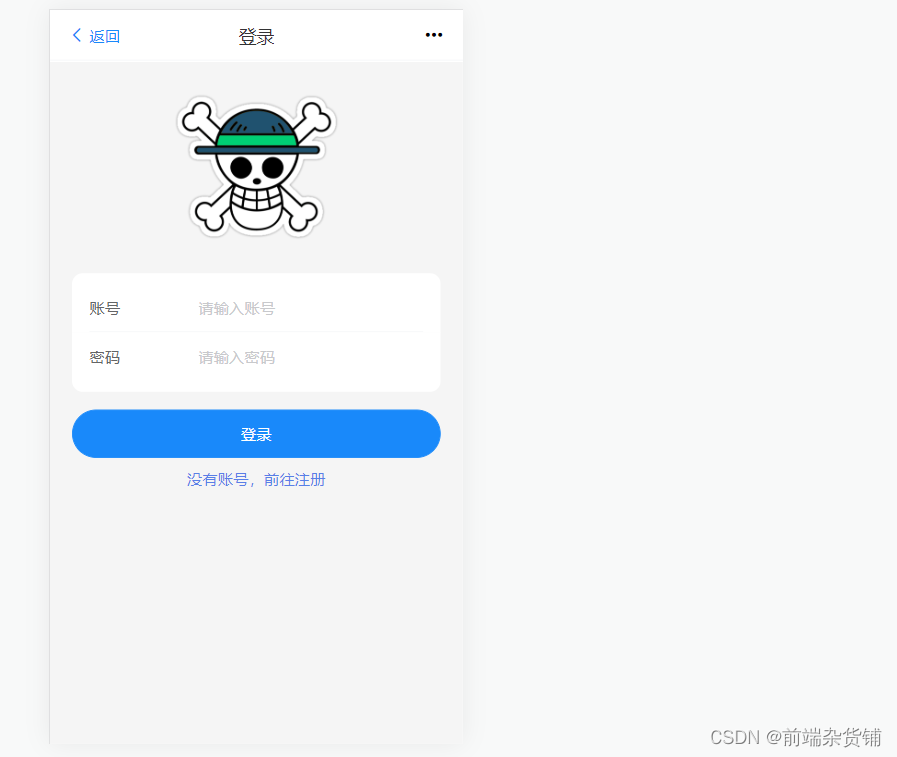
Login.vue
<template>
<!-- 根据页面显示相应头部 -->
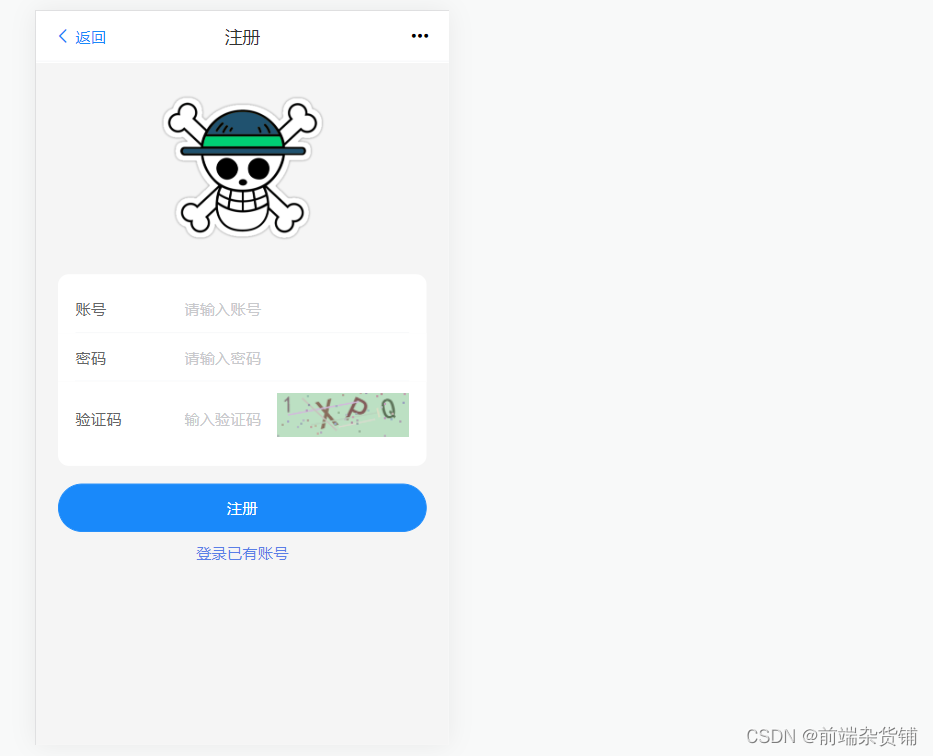
<Header :title="type == 'login' ? '登录' : '注册'" />
<div class="auth">
<img class="logo" src="//s.yezgea02.com/1606836859539/onpeice.png" alt="" />
<!-- 登录界面的表单 -->
<van-form class="form-wrap" @submit="onSubmit" v-if="type == 'login'">
<div class="form">
<!-- 账号输入框,clearable:清除图标,rules:表单校验规则 -->
<van-field
clearable
v-model="username"
name="username"
label="账号"
placeholder="请输入账号"
:rules="[{ required: true, message: '请填写账户' }]"
/>
<!-- 密码输入框 -->
<van-field
clearable
v-model="password"
type="password"
name="password"
label="密码"
placeholder="请输入密码"
:rules="[{ required: true, message: '请填写密码' }]"
/>
</div>
<div style="margin: 16px 0">
<van-button round block type="primary" native-type="submit">
登录
</van-button>
<p @click="chanegType('register')" class="change-btn">
没有账号,前往注册
</p>
</div>
</van-form>
<!-- 注册页面的表单 -->
<van-form class="form-wrap" @submit="onSubmit" v-if="type == 'register'">
<div class="form">
<van-field
clearable
v-model="username"
name="username"
label="账号"
placeholder="请输入账号"
:rules="[{ required: true, message: '请填写账号' }]"
/>
<van-field
clearable
v-model="password"
type="password"
name="password"
label="密码"
placeholder="请输入密码"
:rules="[{ required: true, message: '请填写密码' }]"
/>
<!-- 验证码输入框 -->
<van-field
center
clearable
label="验证码"
placeholder="输入验证码"
v-model="verify"
>
<!-- 点击刷新验证码 -->
<template #button>
<!-- 生成验证码图片组件,ref 方便拿到组件内的实例属性 -->
<VueImgVerify ref="verifyRef" />
</template>
</van-field>
</div>
<div style="margin: 16px 0">
<van-button round block type="primary" native-type="submit">
注册
</van-button>
<p @click="chanegType('login')" class="change-btn">登录已有账号</p>
</div>
</van-form>
</div>
</template>
<script>
import { reactive, toRefs, ref, onMounted } from "vue";
// 生成验证码的组件
import VueImgVerify from "../components/VueImageVerify.vue";
import Header from "../components/Header.vue";
import axios from "../utils/axios";
// 轻提示(成功/失败...)
import { Toast } from "vant";
import router from "../router";
export default {
name: "Login",
components: {
VueImgVerify, // 验证码组件
Header, //公共头组件
},
setup() {
// 便于拿到 verifyRef 组件内的实例属性
const verifyRef = ref(null);
// 注册登录的相关内容
const state = reactive({
username: "",
password: "",
type: "login", // 登录注册模式切换参数
verify: "", // 验证码输入框输入的内容
imgCode: "", // 生成的验证图片内的文字
});
console.log("verifyRef", verifyRef);
// 提交登录 or 注册表单
const onSubmit = async (values) => {
// 登录功能
if (state.type == "login") {
const { data } = await axios.post("/user/login", {
username: state.username,
password: state.password,
});
// 添加 token 到本地存储
localStorage.setItem("token", data.token);
window.location.href = "/";
} else {
// 生成的图片验证码的文字等于验证码组件生成的验证码
state.imgCode = verifyRef.value.imgCode || "";
// 如果验证码组件生成的验证码的小写 != 用户输入的验证码的小写,则提示错误
if (
verifyRef.value.imgCode.toLowerCase() != state.verify.toLowerCase()
) {
console.log("verifyRef.value.imgCode", verifyRef.value.imgCode);
Toast.fail("验证码错误");
return;
}
// 验证码匹配成功,注册=>注册成功
await axios.post("/user/register", {
username: state.username,
password: state.password,
});
Toast.success("注册成功");
}
};
// 切换登录和注册两种模式
const chanegType = (type) => {
state.type = type;
};
return {
...toRefs(state),
onSubmit,
chanegType,
verifyRef,
};
},
};
</script>
<style lang='less' scoped>
@import url("../config/custom.less");
.auth {
height: calc(~"(100% - 46px)");
padding: 30px 20px 0 20px;
background: @primary-bg;
.logo {
width: 150px;
display: block;
margin: 0 auto;
margin-bottom: 30px;
}
.form-wrap {
.form {
border-radius: 10px;
overflow: hidden;
.van-cell:first-child {
padding-top: 20px;
}
.van-cell:last-child {
padding-bottom: 20px;
}
}
}
.change-btn {
text-align: center;
margin: 10px 0;
color: @link-color;
font-size: 14px;
}
}
</style>
在 custom.less 下补充 link-color 变量的定义,在写样式的时候,以 color: @link-color; 这样的形式引用它
custom.less
@primary: #39be77; // 主题色
@danger: #fc3c0c;
@primary-bg: #f5f5f5;
@link-color: #597fe7;
当前页面的外层是 #app、body,作为父级,它们需要先把高度撑开
index.css
body,
html,
p {
  height: 100%;
  margin: 0;
  padding: 0;
}

* {
  box-sizing: border-box;
}

#app {
  height: 100%;
}
此时,yarn dev,打开浏览器可以看到…
注:验证码基本上都是由服务端接口提供,然后上报之后由服务端验证是否正确,所以此部分内容可以自行选择是否去做。
<template>
  <div class="img-verify">
    <!-- 画布,绑定一个点击事件,用于刷新验证码 -->
    <canvas
      ref="verify"
      :width="width"
      :height="height"
      @click="handleDraw"
    ></canvas>
  </div>
</template>
<script type="text/ecmascript-6">
import { reactive, onMounted, ref, toRefs } from "vue";
export default {
  setup() {
    const verify = ref(null);
    const state = reactive({
      pool: "ABCDEFGHIJKLMNOPQRSTUVWXYZ1234567890", // 字符串
      width: 120,
      height: 40,
      imgCode: "", // 初始化验证码为空
    });
    onMounted(() => {
      // 初始化绘制图片验证码
      state.imgCode = draw();
    });

    // 点击图片重新绘制
    const handleDraw = () => {
      state.imgCode = draw();
    };

    // 随机数
    const randomNum = (min, max) => {
      return parseInt(Math.random() * (max - min) + min);
    };
    // 随机颜色
    const randomColor = (min, max) => {
      const r = randomNum(min, max);
      const g = randomNum(min, max);
      const b = randomNum(min, max);
      return `rgb(${r},${g},${b})`;
    };

    // 绘制图片
    const draw = () => {
      // 3.填充背景颜色,背景颜色要浅一点
      const ctx = verify.value.getContext("2d");
      // 填充颜色
      ctx.fillStyle = randomColor(180, 230);
      // 填充的位置
      ctx.fillRect(0, 0, state.width, state.height);
      // 定义paramText
      let imgCode = "";
      // 4.随机产生字符串,并且随机旋转
      for (let i = 0; i < 4; i++) {
        // 随机的四个字
        const text = state.pool[randomNum(0, state.pool.length)];
        imgCode += text;
        // 随机的字体大小
        const fontSize = randomNum(18, 40);
        // 字体随机的旋转角度
        const deg = randomNum(-30, 30);
        /*
         * 绘制文字并让四个文字在不同的位置显示的思路 :
         * 1、定义字体
         * 2、定义对齐方式
         * 3、填充不同的颜色
         * 4、保存当前的状态(以防止以上的状态受影响)
         * 5、平移 translate()
         * 6、旋转 rotate()
         * 7、填充文字
         * 8、restore 出栈
         * */
        ctx.font = fontSize + "px Simhei";
        ctx.textBaseline = "top";
        ctx.fillStyle = randomColor(80, 150);
        /*
         * save() 方法把当前状态的一份拷贝压入到一个保存图像状态的栈中。
         * 这就允许您临时地改变图像状态,
         * 然后,通过调用 restore() 来恢复以前的值。
         * save是入栈,restore 是出栈。
         * 用来保存Canvas的状态。save 之后,可以调用 Canvas 的平移、放缩、旋转、错切、裁剪等操作。 restore:用来恢复 Canvas 之前保存的状态。防止 save 后对 Canvas 执行的操作对后续的绘制有影响。
         *
         * */
        ctx.save();
        ctx.translate(30 * i + 15, 15);
        ctx.rotate((deg * Math.PI) / 180);
        // fillText() 方法在画布上绘制填色的文本。文本的默认颜色是黑色。
        // 请使用 font 属性来定义字体和字号,并使用 fillStyle 属性以另一种颜色/渐变来渲染文本。
        // context.fillText(text,x,y,maxWidth);
        ctx.fillText(text, -15 + 5, -15);
        ctx.restore();
      }
      // 5.随机产生5条干扰线,干扰线的颜色要浅一点
      for (let i = 0; i < 5; i++) {
        ctx.beginPath();
        ctx.moveTo(randomNum(0, state.width), randomNum(0, state.height));
        ctx.lineTo(randomNum(0, state.width), randomNum(0, state.height));
        ctx.strokeStyle = randomColor(180, 230);
        ctx.closePath();
        ctx.stroke();
      }
      // 6.随机产生40个干扰的小点
      for (let i = 0; i < 40; i++) {
        ctx.beginPath();
        ctx.arc(
          randomNum(0, state.width),
          randomNum(0, state.height),
          1,
          0,
          2 * Math.PI
        );
        ctx.closePath();
        ctx.fillStyle = randomColor(150, 200);
        ctx.fill();
      }
      return imgCode;
    };

    return {
      ...toRefs(state),
      verify,
      handleDraw,
    };
  },
};
</script>
<style type="text/css">
.img-verify canvas {
  cursor: pointer;
}
</style>
此时,yarn dev,打开浏览器可以看到…
为避免在页面内请求接口的时候,每次都通过 code 码去判断接口请求是否成功,我们可以这样修改 axios.js 文件
axios.js
import axios from 'axios'
// 轻提示插件(Vant UI)
import { Toast } from 'vant'
import router from '../router'

// 根据环境变量切换本地和线上的请求地址
axios.defaults.baseURL = process.env.NODE_ENV == 'development' ? '/api' : '//47.99.134.126:7008/api'
// 允许跨域
axios.defaults.withCredentials = true
axios.defaults.headers['X-Requested-With'] = 'XMLHttpRequest'
// token的用户鉴权方式,在请求头的 headers 内添加 token,每次请求都会验证用户信息
axios.defaults.headers['Authorization'] = `${localStorage.getItem('token') || null}`
axios.defaults.headers.post['Content-Type'] = 'application/json'

axios.interceptors.response.use(res => {
  // 返回数据的类型不是对象,则报异常
  if (typeof res.data !== 'object') {
    Toast.fail('服务端异常!')
    return Promise.reject(res)
  }
  // code 状态码不是200,则报异常
  if (res.data.code != 200) {
    if (res.data.msg) Toast.fail(res.data.msg)
    // code 状态码为 401 代表接口需要登录,继而跳转到登录页面
    if (res.data.code == 401) {
      router.push({ path: '/login' })
    }
    // 返回失败的实例
    return Promise.reject(res.data)
  }
  // code 为 200 时,请求成功,返回数据
  return res.data
})

export default axios
看到这么好的项目,是不是有种想自己做出来的冲动?
如果有,那么说明你非常的想提升自己,想检验自己这段时间的学习成果,这个项目绝对是你的 不二选择
心动不如行动
那么接下来,一起从0搭建,开始我们基于 Vue3.x + Vant UI 的项目之旅吧~
源码在下方 ↓【回复:记账本】即可
给定这段代码defcreate@upgrades=User.update_all(["role=?","upgraded"],:id=>params[:upgrade])redirect_toadmin_upgrades_path,:notice=>"Successfullyupgradeduser."end我如何在该操作中实际验证它们是否已保存或未重定向到适当的页面和消息? 最佳答案 在Rails3中,update_all不返回任何有意义的信息,除了已更新的记录数(这可能取决于您的DBMS是否返回该信息)。http://ar.ru
我想安装一个带有一些身份验证的私有(private)Rubygem服务器。我希望能够使用公共(public)Ubuntu服务器托管内部gem。我读到了http://docs.rubygems.org/read/chapter/18.但是那个没有身份验证-如我所见。然后我读到了https://github.com/cwninja/geminabox.但是当我使用基本身份验证(他们在他们的Wiki中有)时,它会提示从我的服务器获取源。所以。如何制作带有身份验证的私有(private)Rubygem服务器?这是不可能的吗?谢谢。编辑:Geminabox问题。我尝试“捆绑”以安装新的gem..
如何在buildr项目中使用Ruby?我在很多不同的项目中使用过Ruby、JRuby、Java和Clojure。我目前正在使用我的标准Ruby开发一个模拟应用程序,我想尝试使用Clojure后端(我确实喜欢功能代码)以及JRubygui和测试套件。我还可以看到在未来的不同项目中使用Scala作为后端。我想我要为我的项目尝试一下buildr(http://buildr.apache.org/),但我注意到buildr似乎没有设置为在项目中使用JRuby代码本身!这看起来有点傻,因为该工具旨在统一通用的JVM语言并且是在ruby中构建的。除了将输出的jar包含在一个独特的、仅限ruby
我希望我的UserPrice模型的属性在它们为空或不验证数值时默认为0。这些属性是tax_rate、shipping_cost和price。classCreateUserPrices8,:scale=>2t.decimal:tax_rate,:precision=>8,:scale=>2t.decimal:shipping_cost,:precision=>8,:scale=>2endendend起初,我将所有3列的:default=>0放在表格中,但我不想要这样,因为它已经填充了字段,我想使用占位符。这是我的UserPrice模型:classUserPrice回答before_val
我有一个表单,其中有很多字段取自数组(而不是模型或对象)。我如何验证这些字段的存在?solve_problem_pathdo|f|%>... 最佳答案 创建一个简单的类来包装请求参数并使用ActiveModel::Validations。#definedsomewhere,atthesimplest:require'ostruct'classSolvetrue#youcouldevencheckthesolutionwithavalidatorvalidatedoerrors.add(:base,"WRONG!!!")unlesss
我在我的Rails项目中使用Pow和powifygem。现在我尝试升级我的ruby版本(从1.9.3到2.0.0,我使用RVM)当我切换ruby版本、安装所有gem依赖项时,我通过运行railss并访问localhost:3000确保该应用程序正常运行以前,我通过使用pow访问http://my_app.dev来浏览我的应用程序。升级后,由于错误Bundler::RubyVersionMismatch:YourRubyversionis1.9.3,butyourGemfilespecified2.0.0,此url不起作用我尝试过的:重新创建pow应用程序重启pow服务器更新战俘
我已经像这样安装了一个新的Rails项目:$railsnewsite它执行并到达:bundleinstall但是当它似乎尝试安装依赖项时我得到了这个错误Gem::Ext::BuildError:ERROR:Failedtobuildgemnativeextension./System/Library/Frameworks/Ruby.framework/Versions/2.0/usr/bin/rubyextconf.rbcheckingforlibkern/OSAtomic.h...yescreatingMakefilemake"DESTDIR="cleanmake"DESTDIR="
我有一些非常大的模型,我必须将它们迁移到最新版本的Rails。这些模型有相当多的验证(User有大约50个验证)。是否可以将所有这些验证移动到另一个文件中?说app/models/validations/user_validations.rb。如果可以,有人可以提供示例吗? 最佳答案 您可以为此使用关注点:#app/models/validations/user_validations.rbrequire'active_support/concern'moduleUserValidationsextendActiveSupport:
当我的预订模型通过rake任务在状态机上转换时,我试图找出如何跳过对ActiveRecord对象的特定实例的验证。我想在reservation.close时跳过所有验证!叫做。希望调用reservation.close!(:validate=>false)之类的东西。仅供引用,我们正在使用https://github.com/pluginaweek/state_machine用于状态机。这是我的预订模型的示例。classReservation["requested","negotiating","approved"])}state_machine:initial=>'requested
我有一个服务模型/表及其注册表。在表单中,我几乎拥有服务的所有字段,但我想在验证服务对象之前自动设置其中一些值。示例:--服务Controller#创建Action:defcreate@service=Service.new@service_form=ServiceFormObject.new(@service)@service_form.validate(params[:service_form_object])and@service_form.saverespond_with(@service_form,location:admin_services_path)end在验证@ser