1、面向编程概念
AOP的全称是Aspect-Oriented Programming,即面向切面编程(也称面向方面编程)。它是面向对象 编程(OOP)的一种补充,目前已成为一种比较成熟的编程方式。面向对象编程是按业务执行的时间轴 执行,面向切面是对某个时间点的逻辑添加,是一个动态的过程。
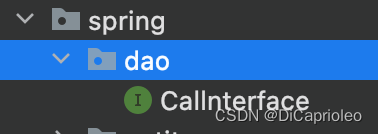
首先:在spring包下闯将dao.Callnterface的java接口(录入以下内容)
package com.test.spring.dao;

public interface Callnterface {
    int add(int num1,int num2);
    int sub(int num1,int num2);
    int mul(int num1,int num2);
    int div(int num1,int num2);
}
接着在spring包底下创建impl包中创建Callmpl类
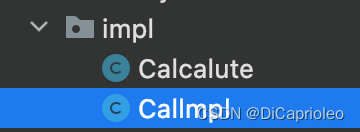
Callmpl类 内容如下:
package com.test.spring.impl;

import com.test.spring.dao.Callnterface;

public class Callmpl implements Callnterface {
//    @Override
//    public int add(int num1,int num2){
//        System.out.println("参数1" + num1 + "参数2"  + num2);
//        int sum = num1 + num2;
//        System.out.println("sum = " + sum);
//        return sum;
//    }


    @Override
    public int add(int num1, int num2) {
        return num1+num2;
    }

    @Override
    public int sub(int num1, int num2) {
        return num1-num2;
    }

    @Override
    public int mul(int num1, int num2) {
        return num1*num2;
    }

    @Override
    public int div(int num1, int num2) {
        return num1/num2;
    }
}
创建并继承上面Callnterface接口,并构造方法,如上述。
然后在我们spring包底下在构建一个util包创建JDKProxy类在里面继承InvocationHandler如下:

此时希望在业务执行前后记录日志。正常模拟处理在前后加打印语句
构造完整代码:导入包后直接粘贴复制即可注意大小写的区分
package com.test.spring.util;

import com.test.spring.dao.Callnterface;

import java.lang.reflect.InvocationHandler;
import java.lang.reflect.Method;
import java.lang.reflect.Proxy;
import java.util.Arrays;

public class JDKProxy implements InvocationHandler {

    private Callnterface callnterface;

    public Object createProxy(Callnterface callnterface){
        this.callnterface = callnterface;
        ClassLoader classLoader = JDKProxy.class.getClassLoader();
        Class<?>[] interfaces = callnterface.getClass().getInterfaces();

        return Proxy.newProxyInstance(classLoader,interfaces,this);
    }

    @Override
    public Object invoke(Object proxy, Method method, Object[] args) throws Throwable {
        String methodName = method.getName();
        System.out.println("方法:" + methodName + " 执行,参数为:" + Arrays.asList(args));
        Object result = method.invoke(callnterface,args);
        System.out.println("方法:" + methodName + " 执行,结果为:" + result); return result;
    }
}
接着打开之前创建的BeanTest1测试类构造一个@Test方法进行测试内容如下:
@Test
    public void testjdkProxy(){
    Callnterface callnterface = new Callmpl();
    JDKProxy jdkProxy = new JDKProxy();
    Callnterface proxy = (Callnterface)jdkProxy.createProxy(callnterface);
    int num = proxy.add(12, 3);
    System.out.println("num = " + num);

    }
设置参数为(12)(3)
执行查看结果:

可以看到测试通过
2.动态代理
JDK动态代理
第一步:导入依赖 当前模块的pom.xml文件添加依赖:
<dependency>
    <groupId>org.springframework</groupId>
    <artifactId>spring-core</artifactId>
</dependency>
<dependency>
    <groupId>org.springframework</groupId>
    <artifactId>spring-beans</artifactId>
</dependency>
<dependency>
    <groupId>org.springframework</groupId>
    <artifactId>spring-context</artifactId>
</dependency>
<dependency>
    <groupId>org.springframework</groupId>
    <artifactId>spring-expression</artifactId>
</dependency>
在pom.xml中添加上面四个类
再创建包com.test.spring.util,在其下创建JDKProxy类,实现InvocationHandler接口,代码如下:
package com.test.spring.util;

import com.test.spring.dao.Callnterface;

import java.lang.reflect.InvocationHandler;
import java.lang.reflect.Method;
import java.lang.reflect.Proxy;
import java.util.Arrays;

public class JDKProxy implements InvocationHandler {

    private Callnterface callnterface;

    public Object createProxy(Callnterface callnterface){
        this.callnterface = callnterface;
        ClassLoader classLoader = JDKProxy.class.getClassLoader();
        Class<?>[] interfaces = callnterface.getClass().getInterfaces();

        return Proxy.newProxyInstance(classLoader,interfaces,this);
    }

    @Override
    public Object invoke(Object proxy, Method method, Object[] args) throws Throwable {
        String methodName = method.getName();
        System.out.println("方法:" + methodName + " 执行,参数为:" + Arrays.asList(args));
        Object result = method.invoke(callnterface,args);
        System.out.println("方法:" + methodName + " 执行,结果为:" + result); return result;
    }
}
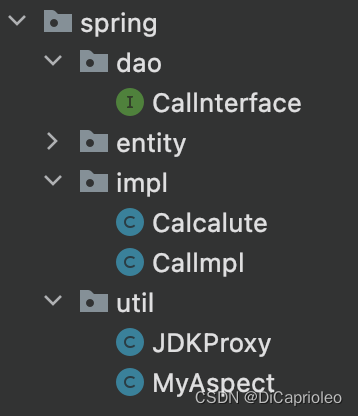
当前项目结构:
在注解方式AOP下再导入:
<dependencyManagement>
    <dependencies>
<!-- 此处省略之前添加的依赖,以下依赖为添加内容 --> <dependency>
            <groupId>org.springframework</groupId>
            <artifactId>spring-aspects</artifactId>
            <version>5.2.9.RELEASE</version>
        </dependency>
        <dependency>
            <groupId>aopalliance</groupId>
            <artifactId>aopalliance</artifactId>
            <version>1.0</version>
        </dependency>
    </dependencies>
</dependencyManagement>
在application.xml文件中一定要导入扫描引用如下:(没导入之前)
<?xmlversion="1.0"encoding="UTF-8"?>
 <beansxmlns="http://www.springframework.org/schema/beans"
 xmlns:xsi="http://www.w3.org/2001/XMLSchema-instance"
 xmlns:context="http://www.springframework.org/schema/context"
 xmlns:aop="http://www.springframework.org/schema/aop"
 xsi:schemaLocation="http://www.springframework.org/schema/beans
 http://www.springframework.org/schema/beans/spring-beans.xsd
 http://www.springframework.org/schema/context
 http://www.springframework.org/schema/context/spring-context.xsd
 http://www.springframework.org/schema/aop
 https://www.springframework.org/schema/aop/spring-aop.xsd">
 <context:component-scan base-package="com.aop.test"/>
 <!-- 开启切面自动代理 默认为JDK动态代理 -->
 <aop:aspectj-autoproxy/>
 </beans>
导入之后:(可直接复制粘贴使用这一类)
<?xml version="1.0" encoding="UTF-8"?>
<beans xmlns="http://www.springframework.org/schema/beans"
       xmlns:xsi="http://www.w3.org/2001/XMLSchema-instance"
       xmlns:p="http://www.springframework.org/schema/p"
       xmlns:c="http://www.springframework.org/schema/c"
       xmlns:util="http://www.springframework.org/schema/util"

       xmlns:aop="http://www.springframework.org/schema/aop"
       xmlns:context="http://www.springframework.org/schema/context"

       xsi:schemaLocation="http://www.springframework.org/schema/beans
        http://www.springframework.org/schema/beans/spring-beans.xsd
        http://www.springframework.org/schema/aop
        http://www.springframework.org/schema/aop/spring-aop.xsd
        http://www.springframework.org/schema/context
http://www.springframework.org/schema/context/spring-context.xsd
        http://www.springframework.org/schema/util
        http://www.springframework.org/schema/util/spring-util.xsd
">
增加部分如下:
xmlns:aop="http://www.springframework.org/schema/aop" 2 xsi:schemaLocation="
 <!-- 此处省略其他内容 -->
 http://www.springframework.org/schema/aop
 https://www.springframework.org/schema/aop/spring-aop.xsd"
接着在aop底下加入spring扫描组件

回到BeanTest1测试类新建一个测试方法如下:
 @Test
    public void testApectj(){
        ApplicationContext applicationContext = new ClassPathXmlApplicationContext("application.xml");
        Calcalute calcalute = applicationContext.getBean("calcalute", Calcalute.class);
        int num = calcalute.add(12, 13);
        System.out.println("num = " + num);


    }
注意认真区分calcalute的单词拼写与大小写
测试结果:

感谢大家观看
我真的很习惯使用Ruby编写以下代码:my_hash={}my_hash['test']=1Java中对应的数据结构是什么? 最佳答案 HashMapmap=newHashMap();map.put("test",1);我假设? 关于java-等价于Java中的RubyHash,我们在StackOverflow上找到一个类似的问题: https://stackoverflow.com/questions/22737685/
几个月前,我读了一篇关于rubygem的博客文章,它可以通过阅读代码本身来确定编程语言。对于我的生活,我不记得博客或gem的名称。谷歌搜索“ruby编程语言猜测”及其变体也无济于事。有人碰巧知道相关gem的名称吗? 最佳答案 是这个吗:http://github.com/chrislo/sourceclassifier/tree/master 关于ruby-寻找通过阅读代码确定编程语言的rubygem?,我们在StackOverflow上找到一个类似的问题:
我正在尝试使用boilerpipe来自JRuby。我看过guide从JRuby调用Java,并成功地将它与另一个Java包一起使用,但无法弄清楚为什么同样的东西不能用于boilerpipe。我正在尝试基本上从JRuby中执行与此Java等效的操作:URLurl=newURL("http://www.example.com/some-location/index.html");Stringtext=ArticleExtractor.INSTANCE.getText(url);在JRuby中试过这个:require'java'url=java.net.URL.new("http://www
我只想对我一直在思考的这个问题有其他意见,例如我有classuser_controller和classuserclassUserattr_accessor:name,:usernameendclassUserController//dosomethingaboutanythingaboutusersend问题是我的User类中是否应该有逻辑user=User.newuser.do_something(user1)oritshouldbeuser_controller=UserController.newuser_controller.do_something(user1,user2)我
什么是ruby的rack或python的Java的wsgi?还有一个路由库。 最佳答案 来自Python标准PEP333:Bycontrast,althoughJavahasjustasmanywebapplicationframeworksavailable,Java's"servlet"APImakesitpossibleforapplicationswrittenwithanyJavawebapplicationframeworktoruninanywebserverthatsupportstheservletAPI.ht
这篇文章是继上一篇文章“Observability:从零开始创建Java微服务并监控它(一)”的续篇。在上一篇文章中,我们讲述了如何创建一个Javaweb应用,并使用Filebeat来收集应用所生成的日志。在今天的文章中,我来详述如何收集应用的指标,使用APM来监控应用并监督web服务的在线情况。源码可以在地址 https://github.com/liu-xiao-guo/java_observability 进行下载。摄入指标指标被视为可以随时更改的时间点值。当前请求的数量可以改变任何毫秒。你可能有1000个请求的峰值,然后一切都回到一个请求。这也意味着这些指标可能不准确,你还想提取最小/
HashMap中为什么引入红黑树,而不是AVL树呢1.概述开始学习这个知识点之前我们需要知道,在JDK1.8以及之前,针对HashMap有什么不同。JDK1.7的时候,HashMap的底层实现是数组+链表JDK1.8的时候,HashMap的底层实现是数组+链表+红黑树我们要思考一个问题,为什么要从链表转为红黑树呢。首先先让我们了解下链表有什么不好???2.链表上述的截图其实就是链表的结构,我们来看下链表的增删改查的时间复杂度增:因为链表不是线性结构,所以每次添加的时候,只需要移动一个节点,所以可以理解为复杂度是N(1)删:算法时间复杂度跟增保持一致查:既然是非线性结构,所以查询某一个节点的时候
网络编程套接字网络编程基础知识理解源`IP`地址和目的`IP`地址理解源MAC地址和目的MAC地址认识端口号理解端口号和进程ID理解源端口号和目的端口号认识`TCP`协议认识`UDP`协议网络字节序socket编程接口`sockaddr``UDP`网络程序服务器端代码逻辑:需要用到的接口服务器端代码`udp`客户端代码逻辑`udp`客户端代码`TCP`网络程序服务器代码逻辑多个版本服务器单进程版本多进程版本多线程版本线程池版本服务器端代码客户端代码逻辑客户端代码TCP协议通讯流程TCP协议的客户端/服务器程序流程三次握手(建立连接)数据传输四次挥手(断开连接)TCP和UDP对比网络编程基础知识
遍历文件夹我们通常是使用递归进行操作,这种方式比较简单,也比较容易理解。本文为大家介绍另一种不使用递归的方式,由于没有使用递归,只用到了循环和集合,所以效率更高一些!一、使用递归遍历文件夹整体思路1、使用File封装初始目录,2、打印这个目录3、获取这个目录下所有的子文件和子目录的数组。4、遍历这个数组,取出每个File对象4-1、如果File是否是一个文件,打印4-2、否则就是一个目录,递归调用代码实现publicclassSearchFile{publicstaticvoidmain(String[]args){//初始目录Filedir=newFile("d:/Dev");Datebeg
我基本上来自Java背景并且努力理解Ruby中的模运算。(5%3)(-5%3)(5%-3)(-5%-3)Java中的上述操作产生,2个-22个-2但在Ruby中,相同的表达式会产生21个-1-2.Ruby在逻辑上有多擅长这个?模块操作在Ruby中是如何实现的?如果将同一个操作定义为一个web服务,两个服务如何匹配逻辑。 最佳答案 在Java中,模运算的结果与被除数的符号相同。在Ruby中,它与除数的符号相同。remainder()在Ruby中与被除数的符号相同。您可能还想引用modulooperation.