python学习资料下载地址:python学习资料整理
在安装pycharm之前,确保你的电脑配置好了python,没有下载安装的可以去看我的文章—>>>python安装详细教程
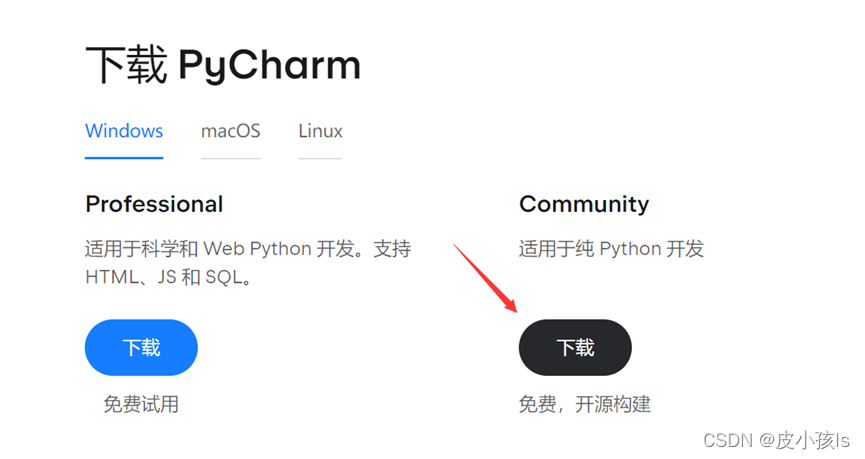
pycharm windows版本下载地址:https://www.jetbrains.com/pycharm/download/#section=windows
下载社区版本(日常学习使用够用了),专业版是收费的哦(功能更强大)
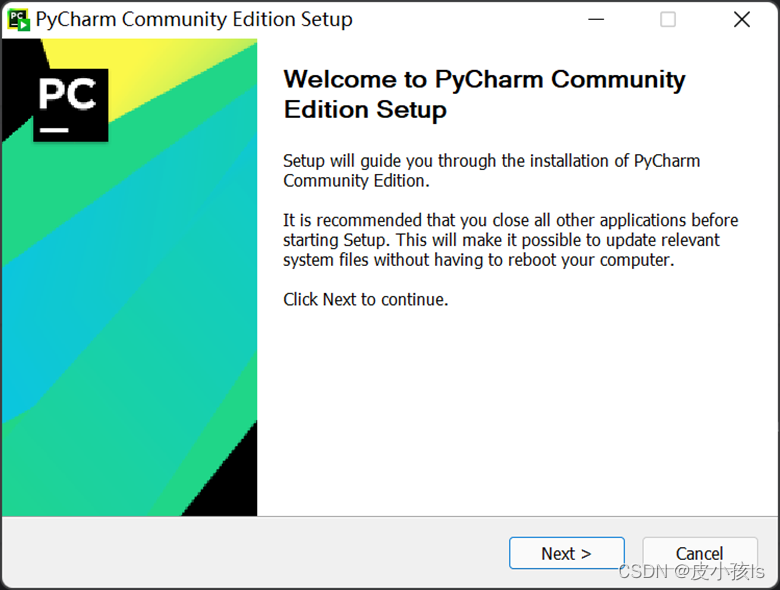
下载完后打开安装程序,点击next
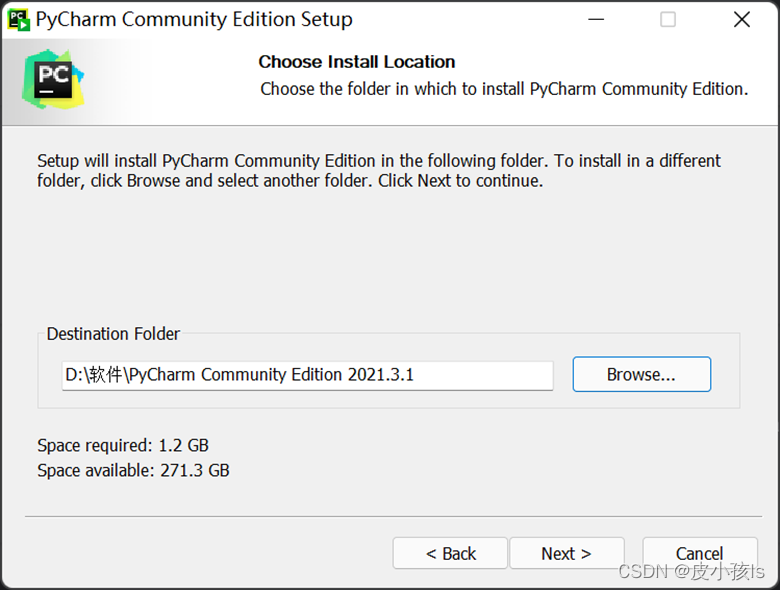
选择一个路径然后next
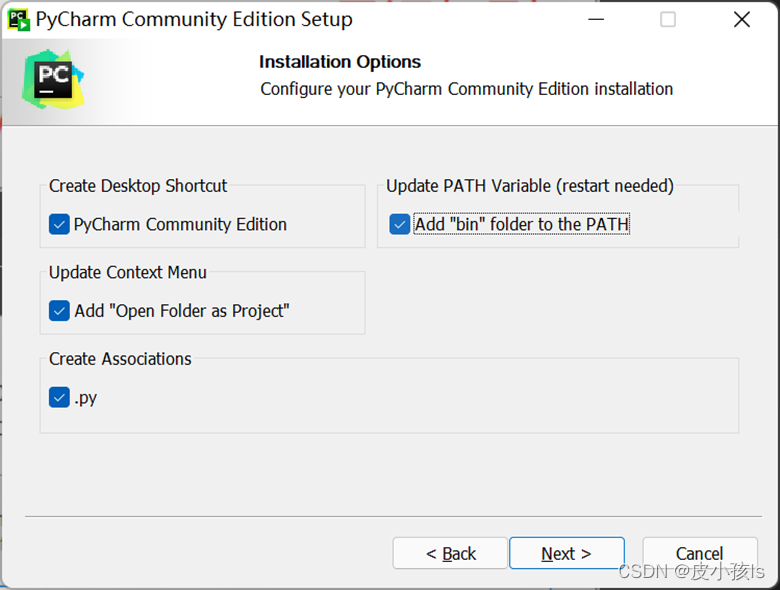
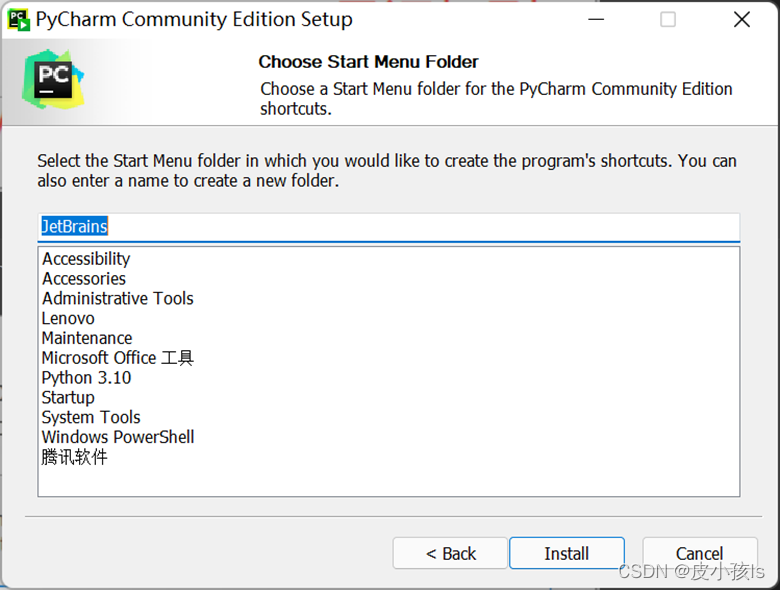
把这些选项都勾选上。
点击Install
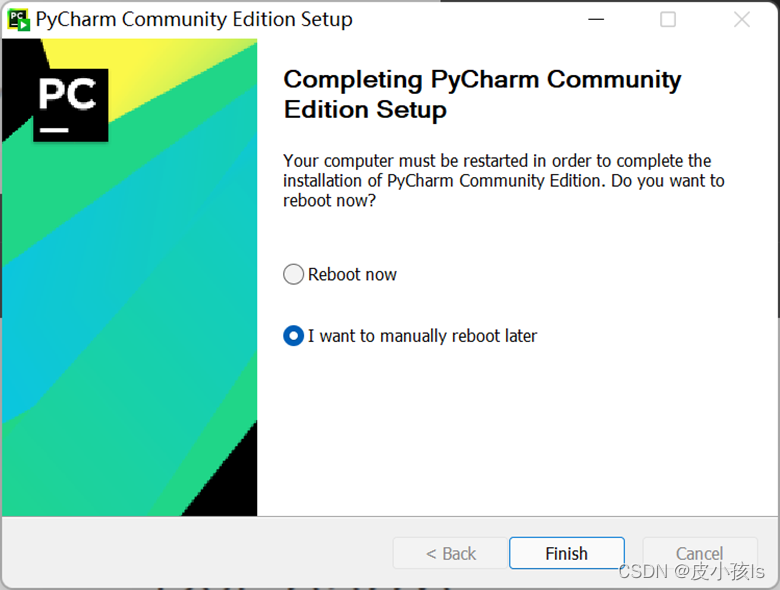
安装完后点击Finish
然后就可以开始使用了,双击桌面的pycharm快捷方式
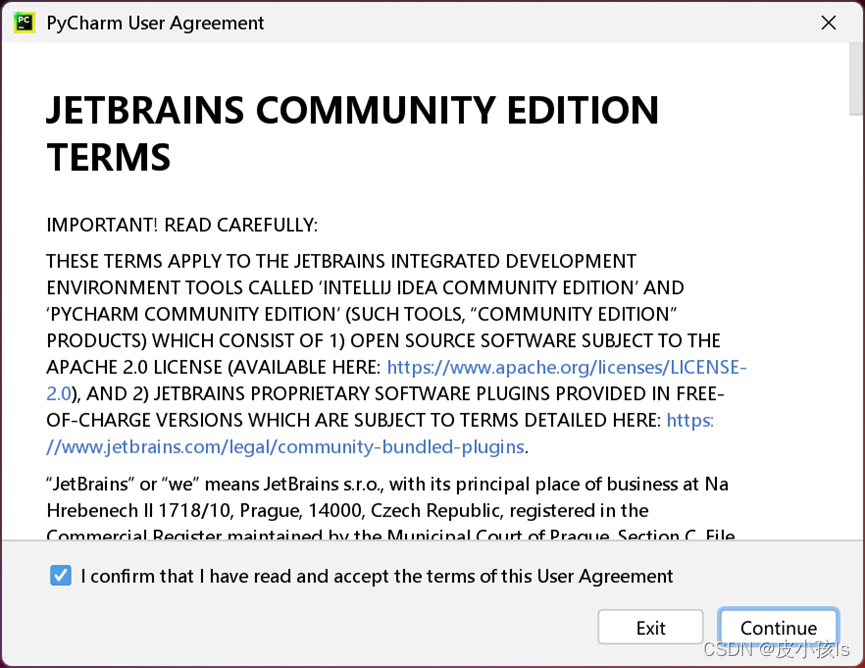
接受,继续!
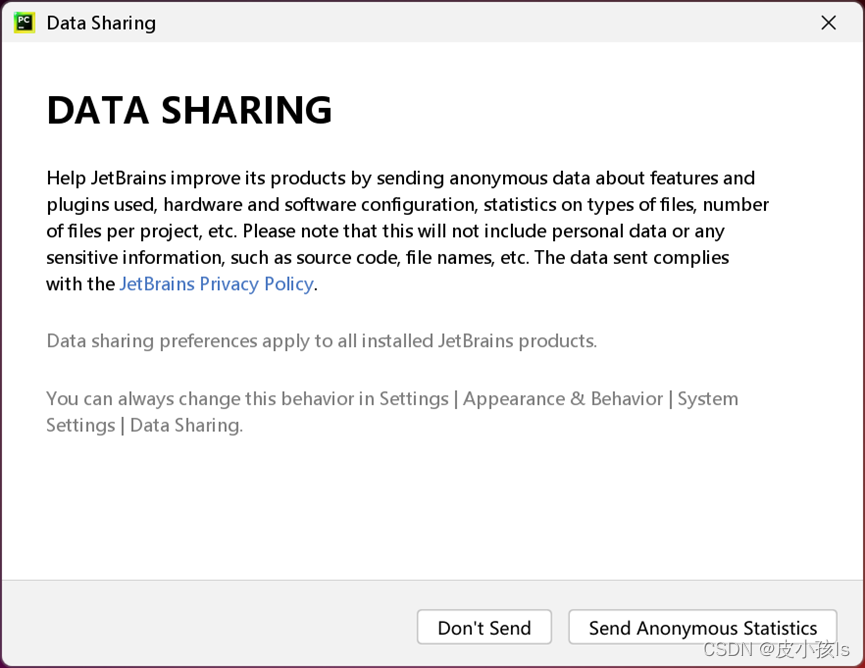
直接关闭或者Don’t Send.
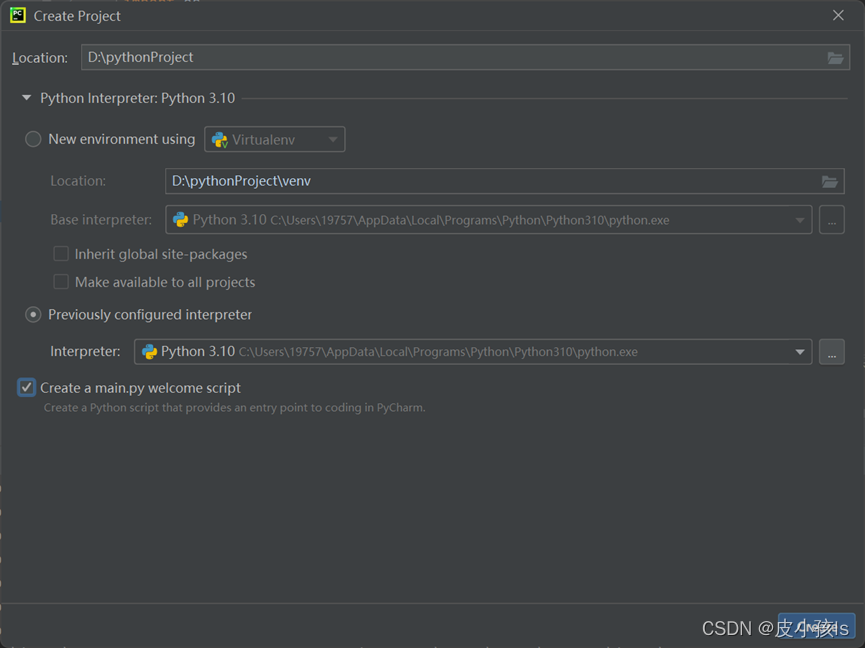
点击New Project(新建一个项目)
选择项目所在路径—>>>选择Previously configured interpreter(需要提前下载安装好python,我这里python版本是python3.10)—>>勾选Create a main.py—>>>最后点击Create.
python安装的教程可以去看我的文章—>>>python安装详细教程
弹出这个直接关闭
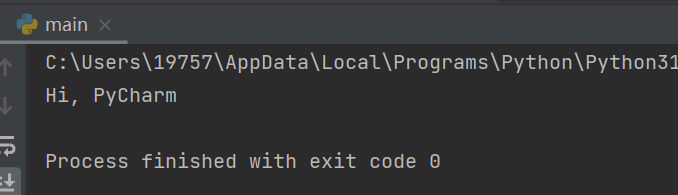
鼠标右击main.py,点击运行

成功输出!说明配置好咯。
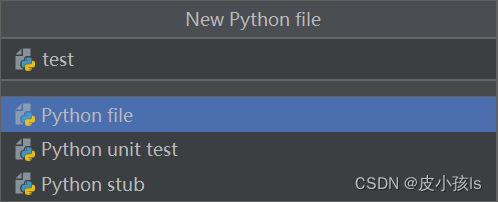
然后我们新建一个python file(右击你的项目文件夹)

命名一下
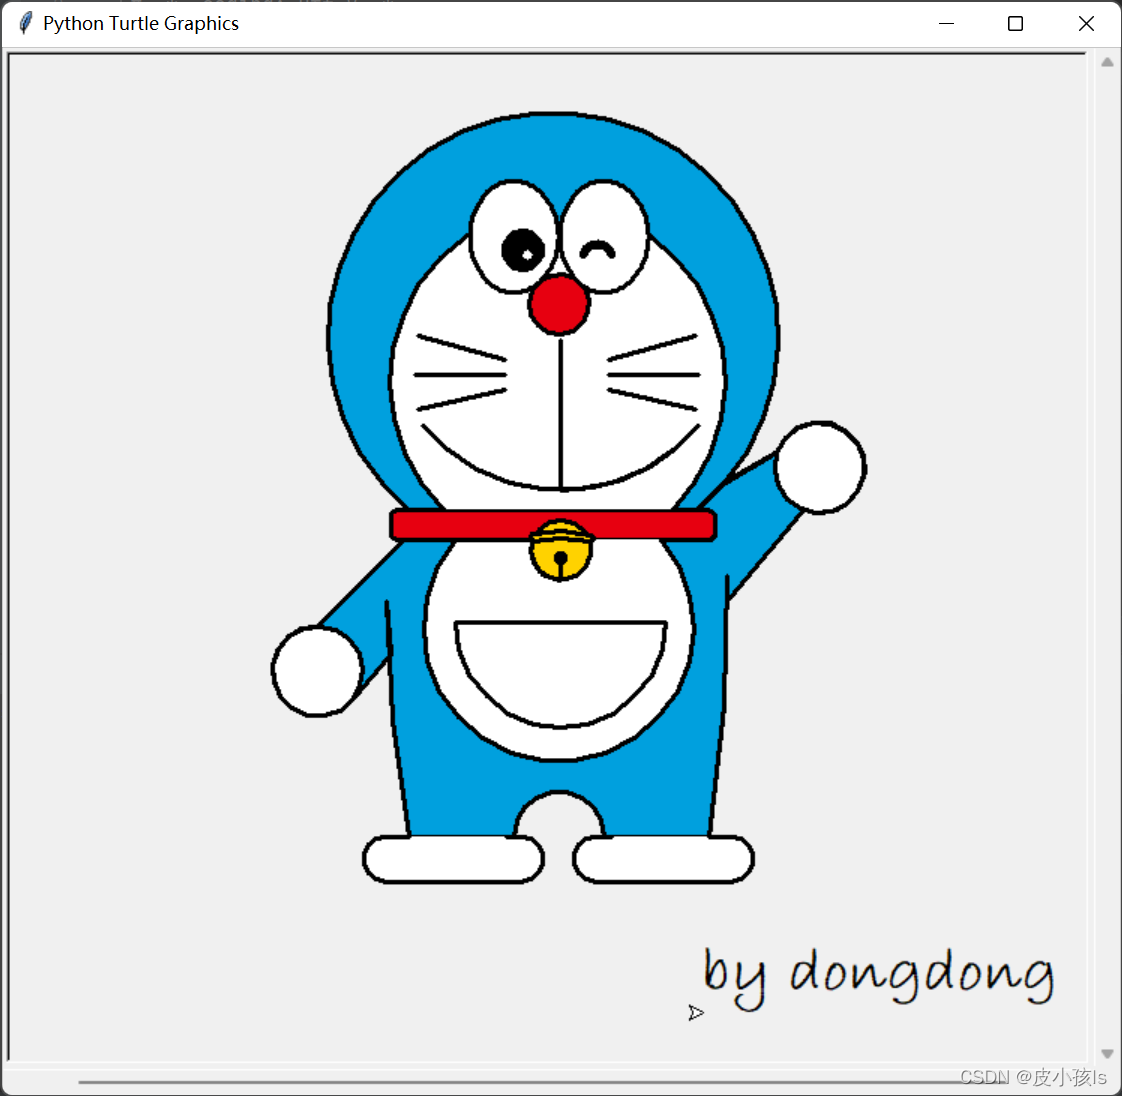
把下面代码复制粘贴过去,看看会出现什么吧。源码来自github
# !/usr/bin/env python3
# -*- coding: utf-8 -*-
# @Author: dong
# @Date: 2018-07-05 19:37:42
# @Env: python 3.6
# @Github: https://github.com/PerpetualSmile

from turtle import *


# 无轨迹跳跃
def my_goto(x, y):
    penup()
    goto(x, y)
    pendown()

# 眼睛
def eyes():
    fillcolor("#ffffff")
    begin_fill()

    tracer(False)
    a = 2.5
    for i in range(120):
        if 0 <= i < 30 or 60 <= i < 90:
            a -= 0.05
            lt(3)
            fd(a)
        else:
            a += 0.05
            lt(3)
            fd(a)
    tracer(True)
    end_fill()


# 胡须
def beard():
    my_goto(-32, 135)
    seth(165)
    fd(60)

    my_goto(-32, 125)
    seth(180)
    fd(60)

    my_goto(-32, 115)
    seth(193)
    fd(60)

    my_goto(37, 135)
    seth(15)
    fd(60)

    my_goto(37, 125)
    seth(0)
    fd(60)

    my_goto(37, 115)
    seth(-13)
    fd(60)

# 嘴巴
def mouth():
    my_goto(5, 148)
    seth(270)
    fd(100)
    seth(0)
    circle(120, 50)
    seth(230)
    circle(-120, 100)

# 围巾
def scarf():
    fillcolor('#e70010')
    begin_fill()
    seth(0)
    fd(200)
    circle(-5, 90)
    fd(10)
    circle(-5, 90)
    fd(207)
    circle(-5, 90)
    fd(10)
    circle(-5, 90)
    end_fill()

# 鼻子
def nose():
    my_goto(-10, 158)
    seth(315)
    fillcolor('#e70010')
    begin_fill()
    circle(20)
    end_fill()

# 黑眼睛
def black_eyes():
    seth(0)
    my_goto(-20, 195)
    fillcolor('#000000')
    begin_fill()
    circle(13)
    end_fill()

    pensize(6)
    my_goto(20, 205)
    seth(75)
    circle(-10, 150)
    pensize(3)

    my_goto(-17, 200)
    seth(0)
    fillcolor('#ffffff')
    begin_fill()
    circle(5)
    end_fill()
    my_goto(0, 0)


# 脸
def face():

    fd(183)
    lt(45)
    fillcolor('#ffffff')
    begin_fill()
    circle(120, 100)
    seth(180)
    # print(pos())
    fd(121)
    pendown()
    seth(215)
    circle(120, 100)
    end_fill()
    my_goto(63.56,218.24)
    seth(90)
    eyes()
    seth(180)
    penup()
    fd(60)
    pendown()
    seth(90)
    eyes()
    penup()
    seth(180)
    fd(64)

# 头型
def head():
    penup()
    circle(150, 40)
    pendown()
    fillcolor('#00a0de')
    begin_fill()
    circle(150, 280)
    end_fill()

# 画哆啦A梦
def Doraemon():
    # 头部
    head()

    # 围脖
    scarf()

    # 脸
    face()

    # 红鼻子
    nose()

    # 嘴巴
    mouth()

    # 胡须
    beard()

    # 身体
    my_goto(0, 0)
    seth(0)
    penup()
    circle(150, 50)
    pendown()
    seth(30)
    fd(40)
    seth(70)
    circle(-30, 270)


    fillcolor('#00a0de')
    begin_fill()

    seth(230)
    fd(80)
    seth(90)
    circle(1000, 1)
    seth(-89)
    circle(-1000, 10)

    # print(pos())

    seth(180)
    fd(70)
    seth(90)
    circle(30, 180)
    seth(180)
    fd(70)

    # print(pos())
    seth(100)
    circle(-1000, 9)

    seth(-86)
    circle(1000, 2)
    seth(230)
    fd(40)

    # print(pos())


    circle(-30, 230)
    seth(45)
    fd(81)
    seth(0)
    fd(203)
    circle(5, 90)
    fd(10)
    circle(5, 90)
    fd(7)
    seth(40)
    circle(150, 10)
    seth(30)
    fd(40)
    end_fill()

    # 左手
    seth(70)
    fillcolor('#ffffff')
    begin_fill()
    circle(-30)
    end_fill()

    # 脚
    my_goto(103.74, -182.59)
    seth(0)
    fillcolor('#ffffff')
    begin_fill()
    fd(15)
    circle(-15, 180)
    fd(90)
    circle(-15, 180)
    fd(10)
    end_fill()

    my_goto(-96.26, -182.59)
    seth(180)
    fillcolor('#ffffff')
    begin_fill()
    fd(15)
    circle(15, 180)
    fd(90)
    circle(15, 180)
    fd(10)
    end_fill()

    # 右手
    my_goto(-133.97, -91.81)
    seth(50)
    fillcolor('#ffffff')
    begin_fill()
    circle(30)
    end_fill()

    # 口袋
    my_goto(-103.42, 15.09)
    seth(0)
    fd(38)
    seth(230)
    begin_fill()
    circle(90, 260)
    end_fill()

    my_goto(5, -40)
    seth(0)
    fd(70)
    seth(-90)
    circle(-70, 180)
    seth(0)
    fd(70)

    #铃铛
    my_goto(-103.42, 15.09)
    fd(90)
    seth(70)
    fillcolor('#ffd200')
    # print(pos())
    begin_fill()
    circle(-20)
    end_fill()
    seth(170)
    fillcolor('#ffd200')
    begin_fill()
    circle(-2, 180)
    seth(10)
    circle(-100, 22)
    circle(-2, 180)
    seth(180-10)
    circle(100, 22)
    end_fill()
    goto(-13.42, 15.09)
    seth(250)
    circle(20, 110)
    seth(90)
    fd(15)
    dot(10)
    my_goto(0, -150)

    # 画眼睛
    black_eyes()

if __name__ == '__main__':
    screensize(800,600, "#f0f0f0")
    pensize(3)  # 画笔宽度
    speed(9)    # 画笔速度
    Doraemon()
    my_goto(100, -300)
    write('by dongdong', font=("Bradley Hand ITC", 30, "bold"))
    mainloop()
效果图:
python学习资料下载地址:python学习资料整理
更多python代码可以去我的专栏看看:
爱心代码——李峋
python实用代码
python爬虫入门
基于python和go-cqhttp实现的QQ机器人
最后教大家怎么安装第三方库。
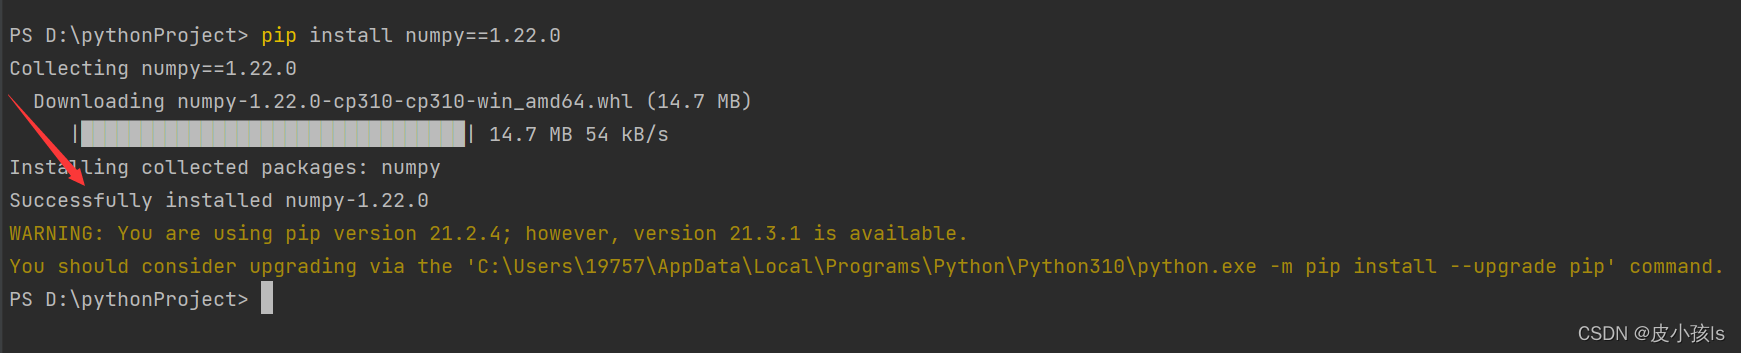
点击pycharm下方的Termainal,输入pip install 第三方库的名称,比如pip install numpy,后面可以跟指定的版本,比如pip install numpy==1.21.0

出现Successfully installed …就说明安装成功了,然后他还提醒我更新pip,这个不管。
大家如果发现下载速度很慢,可以使用国内的镜像。
命令: pip install -i 国内镜像地址 numpy
国内常用源镜像地址:
清华:https://pypi.tuna.tsinghua.edu.cn/simple
阿里云:http://mirrors.aliyun.com/pypi/simple/
中国科技大学 https://pypi.mirrors.ustc.edu.cn/simple/
华中理工大学:http://pypi.hustunique.com/
山东理工大学:http://pypi.sdutlinux.org/
豆瓣:http://pypi.douban.com/simple/
例如:pip install -i https://mirrors.aliyun.com/pypi/simple/ numpy
当然安装第三方库的方法有很多种,上述描述的是我推荐的一种。
我想为Heroku构建一个Rails3应用程序。他们使用Postgres作为他们的数据库,所以我通过MacPorts安装了postgres9.0。现在我需要一个postgresgem并且共识是出于性能原因你想要pggem。但是我对我得到的错误感到非常困惑当我尝试在rvm下通过geminstall安装pg时。我已经非常明确地指定了所有postgres目录的位置可以找到但仍然无法完成安装:$envARCHFLAGS='-archx86_64'geminstallpg--\--with-pg-config=/opt/local/var/db/postgresql90/defaultdb/po
我打算为ruby脚本创建一个安装程序,但我希望能够确保机器安装了RVM。有没有一种方法可以完全离线安装RVM并且不引人注目(通过不引人注目,就像创建一个可以做所有事情的脚本而不是要求用户向他们的bash_profile或bashrc添加一些东西)我不是要脚本本身,只是一个关于如何走这条路的快速指针(如果可能的话)。我们还研究了这个很有帮助的问题:RVM-isthereawayforsimpleofflineinstall?但有点误导,因为答案只向我们展示了如何离线在RVM中安装ruby。我们需要能够离线安装RVM本身,并查看脚本https://raw.github.com/wayn
我有一个奇怪的问题:我在rvm上安装了rubyonrails。一切正常,我可以创建项目。但是在我输入“railsnew”时重新启动后,我有“程序'rails'当前未安装。”。SystemUbuntu12.04ruby-v"1.9.3p194"gemlistactionmailer(3.2.5)actionpack(3.2.5)activemodel(3.2.5)activerecord(3.2.5)activeresource(3.2.5)activesupport(3.2.5)arel(3.0.2)builder(3.0.0)bundler(1.1.4)coffee-rails(
我刚刚为fedora安装了emacs。我想用emacs编写ruby。为ruby提供代码提示、代码完成类型功能所需的工具、扩展是什么? 最佳答案 ruby-mode已经包含在Emacs23之后的版本中。不过,它也可以通过ELPA获得。您可能感兴趣的其他一些事情是集成RVM、feature-mode(Cucumber)、rspec-mode、ruby-electric、inf-ruby、rinari(用于Rails)等。这是我当前用于Ruby开发的Emacs配置:https://github.com/citizen428/emacs
我正在尝试在我的centos服务器上安装therubyracer,但遇到了麻烦。$geminstalltherubyracerBuildingnativeextensions.Thiscouldtakeawhile...ERROR:Errorinstallingtherubyracer:ERROR:Failedtobuildgemnativeextension./usr/local/rvm/rubies/ruby-1.9.3-p125/bin/rubyextconf.rbcheckingformain()in-lpthread...yescheckingforv8.h...no***e
我的最终目标是安装当前版本的RubyonRails。我在OSXMountainLion上运行。到目前为止,这是我的过程:已安装的RVM$\curl-Lhttps://get.rvm.io|bash-sstable检查已知(我假设已批准)安装$rvmlistknown我看到当前的稳定版本可用[ruby-]2.0.0[-p247]输入命令安装$rvminstall2.0.0-p247注意:我也试过这些安装命令$rvminstallruby-2.0.0-p247$rvminstallruby=2.0.0-p247我很快就无处可去了。结果:$rvminstall2.0.0-p247Search
我实际上是在尝试使用RVM在我的OSX10.7.5上更新ruby,并在输入以下命令后:rvminstallruby我得到了以下回复:Searchingforbinaryrubies,thismighttakesometime.Checkingrequirementsforosx.Installingrequirementsforosx.Updatingsystem.......Errorrunning'requirements_osx_brew_update_systemruby-2.0.0-p247',pleaseread/Users/username/.rvm/log/138121
由于fast-stemmer的问题,我很难安装我想要的任何rubygem。我把我得到的错误放在下面。Buildingnativeextensions.Thiscouldtakeawhile...ERROR:Errorinstallingfast-stemmer:ERROR:Failedtobuildgemnativeextension./System/Library/Frameworks/Ruby.framework/Versions/2.0/usr/bin/rubyextconf.rbcreatingMakefilemake"DESTDIR="cleanmake"DESTDIR=
当我尝试安装Ruby时遇到此错误。我试过查看this和this但无济于事➜~brewinstallrubyWarning:YouareusingOSX10.12.Wedonotprovidesupportforthispre-releaseversion.Youmayencounterbuildfailuresorotherbreakages.Pleasecreatepull-requestsinsteadoffilingissues.==>Installingdependenciesforruby:readline,libyaml,makedepend==>Installingrub
当我执行>rvminstall1.9.2时一切顺利。然后我做>rvmuse1.9.2也很顺利。但是当涉及到ruby-v时..sam@sjones:~$rvminstall1.9.2/home/sam/.rvm/rubies/ruby-1.9.2-p136,thismaytakeawhiledependingonyourcpu(s)...ruby-1.9.2-p136-#fetchingruby-1.9.2-p136-#downloadingruby-1.9.2-p136,thismaytakeawhiledependingonyourconnection...%Total%Rece