论文题目:BEVFusion: A Simple and Robust LiDAR-Camera Fusion Framework
论文地址:https://arxiv.org/pdf/2205.13790.pdf
前言:这是今年新发的一篇论文,我在第一次阅读时,代码还未开源,前几天发现开源了,而且这个框架做的很清晰,可以基于这个工作熟悉一下融合方案,也能稍稍改进一下。
笔者环境:
sys.platform: linux
Python: 3.8.3 | packaged by conda-forge | (default, Jun 1 2020, 17:43:00) [GCC 7.5.0]
CUDA available: True
GPU 0,1: NVIDIA GeForce RTX 3090
CUDA_HOME: /usr
NVCC: Build cuda_11.5.r11.5/compiler.30672275_0
GCC: gcc (Ubuntu 7.5.0-6ubuntu2) 7.5.0
PyTorch: 1.8.0+cu111
PyTorch compiling details: PyTorch built with:
- GCC 7.3
- C++ Version: 201402
- Intel® Math Kernel Library Version 2020.0.0 Product Build 20191122 for Intel® 64 architecture applications
- Intel® MKL-DNN v1.7.0 (Git Hash 7aed236906b1f7a05c0917e5257a1af05e9ff683)
- OpenMP 201511 (a.k.a. OpenMP 4.5)
- NNPACK is enabled
- CPU capability usage: AVX2
- CUDA Runtime 11.1
- NVCC architecture flags: -gencode;arch=compute_37,code=sm_37;-gencode;arch=compute_50,code=sm_50;-gencode;arch=compute_60,code=sm_60;-gencode;arch=compute_70,code=sm_70;-gencode;arch=compute_75,code=sm_75;-gencode;arch=compute_80,code=sm_80;-gencode;arch=compute_86,code=sm_86
- CuDNN 8.0.5
- Magma 2.5.2
- Build settings: BLAS_INFO=mkl, BUILD_TYPE=Release, CUDA_VERSION=11.1, CUDNN_VERSION=8.0.5, CXX_COMPILER=/opt/rh/devtoolset-7/root/usr/bin/c++, CXX_FLAGS= -Wno-deprecated -fvisibility-inlines-hidden -DUSE_PTHREADPOOL -fopenmp -DNDEBUG -DUSE_KINETO -DUSE_FBGEMM -DUSE_QNNPACK -DUSE_PYTORCH_QNNPACK -DUSE_XNNPACK -O2 -fPIC -Wno-narrowing -Wall -Wextra -Werror=return-type -Wno-missing-field-initializers -Wno-type-limits -Wno-array-bounds -Wno-unknown-pragmas -Wno-sign-compare -Wno-unused-parameter -Wno-unused-variable -Wno-unused-function -Wno-unused-result -Wno-unused-local-typedefs -Wno-strict-overflow -Wno-strict-aliasing -Wno-error=deprecated-declarations -Wno-stringop-overflow -Wno-psabi -Wno-error=pedantic -Wno-error=redundant-decls -Wno-error=old-style-cast -fdiagnostics-color=always -faligned-new -Wno-unused-but-set-variable -Wno-maybe-uninitialized -fno-math-errno -fno-trapping-math -Werror=format -Wno-stringop-overflow, LAPACK_INFO=mkl, PERF_WITH_AVX=1, PERF_WITH_AVX2=1, PERF_WITH_AVX512=1, TORCH_VERSION=1.8.0, USE_CUDA=ON, USE_CUDNN=ON, USE_EXCEPTION_PTR=1, USE_GFLAGS=OFF, USE_GLOG=OFF, USE_MKL=ON, USE_MKLDNN=ON, USE_MPI=OFF, USE_NCCL=ON, USE_NNPACK=ON, USE_OPENMP=ON,
TorchVision: 0.9.0+cu111
OpenCV: 4.6.0
MMCV: 1.4.0
MMCV Compiler: GCC 7.3
MMCV CUDA Compiler: 11.1
MMDetection: 2.11.0
MMDetection3D: 0.11.0+9d3e162
说人话:torch1.8.0+cuda111,显卡是3090,其余环境根据根据官方文档配的
git clone https://github.com/ADLab-AutoDrive/BEVFusion.git
conda create -n bevfusion python=3.8.3
conda activate bevfusion #激活
尽量选择1.7或者1.8,cuda版本要对应
2022年11月22日更新:尽量选1.7吧,1.8的bug导致训练有些问题
2022年12月2日更新:最近太忙,前几天发现1.7的torch不适合在这个项目上用,具体原因和3090显卡有关,缺少相关库(3090最低支持cuda11.1,torch1.7最高支持cuda11.0)
pip install torch=1.8.0+cu111 torchvision=0.9.0+cu111 torchaudio==0.8.0 -f https://download.pytorch.org/whl/torch_stable.html
这里要根据自己的torch和cuda来,另外,BEVFusion官方文档推荐1.4.0版本
从以下网址找到自己合适的版本
https://download.openmmlab.com/mmcv/dist/{cu_version}/{torch_version}/index.html
其中cu_version代表cuda版本,torch_version代表torch版本,
例如,我的是torch1.8.0+cuda111,所以我的地址是:
https://download.openmmlab.com/mmcv/dist/cu111/torch1.8.0/index.html
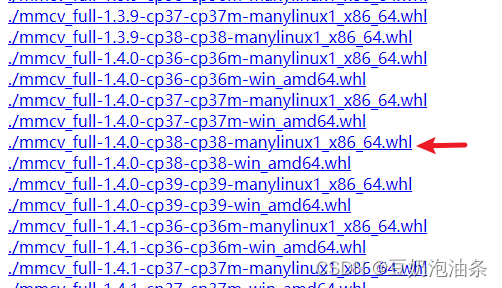
因为创建的环境是python3.8,所以选择cp38,别忘了mmcv-full版本是1.4.0,下载whl文件,并传到服务器上,然后pip whl文件(不再赘述pip安装whl了,百度一下)
下面是BEVFusion官方推荐的环境
python=3.8.3
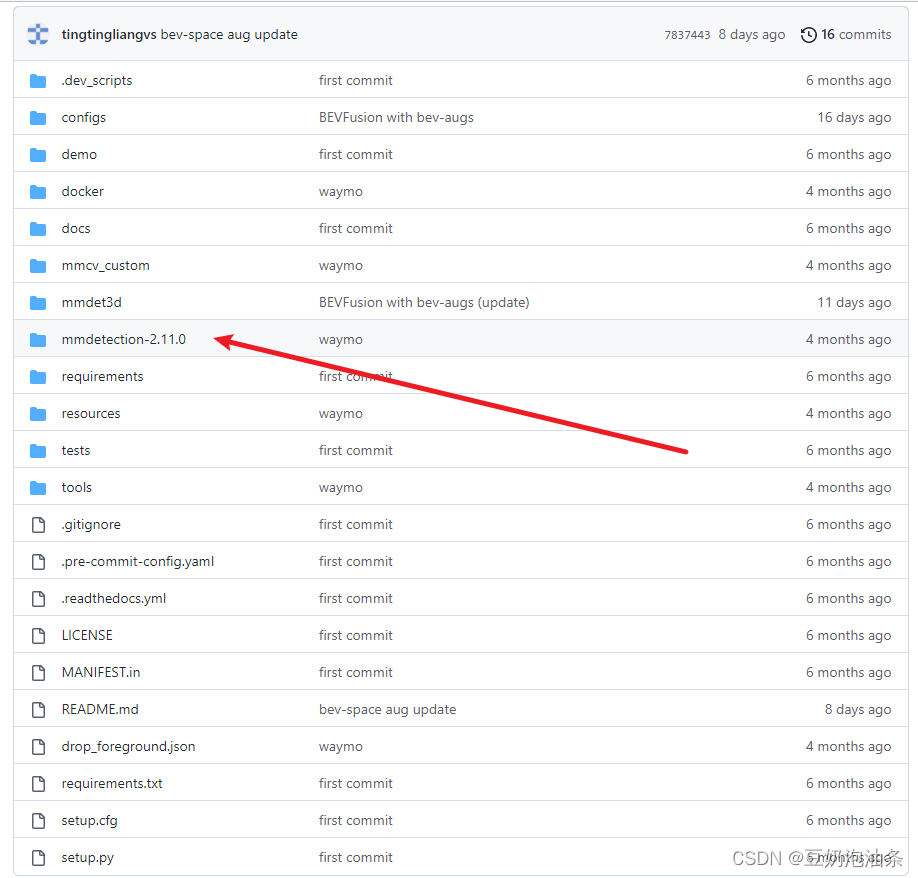
mmdet=2.11.0 (please install mmdet in mmdetection-2.11.0)
mmcv=1.4.0
mmdet3d=0.11.0
numpy=1.19.2
torch=1.7.0
torchvision=0.8.0
注意please install mmdet in mmdetection-2.11.0,作者已经在仓库中放了这个文件夹,我们直接进入这个文件夹
然后执行:
pip install -r requirements/build.txt
pip install -v -e .  # or "python setup.py develop"(推荐执行后者)
退回到BEVFusion根目录下,克隆MMDetection3D,进入执行下面指令
git clone https://github.com/open-mmlab/mmdetection3d.git
cd mmdetection3d
pip install -v -e .  # or "python setup.py develop"(推荐执行后者)
退回到BEVFusion根目录下,你会注意到有个setup.py文件
执行python setup.py develop
至此配置完毕
以下是我的环境
Package Version Editable project location
absl-py 1.3.0
addict 2.4.0
anyio 3.6.2
argon2-cffi 21.3.0
argon2-cffi-bindings 21.2.0
asttokens 2.1.0
attrs 22.1.0
backcall 0.2.0
beautifulsoup4 4.11.1
black 22.10.0
bleach 5.0.1
cachetools 5.2.0
certifi 2022.9.24
cffi 1.15.1
charset-normalizer 2.1.1
click 8.1.3
contourpy 1.0.6
cycler 0.11.0
Cython 0.29.32
debugpy 1.6.3
decorator 5.1.1
defusedxml 0.7.1
depthwise-conv2d-implicit-gemm 0.0.0
descartes 1.1.0
entrypoints 0.4
exceptiongroup 1.0.4
executing 1.2.0
fastjsonschema 2.16.2
filelock 3.8.0
fire 0.4.0
flake8 5.0.4
fonttools 4.38.0
google-auth 2.14.1
google-auth-oauthlib 0.4.6
grpcio 1.50.0
h5py 3.7.0
huggingface-hub 0.11.0
idna 3.4
imageio 2.22.4
importlib-metadata 5.0.0
importlib-resources 5.10.0
iniconfig 1.1.1
ipykernel 6.17.1
ipython 8.6.0
ipython-genutils 0.2.0
ipywidgets 8.0.2
jedi 0.18.1
Jinja2 3.1.2
joblib 1.2.0
jsonschema 4.17.0
jupyter 1.0.0
jupyter_client 7.4.6
jupyter-console 6.4.4
jupyter_core 5.0.0
jupyter-server 1.23.2
jupyterlab-pygments 0.2.2
jupyterlab-widgets 3.0.3
kiwisolver 1.4.4
llvmlite 0.31.0
loguru 0.6.0
lyft-dataset-sdk 0.0.8
Markdown 3.4.1
MarkupSafe 2.1.1
matplotlib 3.6.2
matplotlib-inline 0.1.6
mccabe 0.7.0
mistune 2.0.4
mmcls 0.24.1
mmcv-full 1.4.0
mmdet 2.11.0 /home/wistful/work/my_bevfusion/mmdetection-2.11.0
mmdet3d 0.11.0 /home/wistful/work/my_bevfusion
mmpycocotools 12.0.3
msgpack 1.0.4
msgpack-numpy 0.4.8
multimethod 1.9
mypy-extensions 0.4.3
nbclassic 0.4.8
nbclient 0.7.0
nbconvert 7.2.5
nbformat 5.7.0
nest-asyncio 1.5.6
networkx 2.2
ninja 1.11.1
notebook 6.5.2
notebook_shim 0.2.2
numba 0.48.0
numpy 1.23.4
nuscenes-devkit 1.1.9
oauthlib 3.2.2
opencv-python 4.6.0.66
packaging 21.3
pandas 1.4.4
pandocfilters 1.5.0
parso 0.8.3
pathspec 0.10.2
pexpect 4.8.0
pickleshare 0.7.5
Pillow 9.3.0
pip 22.3.1
pkgutil_resolve_name 1.3.10
platformdirs 2.5.4
plotly 5.11.0
pluggy 1.0.0
plyfile 0.7.4
prettytable 3.5.0
prometheus-client 0.15.0
prompt-toolkit 3.0.32
protobuf 3.20.3
psutil 5.9.4
ptyprocess 0.7.0
pure-eval 0.2.2
pyasn1 0.4.8
pyasn1-modules 0.2.8
pycocotools 2.0.6
pycodestyle 2.9.1
pycparser 2.21
pyflakes 2.5.0
Pygments 2.13.0
pyparsing 3.0.9
pyquaternion 0.9.9
pyrsistent 0.19.2
pytest 7.2.0
python-dateutil 2.8.2
pytz 2022.6
PyWavelets 1.4.1
PyYAML 6.0
pyzmq 24.0.1
qtconsole 5.4.0
QtPy 2.3.0
requests 2.28.1
requests-oauthlib 1.3.1
rsa 4.9
scikit-image 0.19.3
scikit-learn 1.1.3
scipy 1.9.3
Send2Trash 1.8.0
setuptools 65.5.1
Shapely 1.8.5.post1
six 1.16.0
sniffio 1.3.0
soupsieve 2.3.2.post1
stack-data 0.6.1
tabulate 0.9.0
tenacity 8.1.0
tensorboard 2.11.0
tensorboard-data-server 0.6.1
tensorboard-plugin-wit 1.8.1
tensorpack 0.11
termcolor 2.1.0
terminado 0.17.0
terminaltables 3.1.10
threadpoolctl 3.1.0
tifffile 2022.10.10
timm 0.6.11
tinycss2 1.2.1
toml 0.10.2
tomli 2.0.1
torch 1.8.0+cu111
torchaudio 0.8.0
torchpack 0.3.1
torchvision 0.9.0+cu111
tornado 6.2
tqdm 4.64.1
traitlets 5.5.0
trimesh 2.35.39
typing_extensions 4.4.0
urllib3 1.26.12
wcwidth 0.2.5
webencodings 0.5.1
websocket-client 1.4.2
Werkzeug 2.2.2
wheel 0.38.4
widgetsnbextension 4.0.3
yapf 0.32.0
zipp 3.10.0
sys.platform: linux
Python: 3.8.3 | packaged by conda-forge | (default, Jun 1 2020, 17:43:00) [GCC 7.5.0]
CUDA available: True
GPU 0,1: NVIDIA GeForce RTX 3090
CUDA_HOME: /usr/local/cuda
NVCC: Build cuda_11.1.TC455_06.29069683_0
GCC: gcc (Ubuntu 7.5.0-6ubuntu2) 7.5.0
PyTorch: 1.8.0+cu111
PyTorch compiling details: PyTorch built with:
- GCC 7.3
- C++ Version: 201402
- Intel® Math Kernel Library Version 2020.0.0 Product Build 20191122 for Intel® 64 architecture applications
- Intel® MKL-DNN v1.7.0 (Git Hash 7aed236906b1f7a05c0917e5257a1af05e9ff683)
- OpenMP 201511 (a.k.a. OpenMP 4.5)
- NNPACK is enabled
- CPU capability usage: AVX2
- CUDA Runtime 11.1
- NVCC architecture flags: -gencode;arch=compute_37,code=sm_37;-gencode;arch=compute_50,code=sm_50;-gencode;arch=compute_60,code=sm_60;-gencode;arch=compute_70,code=sm_70;-gencode;arch=compute_75,code=sm_75;-gencode;arch=compute_80,code=sm_80;-gencode;arch=compute_86,code=sm_86
- CuDNN 8.0.5
- Magma 2.5.2
- Build settings: BLAS_INFO=mkl, BUILD_TYPE=Release, CUDA_VERSION=11.1, CUDNN_VERSION=8.0.5, CXX_COMPILER=/opt/rh/devtoolset-7/root/usr/bin/c++, CXX_FLAGS= -Wno-deprecated -fvisibility-inlines-hidden -DUSE_PTHREADPOOL -fopenmp -DNDEBUG -DUSE_KINETO -DUSE_FBGEMM -DUSE_QNNPACK -DUSE_PYTORCH_QNNPACK -DUSE_XNNPACK -O2 -fPIC -Wno-narrowing -Wall -Wextra -Werror=return-type -Wno-missing-field-initializers -Wno-type-limits -Wno-array-bounds -Wno-unknown-pragmas -Wno-sign-compare -Wno-unused-parameter -Wno-unused-variable -Wno-unused-function -Wno-unused-result -Wno-unused-local-typedefs -Wno-strict-overflow -Wno-strict-aliasing -Wno-error=deprecated-declarations -Wno-stringop-overflow -Wno-psabi -Wno-error=pedantic -Wno-error=redundant-decls -Wno-error=old-style-cast -fdiagnostics-color=always -faligned-new -Wno-unused-but-set-variable -Wno-maybe-uninitialized -fno-math-errno -fno-trapping-math -Werror=format -Wno-stringop-overflow, LAPACK_INFO=mkl, PERF_WITH_AVX=1, PERF_WITH_AVX2=1, PERF_WITH_AVX512=1, TORCH_VERSION=1.8.0, USE_CUDA=ON, USE_CUDNN=ON, USE_EXCEPTION_PTR=1, USE_GFLAGS=OFF, USE_GLOG=OFF, USE_MKL=ON, USE_MKLDNN=ON, USE_MPI=OFF, USE_NCCL=ON, USE_NNPACK=ON, USE_OPENMP=ON,
TorchVision: 0.9.0+cu111
OpenCV: 4.6.0
MMCV: 1.4.0
MMCV Compiler: GCC 7.3
MMCV CUDA Compiler: 11.1
MMDetection: 2.20.0
MMDetection3D: 0.11.0+9d3e162
注意,一般来说使用mmdetection3d框架的工作,要把数据集组织到mmdetection3d/data下,而不是在项目的根目录创建一个data目录。所以要把数据集组织到BEVFusion/mmdetection3d/data下
It is recommended to symlink the dataset root to
$MMDETECTION3D/data. If your folder structure is different from the following, you may need to change the corresponding paths in config files.
数据集组织我就不再赘述了,按照官方说明的组织形式组织好
mmdetection3d
├── mmdet3d
├── tools
├── configs
├── data
│ ├── nuscenes
│ │ ├── maps
│ │ ├── samples
│ │ ├── sweeps
│ │ ├── v1.0-test
| | ├── v1.0-trainval
│ ├── kitti
│ │ ├── ImageSets
│ │ ├── testing
│ │ │ ├── calib
│ │ │ ├── image_2
│ │ │ ├── velodyne
│ │ ├── training
│ │ │ ├── calib
│ │ │ ├── image_2
│ │ │ ├── label_2
│ │ │ ├── velodyne
│ ├── waymo
│ │ ├── waymo_format
│ │ │ ├── training
│ │ │ ├── validation
│ │ │ ├── testing
│ │ │ ├── gt.bin
│ │ ├── kitti_format
│ │ │ ├── ImageSets
│ ├── lyft
│ │ ├── v1.01-train
│ │ │ ├── v1.01-train (train_data)
│ │ │ ├── lidar (train_lidar)
│ │ │ ├── images (train_images)
│ │ │ ├── maps (train_maps)
│ │ ├── v1.01-test
│ │ │ ├── v1.01-test (test_data)
│ │ │ ├── lidar (test_lidar)
│ │ │ ├── images (test_images)
│ │ │ ├── maps (test_maps)
│ │ ├── train.txt
│ │ ├── val.txt
│ │ ├── test.txt
│ │ ├── sample_submission.csv
│ ├── scannet
│ │ ├── meta_data
│ │ ├── scans
│ │ ├── batch_load_scannet_data.py
│ │ ├── load_scannet_data.py
│ │ ├── scannet_utils.py
│ │ ├── README.md
│ ├── sunrgbd
│ │ ├── OFFICIAL_SUNRGBD
│ │ ├── matlab
│ │ ├── sunrgbd_data.py
│ │ ├── sunrgbd_utils.py
│ │ ├── README.md
(以上数据集不用全需要的,自己需要哪个组织哪个)
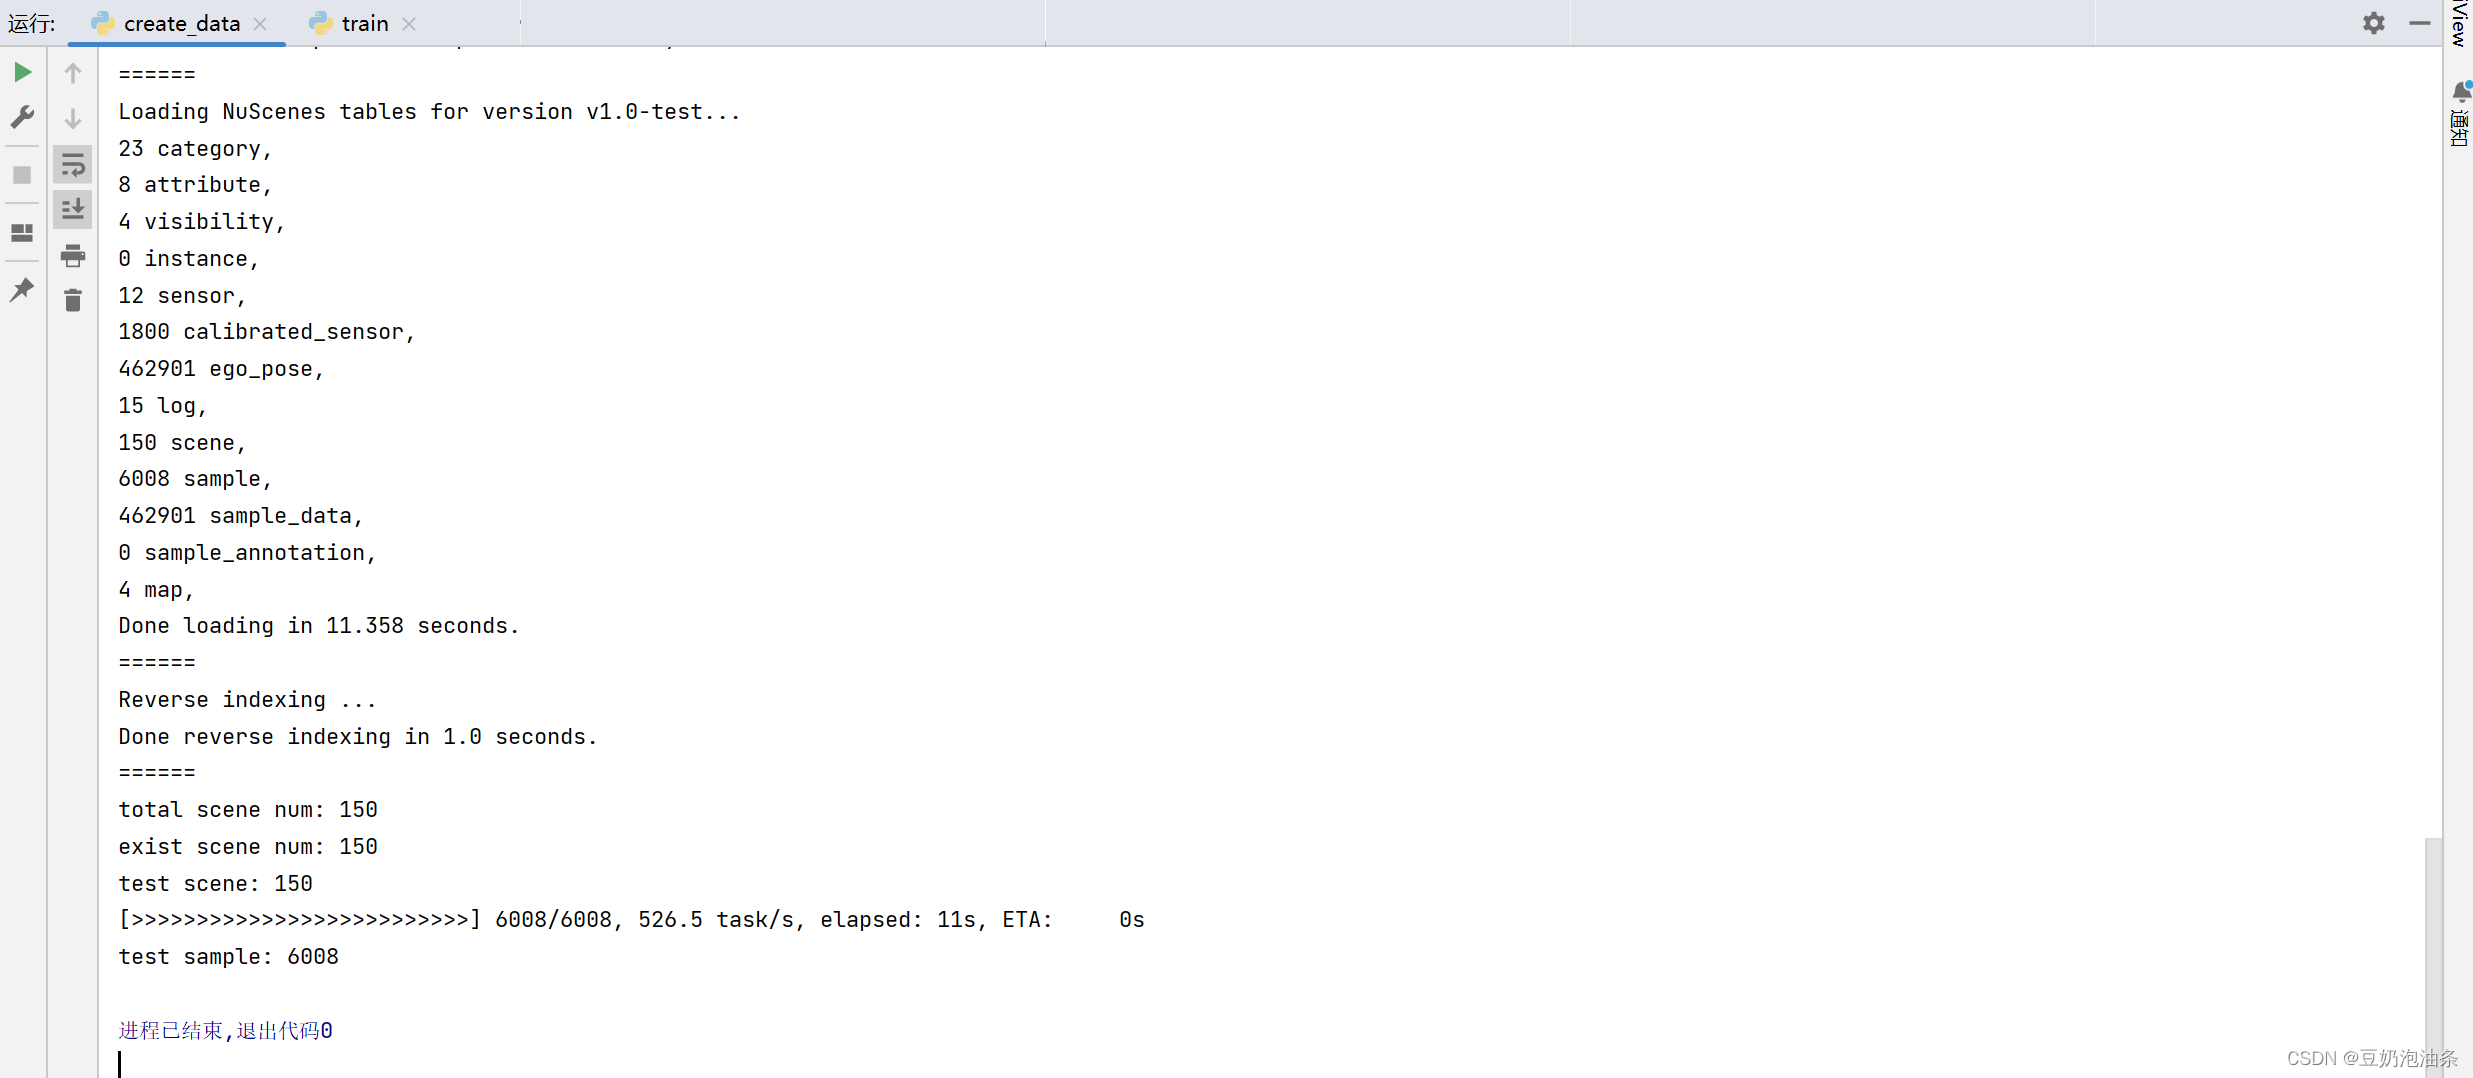
然后利用BEVFusion/tools/create_data.py脚本组织文件就行了,放一下组织nuScenes数据集成功的截图吧
# first train camera stream
./tools/dist_train.sh configs/bevfusion/cam_stream/bevf_pp_4x8_2x_nusc_cam.py 8
# then train LiDAR stream
./tools/dist_train.sh configs/bevfusion/lidar_stream/hv_pointpillars_secfpn_sbn-all_4x8_2x_nus-3d.py 8
# then train BEVFusion
./tools/dist_train.sh configs/bevfusion/bevf_pp_2x8_1x_nusc.py 8
./tools/dist_train.sh configs/bevfusion/cam_stream/bevf_pp_4x8_2x_nusc_cam.py 8中,8代表GPU个数
使用sh文件进行训练和测试时,可能会遇到无权限的问题,使用chmod 777 tools/dist_train.sh进行权限更改即可
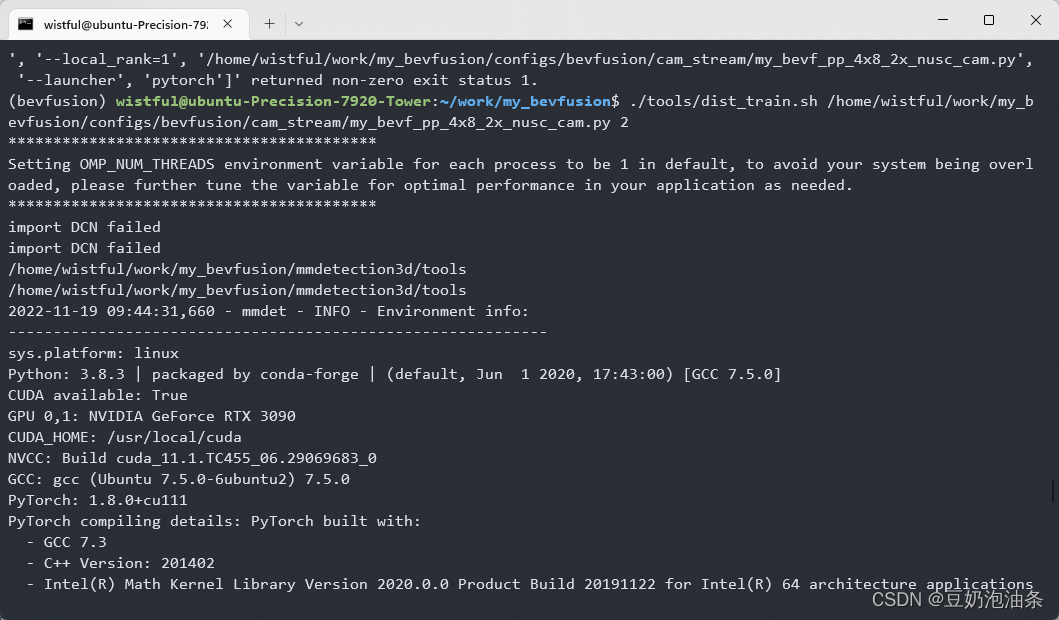
其中,配置文件我就不再叙述,可以使用官方的简单测试,如果需要使用自己的配置文件,请参考mmdetection3d官方文档
值得注意的是,我在使用分布式和非分布式方法做测试的时候,非分布式运行正常,分布式仍然提示找不到数据集,我搜寻资料得知是因为工作路径的原因导致的,我用print(os.getcwd())打印了一下,发现使用非分布式训练时,工作路径/home/wistful/work/my_bevfusion/mmdetection3d/tools下,即在BEVFusion/mmdetection3d/tools下,而使用分布式训练时,工作路径在/home/wistful/work/my_bevfusion下,即在BEVFusion根目录下。所以我使用os.chdir('/home/wistful/work/my_bevfusion/mmdetection3d/tools')将工作路径改变了一下,问题解决
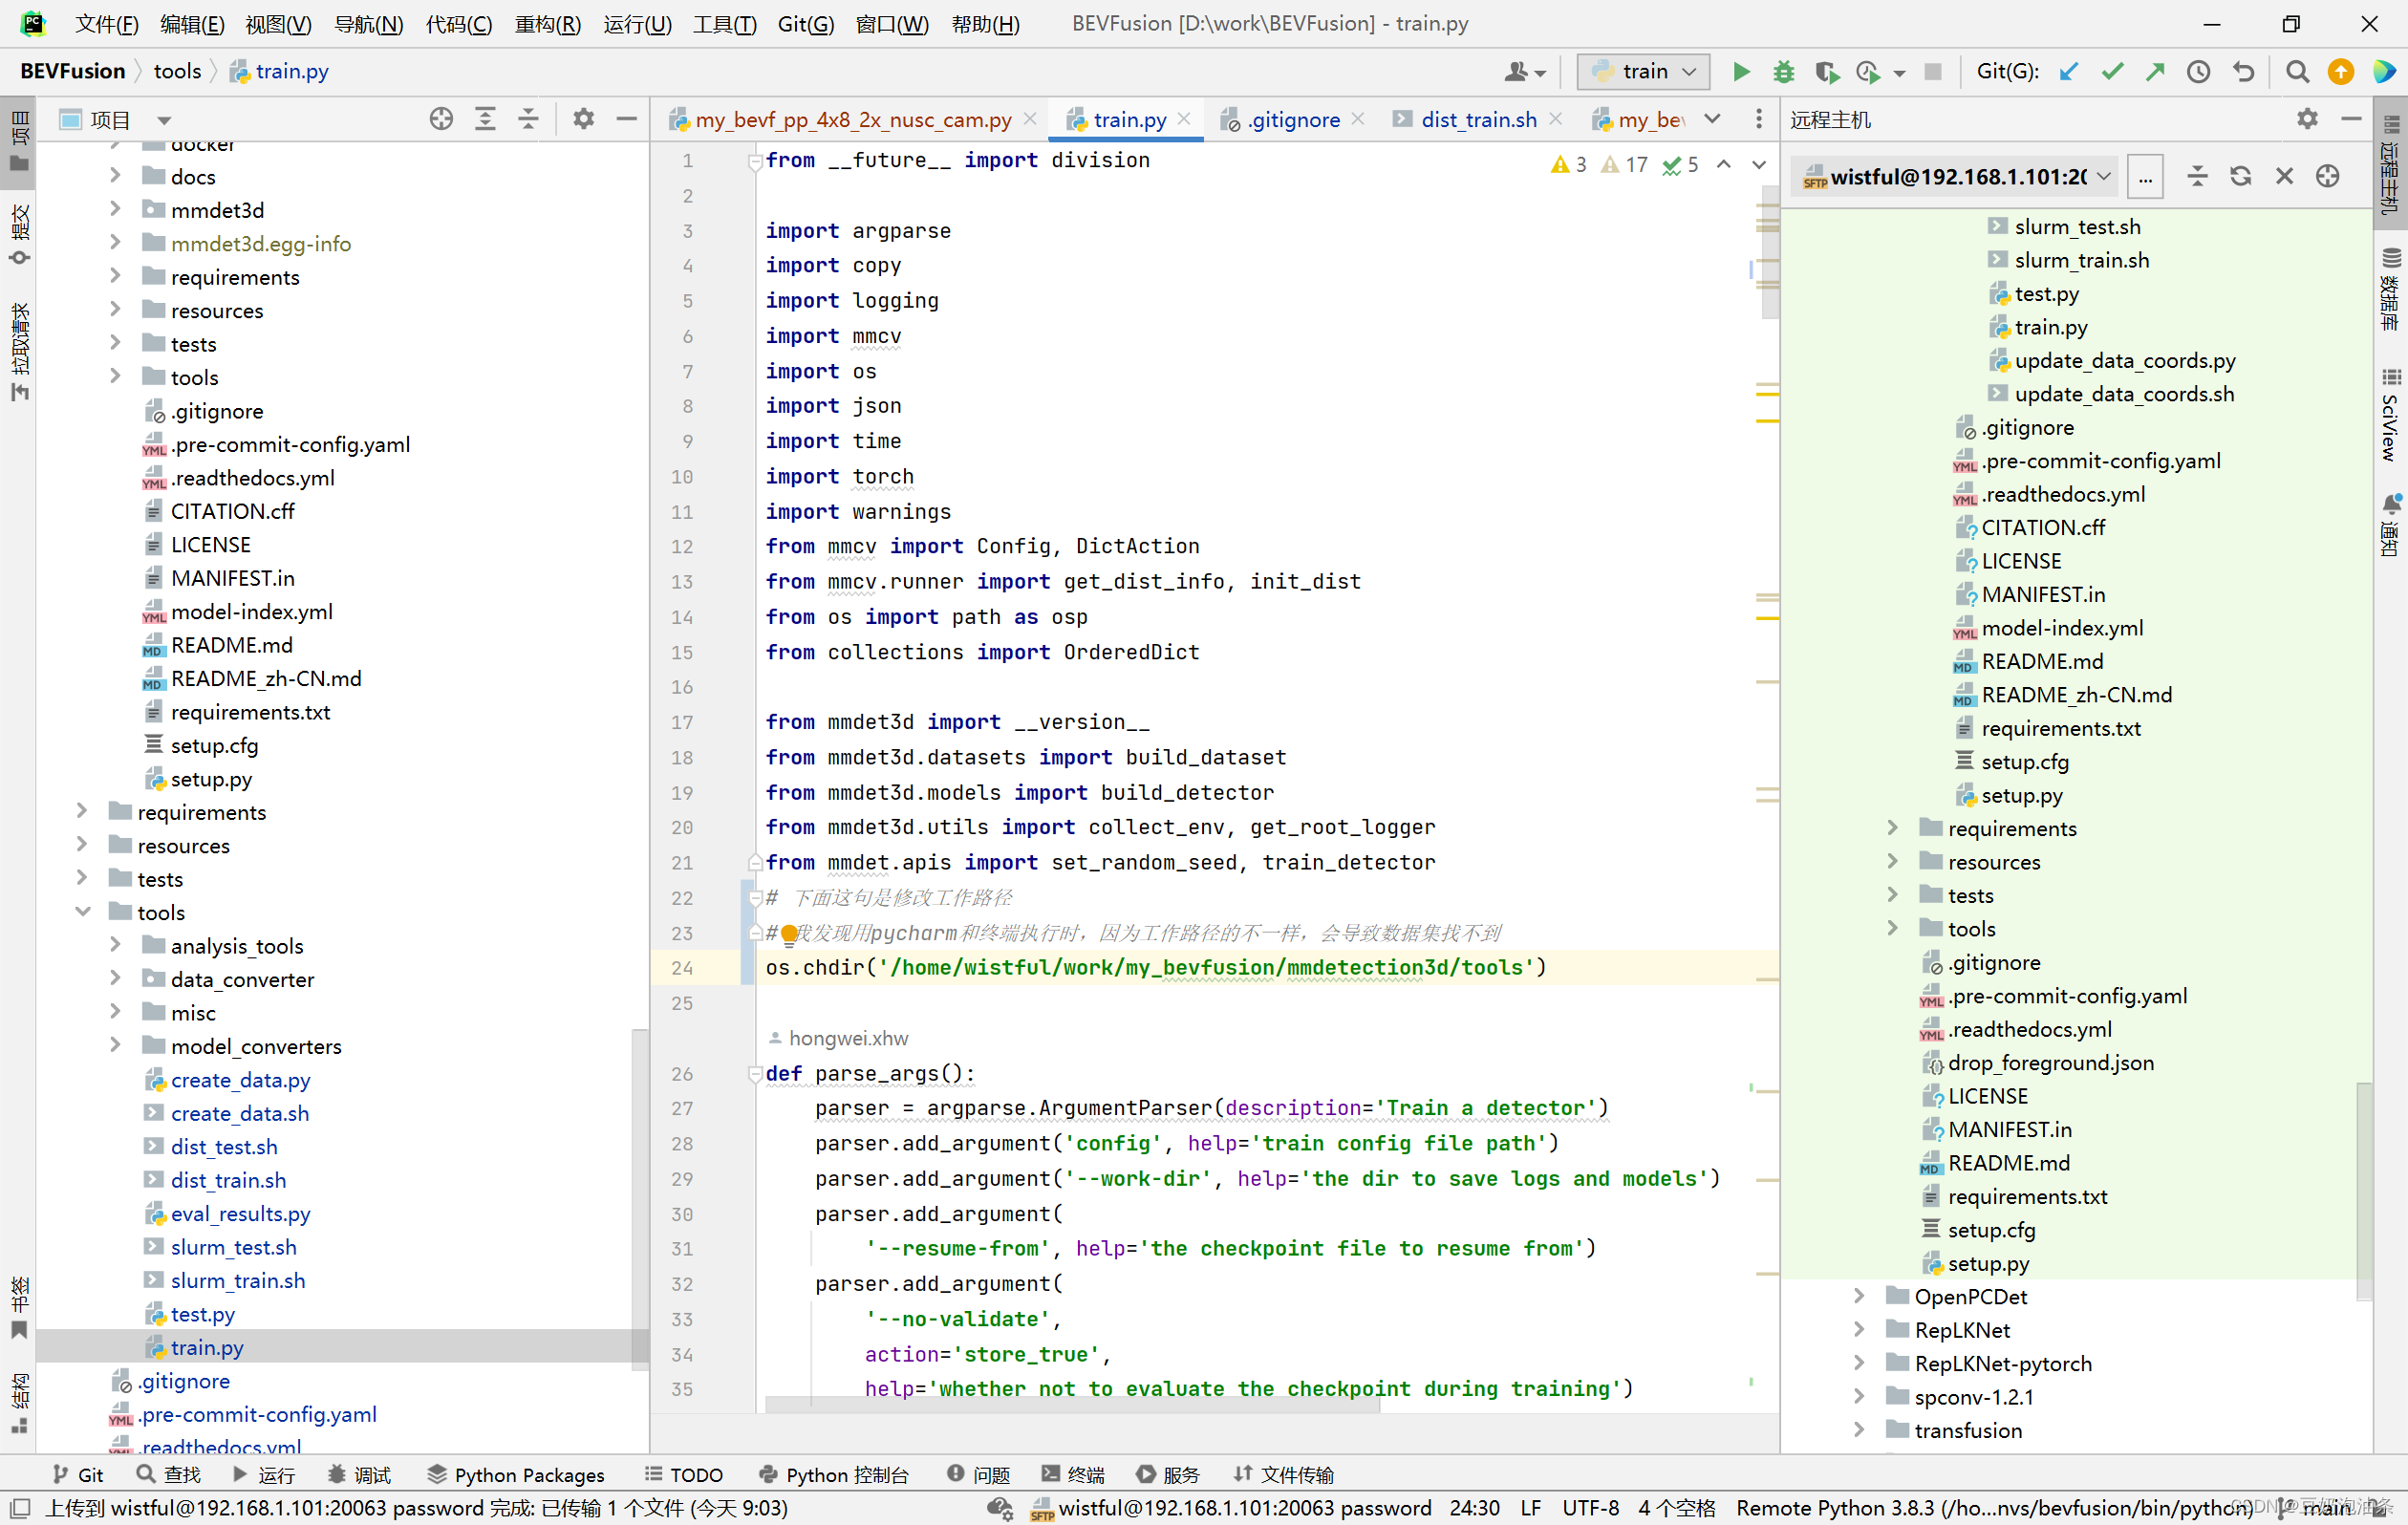
直接在pycharm中根据各参数设置一下,训练即可,不再叙述。
./tools/dist_test.sh configs/bevfusion/bevf_pp_2x8_1x_nusc.py ./work_dirs/bevfusion_pp.pth 8 --eval bbox
 # 前者是配置文件,后者是GPU个数

# 如需可视化
./tools/dist_test.sh configs/bevfusion/bevf_pp_2x8_1x_nusc.py ./work_dirs/bevfusion_pp.pth 8 --eval bbox --show-dir YourVisualResultsDir --show --eval bbox #根据test.py的参数看一下
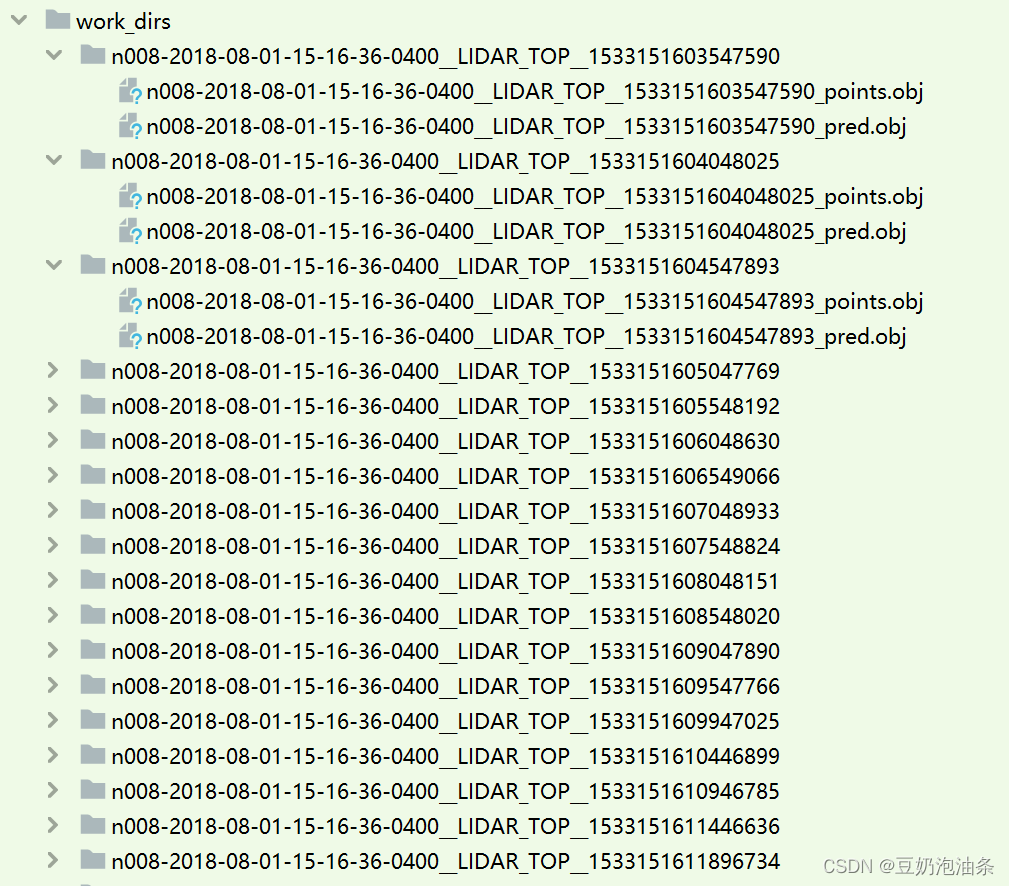
可视化结果会保存在你指定的目录下,如下所示
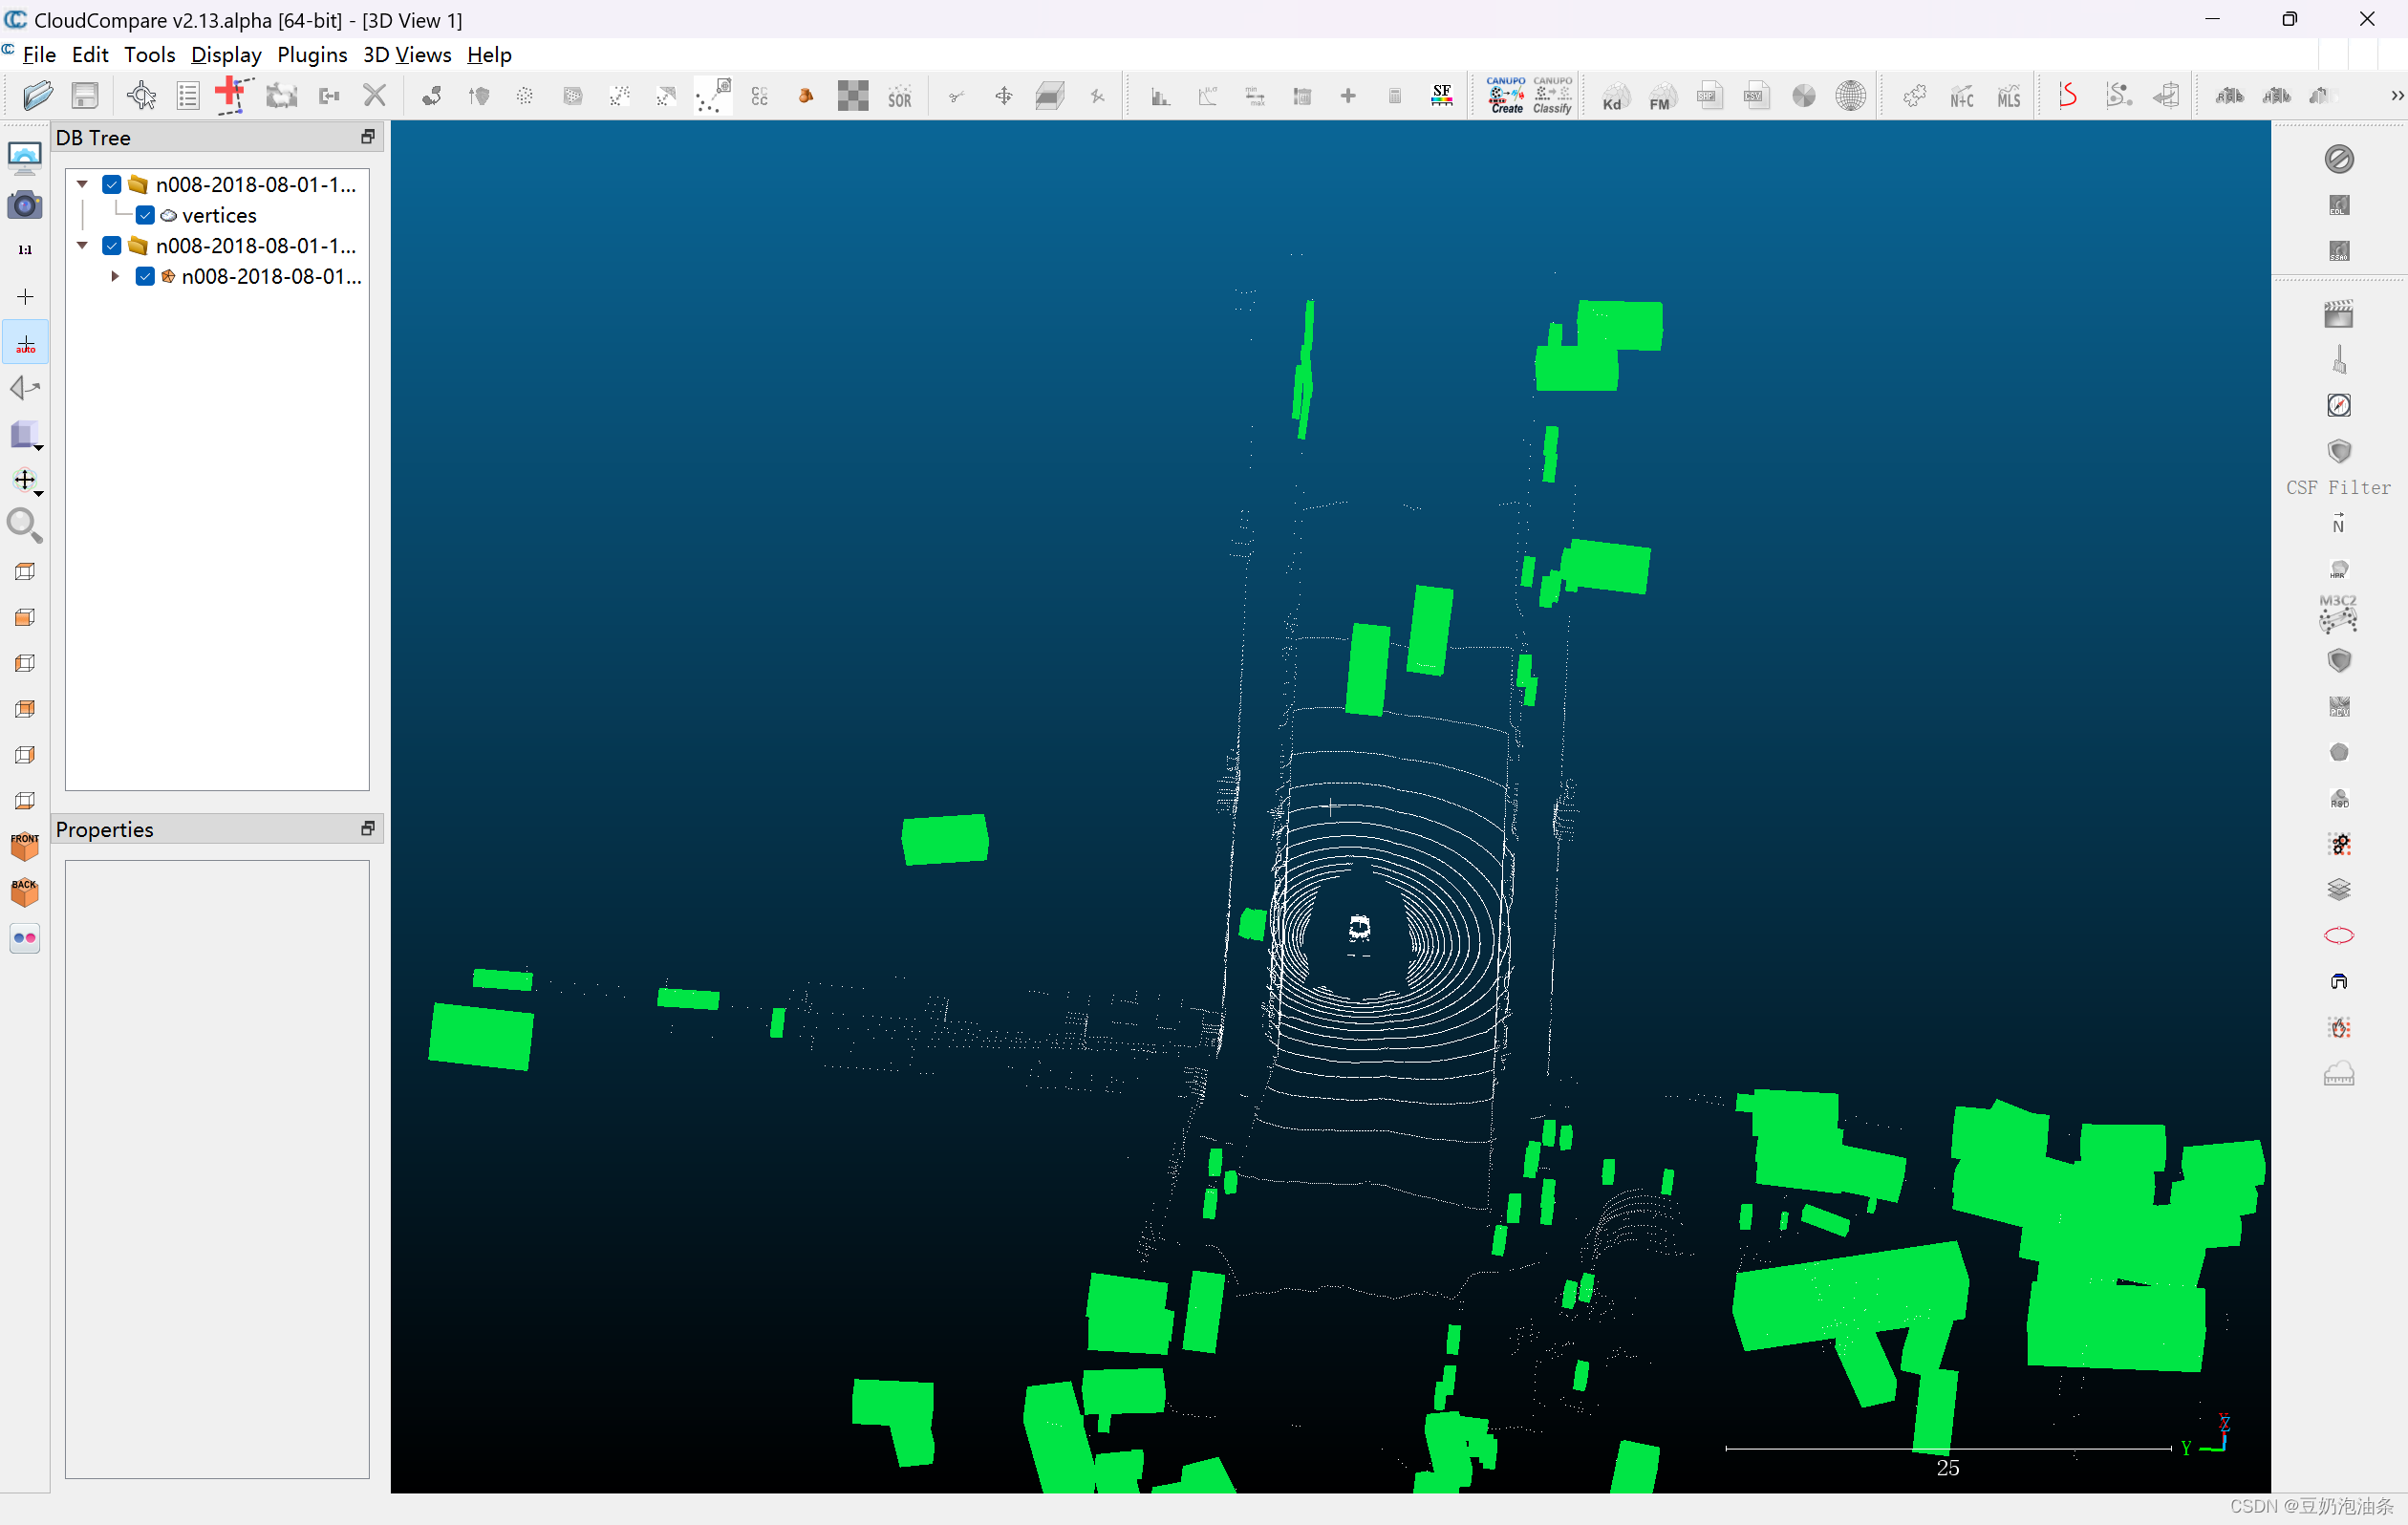
导入CloudCampare查看
我正在尝试测试是否存在表单。我是Rails新手。我的new.html.erb_spec.rb文件的内容是:require'spec_helper'describe"messages/new.html.erb"doit"shouldrendertheform"dorender'/messages/new.html.erb'reponse.shouldhave_form_putting_to(@message)with_submit_buttonendendView本身,new.html.erb,有代码:当我运行rspec时,它失败了:1)messages/new.html.erbshou
我在从html页面生成PDF时遇到问题。我正在使用PDFkit。在安装它的过程中,我注意到我需要wkhtmltopdf。所以我也安装了它。我做了PDFkit的文档所说的一切......现在我在尝试加载PDF时遇到了这个错误。这里是错误:commandfailed:"/usr/local/bin/wkhtmltopdf""--margin-right""0.75in""--page-size""Letter""--margin-top""0.75in""--margin-bottom""0.75in""--encoding""UTF-8""--margin-left""0.75in""-
我在我的项目目录中完成了compasscreate.和compassinitrails。几个问题:我已将我的.sass文件放在public/stylesheets中。这是放置它们的正确位置吗?当我运行compasswatch时,它不会自动编译这些.sass文件。我必须手动指定文件:compasswatchpublic/stylesheets/myfile.sass等。如何让它自动运行?文件ie.css、print.css和screen.css已放在stylesheets/compiled。如何在编译后不让它们重新出现的情况下删除它们?我自己编译的.sass文件编译成compiled/t
我有一个对象has_many应呈现为xml的子对象。这不是问题。我的问题是我创建了一个Hash包含此数据,就像解析器需要它一样。但是rails自动将整个文件包含在.........我需要摆脱type="array"和我该如何处理?我没有在文档中找到任何内容。 最佳答案 我遇到了同样的问题;这是我的XML:我在用这个:entries.to_xml将散列数据转换为XML,但这会将条目的数据包装到中所以我修改了:entries.to_xml(root:"Contacts")但这仍然将转换后的XML包装在“联系人”中,将我的XML代码修改为
为了将Cucumber用于命令行脚本,我按照提供的说明安装了arubagem。它在我的Gemfile中,我可以验证是否安装了正确的版本并且我已经包含了require'aruba/cucumber'在'features/env.rb'中为了确保它能正常工作,我写了以下场景:@announceScenario:Testingcucumber/arubaGivenablankslateThentheoutputfrom"ls-la"shouldcontain"drw"假设事情应该失败。它确实失败了,但失败的原因是错误的:@announceScenario:Testingcucumber/ar
我在我的项目中添加了一个系统来重置用户密码并通过电子邮件将密码发送给他,以防他忘记密码。昨天它运行良好(当我实现它时)。当我今天尝试启动服务器时,出现以下错误。=>BootingWEBrick=>Rails3.2.1applicationstartingindevelopmentonhttp://0.0.0.0:3000=>Callwith-dtodetach=>Ctrl-CtoshutdownserverExiting/Users/vinayshenoy/.rvm/gems/ruby-1.9.3-p0/gems/actionmailer-3.2.1/lib/action_mailer
我的瘦服务器配置了nginx,我的ROR应用程序正在它们上运行。在我发布代码更新时运行thinrestart会给我的应用程序带来一些停机时间。我试图弄清楚如何优雅地重启正在运行的Thin实例,但找不到好的解决方案。有没有人能做到这一点? 最佳答案 #Restartjustthethinserverdescribedbythatconfigsudothin-C/etc/thin/mysite.ymlrestartNginx将继续运行并代理请求。如果您将Nginx设置为使用多个上游服务器,例如server{listen80;server
在MRIRuby中我可以这样做:deftransferinternal_server=self.init_serverpid=forkdointernal_server.runend#Maketheserverprocessrunindependently.Process.detach(pid)internal_client=self.init_client#Dootherstuffwithconnectingtointernal_server...internal_client.post('somedata')ensure#KillserverProcess.kill('KILL',
我已经从我的命令行中获得了一切,所以我可以运行rubymyfile并且它可以正常工作。但是当我尝试从sublime中运行它时,我得到了undefinedmethod`require_relative'formain:Object有人知道我的sublime设置中缺少什么吗?我正在使用OSX并安装了rvm。 最佳答案 或者,您可以只使用“require”,它应该可以正常工作。我认为“require_relative”仅适用于ruby1.9+ 关于ruby-主要:Objectwhenrun
我花了三天的时间用头撞墙,试图弄清楚为什么简单的“rake”不能通过我的规范文件。如果您遇到这种情况:任何文件夹路径中都不要有空格!。严重地。事实上,从现在开始,您命名的任何内容都没有空格。这是我的控制台输出:(在/Users/*****/Desktop/LearningRuby/learn_ruby)$rake/Users/*******/Desktop/LearningRuby/learn_ruby/00_hello/hello_spec.rb:116:in`require':cannotloadsuchfile--hello(LoadError) 最佳
