文章目录


{
  "pages":[
    "pages/index/index",
    "pages/picture/picture",
    "pages/video/video",
    "pages/map/map",
    "pages/guest/guest",
    "pages/logs/logs"
  ],
  "window":{
    "backgroundTextStyle":"light",
    "navigationBarBackgroundColor": "#fff",
    "navigationBarTitleText": "婚礼邀请函",
    "navigationBarTextStyle":"black"
  },
  "tabBar": {
    "color": "#ccc",
    "selectedColor": "#ff4ccc",
    "borderStyle": "black",
    "backgroundColor": "#ffffff",
    "position": "bottom",
    "list": [
      {
          "pagePath": "pages/index/index",
          "iconPath": "/images/invite.png",
          "selectedIconPath": "/images/invite.png",
          "text": "邀请函"
      },
      {
       "pagePath":"pages/picture/picture",
      "iconPath": "/images/marry.png",
      "selectedIconPath": "/images/marry.png",
      "text": "照片"},
      {
          "pagePath":"pages/video/video",
         "iconPath": "/images/video.png",
         "selectedIconPath": "/images/video.png",
         "text": "美好时光"},
         {
          "pagePath":"pages/map/map",
         "iconPath": "/images/map.png",
         "selectedIconPath": "/images/map.png",
         "text": "婚礼地点"},
         {
          "pagePath":"pages/guest/guest",
         "iconPath": "/images/guest.png",
         "selectedIconPath": "/images/guest.png",
         "text": "宾客信息"}
  ]
},
  "style": "v2",
  "sitemapLocation": "sitemap.json"
}
<view class="player player-{{isPlayingMusic ? 'play' : 'pause'}}"
bindtap="play">
  <image src="/images/music_icon.png" />
  <image src="/images/music_play.png"/>
</view>
.content{
  /*vw 表示屏幕的宽度,vh 表示屏幕的高度*/
  width: 100vw;
  height: 100vh;
}

.bg{
  width: 100%;
  height: 100%;
}
.play{
  position: fixed;
  top: 20rpx;
  right: 20rpx;
  /*提高堆叠的顺序*/
  z-index: 1;
}
.play>image:first-child{
  width: 80rpx;
  height: 80rpx;
}
.play>image:last-child{
  width: 20rpx;
  height: 80rpx;
  margin-left: -5px;
}
.cont{
  width: 100%;
  height: 100%;
  position: fixed;
  top: 0rpx;
  z-index: 2;
  display: flex;
  flex-direction: column;
  align-items: center;
}
.cont-info-weding{
  flex: 1;
  display: flex;
  flex-direction: column;
  align-items: center;
}
.cont-gif{
  width: 19vh;
  height: 18.6vh;
}
.cont-title{
  font-size: 5vh;
  color:#ff4c91;
  font-weight: bold;
  margin-top: 1.5vh;
}
.cont-avatar{
  width: 24vh;
  height: 24vh;
  border-radius: 50%;
  border: 3px solid #ff4c91;
  margin-top: 2.5vh;
}
.cont-info{
  display: flex;
  flex-direction: row;
  align-items: center;
  width: 50vw;
}
.cont-info-wedding{
  width: 60rpx;
  height: 60rpx;
  /*margin-left: 40rpx;
  margin-right: 40rpx;*/
}
.content-name{
  position: relative;
  color: #ff4c91;
  font-weight: bold;
  font-size: 2.7vh;

}
.content-name>image{
  height: 30rpx;
  width: 30rpx;
  /*设置电话半圆*/
  border-radius: 50%;
  border: 1px solid #ff4c91;
  position: absolute;
  top: -25rpx;
  right: -35rpx;
}
.cont-address{
  color:#ff4c91;
  font-weight: bold;
  margin-top: 10rpx;
  font-size: 2.9vh;
  align-items: center;
  text-align: center;
  line-height: 4.5vh;/*时间地点的行高度*/
}
.cont-address>view:first-child{
  font-size:3.2vh;
  margin-bottom: 2vh;
}
onReady: function () {
  this.bgm = wx.getBackgroundAudioManager()
  this.bgm.onCanplay(()=> {
    this.bgm.pause()
  })
  this.bgm.src = this.music_url
},
play: function (e) {
  if (this.data.isPlayingMusic) {
    this.bgm.pause()
  } else { this.bgm.play() }
  this.setData({
isPlayingMusic:!this.data.isPlayingMusic })
},
<view class="content">
    <image class="bg" src="/images/bg_1.png"></image>
    <view class="play">
        <image src="/images/music_icon.png"></image>
        <image src="/images/music_play.png"></image>
      </view>
    <view class="cont">
        <image class="cont-gif" src="/imagesve_the_date.gif"></image>
        <view class="cont-title">邀请函</view>
        <image class="cont-avatar" src="/images/avatar.png" ></image>
        <view class="cont-info">
        <!--新郎的信息-->
            <view class="content-name">
                <image src="/images/tel.png" bindtap="callGroom"></image>
                <view>小张</view>
                <view>新郎</view>
                </view>
                <!--放的喜字信息-->
            <view class="cont-info-weding">
                <image class="cont-info-wedding" src="/images/wedding.png"></image>
              </view>
              <!--新娘的信息-->
            <view class="content-name">
                <image src="/images/tel.png" bindtap="callBride"></image>
                <view>小李</view>
                <view>新娘</view>
                </view>
            </view>
            <view class="cont-address">
            <view>我们邀请您来参加我们的婚礼</view>
            <view>时间:2022年12月24日</view>
            <view>地点:    </view>
          </view>
        </view>
</view>
/
Page({

  /**
   * 页面的初始数据
   */
  data: {
     pictures:[
       {
         id:0,
         src:"/images/timg1.jpg"
       },
       {
        id:1,
        src:"/images/timg2.jpg"
      },
      {
        id:2,
        src:"/images/timg3.jpg"
      },
      {
        id:3,
        src:"/images/timg4.jpg"
      }
     ]
  },
<swiper indicator-dots="true" vertical="ture" indicator-color="white" indicator-active-color="#ff4c91"
autoplay="true" interval="3500" duration="1000">
<swiper-item wx:for="{{pictures}}" wx:key="id">
<image src="{{item.src}}"></image>
</swiper-item>
 <!--
<swiper-item>
<image src="/images/timg1.jpg"></image>
</swiper-item>
<swiper-item>
<image src="/images/timg2.jpg"></image>
</swiper-item>
<swiper-item>
<image src="/images/timg3.jpg"></image>
</swiper-item>
<swiper-item>
<image src="/images/timg4.jpg"></image>
</swiper-item>
-->
</swiper>
swiper{
  height: 100vh;
}
/*设置图片的大小*/
image{
  height: 100%;
}
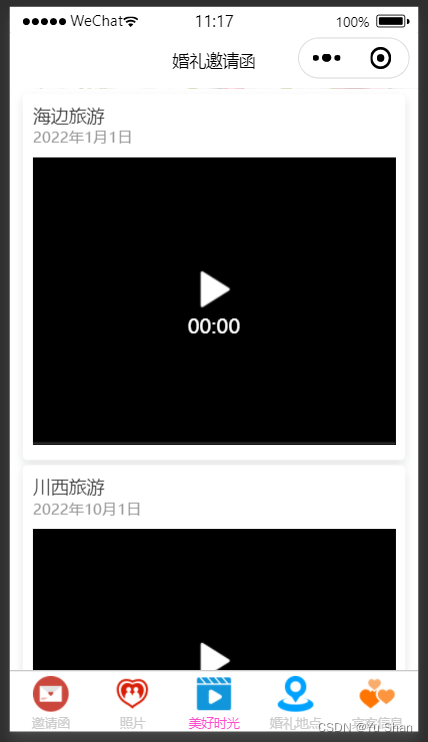
<view class="video-list" wx:for="{{vedioList}}" wx:key="title">
<view class="video-list-title">{{item.title}}</view>
<view class="video-list-time">{{item.time}}</view>
<video src="{{item.src}}" object-fit="fill" loop="ture" controls="false" danmu-btn="ture" enable-danmu="ture"></video>
</view>
Page({

  /**
   * 页面的初始数据
   */
  data: {
    danmuList: [{ text: '第 1s 出现的弹幕', color: '#ff0000', time: 1 },
                { text: '第 2s 出现的弹幕', color: '#ff00ff', time: 2 },
                { text: '第 3s 出现的弹幕', color: '#ff00ff', time: 3},
                { text: '第 4s 出现的弹幕', color: '#ff00ff', time: 3}

 ] ,
   vedioList:[
     {title:"海边旅游",
      time:'2022年1月1日',
     src:'http://www.lzy.edu.cn/vedio/lzy2022.mp4'},
     {title:"川西旅游",
      time:'2022年10月1日',
     src:'http://www.lzy.edu.cn/vedio/lzy2022.mp4'},
     {title:"北京旅游",
      time:'2022年5月1日',
     src:'http://www.lzy.edu.cn/vedio/lzy2022.mp4'},
    ]
  },
  play:function(e){
    console.log("播放了")
  },
  pause:function(e){
    console.log("视频暂停")
  },

  /**
   * 生命周期函数--监听页面加载
   */
  onLoad(options) {

  },
.video-list{
  margin:10rpx 25rpx;
  padding:20rpx;
  border-radius: 10rpx;
 /* border:1px solid #000000;*/
  background: #ffffff;
  box-shadow:0 8rpx 17rpx 0 rgba(7,17,27,0.1);
}
.video-list-title{
  font-size:35rpx;
  color:#333333;
}
 .video-list-time{
  font-size:30rpx;
  color:#979797;
}
.video-list>video{
  width:100%;
  margin-top: 20rpx;
}
"plugins":{
	"tencentvideo":{
		"version":"1.2.2",
		"provider":"wxa75efa648b60994b"
		}
}
{
  "usingComponents": {
    "txv-video":"plugin://tencentvideo/video"
  }
}
<map class="pg" latitude="28.915616" longitude="105.410766" markers="{{markers}}" scale="16" polyline="{{polyLine}}" circles="{{circles}}"
show-location="ture" bindmarkertap="markertap"
bindregionchange="regionchange" bindtap="tap" bindupdated="updated"
></map>
.pg{
  width: 100vh;
  height: 100vh;
}
// pages/map/map.js
Page({

  /**
   * 页面的初始数据
   */
  data: {
    markers: [
      {
        id: 0,
        longitude: 105.410766,
        latitude: 28.915616,
        title: "婚礼地点",
        iconPath: "/images/navi.png",
        width: 30,
        height: 30
      },
      {
        id: 1,
        longitude: 105.410766,
        latitude: 28.916616,
        title: "停车场",
        iconPath: "/images/navi.png",
        width: 30,
        height: 30
      },
      {
        id: 2,
        longitude: 105.413886,
        latitude: 28.917616,
        title: "停车场",
        iconPath: "/images/navi.png",
        width: 30,
        height: 30
      }
    ],
    polyLine:[{
      points:[
      {latitude: 28.917616, longitude: 105.413886},
      {latitude:28.916616,longitude:105.410766},
        {latitude:28.915616,longitude:105.410766}],
         color:"#ffffffAA",
         width:3,
       dottedLine:true
      },
      //{
      //  points:[
      //  {latitude: 28.917616, longitude: 105.413586},
      //  {latitude:28.916616,longitude:105.415766},
       //   {latitude:28.915616,longitude:105.415766}],
       //    color:"#ffffffAA",
       //    width:3,
       //  dottedLine:true
     //   }
    ],
    circles:[{
      latitude:28.915616,
      longitude:105.410566,
      radius:200,
      color:"#ff4c91AA",
      strokeWidth:3,
      fillColor:"#ff4c910A"
    },
    {
      latitude:28.915616,
      longitude:105.410566,
      radius:300,
      color:"#000000AA",
      strokeWidth:3,
      fillColor:"#ff4c910A",
    }
  ]
  },
  markertap:function(e){
    //点击标记处位触发,后面给地图导航的逻辑
    console.log(e)
    var onemarker=this.data.markers[e.markerId]
    wx.openLocation({
      latitude: onemarker.latitude,
      longitude: onemarker.longitude,
      name:onemarker.title,
      address:""
    })
  },
  regionchange:function(e){
    console.log(e);
  },
  tap:function(e){
    console.log(e);
  },
  updated:function(e){
    console.log(e);
  },
<form bindsubmit="formsubmit">
    <view class="container">
    <view class="container-info">
        <input name="name" placeholder="请输入您的名字" placeholder-class="phclass" />
    </view>
    <view class="container-info">
        <input name="phone" placeholder="请输入您的手机号码" placeholder-class="phclass" />
      </view>

    <view class="container-info">
        <picker name="num" range="{{picker.array}}" value="{{picker.index}}" bindchange="pickerchange">
            <view>参加婚礼的人数:{{picker.array[picker.index]}}</view>
        </picker>
      </view>
    <view class="container-info">
        <input name="wish" placeholder="请输入您的祝福语" placeholder-class="phclass" />
      </view>
        <button form-type="submit" style="width: 550rpx;">提交</button>
        </view>
</form>

<image src="/images/bj_2.png" class="bg"></image>
// pages/guest/guest.js
Page({

  /**
 * 页面的初始数据
   */
  data: {
    picker:{
      array:['1','2','3','4','5'],
      index:0
    }

  },
  pickerchange:function(e){
    console.log(e);
    this.setData({
      'picker.index':e.detail.value
    })
  },
 formsubmit:function(e){
   console.log(e);
   var name = e.detail.value.name;
   var phone=e.detail.value.phone;
   var num = e.detail.value.num;
   var wish =e.detail.value.wish;
   //1'判断姓名是否由中英文组成
   this.checkName(name)
   //2.判断电话号码是否符合规范
   this.checkPhone(phone)
 },
 checkPhone:function(data){
   var reg = /^1[3456789][0-9]{9}$/
   if(!reg.test(data)){
     wx.showToast({
       title: '号码格式错误',
       icon:"none",
       duration:1500
     })
   }
 },
 checkName:function(data){
   //正则表达式 中英文
   var reg = /^[a-zA-Z\u4e00-\u9fa5]+$/
   if(!reg.test(data)){
     wx.showToast({
       title: '姓名输入错误',
       icon:"none",
       duration:1500
     })
   }
 },
我需要在客户计算机上运行Ruby应用程序。通常需要几天才能完成(复制大备份文件)。问题是如果启用sleep,它会中断应用程序。否则,计算机将持续运行数周,直到我下次访问为止。有什么方法可以防止执行期间休眠并让Windows在执行后休眠吗?欢迎任何疯狂的想法;-) 最佳答案 Here建议使用SetThreadExecutionStateWinAPI函数,使应用程序能够通知系统它正在使用中,从而防止系统在应用程序运行时进入休眠状态或关闭显示。像这样的东西:require'Win32API'ES_AWAYMODE_REQUIRED=0x0
如何在buildr项目中使用Ruby?我在很多不同的项目中使用过Ruby、JRuby、Java和Clojure。我目前正在使用我的标准Ruby开发一个模拟应用程序,我想尝试使用Clojure后端(我确实喜欢功能代码)以及JRubygui和测试套件。我还可以看到在未来的不同项目中使用Scala作为后端。我想我要为我的项目尝试一下buildr(http://buildr.apache.org/),但我注意到buildr似乎没有设置为在项目中使用JRuby代码本身!这看起来有点傻,因为该工具旨在统一通用的JVM语言并且是在ruby中构建的。除了将输出的jar包含在一个独特的、仅限ruby
Rackup通过Rack的默认处理程序成功运行任何Rack应用程序。例如:classRackAppdefcall(environment)['200',{'Content-Type'=>'text/html'},["Helloworld"]]endendrunRackApp.new但是当最后一行更改为使用Rack的内置CGI处理程序时,rackup给出“NoMethodErrorat/undefinedmethod`call'fornil:NilClass”:Rack::Handler::CGI.runRackApp.newRack的其他内置处理程序也提出了同样的反对意见。例如Rack
我想用ruby编写一个小的命令行实用程序并将其作为gem分发。我知道安装后,Guard、Sass和Thor等某些gem可以从命令行自行运行。为了让gem像二进制文件一样可用,我需要在我的gemspec中指定什么。 最佳答案 Gem::Specification.newdo|s|...s.executable='name_of_executable'...endhttp://docs.rubygems.org/read/chapter/20 关于ruby-在Ruby中编写命令行实用程序
我构建了两个需要相互通信和发送文件的Rails应用程序。例如,一个Rails应用程序会发送请求以查看其他应用程序数据库中的表。然后另一个应用程序将呈现该表的json并将其发回。我还希望一个应用程序将存储在其公共(public)目录中的文本文件发送到另一个应用程序的公共(public)目录。我从来没有做过这样的事情,所以我什至不知道从哪里开始。任何帮助,将不胜感激。谢谢! 最佳答案 无论Rails是什么,几乎所有Web应用程序都有您的要求,大多数现代Web应用程序都需要相互通信。但是有一个小小的理解需要你坚持下去,网站不应直接访问彼此
我尝试运行2.x应用程序。我使用rvm并为此应用程序设置其他版本的ruby:$rvmuseree-1.8.7-head我尝试运行服务器,然后出现很多错误:$script/serverNOTE:Gem.source_indexisdeprecated,useSpecification.Itwillberemovedonorafter2011-11-01.Gem.source_indexcalledfrom/Users/serg/rails_projects_terminal/work_proj/spohelp/config/../vendor/rails/railties/lib/r
刚入门rails,开始慢慢理解。有人可以解释或给我一些关于在application_controller中编码的好处或时间和原因的想法吗?有哪些用例。您如何为Rails应用程序使用应用程序Controller?我不想在那里放太多代码,因为据我了解,每个请求都会调用此Controller。这是真的? 最佳答案 ApplicationController实际上是您应用程序中的每个其他Controller都将从中继承的类(尽管这不是强制性的)。我同意不要用太多代码弄乱它并保持干净整洁的态度,尽管在某些情况下ApplicationContr
我在我的Rails项目中使用Pow和powifygem。现在我尝试升级我的ruby版本(从1.9.3到2.0.0,我使用RVM)当我切换ruby版本、安装所有gem依赖项时,我通过运行railss并访问localhost:3000确保该应用程序正常运行以前,我通过使用pow访问http://my_app.dev来浏览我的应用程序。升级后,由于错误Bundler::RubyVersionMismatch:YourRubyversionis1.9.3,butyourGemfilespecified2.0.0,此url不起作用我尝试过的:重新创建pow应用程序重启pow服务器更新战俘
我已经像这样安装了一个新的Rails项目:$railsnewsite它执行并到达:bundleinstall但是当它似乎尝试安装依赖项时我得到了这个错误Gem::Ext::BuildError:ERROR:Failedtobuildgemnativeextension./System/Library/Frameworks/Ruby.framework/Versions/2.0/usr/bin/rubyextconf.rbcheckingforlibkern/OSAtomic.h...yescreatingMakefilemake"DESTDIR="cleanmake"DESTDIR="
我是一个Rails初学者,但我想从我的RailsView(html.haml文件)中查看Ruby变量的内容。我试图在ruby中打印出变量(认为它会在终端中出现),但没有得到任何结果。有什么建议吗?我知道Rails调试器,但更喜欢使用inspect来打印我的变量。 最佳答案 您可以在View中使用puts方法将信息输出到服务器控制台。您应该能够在View中的任何位置使用Haml执行以下操作:-puts@my_variable.inspect 关于ruby-on-rails-如何在我的R