WPF以其丰富灵活的控件样式设计,相较于WinForm而言,一直是工控组态软件的宠儿。经过上一篇文章的学习,已经对WPF开发工控组态软件有了一个基本的了解, 今天继续学习冷却塔和空气压缩机的开发,仅供学习分享使用,如有不足之处,还请指正。
关于本示例中,涉及的知识点,如下所示:
关于冷却塔的组成部分,经过拆解如下所示:
经过以上分析,不难发现,复杂的图形均是由简单的图形组合起来的。
冷却塔正常运转时,绿灯亮且风扇转动,异常时红灯亮,且风扇停止。截图如下所示:

冷却塔源码分为三个组成部分,如下所示:
控件布局主要是排版布局形状等内容。如下所示:
  1 <Viewbox HorizontalAlignment="Center" VerticalAlignment="Center">
  2     <Canvas Width="205" Height="245" Margin="5">
  3         <Polygon Points="0,65 40,10 205,10 180,65 " Fill="#EEE"></Polygon>
  4         <Path Data="M0 0 A60 15 0 0 0 120 0 L120 25 A60 15 0 0 1 0 25" Canvas.Left="45" Canvas.Top="15">
  5             <Path.Fill>
  6                 <LinearGradientBrush EndPoint="1,0" StartPoint="0,0">
  7                     <GradientStop Color="#FFD6D6D6" Offset="0"></GradientStop>
  8                     <GradientStop Color="White" Offset="0.52"></GradientStop>
  9                     <GradientStop Color="#FFD6D6D6" Offset="1"></GradientStop>
 10                 </LinearGradientBrush>
 11             </Path.Fill>
 12         </Path>
 13         <Ellipse Width="120" Height="30" Fill="#CCC" Canvas.Left="45"></Ellipse>
 14         <Border Canvas.Left="52" Canvas.Top="-38">
 15             <Viewbox Width="105" Height="105" RenderTransformOrigin="0.5,0.5">
 16                 <Viewbox.RenderTransform>
 17                     <TransformGroup>
 18                         <RotateTransform Angle="20" x:Name="rt"></RotateTransform>
 19                         <ScaleTransform ScaleY="0.25"></ScaleTransform>
 20                     </TransformGroup>
 21                 </Viewbox.RenderTransform>
 22                 <Path Stretch="Fill" Data="M261.851429 528.822857c-43.885714-24.868571-84.845714-23.405714-121.417143 5.851429-35.108571 26.331429-49.737143 62.902857-43.885715 106.788571 5.851429 38.034286 19.017143 74.605714 40.96 108.251429 21.942857 35.108571 46.811429 59.977143 76.068572 74.605714 78.994286 40.96 147.748571 29.257143 207.725714-35.108571 19.017143-20.48 33.645714-43.885714 46.811429-73.142858 14.628571-32.182857 23.405714-61.44 24.868571-90.697142 0-14.628571 7.314286-21.942857 19.017143-21.942858s19.017143 5.851429 24.868571 16.091429c17.554286 51.2 14.628571 99.474286-10.24 143.36-24.868571 43.885714-21.942857 84.845714 4.388572 119.954286 26.331429 35.108571 62.902857 49.737143 106.788571 42.422857 38.034286-5.851429 74.605714-19.017143 108.251429-40.96 35.108571-21.942857 59.977143-46.811429 74.605714-76.068572 40.96-78.994286 29.257143-147.748571-36.571428-206.262857-20.48-19.017143-43.885714-35.108571-73.142858-48.274285-32.182857-14.628571-61.44-23.405714-90.697142-24.868572-14.628571 0-21.942857-7.314286-21.942858-19.017143s5.851429-20.48 17.554286-23.405714c20.48-7.314286 40.96-11.702857 62.902857-11.702857 27.794286 0 54.125714 7.314286 78.994286 20.48 43.885714 24.868571 84.845714 23.405714 121.417143-4.388572 35.108571-26.331429 49.737143-62.902857 43.885714-106.788571-5.851429-38.034286-19.017143-74.605714-40.96-108.251429-21.942857-35.108571-46.811429-59.977143-76.068571-74.605714-78.994286-40.96-147.748571-29.257143-207.725715 35.108572-19.017143 20.48-33.645714 45.348571-46.811428 73.142857-14.628571 32.182857-23.405714 62.902857-24.868572 90.697143 0 13.165714-7.314286 20.48-19.017142 21.942857s-20.48-5.851429-24.868572-16.091429c-7.314286-20.48-10.24-40.96-10.24-64.365714 0-27.794286 7.314286-54.125714 20.48-78.994286 24.868571-43.885714 21.942857-84.845714-4.388571-119.954286-26.331429-35.108571-61.44-49.737143-105.325715-43.885714-38.034286 5.851429-74.605714 19.017143-108.251428 40.96-35.108571 21.942857-59.977143 46.811429-76.068572 76.068572-40.96 78.994286-29.257143 147.748571 36.571429 207.725714 20.48 19.017143 45.348571 35.108571 73.142857 48.274286 32.182857 14.628571 61.44 21.942857 90.697143 23.405714 14.628571 0 21.942857 7.314286 21.942857 19.017143s-5.851429 20.48-17.554286 24.868571c-49.737143 17.554286-98.011429 14.628571-141.897142-10.24m279.405714-46.811428c8.777143 8.777143 11.702857 17.554286 11.702857 29.257142s-4.388571 21.942857-11.702857 30.72c-8.777143 7.314286-17.554286 11.702857-29.257143 11.702858s-21.942857-4.388571-30.72-11.702858c-8.777143-8.777143-11.702857-19.017143-11.702857-30.72s4.388571-21.942857 11.702857-29.257142c8.777143-8.777143 19.017143-13.165714 30.72-13.165715 11.702857 1.462857 20.48 4.388571 29.257143 13.165715z" Fill="#EEE">
 23                 </Path>
 24             </Viewbox>
 25         </Border>
 26         <Grid Width="180" Height="180" Canvas.Top="65" Background="#E0E0E0">
 27             <Border VerticalAlignment="Top" Height="140" BorderThickness="10">
 28                 <Border.Background>
 29                     <DrawingBrush TileMode="Tile" ViewportUnits="Absolute" Viewport="1,0,25,1">
 30                         <DrawingBrush.Drawing>
 31                             <GeometryDrawing>
 32                                 <GeometryDrawing.Pen>
 33                                     <Pen Brush="#EEE"></Pen>
 34                                 </GeometryDrawing.Pen>
 35                                 <GeometryDrawing.Geometry>
 36                                     <PathGeometry>
 37                                         <PathFigure>
 38                                             <LineSegment Point="10,0"></LineSegment>
 39                                             <LineSegment Point="10,10"></LineSegment>
 40                                         </PathFigure>
 41                                     </PathGeometry>
 42                                 </GeometryDrawing.Geometry>
 43                             </GeometryDrawing>
 44                         </DrawingBrush.Drawing>
 45                     </DrawingBrush>
 46                 </Border.Background>
 47             </Border>
 48             <Grid Height="50" VerticalAlignment="Bottom">
 49                 <Grid.ColumnDefinitions>
 50                     <ColumnDefinition></ColumnDefinition>
 51                     <ColumnDefinition></ColumnDefinition>
 52                 </Grid.ColumnDefinitions>
 53                 <Border Background="DarkGray" Grid.Column="0" Margin="5,0"></Border>
 54                 <Border Background="DarkGray" Grid.Column="1" Margin="5,0"></Border>
 55             </Grid>
 56          </Grid>
 57
 58         <Grid Width="180" Height="180" Canvas.Top="65" Canvas.Left="180" Background="#E0E0E0">
 59             <Grid.RenderTransform>
 60                 <TransformGroup>
 61                     <ScaleTransform ScaleX="0.139"></ScaleTransform>
 62                     <SkewTransform AngleY="-65.5"></SkewTransform>
 63                 </TransformGroup>
 64             </Grid.RenderTransform>
 65             <Border VerticalAlignment="Top" Height="140" BorderThickness="10">
 66                 <Border.Background>
 67                     <DrawingBrush TileMode="Tile" ViewportUnits="Absolute" Viewport="1,0,25,1">
 68                         <DrawingBrush.Drawing>
 69                             <GeometryDrawing>
 70                                 <GeometryDrawing.Pen>
 71                                     <Pen Brush="#EEE"></Pen>
 72                                 </GeometryDrawing.Pen>
 73                                 <GeometryDrawing.Geometry>
 74                                     <PathGeometry>
 75                                         <PathFigure>
 76                                             <LineSegment Point="10,0"></LineSegment>
 77                                             <LineSegment Point="10,10"></LineSegment>
 78                                         </PathFigure>
 79                                     </PathGeometry>
 80                                 </GeometryDrawing.Geometry>
 81                             </GeometryDrawing>
 82                         </DrawingBrush.Drawing>
 83                     </DrawingBrush>
 84                 </Border.Background>
 85             </Border>
 86             <Grid Height="50" VerticalAlignment="Bottom">
 87                 <Grid.ColumnDefinitions>
 88                     <ColumnDefinition></ColumnDefinition>
 89                     <ColumnDefinition></ColumnDefinition>
 90                 </Grid.ColumnDefinitions>
 91                 <Border Background="DarkGray" Grid.Column="0" Margin="5,0"></Border>
 92                 <Border Background="DarkGray" Grid.Column="1" Margin="5,0"></Border>
 93             </Grid>
 94         </Grid>
 95
 96         <Border Width="18" Height="18" CornerRadius="10" Canvas.Left="150" Canvas.Top="80">
 97             <Border.Background>
 98                 <RadialGradientBrush>
 99                     <GradientStop Color="Gray" Offset="0.6" x:Name="gsGreen"></GradientStop>
100                     <GradientStop Color="White"></GradientStop>
101                 </RadialGradientBrush>
102             </Border.Background>
103         </Border>
104         <Border Width="18" Height="18" CornerRadius="10" Canvas.Left="150" Canvas.Top="105">
105             <Border.Background>
106                 <RadialGradientBrush>
107                     <GradientStop Color="Gray" Offset="0.6" x:Name="gsRed"></GradientStop>
108                     <GradientStop Color="White"></GradientStop>
109                 </RadialGradientBrush>
110             </Border.Background>
111         </Border>
112     </Canvas>
113 </Viewbox>冷却塔有两个状态,正常运行状态和异常状态,分别对应不同的呈现。如下所示:
 1 <VisualStateManager.VisualStateGroups>
 2     <VisualStateGroup>
 3         <VisualState x:Name="normalState">
 4             <Storyboard>
 5                 <DoubleAnimation Duration="0:0:0.5" From="0" To="-360" RepeatBehavior="Forever" Storyboard.TargetName="rt" Storyboard.TargetProperty="Angle"></DoubleAnimation>
 6                 <ColorAnimationUsingKeyFrames Storyboard.TargetName="gsGreen" Storyboard.TargetProperty="Color">
 7                     <DiscreteColorKeyFrame Value="Green" KeyTime="0"></DiscreteColorKeyFrame>
 8                 </ColorAnimationUsingKeyFrames>
 9             </Storyboard>
10         </VisualState>
11         <VisualState x:Name="errorState">
12             <Storyboard>
13                 <ColorAnimationUsingKeyFrames Storyboard.TargetName="gsRed" RepeatBehavior="Forever" Storyboard.TargetProperty="Color" Duration="0:0:1">
14                     <DiscreteColorKeyFrame Value="Red" KeyTime="0:0:0.5"></DiscreteColorKeyFrame>
15                     <DiscreteColorKeyFrame Value="Gray" KeyTime="0:0:1"></DiscreteColorKeyFrame>
16                 </ColorAnimationUsingKeyFrames>
17             </Storyboard>
18         </VisualState>
19     </VisualStateGroup>
20 </VisualStateManager.VisualStateGroups>在本示例中,依赖属性主要用于控制状态,如下所示:
 1 namespace WpfControl.UserControls
 2 {
 3     /// <summary>
 4     /// CoolingTower.xaml 的交互逻辑
 5     /// </summary>
 6     public partial class CoolingTower : UserControl
 7     {
 8         public RunningState RunningState
 9         {
10             get { return (RunningState)GetValue(RunningStateProperty); }
11             set { SetValue(RunningStateProperty, value); }
12         }
13
14         // Using a DependencyProperty as the backing store for RunningState.  This enables animation, styling, binding, etc...
15         public static readonly DependencyProperty RunningStateProperty =
16             DependencyProperty.Register("RunningState", typeof(RunningState), typeof(CoolingTower), new PropertyMetadata(default(RunningState), RunningStateChangedCallback));
17
18         private static void RunningStateChangedCallback(DependencyObject d, DependencyPropertyChangedEventArgs e)
19         {
20             RunningState value = (RunningState)e.NewValue;
21             VisualStateManager.GoToState(d as CoolingTower, value == RunningState.Normal ? "normalState" : "errorState", false);
22         }
23         public CoolingTower()
24         {
25             InitializeComponent();
26         }
27     }
28 }组件写好后,调用非常简单,如下所示:
 1 <Window x:Class="WpfControl.TestWindow2"
 2         xmlns="http://schemas.microsoft.com/winfx/2006/xaml/presentation"
 3         xmlns:x="http://schemas.microsoft.com/winfx/2006/xaml"
 4         xmlns:d="http://schemas.microsoft.com/expression/blend/2008"
 5         xmlns:mc="http://schemas.openxmlformats.org/markup-compatibility/2006"
 6         xmlns:local="clr-namespace:WpfControl"
 7         xmlns:uctrl="clr-namespace:WpfControl.UserControls"
 8         mc:Ignorable="d"
 9         Title="冷却塔" Height="450" Width="800">
10     <Grid>
11         <Grid.ColumnDefinitions>
12             <ColumnDefinition></ColumnDefinition>
13             <ColumnDefinition></ColumnDefinition>
14         </Grid.ColumnDefinitions>
15         <uctrl:CoolingTower Grid.Column="0" RunningState="Error" Width="100" Height="100"></uctrl:CoolingTower>
16         <uctrl:CoolingTower Grid.Column="1" RunningState="Normal" Width="100" Height="100"></uctrl:CoolingTower>
17     </Grid>
18 </Window>
关于空气压缩式机的组成部分,经过拆解如下所示:
经过以上分析,不难发现,空气压缩机均是由简单的图形组合起来的。
空气压缩式机同样包括两种状态,正常状态,绿灯亮和异常状态,红灯闪烁。示例截图如下所示:
空气压缩机源码分为三个组成部分,如下所示:
页面布局主要进行控件的排版,如下所示:
 1  <Viewbox Stretch="Fill">
 2     <Grid>
 3         <Path x:Name="left" Data="M0,0,0,200,80,300,80,70" Fill="Gray"></Path>
 4         <Path x:Name="top" Data="M0,0,80,70,400,60,320 -10" Fill="Gray"></Path>
 5         <Path x:Name="front" Data="M80,300,80,70,400,60,400,280" Fill="LightGray"></Path>
 6         <Line x:Name="l1" X1="180" X2="180" Y1="66" Y2="280" StrokeThickness="1" Stroke="Gray"></Line>
 7         <Line x:Name="l2" X1="280" X2="280" Y1="66" Y2="280" StrokeThickness="1" Stroke="Gray"></Line>
 8         <Ellipse x:Name="c1" Width="10" Height="10" Fill="DarkGray"></Ellipse>
 9         <Ellipse x:Name="c2" Width="10" Height="10" Fill="DarkGray" Margin="0,3,80,0"></Ellipse>
10         <Border x:Name="bottom"  Height="22" Background="DarkGray" Margin="80,0,0,0" VerticalAlignment="Bottom">
11             <Border.RenderTransform>
12                 <SkewTransform AngleY="-4"></SkewTransform>
13             </Border.RenderTransform>
14         </Border>
15         <Ellipse x:Name="alarm"  Width="18" Height="18" Margin="0,80,10,0" HorizontalAlignment="Right" VerticalAlignment="Top">
16             <Ellipse.Fill>
17                 <SolidColorBrush Color="LightGray"></SolidColorBrush>
18             </Ellipse.Fill>
19         </Ellipse>
20     </Grid>
21 </Viewbox>空气压缩机主要有两种状态,分别表示不同的运行情况,如下所示:
 1 <VisualStateManager.VisualStateGroups>
 2     <VisualStateGroup>
 3         <VisualState x:Name="errorState">
 4             <Storyboard RepeatBehavior="Forever">
 5                 <ColorAnimation Duration="0:0:0.5" From="White" To="Red" BeginTime="0:0:0"   Storyboard.TargetName="alarm" Storyboard.TargetProperty="Fill.Color"></ColorAnimation>
 6             </Storyboard>
 7         </VisualState>
 8         <VisualState x:Name="normalSate">
 9             <Storyboard RepeatBehavior="Forever">
10                 <ColorAnimation Duration="0:0:0.1" From="LightGreen" To="LightGreen" BeginTime="0:0:0" Storyboard.TargetName="alarm" Storyboard.TargetProperty="Fill.Color"></ColorAnimation>
11             </Storyboard>
12         </VisualState>
13     </VisualStateGroup>
14 </VisualStateManager.VisualStateGroups>空气压缩机的依赖属性和冷却塔相似,如下所示:
 1 namespace WpfControl.UserControls
 2 {
 3     /// <summary>
 4     /// AirCompresser.xaml 的交互逻辑
 5     /// </summary>
 6     public partial class AirCompresser : UserControl
 7     {
 8
 9
10
11
12         public RunningState RunningState
13         {
14             get { return (RunningState)GetValue(RunningStateProperty); }
15             set { SetValue(RunningStateProperty, value); }
16         }
17
18         // Using a DependencyProperty as the backing store for RunningState.  This enables animation, styling, binding, etc...
19         public static readonly DependencyProperty RunningStateProperty =
20             DependencyProperty.Register("RunningState", typeof(RunningState), typeof(AirCompresser), new PropertyMetadata(default(RunningState),RunningStateChangedCallback));
21
22         private static void RunningStateChangedCallback(DependencyObject d, DependencyPropertyChangedEventArgs e)
23         {
24             RunningState value = (RunningState)e.NewValue;
25             VisualStateManager.GoToState(d as AirCompresser, value == RunningState.Error ? "errorState" : "normalSate", false);
26         }
27
28         public AirCompresser()
29         {
30             InitializeComponent();
31         }
32     }
33 }调用空气压缩机示例,如下所示:
 1 <Window x:Class="WpfControl.TestWindow"
 2         xmlns="http://schemas.microsoft.com/winfx/2006/xaml/presentation"
 3         xmlns:x="http://schemas.microsoft.com/winfx/2006/xaml"
 4         xmlns:d="http://schemas.microsoft.com/expression/blend/2008"
 5         xmlns:mc="http://schemas.openxmlformats.org/markup-compatibility/2006"
 6         xmlns:local="clr-namespace:WpfControl"
 7         xmlns:uctrl="clr-namespace:WpfControl.UserControls"
 8         mc:Ignorable="d"
 9         Title="空气压缩机示例" Height="450" Width="800">
10     <Grid>
11         <uctrl:AirCompresser Width="150" Height="100" RunningState="Error" Margin="10,10,0,0" HorizontalAlignment="Left" VerticalAlignment="Top"></uctrl:AirCompresser>
12         <uctrl:AirCompresser Width="150" Height="100" RunningState="Normal" Margin="50,200,0,0" HorizontalAlignment="Left" VerticalAlignment="Top"></uctrl:AirCompresser>
13         <uctrl:AirCompresser Width="150" Height="100" RunningState="Normal" Margin="0,0,10,10" HorizontalAlignment="Right" VerticalAlignment="Bottom"></uctrl:AirCompresser>
14         <uctrl:AirCompresser Width="150" Height="100" RunningState="Error" Margin="0,0,50,200" HorizontalAlignment="Right" VerticalAlignment="Bottom"></uctrl:AirCompresser>
15     </Grid>
16 </Window>以上就是本篇文章的全部内容,旨在抛砖引玉,共同学习,一起进步。学习编程,从关注【老码识途】开始!!!
defperformrefund_log={success:refund_retry.success?,amount:refund_amount,action:"refund"}ifrefund_retry.success?refund_log[:reference]=refund_retry.transaction.idrefund_log[:message]=refund_retry.transaction.statuselserefund_log[:message]=refund_retry.messagerefund_log[:params]={}refund_retry.er
我需要构建一个GUI,以通过WindowsPC通过批量USB通信到PIC微控制器。我正在尝试使用mpusbapi.dll正如我在Internet上看到的不同教程时,我无法成功地引用项目中的DLL。vs2015向我展示了这个错误:无法添加“mpusbapi.dll”。确保该文件可访问,并且是valis组件或com组件。我进行了研究,我发现问题是未管理的DLL,所以我试图通过Dllimport参考。但是目前,这也没有起作用。我在下面分享我的代码,期望某人可以帮助我或给我一些更好的方法来实现我的目标。usingSystem.Runtime.InteropServices;namespaceGUI_R
我希望能够直接在我的WPF应用程序上创建一个使用开放层的应用程序。我发现我可以创建浏览器对象并调用JavaScript,但我不需要完整的浏览器。是否有一些脚本对象我可以使用并一起绕过浏览器对象? 最佳答案 您不需要Web浏览器或WebBrowser控件即可在NETFramework中使用JavaScript。NETFramework有一个内置的JavaScript实现,它实现了JavaScript/ECMAScript的超集,如here所述。和here.要使用NETFramework的内置JavaScript实现:添加对Micros
我正在使用WpfWebBrowser访问某个页面。我需要获取它的HTML内容——我不能使用Webclient或WebReques等,因为我需要在该页面上执行JS。我还尝试了Awesomium和WfWebBrowser(都错了)。dynamicdoc=browser.Document;vartext=doc.InnerHtml//orsomethinglikethis上面的代码对我不起作用,它显示空引用。谁能告诉我如何获取它?我已经搜索了数周,但没有发现任何真正有效的东西:/。请像您能想象到的最大笨蛋一样回答:D。有时我会遇到有人发给我一段代码,但我不知道如何使用它...我的意思是请让你
我在我的wpf应用程序中使用“WebBroswer”来呈现Googlemap。因此,我使用C#代码中的一些参数调用Pan(x,y)JavaScript方法。但我收到以下错误。Unknownname.(ExceptionfromHRESULT:0x80020006(DISP_E_UNKNOWNNAME))我的Window2.xaml文件:Button我的Window2.xaml.cs文件:namespaceTest{//////InteractionlogicforWindow2.xaml///publicpartialclassWindow2:Window{publicWindow2(
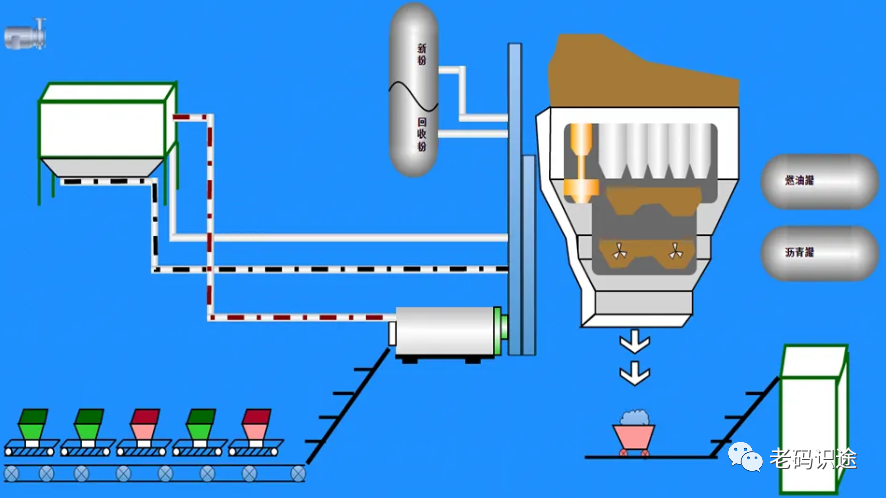
WPF以其丰富灵活的控件样式设计,相较于WinForm而言,一直是工控组态软件的宠儿,本文以两个简单的小例子,简述如何通过WPF设计出表示水流的管道,和转动的冷却风扇。仅供学习分享使用,如有不足之处,还请指正。设计知识点关于本示例中,涉及的知识点,如下所示:自定义用户控件,用户可以根据业务需要自定义控件,将普通的控件进行组合,封装,以满足特定的功能,并达到复用的目的。WPF形状,动画,可以通过选择,移动,变形等相关功能,改变控件的呈现形状。依赖属性,WPF可以通过依赖属性进行数据的绑定,实现UI与业务逻辑的解耦。示例截图 本示例主要实现了管道,和冷却扇,然后通过不同的旋转,移动并加以组合,如下
0.需求在HSmartWindowsControlWPF上用鼠标绘制ROI,且显示绘制时的鼠标交互过程,最终效果如下:1.基本思路在HSmartWindowControl上布置一层透明的Canvas,用于实时显示鼠标绘制ROI的过程鼠标移动时,在Canvas上用鼠标实时绘制Rectangle等ROI形状,鼠标在Canvas坐标系中的Position信息(x,y)坐标转换到HALCON图像坐标系,变换为Row、Column等信息根据Row、Column信息调用HDrawingObject.CreateDrawingObject()方法生成Halcon原生ROI鼠标左键释放时,隐藏Canvas,将
我想将一个ObservableCollection绑定(bind)到一个XML文件。在的多次回复之前YoushouldbindyourDataGrid,ComboBox,etc..directlytotheXMLfile请注意ObservableCollection已经存在并且已经绑定(bind)到DataGrid、ComboBox等...重写所有代码对我来说听起来一点也不有趣。尽管我所做的关于将XML文件绑定(bind)到ObservableCollection的每个搜索都会直接返回XML文件的绑定(bind)对象。是的,我知道我可以自己手动添加、更新和删除,但我希望不必这样做。
我正在尝试在visualstudiowpf中制作图像查看器/相册创建器。每个相册的图像路径都存储在一个xml文档中,我绑定(bind)到该文档以在列表框中显示每个相册中的图像。问题是当我在运行时添加图像或相册并将其写入xml文档时。我似乎无法对xml文档更新进行绑定(bind),因此它们也会显示新图像和相册。在XmlDataProvider上调用Refresh()不会改变任何内容。我不想重做XmlDataProvider的绑定(bind),只是让它再次从同一源读取。XAML:............代码隐藏:privatevoidnewImagePathButton_Click(obj
我有一个创建XDocument的代码,我在其中使用System.Xml.Linq类添加了XElements。唯一的问题是,如果xml节点没有值,它会返回一个已经关闭的标签。即但我有点想创建一个同时显示开始标记和结束标记的XML。即即使它没有值(value)。有什么方法可以使它看起来像这样吗?P.S.:我将这段代码保存在数据库中,在一个接受数据类型xml的表列下,因此添加一个字符串。在数据库上关闭Empty,所以FML。有什么想法吗? 最佳答案 尝试分配InnerTextXmlNode的"".此操作显然会使它扩展为形式。