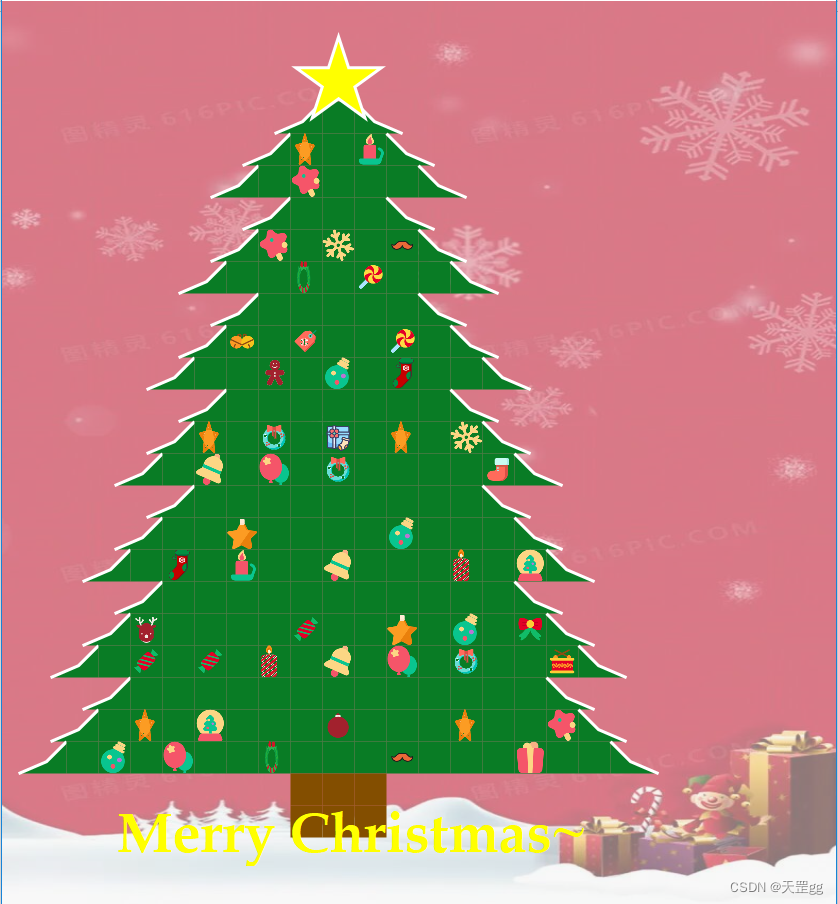
本文会基于C# GDI+技术 从零到一 实现一颗 魔法圣诞树!源码和素材在文末全部都有!
对于用代码画圣诞树,网上各种编程语言像python、css、java、c/c++我们都有见到过了,那么在绘图方面,还有一位实力强劲的隐藏高手,那就C#语言,它的GDI+技术也可以称的上是笑傲江湖,但网上鲜见C#代码画的圣诞树,所以今天我就使用 C# 代码 来 展示一下 它的独特魅力,挑战的是画一颗带魔法的圣诞树:树会自动成长,树上挂件会不断变换,就像有魔法一样~
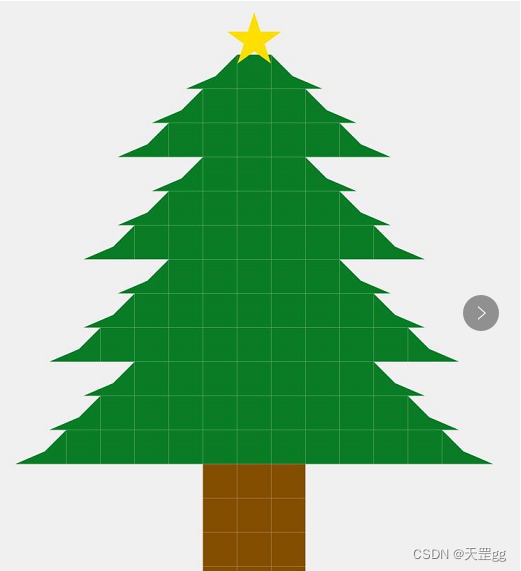
静态图:
动态图:
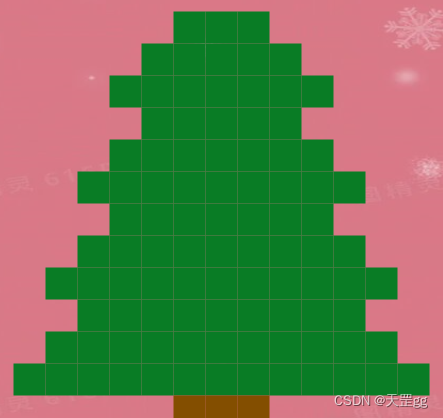
画圣诞树轮廓
画圣诞树的星星

画树左边线和右边线
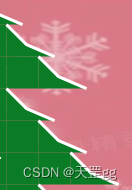
雪压青松的效果.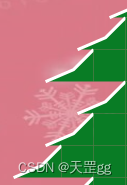
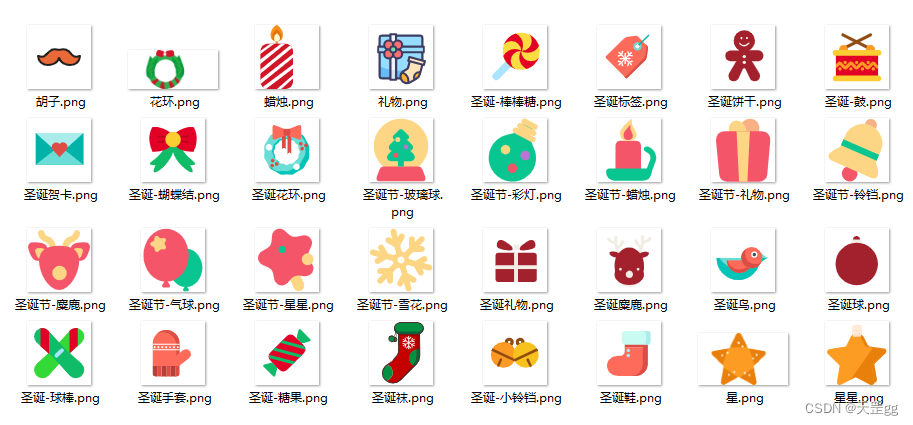
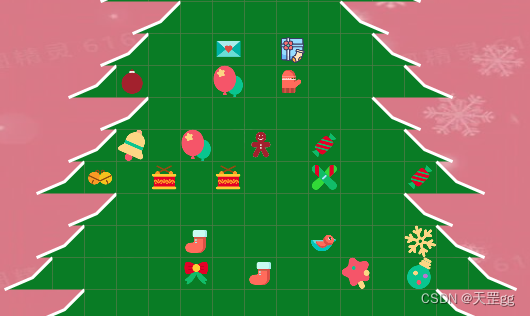
画树上的小装饰挂件
画背景图
小亮点,背景图做了透明度处理,看起来更突显出重点:树施魔法:让圣诞树动态生长,树上挂件不断变换
打开双缓冲
画图为了界面没有明显的刷新,我们都需要开启双缓冲,在构造函数开启即可:
this.DoubleBuffered = true;
画笔抗锯齿
画图为了线条没有锯齿状,我们都需要设置绘制模式为抗锯齿,在OnPaint中设置:
 Graphics g = e.Graphics;
 g.SmoothingMode = SmoothingMode.AntiAlias;
DrawTreeLayer:画整颗树的“一段/一截”的方法,一般圣诞树有3/5/7段这样,这里根据start和end控制循环次数,这里采用的画刷就是单色的SolidBrush:
private void DrawTreeLayer(Graphics g, int start, int end, ref int x, ref int y)
{
    using (Brush brush = new SolidBrush(Color.FromArgb(9, 124, 37)))
    {
        int outSize = rectSize + border;
        bool lastFillImage = false;
        for (int i = start; i <= end; i++)
        {
            for (int j = 0; j < (i * 2 - 1); j++)
            {
                if (j == 0)
                {
                    // 画最左边
                    DrawTreeLeft(g, brush, x, y, rectSize, rectSize);
                }
                else if (j == i * 2 - 2)
                {
                    // 画最右边
                    DrawTreeRight(g, brush, x, y, rectSize, rectSize);
                }
                else
                {
                    // 画树上的小装饰挂件
                    g.FillRectangle(brush, x, y, rectSize, rectSize);
                    if (lastFillImage || i == start)
                    {
                        lastFillImage = false;
                    }
                    else
                    {
                        lastFillImage = DrawGift(g, brush, x, y, rectSize, rectSize);
                    }
                }
                x += outSize;
            }
            x = startX - i * outSize;
            y += outSize;
        }
    }
}
实现了画一段,我们再把每一段画出来就是一整颗树,在OnPaint里指定实现,这里的全量变量level代表段数:
int x = startX;
int y = startY;
int outSize = rectSize + border;
for (int i = 4; i < 3 + level; i++)
{
// 一层比一层低的设置
int start = 2 + i - 4;
int end = i;
x = startX - (start - 1) * (rectSize + border);
DrawTreeLayer(g, start, end, ref x, ref y);
}
x = startX - (rectSize + border);
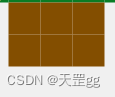
DrwaRoot(g, ref x, ref y);
画树根的方法,和画树干的方块的画刷相同SolidBrush:
// 画树根
private void DrwaRoot(Graphics g, ref int x, ref int y)
{
    using (Brush brush = new SolidBrush(Color.FromArgb(131, 78, 0)))
    {
        int outSize = rectSize + border;
        for (int i = 0; i < rootHeight; i++)
        {
            for (int j = 0; j < rootWidth; j++)
            {
                g.FillRectangle(brush, x, y, rectSize, rectSize);
                x += outSize;
            }
            x = startX - outSize;
            y += outSize;
        }
    }
}
路径(GraphicsPath)画出的一颗小星星,这里通过starColors 和 curStarColorIndex 控制颜色每次刷新变换。小细节是:星星不只是填充背景色,还加了白色外边框达到和树边一样的效果,看起来更和谐。为了画出边框,采用了Inflate方法:即先外放大画边框,画完再缩小归位,不影响后续画笔。// 画星星
Color[] starColors = new Color[] { Color.Yellow, Color.Cyan, ColorTranslator.FromHtml("#FFDF00") };
int curStarColorIndex = 0;
private void DrawStar(Graphics g, Point center, float angle, int radius)
{
PointF[] points = new PointF[]
{
new PointF(center.X, center.Y - radius),
new PointF((float)(center.X + radius * Math.Sin(72 * Math.PI / 180)), (float)(center.Y - radius * Math.Cos(72 * Math.PI / 180))),
new PointF((float)(center.X + radius * Math.Sin(36 * Math.PI / 180)), (float)(center.Y + radius * Math.Cos(36* Math.PI / 180))),
new PointF((float)(center.X - radius * Math.Sin(36 * Math.PI / 180)),(float)( center.Y + radius * Math.Cos(36 * Math.PI / 180))),
new PointF((float)(center.X - radius * Math.Sin(72 * Math.PI / 180)), (float)(center.Y - radius * Math.Cos(72 * Math.PI / 180))),
};
GraphicsPath path = new GraphicsPath(FillMode.Winding);
path.AddLine(points[0], points[2]);
path.AddLine(points[2], points[4]);
path.AddLine(points[4], points[1]);
path.AddLine(points[1], points[3]);
path.AddLine(points[3], points[0]);
path.CloseFigure();
g.RotateTransform(angle);
// 画白边框
using (Pen pen = new Pen(Color.White, 6f))
{
path.GetBounds().Inflate(6, 6);
g.DrawPath(pen, path);
path.GetBounds().Inflate(-6, -6);
}
// 填充色轮换
using (Brush brush = new SolidBrush(starColors[curStarColorIndex]))
{
g.FillPath(brush, path);
}
int nextStarColorIndex = (curStarColorIndex == starColors.Length - 1) ? 0 : (curStarColorIndex + 1);
curStarColorIndex = nextStarColorIndex;
}
画树左边线和右边线
这里有个小细节,就是为了看起来更有层次感,所以对左边线和右边线,也做了处理,开始是单纯的画直角三角形,但是太直了,所以改为画多边形效果就好很多,像雪压青松的效果~
FillPolygon 是填充多边线颜色画白边为什么用DrawLines呢?因为我只画外边,不折合// 画树左边
private void DrawTreeLeft(Graphics g, Brush brush, int x, int y, int width, int height)
{
PointF point1 = new PointF(x + width, y);
PointF point2 = new PointF(x + z12, y + height - z12);
PointF point3 = new PointF(x - z16, y + height);
PointF point4 = new PointF(x + width, y + height);
PointF[] fillPts = { point1, point2, point3, point4 };
g.FillPolygon(brush, fillPts);
// 画白边框
PointF[] borderPts = { point1, point2, point3 };
using (Pen pen = new Pen(Color.White, 3f))
{
g.DrawLines(pen, borderPts);
}
}
// 画树右边
private void DrawTreeRight(Graphics g, Brush brush, int x, int y, int width, int height)
{
PointF point1 = new PointF(x, y);
PointF point2 = new PointF(x, y + height);
PointF point3 = new PointF(x + width + z16, y + height);
PointF point4 = new PointF(x + width - z12, y + height - z12);
PointF[] pntArr = { point1, point2, point3, point4 };
g.FillPolygon(brush, pntArr);
// 画白边框
PointF[] borderPts = { point1, point4, point3 };
using (Pen pen = new Pen(Color.White, 3f))
{
g.DrawLines(pen, borderPts);
}
}
画树上的小装饰挂件
因为树上挂件很多,最开始是想全用GDI+技术来画,画了几个发现效果不多,所以就弄了32张png小图片,直接画图片,但这里也有一个小细节,png背景是白色,如果原样画图片,会很不和谐,所以需要把白色变透明,请看代码:
string[] files = Directory.GetFiles("iconfont\\");
foreach (string file in files)
{
    Image img = Image.FromFile(file);
    Bitmap bmp = new Bitmap(img.Width, img.Height, System.Drawing.Imaging.PixelFormat.Format32bppArgb);
    using (Graphics g = Graphics.FromImage(bmp))
    {
        g.DrawImage(img, 0, 0, img.Width, img.Height);
    }
    bmp.MakeTransparent(Color.White);
    bitmapList.Add(bmp);
}

this.backImage = Image.FromFile("backgroud\\backgroud.jpg");
小细节:Random 默认会以当前时间为种子,所以在同一时间,循环数字相同,也就没什么效果,看起来都一样,所以我们要变化Random的种子,也就是我每次用Guid生成一个全新的。DrawImage采用的像素画法.// 画树上的小装饰挂件
private bool DrawGift(Graphics g, Brush brush, int x, int y, int width, int height)
{
byte[] buffer = Guid.NewGuid().ToByteArray();
int iSeed = BitConverter.ToInt32(buffer, 0);
Random random = new Random(iSeed);
int i = random.Next(bitmapList.Count * 2);
if (i < bitmapList.Count)
{
Rectangle destRect = new Rectangle(x, y, width, height);
Rectangle srcRect = new Rectangle(0, 0, bitmapList[i].Width, bitmapList[i].Height);
g.DrawImage(bitmapList[i], destRect, srcRect, GraphicsUnit.Pixel);
return true;
}
return false;
}
画背景图
那么这么魔法的圣诞树,当然要配上圣诞老人的图片,这里也有一个小细节,如何把背景图片模糊化,这样才好突显树的效果,我这里是做了透明度处理,通过指定DrawImage的ImageAttributes :
this.backImage = Image.FromFile("backgroud\\backgroud.jpg");
// 画背景图片带透明度
using (ImageAttributes attributes = GetAlphaImgAttr(50))
{
    Rectangle destRect = new Rectangle(0, 0, this.Width, this.Height);
    g.DrawImage(this.backImage, destRect, 0, 0, this.backImage.Width, this.backImage.Height, GraphicsUnit.Pixel, attributes);
}
关键代码:获取一个带有透明度的ImageAttributespublic ImageAttributes GetAlphaImgAttr(int opcity)
{
if (opcity < 0 || opcity > 100)
{
throw new ArgumentOutOfRangeException("opcity 值为 0~100");
}
//颜色矩阵
float[][] matrixItems =
{
new float[]{
1,0,0,0,0},
new float[]{
0,1,0,0,0},
new float[]{
0,0,1,0,0},
new float[]{
0,0,0,(float)opcity / 100,0},
new float[]{
0,0,0,0,1}
};
ColorMatrix colorMatrix = new ColorMatrix(matrixItems);
ImageAttributes imageAtt = new ImageAttributes();
imageAtt.SetColorMatrix(colorMatrix, ColorMatrixFlag.Default, ColorAdjustType.Bitmap);
return imageAtt;
}
施魔法:让圣诞树动态生长,树上挂件不断变换
ok, 动态效果是通过timer定时器刷新实现的,1秒一刷新,3秒自动成长,长到8秒停止,就这么简单~
// 当前刷新次数
int curRefreshCount = 0;
// 成长阀值
int growThreshold = 9;
private void timer1_Tick(object sender, EventArgs e)
{
    this.Refresh();
    curRefreshCount++;
    // 刷新次数超过growThreshold长一次高度
    if (curRefreshCount >= growThreshold)
    {
        curRefreshCount = 0;
        if (level >= 8)
        {
            //level = 3;
            this.startY = 100 + (8 - level) * 3 * rectSize;
        }
        else
        {
            this.level++;
            this.startY -= 3 * rectSize;
        }
    }
}
打包下载地址:https://download.csdn.net/download/scm_2008/87342631
最后祝大家Merry Christmas~
大家有什么好的建议或想法,欢迎评论区讨论.
创作不易,求关注,点赞,收藏,谢谢~
如何在buildr项目中使用Ruby?我在很多不同的项目中使用过Ruby、JRuby、Java和Clojure。我目前正在使用我的标准Ruby开发一个模拟应用程序,我想尝试使用Clojure后端(我确实喜欢功能代码)以及JRubygui和测试套件。我还可以看到在未来的不同项目中使用Scala作为后端。我想我要为我的项目尝试一下buildr(http://buildr.apache.org/),但我注意到buildr似乎没有设置为在项目中使用JRuby代码本身!这看起来有点傻,因为该工具旨在统一通用的JVM语言并且是在ruby中构建的。除了将输出的jar包含在一个独特的、仅限ruby
在rails源中:https://github.com/rails/rails/blob/master/activesupport/lib/active_support/lazy_load_hooks.rb可以看到以下内容@load_hooks=Hash.new{|h,k|h[k]=[]}在IRB中,它只是初始化一个空哈希。和做有什么区别@load_hooks=Hash.new 最佳答案 查看rubydocumentationforHashnew→new_hashclicktotogglesourcenew(obj)→new_has
我的主要目标是能够完全理解我正在使用的库/gem。我尝试在Github上从头到尾阅读源代码,但这真的很难。我认为更有趣、更温和的踏脚石就是在使用时阅读每个库/gem方法的源代码。例如,我想知道RubyonRails中的redirect_to方法是如何工作的:如何查找redirect_to方法的源代码?我知道在pry中我可以执行类似show-methodmethod的操作,但我如何才能对Rails框架中的方法执行此操作?您对我如何更好地理解Gem及其API有什么建议吗?仅仅阅读源代码似乎真的很难,尤其是对于框架。谢谢! 最佳答案 Ru
我的假设是moduleAmoduleBendend和moduleA::Bend是一样的。我能够从thisblog找到解决方案,thisSOthread和andthisSOthread.为什么以及什么时候应该更喜欢紧凑语法A::B而不是另一个,因为它显然有一个缺点?我有一种直觉,它可能与性能有关,因为在更多命名空间中查找常量需要更多计算。但是我无法通过对普通类进行基准测试来验证这一点。 最佳答案 这两种写作方法经常被混淆。首先要说的是,据我所知,没有可衡量的性能差异。(在下面的书面示例中不断查找)最明显的区别,可能也是最著名的,是你的
几个月前,我读了一篇关于rubygem的博客文章,它可以通过阅读代码本身来确定编程语言。对于我的生活,我不记得博客或gem的名称。谷歌搜索“ruby编程语言猜测”及其变体也无济于事。有人碰巧知道相关gem的名称吗? 最佳答案 是这个吗:http://github.com/chrislo/sourceclassifier/tree/master 关于ruby-寻找通过阅读代码确定编程语言的rubygem?,我们在StackOverflow上找到一个类似的问题:
我目前正在使用以下方法获取页面的源代码:Net::HTTP.get(URI.parse(page.url))我还想获取HTTP状态,而无需发出第二个请求。有没有办法用另一种方法做到这一点?我一直在查看文档,但似乎找不到我要找的东西。 最佳答案 在我看来,除非您需要一些真正的低级访问或控制,否则最好使用Ruby的内置Open::URI模块:require'open-uri'io=open('http://www.example.org/')#=>#body=io.read[0,50]#=>"["200","OK"]io.base_ur
是否可以为特定(或所有)项目使用多个布局?例如,我有几个项目,我想对其应用两种不同的布局。一个是绿色的,一个是蓝色的(但是)。我想将它们编译到我的输出目录中的两个不同文件夹中(例如v1和v2)。我一直在玩弄规则和编译block,但我不知道这是怎么回事。因为,每个项目在编译过程中只编译一次,我不能告诉nanoc第一次用layout1编译,第二次用layout2编译。我试过这样的东西,但它导致输出文件损坏。compile'*'doifitem.binary?#don’tfilterbinaryitemselsefilter:erblayout'layout1'layout'layout2'
按照目前的情况,这个问题不适合我们的问答形式。我们希望答案得到事实、引用或专业知识的支持,但这个问题可能会引发辩论、争论、投票或扩展讨论。如果您觉得这个问题可以改进并可能重新打开,visitthehelpcenter指导。关闭10年前。问题1)我想知道rubyonrails是否有功能类似于primefaces的gem。我问的原因是如果您使用primefaces(http://www.primefaces.org/showcase-labs/ui/home.jsf),开发人员无需担心javascript或jquery的东西。据我所知,JSF是一个规范,基于规范的各种可用实现,prim
前言作为一名程序员,自己的本质工作就是做程序开发,那么程序开发的时候最直接的体现就是代码,检验一个程序员技术水平的一个核心环节就是开发时候的代码能力。众所周知,程序开发的水平提升是一个循序渐进的过程,每一位程序员都是从“菜鸟”变成“大神”的,所以程序员在程序开发过程中的代码能力也是根据平时开发中的业务实践来积累和提升的。提高代码能力核心要素程序员要想提高自身代码能力,尤其是新晋程序员的代码能力有很大的提升空间的时候,需要针对性的去提高自己的代码能力。提高代码能力其实有几个比较关键的点,只要把握住这些方面,就能很好的、快速的提高自己的一部分代码能力。1、多去阅读开源项目,如有机会可以亲自参与开源
嗨~大家好,这里是可莉!今天给大家带来的是7个C语言的经典基础代码~那一起往下看下去把【程序一】打印100到200之间的素数#includeintmain(){ inti; for(i=100;i 【程序二】输出乘法口诀表#includeintmain(){inti;for(i=1;i 【程序三】判断1000年---2000年之间的闰年#includeintmain(){intyear;for(year=1000;year 【程序四】给定两个整形变量的值,将两个值的内容进行交换。这里提供两种方法来进行交换,第一种为创建临时变量来进行交换,第二种是不创建临时变量而直接进行交换。1.创建临时变量来