YOLOv5有大约30个超参数用于各种训练设置。它们在*xml中定义。/data目录下的Yaml文件。更好的初始猜测将产生更好的最终结果,因此在进化之前正确地初始化这些值是很重要的。如果有疑问,只需使用缺省值,这些缺省值是为YOLOv5 COCO训练从头优化的。
YOLOv5的超参文件见data/hyp.finetune.yaml(适用VOC数据集)或者hyo.scrach.yaml(适用COCO数据集)文件
# Hyperparameters for low-augmentation COCO training from scratch
 # python train.py --batch 64 --cfg yolov5n6.yaml --weights '' --data coco.yaml --img 640 --epochs 300 --linear
 # See tutorials for hyperparameter evolution https://github.com/ultralytics/yolov5#tutorials

 lr0: 0.01  # initial learning rate (SGD=1E-2, Adam=1E-3) 初始学习速率
 lrf: 0.01  # final OneCycleLR learning rate (lr0 * lrf) ,最终OneCycleLR学习率
 momentum: 0.937  # SGD momentum/Adam beta1
 weight_decay: 0.0005  # optimizer weight decay 5e-4 ,权重衰变
 warmup_epochs: 3.0  # warmup epochs (fractions ok) 学习率热身epoch
 warmup_momentum: 0.8  # warmup initial momentum 学习率热身初始动量
 warmup_bias_lr: 0.1  # warmup initial bias lr 学习率热身偏执学习率
 box: 0.05  # box loss gain
 cls: 0.5  # cls loss gain
 cls_pw: 1.0  # cls BCELoss positive_weight
 obj: 1.0  # obj loss gain (scale with pixels)
 obj_pw: 1.0  # obj BCELoss positive_weight
 iou_t: 0.20  # IoU training threshold
 anchor_t: 4.0  # anchor-multiple threshold
 # anchors: 3  # anchors per output layer (0 to ignore)
 fl_gamma: 0.0  # focal loss gamma (efficientDet default gamma=1.5)
 #颜色亮度,色调(Hue)、饱和度(Saturation)
 hsv_h: 0.015  # image HSV-Hue augmentation (fraction)
 hsv_s: 0.7  # image HSV-Saturation augmentation (fraction)
 hsv_v: 0.4  # image HSV-Value augmentation (fraction)
 #图像旋转
 degrees: 0.0  # image rotation (+/- deg)
 #图像平移
 translate: 0.1  # image translation (+/- fraction)
 ##图像仿射变换的缩放比例
 scale: 0.5  # image scale (+/- gain)
 #设置裁剪的仿射矩阵系数
 shear: 0.0  # image shear (+/- deg)
 #透视变换
 perspective: 0.0  # image perspective (+/- fraction), range 0-0.001 ,range 0-0.001 0.0:仿射变换,>0为透视变换
 flipud: 0.0  # image flip up-down (probability)
 fliplr: 0.5  # image flip left-right (probability)
 mosaic: 1.0  # image mosaic (probability)
 mixup: 0.0  # image mixup (probability) #在mosaic启用时,才可以启用
 copy_paste: 0.0  # segment copy-paste (probability),在mosaic启用时,才可以启用
# YOLOv5 🚀 by Ultralytics, GPL-3.0 license
# Hyperparameters for medium-augmentation COCO training from scratch
# python train.py --batch 32 --cfg yolov5m6.yaml --weights '' --data coco.yaml --img 1280 --epochs 300
# See tutorials for hyperparameter evolution https://github.com/ultralytics/yolov5#tutorials

lr0: 0.01  # initial learning rate (SGD=1E-2, Adam=1E-3)
lrf: 0.1  # final OneCycleLR learning rate (lr0 * lrf)
momentum: 0.937  # SGD momentum/Adam beta1
weight_decay: 0.0005  # optimizer weight decay 5e-4
warmup_epochs: 3.0  # warmup epochs (fractions ok)
warmup_momentum: 0.8  # warmup initial momentum
warmup_bias_lr: 0.1  # warmup initial bias lr
box: 0.05  # box loss gain
cls: 0.3  # cls loss gain
cls_pw: 1.0  # cls BCELoss positive_weight
obj: 0.7  # obj loss gain (scale with pixels)
obj_pw: 1.0  # obj BCELoss positive_weight
iou_t: 0.20  # IoU training threshold
anchor_t: 4.0  # anchor-multiple threshold
# anchors: 3  # anchors per output layer (0 to ignore)
fl_gamma: 0.0  # focal loss gamma (efficientDet default gamma=1.5)
hsv_h: 0.015  # image HSV-Hue augmentation (fraction)
hsv_s: 0.7  # image HSV-Saturation augmentation (fraction)
hsv_v: 0.4  # image HSV-Value augmentation (fraction)
degrees: 0.0  # image rotation (+/- deg)
translate: 0.1  # image translation (+/- fraction)
scale: 0.9  # image scale (+/- gain)
shear: 0.0  # image shear (+/- deg)
perspective: 0.0  # image perspective (+/- fraction), range 0-0.001
flipud: 0.0  # image flip up-down (probability)
fliplr: 0.5  # image flip left-right (probability)
mosaic: 1.0  # image mosaic (probability)
mixup: 0.1  # image mixup (probability)
copy_paste: 0.0  # segment copy-paste (probability)
# YOLOv5 🚀 by Ultralytics, GPL-3.0 license
# Hyperparameters for high-augmentation COCO training from scratch
# python train.py --batch 32 --cfg yolov5m6.yaml --weights '' --data coco.yaml --img 1280 --epochs 300
# See tutorials for hyperparameter evolution https://github.com/ultralytics/yolov5#tutorials

lr0: 0.01  # initial learning rate (SGD=1E-2, Adam=1E-3)
lrf: 0.1  # final OneCycleLR learning rate (lr0 * lrf)
momentum: 0.937  # SGD momentum/Adam beta1
weight_decay: 0.0005  # optimizer weight decay 5e-4
warmup_epochs: 3.0  # warmup epochs (fractions ok)
warmup_momentum: 0.8  # warmup initial momentum
warmup_bias_lr: 0.1  # warmup initial bias lr
box: 0.05  # box loss gain
cls: 0.3  # cls loss gain
cls_pw: 1.0  # cls BCELoss positive_weight
obj: 0.7  # obj loss gain (scale with pixels)
obj_pw: 1.0  # obj BCELoss positive_weight
iou_t: 0.20  # IoU training threshold
anchor_t: 4.0  # anchor-multiple threshold
# anchors: 3  # anchors per output layer (0 to ignore)
fl_gamma: 0.0  # focal loss gamma (efficientDet default gamma=1.5)
hsv_h: 0.015  # image HSV-Hue augmentation (fraction)
hsv_s: 0.7  # image HSV-Saturation augmentation (fraction)
hsv_v: 0.4  # image HSV-Value augmentation (fraction)
degrees: 0.0  # image rotation (+/- deg)
translate: 0.1  # image translation (+/- fraction)
scale: 0.9  # image scale (+/- gain)
shear: 0.0  # image shear (+/- deg)
perspective: 0.0  # image perspective (+/- fraction), range 0-0.001
flipud: 0.0  # image flip up-down (probability)
fliplr: 0.5  # image flip left-right (probability)
mosaic: 1.0  # image mosaic (probability)
mixup: 0.1  # image mixup (probability)
copy_paste: 0.1  # segment copy-paste (probability)
根据“OneCycleLR学习率”策略,设置各参数组的学习率。1cycle策略将学习率从初始学习率退火到最大学习率,然后从最大学习率退火到远低于初始学习率的最小学习率。论文地址
warmup是一种学习率优化方法,最早出现在resnet论文中,在模型训练初期选用较小的学习率,训练一段时间之后(10epoch 或者 10000steps)使用预设的学习率进行训练
为什么使用
模型训练初期,权重随机化,对数据的理解为0,在第一个epoch中,模型会根据输入的数据进行快速的调参,此时如果采用较大的学习率,有很大的可能使模型学偏,后续需要更多的轮次才能拉回来
当模型训练一段时间之后,对数据有一定的先验知识,此时使用较大的学习率模型不容易学偏,可以使用较大的学习率加速训练。
当模型使用较大的学习率训练一段时间之后,模型的分布相对比较稳定,此时不宜从数据中再学到新的特点,如果继续使用较大的学习率会破坏模型的稳定性,而使用较小的学习率更获得最优。
Pytorch内部并没有warmup的接口,为此需要使用第三方包pytorch_warmup ,可以使用命令pip install pytorch_warmup进行安装
import torch
import pytorch_warmup as warmup

optimizer = torch.optim.AdamW(params, lr=0.001, betas=(0.9, 0.999), weight_decay=0.01)
num_steps = len(dataloader) * num_epochs
lr_scheduler = torch.optim.lr_scheduler.CosineAnnealingLR(optimizer, T_max=num_steps)
warmup_scheduler = warmup.UntunedLinearWarmup(optimizer)
for epoch in range(1,num_epochs+1):
    for batch in dataloader:
        optimizer.zero_grad()
        loss = ...
        loss.backward()
        optimizer.step()
        with warmup_scheduler.dampening():
            lr_scheduler.step()
lr_scheduler1 = torch.optim.lr_scheduler.ExponentialLR(optimizer, gamma=0.9)
lr_scheduler2 = torch.optim.lr_scheduler.StepLR(optimizer, step_size=3, gamma=0.1)
warmup_scheduler = warmup.UntunedLinearWarmup(optimizer)
for epoch in range(1,num_epochs+1):
    for batch in dataloader:
        ...
        optimizer.step()
        with warmup_scheduler.dampening():
            lr_scheduler1.step()
            lr_scheduler2.step()
lr_scheduler = torch.optim.lr_scheduler.MultiStepLR(optimizer, milestones=[num_epochs//3], gamma=0.1)
warmup_scheduler = warmup.UntunedLinearWarmup(optimizer)
for epoch in range(1,num_epochs+1):
    for iter, batch in enumerate(dataloader):
        optimizer.zero_grad()
        loss = ...
        loss.backward()
        optimizer.step()
        if iter < len(dataloader)-1:
            with warmup_scheduler.dampening():
                pass
    with warmup_scheduler.dampening():
        lr_scheduler.step()
预热因子w(t)取决于预热期,必须手动指定线性预热和指数预热。
w(t) = min(1, t / warmup_period)
warmup_scheduler = warmup.LinearWarmup(optimizer, warmup_period=2000)
warmup_period = 1 / (1 - beta2)

warmup_scheduler = warmup.UntunedExponentialWarmup(optimizer)
The warmup factor depends on Adam’s beta2 parameter for RAdamWarmup. Please see the original paper for the details.
warmup_scheduler = warmup.RAdamWarmup(optimizer)
The Apex library provides an Adam optimizer tuned for CUDA devices, FusedAdam. The FusedAdam optimizer can be used with the warmup schedulers. For example:
optimizer = apex.optimizers.FusedAdam(params, lr=0.001, betas=(0.9, 0.999), weight_decay=0.01)
lr_scheduler = torch.optim.lr_scheduler.CosineAnnealingLR(optimizer, T_max=num_steps)
warmup_scheduler = warmup.UntunedLinearWarmup(optimizer)
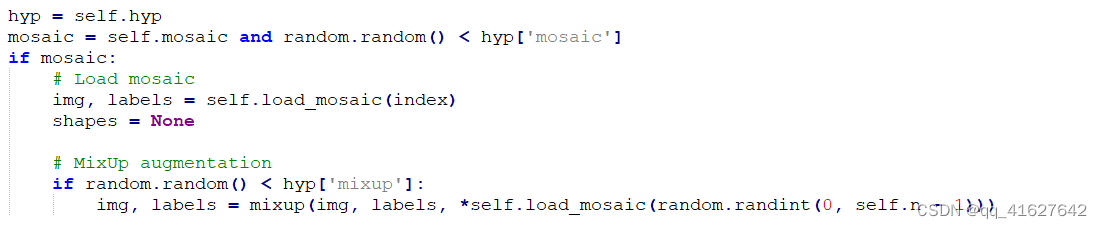
目标检测 YOLOv5 - 数据增强
Yolov5(v6.1)数据增强方式解析
一旦训练开始,您可以在train_batch*.jpg图像中查看增强策略的效果。这些图像将在你的火车日志目录中,通常是yolov5/runs/train/exp:
train_batch0.jpg shows train batch 0 mosaics and labels:

To use albumentations simply pip install -U albumentations and then update the augmentation pipeline as you see fit in the new Albumentations class in yolov5/utils/augmentations.py. Note these Albumentations operations run in addition to the YOLOv5 hyperparameter augmentations, i.e. defined in hyp.scratch.yaml.
Here’s an example that applies Blur, MedianBlur and ToGray albumentations in addition to the YOLOv5 hyperparameter augmentations normally applied to your training mosaics 😃
class Albumentations:
    # YOLOv5 Albumentations class (optional, used if package is installed)
    def __init__(self):
        self.transform = None
        try:
            import albumentations as A
            check_version(A.__version__, '1.0.3')  # version requirement

            self.transform = A.Compose([
                A.Blur(blur_limit=50, p=0.1),
                A.MedianBlur(blur_limit=51, p=0.1),
                A.ToGray(p=0.3)],
                bbox_params=A.BboxParams(format='yolo', label_fields=['class_labels']))

            logging.info(colorstr('albumentations: ') + ', '.join(f'{x}' for x in self.transform.transforms))
        except ImportError:  # package not installed, skip
            pass
        except Exception as e:
            logging.info(colorstr('albumentations: ') + f'{e}')

    def __call__(self, im, labels, p=1.0):
        if self.transform and random.random() < p:
            new = self.transform(image=im, bboxes=labels[:, 1:], class_labels=labels[:, 0])  # transformed
            im, labels = new['image'], np.array([[c, *b] for c, b in zip(new['class_labels'], new['bboxes'])])
        return im, labels

##您可以在YOLOv5数据加载器中集成额外的Albumentations增强功能:
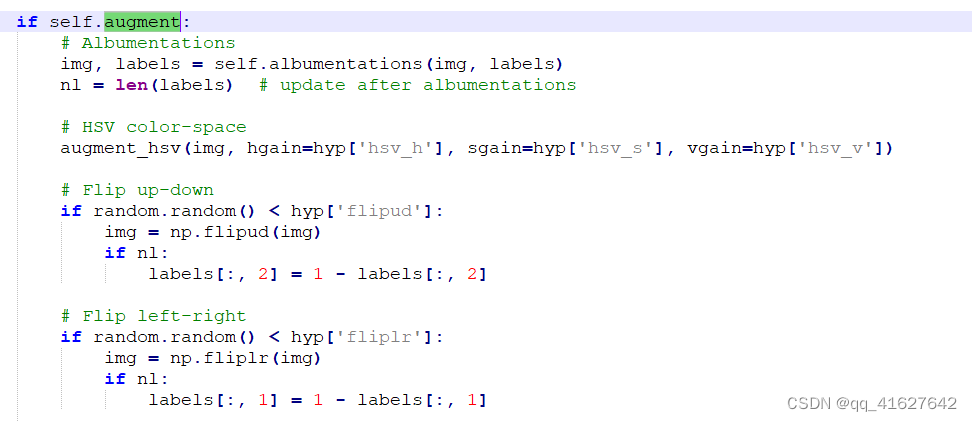
在YOLOv5数据加载器中插入albumentaugment功能的最佳位置是这里:
if self.augment:
     # Augment imagespace
     if not mosaic:
         img, labels = random_perspective(img, labels,
                                          degrees=hyp['degrees'],
                                          translate=hyp['translate'],
                                          scale=hyp['scale'],
                                          shear=hyp['shear'],
                                          perspective=hyp['perspective'])

     # Augment colorspace
     augment_hsv(img, hgain=hyp['hsv_h'], sgain=hyp['hsv_s'], vgain=hyp['hsv_v'])

     # Apply cutouts
     # if random.random() < 0.9:
     #     labels = cutout(img, labels)
其中img为图像,label为边框标签。请注意,您添加的任何albuments增强都将是对超参数文件中定义的现有自动YOLOv5增强的补充:
健康是我们追求的价值最大化。在YOLOv5中,我们将默认适应度函数定义为指标的加权组合:mAP@0.5占权重的10%,mAP@0.5:0.95占剩余的90%,没有Precision P和Recall R。您可以根据自己的需要进行调整,或者使用默认的适合度定义(推荐)。
yolov5/utils/metrics.py

Lines 12 to 16 in 4103ce9

 def fitness(x):
     # Model fitness as a weighted combination of metrics
     w = [0.0, 0.0, 0.1, 0.9]  # weights for [P, R, mAP@0.5, mAP@0.5:0.95]
     return (x[:, :4] * w).sum(1)
# Single-GPU
python train.py --epochs 10 --data coco128.yaml --weights yolov5s.pt --cache --evolve

# Multi-GPU
for i in 0 1 2 3 4 5 6 7; do
  sleep $(expr 30 \* $i) &&  # 30-second delay (optional)
  echo 'Starting GPU '$i'...' &&
  nohup python train.py --epochs 10 --data coco128.yaml --weights yolov5s.pt --cache --device $i --evolve > evolve_gpu_$i.log &
done

# Multi-GPU bash-while (not recommended)
for i in 0 1 2 3 4 5 6 7; do
  sleep $(expr 30 \* $i) &&  # 30-second delay (optional)
  echo 'Starting GPU '$i'...' &&
  "$(while true; do nohup python train.py... --device $i --evolve 1 > evolve_gpu_$i.log; done)" &
done
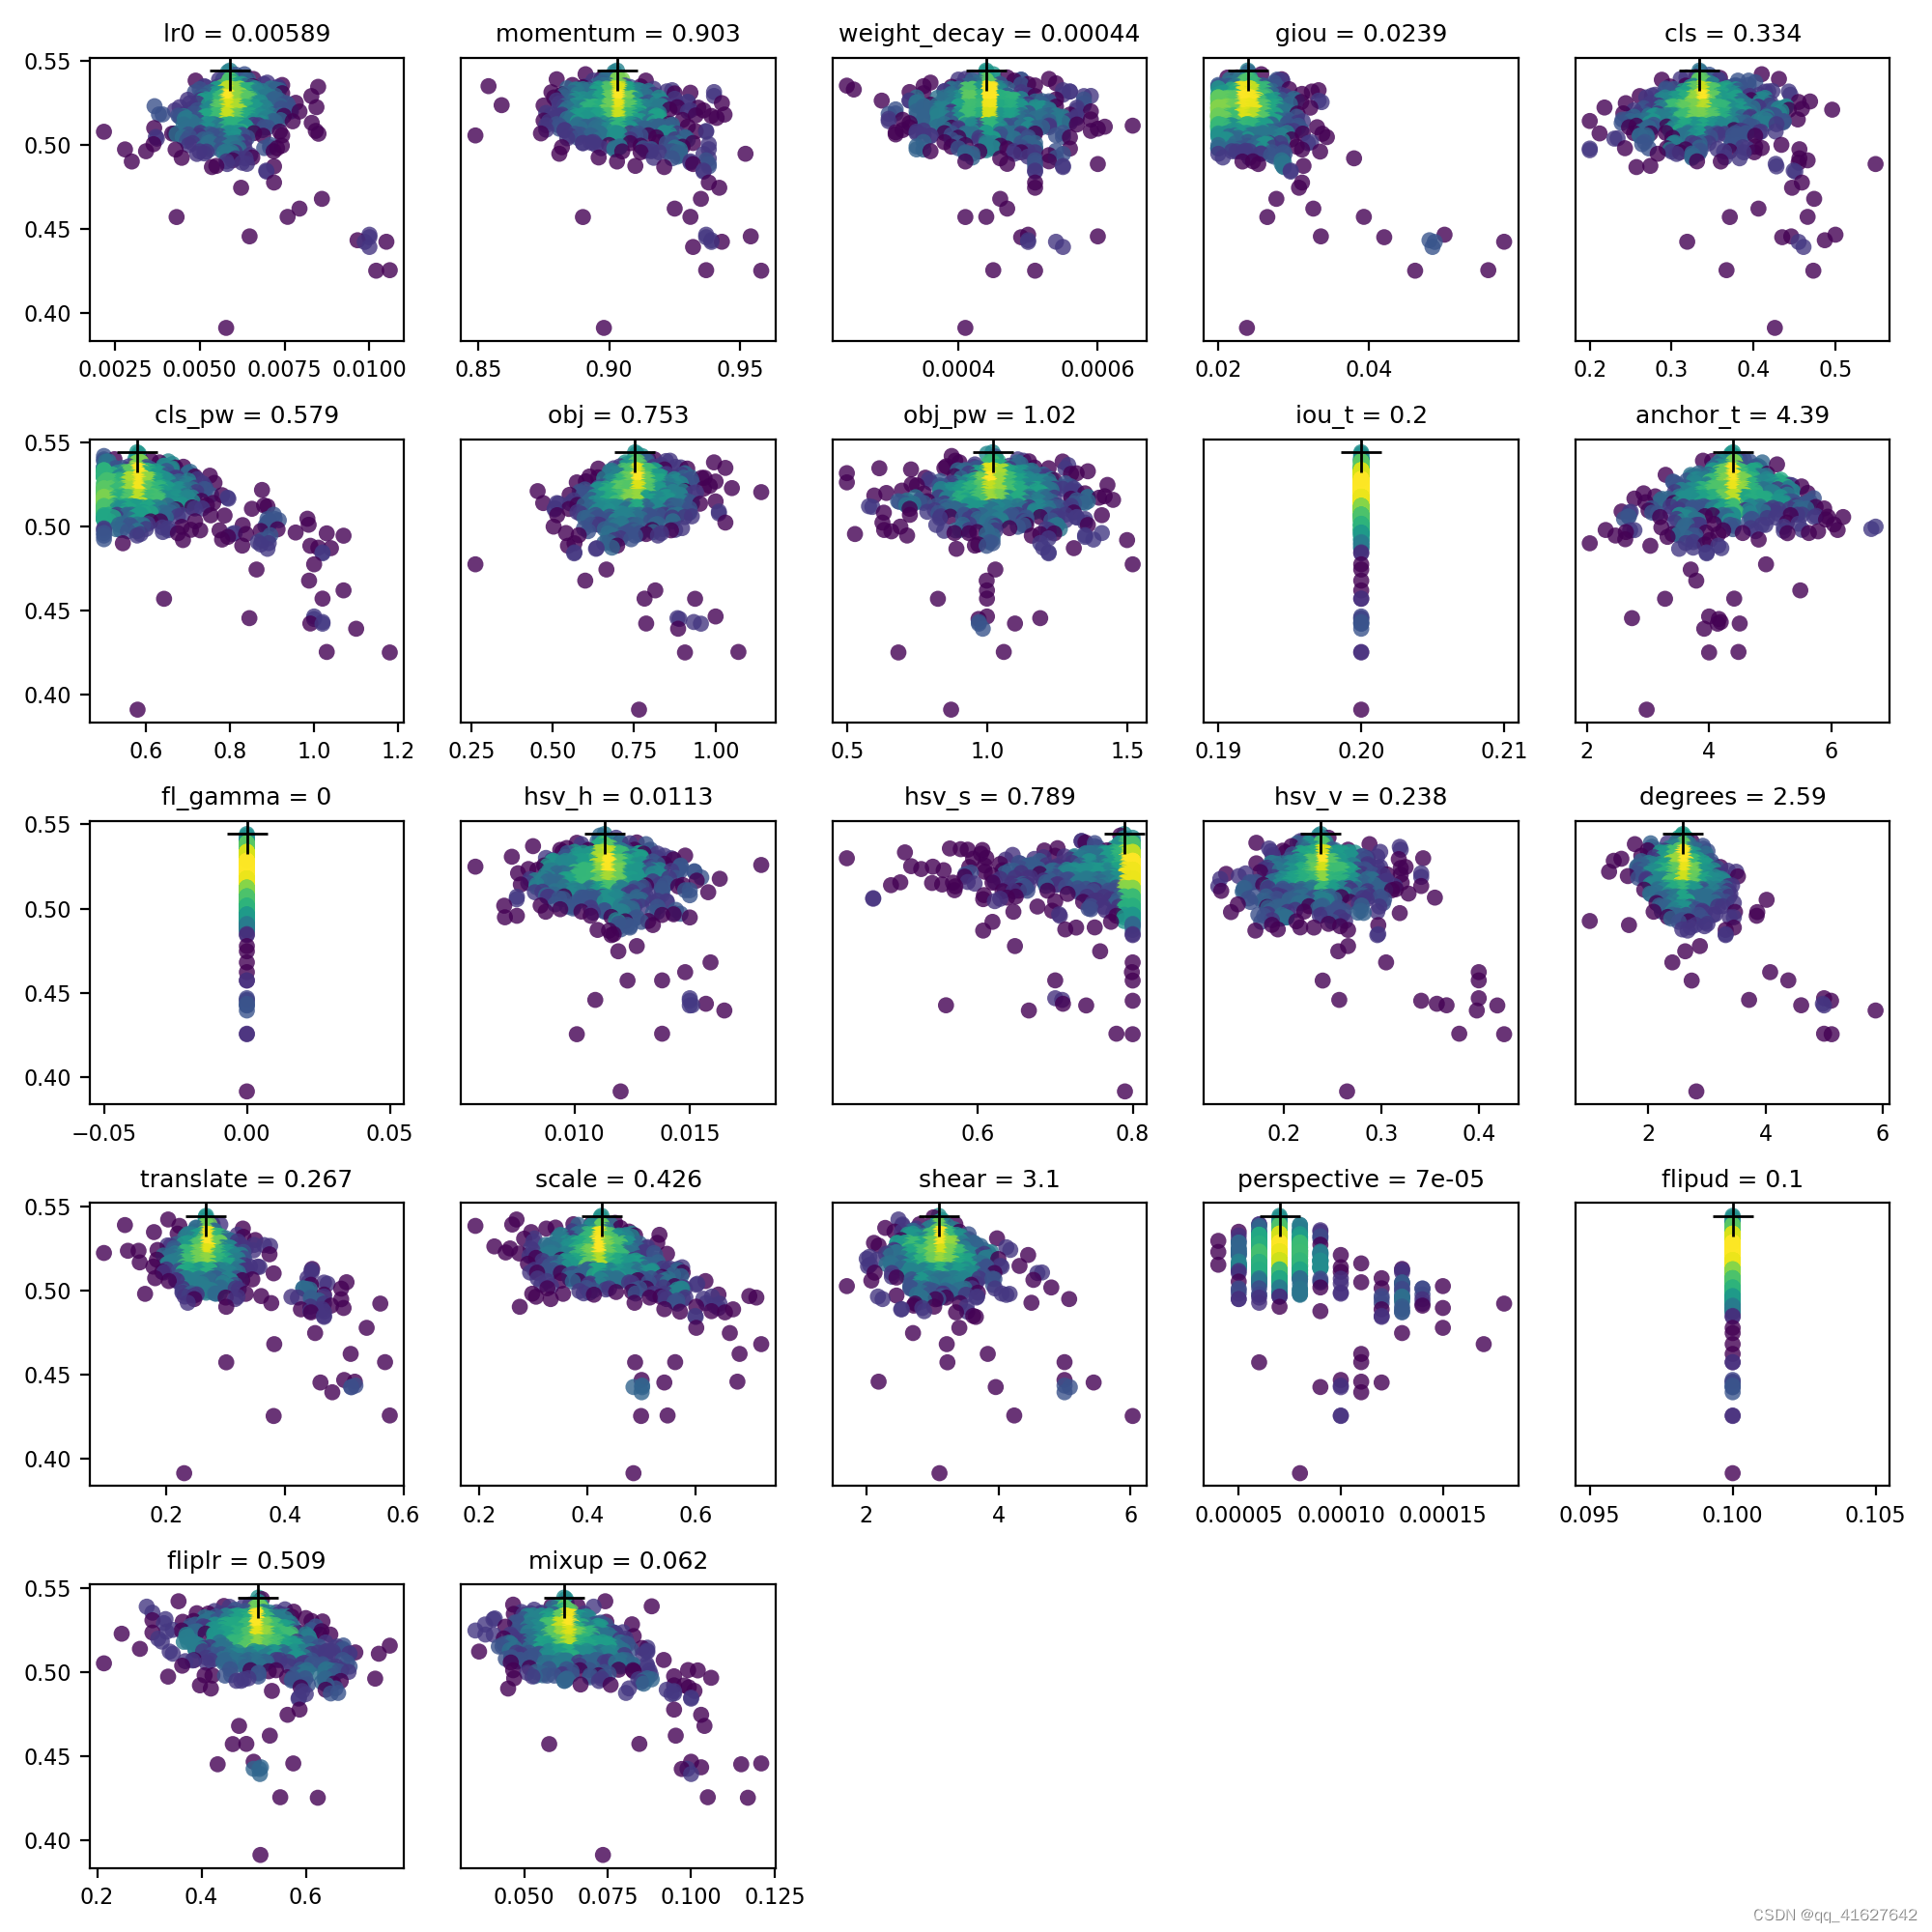
# YOLOv5 Hyperparameter Evolution Results
# Best generation: 287
# Last generation: 300
#    metrics/precision,       metrics/recall,      metrics/mAP_0.5, metrics/mAP_0.5:0.95,         val/box_loss,         val/obj_loss,         val/cls_loss
#              0.54634,              0.55625,              0.58201,              0.33665,             0.056451,             0.042892,             0.013441

lr0: 0.01  # initial learning rate (SGD=1E-2, Adam=1E-3)
lrf: 0.2  # final OneCycleLR learning rate (lr0 * lrf)
momentum: 0.937  # SGD momentum/Adam beta1
weight_decay: 0.0005  # optimizer weight decay 5e-4
warmup_epochs: 3.0  # warmup epochs (fractions ok)
warmup_momentum: 0.8  # warmup initial momentum
warmup_bias_lr: 0.1  # warmup initial bias lr
box: 0.05  # box loss gain
cls: 0.5  # cls loss gain
cls_pw: 1.0  # cls BCELoss positive_weight
obj: 1.0  # obj loss gain (scale with pixels)
obj_pw: 1.0  # obj BCELoss positive_weight
iou_t: 0.20  # IoU training threshold
anchor_t: 4.0  # anchor-multiple threshold
# anchors: 3  # anchors per output layer (0 to ignore)
fl_gamma: 0.0  # focal loss gamma (efficientDet default gamma=1.5)
hsv_h: 0.015  # image HSV-Hue augmentation (fraction)
hsv_s: 0.7  # image HSV-Saturation augmentation (fraction)
hsv_v: 0.4  # image HSV-Value augmentation (fraction)
degrees: 0.0  # image rotation (+/- deg)
translate: 0.1  # image translation (+/- fraction)
scale: 0.5  # image scale (+/- gain)
shear: 0.0  # image shear (+/- deg)
perspective: 0.0  # image perspective (+/- fraction), range 0-0.001
flipud: 0.0  # image flip up-down (probability)
fliplr: 0.5  # image flip left-right (probability)
mosaic: 1.0  # image mosaic (probability)
mixup: 0.0  # image mixup (probability)
copy_paste: 0.0  # segment copy-paste (probability)

我们建议至少300代的进化才能获得最好的结果。请注意,进化通常是昂贵和耗时的,因为基本场景要训练数百次,可能需要数百或数千个GPU小时。
evolve.csv is plotted as evolve.png by utils.plots.plot_evolve() after evolution finishes with one subplot per hyperparameter showing fitness (y axis) vs hyperparameter values (x axis). Yellow indicates higher concentrations. Vertical distributions indicate that a parameter has been disabled and does not mutate. This is user selectable in the meta dictionary in train.py, and is useful for fixing parameters and preventing them from evolving.
我有一个字符串input="maybe(thisis|thatwas)some((nice|ugly)(day|night)|(strange(weather|time)))"Ruby中解析该字符串的最佳方法是什么?我的意思是脚本应该能够像这样构建句子:maybethisissomeuglynightmaybethatwassomenicenightmaybethiswassomestrangetime等等,你明白了......我应该一个字符一个字符地读取字符串并构建一个带有堆栈的状态机来存储括号值以供以后计算,还是有更好的方法?也许为此目的准备了一个开箱即用的库?
我有一个Ruby程序,它使用rubyzip压缩XML文件的目录树。gem。我的问题是文件开始变得很重,我想提高压缩级别,因为压缩时间不是问题。我在rubyzipdocumentation中找不到一种为创建的ZIP文件指定压缩级别的方法。有人知道如何更改此设置吗?是否有另一个允许指定压缩级别的Ruby库? 最佳答案 这是我通过查看rubyzip内部创建的代码。level=Zlib::BEST_COMPRESSIONZip::ZipOutputStream.open(zip_file)do|zip|Dir.glob("**/*")d
我在使用omniauth/openid时遇到了一些麻烦。在尝试进行身份验证时,我在日志中发现了这一点:OpenID::FetchingError:Errorfetchinghttps://www.google.com/accounts/o8/.well-known/host-meta?hd=profiles.google.com%2Fmy_username:undefinedmethod`io'fornil:NilClass重要的是undefinedmethodio'fornil:NilClass来自openid/fetchers.rb,在下面的代码片段中:moduleNetclass
我主要使用Ruby来执行此操作,但到目前为止我的攻击计划如下:使用gemsrdf、rdf-rdfa和rdf-microdata或mida来解析给定任何URI的数据。我认为最好映射到像schema.org这样的统一模式,例如使用这个yaml文件,它试图描述数据词汇表和opengraph到schema.org之间的转换:#SchemaXtoschema.orgconversion#data-vocabularyDV:name:namestreet-address:streetAddressregion:addressRegionlocality:addressLocalityphoto:i
我正在使用ruby1.9解析以下带有MacRoman字符的csv文件#encoding:ISO-8859-1#csv_parse.csvName,main-dialogue"Marceu","Giveittohimóhe,hiswife."我做了以下解析。require'csv'input_string=File.read("../csv_parse.rb").force_encoding("ISO-8859-1").encode("UTF-8")#=>"Name,main-dialogue\r\n\"Marceu\",\"Giveittohim\x97he,hiswife.\"\
exe应该在我打开页面时运行。异步进程需要运行。有什么方法可以在ruby中使用两个参数异步运行exe吗?我已经尝试过ruby命令-system()、exec()但它正在等待过程完成。我需要用参数启动exe,无需等待进程完成是否有任何rubygems会支持我的问题? 最佳答案 您可以使用Process.spawn和Process.wait2:pid=Process.spawn'your.exe','--option'#Later...pid,status=Process.wait2pid您的程序将作为解释器的子进程执行。除
我正在查看instance_variable_set的文档并看到给出的示例代码是这样做的:obj.instance_variable_set(:@instnc_var,"valuefortheinstancevariable")然后允许您在类的任何实例方法中以@instnc_var的形式访问该变量。我想知道为什么在@instnc_var之前需要一个冒号:。冒号有什么作用? 最佳答案 我的第一直觉是告诉你不要使用instance_variable_set除非你真的知道你用它做什么。它本质上是一种元编程工具或绕过实例变量可见性的黑客攻击
我有一些Ruby代码,如下所示:Something.createdo|x|x.foo=barend我想编写一个测试,它使用double代替block参数x,这样我就可以调用:x_double.should_receive(:foo).with("whatever").这可能吗? 最佳答案 specify'something'dox=doublex.should_receive(:foo=).with("whatever")Something.should_receive(:create).and_yield(x)#callthere
我正在为一个项目制作一个简单的shell,我希望像在Bash中一样解析参数字符串。foobar"helloworld"fooz应该变成:["foo","bar","helloworld","fooz"]等等。到目前为止,我一直在使用CSV::parse_line,将列分隔符设置为""和.compact输出。问题是我现在必须选择是要支持单引号还是双引号。CSV不支持超过一个分隔符。Python有一个名为shlex的模块:>>>shlex.split("Test'helloworld'foo")['Test','helloworld','foo']>>>shlex.split('Test"
我不确定传递给方法的对象的类型是否正确。我可能会将一个字符串传递给一个只能处理整数的函数。某种运行时保证怎么样?我看不到比以下更好的选择:defsomeFixNumMangler(input)raise"wrongtype:integerrequired"unlessinput.class==FixNumother_stuffend有更好的选择吗? 最佳答案 使用Kernel#Integer在使用之前转换输入的方法。当无法以任何合理的方式将输入转换为整数时,它将引发ArgumentError。defmy_method(number)