最近写项目需要有一个试卷功能,作为初学者一头雾水,网上找了些资料。非常感谢
才华横溢吴道简 大佬写的答题小程序。参考了大佬的文章,自己做了一点点修改。欢迎大佬指点。原文链接:http://t.csdn.cn/15v4L
首先新建一个文件夹 exam,之后添加数据,假设后台传过来的数据是这样的
Page({
data: {
answer:{
total:5, //总共题目数量
subject:[ //数组用来存放所有的题目
{
title:'题目一',
options:[{
number:'A',
describe:'选项A'
},{
number:'B',
describe:'选项B'
},{
number:'C',
describe:'选项C'
},{
number:'D',
describe:'选项D'
},]
}, {
title:'题目二',
options:[{
number:'A',
describe:'选项A'
},{
number:'B',
describe:'选项B'
},{
number:'C',
describe:'选项C'
},{
number:'D',
describe:'选项D'
},]
}, {
title:'题目三',
options:[{
number:'A',
describe:'选项A'
},{
number:'B',
describe:'选项B'
},{
number:'C',
describe:'选项C'
},{
number:'D',
describe:'选项D'
},]
},
]
}
},
onLoad(options) {
},
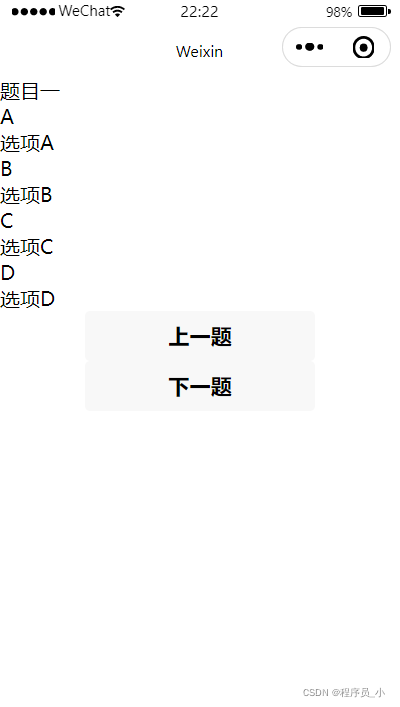
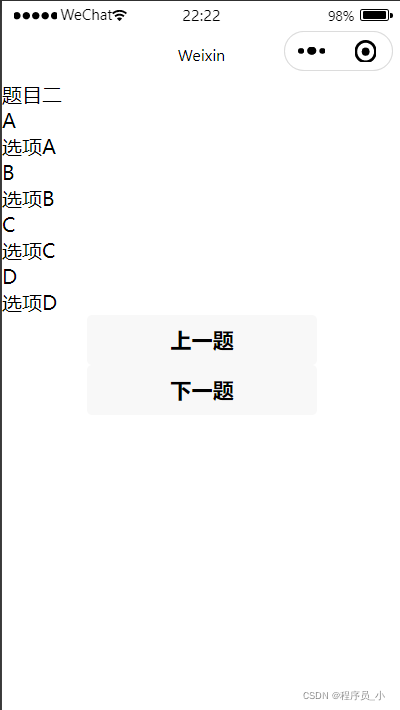
})之后我们需要在页面上渲染,再添加上一题下一题按钮进行题目切换。题目的切换需要添加一个变量,用于记录当前是第几页。通过点击按钮改变index的值,来改变数组subject的下标。
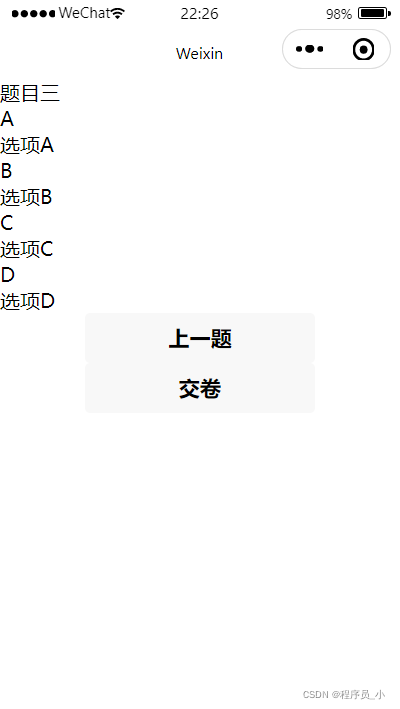
按钮里面通过index的值来控制按钮的显示第一题时,上一题按钮无法点击,最后一页显示交卷按钮。
data里面新增数据
index:0, //用于记录当前是第几页.wxml页面
<view >
  <view>{{answer.subject[index].title}}
  </view>
  <view class="options">
    <view>{{answer.subject[index].options[0].number}}</view>
    <view>{{answer.subject[index].options[0].describe}}</view>
  </view>
  <view>
    <view>{{answer.subject[index].options[1].number}}</view>
    <view> {{answer.subject[index].options[1].describe}}</view>
  </view>
  <view>
    <view> {{answer.subject[index].options[2].number}} </view>
    <view>{{answer.subject[index].options[2].describe}} </view>
  </view>
  <view>
    <view> {{answer.subject[index].options[3].number}} </view>
    <view> {{answer.subject[index].options[3].describe}} </view>
  </view>
</view>
<view>
  <button bindtap="last" wx:if='{{index == 0}}' disabled="false">上一题</button>
  <button bindtap="last" wx:else>上一题</button>
</view>
<view>
  <button wx:if="{{index==answer.subject.length-1}}" class="top-sure">交卷</button>
  <button bindtap="next" wx:else>下一题</button>
</view>
两个按钮的点击事件
 next(){          //上一题
    if(this.data.index<this.data.answer.subject.length-1){
      this.setData({
        index:this.data.index+1
      })
    }
  },
  last(){       //下一题
    if(this.data.index>0){
      this.setData({
        index:this.data.index-1
      })
    }
  }
当前页面显示效果,按钮可以实现题目切换
交卷按钮的点击事件,会有弹窗提示,把答案发送过去之后会跳转页面。
ok: function () {          //提交试卷
    wx.showModal({
      title: '提示',
      content: '确定要提交试卷吗?',
      success: function (res) {
        if (res.confirm) {
          console.log('用户点击确定')
            // request.sendAnser(this,optionsid,function(res){
            // wx.reLaunch({
           // })
       wx.hideLoading()
       //)}
        } else {
          console.log('用户点击取消')
        }
      }
    })
  },
接下里需要做的就是选项的点击效果。点击之后选项颜色改变,页面保留被选择的选项。需要一个数组记录每一页被点击的选项。给每一个选项绑定一个不同的id。style="background-color: {{bcA}};"这里通过变量控制选项显示效果。 bindtap="btnOpClick"绑定点击事件。
大概就是这样,放在选项的外层view里面。
 <view class="options" id="0" bindtap="btnOpClick" style="background-color: {{bcA}};" data-options="{{options[0]}}">
    <view >{{answer.subject[index].options[0].number}}</view>
    <view>{{answer.subject[index].options[0].describe}}</view>
  </view>
data里面的数据
 optionsid:[],//用于记录每一页的选项
    bc_right: '#98FB98',   //控制选项的颜色
    bcA: null,
    bcB: null,
    bcC: null,
    bcD: null,
选项点击事件,当一个选项被选中后其余选项颜色为null。这里我定义了一个函数用来改变选项的颜色。因为这个功能需要多次使用,所以这里把他单独写成一个函数。
btnOpClick: function(e){        //点击选项
    var select=parseInt(e.currentTarget.id )  //通过e.currentTarget.id获取到选项的id
    this.change(select)
  },

  change(e){          //控制选项的点击效果
    var index=this.data.index
    if (e == 0) {
      this.setData({
        bcA: this.data.bc_right ,
        bcB: null,
        bcC: null,
        bcD: null,
      });
      this.data.optionsid[index] = 0
  }
  else if (e == 1) {
      this.setData({
        bcB: this.data.bc_right ,
        bcA: null,
        bcC: null,
        bcD: null,
      });
      this.data.optionsid[index] = 1
  }
  else if (e == 2) {
      this.setData({
        bcC: this.data.bc_right ,
        bcA: null,
        bcB: null,
        bcD: null,
      });
      this.data.optionsid[index] = 2
  }
  else if (e == 3) {
      this.setData({
        bcD: this.data.bc_right ,
        bcA: null,
        bcB: null,
        bcC: null,
      });
      this.data.optionsid[index] =3
  }
  },
之后这里会有个问题,当一个选项被选中之后,其余题目的选项也相当于被选中,这里需要在上一题下一题的点击事件中给所有选项的颜色变量赋null,并通过optionsid这一数组记录的数据实现选项颜色的变化。
next(){          //上一题
    if(this.data.index<this.data.answer.subject.length-1){
      this.setData({
        index:this.data.index+1,
        bcA: null,
        bcB: null,
        bcC: null,
        bcD: null,
      })
      this.change(this.data.optionsid[this.data.index])
    }
  },
  last(){       //下一题
    if(this.data.index>0){
      this.setData({
        index:this.data.index-1,
        bcA: null,
        bcB: null,
        bcC: null,
        bcD: null,
      })
      this.change(this.data.optionsid[this.data.index])
    }
  }
还有一点就是微信小程序里面想要修改button的样式需要在button标签里面进行修改。
之后我们还可以加一个倒计时,时间结束自动提交试卷,这里需要后台给我们一个数据。倒计时功能这里用到延时函数。这里可能有些绕,首先定义一个setTimeout函数。之后在这个函数里面写一个延时函数setTimeout,延时函数里面再调用setTimeout。延时函数设置的是一秒之后执行。这样通过不断的调用自己,每秒钟执行一次。
setTimeout(){        //时间倒计时
    setTimeout(()=>{
     this.setTimeout();
    }, 1000)
  },
之后我假定了一个数据timeLong用来表示考试时长。parseInt()用来获取整数,else里面的this。admit()方法是时间到了之后自动提交答案。
 setTimeout(){        //时间倒计时
    setTimeout(()=>{
      if(this.data.answer.timeLong>=0){
      var time=this.data.answer.timeLong
      var hour=parseInt(time/3600);
      var min=parseInt((time%3600)/60)
      var sec=(time%3600)%60
      this.data.answer.timeLong=this.data.answer.timeLong-1   //每执行一次时间减一

      if(hour<1){
        this.setData({
          time:min+':'+sec,
        })
           if(min<1){
            this.setData({
              time:''+sec,
            })
           }
      }else{
        this.setData({
          time:hour+':'+min+':'+sec,
        })
      }
      this.setTimeout();
    }else{
        this.admit()
    }
    }, 1000)
  },
自动提交答案,wx.showLoading这是微信小程序提供的弹窗方法。这个时候可以在发送请求成功之后调用wx.hideLoading()来隐藏弹窗。我这里是在外部写了一个封装好了发送请求的方法,然后导入进来直接调用的。
admit(){          //考试结束自动提交试卷
    wx.showLoading({
      title: '提交中...',
      icon: 'loading',
    })
    // request.sendAnser(this,optionsid,function(res){
      // wx.reLaunch({
      //
      // })
       wx.hideLoading()
  //)}
  },
动态修改标题,在页面加载时就显示,需要在onLoad函数中进行调用。之后在上一题下一题点击事件中,也要调用这个函数,将index的值传入进来。
setTitle:function(id){   //动态修改标题
    var length=this.data.answer.subject.length;  //获取总共的题目数量
    var id=id+1;
    let a=id+'/'+length
    wx.setNavigationBarTitle({
      title: a
   })
  },
接下来我把全部的代码附上
js文件的
Page({

  data: {
    index:0, //用于记录当前是第几页
    optionsid:[],//用于记录每一页的选项
    time:null,
    bc_right: '#98FB98',   //控制选项的颜色
    bcA: null,
    bcB: null,
    bcC: null,
    bcD: null,
    answer:{
      timeLong:18000, //考试
      subject:[    //数组用来存放所有的题目
        {
          title:'题目一',
          options:[{
            number:'A',
            describe:'选项A'
          },{
            number:'B',
            describe:'选项B'
          },{
            number:'C',
            describe:'选项C'
          },{
            number:'D',
            describe:'选项D'
          },]
        }, {
          title:'题目二',
          options:[{
            number:'A',
            describe:'选项A'
          },{
            number:'B',
            describe:'选项B'
          },{
            number:'C',
            describe:'选项C'
          },{
            number:'D',
            describe:'选项D'
          },]
        }, {
          title:'题目三',
          options:[{
            number:'A',
            describe:'选项A'
          },{
            number:'B',
            describe:'选项B'
          },{
            number:'C',
            describe:'选项C'
          },{
            number:'D',
            describe:'选项D'
          },]
        },
      ]
    }
  },

  onLoad(options) {
   this.setTitle(this.data.index)
   this.setTimeout()
  },

  btnOpClick: function(e){        //点击选项
    var select=parseInt(e.currentTarget.id )
    this.change(select)
  },

  change(e){          //控制选项的点击效果
    var index=this.data.index
    if (e == 0) {
      this.setData({
        bcA: this.data.bc_right ,
        bcB: null,
        bcC: null,
        bcD: null,
      });
      this.data.optionsid[index] = 0
  }
  else if (e == 1) {
      this.setData({
        bcB: this.data.bc_right ,
        bcA: null,
        bcC: null,
        bcD: null,
      });
      this.data.optionsid[index] = 1
  }
  else if (e == 2) {
      this.setData({
        bcC: this.data.bc_right ,
        bcA: null,
        bcB: null,
        bcD: null,
      });
      this.data.optionsid[index] = 2
  }
  else if (e == 3) {
      this.setData({
        bcD: this.data.bc_right ,
        bcA: null,
        bcB: null,
        bcC: null,
      });
      this.data.optionsid[index] =3
  }
  },
  next(){          //上一题
    if(this.data.index<this.data.answer.subject.length-1){
      this.setData({
        index:this.data.index+1,
        bcA: null,
        bcB: null,
        bcC: null,
        bcD: null,
      })
      this.change(this.data.optionsid[this.data.index])
      this.setTitle(this.data.index)
    }
  },
  last(){       //下一题
    if(this.data.index>0){
      this.setData({
        index:this.data.index-1,
        bcA: null,
        bcB: null,
        bcC: null,
        bcD: null,
      })
      this.change(this.data.optionsid[this.data.index])
      this.setTitle(this.data.index)
    }
  },
  ok: function () {          //提交试卷
    wx.showModal({
      title: '提示',
      content: '确定要提交试卷吗?',
      success: function (res) {
        if (res.confirm) {
          console.log('用户点击确定')
            // request.sendAnser(this,optionsid,function(res){
            // wx.reLaunch({
           // })
       wx.hideLoading()
       //)}
        } else {
          console.log('用户点击取消')
        }
      }
    })
  },
  setTimeout(){        //时间倒计时
    setTimeout(()=>{
      if(this.data.answer.timeLong>=0){
      var time=this.data.answer.timeLong
      var hour=parseInt(time/3600);
      var min=parseInt((time%3600)/60)
      var sec=(time%3600)%60
      this.data.answer.timeLong=this.data.answer.timeLong-1   //每执行一次时间减一

      if(hour<1){
        this.setData({
          time:min+':'+sec,
        })
           if(min<1){
            this.setData({
              time:''+sec,
            })
           }
      }else{
        this.setData({
          time:hour+':'+min+':'+sec,
        })
      }
      this.setTimeout();
    }else{
        this.admit()
    }
    }, 1000)
  },
  admit(){          //考试结束自动提交试卷
    wx.showLoading({
      title: '提交中...',
      icon: 'loading',
    })
    // request.sendAnser(this,optionsid,function(res){
      // wx.reLaunch({
      //
      // })
       wx.hideLoading()
  //)}
  },
  setTitle:function(id){   //动态修改标题
    var length=this.data.answer.subject.length;
    var id=id+1;
    let a=id+'/'+length
    wx.setNavigationBarTitle({
      title: a
   })
  },

})
wxml页面的
<view>{{time}}</view>
<view>
  <view>{{answer.subject[index].title}}
  </view>
  <view class="options" id="0" bindtap="btnOpClick" style="background-color: {{bcA}};">
    <view>{{answer.subject[index].options[0].number}}</view>
    <view>{{answer.subject[index].options[0].describe}}</view>
  </view>
  <view class="options" id="1" bindtap="btnOpClick" style="background-color: {{bcB}};">
    <view>{{answer.subject[index].options[1].number}}</view>
    <view> {{answer.subject[index].options[1].describe}}</view>
  </view>
  <view class="options" id="2" bindtap="btnOpClick" style="background-color: {{bcC}};">
    <view> {{answer.subject[index].options[2].number}} </view>
    <view>{{answer.subject[index].options[2].describe}} </view>
  </view>
  <view class="options" id="3" bindtap="btnOpClick" style="background-color: {{bcD}};">
    <view> {{answer.subject[index].options[3].number}} </view>
    <view> {{answer.subject[index].options[3].describe}} </view>
  </view>
</view>
<view>
  <button bindtap="last" wx:if='{{index == 0}}' disabled="false">上一题</button>
  <button bindtap="last" wx:else>上一题</button>
</view>
<view>
  <button wx:if="{{index==answer.subject.length-1}}" class="top-sure"  bindtap="ok">交卷</button>
  <button bindtap="next" wx:else>下一题</button>
</view>
如有疑惑请在评论区留言,欢迎大家来讨论交流。
使用带有Rails插件的vim,您可以创建一个迁移文件,然后一次性打开该文件吗?textmate也可以这样吗? 最佳答案 你可以使用rails.vim然后做类似的事情::Rgeneratemigratonadd_foo_to_bar插件将打开迁移生成的文件,这正是您想要的。我不能代表textmate。 关于ruby-使用VimRails,您可以创建一个新的迁移文件并一次性打开它吗?,我们在StackOverflow上找到一个类似的问题: https://sta
我需要从一个View访问多个模型。以前,我的links_controller仅用于提供以不同方式排序的链接资源。现在我想包括一个部分(我假设)显示按分数排序的顶级用户(@users=User.all.sort_by(&:score))我知道我可以将此代码插入每个链接操作并从View访问它,但这似乎不是“ruby方式”,我将需要在不久的将来访问更多模型。这可能会变得很脏,是否有针对这种情况的任何技术?注意事项:我认为我的应用程序正朝着单一格式和动态页面内容的方向发展,本质上是一个典型的网络应用程序。我知道before_filter但考虑到我希望应用程序进入的方向,这似乎很麻烦。最终从任何
我想要做的是有2个不同的Controller,client和test_client。客户端Controller已经构建,我想创建一个test_clientController,我可以使用它来玩弄客户端的UI并根据需要进行调整。我主要是想绕过我在客户端中内置的验证及其对加载数据的管理Controller的依赖。所以我希望test_clientController加载示例数据集,然后呈现客户端Controller的索引View,以便我可以调整客户端UI。就是这样。我在test_clients索引方法中试过这个:classTestClientdefindexrender:template=>
我想用ruby编写一个小的命令行实用程序并将其作为gem分发。我知道安装后,Guard、Sass和Thor等某些gem可以从命令行自行运行。为了让gem像二进制文件一样可用,我需要在我的gemspec中指定什么。 最佳答案 Gem::Specification.newdo|s|...s.executable='name_of_executable'...endhttp://docs.rubygems.org/read/chapter/20 关于ruby-在Ruby中编写命令行实用程序
如果您尝试在Ruby中的nil对象上调用方法,则会出现NoMethodError异常并显示消息:"undefinedmethod‘...’fornil:NilClass"然而,有一个tryRails中的方法,如果它被发送到一个nil对象,它只返回nil:require'rubygems'require'active_support/all'nil.try(:nonexisting_method)#noNoMethodErrorexceptionanymore那么try如何在内部工作以防止该异常? 最佳答案 像Ruby中的所有其他对象
关闭。这个问题需要detailsorclarity.它目前不接受答案。想改进这个问题吗?通过editingthispost添加细节并澄清问题.关闭8年前。Improvethisquestion为什么SecureRandom.uuid创建一个唯一的字符串?SecureRandom.uuid#=>"35cb4e30-54e1-49f9-b5ce-4134799eb2c0"SecureRandom.uuid方法创建的字符串从不重复?
我有一个正在构建的应用程序,我需要一个模型来创建另一个模型的实例。我希望每辆车都有4个轮胎。汽车模型classCar轮胎模型classTire但是,在make_tires内部有一个错误,如果我为Tire尝试它,则没有用于创建或新建的activerecord方法。当我检查轮胎时,它没有这些方法。我该如何补救?错误是这样的:未定义的方法'create'forActiveRecord::AttributeMethods::Serialization::Tire::Module我测试了两个环境:测试和开发,它们都因相同的错误而失败。 最佳答案
我想在Ruby中创建一个用于开发目的的极其简单的Web服务器(不,不想使用现成的解决方案)。代码如下:#!/usr/bin/rubyrequire'socket'server=TCPServer.new('127.0.0.1',8080)whileconnection=server.acceptheaders=[]length=0whileline=connection.getsheaders想法是从命令行运行这个脚本,提供另一个脚本,它将在其标准输入上获取请求,并在其标准输出上返回完整的响应。到目前为止一切顺利,但事实证明这真的很脆弱,因为它在第二个请求上中断并出现错误:/usr/b
我想让一个yaml对象引用另一个,如下所示:intro:"Hello,dearuser."registration:$introThanksforregistering!new_message:$introYouhaveanewmessage!上面的语法只是它如何工作的一个例子(这也是它在thiscpanmodule中的工作方式。)我正在使用标准的rubyyaml解析器。这可能吗? 最佳答案 一些yaml对象确实引用了其他对象:irb>require'yaml'#=>trueirb>str="hello"#=>"hello"ir
我的问题的一个例子是体育游戏。一场体育比赛有两支球队,一支主队和一支客队。我的事件记录模型如下:classTeam"Team"has_one:away_team,:class_name=>"Team"end我希望能够通过游戏访问一个团队,例如:Game.find(1).home_team但我收到一个单元化常量错误:Game::team。谁能告诉我我做错了什么?谢谢, 最佳答案 如果Gamehas_one:team那么Rails假设您的teams表有一个game_id列。不过,您想要的是games表有一个team_id列,在这种情况下