这里设计的是一个监测控制智能风扇的APP,可以实时监测当前温度、湿度及下位机的传感器、控制器件的一些状态。
项目创建这里就不过多赘述了!
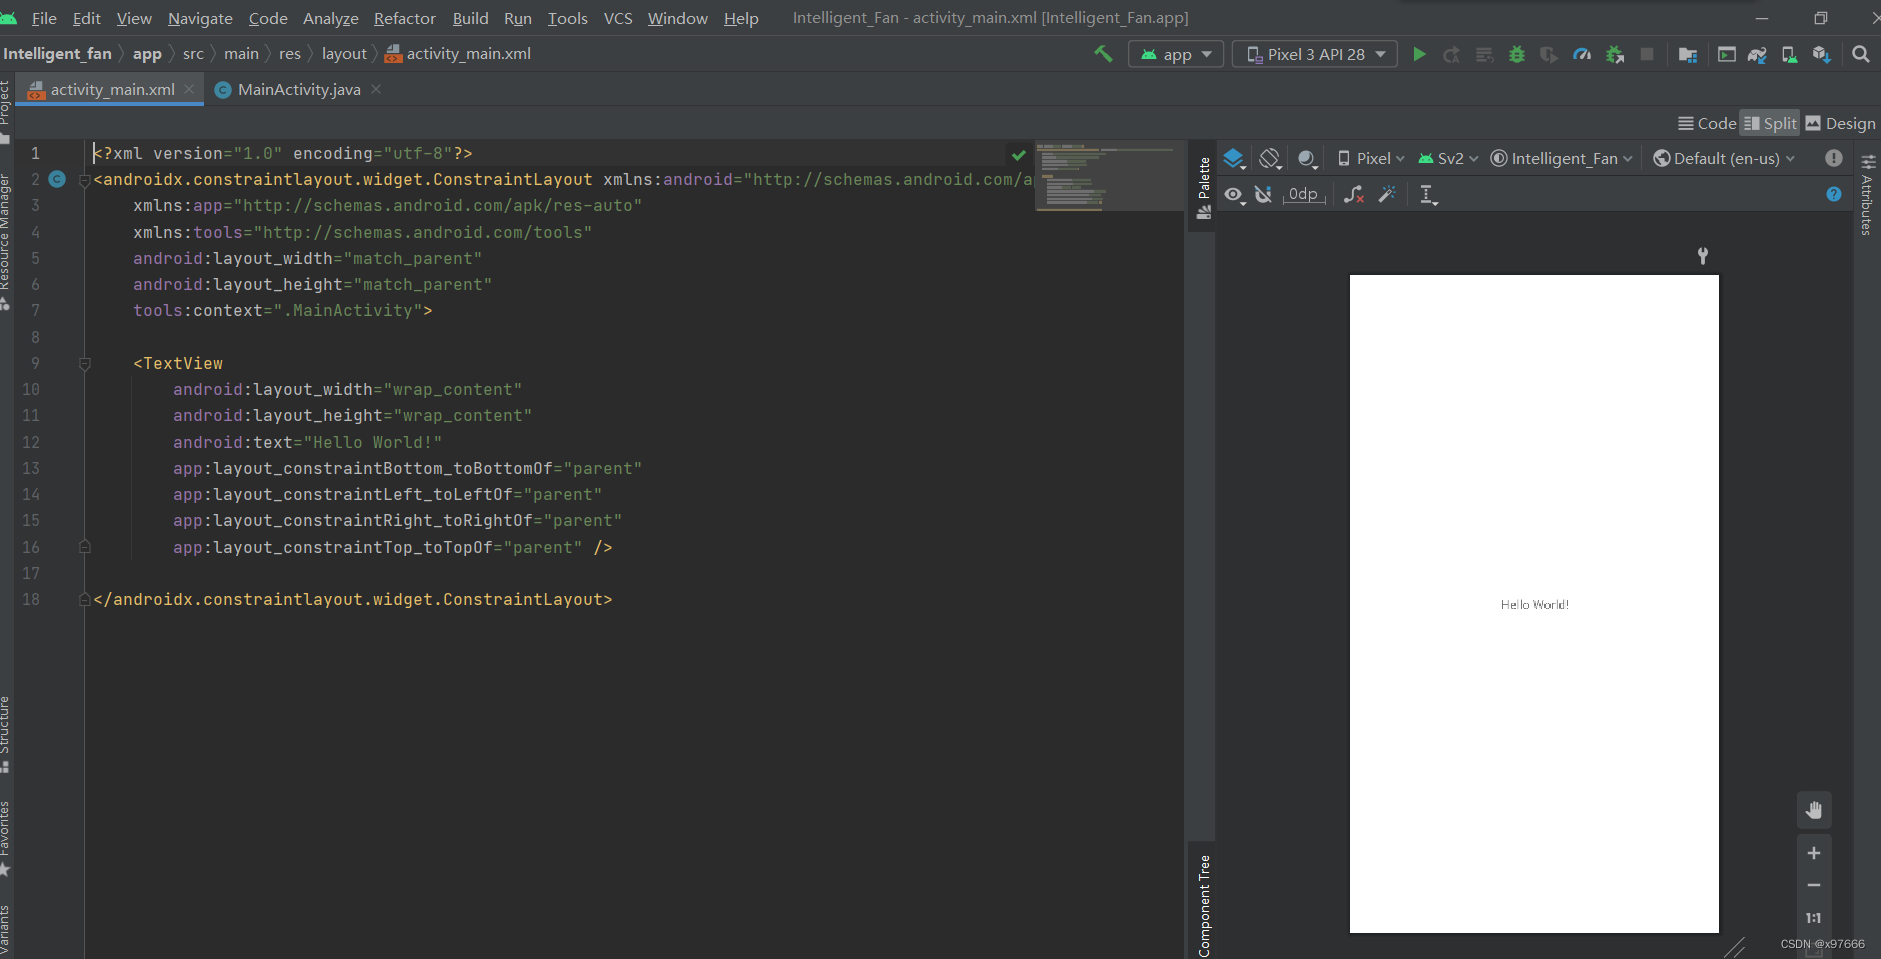
我这里主要是以毕设的需求设计的,所以比较简单;
模拟器界面
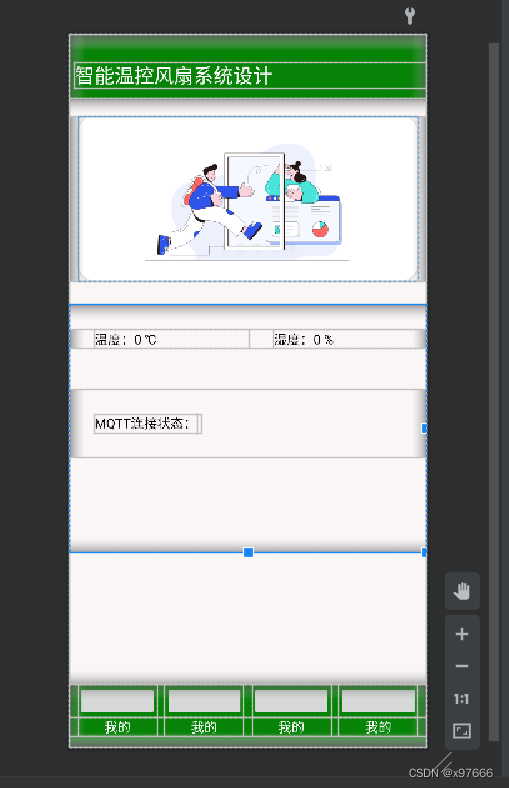
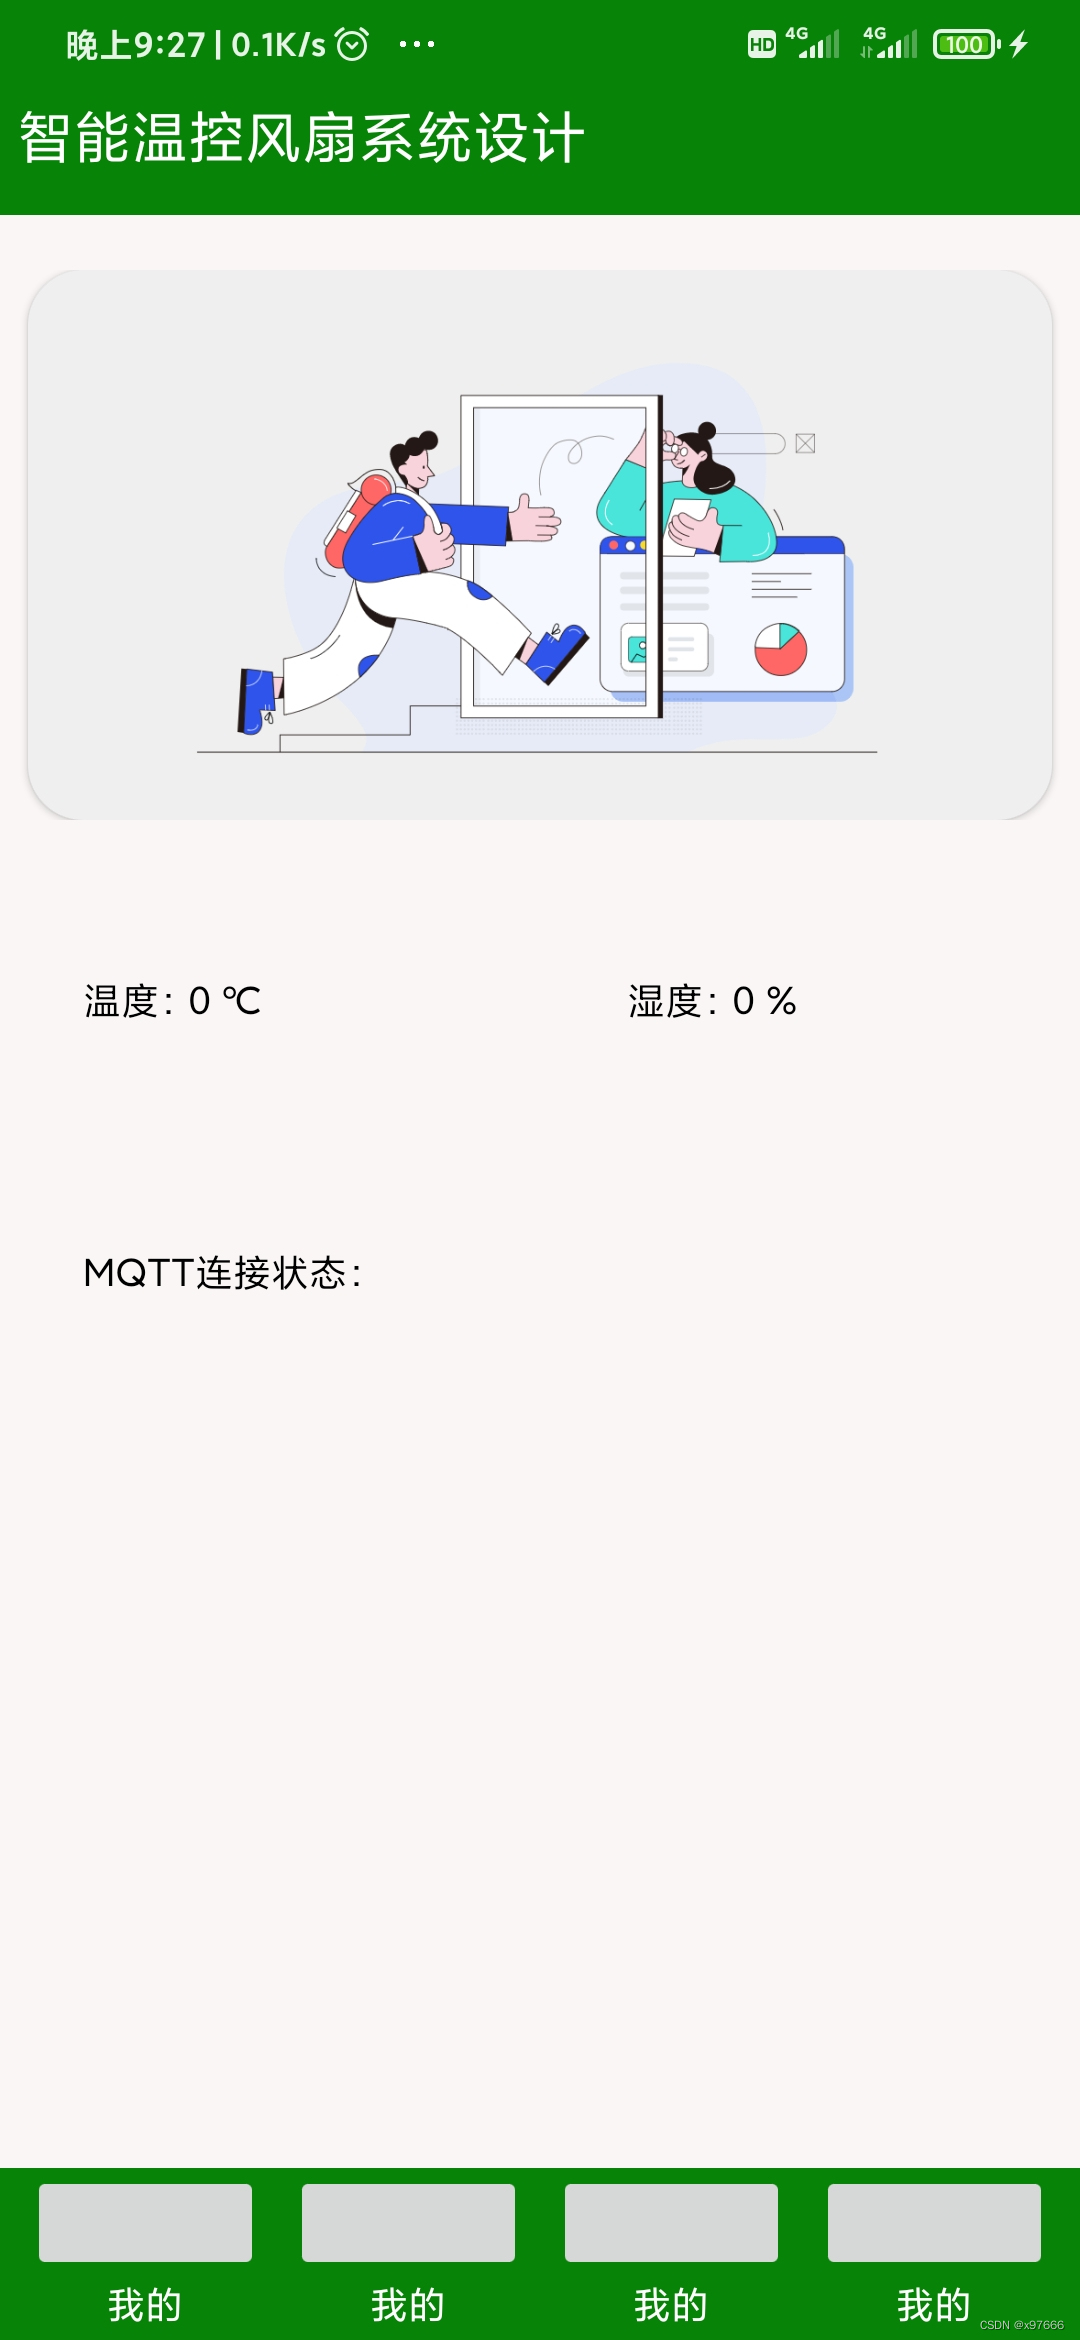
手机app界面
这个显示界面代码相对简单,有需要的可以参考一下,代码如下:
<?xml version="1.0" encoding="utf-8"?>
<LinearLayout xmlns:android="http://schemas.android.com/apk/res/android"
    xmlns:app="http://schemas.android.com/apk/res-auto"
    xmlns:tools="http://schemas.android.com/tools"
    android:layout_width="match_parent"
    android:layout_height="match_parent"
    android:orientation="vertical"
    tools:context=".MainActivity">

    <LinearLayout
        android:layout_width="match_parent"
        android:orientation="vertical"
        android:background="#078307"
        android:layout_height="match_parent">

        <LinearLayout
            android:layout_width="match_parent"
            android:layout_height="78dp">
            <TextView
                android:layout_width="match_parent"
                android:layout_marginTop="10dp"
                android:text="智能温控风扇系统设计"
                android:textSize="24sp"
                android:layout_marginLeft="6dp"
                android:layout_gravity="center"
                android:textColor="@color/white"
                android:layout_height="wrap_content"/>
        </LinearLayout>

        <LinearLayout
            android:layout_width="match_parent"
            android:background="#FAF6F6"
            android:orientation="vertical"
            android:layout_height="710dp">

            <LinearLayout
                android:layout_width="match_parent"
                android:layout_marginTop="20dp"
                android:layout_height="wrap_content">
                <androidx.cardview.widget.CardView
                    android:layout_width="match_parent"
                    android:layout_height="200dp"
                    android:layout_marginLeft="10dp"
                    android:layout_marginRight="10dp"
                    app:cardCornerRadius="20dp">
                    <ImageView
                        android:id="@+id/m_im_1"
                        android:layout_width="wrap_content"
                        android:src="@drawable/img_3"
                        android:layout_height="wrap_content"/>

                </androidx.cardview.widget.CardView>
            </LinearLayout>

            <LinearLayout
                android:layout_width="match_parent"
                android:layout_marginTop="30dp"
                android:orientation="vertical"
                android:layout_height="300dp">

                <LinearLayout
                    android:layout_width="match_parent"
                    android:layout_marginTop="30sp"
                    android:orientation="horizontal"
                    android:layout_height="wrap_content">
                    <TextView
                        android:id="@+id/m_temp"
                        android:layout_width="wrap_content"
                        android:text="温度:0 ℃"
                        android:textSize="16sp"
                        android:layout_weight="1"
                        android:textColor="@color/black"
                        android:layout_marginLeft="30dp"
                        android:layout_height="wrap_content"/>
                    <TextView
                        android:id="@+id/m_humi"
                        android:layout_weight="1"
                        android:layout_width="wrap_content"
                        android:text="湿度:0 %"
                        android:textSize="16sp"
                        android:textColor="@color/black"
                        android:layout_marginLeft="30dp"
                        android:layout_height="wrap_content"/>
                </LinearLayout>

                <LinearLayout
                    android:layout_width="match_parent"
                    android:layout_marginTop="50dp"
                    android:padding="30dp"
                    android:layout_height="wrap_content">
                    <TextView
                        android:layout_width="wrap_content"
                        android:text="MQTT连接状态:"
                        android:textColor="@color/black"
                        android:textSize="16sp"
                        android:layout_height="wrap_content"/>
                    <TextView
                        android:id="@+id/m_mqtt"
                        android:layout_width="wrap_content"
                        android:text=" "
                        android:textColor="@color/black"
                        android:textSize="16sp"
                        android:layout_height="wrap_content"/>
                </LinearLayout>

            </LinearLayout>

        </LinearLayout>


        <LinearLayout
            android:layout_width="match_parent"
            android:orientation="vertical"
            android:layout_height="match_parent">

            <LinearLayout
                android:layout_width="match_parent"
                android:layout_height="wrap_content">
                <ImageButton
                    android:layout_width="30dp"
                    android:layout_marginLeft="10dp"
                    android:layout_marginRight="10dp"
                    android:layout_weight="1"
                    android:layout_height="40dp"/>
                <ImageButton
                    android:layout_width="30dp"
                    android:layout_marginRight="10dp"
                    android:layout_weight="1"
                    android:layout_height="40dp"/>
                <ImageButton
                    android:layout_width="30dp"
                    android:layout_marginRight="10dp"
                    android:layout_weight="1"
                    android:layout_height="40dp"/>
                <ImageButton
                    android:layout_width="30dp"
                    android:layout_marginRight="10dp"
                    android:layout_weight="1"
                    android:layout_height="40dp"/>

            </LinearLayout>
            <LinearLayout
                android:layout_width="match_parent"
                android:orientation="horizontal"
                android:layout_height="wrap_content">
                <TextView
                    android:layout_width="wrap_content"
                    android:text="我的"
                    android:gravity="center"
                    android:textSize="16sp"
                    android:layout_weight="1"
                    android:layout_marginLeft="10dp"
                    android:textColor="@color/white"
                    android:layout_height="wrap_content"/>
                <TextView
                    android:layout_width="wrap_content"
                    android:text="我的"
                    android:gravity="center"
                    android:textSize="16sp"
                    android:layout_weight="1"
                    android:layout_marginLeft="10dp"
                    android:textColor="@color/white"
                    android:layout_height="wrap_content"/>
                <TextView
                    android:layout_width="wrap_content"
                    android:text="我的"
                    android:gravity="center"
                    android:textSize="16sp"
                    android:layout_weight="1"
                    android:layout_marginLeft="10dp"
                    android:textColor="@color/white"
                    android:layout_height="wrap_content"/>
                <TextView
                    android:layout_width="wrap_content"
                    android:text="我的"
                    android:gravity="center"
                    android:textSize="16sp"
                    android:layout_weight="1"
                    android:layout_marginRight="10dp"
                    android:layout_marginLeft="10dp"
                    android:textColor="@color/white"
                    android:layout_height="wrap_content"/>

            </LinearLayout>

        </LinearLayout>

    </LinearLayout>

</LinearLayout>
进入正题,开始导入MQTT所需要的jar包:
jar包链接 链接:https://pan.baidu.com/s/1hLt1xiL67dhbJ3v3MKfUlw
提取码:wmmh
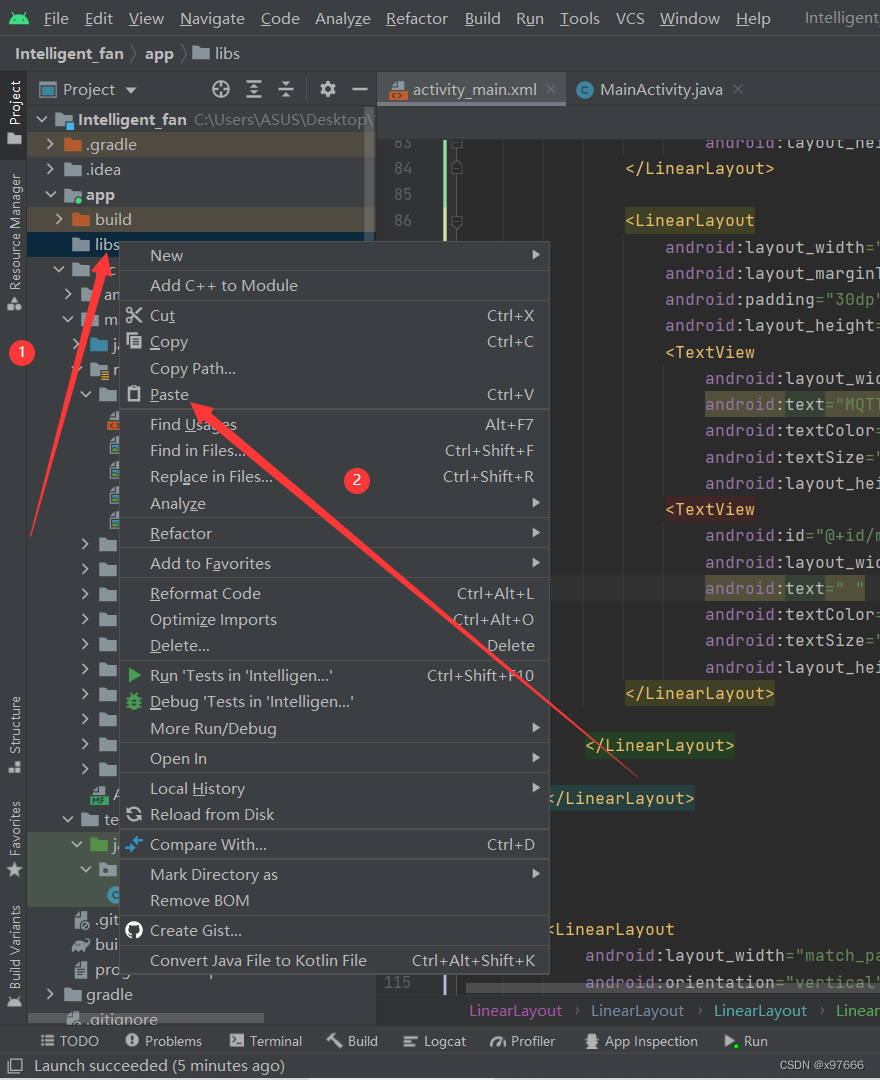
下载jar包后直接复制这个jar包
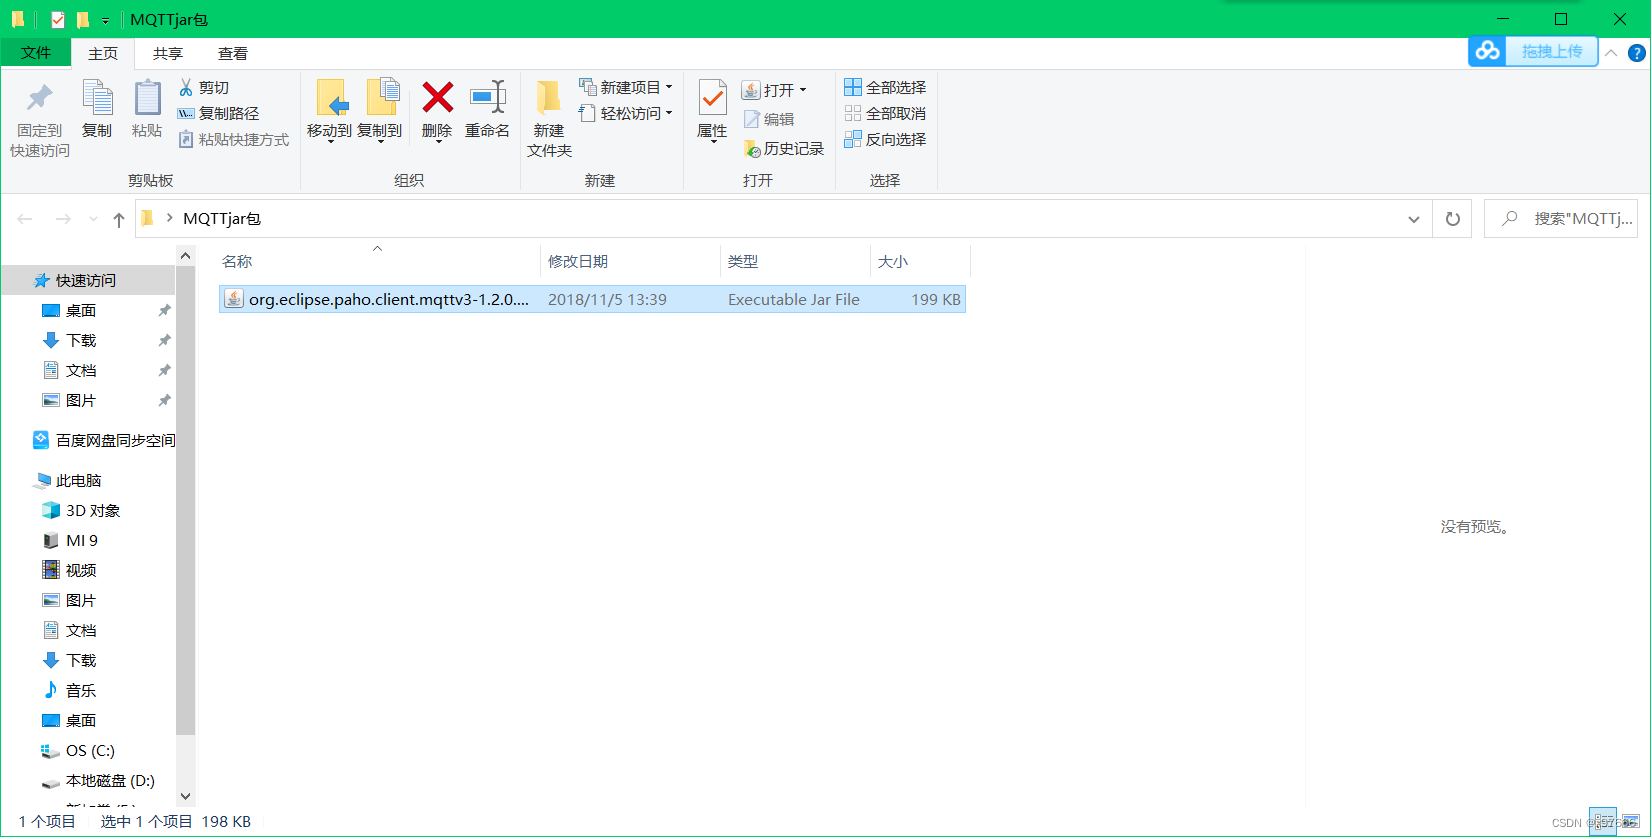
然后给粘贴至libs目录下
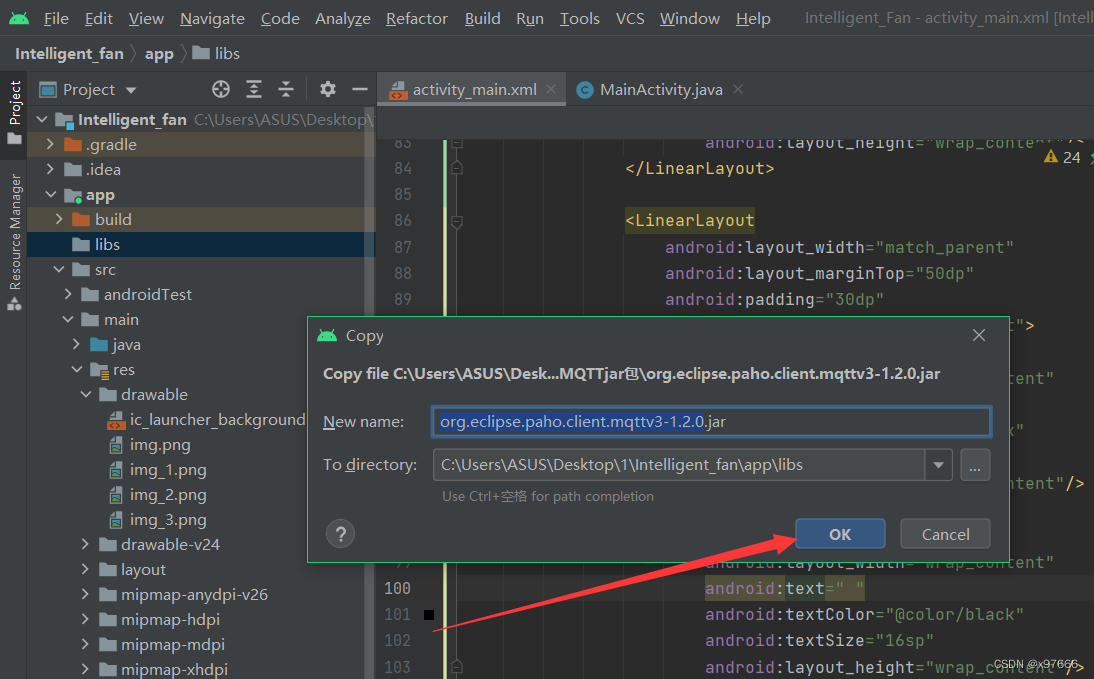
点击OK即可
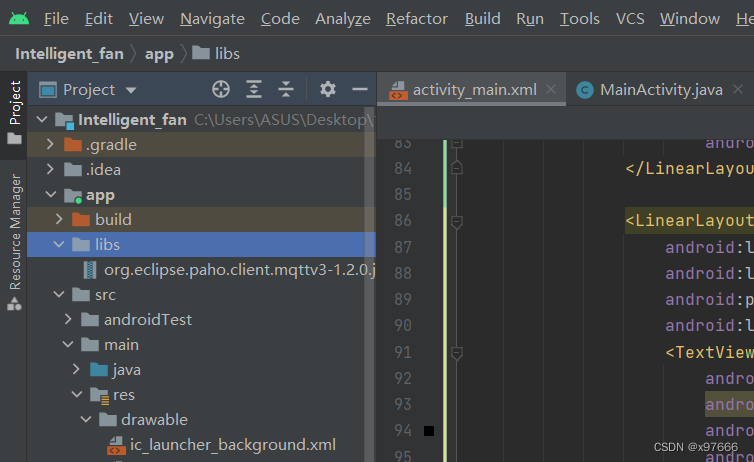
导入
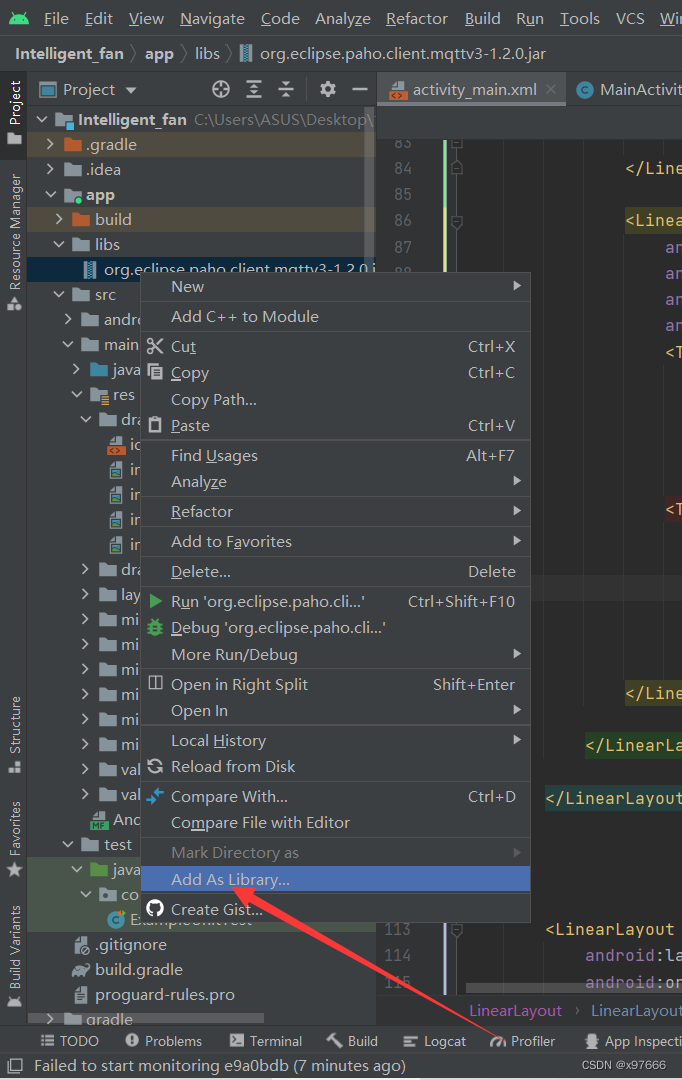
然后鼠标右键给它添加依赖
点击OK
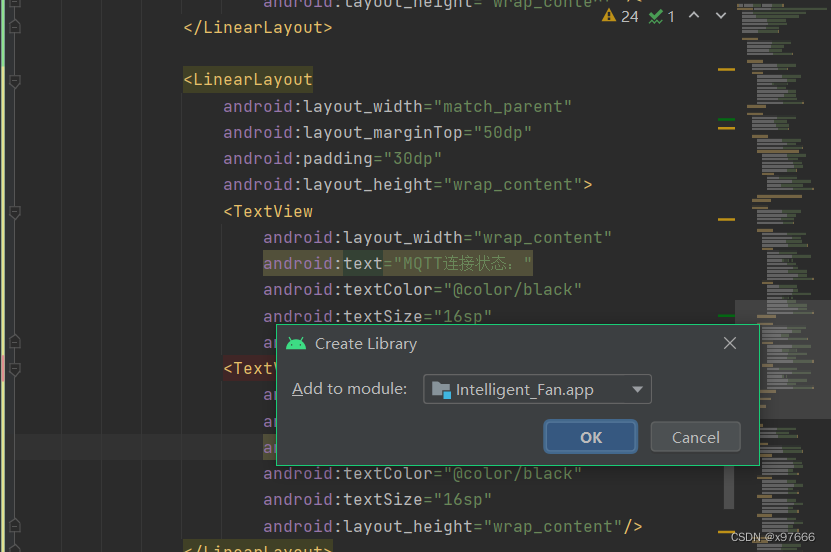
等待构建完成即可.
此时我们来到java代码界面敲MQTT就可以看到很多方法
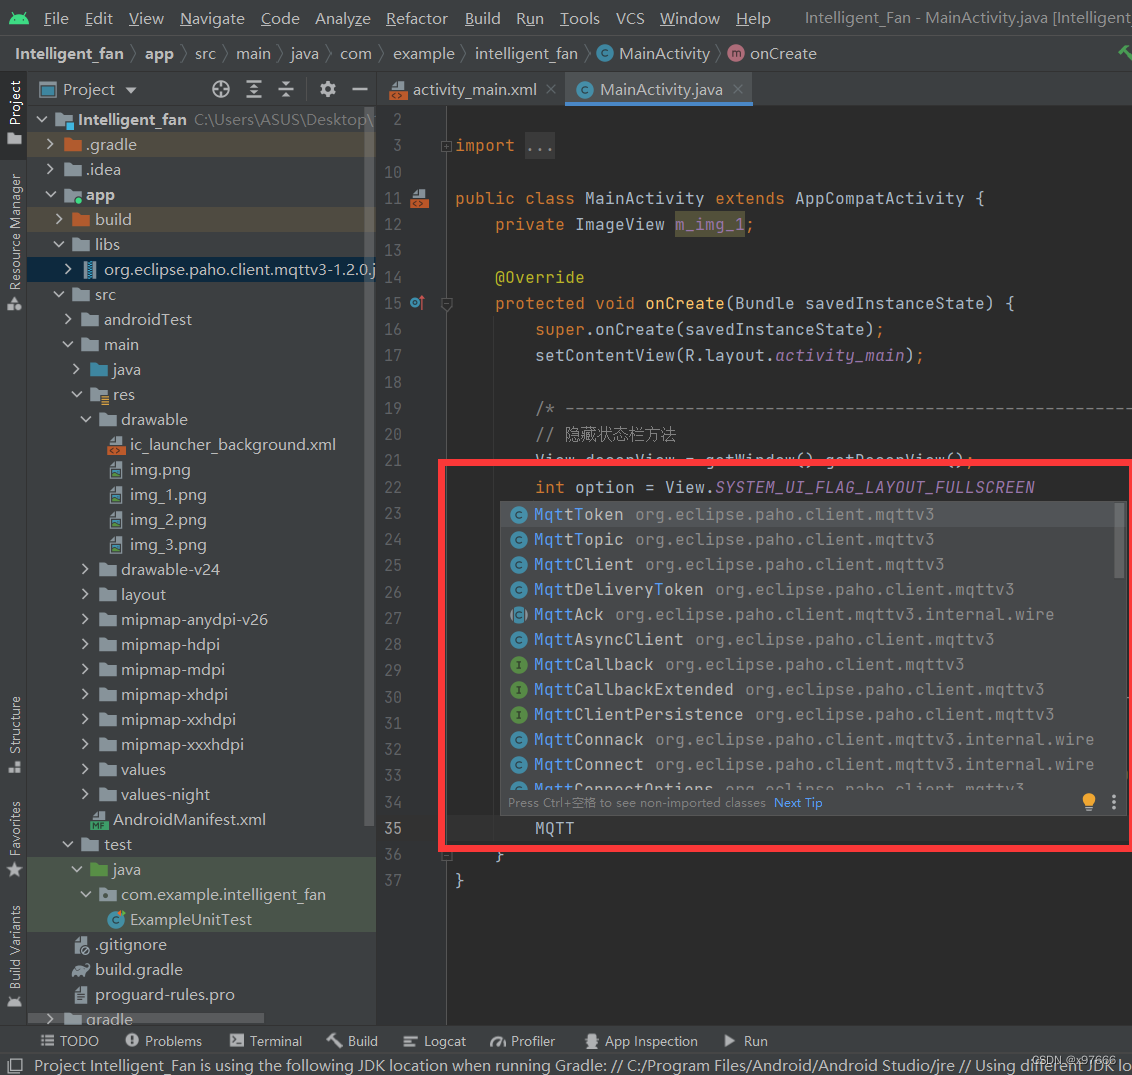
好,到了这一步就可以添加MQTT的配置代码了
在onCreate后面添加下列代码
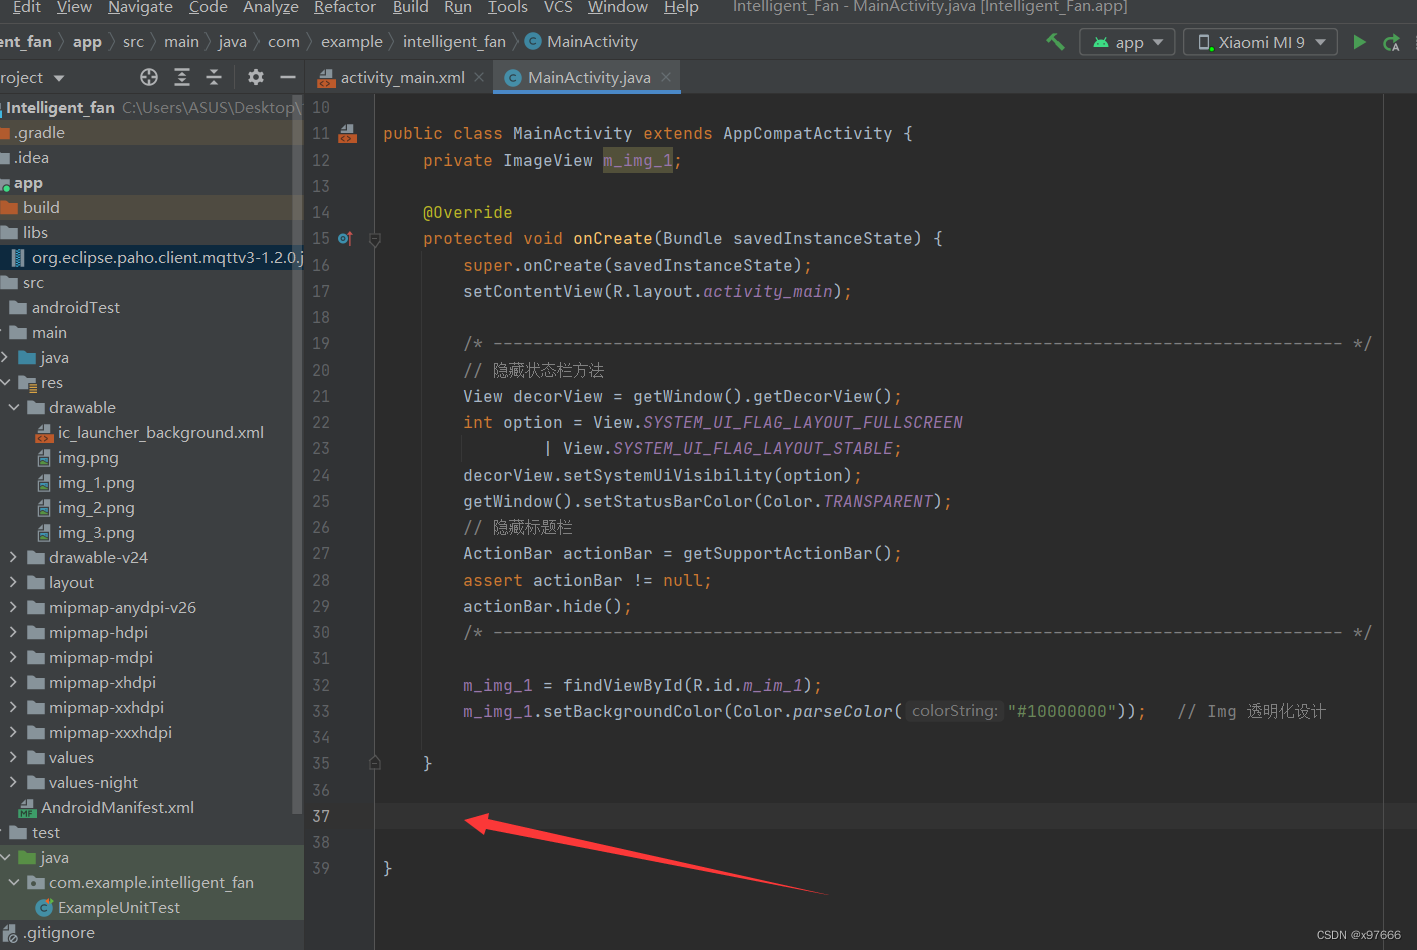
添加代码
// MQTT初始化
    private void Mqtt_init()
    {
        try {
            //host为主机名,test为clientid即连接MQTT的客户端ID,一般以客户端唯一标识符表示,MemoryPersistence设置clientid的保存形式,默认为以内存保存
            client = new MqttClient(host, mqtt_id,
                    new MemoryPersistence());
            //MQTT的连接设置
            MqttConnectOptions options = new MqttConnectOptions();
            //设置是否清空session,这里如果设置为false表示服务器会保留客户端的连接记录,这里设置为true表示每次连接到服务器都以新的身份连接
            options.setCleanSession(false);
            //设置连接的用户名
            options.setUserName(userName);
            //设置连接的密码
            options.setPassword(passWord.toCharArray());
            // 设置超时时间 单位为秒
            options.setConnectionTimeout(10);
            // 设置会话心跳时间 单位为秒 服务器会每隔1.5*20秒的时间向客户端发送个消息判断客户端是否在线,但这个方法并没有重连的机制
            options.setKeepAliveInterval(20);
            //设置回调
            client.setCallback(new MqttCallback() {
                @Override
                public void connectionLost(Throwable cause) {
                    //连接丢失后,一般在这里面进行重连
                    System.out.println("connectionLost----------");
                    //startReconnect();
                }
                @Override
                public void deliveryComplete(IMqttDeliveryToken token) {
                    //publish后会执行到这里
                    System.out.println("deliveryComplete---------"
                            + token.isComplete());
                }
                @Override
                public void messageArrived(String topicName, MqttMessage message)
                        throws Exception {
                    //subscribe后得到的消息会执行到这里面
                    System.out.println("messageArrived----------");
                    Message msg = new Message();
                    msg.what = 3;   //收到消息标志位
//                    msg.obj = topicName + "---" +message.toString();
                    msg.obj = message.toString();
                    handler.sendMessage(msg);    // hander 回传
                }
            });
        } catch (Exception e) {
            e.printStackTrace();
        }
    }

    // MQTT连接函数
    private void Mqtt_connect() {
        new Thread(new Runnable() {
            @Override
            public void run() {
                try {
                    if(!(client.isConnected()) )  //如果还未连接
                    {
                        MqttConnectOptions options = null;
                        client.connect(options);
                        Message msg = new Message();
                        msg.what = 31;
                        handler.sendMessage(msg);
                    }
                } catch (Exception e) {
                    e.printStackTrace();
                    Message msg = new Message();
                    msg.what = 30;
                    handler.sendMessage(msg);
                }
            }
        }).start();
    }

    // MQTT重新连接函数
    private void startReconnect() {
        scheduler = Executors.newSingleThreadScheduledExecutor();
        scheduler.scheduleAtFixedRate(new Runnable() {
            @Override
            public void run() {
                if (!client.isConnected()) {
                    Mqtt_connect();
                }
            }
        }, 0*1000, 10 * 1000, TimeUnit.MILLISECONDS);
    }

    // 订阅函数    (下发任务/命令)
    private void publishmessageplus(String topic,String message2)
    {
        if (client == null || !client.isConnected()) {
            return;
        }
        MqttMessage message = new MqttMessage();
        message.setPayload(message2.getBytes());
        try {
            client.publish(topic,message);
        } catch (MqttException e) {

            e.printStackTrace();
        }
    }
    /* ========================================================================================== */
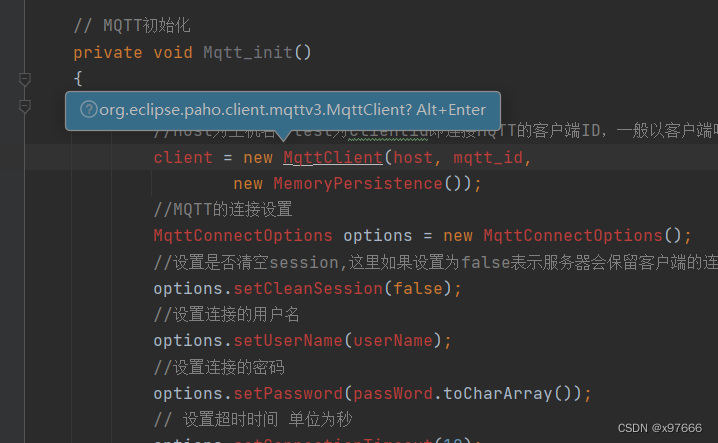
不出意外,这里会出现一堆报红
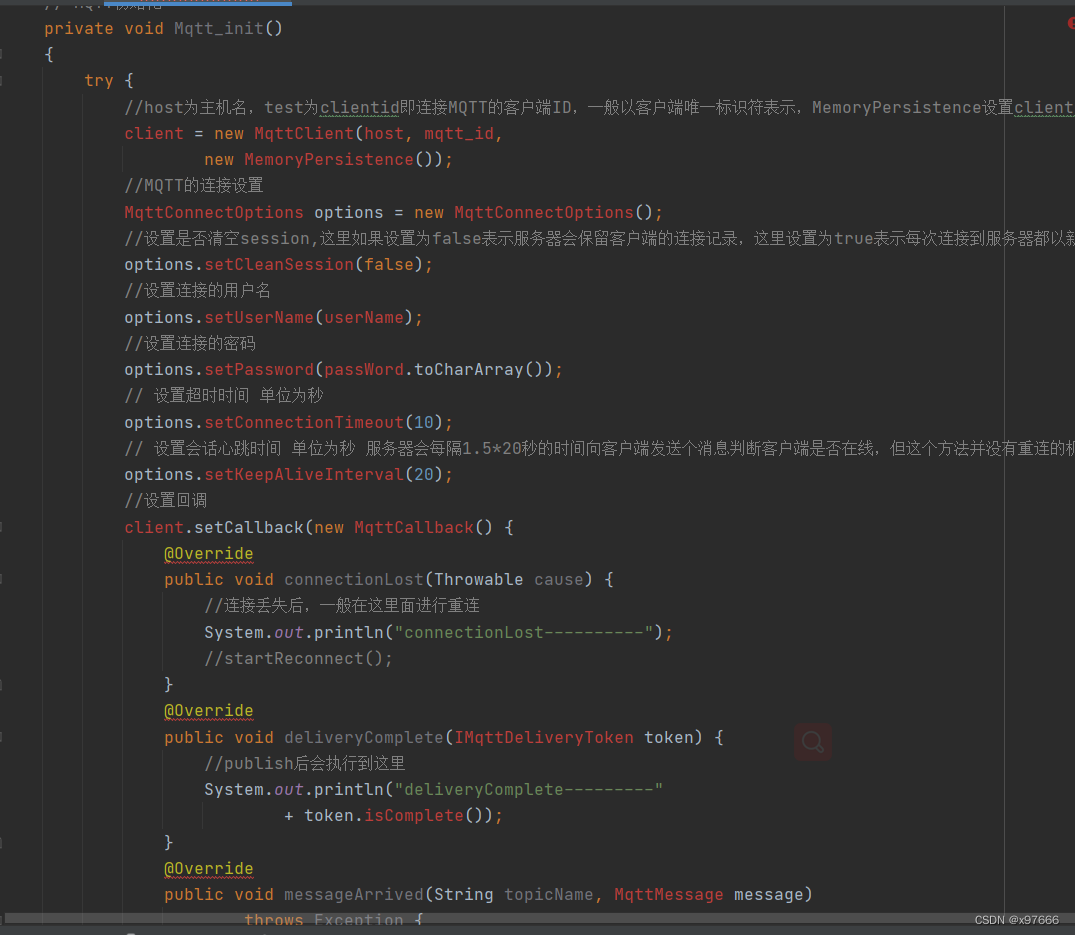
不用慌,这是因为有一些方法还没构建,有一些参数还没声明,我们一步一步来;
光标放置后按alt+Enter后,有部分参数就会自动构建,开干
然后把下列处理代码添加至主函数(这个位置)
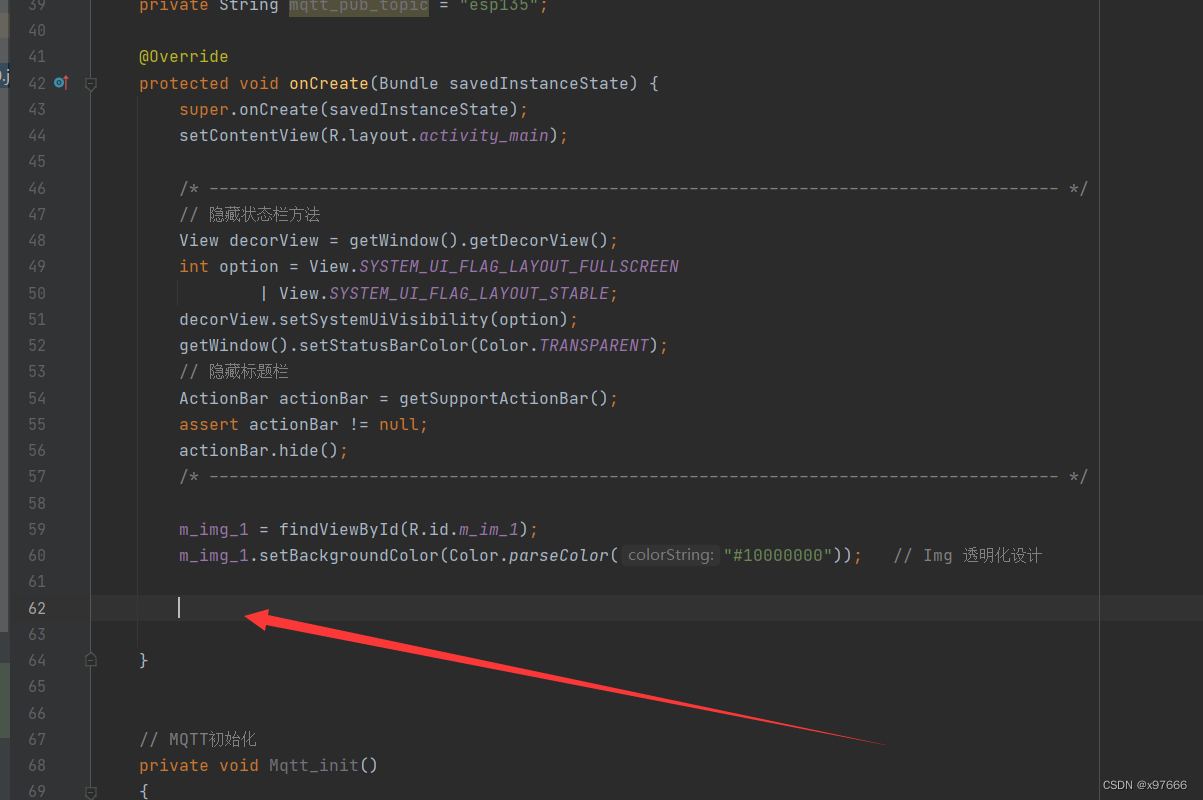
        Mqtt_init();
        startReconnect();

        handler = new Handler(Looper.myLooper()) {
            @SuppressLint("SetTextI18n")
            public void handleMessage(Message msg) {
                super.handleMessage(msg);
                switch (msg.what){
                    case 1: //开机校验更新回传
                        break;
                    case 2:  // 反馈回传

                        break;
                    case 3:  //MQTT 收到消息回传   UTF8Buffer msg=new UTF8Buffer(object.toString());

                        System.out.println(msg.obj.toString());   // 显示MQTT数据
                        break;
                    case 30:  //连接失败
                        Toast.makeText(MainActivity.this,"连接失败" ,Toast.LENGTH_SHORT).show();
                        break;
                    case 31:   //连接成功
                        Toast.makeText(MainActivity.this,"连接成功" ,Toast.LENGTH_SHORT).show();
                        try {
                            client.subscribe(mqtt_sub_topic,1);
                        } catch (MqttException e) {
                            e.printStackTrace();
                        }
                        break;
                    default:
                        break;
                }
            }
        };
        /* -------------------------------------------------------------------------------------- */
好,把这个配置代码加上去
    private ScheduledExecutorService scheduler;
    private MqttClient client;
    private Handler handler;
    private String host = "tcp://114.132.53.92:1883";     // TCP协议
    private String userName = "aixin123456";
    private String passWord = "aixin123456";
    private String mqtt_id = "1353023461";
    private String mqtt_sub_topic = "mqtt135";
    private String mqtt_pub_topic = "esp135";
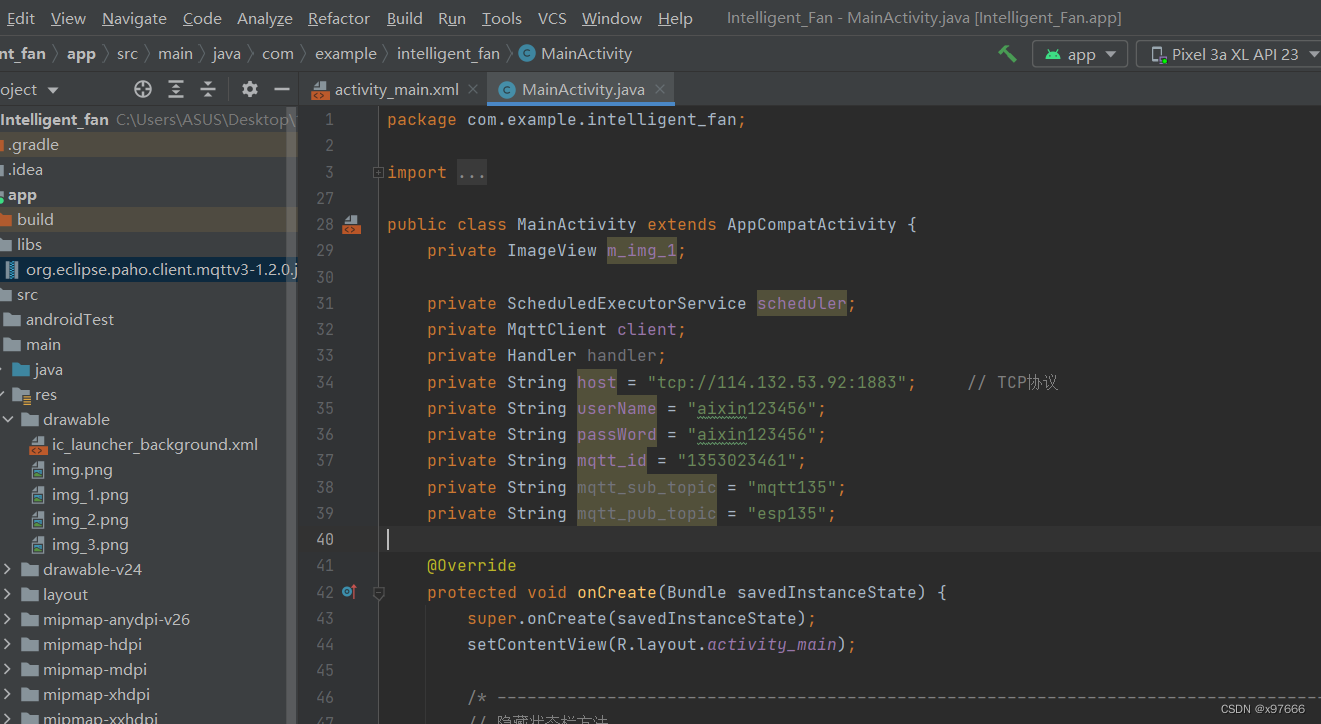
那么到达这一步就不会有报错了! 解决
在事件清单中添加联网权限
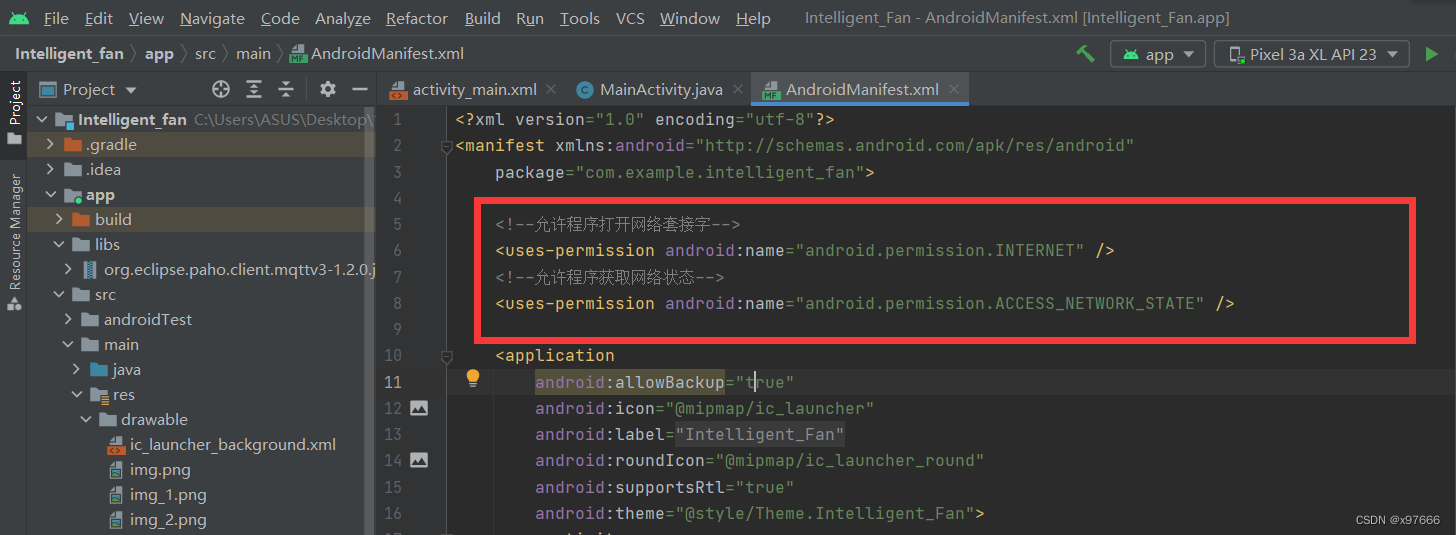
    <!--允许程序打开网络套接字-->
    <uses-permission android:name="android.permission.INTERNET" />
    <!--允许程序获取网络状态-->
    <uses-permission android:name="android.permission.ACCESS_NETWORK_STATE" />
这里的服务器连接的参数注意一定要修改,这里连接服务器地址可以填写我的服务器地址(“tcp://114.132.53.92:1883”),当然也可以使用官方公用的MQTT服务器地址或者用别人的都是可以的;然后就是用户名和密码,一定不要用这里我填写的这个,可以用自己的QQ加上一些英文,或者自定义一些内容都是可以的,注意不要用我这里填写的这个!!! 然后就是订阅和发布号可以随意起,建议不用下面这些!
private String host = "tcp://114.132.53.92:1883"; // TCP协议
private String userName = "aixin123456";
private String passWord = "aixin123456";
private String mqtt_id = "1353023461";
private String mqtt_sub_topic = "mqtt135";
private String mqtt_pub_topic = "esp135";
好!配置完以上步骤之后,咱们就可以下载到模拟机或者真机测试一下了,这里我用的真机测试,不用慌!直接下载运行,弹窗弹出连接成功!完美
真机运行画面
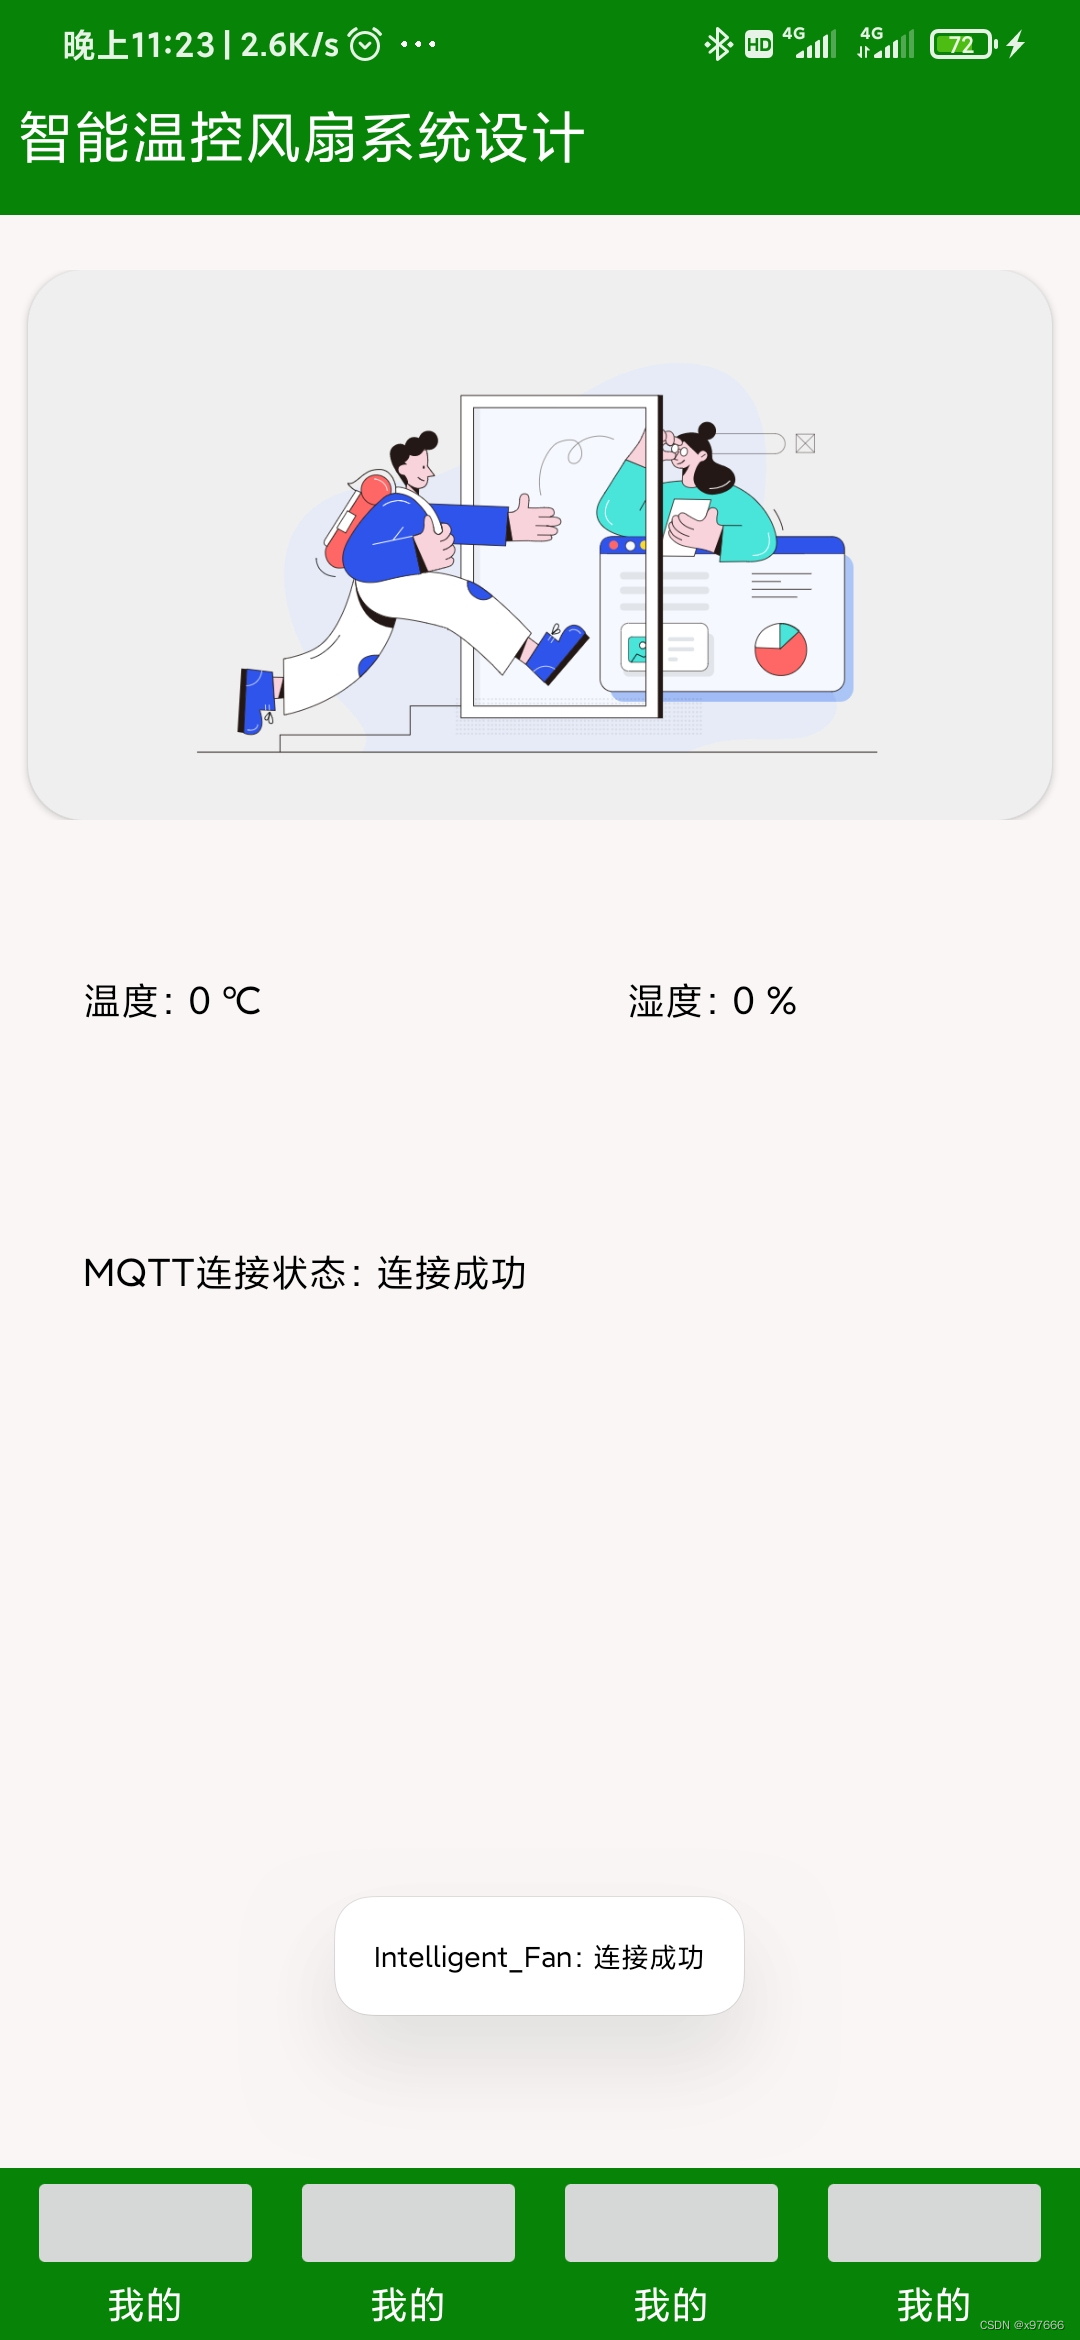
那么到这里我们的app已经成功连接了MQTT服务器了!
这里需要使用到一个测试软件 MQTT.fx
这里不提供软件安装包(我的找不到按转包在哪了),网上有教程,也可以去官网下载
这里的连接服务器地址填114.132.53.92或者是你自己app中连接的地址,端口1883,clientld_ID可以自己填
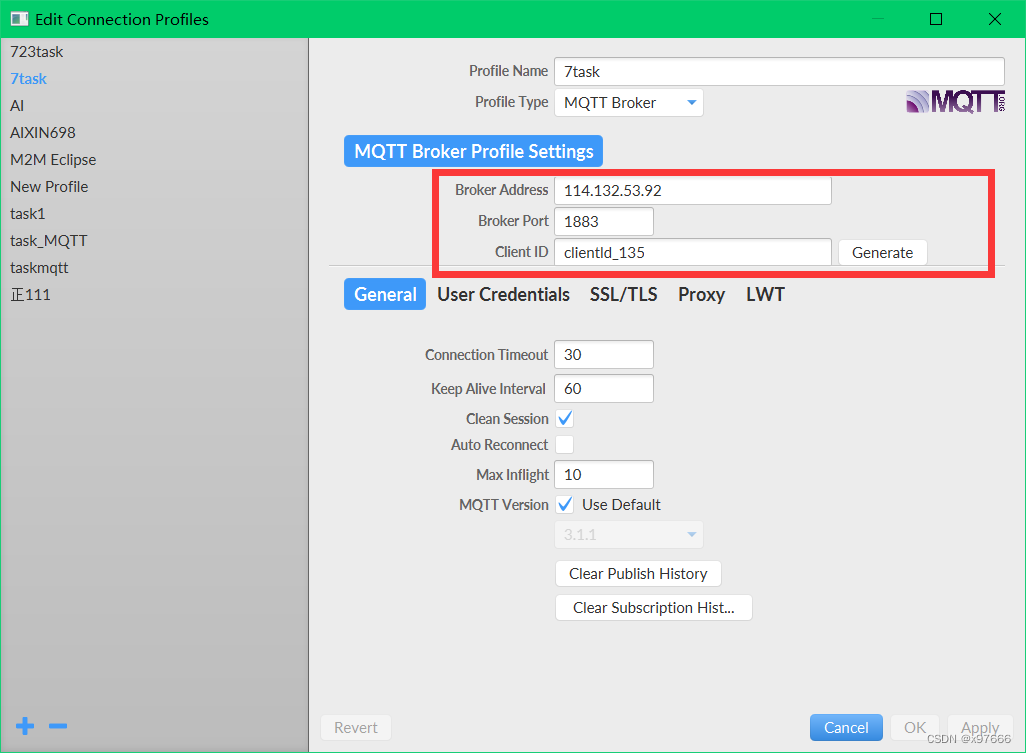
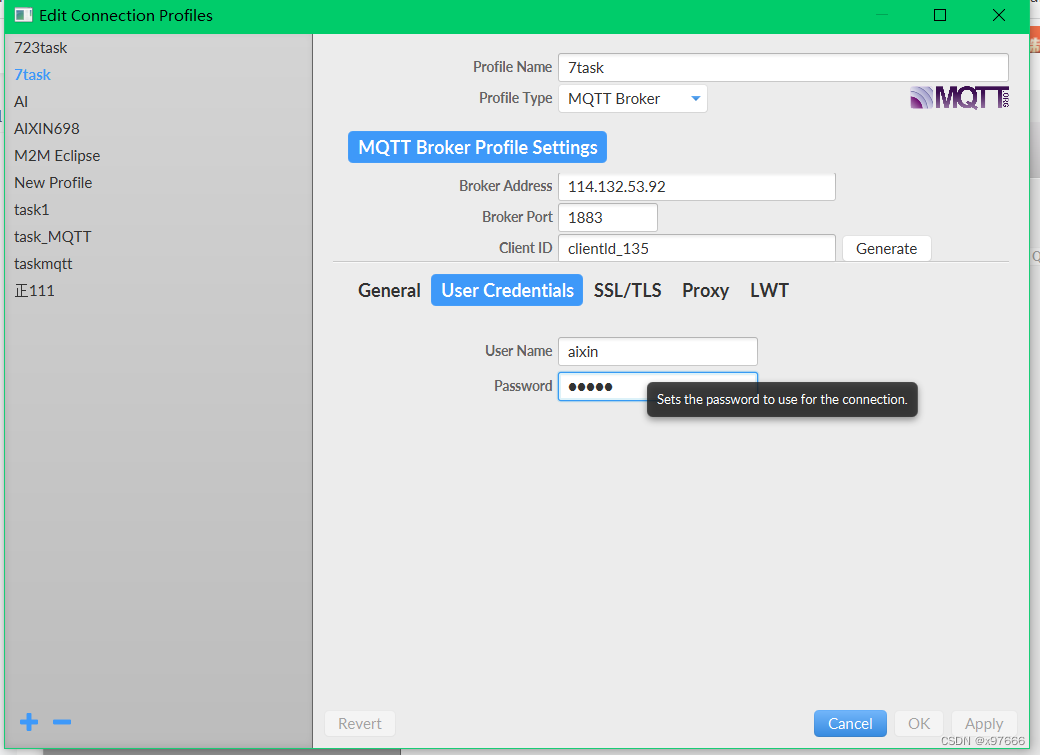
用户名和密码也可以自己填写(需要注意的是,这里填写的这些其实是模拟你下位机的连接用户信息,也就是你STM32通过ESP8266连接MQTT服务器的信息)
点击这里,填写发布号以及填写要发往app中的信息,点击Publish
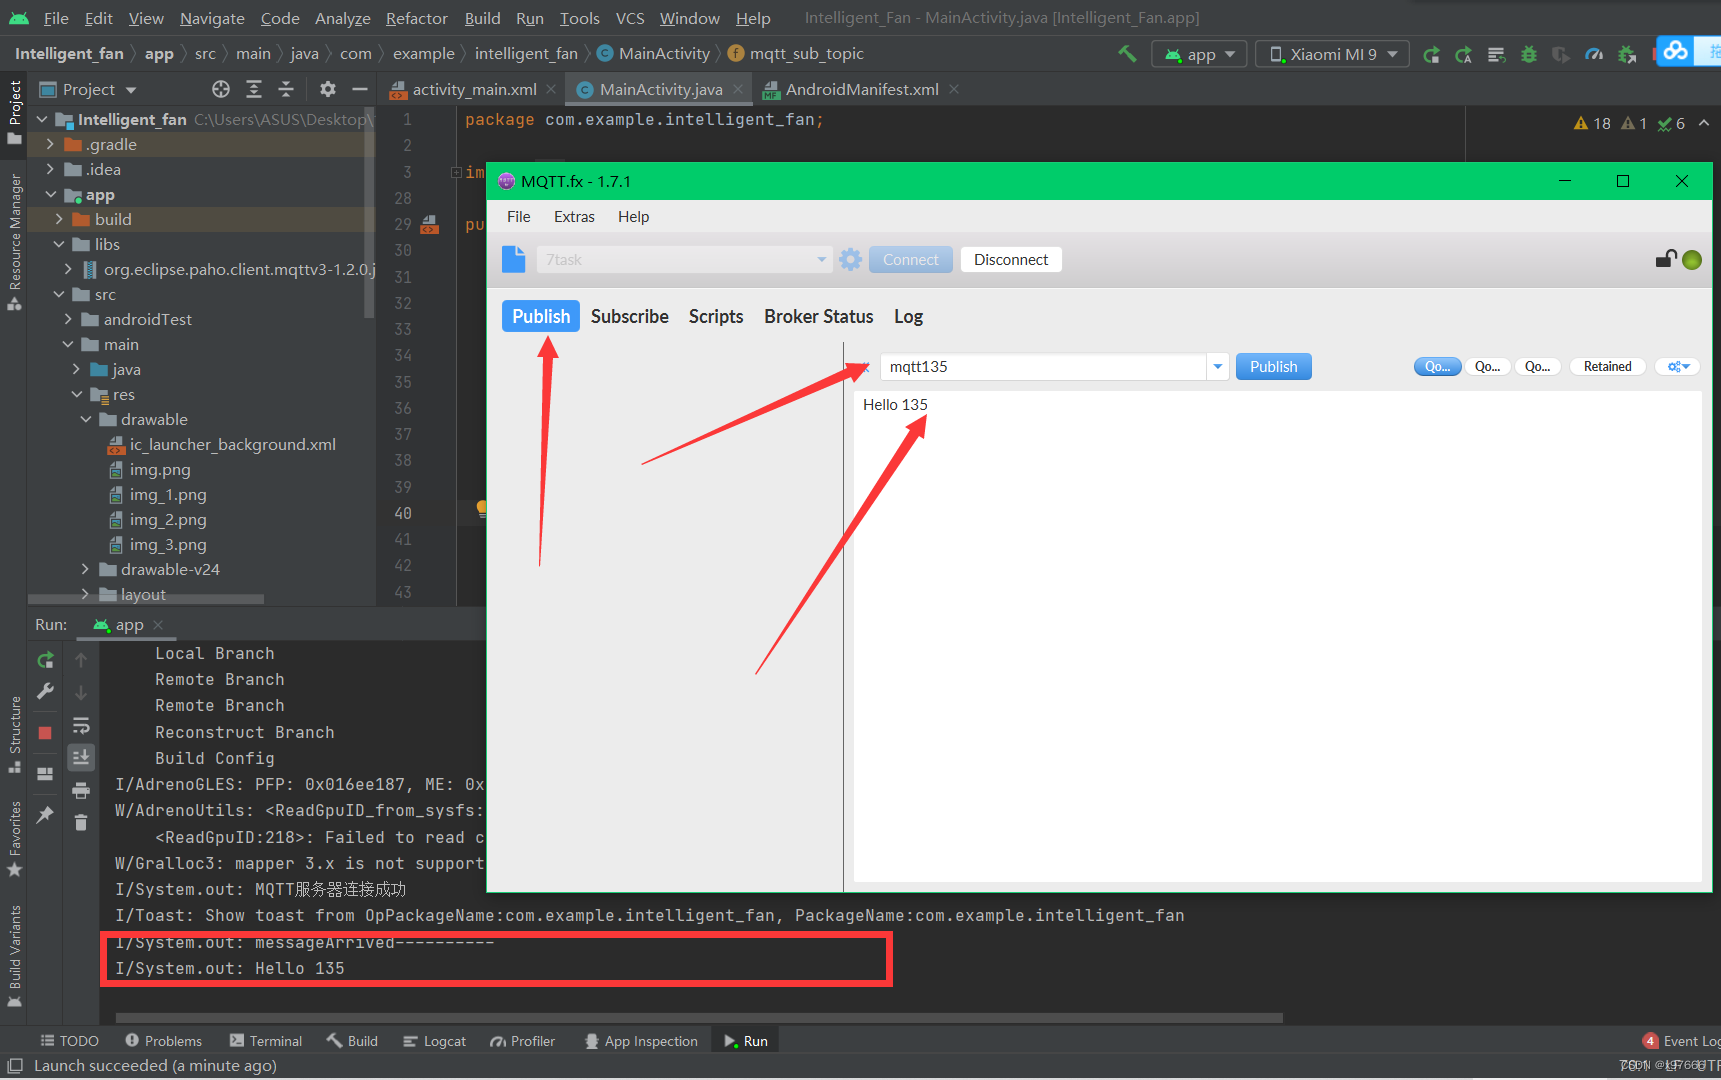
然后就可以看的到Android Studio调试台下的接收到了数据,到了这里是不是就实现了下位机上传数据至MQTT服务器至客户端手机APP
这里再介绍一种简单的Json格式数据处理吧!
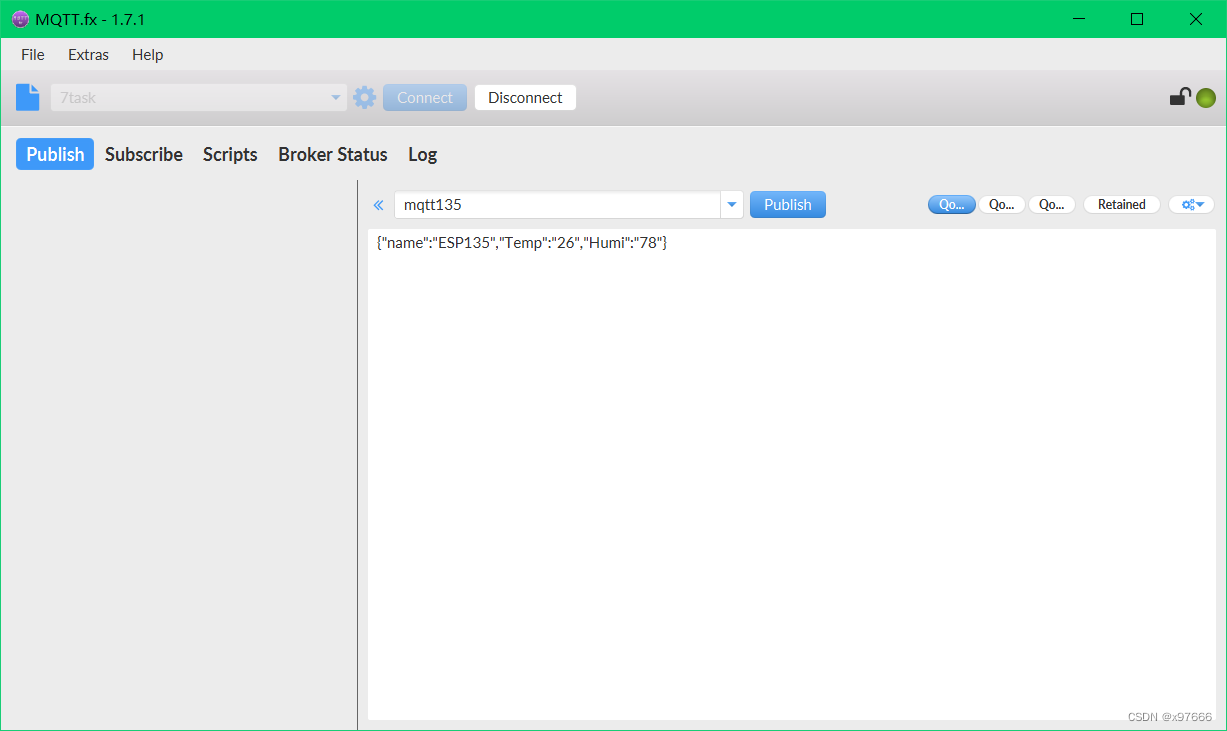
简单的Json数据格式模拟下位机数据
{"name":"ESP135","Temp":"26","Humi":"78"}
这里我们就要在app中添加一个Json数据处理的函数,形参就是需要处理的字符串
    // Json数据解析
    private void parseJsonobj(String jsonobj){
        // 解析json
        try {
            JSONObject jsonObject = new JSONObject(jsonobj);
            String name = jsonObject.getString("name");
            String temp = jsonObject.getString("Temp");
            String humi = jsonObject.getString("Humi");
            m_temp.setText("温度: "+temp+" ℃ ");
            m_humi.setText("湿度: "+humi+" % ");
        } catch (JSONException e) {
            e.printStackTrace();
        }
    }
app中接收到的数据
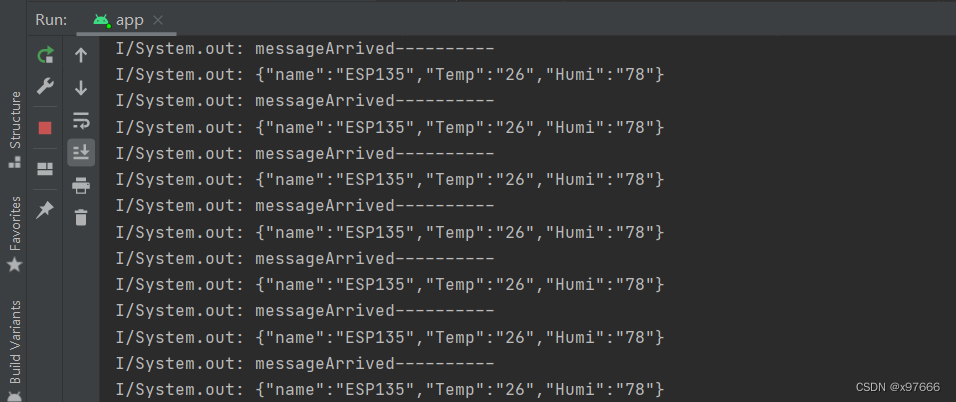
经过处理后就可以在我们app的控件中以指定格式显示
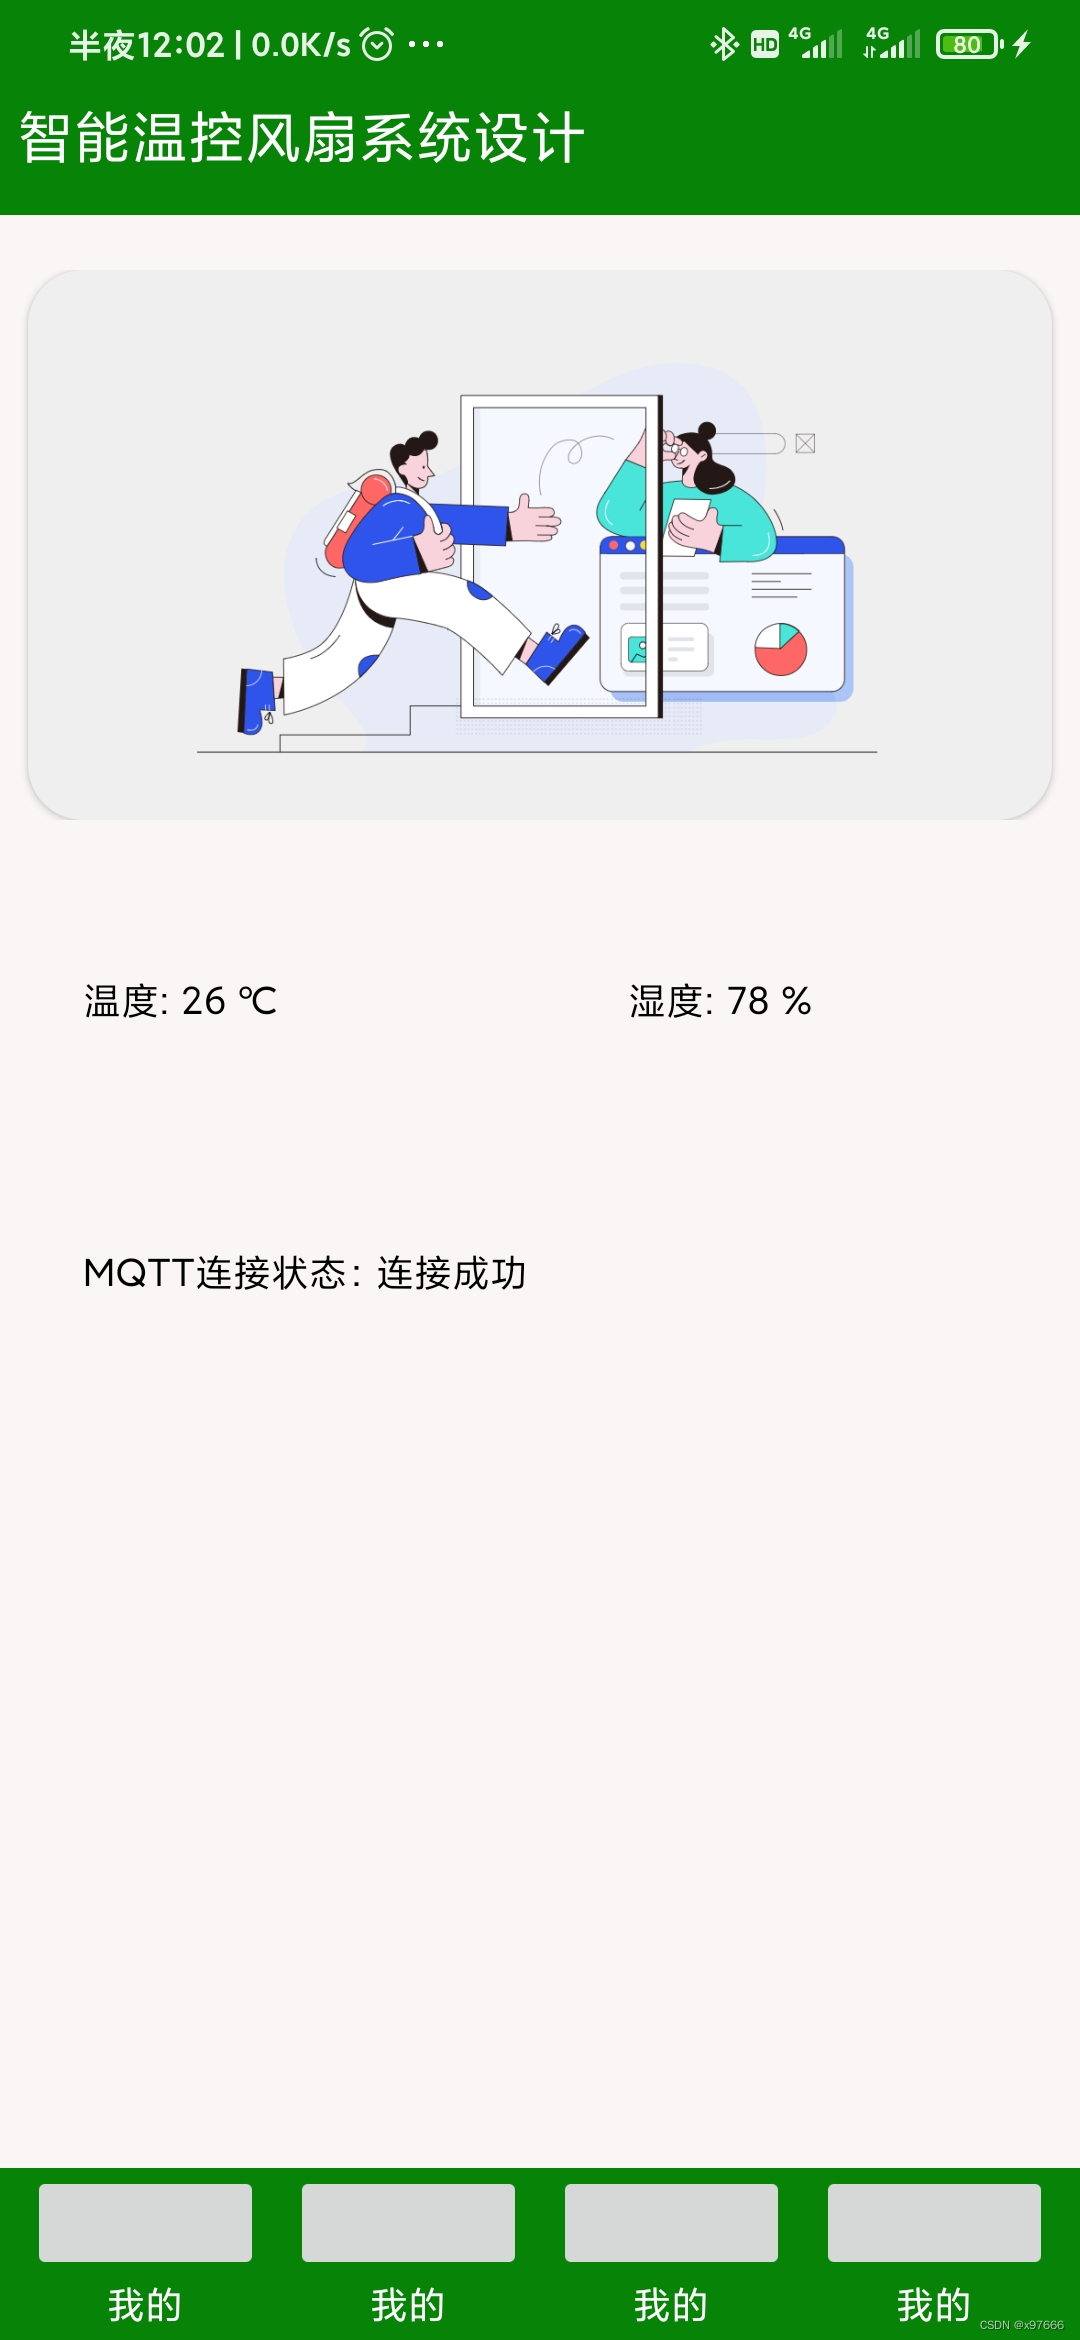
这样是不是感觉就出来了!好到此那么我们上位机数据接收就差不多了
嗯,那么app向下位机发送数据呢!其实也就是订阅号与STM32+ESP的信息关联后,经过一个函数就可以下发数据了,下一篇下位机(STM32+ESP)再详细介绍吧!发送的函数已经添加在上述的代码中了;这里贴出来一个示例代码,简单介绍一下,一个按键然后下发数据 publishmessageplus(mqtt_pub_topic,"{\"set_curtain\": \"fB}");
     // 关闭控件点击事件
    private void button_guan(View v){
        if(curtain_flag == 0){
            curtain_flag = 1;
            // 发送指令让下位机关闭窗帘
            publishmessageplus(mqtt_pub_topic,"{\"set_curtain\": \"fB}");
        }
        mtv_1.setText("关闭");
    }
最后,嗯就这样!第一次写这么长篇的学习记录,也是对自己所学内容的一种巩固,希望能帮到有需要的同志,如果有错误的地方还请多多见谅!谢谢!!!
我正在尝试使用ruby和Savon来使用网络服务。测试服务为http://www.webservicex.net/WS/WSDetails.aspx?WSID=9&CATID=2require'rubygems'require'savon'client=Savon::Client.new"http://www.webservicex.net/stockquote.asmx?WSDL"client.get_quotedo|soap|soap.body={:symbol=>"AAPL"}end返回SOAP异常。检查soap信封,在我看来soap请求没有正确的命名空间。任何人都可以建议我
我想安装一个带有一些身份验证的私有(private)Rubygem服务器。我希望能够使用公共(public)Ubuntu服务器托管内部gem。我读到了http://docs.rubygems.org/read/chapter/18.但是那个没有身份验证-如我所见。然后我读到了https://github.com/cwninja/geminabox.但是当我使用基本身份验证(他们在他们的Wiki中有)时,它会提示从我的服务器获取源。所以。如何制作带有身份验证的私有(private)Rubygem服务器?这是不可能的吗?谢谢。编辑:Geminabox问题。我尝试“捆绑”以安装新的gem..
我正在使用Sequel构建一个愿望list系统。我有一个wishlists和itemstable和一个items_wishlists连接表(该名称是续集选择的名称)。items_wishlists表还有一个用于facebookid的额外列(因此我可以存储opengraph操作),这是一个NOTNULL列。我还有Wishlist和Item具有续集many_to_many关联的模型已建立。Wishlist类也有:selectmany_to_many关联的选项设置为select:[:items.*,:items_wishlists__facebook_action_id].有没有一种方法可以
最近,当我启动我的Rails服务器时,我收到了一长串警告。虽然它不影响我的应用程序,但我想知道如何解决这些警告。我的估计是imagemagick以某种方式被调用了两次?当我在警告前后检查我的git日志时。我想知道如何解决这个问题。-bcrypt-ruby(3.1.2)-better_errors(1.0.1)+bcrypt(3.1.7)+bcrypt-ruby(3.1.5)-bcrypt(>=3.1.3)+better_errors(1.1.0)bcrypt和imagemagick有关系吗?/Users/rbchris/.rbenv/versions/2.0.0-p247/lib/ru
在Rails4.0.2中,我使用s3_direct_upload和aws-sdkgems直接为s3存储桶上传文件。在开发环境中它工作正常,但在生产环境中它会抛出如下错误,ActionView::Template::Error(noimplicitconversionofnilintoString)在View中,create_cv_url,:id=>"s3_uploader",:key=>"cv_uploads/{unique_id}/${filename}",:key_starts_with=>"cv_uploads/",:callback_param=>"cv[direct_uplo
我使用的是Firefox版本36.0.1和Selenium-Webdrivergem版本2.45.0。我能够创建Firefox实例,但无法使用脚本继续进行进一步的操作无法在60秒内获得稳定的Firefox连接(127.0.0.1:7055)错误。有人能帮帮我吗? 最佳答案 我遇到了同样的问题。降级到firefoxv33后一切正常。您可以找到旧版本here 关于ruby-无法在60秒内获得稳定的Firefox连接(127.0.0.1:7055),我们在StackOverflow上找到一个类
我想在Ruby中创建一个用于开发目的的极其简单的Web服务器(不,不想使用现成的解决方案)。代码如下:#!/usr/bin/rubyrequire'socket'server=TCPServer.new('127.0.0.1',8080)whileconnection=server.acceptheaders=[]length=0whileline=connection.getsheaders想法是从命令行运行这个脚本,提供另一个脚本,它将在其标准输入上获取请求,并在其标准输出上返回完整的响应。到目前为止一切顺利,但事实证明这真的很脆弱,因为它在第二个请求上中断并出现错误:/usr/b
您如何在Rails中的实时服务器上进行有效调试,无论是在测试版/生产服务器上?我试过直接在服务器上修改文件,然后重启应用,但是修改好像没有生效,或者需要很长时间(缓存?)我也试过在本地做“脚本/服务器生产”,但是那很慢另一种选择是编码和部署,但效率很低。有人对他们如何有效地做到这一点有任何见解吗? 最佳答案 我会回答你的问题,即使我不同意这种热修补服务器代码的方式:)首先,你真的确定你已经重启了服务器吗?您可以通过跟踪日志文件来检查它。您更改的代码显示的View可能会被缓存。缓存页面位于tmp/cache文件夹下。您可以尝试手动删除
最近因为项目需要,需要将Android手机系统自带的某个系统软件反编译并更改里面某个资源,并重新打包,签名生成新的自定义的apk,下面我来介绍一下我的实现过程。APK修改,分为以下几步:反编译解包,修改,重打包,修改签名等步骤。安卓apk修改准备工作1.系统配置好JavaJDK环境变量2.需要root权限的手机(针对系统自带apk,其他软件免root)3.Auto-Sign签名工具4.apktool工具安卓apk修改开始反编译本文拿Android系统里面的Settings.apk做demo,具体如何将apk获取出来在此就不过多介绍了,直接进入主题:按键win+R输入cmd,打开命令窗口,并将路
require"socket"server="irc.rizon.net"port="6667"nick="RubyIRCBot"channel="#0x40"s=TCPSocket.open(server,port)s.print("USERTesting",0)s.print("NICK#{nick}",0)s.print("JOIN#{channel}",0)这个IRC机器人没有连接到IRC服务器,我做错了什么? 最佳答案 失败并显示此消息::irc.shakeababy.net461*USER:Notenoughparame
