一份好的测试报告,可以很直观的看出整个测试过程的各种数据。而Cypress的测试报告是基于Mocha,因此任何支持Mocha的测试报告都可以应用于Cypress。但实际上,Cypress默认使用spec输出测试报告。如果不想使用自带的测试报告,也可以添加第三方的测试报告模板和自定义的测试报告模板。
自带的测试报告包括Mocha自带的测试报告和直接嵌入在Cypress中的测试报告。主要如下所示:
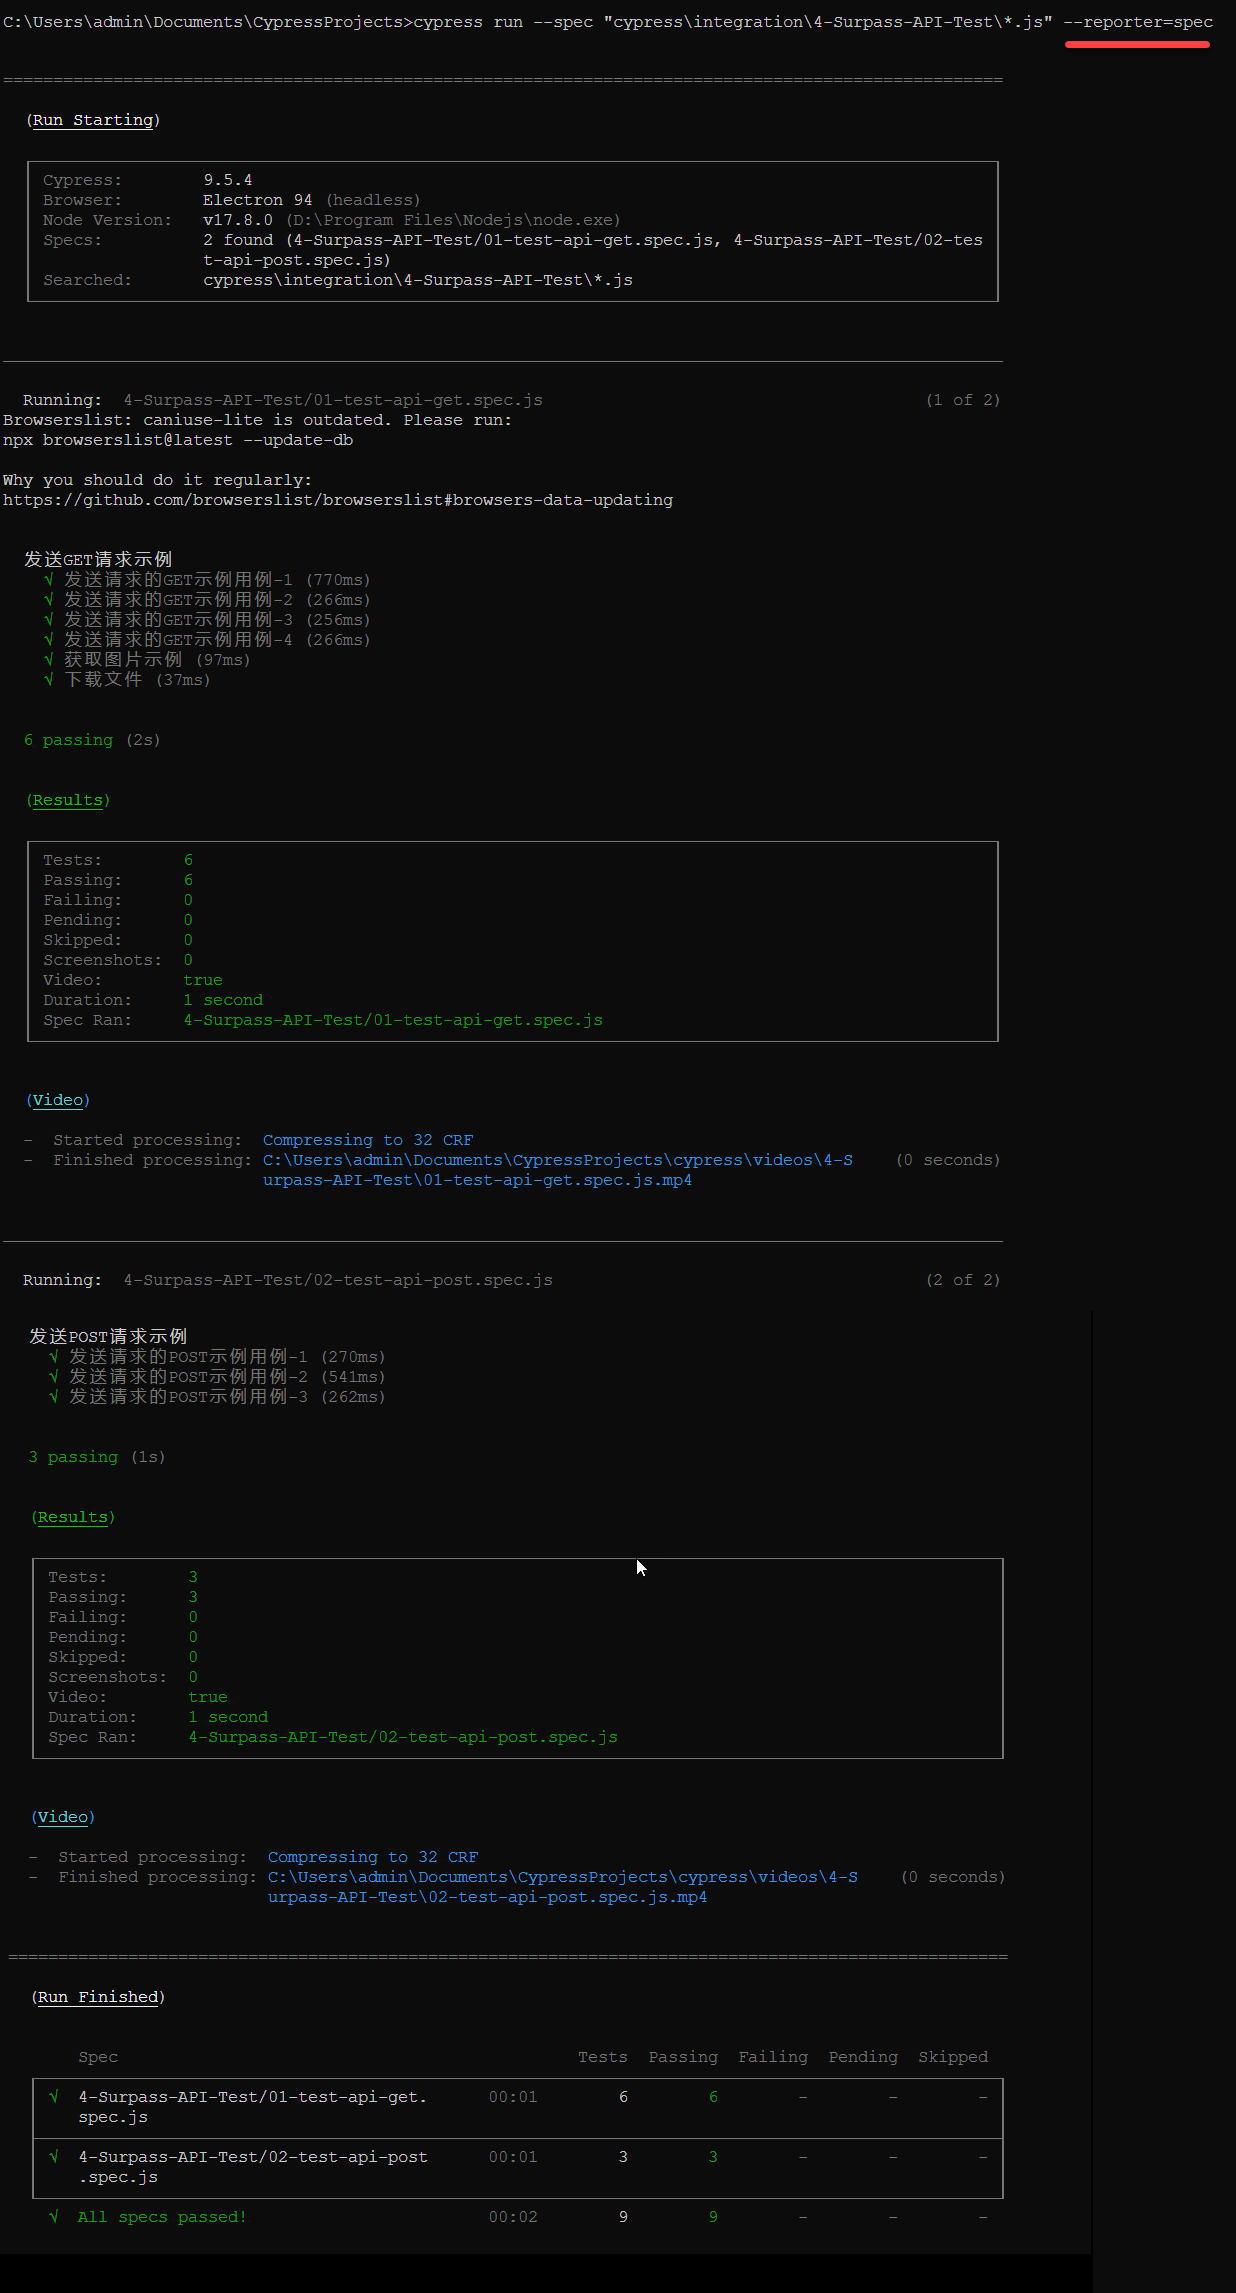
spec是Mocha自带的测试报告,输出是一个嵌套样式的分组视图,其使用方法也非常简单,在命令行模式中按以下输入即可:
cypress run --spec "cypress\integration\4-Surpass-API-Test*.js" --reporter=spec
运行结果如下所示:
json格式的测试报告是将测试报告的输出格式调整为JSON对象。其使用方法也非常简单,在命令行模式中按以下输入即可:
cypress run --spec "cypress\integration\4-Surpass-API-Test*.js" --reporter=json
运行结果如下所示:

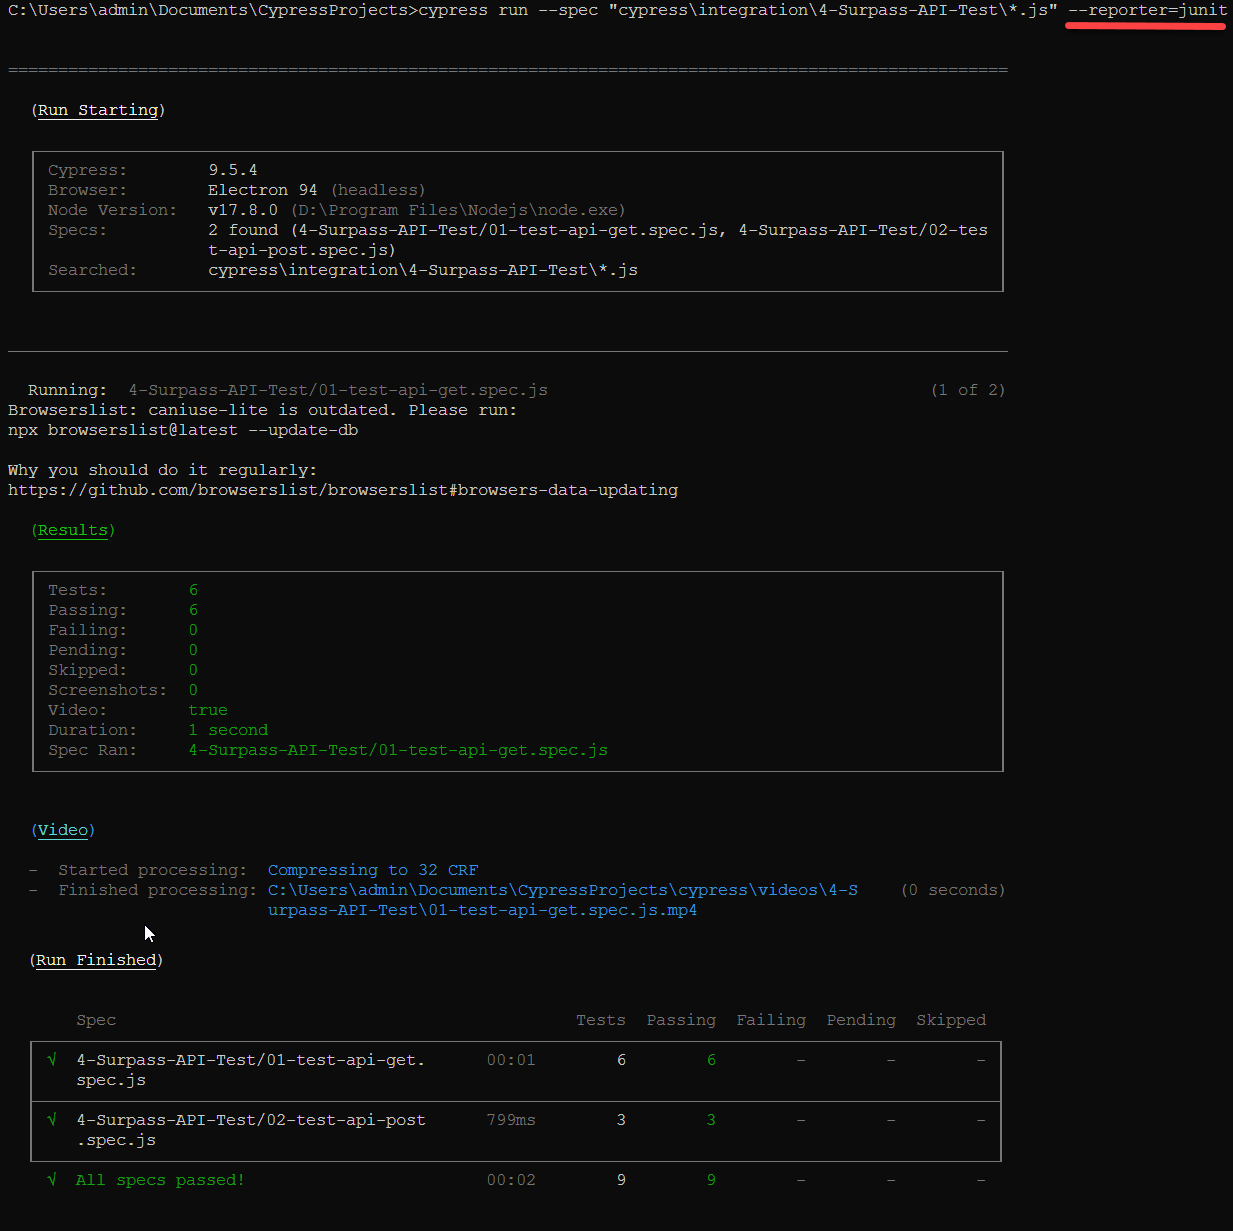
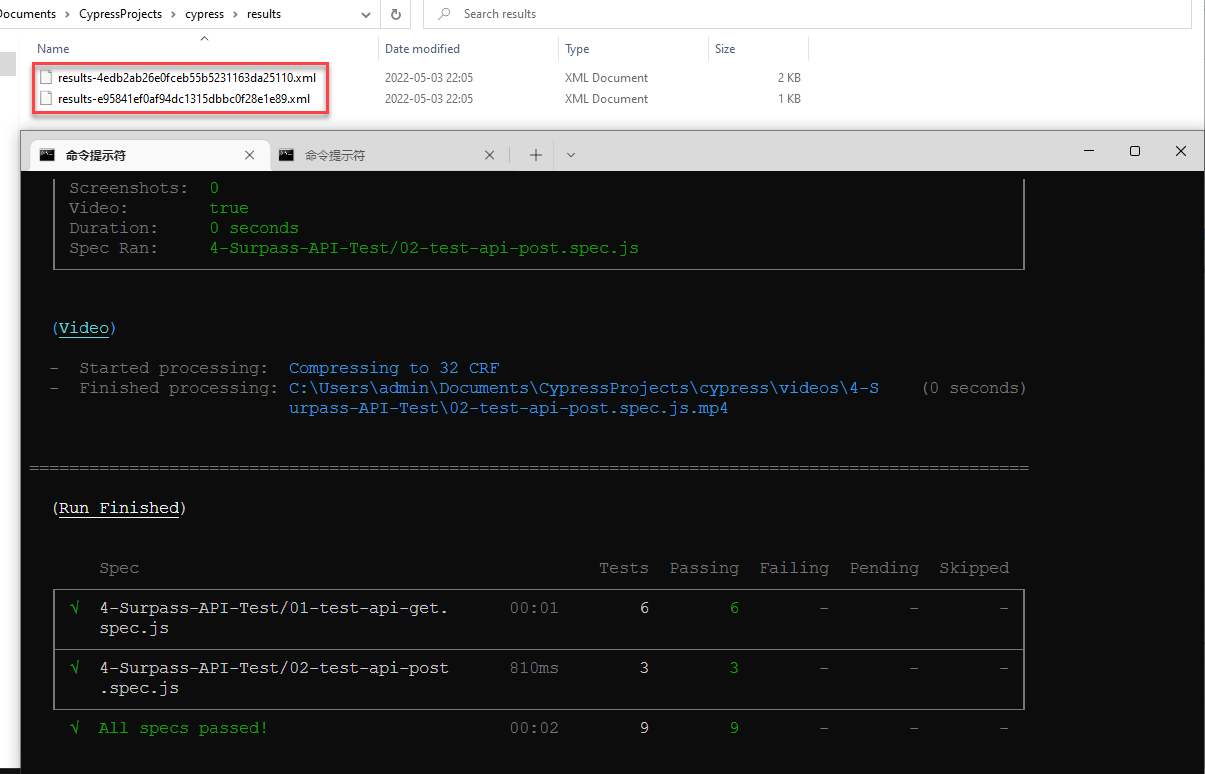
json格式的测试报告是将测试报告的输出格式调整为XML文件。其使用方法也非常简单,在命令行模式中按以下输入即可:
cypress run --spec "cypress\integration\4-Surpass-API-Test*.js" --reporter=junit
运行结果如下所示:
测试运行完成后,会在工程的根目录中生成test-results.xml
如果内置的测试报告不能满足要求,也可以自定义测试报告。若是用户自定义的Mocha报告,可以通过相对路径或绝对路径进行加载,具体可在cypress.json或命令行中配置。
具体配置如下所示:
> surpass-project
  > cypress
  > reporters
    - custom.js
{
  "reporter": "reporters/custom.js"
}
cypress run --reporter reporters/custom.js
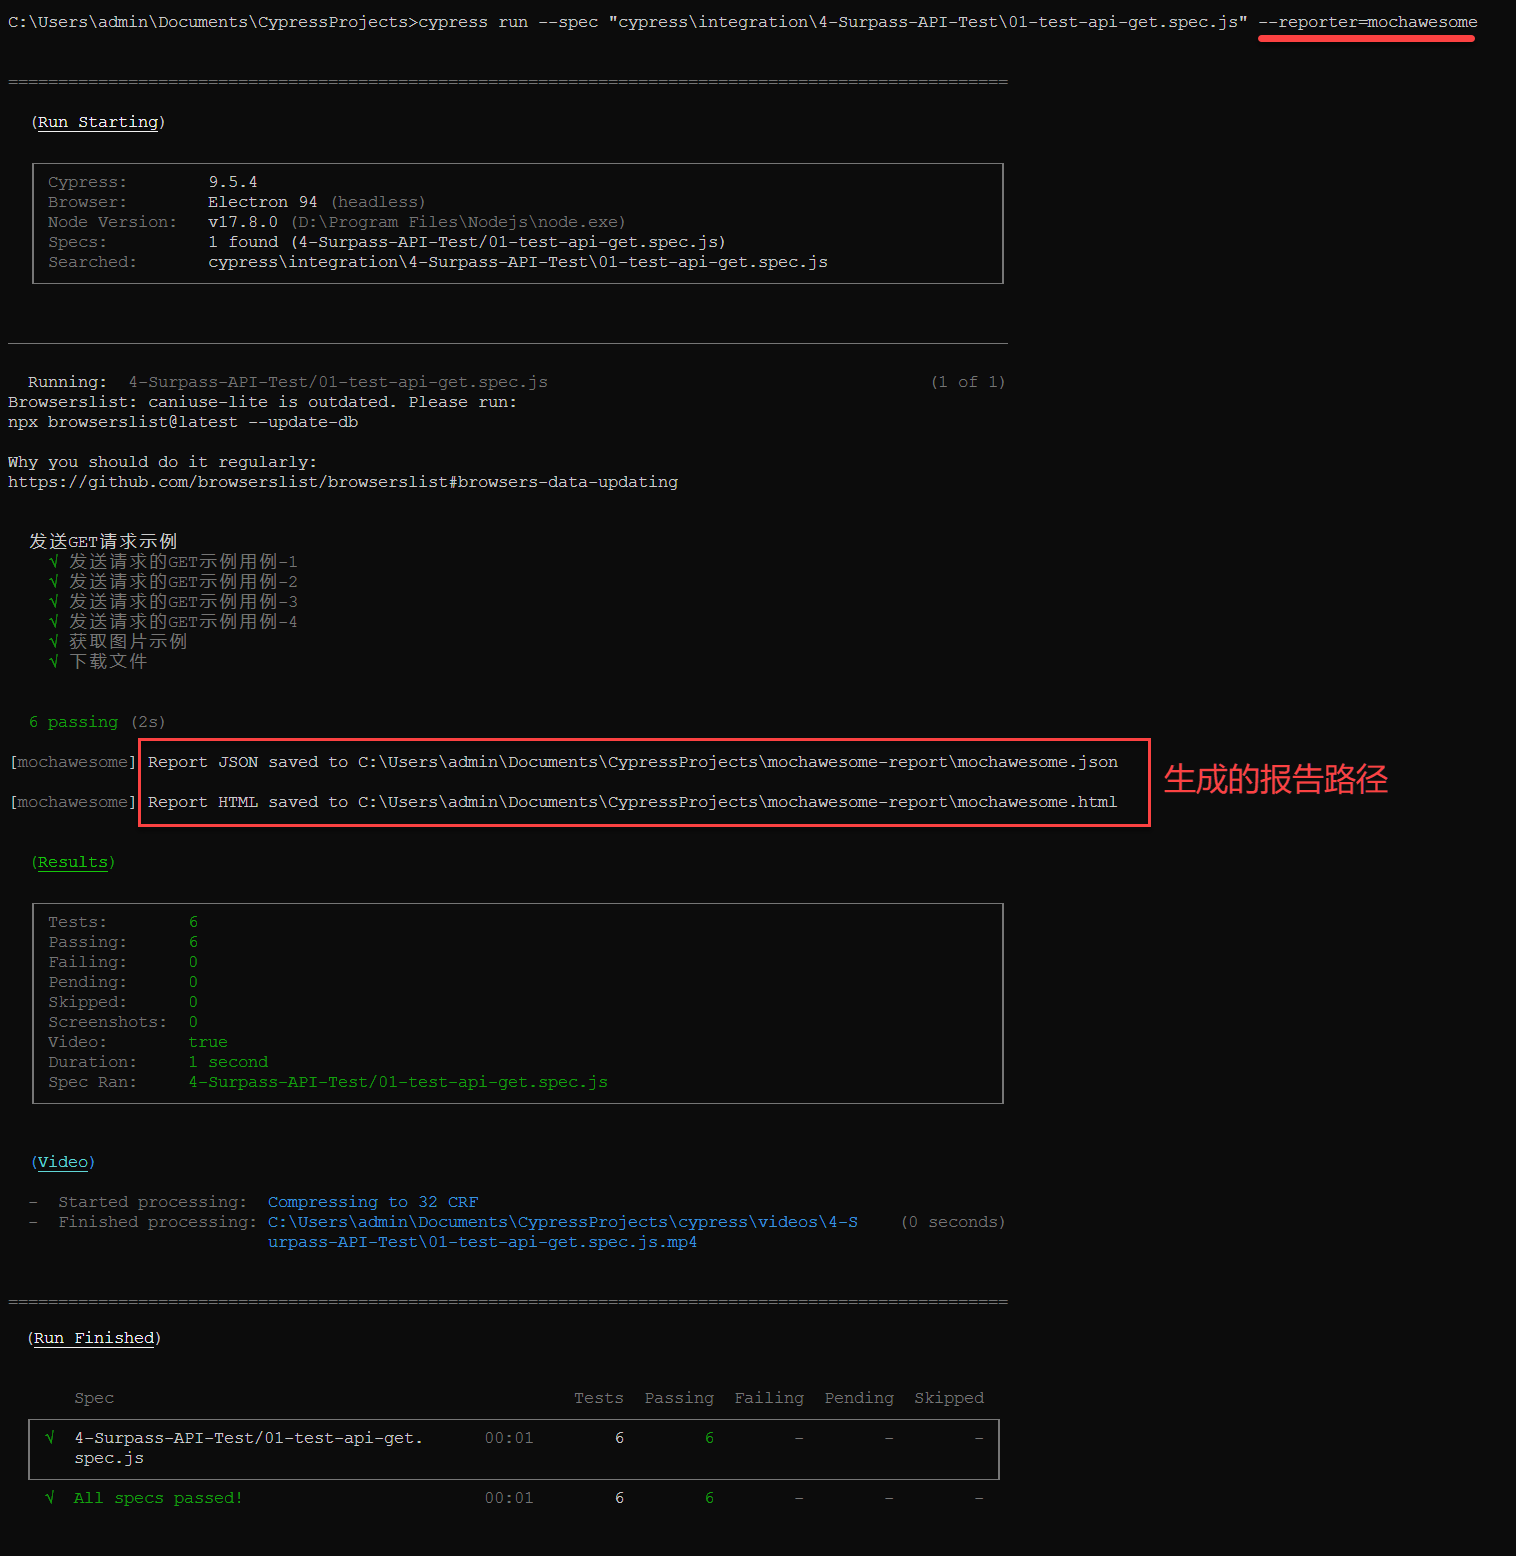
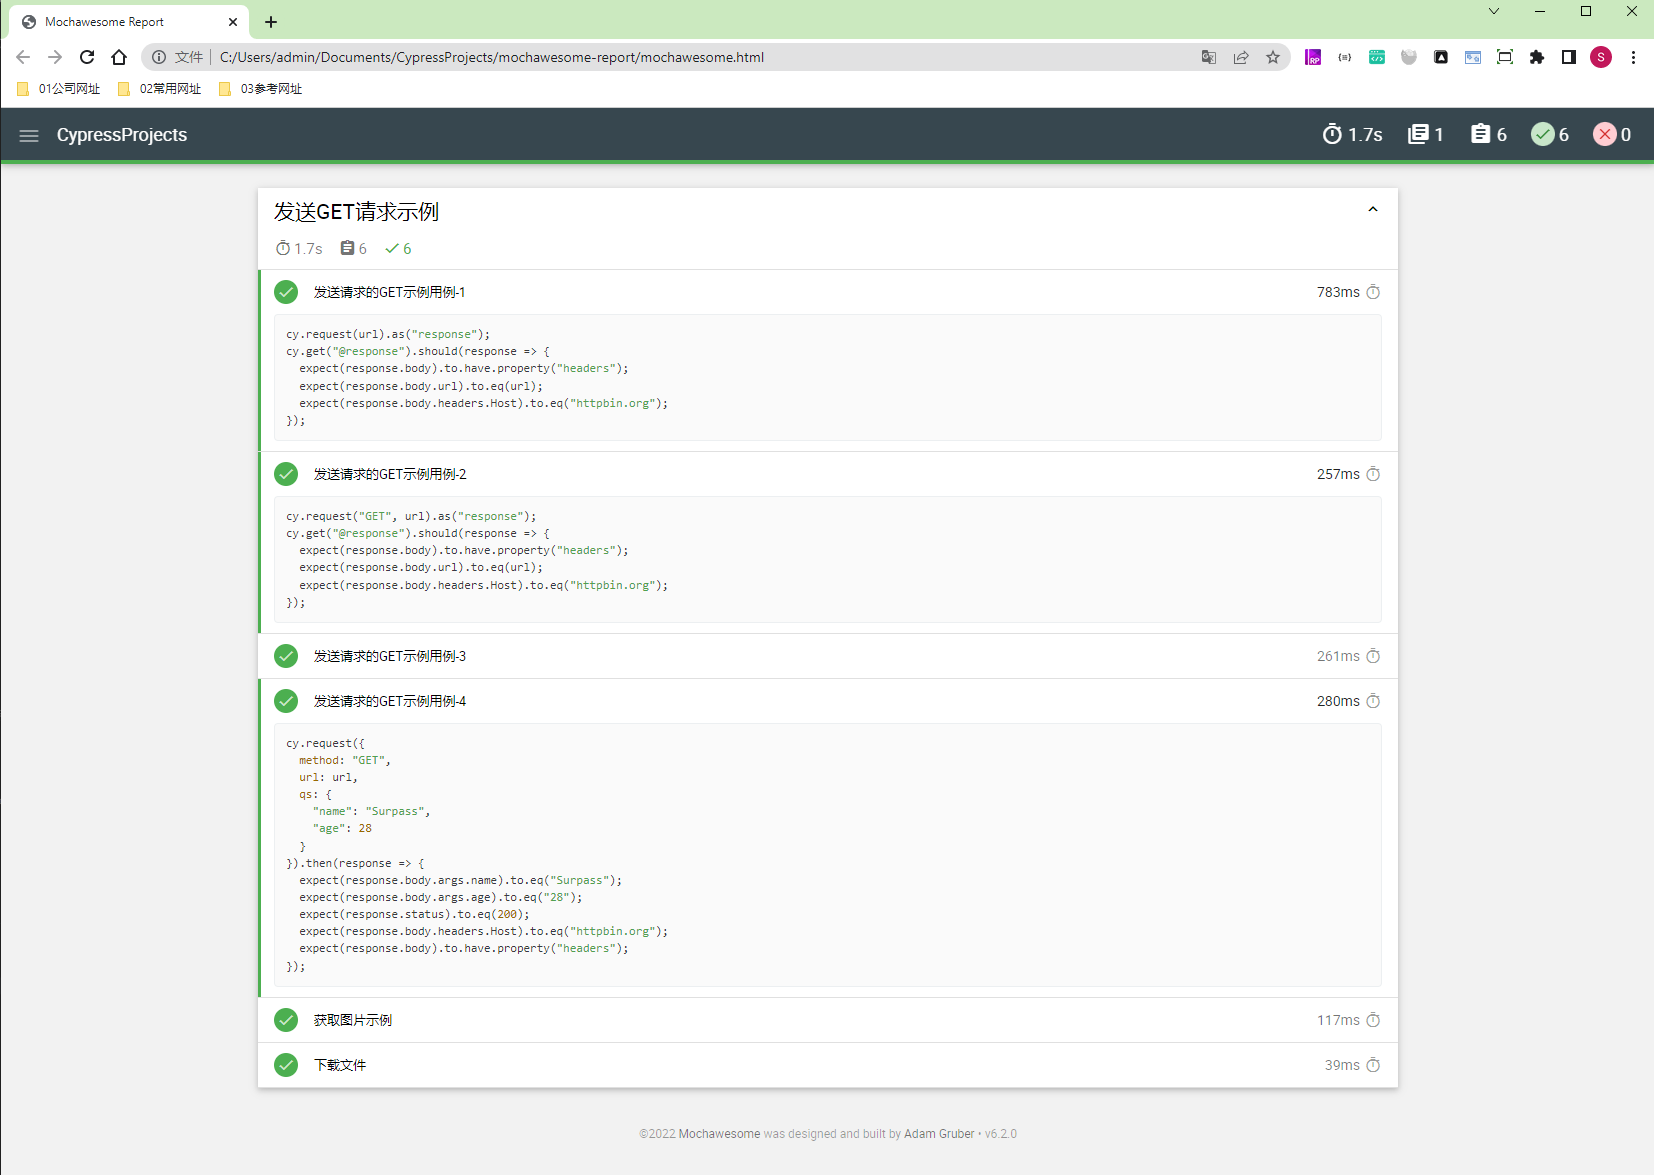
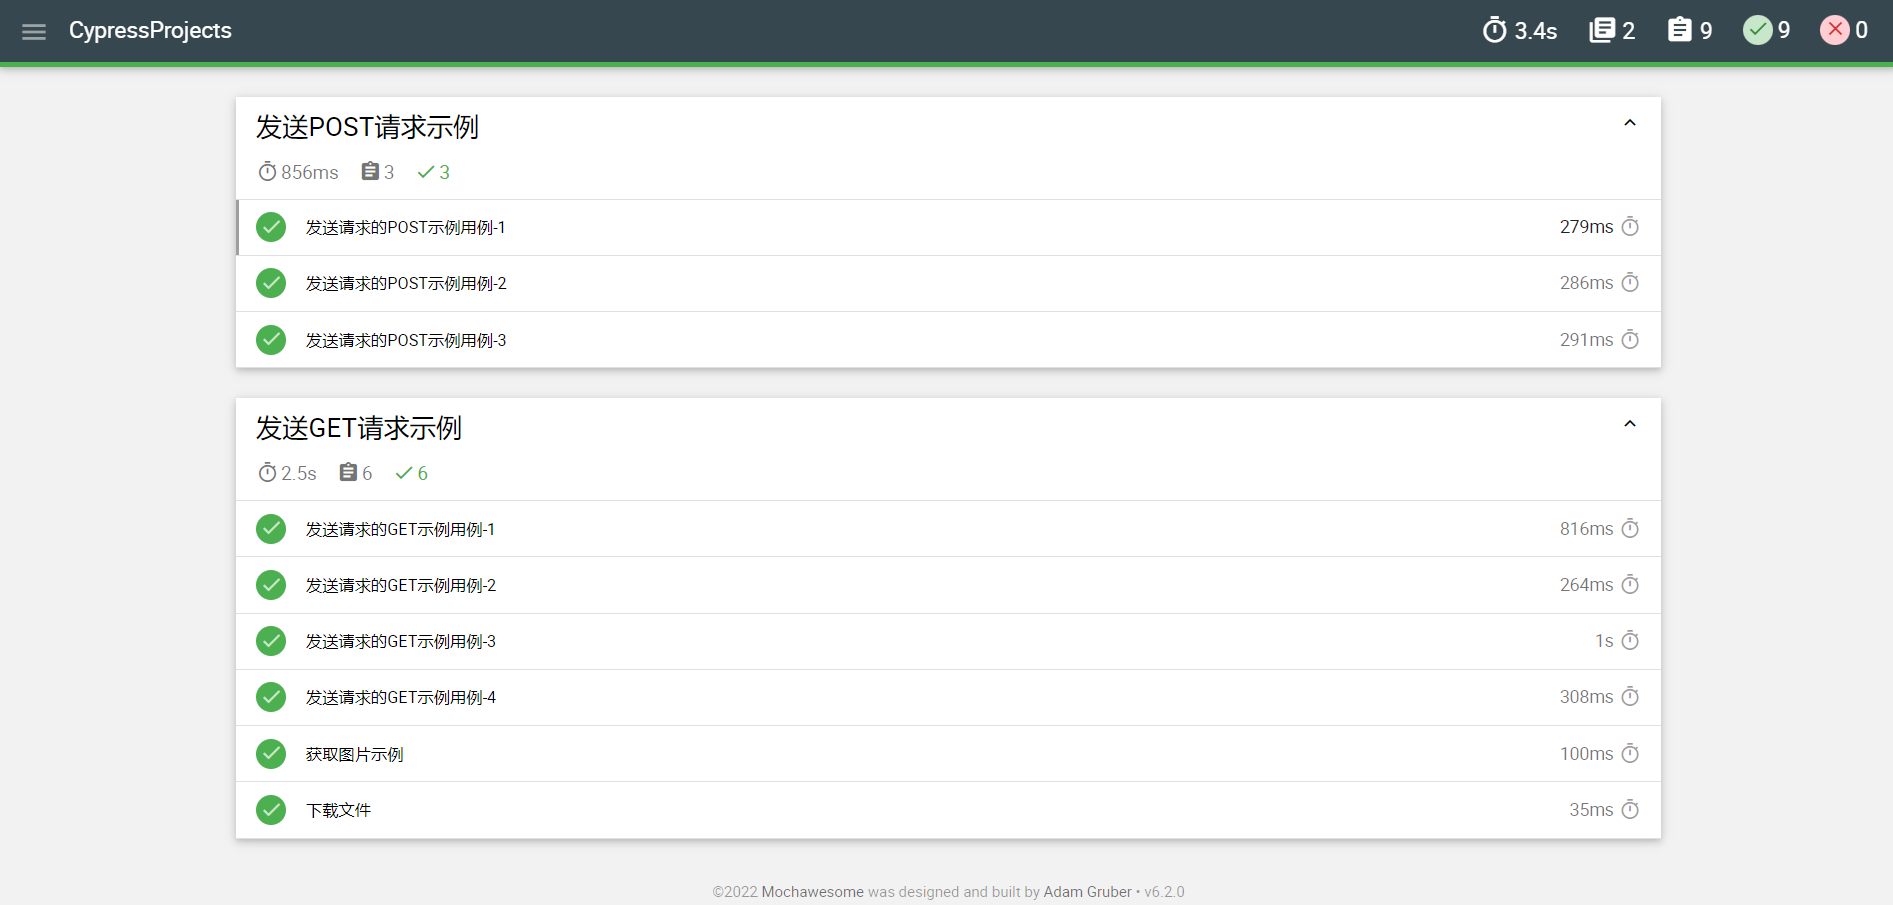
我们以官方提供的mochawesome为例,其操作步骤如下所示:
npm install mochawesome --save-dev
安装的时候,需要注意系统是否有写入权限和工程所在目录
cypress run --spec "cypress\integration\4-Surpass-API-Test\01-test-api-get.spec.js" --reporter=mochawesome
运行结果如下所示:
在每次启动一个测试时,都会生成一份测试报告,所以在每次运行cypress run完成后,都会覆盖前一次运行所生成的测试报告。为避免这种情况,可以在生成测试报告文件时,使用hash码。示意配置文件如下所示:
{
  "reporter": "junit",
  "reporterOptions": {
     "mochaFile": "results/my-test-output-[hash].xml"
  }
}
cypress run --reporter junit --reporter-options "mochaFile=results/my-test-output-[hash].xml"
但在很多情况下,我们希望一次生成多种类型的报告,比如在一次运行时,同时生成junit和json的报告。针对这种情况,Cypress提供了一个插件cypress-multi-reporters,用于生成混合报告。该插件的网址为:https://github.com/you54f/cypress-multi-reporters,其操作步骤如下所示:
npm install --save-dev cypress-multi-reporters mocha-junit-reporter
{
  "reporter": "cypress-multi-reporters",
  "reporterOptions": {
    "configFile": "merge-reporter-config.json"
  }
}
cypress run --reporter cypress-multi-reporters --reporter-options configFile=merge-reporter-config.json
{
  "reporterEnabled": "spec, mocha-junit-reporter",
  "mochaJunitReporterReporterOptions": {
    "mochaFile": "cypress/results/results-[hash].xml"
  }
}
以上配置,表示同时允许生成spec和junit格式的报告
cypress run --spec "cypress\integration\4-Surpass-API-Test\*.js" --reporter cypress-multi-reporters --reporter-options configFile=merge-reporter-config.json
运行结果如下所示:
因为在文件名添加了Hash码,所以每次执行测试完成后生成的报告文件不会相互覆盖。但还是建议每次启动测试删除所有的测试报告文件。可以按以下方法进行配置
"scripts": {
    "deletereports": "del /q \"cypress\\results\\*\" ", // 这里取决于配置的操作系统,Windows中使用del删除文件,在Linux中使用rm删除文件
    "prereport": "npm run deletereports",
    "report": "cypress run --spec \"cypress\\integration\\4-Surpass-API-Test\\*.js\" --reporter cypress-multi-reporters  --reporter-options configFile=merge-reporter-config.json"
  }
npm install junit-report-merger --save-dev
"scripts": {
    "deletereports": "del /q \"cypress\\results\\*\"",
		"combinereports": "jrm cypress\\results\\combined-report.xml \"cypress\\results\\*.xml\"",
		"prereport": "npm run deletereports",
		"report": "cypress run --spec \"cypress\\integration\\4-Surpass-API-Test\\*.js\" --reporter cypress-multi-reporters  --reporter-options configFile=merge-reporter-config.json",
		"postreport": "npm run combinereports"
  }
npm run postreport
该操作步骤如下所示:
npm install --save-dev mochawesome mochawesome-merge mochawesome-report-generator
{
  "reporter": "mochawesome",
  "reporterOptions": {
    "reportDir": "cypress/results",
    "overwrite": false,
    "html": false,
    "json": true
  }
}
cypress run --spec "cypress\integration\4-Surpass-API-Test\*.js" --reporter mochawesome --reporter-options configFile=merge-mochawesome.json,reportDir="cypress/results",overwrite=false,html=false,json=true
在运行完成后,仅会生成json文件,如下所示:
npx mochawesome-merge "cypress/results/*.json" > merge-test-mochawesome.json
npx marge merge-test-mochawesome.json

✓ Reports saved:
C:\Users\admin\Documents\CypressProjects\mochawesome-report\merge-test-mochawesome.html
在生成测试报告时,部分reporter支持设定一些参数选项,从而改变其行为。可以通过配置文件(cypress.json)或命令行中指定。以junit为例,如下所示:
并不是所有reporter都支持该参数选项,具体情况,可查阅相关文档。
{
  "reporter": "junit",
  "reporterOptions": {
    "mochaFile": "results/surpass-test.xml",
    "toConsole": true
  }
}
cypress run --reporter junit --reporter-options "mochaFile=results/surpass-test.xml,toConsole=true"
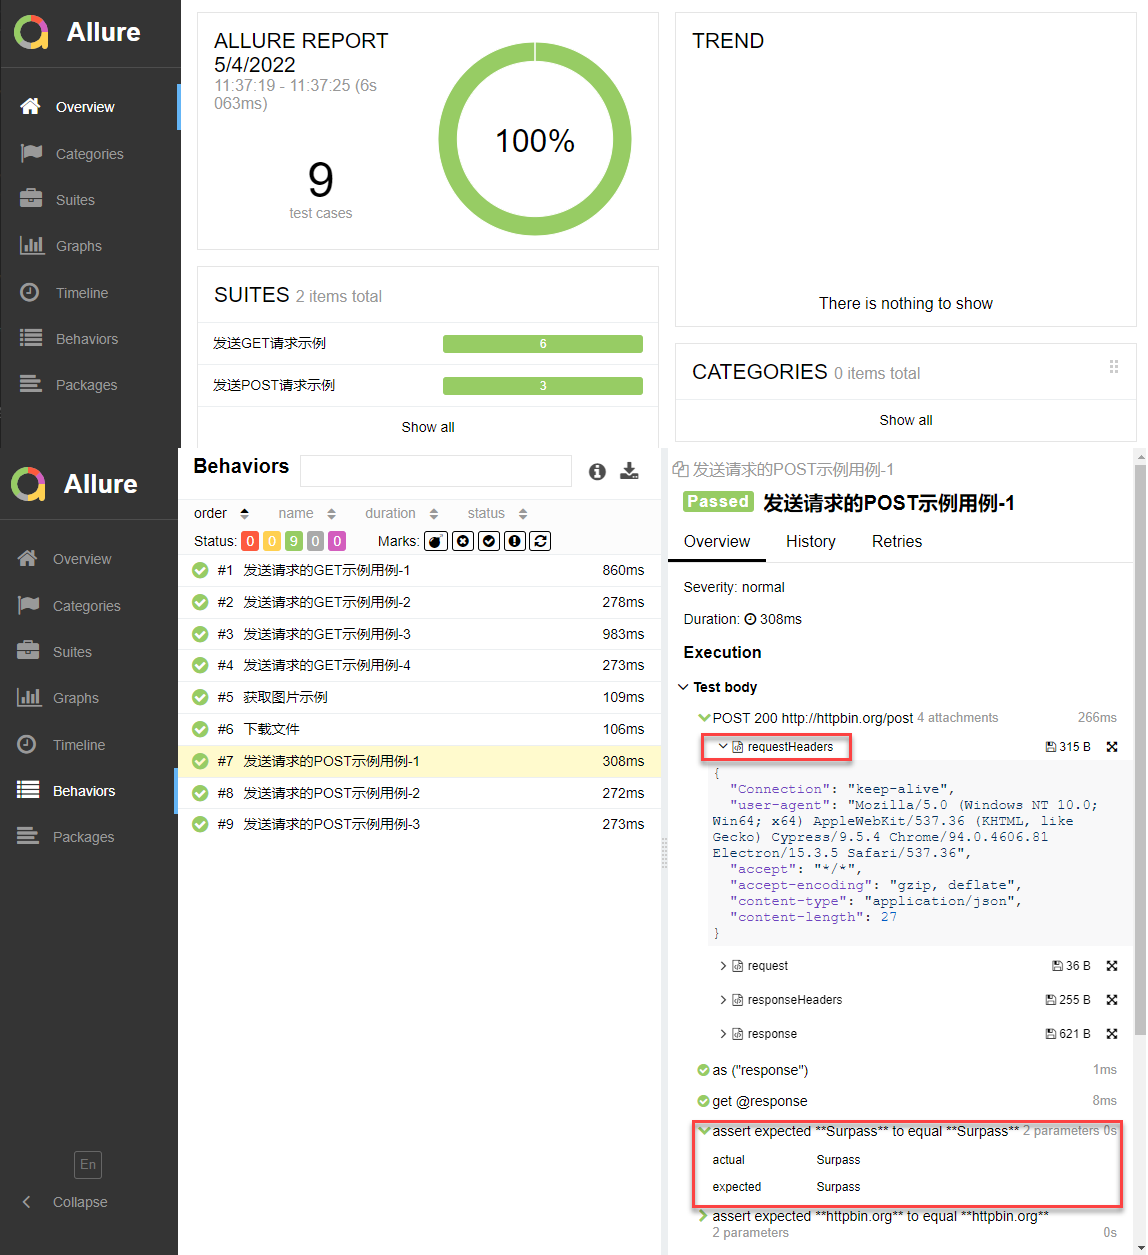
Allure是一款使用非常用于展示测试报告的工具,我们来看看如何与Cypress进行集成。插件帮助文档地址:https://github.com/Shelex/cypress-allure-plugin,具体操作步骤如下所示:
安装的过程在此略过,如需查看详情,可以转至https://www.cnblogs.com/surpassme/p/15491632.html
npm install @shelex/cypress-allure-plugin --save-dev
在cypress/plugins/index.js中添加以下内容,用以引用插件:
// 仅做为插件引用
// 引用allure
const allureWriter = require('@shelex/cypress-allure-plugin/writer');

// 加载模块
module.exports = (on, config) => {
  allureWriter(on, config);
  return config;
};
在cypress/support/index.js中添加以下内容,用以注册
// 使用import
import '@shelex/cypress-allure-plugin';
// 使用require
require('@shelex/cypress-allure-plugin');
在cypress/plugins/index.js中添加以下内容,用以添加代码智能提示:
// 添加代码智能化提示
/// <reference types="@shelex/cypress-allure-plugin" />
也可以在tsconfig.json中添加以下内容,用以添加代码智能提示:
"include": [
   "../node_modules/@shelex/cypress-allure-plugin/reporter",
   "../node_modules/cypress"
 ]
在Cypress中,Allure与Cypress环境变量一样,也是支持自定义的,如下所示:
| 环境变量名 | 默认值 | 功能描述 |
|---|---|---|
| allure | false | 是否启用Allure插件 |
| allureResultsPath | allure-results | 自定义Allure报告路径和文件名 |
| issuePrefix | `` | 链接到缺陷管理系统的前缀 |
| allureLogCypress | true | 是否将Cypress的命令等信息显示在报告中 |
| allureAttachRequests | false | 是否自动将cy.request中的headers, body, response headers, respose body 等信息添加到Allure报告中 |
| allureOmitPreviousAttemptScreenshots | false | 在重试前,是否添加前一次的尝试结果截图 |
| allureSkipAutomaticScreenshots | false | 不自动添加截图 |
| allureClearSkippedTests | false | 从测试报告中移除跳过的测试用例 |
| allureAddVideoOnPass | false | 为通过的测试用例添加视频 |
cypress.json的配置如下所示:
{
    "env": {
        "allureResultsPath": "allure/results",
        "allureAttachRequests":true
    }
}
命令行运行时的配置如下所示:
cypress run --env allure=true,allureResultsPath=allure/results
cypress run --spec cypress\integration\4-Surpass-API-Test\*.js --env allure=true,allureResultPath=allure/results
allure serve allure\results
最终运行的结果如下所示:
Cypress官方有很多插件,包括官方和三方,且有详细使用说明文档,非常优秀,地址为:https://docs.cypress.io/plugins/directory
原文地址:https://www.jianshu.com/p/3b7efbbbdc63
本文同步在微信订阅号上发布,如各位小伙伴们喜欢我的文章,也可以关注我的微信订阅号:woaitest,或扫描下面的二维码添加关注:

很好奇,就使用rubyonrails自动化单元测试而言,你们正在做什么?您是否创建了一个脚本来在cron中运行rake作业并将结果邮寄给您?git中的预提交Hook?只是手动调用?我完全理解测试,但想知道在错误发生之前捕获错误的最佳实践是什么。让我们理所当然地认为测试本身是完美无缺的,并且可以正常工作。下一步是什么以确保他们在正确的时间将可能有害的结果传达给您? 最佳答案 不确定您到底想听什么,但是有几个级别的自动代码库控制:在处理某项功能时,您可以使用类似autotest的内容获得关于哪些有效,哪些无效的即时反馈。要确保您的提
我正在编写一个包含C扩展的gem。通常当我写一个gem时,我会遵循TDD的过程,我会写一个失败的规范,然后处理代码直到它通过,等等......在“ext/mygem/mygem.c”中我的C扩展和在gemspec的“扩展”中配置的有效extconf.rb,如何运行我的规范并仍然加载我的C扩展?当我更改C代码时,我需要采取哪些步骤来重新编译代码?这可能是个愚蠢的问题,但是从我的gem的开发源代码树中输入“bundleinstall”不会构建任何native扩展。当我手动运行rubyext/mygem/extconf.rb时,我确实得到了一个Makefile(在整个项目的根目录中),然后当
我有一个围绕一些对象的包装类,我想将这些对象用作散列中的键。包装对象和解包装对象应映射到相同的键。一个简单的例子是这样的:classAattr_reader:xdefinitialize(inner)@inner=innerenddefx;@inner.x;enddef==(other)@inner.x==other.xendenda=A.new(o)#oisjustanyobjectthatallowso.xb=A.new(o)h={a=>5}ph[a]#5ph[b]#nil,shouldbe5ph[o]#nil,shouldbe5我试过==、===、eq?并散列所有无济于事。
我有一些Ruby代码,如下所示:Something.createdo|x|x.foo=barend我想编写一个测试,它使用double代替block参数x,这样我就可以调用:x_double.should_receive(:foo).with("whatever").这可能吗? 最佳答案 specify'something'dox=doublex.should_receive(:foo=).with("whatever")Something.should_receive(:create).and_yield(x)#callthere
Sinatra新手;我正在运行一些rspec测试,但在日志中收到了一堆不需要的噪音。如何消除日志中过多的噪音?我仔细检查了环境是否设置为:test,这意味着记录器级别应设置为WARN而不是DEBUG。spec_helper:require"./app"require"sinatra"require"rspec"require"rack/test"require"database_cleaner"require"factory_girl"set:environment,:testFactoryGirl.definition_file_paths=%w{./factories./test/
我遵循MichaelHartl的“RubyonRails教程:学习Web开发”,并创建了检查用户名和电子邮件长度有效性的测试(名称最多50个字符,电子邮件最多255个字符)。test/helpers/application_helper_test.rb的内容是:require'test_helper'classApplicationHelperTest在运行bundleexecraketest时,所有测试都通过了,但我看到以下消息在最后被标记为错误:ERROR["test_full_title_helper",ApplicationHelperTest,1.820016791]test
我收到这个错误:RuntimeError(自动加载常量Apps时检测到循环依赖当我使用多线程时。下面是我的代码。为什么会这样?我尝试多线程的原因是因为我正在编写一个HTML抓取应用程序。对Nokogiri::HTML(open())的调用是一个同步阻塞调用,需要1秒才能返回,我有100,000多个页面要访问,所以我试图运行多个线程来解决这个问题。有更好的方法吗?classToolsController0)app.website=array.join(',')putsapp.websiteelseapp.website="NONE"endapp.saveapps=Apps.order("
我已经构建了一些serverspec代码来在多个主机上运行一组测试。问题是当任何测试失败时,测试会在当前主机停止。即使测试失败,我也希望它继续在所有主机上运行。Rakefile:namespace:specdotask:all=>hosts.map{|h|'spec:'+h.split('.')[0]}hosts.eachdo|host|begindesc"Runserverspecto#{host}"RSpec::Core::RakeTask.new(host)do|t|ENV['TARGET_HOST']=hostt.pattern="spec/cfengine3/*_spec.r
我在app/helpers/sessions_helper.rb中有一个帮助程序文件,其中包含一个方法my_preference,它返回当前登录用户的首选项。我想在集成测试中访问该方法。例如,这样我就可以在测试中使用getuser_path(my_preference)。在其他帖子中,我读到这可以通过在测试文件中包含requiresessions_helper来实现,但我仍然收到错误NameError:undefinedlocalvariableormethod'my_preference'.我做错了什么?require'test_helper'require'sessions_hel
只是想确保我理解了事情。据我目前收集到的信息,Cucumber只是一个“包装器”,或者是一种通过将事物分类为功能和步骤来组织测试的好方法,其中实际的单元测试处于步骤阶段。它允许您根据事物的工作方式组织您的测试。对吗? 最佳答案 有点。它是一种组织测试的方式,但不仅如此。它的行为就像最初的Rails集成测试一样,但更易于使用。这里最大的好处是您的session在整个Scenario中保持透明。关于Cucumber的另一件事是您(应该)从使用您的代码的浏览器或客户端的角度进行测试。如果您愿意,您可以使用步骤来构建对象和设置状态,但通常您