
最近《点燃我温暖你》中李峋的爱心代码超级火,看着特别心动,这不,光棍节快到了,给兄弟们教学一波爱心代码,赶在双十一前表白,让这个双十一不在是孤单一个人!
目录
SetConsoleTextAttribute(GetStdHandle(STD_OUTPUT_HANDLE),字体色)
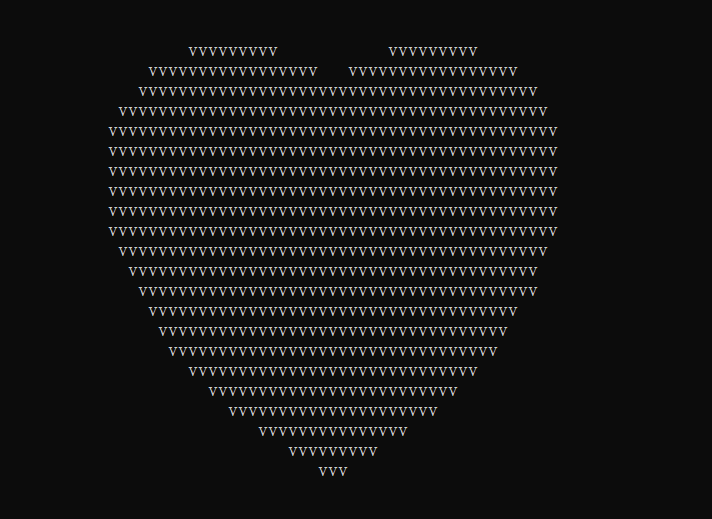
心形线直角坐标式(x^2+y^2-1)^3=x^2*y^3
让a=x^2+y^2-1,那么a*a*a就是(x^2+y^2-1)^3,有数学定理易得(x^2+y^2-1)^3<=x^2*y^3是为心形线里面的部分包括心形线,那么只要满足(x^2+y^2-1)^3<=x^2*y^3就输出某个指定符号,不满足就输出空格,就可以获得由这个字符组成的爱心,下面我使用的是'v'当指定字符,用三目运算符判断是否满足(x^2+y^2-1)^3<=x^2*y^3,注意输出完一行要换行。
#include <stdio.h>

int main() {
	for (float y = 2.0f; y > -2.0f; y -= 0.1f) {
		for (float x = -2.0f; x < 2.0f; x += 0.05f) {
			float a = x * x + y * y - 1;
			putchar(a * a * a - x * x * y * y * y <= 0.0f ? 'v' : ' ');
		}

		putchar('\n');
	}
}
SetConsoleTextAttribute()是Windows系统中一个可以设置控制台窗口字体颜色和背景色的计算机函数,常用的几种颜色:
0=黑色 1=蓝色 2=绿色 4=红色 3=湖蓝色 5=紫色 6=黄色 7=白色 8=灰色
执行挂起一段时间
#include <stdio.h>
#include <math.h>
#include <windows.h>
#include <tchar.h>

float f(float x, float y, float z) {
	float a = x * x + 9.0f / 4.0f * y * y + z * z - 1;
	return a * a * a - x * x * z * z * z - 9.0f / 80.0f * y * y * z * z * z;
}

float h(float x, float z) {
	for (float y = 1.0f; y >= 0.0f; y -= 0.001f)
		if (f(x, y, z) <= 0.0f)
			return y;

	return 0.0f;
}

int main() {
	SetConsoleTextAttribute(GetStdHandle(STD_OUTPUT_HANDLE),
	                        0xc);//SetConsoleTextAttribute()是Windows系统中一个可以设置控制台窗口字体颜色和背景色的计算机函数
	HANDLE o = GetStdHandle(STD_OUTPUT_HANDLE);// GetStdHandle()检索指定标准设备的句柄(标准输入、标准输出或标准错误)
	_TCHAR buffer[25][80] = { _T(' ') };
	_TCHAR ramp[] = _T("vvvvvvvv");
	int count = 0;
	int count1 = 0;

	for (float t = 0.0f;; t += 0.1f) {
		int sy = 0;
		float s = sinf(t);
		float a = s * s * s * s * 0.2f;

		for (float z = 1.3f; z > -1.2f; z -= 0.1f) {
			_TCHAR *p = &buffer[sy++][0];
			float tz = z * (1.2f - a);

			for (float x = -1.5f; x < 1.5f; x += 0.05f) {
				float tx = x * (1.2f + a);
				float v = f(tx, 0.0f, tz);

				if (v <= 0.0f) {
					float y0 = h(tx, tz);
					float ny = 0.01f;
					float nx = h(tx + ny, tz) - y0;
					float nz = h(tx, tz + ny) - y0;
					float nd = 1.0f / sqrtf(nx * nx + ny * ny + nz * nz);
					float d = (nx + ny - nz) * nd * 0.5f + 0.5f;
					*p++ = ramp[(int)(d * 5.0f)];
				} else
					*p++ = ' ';
			}
		}

		for (sy = 0; sy < 25; sy++) {
			COORD coord = { 0, sy };
			SetConsoleCursorPosition(o, coord);//作用是设置控制台(cmd)光标位置
			WriteConsole(o, buffer[sy], 79, NULL, 0);//从当前光标位置开始,将字符串写入控制台屏幕缓冲区
		}

		if (count <= 22) {
			printf("I Love You") ;//表白内容
			printf("            To CSDN");// 被表白者的名字
			count++;
		} else {
			printf("You Are My Best Lover.\n");
			count++;

			if (count >= 44) {
				count = 0;
			}
		}

		Sleep(36);//Sleep函数:执行挂起一段时间,也就是等待一段时间在继续执行
	}
}

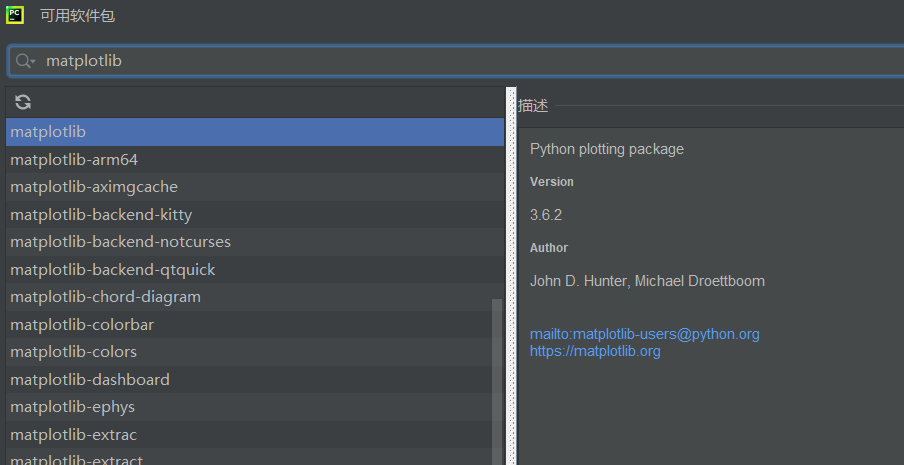
下载matplotlib软件包

用于返回指定区间等间隔的数组,例如np.linspace(0,2*np.pi)就是0到2π等间隔的数组
对中元素取正弦值
对中元素取余弦值
是matplotlib.pyplot模块下的一个函数, 用于画图,它可以绘制点和线
展示图像
原始的心形线的极坐标方程为r=a(1-cos)
与其对应的参数方程是:
x()=2r(sin
-(sin2
)/2)
y()= 2r(cos
-(cos2
)/2),(0<=
<=2π)
import numpy as np
import matplotlib.pyplot as plt
t=np.linspace(0,2*np.pi)#用于返回指定区间等间隔的数组
x=2*1*(np.cos(t)-np.cos(2*t)/2)
y=2*1*(np.sin(t)-np.sin(2*t)/2)
plt.plot(y,x,c='purple')#c=''控制颜色
plt.show()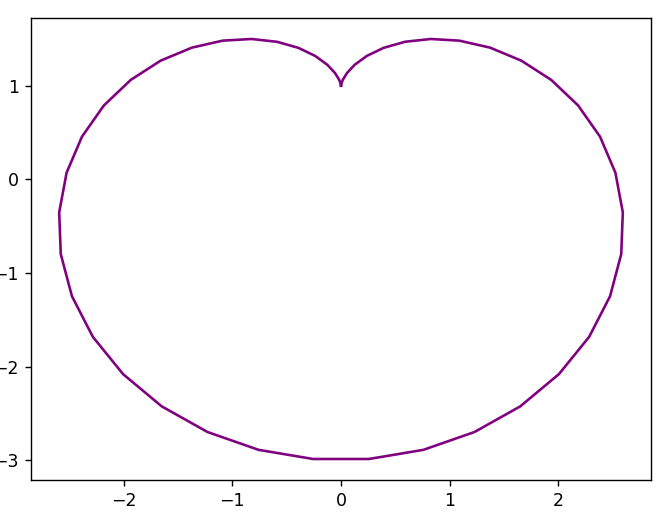
这个也是最还原的,代码过长,下面仅展示爱心的基础函数,需要的朋友可以去《点燃我温暖你》中李峋的同款爱心代码-Python文档类资源-CSDN文库下载,我设置的是免费下载
    x = 16 * (sin(t) ** 3)
    y = -(13 * cos(t) - 5 * cos(2 * t) - 2 * cos(3 * t) - cos(4 * t))
由于代码过长,源码放在资源html网页做的动态爱心(超好看)-Javascript文档类资源-CSDN文库里,可以免费下载
直达:💗
<!DOCTYPE html>
<html>
  <head>
    <meta charset="utf-8" />
    <title>💗</title>

    <style>
      html,
      body {
        height: 100%;
        padding: 0;
        margin: 0;
        background: #000;
      }
      canvas {
        position: absolute;
        width: 100%;
        height: 100%;
        animation: anim 1.5s ease-in-out infinite;
        -webkit-animation: anim 1.5s ease-in-out infinite;
        -o-animation: anim 1.5s ease-in-out infinite;
        -moz-animation: anim 1.5s ease-in-out infinite;
      }
      #name {
        position: absolute;
        top: 50%;
        left: 50%;
        transform: translate(-50%, -50%);
        margin-top: -20px;
        font-size: 46px;
        color: #ea80b0;
      }
      @keyframes anim {
        0% {
          transform: scale(0.8);
        }
        25% {
          transform: scale(0.7);
        }
        50% {
          transform: scale(1);
        }
        75% {
          transform: scale(0.7);
        }
        100% {
          transform: scale(0.8);
        }
      }
      @-webkit-keyframes anim {
        0% {
          -webkit-transform: scale(0.8);
        }
        25% {
          -webkit-transform: scale(0.7);
        }
        50% {
          -webkit-transform: scale(1);
        }
        75% {
          -webkit-transform: scale(0.7);
        }
        100% {
          -webkit-transform: scale(0.8);
        }
      }
      @-o-keyframes anim {
        0% {
          -o-transform: scale(0.8);
        }
        25% {
          -o-transform: scale(0.7);
        }
        50% {
          -o-transform: scale(1);
        }
        75% {
          -o-transform: scale(0.7);
        }
        100% {
          -o-transform: scale(0.8);
        }
      }
      @-moz-keyframes anim {
        0% {
          -moz-transform: scale(0.8);
        }
        25% {
          -moz-transform: scale(0.7);
        }
        50% {
          -moz-transform: scale(1);
        }
        75% {
          -moz-transform: scale(0.7);
        }
        100% {
          -moz-transform: scale(0.8);
        }
      }
    </style>
  </head>
  <body>
    <canvas id="pinkboard"></canvas>
    <!-- 在下面加名字 -->
     <div id="name" style="color: blue;">CSDN</div>

    <script>
      var settings = {
        particles: {
          length: 500,
          duration: 2,
          velocity: 100,
          effect: -0.75,
          size: 30,
        },
      };
      (function () {
        var b = 0;
        var c = ["ms", "moz", "webkit", "o"];
        for (var a = 0; a < c.length && !window.requestAnimationFrame; ++a) {
          window.requestAnimationFrame = window[c[a] + "RequestAnimationFrame"];
          window.cancelAnimationFrame =
            window[c[a] + "CancelAnimationFrame"] ||
            window[c[a] + "CancelRequestAnimationFrame"];
        }
        if (!window.requestAnimationFrame) {
          window.requestAnimationFrame = function (h, e) {
            var d = new Date().getTime();
            var f = Math.max(0, 16 - (d - b));
            var g = window.setTimeout(function () {
              h(d + f);
            }, f);
            b = d + f;
            return g;
          };
        }
        if (!window.cancelAnimationFrame) {
          window.cancelAnimationFrame = function (d) {
            clearTimeout(d);
          };
        }
      })();
      var Point = (function () {
        function Point(x, y) {
          this.x = typeof x !== "undefined" ? x : 0;
          this.y = typeof y !== "undefined" ? y : 0;
        }
        Point.prototype.clone = function () {
          return new Point(this.x, this.y);
        };
        Point.prototype.length = function (length) {
          if (typeof length == "undefined")
            return Math.sqrt(this.x * this.x + this.y * this.y);
          this.normalize();
          this.x *= length;
          this.y *= length;
          return this;
        };
        Point.prototype.normalize = function () {
          var length = this.length();
          this.x /= length;
          this.y /= length;
          return this;
        };
        return Point;
      })();
      var Particle = (function () {
        function Particle() {
          this.position = new Point();
          this.velocity = new Point();
          this.acceleration = new Point();
          this.age = 0;
        }
        Particle.prototype.initialize = function (x, y, dx, dy) {
          this.position.x = x;
          this.position.y = y;
          this.velocity.x = dx;
          this.velocity.y = dy;
          this.acceleration.x = dx * settings.particles.effect;
          this.acceleration.y = dy * settings.particles.effect;
          this.age = 0;
        };
        Particle.prototype.update = function (deltaTime) {
          this.position.x += this.velocity.x * deltaTime;
          this.position.y += this.velocity.y * deltaTime;
          this.velocity.x += this.acceleration.x * deltaTime;
          this.velocity.y += this.acceleration.y * deltaTime;
          this.age += deltaTime;
        };
        Particle.prototype.draw = function (context, image) {
          function ease(t) {
            return --t * t * t + 1;
          }
          var size = image.width * ease(this.age / settings.particles.duration);
          context.globalAlpha = 1 - this.age / settings.particles.duration;
          context.drawImage(
            image,
            this.position.x - size / 2,
            this.position.y - size / 2,
            size,
            size
          );
        };
        return Particle;
      })();
      var ParticlePool = (function () {
        var particles,
          firstActive = 0,
          firstFree = 0,
          duration = settings.particles.duration;

        function ParticlePool(length) {
          particles = new Array(length);
          for (var i = 0; i < particles.length; i++)
            particles[i] = new Particle();
        }
        ParticlePool.prototype.add = function (x, y, dx, dy) {
          particles[firstFree].initialize(x, y, dx, dy);
          firstFree++;
          if (firstFree == particles.length) firstFree = 0;
          if (firstActive == firstFree) firstActive++;
          if (firstActive == particles.length) firstActive = 0;
        };
        ParticlePool.prototype.update = function (deltaTime) {
          var i;
          if (firstActive < firstFree) {
            for (i = firstActive; i < firstFree; i++)
              particles[i].update(deltaTime);
          }
          if (firstFree < firstActive) {
            for (i = firstActive; i < particles.length; i++)
              particles[i].update(deltaTime);
            for (i = 0; i < firstFree; i++) particles[i].update(deltaTime);
          }
          while (
            particles[firstActive].age >= duration &&
            firstActive != firstFree
          ) {
            firstActive++;
            if (firstActive == particles.length) firstActive = 0;
          }
        };
        ParticlePool.prototype.draw = function (context, image) {
          if (firstActive < firstFree) {
            for (i = firstActive; i < firstFree; i++)
              particles[i].draw(context, image);
          }
          if (firstFree < firstActive) {
            for (i = firstActive; i < particles.length; i++)
              particles[i].draw(context, image);
            for (i = 0; i < firstFree; i++) particles[i].draw(context, image);
          }
        };
        return ParticlePool;
      })();
      (function (canvas) {
        var context = canvas.getContext("2d"),
          particles = new ParticlePool(settings.particles.length),
          particleRate =
            settings.particles.length / settings.particles.duration,
          time;
        function pointOnHeart(t) {
          return new Point(
            160 * Math.pow(Math.sin(t), 3),
            130 * Math.cos(t) -
              50 * Math.cos(2 * t) -
              20 * Math.cos(3 * t) -
              10 * Math.cos(4 * t) +
              25
          );
        }
        var image = (function () {
          var canvas = document.createElement("canvas"),
            context = canvas.getContext("2d");
          canvas.width = settings.particles.size;
          canvas.height = settings.particles.size;
          function to(t) {
            var point = pointOnHeart(t);
            point.x =
              settings.particles.size / 2 +
              (point.x * settings.particles.size) / 350;
            point.y =
              settings.particles.size / 2 -
              (point.y * settings.particles.size) / 350;
            return point;
          }
          context.beginPath();
          var t = -Math.PI;
          var point = to(t);
          context.moveTo(point.x, point.y);
          while (t < Math.PI) {
            t += 0.01;
            point = to(t);
            context.lineTo(point.x, point.y);
          }
          context.closePath();
          context.fillStyle = "#ea80b0";
          context.fill();
          var image = new Image();
          image.src = canvas.toDataURL();
          return image;
        })();
        function render() {
          requestAnimationFrame(render);
          var newTime = new Date().getTime() / 1000,
            deltaTime = newTime - (time || newTime);
          time = newTime;
          context.clearRect(0, 0, canvas.width, canvas.height);
          var amount = particleRate * deltaTime;
          for (var i = 0; i < amount; i++) {
            var pos = pointOnHeart(Math.PI - 2 * Math.PI * Math.random());
            var dir = pos.clone().length(settings.particles.velocity);
            particles.add(
              canvas.width / 2 + pos.x,
              canvas.height / 2 - pos.y,
              dir.x,
              -dir.y
            );
          }
          particles.update(deltaTime);
          particles.draw(context, image);
        }
        function onResize() {
          canvas.width = canvas.clientWidth;
          canvas.height = canvas.clientHeight;
        }
        window.onresize = onResize;
        setTimeout(function () {
          onResize();
          render();
        }, 10);
      })(document.getElementById("pinkboard"));

    </script>
  </body>
</html>
首先建一个txt文件
打开将代码粘进去并保存
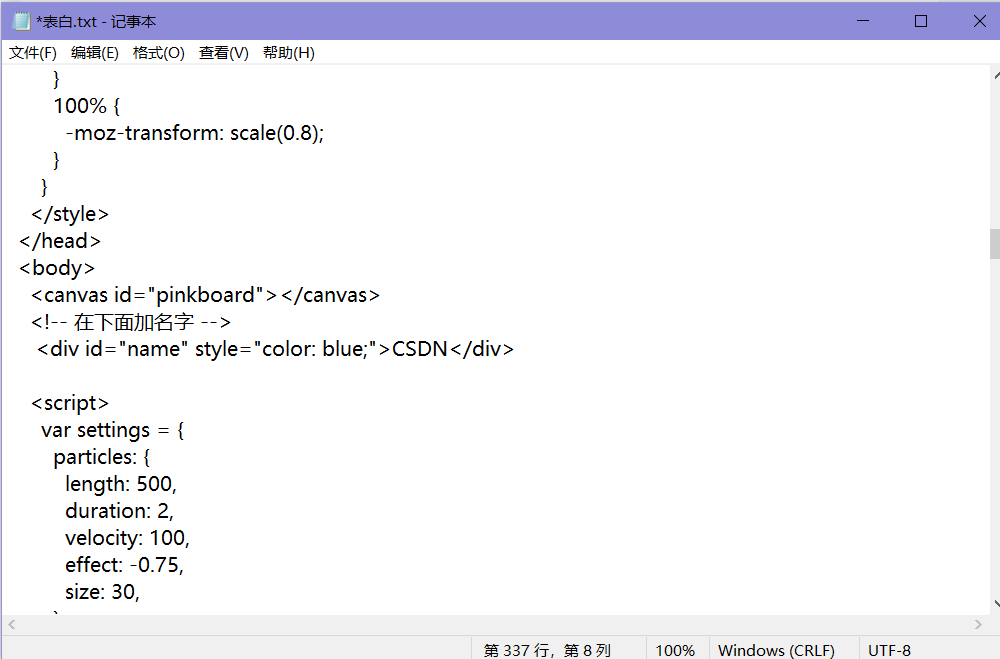
找到 <!-- 在下面加名字 -->
<div id="name" style="color: blue;">这里加你想要加的文字</div>
如果你想要修改文字颜色的话,将上面的blue修改为你想要的颜色
然后保存退出,将文件名修改为表白.html,回车双击
如果修改完文件名还是代码就看看文件>查看>文件拓展名选了没
 效果图
效果图
直达:💗

👍+✏️+⭐️是对博主最大的鼓励与支持!!!
我需要在客户计算机上运行Ruby应用程序。通常需要几天才能完成(复制大备份文件)。问题是如果启用sleep,它会中断应用程序。否则,计算机将持续运行数周,直到我下次访问为止。有什么方法可以防止执行期间休眠并让Windows在执行后休眠吗?欢迎任何疯狂的想法;-) 最佳答案 Here建议使用SetThreadExecutionStateWinAPI函数,使应用程序能够通知系统它正在使用中,从而防止系统在应用程序运行时进入休眠状态或关闭显示。像这样的东西:require'Win32API'ES_AWAYMODE_REQUIRED=0x0
如何在buildr项目中使用Ruby?我在很多不同的项目中使用过Ruby、JRuby、Java和Clojure。我目前正在使用我的标准Ruby开发一个模拟应用程序,我想尝试使用Clojure后端(我确实喜欢功能代码)以及JRubygui和测试套件。我还可以看到在未来的不同项目中使用Scala作为后端。我想我要为我的项目尝试一下buildr(http://buildr.apache.org/),但我注意到buildr似乎没有设置为在项目中使用JRuby代码本身!这看起来有点傻,因为该工具旨在统一通用的JVM语言并且是在ruby中构建的。除了将输出的jar包含在一个独特的、仅限ruby
Rackup通过Rack的默认处理程序成功运行任何Rack应用程序。例如:classRackAppdefcall(environment)['200',{'Content-Type'=>'text/html'},["Helloworld"]]endendrunRackApp.new但是当最后一行更改为使用Rack的内置CGI处理程序时,rackup给出“NoMethodErrorat/undefinedmethod`call'fornil:NilClass”:Rack::Handler::CGI.runRackApp.newRack的其他内置处理程序也提出了同样的反对意见。例如Rack
在rails源中:https://github.com/rails/rails/blob/master/activesupport/lib/active_support/lazy_load_hooks.rb可以看到以下内容@load_hooks=Hash.new{|h,k|h[k]=[]}在IRB中,它只是初始化一个空哈希。和做有什么区别@load_hooks=Hash.new 最佳答案 查看rubydocumentationforHashnew→new_hashclicktotogglesourcenew(obj)→new_has
我想用ruby编写一个小的命令行实用程序并将其作为gem分发。我知道安装后,Guard、Sass和Thor等某些gem可以从命令行自行运行。为了让gem像二进制文件一样可用,我需要在我的gemspec中指定什么。 最佳答案 Gem::Specification.newdo|s|...s.executable='name_of_executable'...endhttp://docs.rubygems.org/read/chapter/20 关于ruby-在Ruby中编写命令行实用程序
我构建了两个需要相互通信和发送文件的Rails应用程序。例如,一个Rails应用程序会发送请求以查看其他应用程序数据库中的表。然后另一个应用程序将呈现该表的json并将其发回。我还希望一个应用程序将存储在其公共(public)目录中的文本文件发送到另一个应用程序的公共(public)目录。我从来没有做过这样的事情,所以我什至不知道从哪里开始。任何帮助,将不胜感激。谢谢! 最佳答案 无论Rails是什么,几乎所有Web应用程序都有您的要求,大多数现代Web应用程序都需要相互通信。但是有一个小小的理解需要你坚持下去,网站不应直接访问彼此
我尝试运行2.x应用程序。我使用rvm并为此应用程序设置其他版本的ruby:$rvmuseree-1.8.7-head我尝试运行服务器,然后出现很多错误:$script/serverNOTE:Gem.source_indexisdeprecated,useSpecification.Itwillberemovedonorafter2011-11-01.Gem.source_indexcalledfrom/Users/serg/rails_projects_terminal/work_proj/spohelp/config/../vendor/rails/railties/lib/r
刚入门rails,开始慢慢理解。有人可以解释或给我一些关于在application_controller中编码的好处或时间和原因的想法吗?有哪些用例。您如何为Rails应用程序使用应用程序Controller?我不想在那里放太多代码,因为据我了解,每个请求都会调用此Controller。这是真的? 最佳答案 ApplicationController实际上是您应用程序中的每个其他Controller都将从中继承的类(尽管这不是强制性的)。我同意不要用太多代码弄乱它并保持干净整洁的态度,尽管在某些情况下ApplicationContr
我是一个Rails初学者,但我想从我的RailsView(html.haml文件)中查看Ruby变量的内容。我试图在ruby中打印出变量(认为它会在终端中出现),但没有得到任何结果。有什么建议吗?我知道Rails调试器,但更喜欢使用inspect来打印我的变量。 最佳答案 您可以在View中使用puts方法将信息输出到服务器控制台。您应该能够在View中的任何位置使用Haml执行以下操作:-puts@my_variable.inspect 关于ruby-on-rails-如何在我的R
我的主要目标是能够完全理解我正在使用的库/gem。我尝试在Github上从头到尾阅读源代码,但这真的很难。我认为更有趣、更温和的踏脚石就是在使用时阅读每个库/gem方法的源代码。例如,我想知道RubyonRails中的redirect_to方法是如何工作的:如何查找redirect_to方法的源代码?我知道在pry中我可以执行类似show-methodmethod的操作,但我如何才能对Rails框架中的方法执行此操作?您对我如何更好地理解Gem及其API有什么建议吗?仅仅阅读源代码似乎真的很难,尤其是对于框架。谢谢! 最佳答案 Ru