都知道分布式事务n种处理方案,但是比较好用的属于seata这块,Seata 是一款开源的分布式事务解决方案,致力于提供高性能和简单易用的分布式事务服务。Seata 将为用户提供了 AT、TCC、SAGA 和 XA 事务模式,为用户打造一站式的分布式解决方案。
seata的几种术语:
1. 下载seata docker镜像
docker pull seataio/seata-server
2.启动docker镜像
docker run -d --name seata-server -p 8091:8091 seataio/seata-server
3. 拷贝docker seata启动后的镜像文件文件至/config/docker-data/seata下
cd ..

mkdir config/docker-data/seata

docker cp seata-server:/seata-server /docker-data/seata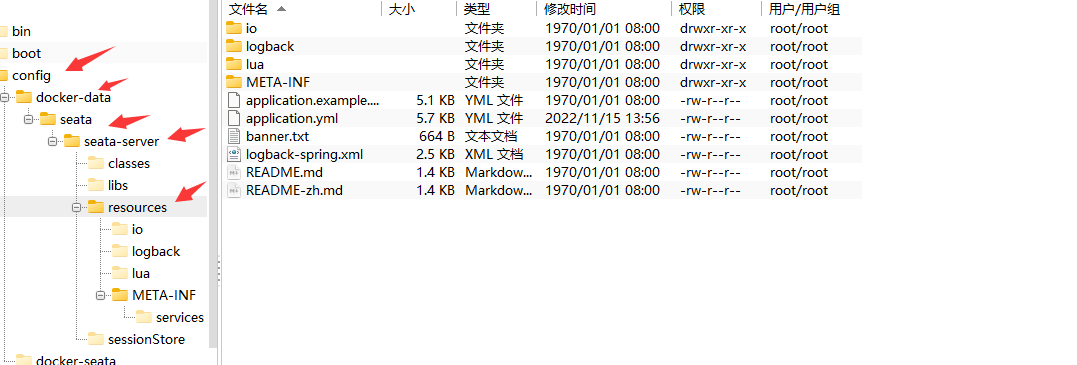
4.修改配置文件application.yml 参考application.example.yml
# Copyright 1999-2019 Seata.io Group.
#
# Licensed under the Apache License, Version 2.0 (the "License");
# you may not use this file except in compliance with the License.
# You may obtain a copy of the License at
#
# http://www.apache.org/licenses/LICENSE-2.0
#
# Unless required by applicable law or agreed to in writing, software
# distributed under the License is distributed on an "AS IS" BASIS,
# WITHOUT WARRANTIES OR CONDITIONS OF ANY KIND, either express or implied.
# See the License for the specific language governing permissions and
# limitations under the License.
server:
port: 7091
spring:
application:
name: seata-server
logging:
config: classpath:logback-spring.xml
file:
path: ${user.home}/logs/seata
extend:
logstash-appender:
destination: 127.0.0.1:4560
kafka-appender:
bootstrap-servers: 127.0.0.1:9092
topic: logback_to_logstash
seata:
config:
# support: nacos 、 consul 、 apollo 、 zk 、 etcd3
type: file
nacos:
server-addr: 127.0.0.1:8848
namespace:
group: SEATA_GROUP
username:
password:
##if use MSE Nacos with auth, mutex with username/password attribute
#access-key: ""
#secret-key: ""
data-id: seataServer.properties
consul:
server-addr: 127.0.0.1:8500
acl-token:
key: seata.properties
apollo:
appId: seata-server
apollo-meta: http://192.168.1.204:8801
apollo-config-service: http://192.168.1.204:8080
namespace: application
apollo-access-key-secret:
cluster: seata
zk:
server-addr: 127.0.0.1:2181
session-timeout: 6000
connect-timeout: 2000
username:
password:
node-path: /seata/seata.properties
etcd3:
server-addr: http://localhost:2379
key: seata.properties
registry:
# support: nacos 、 eureka 、 redis 、 zk 、 consul 、 etcd3 、 sofa
type: file
preferred-networks: 30.240.*
nacos:
application: seata-server
server-addr: 127.0.0.1:8848
group: SEATA_GROUP
namespace:
cluster: default
username:
password:
##if use MSE Nacos with auth, mutex with username/password attribute
#access-key: ""
#secret-key: ""
eureka:
service-url: http://localhost:8761/eureka
application: default
weight: 1
redis:
server-addr: localhost:6379
db: 0
password:
cluster: default
timeout: 0
zk:
cluster: default
server-addr: 127.0.0.1:2181
session-timeout: 6000
connect-timeout: 2000
username: ""
password: ""
consul:
cluster: default
server-addr: 127.0.0.1:8500
acl-token:
etcd3:
cluster: default
server-addr: http://localhost:2379
sofa:
server-addr: 127.0.0.1:9603
application: default
region: DEFAULT_ZONE
datacenter: DefaultDataCenter
cluster: default
group: SEATA_GROUP
address-wait-time: 3000
server:
service-port: 8091 #If not configured, the default is '${server.port} + 1000'
max-commit-retry-timeout: -1
max-rollback-retry-timeout: -1
rollback-retry-timeout-unlock-enable: false
enable-check-auth: true
enable-parallel-request-handle: true
retry-dead-threshold: 130000
xaer-nota-retry-timeout: 60000
recovery:
committing-retry-period: 1000
async-committing-retry-period: 1000
rollbacking-retry-period: 1000
timeout-retry-period: 1000
undo:
log-save-days: 7
log-delete-period: 86400000
session:
branch-async-queue-size: 5000 #branch async remove queue size
enable-branch-async-remove: false #enable to asynchronous remove branchSession
store:
# support: file 、 db 、 redis
mode: file
session:
mode: file
lock:
mode: file
file:
dir: sessionStore
max-branch-session-size: 16384
max-global-session-size: 512
file-write-buffer-cache-size: 16384
session-reload-read-size: 100
flush-disk-mode: async
db:
datasource: druid
db-type: mysql
driver-class-name: com.mysql.jdbc.Driver
url: jdbc:mysql://127.0.0.1:3306/seata?rewriteBatchedStatements=true
user: mysql
password: mysql
min-conn: 5
max-conn: 100
global-table: global_table
branch-table: branch_table
lock-table: lock_table
distributed-lock-table: distributed_lock
query-limit: 100
max-wait: 5000
redis:
mode: single
database: 0
min-conn: 1
max-conn: 10
password:
max-total: 100
query-limit: 100
single:
host: 127.0.0.1
port: 6379
sentinel:
master-name:
sentinel-hosts:
metrics:
enabled: false
registry-type: compact
exporter-list: prometheus
exporter-prometheus-port: 9898
transport:
rpc-tc-request-timeout: 30000
enable-tc-server-batch-send-response: false
shutdown:
wait: 3
thread-factory:
boss-thread-prefix: NettyBoss
worker-thread-prefix: NettyServerNIOWorker
boss-thread-size: 15.停掉并清除旧容器
docker stop xxxx

docker rm xxxx
6.重新启动新容器
docker run -d --restart always --name seata-server -p 8091:8091 -v /config/docker-data/seata/seata-server -e SEATA_IP=[公网ip] -e SEATA_PORT=8091 seataio/seata-server接下来就可以在项目中进行相关操作了,爽不爽
我想为Heroku构建一个Rails3应用程序。他们使用Postgres作为他们的数据库,所以我通过MacPorts安装了postgres9.0。现在我需要一个postgresgem并且共识是出于性能原因你想要pggem。但是我对我得到的错误感到非常困惑当我尝试在rvm下通过geminstall安装pg时。我已经非常明确地指定了所有postgres目录的位置可以找到但仍然无法完成安装:$envARCHFLAGS='-archx86_64'geminstallpg--\--with-pg-config=/opt/local/var/db/postgresql90/defaultdb/po
我打算为ruby脚本创建一个安装程序,但我希望能够确保机器安装了RVM。有没有一种方法可以完全离线安装RVM并且不引人注目(通过不引人注目,就像创建一个可以做所有事情的脚本而不是要求用户向他们的bash_profile或bashrc添加一些东西)我不是要脚本本身,只是一个关于如何走这条路的快速指针(如果可能的话)。我们还研究了这个很有帮助的问题:RVM-isthereawayforsimpleofflineinstall?但有点误导,因为答案只向我们展示了如何离线在RVM中安装ruby。我们需要能够离线安装RVM本身,并查看脚本https://raw.github.com/wayn
我有一个奇怪的问题:我在rvm上安装了rubyonrails。一切正常,我可以创建项目。但是在我输入“railsnew”时重新启动后,我有“程序'rails'当前未安装。”。SystemUbuntu12.04ruby-v"1.9.3p194"gemlistactionmailer(3.2.5)actionpack(3.2.5)activemodel(3.2.5)activerecord(3.2.5)activeresource(3.2.5)activesupport(3.2.5)arel(3.0.2)builder(3.0.0)bundler(1.1.4)coffee-rails(
我刚刚为fedora安装了emacs。我想用emacs编写ruby。为ruby提供代码提示、代码完成类型功能所需的工具、扩展是什么? 最佳答案 ruby-mode已经包含在Emacs23之后的版本中。不过,它也可以通过ELPA获得。您可能感兴趣的其他一些事情是集成RVM、feature-mode(Cucumber)、rspec-mode、ruby-electric、inf-ruby、rinari(用于Rails)等。这是我当前用于Ruby开发的Emacs配置:https://github.com/citizen428/emacs
我正在尝试在我的centos服务器上安装therubyracer,但遇到了麻烦。$geminstalltherubyracerBuildingnativeextensions.Thiscouldtakeawhile...ERROR:Errorinstallingtherubyracer:ERROR:Failedtobuildgemnativeextension./usr/local/rvm/rubies/ruby-1.9.3-p125/bin/rubyextconf.rbcheckingformain()in-lpthread...yescheckingforv8.h...no***e
我的最终目标是安装当前版本的RubyonRails。我在OSXMountainLion上运行。到目前为止,这是我的过程:已安装的RVM$\curl-Lhttps://get.rvm.io|bash-sstable检查已知(我假设已批准)安装$rvmlistknown我看到当前的稳定版本可用[ruby-]2.0.0[-p247]输入命令安装$rvminstall2.0.0-p247注意:我也试过这些安装命令$rvminstallruby-2.0.0-p247$rvminstallruby=2.0.0-p247我很快就无处可去了。结果:$rvminstall2.0.0-p247Search
我实际上是在尝试使用RVM在我的OSX10.7.5上更新ruby,并在输入以下命令后:rvminstallruby我得到了以下回复:Searchingforbinaryrubies,thismighttakesometime.Checkingrequirementsforosx.Installingrequirementsforosx.Updatingsystem.......Errorrunning'requirements_osx_brew_update_systemruby-2.0.0-p247',pleaseread/Users/username/.rvm/log/138121
由于fast-stemmer的问题,我很难安装我想要的任何rubygem。我把我得到的错误放在下面。Buildingnativeextensions.Thiscouldtakeawhile...ERROR:Errorinstallingfast-stemmer:ERROR:Failedtobuildgemnativeextension./System/Library/Frameworks/Ruby.framework/Versions/2.0/usr/bin/rubyextconf.rbcreatingMakefilemake"DESTDIR="cleanmake"DESTDIR=
当我尝试安装Ruby时遇到此错误。我试过查看this和this但无济于事➜~brewinstallrubyWarning:YouareusingOSX10.12.Wedonotprovidesupportforthispre-releaseversion.Youmayencounterbuildfailuresorotherbreakages.Pleasecreatepull-requestsinsteadoffilingissues.==>Installingdependenciesforruby:readline,libyaml,makedepend==>Installingrub
当我执行>rvminstall1.9.2时一切顺利。然后我做>rvmuse1.9.2也很顺利。但是当涉及到ruby-v时..sam@sjones:~$rvminstall1.9.2/home/sam/.rvm/rubies/ruby-1.9.2-p136,thismaytakeawhiledependingonyourcpu(s)...ruby-1.9.2-p136-#fetchingruby-1.9.2-p136-#downloadingruby-1.9.2-p136,thismaytakeawhiledependingonyourconnection...%Total%Rece