目录
pytest -k stringexpr 当测试文件、测试类名、测试方法中包含stringexpr关键字时,均可以被执行
pytest test_mod.py::test_func 仅运行与节点ID匹配的测试
pytest是python的一种单元测试框架,与python自带的unittest测试框架类似,但是比unittest框架使用起来更简洁,效率更高。
根据pytest的官方网站介绍,它具有如下特点:
(1)非常容易上手,入门简单,文档丰富,文档中有很多实例可以参考
(2)能够支持简单的单元测试和复杂的功能测试
(3)支持参数化
(4)执行测试过程中可以将某些测试跳过,或者对某些预期失败的case标记成失败
(5)支持重复执行失败的case
(6)支持运行由nose, unittest编写的测试case
(7)pytest具有很多第三方插件,并且可以自定义扩展,比较好用的如pytest-selenium(集成selenium)、pytest-html(完美html测试报告生成)、pytest-rerunfailures(失败case重复执行)、pytest-xdist(多CPU分发)等
(8)方便的和持续集成工具集成
py -3 -m pip install pytest
或者
py -3 -m pip install -U pytest
pytest --version
(1)测试文件以test_开头(以_test结尾也可以),注意:pytest 文件名.py不受此规则限制。
(2)测试类以Test开头,并且不能带有 __init__ 方法
(3)测试函数以test_开头
(4)断言使用基本的assert即可
# 执行pytest目录下所有test_开头(以_test结尾也可以)的py文件
# 子目录中以_test开头或结尾的py文件也会被执行
...\pytest>pytest# 执行某个测试文件
...\pytest>pytest test_a.py# 执行指定目录下所有test_开头(以_test结尾也可以)的py文件
...\pytest>pytest pytest_sub_path# 测试文件、测试类名、测试方法中包含指定关键字,匹配成功时,均可以被执行
F:\LiFuChe\python_20_自动化\pytest>pytest -k fixture
================================ test session starts ================================
platform win32 -- Python 3.10.2, pytest-7.1.2, pluggy-1.0.0
rootdir: F:\LiFuChe\python_20_自动化\pytest
plugins: html-3.1.1, metadata-2.0.2, ordering-0.6, rerunfailures-10.2
collected 49 items / 29 deselected / 20 selected
test_fixture1.py . [ 5%]
test_fixture2.py ... [ 20%]
test_fixture3.py ... [ 35%]
test_fixture4.py ... [ 50%]
test_fixture5.py .F [ 60%]
test_fixture6.py .... [ 80%]
conftest\test_fixture_module.py FF [ 90%]
test_conftest\test_fixture_module.py FFpytest test_a.py::test_case1 #执行test_a.py文件下的test_case1函数
pytest test_mod.py::TestClass::test_method #执行指定测试类TestClass中的test_method 方法使用pytest --help可以查看全部选项
| 命令 | 说明 |
| -q | 等价于pytest --quiet,简化输出信息 |
| -s | 等价于pytest --capture=no,输出测试用例中的打印信息 |
| -v | 等价于pytest --verbose,显示具体的详情信息(哪个测试用例的哪个测试方法被执行),一般显示错误的位置及错误的详细信息 |
| -m | 用于标记测试并分组,以便快速选中并运行。需要先在待分组的方法前加上@pytest.mark.mark_name这样的装饰器,执行时用pytest-m mark_name。 -m还可以用表达式指定多个标记。使用-m "mark1 and mark2"可以同时选中带有这两个标记的所有测试用例。使用-m "mark1 and not mark2"则会选中带有mark1但不带mark2的测试用例;使用-m "mark1 or mark2"则选中带有mark1或mark2的所有测试用例 |
| -k | 后面可为测试文件、测试类名、测试方法中包含的关键字,匹配成功时,均可以被执行 |
| --lf | 等价于--last-failed,只重新运行上次运行失败的用例(如果没有失败的话,会全部跑) |
| --ff | 等价于--failed-first,运行所有测试用例,但首先运行上次运行失败的测试 |
| --x | 等价于--exitfirst,遇到错误或者用力不通过,则退出执行 |
| --maxfailed=num | 指定执行失败次数后停止 |
生成测试报告需要安装插件:
py -3 -m pip install pytest-html
或:pip install -U pytest-html
执行用例的命令:
pytest --html=report.html

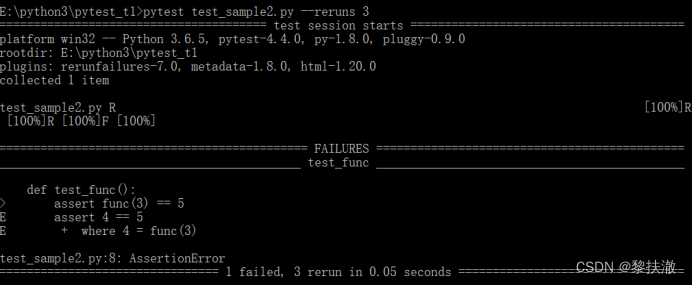
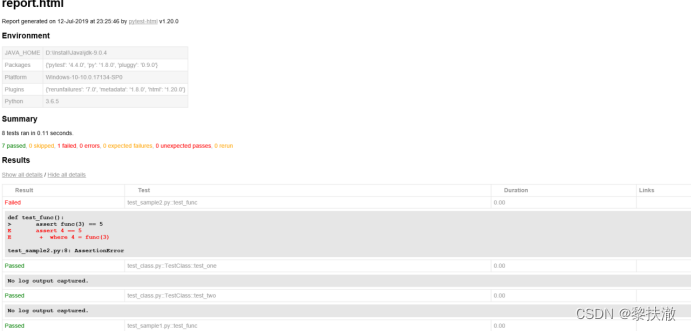 失败重跑
失败重跑需要安装插件:
py -3 -m pip install pytest-rerunfailures
或:pip install -U pytest-rerunfailures
运行命令:
pytest test_sample2.py --reruns n
# n表示重试的次数
setup和teardown:每个测试函数运行时,运行一次
import pytest

class Test_ST():
    def setup(self):
        print("------setup------")

    def teardown(self):
        print("------teardown------")

    def test_001(self):
        assert True

    def test_002(self):
        assert False
setup_class和teardown_class:一个测试类只运行一次
import pytest

class Test_ST():
    def setup_class(cls):
        print("------setup_class------")

    def teardown_class(cls):
        print("------teardown_class------")

    def test_001(self):
        assert True

    def test_002(self):
        assert True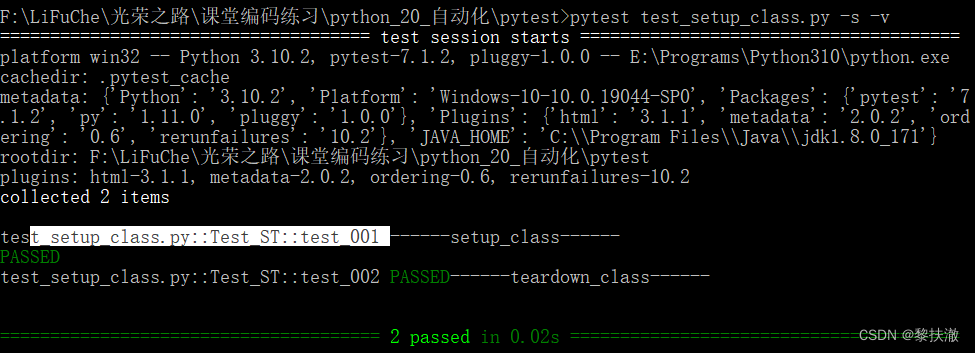
需要安装插件:
py -3 -m pip install pytest-ordering
使用访求:
import pytest
class Test_ST():

    @pytest.mark.run(order=3)
    def test_001(self):
        print("001...")
        assert True

    @pytest.mark.run(order=2)
    def test_002(self):
        print("002...")
        assert True

    @pytest.mark.run(order=1)
    def test_003(self):
        print("003...")
        assert True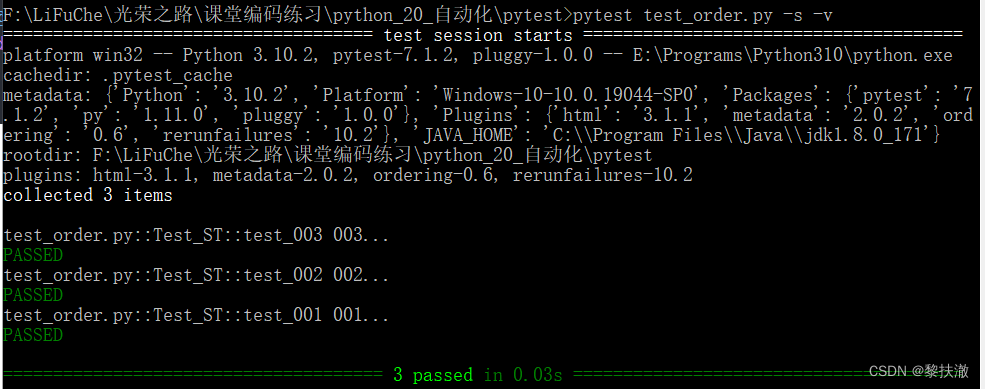
(1)pytest的配置文件存放位置及命名:
通常放在测试目录下,名称为pytest.ini,命令行运行时会使用配置文件中的配置
(2)配置pytest命令行运行参数
[pytest]
addopts=-s ... # 以空格分隔,可添加个命令行参数;所以参数均为插件包的参数
名称固定不要乱改
(3)配置测试搜索的路径
[pytest]
testpaths=./scripts # 表示当前目录下的scripts目录,srcipts目录可自定义
(4)配置测试搜索的文件名
[pytest]
python_files=test_*.py # 表示当前目录下的scripts目录下,以test_开头,.py结尾的所有文件,文件名可自定义
(5)配置测试的测试类名
[pytest]
python_classes=Test_* #当前目录下的scripts目录下,以test_开头,以.py结尾的所有文件中,以Test_开头的类,类可自定义
(6)配置测试的测试函数名
[pytest]
python_functions=test_* #当前目录下的scripts目录下,以test_开头,以.py结尾的所有文件中,以Test_开头的类内,以test_开头的方法,方法可自定义
目录结构:
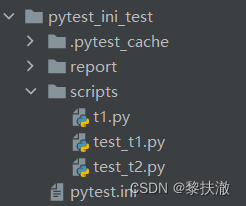
pytest.ini
[pytest]
addopts = -s --html=./report/test_report.html
testpaths = ./scripts
python_files = test_*.py
python_classes = Test_*
python_functions = test_*
t1.py
def test_t1():
    print("test_t1")
	assert True
test_t1.py
import pytest

def test_1():
    print("test_1")
    assert True
test_t2.py
import pytest
class Test_2():
    def test_2_1(self):
        assert True

    def test_2_2(self):
        assert True

    def t_2_3(self):
        assert True
pytest中加入fixture装饰器来标记固定的工厂函数,使测试能够可靠、重复地执行,fixture函数可以在测试执行前和执行后进行必要的准备和清理工作,和unitest测试框架中的setup、teardown类似,但是pytest fixture和传统xUnit风格的setup/teardown函数相比,有了巨大的改进:
(1)fixture具有明确的名称,并通过在测试函数、模块、类或整个项目中声明它们的使用来激活。
(2)fixture是以模块化的方式实现的,因为每个fixture名称都会触发fixture函数,其本身也可以使用其他fixture。
(3)fixture管理从简单的单元扩展到复杂的函数测试,允许根据配置和组件选项参数化fixture和测试,或者在函数、类、模块或整个测试会话范围内重复使用fixture。
@pytest.fixture(scope=”function”,params=None,autouse=False,ids=None,name=None)
常用参数:
scope:被标记方法的作用域
params:(list类型)提供参数数据,供调用标记方法的函数使用
autouse:是否自动执行,默认为False不运行,设置为True自动运行
ids:每个字符串id的列表,每个字符串对应于params,这样他们就是测试ID的一部分。如果没有提供ID它们将从params自动生成
name:fixture的名称。默认为装饰函数的名称。(一般不用)
如果fixture在定义它的统一模块中使用,fixture的功能名称将被请求fixture的功能arg遮蔽,解决这个问题的一种方法是将装饰函数命令"fixture_<fixturename>"然后使用"@pytest.fixture(name='<fixturename>')"
直接将pytest.fixture函数的执行结果,作为参数传递给被测试函数
import requests
import pytest

@pytest.fixture
def baidu_response():
    print("执行fixture")
    return requests.get("http://www.baidu.com")


def test_baidu(baidu_response):
    response = baidu_response
    assert response.status_code == 200
import pytest
# fixture作为函数引用

@pytest.fixture()
def before():
    print("before执行啦。。。")

@pytest.mark.usefixtures("before") # 每个测试方法执行前执行,不包括setup、teardown
class Test_before():
    def setup(self):
        print("setup。。。")

    def test_a(self):
        print("test_a。。。")

    def test_b(self):
        print("test_b。。。")


@pytest.mark.usefixtures("before")  # 函数执行前执行
def test_c():
    print("test_c。。。")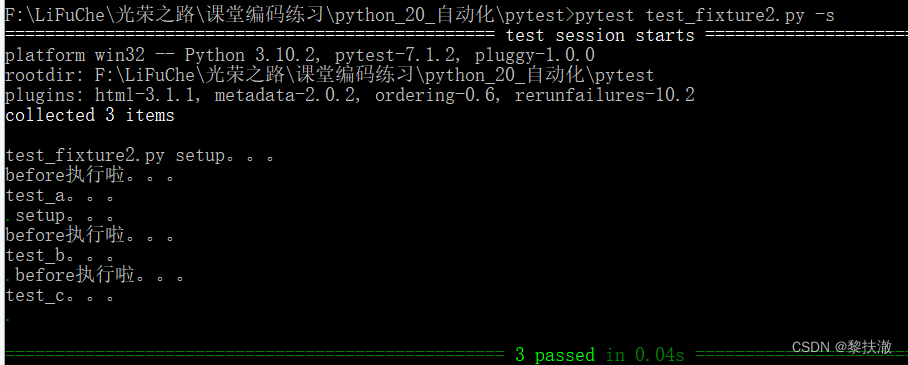
import pytest
# fixture作为函数引用

@pytest.fixture(autouse=True)
def before():
    print("before执行啦。。。")

class Test_before():
    def setup(self):
        print("setup。。。")

    def test_a(self):
        print("test_a。。。")

    def test_b(self):
        print("test_b。。。")

def test_c():
    print("test_c。。。")
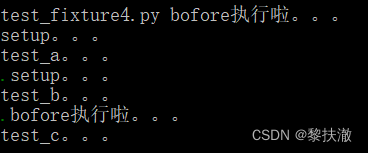
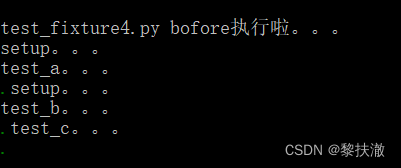
test_fixture4.py
import pytest

@pytest.fixture(scope="function",autouse=True)  # 如果不设置自动运行将不会被调用
def before():
    print("bofore执行啦。。。")

class Test_before():
    def setup(self):
        print("setup。。。")

    def test_a(self):
        print("test_a。。。")

    def test_b(self):
        print("test_b。。。")

def test_c():
print("test_c。。。")每个函数、类中的每个方法都运行一次

一个类只运行一次
一个模块运行一次
不建议使用,影响范围大
import pytest

@pytest.fixture
def generator_num():
    return 1

def test_1_generator_num(generator_num):
    assert generator_num==1

def test_2_generator_num(generator_num):
    assert generator_num==2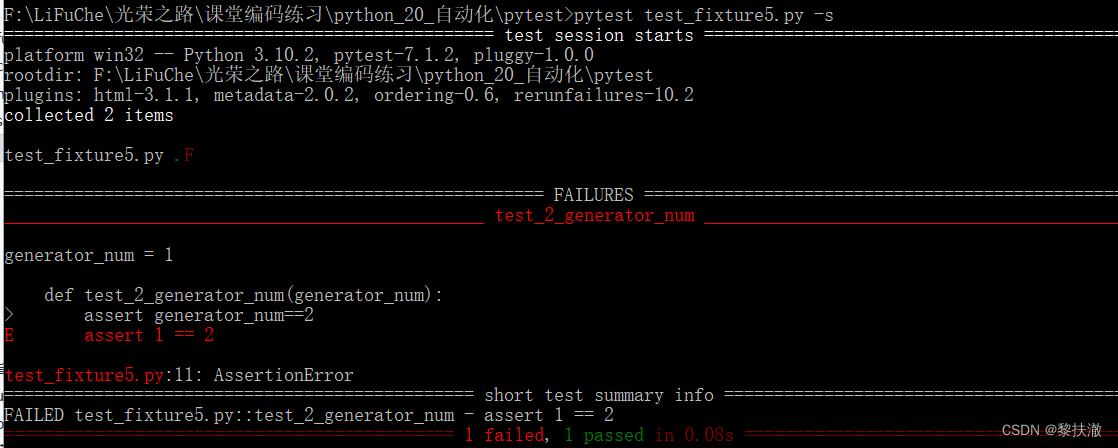
import pytest

@pytest.fixture(params=[1,2,3])
def init_xx(request):  # 参数为固定用法
    return request.param   # 取出单个参数,也为固定用法

class Test_xx:
    def setup_class(self):
        print("setup_class------")

    def teardown_class(self):
        print("teardown_class------")

    def test_xx(self,init_xx):  # 每个参数执行一遍
        print("test_xx------")
        assert init_xx !=4

    def test_yy(self):  # 只执行一次
        print("test_yy------")
        assert True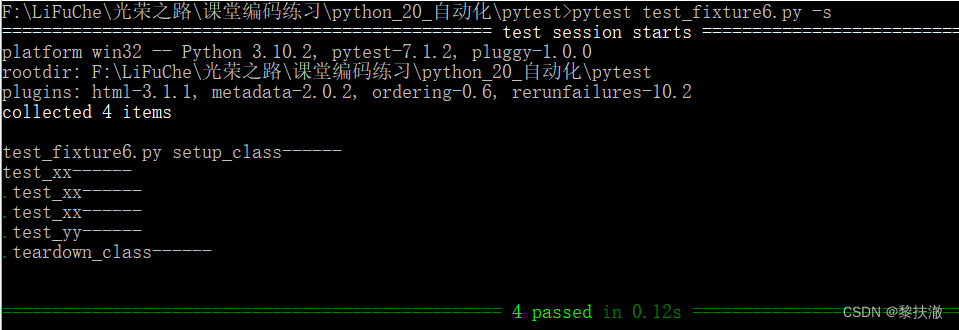
使用方法:
@pytest.mark.skipif(condition,reason=None)
参数:
import pytest

class Test_skip:
    def test_a(self):
        assert True

    @pytest.mark.skipif(2>1,reason="故意的")  #条件为boolean值,True(跳过)/False(执行)
    def test_b(self):
        assert False
import pytest

def is_res():
    # return False
    return True

class Test_skip:
    def test_a(self):
        assert True

    @pytest.mark.skipif(is_res(),reason="故意的")  # 条件为boolean值,True(跳过)/False(不跳过/执行)
    def test_b(self):
        assert True
标记测试函数为失败函数
@pytest.mark.xfail(condition,reason=None)
参数:
import pytest

class Test_xfail:
    def test_a(self):
        assert True

    @pytest.mark.xfail(True,reason="故意的")  # 条件为boolean值,True(跳过)/False(不跳过/执行)
    def test_b(self):
        assert True
@pytest.mark.parametrize(argnames,argvalues,indirect=False,ids=None,scope=None)
常用参数:
注意:与fixture的参数化使用方式不同,比fixture更灵活、方便
import pytest

class Test_para:
    @pytest.mark.parametrize('name', ["tom", "lisa", "lucy"])
    def test_p1(self, name):  # 要传参数的名称,且和参数化中定义的一致
        print("name:",name)
        assert name != "haha"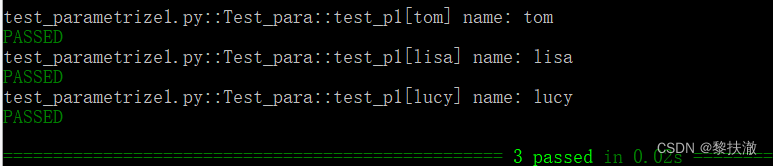
import pytest

def login_data():
    data=[('wang','wang123'),('li','li23'),('zhao','zhao123')]
    return data

class Test_param:
    @pytest.mark.parametrize("username,password",login_data())
    def test_login(self,username,password):
        print("用户名:%s,密码:%s 登录成功!"%(username,password))
        assert True
import pytest
from selenium import webdriver
from selenium.webdriver.common.by import By
from selenium.webdriver.chrome.service import Service
import time
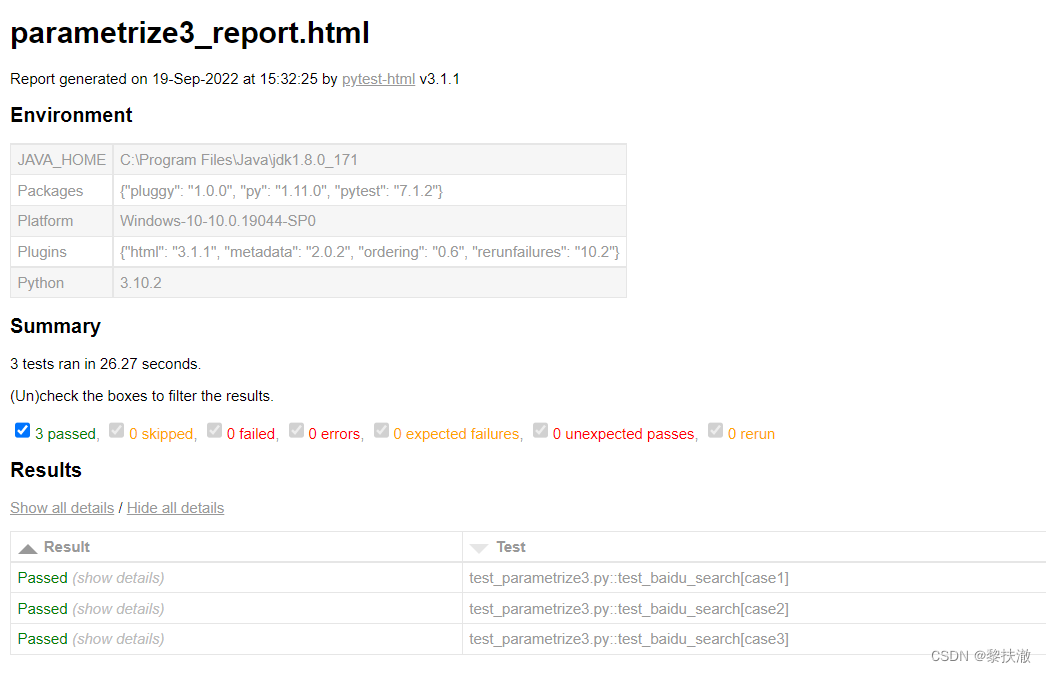
@pytest.mark.parametrize(
"num,search_key",
[("3","光荣之路"),
("2","Selenium"),
("1","python"),
],
ids=["case1","case2","case3"]
# ids中的数据相当于用例名称,如果不写,报告中的用例名称会有中文乱码问题
)
def test_baidu_search(num,search_key):
s = Service("chromedriver.exe")
# driver = webdriver.Chrome(executable_path="chromeDriver")
driver = webdriver.Chrome(service=s)
driver.get("https://www.baidu.com")
time.sleep(2)
driver.find_element(By.ID, "kw").send_keys(search_key)
driver.find_element(By.ID, "su").click()
time.sleep(2)
assert driver.title==search_key+"_百度搜索"
driver.quit()运行命令:pytest test_parametrize3.py -v --html=parametrize3_report.html

将fixture函数放入单独的conftest.py文件中,以便目录中多个测试模块的测试可以访问fixture函数,使用时不需要导入,Pytest会自动发现它。fixture函数的发现规则从测试类开始,然后是测试模块,然后是conftest.py文件,最后是内置插件和第三方插件。
范围:在类、模块或会话中跨测试共享一个fixture实例
使用conftest.py的规则:
(1)conftest.py这个文件名是固定的,不可以更改。
(2)conftest.py与运行用例在同一个包下,并且该包中有__init__.py文件
(3)使用的时候不需要导入conftest.py,会自动寻找。
conftest.py文件的作用域是当前包内(包括子包);如果函数被调用,会优先从当前测试类中寻找,然后是模块(.py文件)中,接着是当前包中寻找(conftest.py中),如果没有再找父包直至根目录;如果我们要声明全局的conftest.py文件,我们可以将其放在根目录下
fixture的作用范围:
fixture里面有个scope参数可以控制fixture的作用范围:session>module>class>function
-function:每一个函数或方法都会调用
-class:每一个类调用一次,一个类中可以有多个方法
-module:每一个.py文件调用一次,该文件内又有多个function和class
-session:是多个文件调用一次,可以跨.py文件调用,每个.py文件就是module
test_fixture_scope.py
def test_ehlo(smtp):
    """执行结果:失败"""
    response, msg = smtp.ehlo()
    assert response == 250
    assert b"smtp.gmail.com" in msg
    assert 0


def test_noop(smtp):
    """执行结果:失败"""
    response, msg = smtp.noop()
    assert response == 250
assert 0conftest.py
import pytest
import smtplib

@pytest.fixture(scope="function")
def smtp():
    return smtplib.SMTP("smtp.qq.com", 587, timeout=5)
运行命令:pytest test_fixture_scope.py
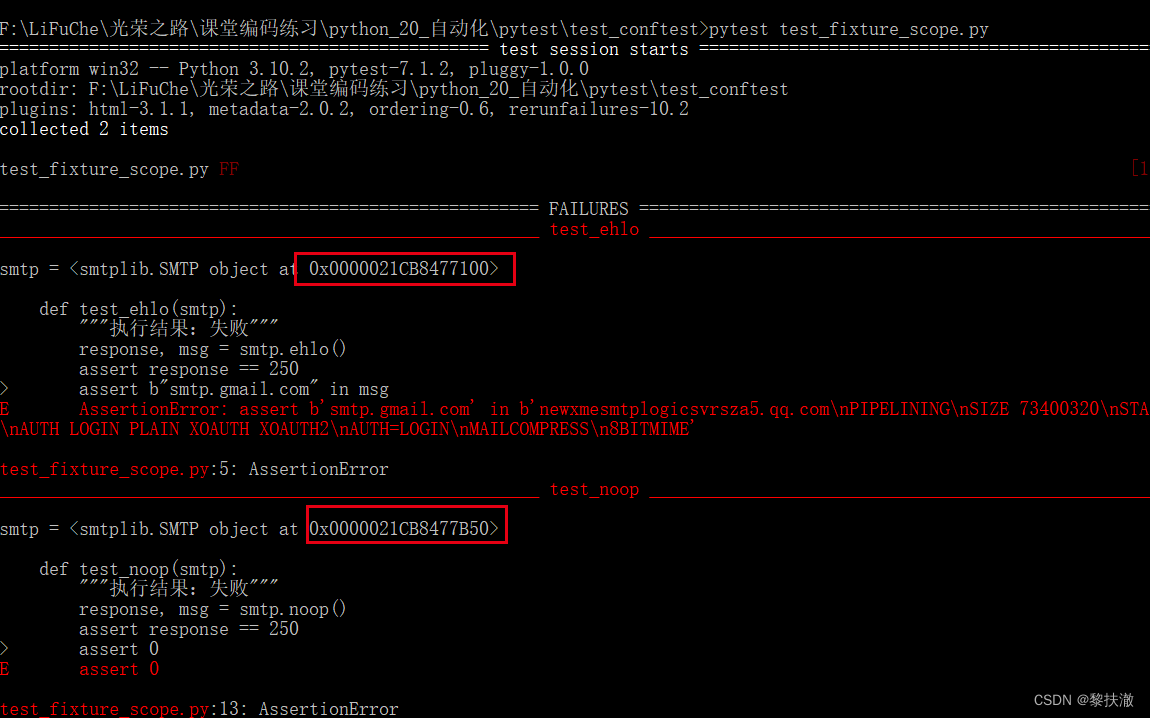
当scope="function"时,每个测试函数都调用一次smtp(),所以可看到两个测试函数使用的smtp对象不同
import pytest
import smtplib

@pytest.fixture(scope="module")
def smtp():
    return smtplib.SMTP("smtp.qq.com", 587, timeout=5)
运行命令:pytest test_fixture_scope.py
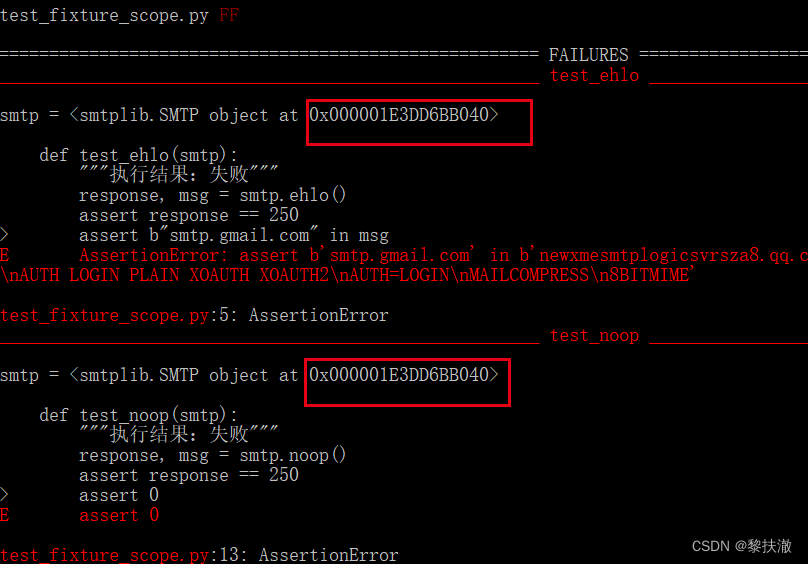
可以看到同一模块范围内的smtp对象被传递到两个测试函数中,因为pytest显示了回溯中的传入参数值。因此,使用smtp的两个测试函数的运行速度与单个测试函数差不多,因为它们重用了相同的实例。
在特性的函数请求中,高范围(如会话)的fixture比低范围fixture(如函数或类)先被实例化。相同范围内的固定装置的相对顺序遵循测试功能中声明的顺序,并尊重固定装置之间的依赖关系。
import pytest

@pytest.fixture(scope="session")
def s1():
    print("s1...session....")

@pytest.fixture(scope="module")
def m1():
    print("m1...module...")

@pytest.fixture
def f1():
    print("f1...function...")

@pytest.fixture
def f2():
    print("f2...function...")

def test_foo(f1, m1, f2, s1):
    f1=f1
    m1=m1
    f2=f2
    s1=s1
    assert 0
当fixture超出范围时,pytest支持执行fixture特定的最终代码,通过使用yield语句而不是return,yield语句之后的所有代码都用作拆卸代码。

conftest.py
import smtplib
import pytest

@pytest.fixture(scope="module")
def smtp():
	smtp = smtplib.SMTP("smtp.qq.com", 587, timeout=5)
	yield smtp
	print("teardown smtp...")
	smtp.close()
print和smtp.close()语句将在模块的最后一次测试完成后执行,不管测试的异常状态如何
注意:如果我们用scope='function'修饰fixture函数,那么每个测试都会发生fixture设置和清理。
test_fixture_teardown.py
def test_ehlo(smtp):
    """执行结果:失败"""
    response, msg = smtp.ehlo()
    assert response == 250
    assert b"smtp.gmail.com" in msg
    assert 0


def test_noop(smtp):
    """执行结果:失败"""
    response, msg = smtp.noop()
    assert response == 250
    assert 1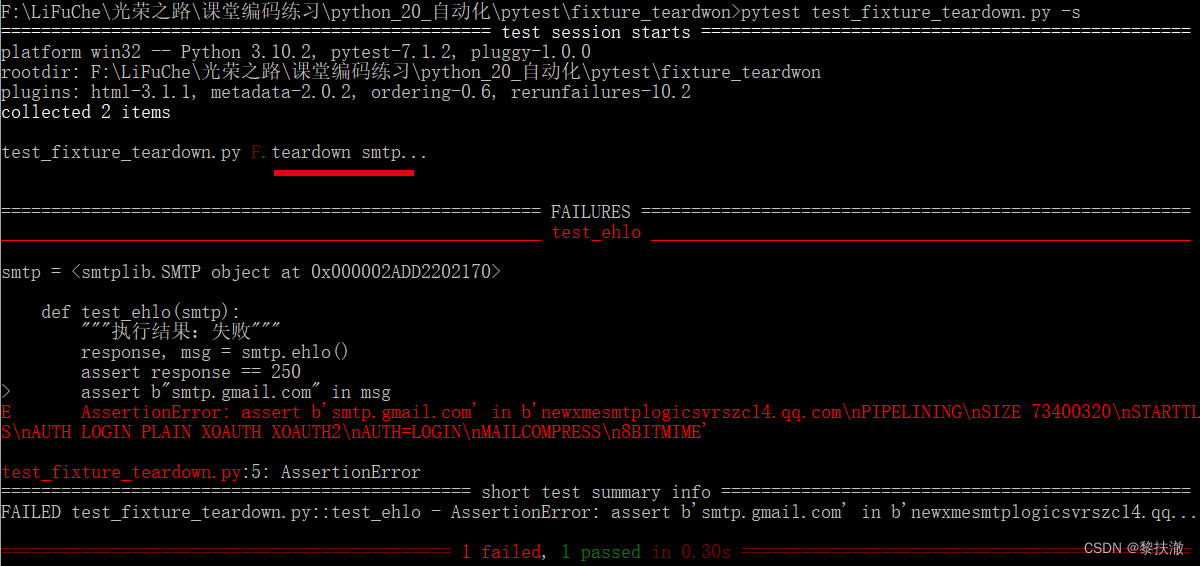
conftest.py
import smtplib
import pytest

@pytest.fixture(scope="module")
def smtp(request):
    smtp = smtplib.SMTP("smtp.qq.com", 587, timeout=5)
    def fin():
        print("teardown smtp...")
        smtp.close()
    request.addfinalizer(fin)
return smtp 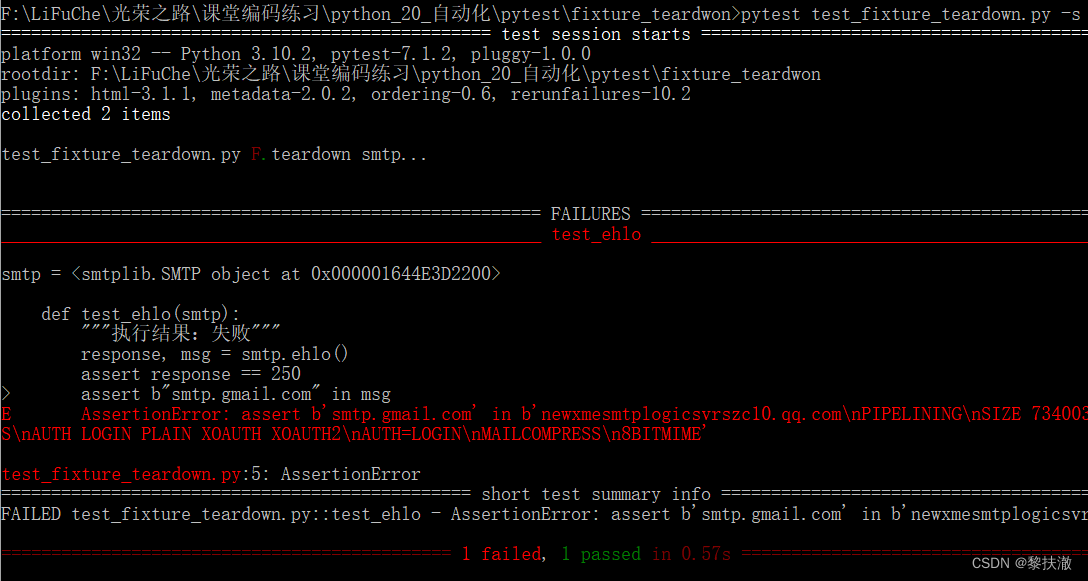
yield和addfinalizer方法在测试结束后调用其代码的工作方式相似,但addfinalizer与yield有两个关键区别:
(1)addfinalizer 可以注册多个终结器函数。
(2)addfinalizer 无论fixture设置代码是否引发异常,都将始终调用终结器。即使其中一个无法创建/获取,也可以方便地正确关闭设备创建的所有资源
conftest.py
import pytest


@pytest.fixture(scope="module",params=["smtp.gmail.com", "smtp.qq.com"])
def func_param(request):
    return request.param  # 通过request.param访问参数的值
test_fixture_params1.py
def test_func_param_1(func_param):
    """执行结果:失败"""
    res=func_param
    print(res+"111111111")
    assert 0


def test_func_param_2(func_param):
    """执行结果:失败"""
    res=func_param
    print(res+"222222222")
    assert 0
以上可以看出两个测试函数每个都运行了两次,而且是针对不同的参数。
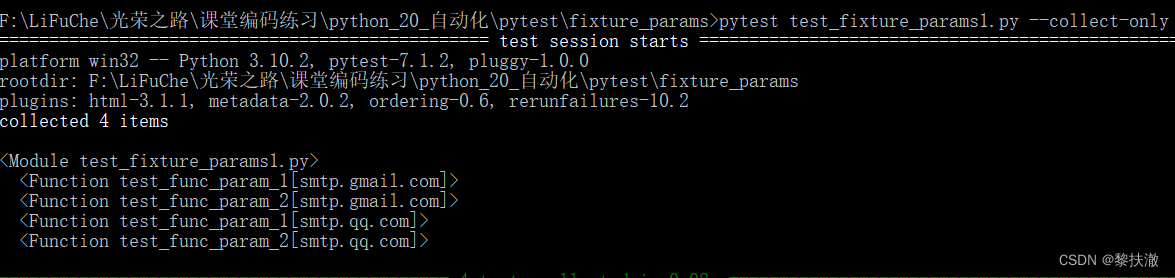
pytest将建立一个字符串,它是参数化fixture中每个fixture值的测试ID,在上例中,test_func_param_1[smtp.qq.com]和test_func_param_1[smtp.qq.com],这些ID可以与-k一起使用来选择要运行的特定实例,还可以在发生故障时识别特定实例。
使用--collect-only运行pytest会显示生成的ID
如:
运行命令:pytest test_fixture_params1.py --collect-only
目录结构:
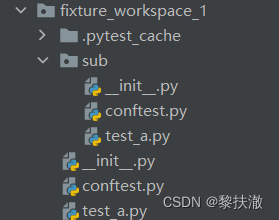
fixture_workspace_1/conftest.py
import pytest

@pytest.fixture
def username():
    return 'Parmley'
fixture_workspace_1/test_a.py
def test_username(username):
    assert username == 'Parmley'
fixture_workspace_1/sub/conftest.py
import pytest

@pytest.fixture
def sub_username(username):
    return 'sub-' + username
fixture_workspace_1/sub/test_a.py
def test_username(sub_username):
    assert sub_username == 'sub-Parmley'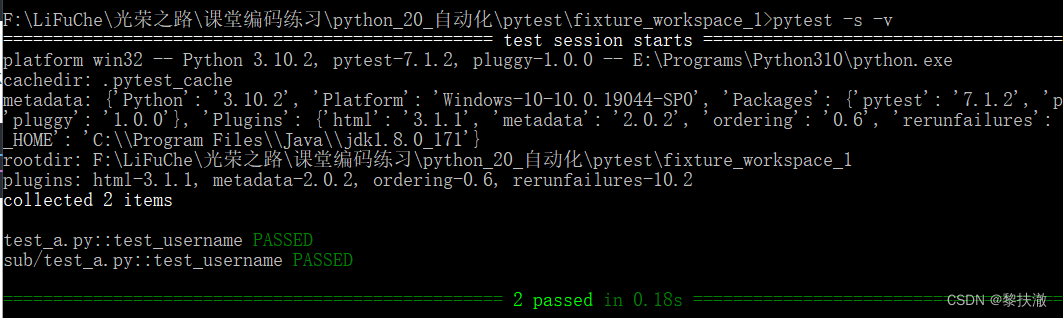
说明:fixture_workspace_1/conftest.py中的username作为参数引用传递给了fixture_workspace_1/sub/conftest.py里的sub_username方法
目录结构:
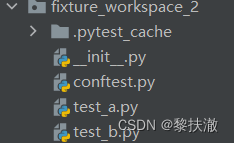
fixture_workspace_2/conftest.py
import pytest

@pytest.fixture
def username():
    return 'Parmley'
fixture_workspace_2/test_a.py
import pytest

@pytest.fixture
def username(username):
	return 'ta-' + username

def test_username(username):
    print(username)
    assert username == 'ta-Parmley'
fixture_workspace_2/test_b.py
import pytest

@pytest.fixture
def username(username):
	return 'tb-' + username

def test_username(username):
    print(username)
    assert username == 'tb-Parmley'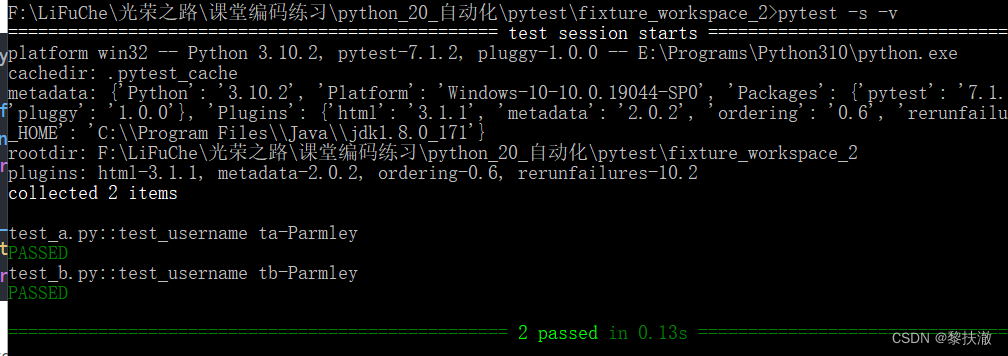
说明:fixture_workspace_2/conftest.py中的username作为参数引用传递给了fixture_workspace_1/test_a.py和test_b.py里的username方法
fixture_workspace_3/conftest.py
import pytest

@pytest.fixture
def username():
    return 'Parmley'

@pytest.fixture
def other_username(username):
    return 'other-' + username
fixture_workspace_3/test_a.py
import pytest

@pytest.mark.parametrize('username', ['directly-overridden-username-ta'])
def test_username(username):
    print(username)
    assert username == 'directly-overridden-username-ta'
fixture_workspace_3/test_b.py
import pytest

@pytest.mark.parametrize('username', ['directly-overridden-username-tb'])
def test_username(username):
    print(username)
    assert username == 'directly-overridden-username-tb'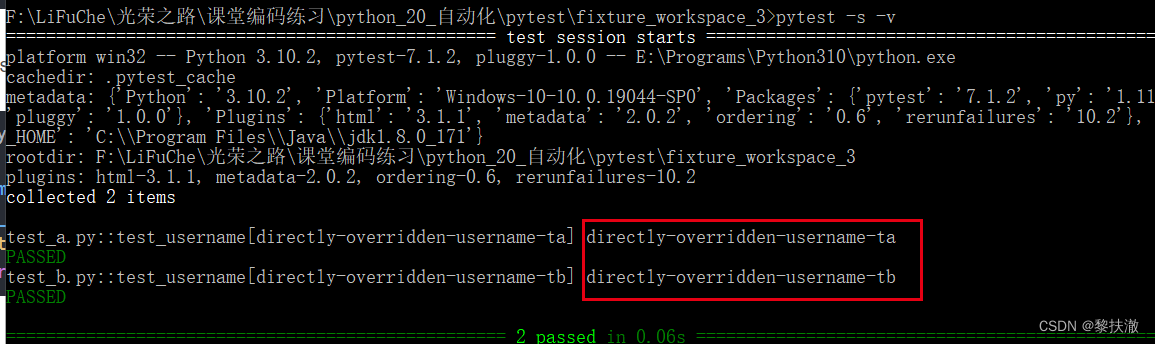
说明:conftest不会影响到被@parametrize装饰的函数的同名参数值
Allure是一个独立的报告插件,生成美观易读的报告,支持的语言:java,python,php,ruby等。
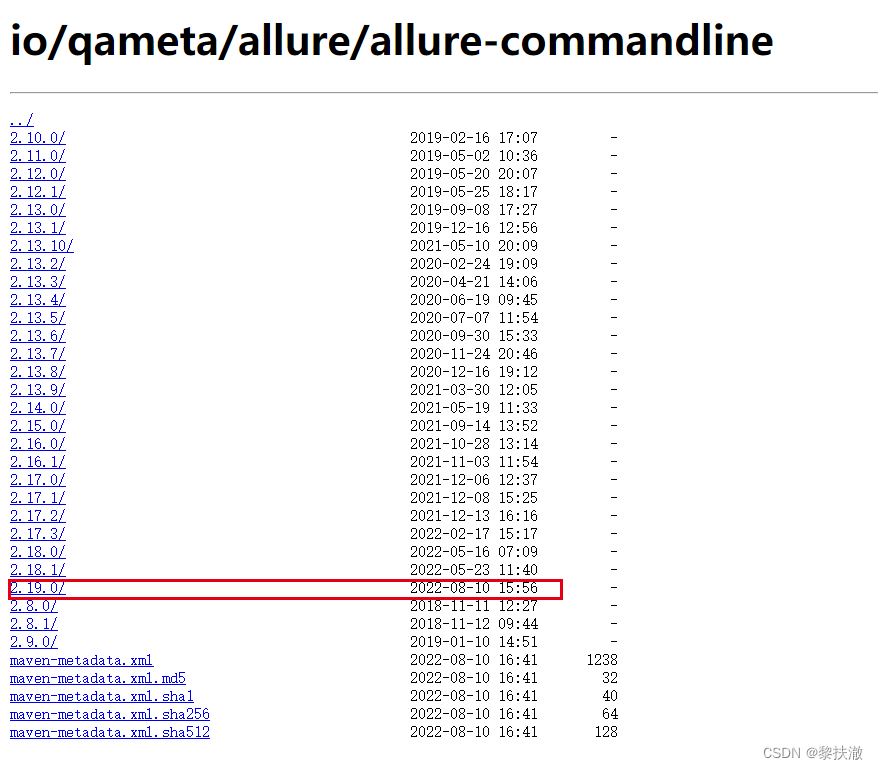
1. 点击进入allure的下载链接:https://repo.maven.apache.org/maven2/io/qameta/allure/allure-commandline/
选择点击进入:(我选择的是2.19.0版本)
2. 下载zip包,并直接解压到某路径下,如解压到D盘,进入bin目录,双击allure.bat
3. 在环境变量path中添加allure的bin目录,如E:\Programs\allure-2.19.0\bin
4. 在cmd中,输入allure --version,验证是否安装成功
allure --version
pip3 install pytest-allure-adaptor
或pip3 install allure-pytest
pytest [测试文件] --alluredir=./result #--alluredir用于指定存储测试结果的路径
【注意事项】
如果运行报错,可能是pytest版本太高,换个低版本的就可以了:
pip3 uninstall pytest
pip3 install pytest==4.0.2
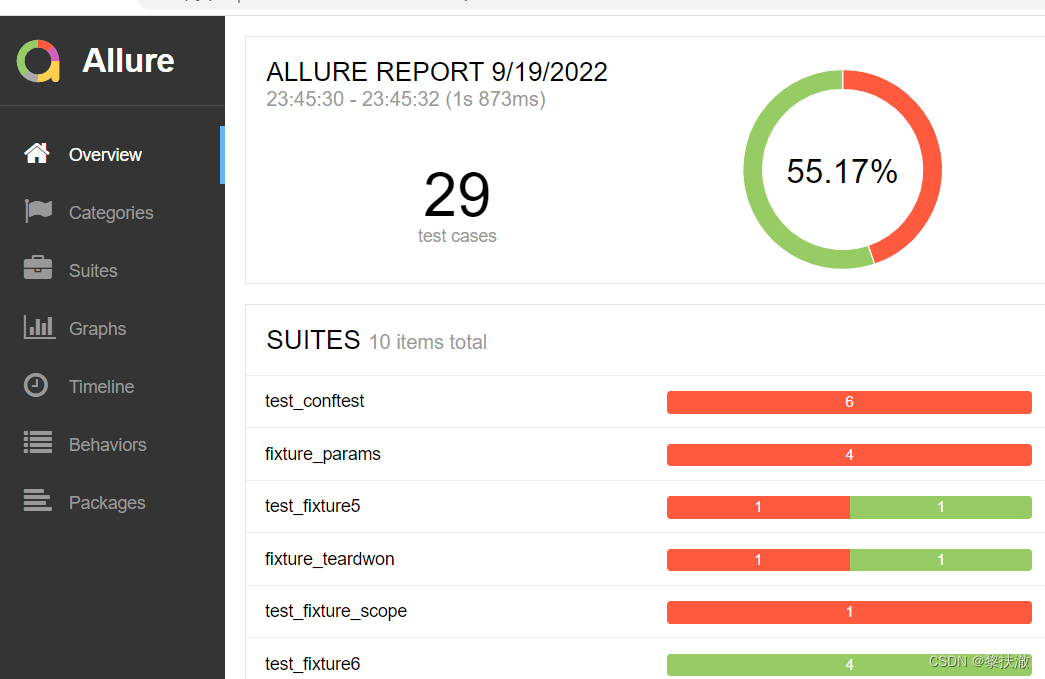
方式一:直接打开默认浏览器展示报告
在cmd窗口对应路径下,运行如下命令:
allure serve ./result/
方式二:从结果生成报告
生成报告
allure generate ./result/ -o ./report/ --clean (覆盖路径加–clean)
打开报告
allure open -h 127.0.0.1 -p 8883 ./report/
参考文章:Pytest测试框架(五):pytest + allure生成测试报告
可以在报告中添加用例描述信息,比如测试功能,子功能或场景,测试步骤以及测试附加信息:
import pytest
import allure
@allure.feature("登录")
class TestLogin():
@allure.story("登录成功")
def test_login_success(self):
print("登录成功")
pass
@allure.story("密码错误")
def test_login_failure(self):
with allure.step("输入用户名"):
print("输入用户名")
with allure.step("输入密码"):
print("输入密码")
print("点击登录")
with allure.step("登录失败"):
assert '1' == 1
print("登录失败")
pass
@allure.story("用户名密码错误")
def test_login_failure_a(self):
print("用户名或者密码错误,登录失败")
pass
@allure.feature("注册")
class TestRegister():
@allure.story("注册成功")
def test_register_success(self):
print("测试用例:注册成功")
pass
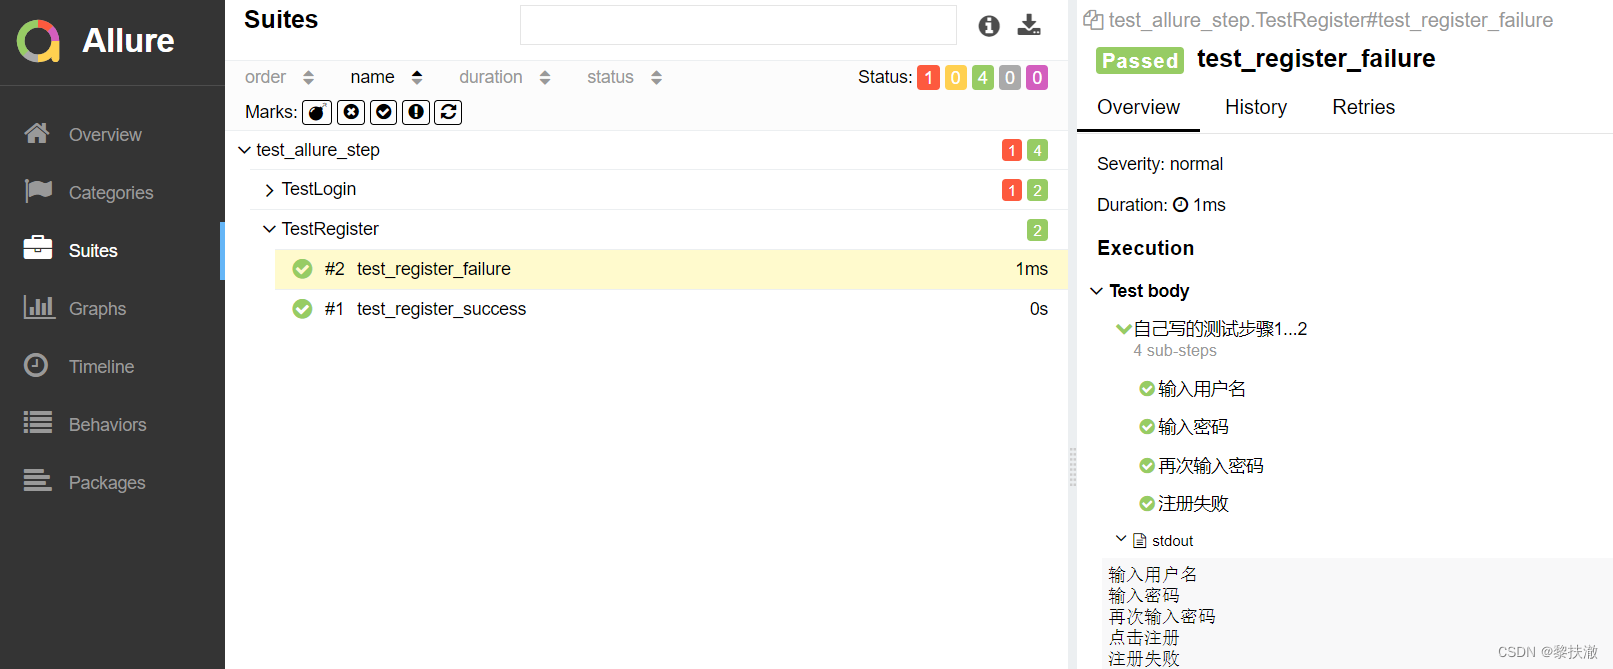
@allure.story("注册失败")
@allure.step(title="自己写的测试步骤1...2")
def test_register_failure(self):
with allure.step("输入用户名"):
print("输入用户名")
with allure.step("输入密码"):
print("输入密码")
with allure.step("再次输入密码"):
print("再次输入密码")
print("点击注册")
with allure.step("注册失败"):
assert 1 + 1 == 2
print("注册失败")
pass用例执行、生成报告
pytest test_allure_step.py --alluredir=./result/2
allure generate ./result/2 -o ./report/2/ --clean
allure open -h 127.0.0.1 -p 8883 ./report/2
可以在报告中附加文本、图片以及html网页,用来补充测试步骤或测试结果,比如错误截图或者关键步骤的截图。
import allure
import pytest

def test_attach_text():
    allure.attach("纯文本", attachment_type=allure.attachment_type.TEXT)

def test_attach_html():
    allure.attach("<body>这是一段htmlbody块</body>", "html页面", attachment_type=allure.attachment_type.HTML)

def test_attach_photo():
    allure.attach.file("test.jpg", name="图片", attachment_type=allure.attachment_type.JPG)
用例执行:
pytest test_allure_attach.py --alluredir=./result/5
allure serve ./result/5

可以在测试报告中添加链接、bug地址、测试用例地址。
关联bug可在用例执行时添加参数:
import allure

@allure.link("http://www.baidu.com", name="baidu link")
def test_with_link():
    pass

@allure.issue("http://www.baidu.com/test_02","this is a issue")
def test_with_issue_link():
    pass

TEST_CASE_LINK = 'http://www.baidu.com/test_03'
@allure.testcase(TEST_CASE_LINK, 'Test case title')
def test_with_testcase_link():
    pass
用例执行、报告查看
#执行用例并保存结果
pytest test_allure_link_issue.py --alluredir=./result/3
#或使用如下方式
pytest test_allure_link_issue.py --allure-link-pattern=issue:http://www.bugfree.com/issue/{} --alluredir=./result/3
#查看测试报告
allure serve ./result/3
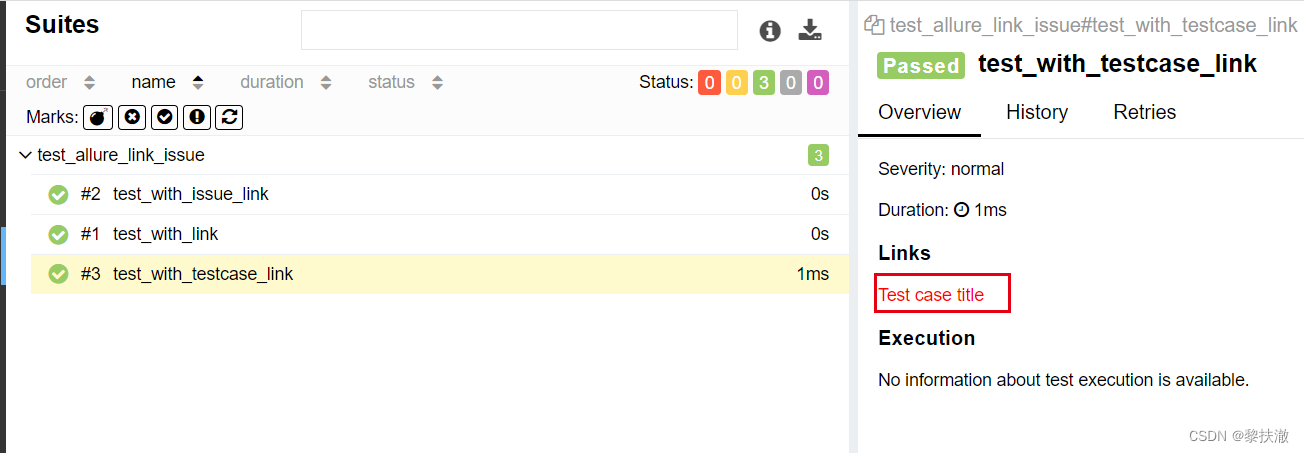
点击链接会跳转到指定页面
allure.severity按重要性级别来标记,有5种级别:
Blocker:阻塞
Critical:严重
Normal:正常(默认值)
Minor:不太重要
Trivial:不重要
import allure
import pytest

def test_with_no_severity_label():
    pass

@allure.severity(allure.severity_level.TRIVIAL)
def test_with_trivial_severity():
    pass

@allure.severity(allure.severity_level.NORMAL)
def test_with_normal_severity():
    pass

@allure.severity(allure.severity_level.BLOCKER)
def test_with_blocker_severity():
    pass

@allure.severity(allure.severity_level.NORMAL)
class TestclassWithNormalSeverity(object):
    def test_inside_the_normal_severity_test_no_severity(self):
        pass

    @allure.severity(allure.severity_level.CRITICAL)
    def test_inside_the_normal_severity_test_critical_severity(self):
        pass
用例执行
pytest test_allure_severity.py --alluredir=./result/4 --allure-severities normal,critical
allure serve ./result/4

很好奇,就使用rubyonrails自动化单元测试而言,你们正在做什么?您是否创建了一个脚本来在cron中运行rake作业并将结果邮寄给您?git中的预提交Hook?只是手动调用?我完全理解测试,但想知道在错误发生之前捕获错误的最佳实践是什么。让我们理所当然地认为测试本身是完美无缺的,并且可以正常工作。下一步是什么以确保他们在正确的时间将可能有害的结果传达给您? 最佳答案 不确定您到底想听什么,但是有几个级别的自动代码库控制:在处理某项功能时,您可以使用类似autotest的内容获得关于哪些有效,哪些无效的即时反馈。要确保您的提
关闭。这个问题是opinion-based.它目前不接受答案。想要改进这个问题?更新问题,以便editingthispost可以用事实和引用来回答它.关闭4年前。Improvethisquestion我想在固定时间创建一系列低音和高音调的哔哔声。例如:在150毫秒时发出高音调的蜂鸣声在151毫秒时发出低音调的蜂鸣声200毫秒时发出低音调的蜂鸣声250毫秒的高音调蜂鸣声有没有办法在Ruby或Python中做到这一点?我真的不在乎输出编码是什么(.wav、.mp3、.ogg等等),但我确实想创建一个输出文件。
我正在编写一个包含C扩展的gem。通常当我写一个gem时,我会遵循TDD的过程,我会写一个失败的规范,然后处理代码直到它通过,等等......在“ext/mygem/mygem.c”中我的C扩展和在gemspec的“扩展”中配置的有效extconf.rb,如何运行我的规范并仍然加载我的C扩展?当我更改C代码时,我需要采取哪些步骤来重新编译代码?这可能是个愚蠢的问题,但是从我的gem的开发源代码树中输入“bundleinstall”不会构建任何native扩展。当我手动运行rubyext/mygem/extconf.rb时,我确实得到了一个Makefile(在整个项目的根目录中),然后当
我有一个围绕一些对象的包装类,我想将这些对象用作散列中的键。包装对象和解包装对象应映射到相同的键。一个简单的例子是这样的:classAattr_reader:xdefinitialize(inner)@inner=innerenddefx;@inner.x;enddef==(other)@inner.x==other.xendenda=A.new(o)#oisjustanyobjectthatallowso.xb=A.new(o)h={a=>5}ph[a]#5ph[b]#nil,shouldbe5ph[o]#nil,shouldbe5我试过==、===、eq?并散列所有无济于事。
我有一些Ruby代码,如下所示:Something.createdo|x|x.foo=barend我想编写一个测试,它使用double代替block参数x,这样我就可以调用:x_double.should_receive(:foo).with("whatever").这可能吗? 最佳答案 specify'something'dox=doublex.should_receive(:foo=).with("whatever")Something.should_receive(:create).and_yield(x)#callthere
Sinatra新手;我正在运行一些rspec测试,但在日志中收到了一堆不需要的噪音。如何消除日志中过多的噪音?我仔细检查了环境是否设置为:test,这意味着记录器级别应设置为WARN而不是DEBUG。spec_helper:require"./app"require"sinatra"require"rspec"require"rack/test"require"database_cleaner"require"factory_girl"set:environment,:testFactoryGirl.definition_file_paths=%w{./factories./test/
我遵循MichaelHartl的“RubyonRails教程:学习Web开发”,并创建了检查用户名和电子邮件长度有效性的测试(名称最多50个字符,电子邮件最多255个字符)。test/helpers/application_helper_test.rb的内容是:require'test_helper'classApplicationHelperTest在运行bundleexecraketest时,所有测试都通过了,但我看到以下消息在最后被标记为错误:ERROR["test_full_title_helper",ApplicationHelperTest,1.820016791]test
我已经构建了一些serverspec代码来在多个主机上运行一组测试。问题是当任何测试失败时,测试会在当前主机停止。即使测试失败,我也希望它继续在所有主机上运行。Rakefile:namespace:specdotask:all=>hosts.map{|h|'spec:'+h.split('.')[0]}hosts.eachdo|host|begindesc"Runserverspecto#{host}"RSpec::Core::RakeTask.new(host)do|t|ENV['TARGET_HOST']=hostt.pattern="spec/cfengine3/*_spec.r
我在app/helpers/sessions_helper.rb中有一个帮助程序文件,其中包含一个方法my_preference,它返回当前登录用户的首选项。我想在集成测试中访问该方法。例如,这样我就可以在测试中使用getuser_path(my_preference)。在其他帖子中,我读到这可以通过在测试文件中包含requiresessions_helper来实现,但我仍然收到错误NameError:undefinedlocalvariableormethod'my_preference'.我做错了什么?require'test_helper'require'sessions_hel
只是想确保我理解了事情。据我目前收集到的信息,Cucumber只是一个“包装器”,或者是一种通过将事物分类为功能和步骤来组织测试的好方法,其中实际的单元测试处于步骤阶段。它允许您根据事物的工作方式组织您的测试。对吗? 最佳答案 有点。它是一种组织测试的方式,但不仅如此。它的行为就像最初的Rails集成测试一样,但更易于使用。这里最大的好处是您的session在整个Scenario中保持透明。关于Cucumber的另一件事是您(应该)从使用您的代码的浏览器或客户端的角度进行测试。如果您愿意,您可以使用步骤来构建对象和设置状态,但通常您