前言:
首先祝大家端午节快乐。本篇文章有5个练手项目
对于刚学完前端三剑客的你们。应该是一个很好的实践

目录
🥩.跑马灯
🌮.闹钟
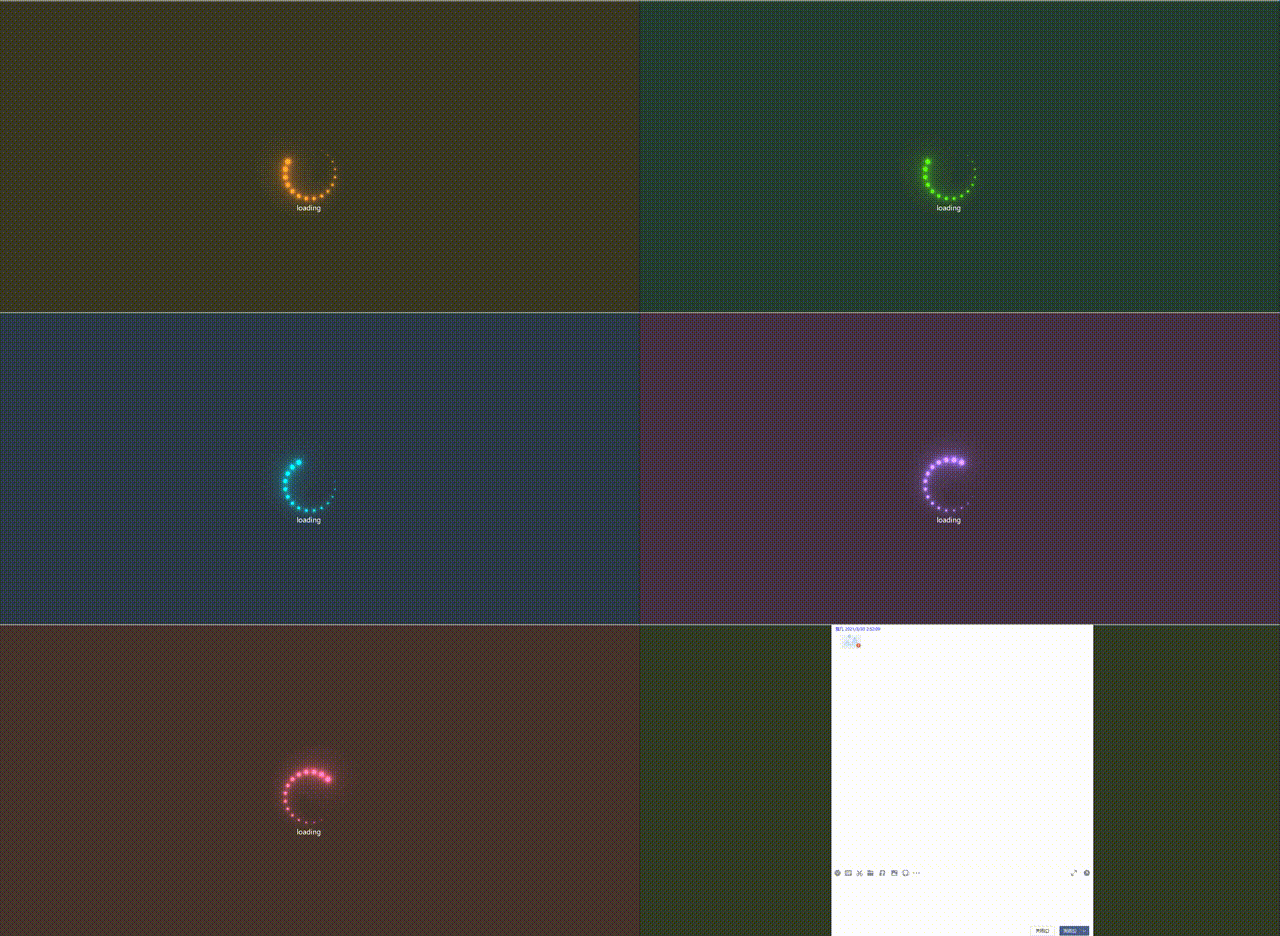
在这个项目中,在html中创立20个span标签
每个span标签设置style为--i:数字的样式用于
在css中动态分配圆圈分几份,transform: rotate(calc(18deg*var(--i)))
利用filter属性结合关键帧动态切换颜色。同时设置每一个span标签进行
旋转
<style>
	* {
	padding: 0;
	margin: 0;
	box-sizing: border-box;
	}
main{
	display: flex;
    background-color: #2c3a47;
	/*用于设置图像居中 */
	align-items: center;
	justify-content: center;
	width: 1920px;
	height: 1000px;
	animation: animate1 10s linear infinite;
	}
/* 用于设置动画属性 其中filter用于做利镜其中的hue-rotate属性让图像运用色相旋转*/
@keyframes animate1 {
	0% {
		filter: hue-rotate(0deg);
		}
	100% {
		filter: hue-rotate(360deg);
			}
		}
main .cube {
		position: relative;
		height: 120px;
		width: 120px;
	    }
main .cube span {
	position: absolute;
	top: 0;
	left: 0;
	width: 100%;
	height: 100%;
	/* 用于设置一个圆圈被分成几份 */
	transform: rotate(calc(18deg*var(--i)));
	}
	/* :before用于设置在给定的属性之前添加效果 */
main .cube span::before {
		content: '';
		position: absolute;
		top: 0;
		left: 0;
		width: 15px;
		height: 15px;
		border-radius: 50%;
		background-color: aqua;
		box-shadow: 0 0 10px aqua ,0 0 20px aqua,0 0 40px aqua,0 0 80px aqua,0 0 100px aqua;
animation: animate 2s linear infinite;
		animation-delay: calc(0.1s*var(--i));
		}
@keyframes animate {
	0% {
		transform: scale(1);
		}
	80%,
	100% {
	    transform: scale(0);
		}
	}
.loading{
		color:#fff;
		font-size: 20px;
		position: relative;
		top:100px;
		right:100px;
          }
@media (min-width:765px){

	}

</style>
</head>
<body>
<main>
<div class="cube">
	<span style="--i:1;"></span>
	<span style="--i:2;"></span>
    <span style="--i:3;"></span>
	<span style="--i:4;"></span>
	<span style="--i:5;"></span>
	<span style="--i:6;"></span>
	<span style="--i:7;"></span>
	<span style="--i:8;"></span>
	<span style="--i:9;"></span>
	<span style="--i:10;"></span>
	<span style="--i:11;"></span>
	<span style="--i:12;"></span>
	<span style="--i:13;"></span>
	<span style="--i:14;"></span>
	<span style="--i:15;"></span>
	<span style="--i:16;"></span>
	<span style="--i:17;"></span>
	<span style="--i:18;"></span>
	<span style="--i:19;"></span>
	<span style="--i:20;"></span>
</div>
<div class="loading">
    <p>loading</p>
</div>
</main>
</body>
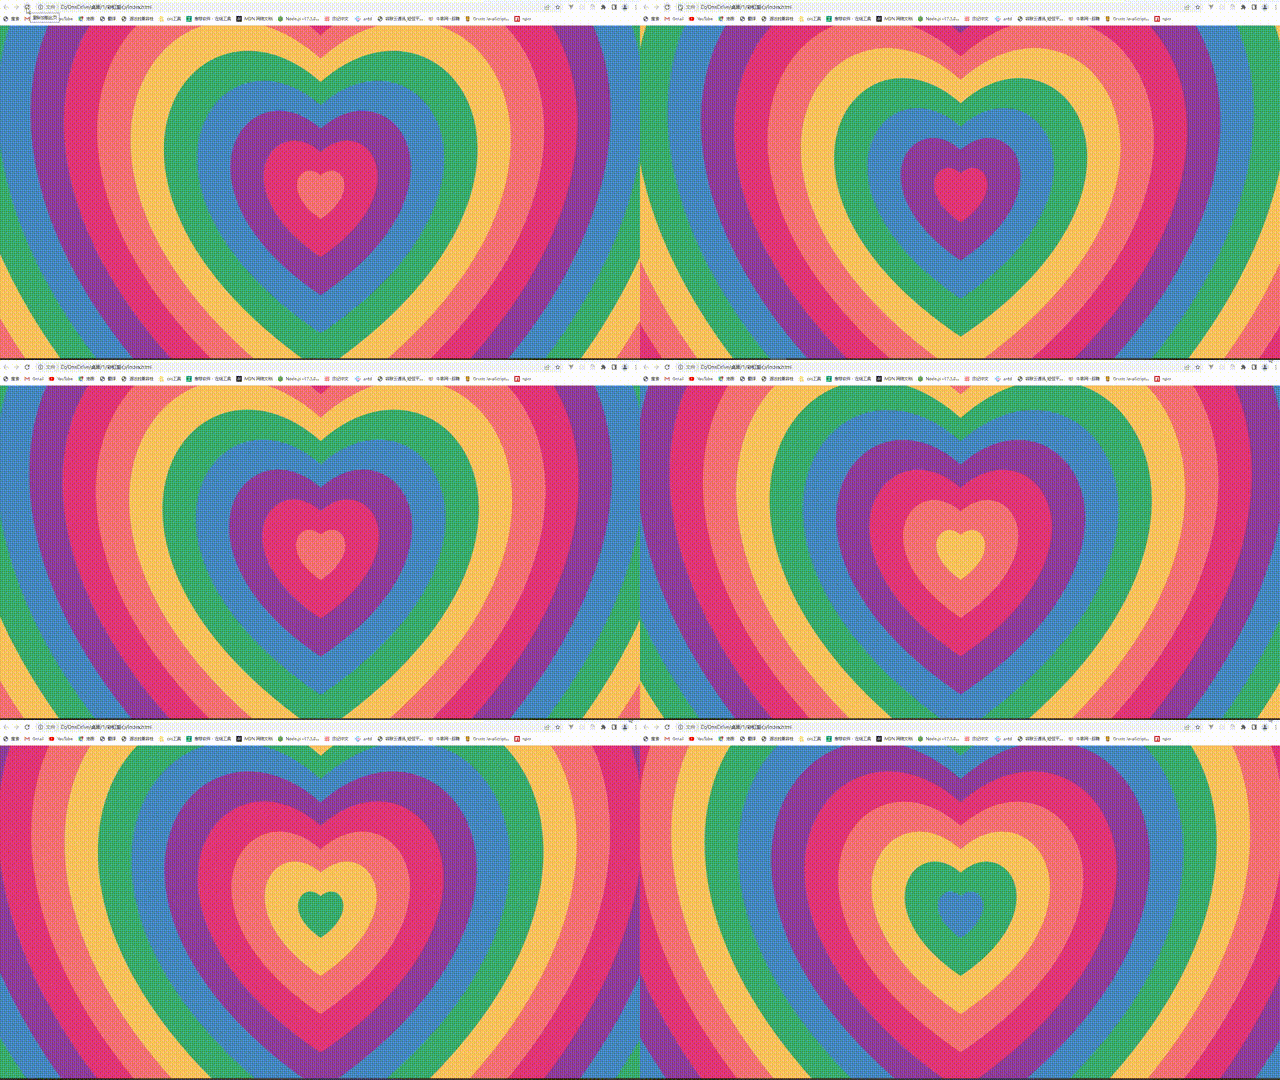
搭建基本的html结构,采用的svg技术,
通过js动态改变颜色,以及动态实现切换图形
<svg id="hearts" viewBox="-600 -400 1200 800" preserveAspectRatio="xMidYMid slice">

<defs>

<symbol  id="heart" viewBox="-69 -16 138 138">

<path d="M0,12
         C 50,-30 110,50  0,120
         C-110,50 -50,-30 0,12z"/>

</symbol>

</defs>

</svg>


const colors = ["#e03776","#8f3e98","#4687bf","#3bab6f","#f9c25e","#f47274"];
const SVG_NS = 'http://www.w3.org/2000/svg';
const SVG_XLINK = "http://www.w3.org/1999/xlink";

let heartsRy = []

function useTheHeart(n){
  let use = document.createElementNS(SVG_NS, 'use');
  use.n = n;
  use.setAttributeNS(SVG_XLINK, 'xlink:href', '#heart');
  use.setAttributeNS(null, 'transform', `scale(${use.n})`);
  use.setAttributeNS(null, 'fill', colors[n%colors.length]);
  use.setAttributeNS(null, 'x', -69);
  use.setAttributeNS(null, 'y', -69);
  use.setAttributeNS(null, 'width', 138);
  use.setAttributeNS(null, 'height', 138);

  heartsRy.push(use)
  hearts.appendChild(use);
}

for(let n = 18; n >= 0; n--){useTheHeart(n)}

function Frame(){
  window.requestAnimationFrame(Frame);
  for(let i = 0; i < heartsRy.length; i++){
    if(heartsRy[i].n < 18){heartsRy[i].n +=.01
     }else{
     heartsRy[i].n = 0;
     hearts.appendChild(heartsRy[i])
    }
    heartsRy[i].setAttributeNS(null, 'transform', `scale(${heartsRy[i].n})`);
  }
}

Frame()
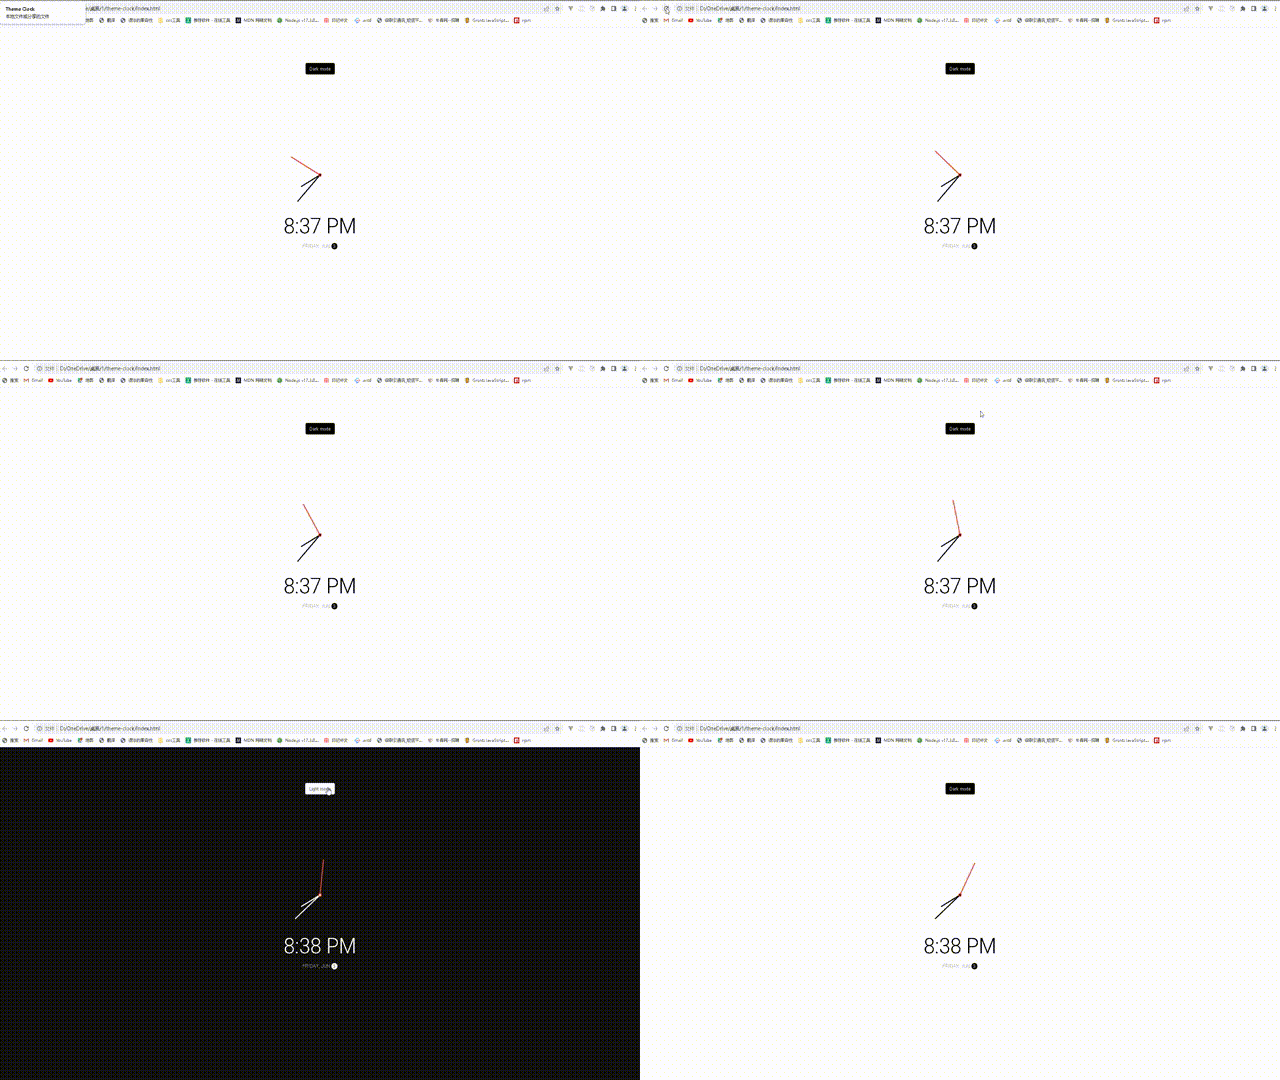
搭建基本的html结构,动态得到实时的时,分,秒
通过Date()函数获得。将得到的数字根据逻辑,绑定
给各div结构,实行动态旋转。点击按钮,改变背景颜色
html:
<body>
  <button class="toggle">Dark mode</button>
 <div class="clock-container">
   <div class="clock">
     <div class="needle hour"></div>
     <div class="needle minute"></div>
     <div class="needle second"></div>
     <div class="center-point"></div>
   </div>
      <div class="time"></div>
      <div class="date"></div>
  </div>
</body>
css:
@import url('https://fonts.googleapis.com/css?family=Heebo:300&display=swap');

* {
  box-sizing: border-box;
}

:root {
  --primary-color: #000;
  --secondary-color: #fff;
}

html {
  transition: all 0.5s ease-in;
}

html.dark {
  --primary-color: #fff;
  --secondary-color: #333;
}

html.dark {
  background-color: #111;
  color: var(--primary-color);
}

body {
  font-family: 'Heebo', sans-serif;
  display: flex;
  align-items: center;
  justify-content: center;
  height: 100vh;
  overflow: hidden;
  margin: 0;
}

.toggle {
  cursor: pointer;
  background-color: var(--primary-color);
  color: var(--secondary-color);
  border: 0;
  border-radius: 4px;
  padding: 8px 12px;
  position: absolute;
  top: 100px;
}

.toggle:focus {
  outline: none;
}

.clock-container {
  display: flex;
  flex-direction: column;
  justify-content: space-between;
  align-items: center;
}

.clock {
  position: relative;
  width: 200px;
  height: 200px;
}

.needle {
  background-color: var(--primary-color);
  position: absolute;
  top: 50%;
  left: 50%;
  height: 65px;
  width: 3px;
  transform-origin: bottom center;
  transition: all 0.5s ease-in;
}

.needle.hour {
  transform: translate(-50%, -100%) rotate(0deg);
}

.needle.minute {
  transform: translate(-50%, -100%) rotate(0deg);
  height: 100px;
}

.needle.second {
  transform: translate(-50%, -100%) rotate(0deg);
  height: 100px;
  background-color: #e74c3c;
}

.center-point {
  background-color: #e74c3c;
  width: 10px;
  height: 10px;
  position: absolute;
  top: 50%;
  left: 50%;
  transform: translate(-50%, -50%);
  border-radius: 50%;
}

.center-point::after {
  content: '';
  background-color: var(--primary-color);
  width: 5px;
  height: 5px;
  position: absolute;
  top: 50%;
  left: 50%;
  transform: translate(-50%, -50%);
  border-radius: 50%;
}

.time {
  font-size: 60px;
}

.date {
  color: #aaa;
  font-size: 14px;
  letter-spacing: 0.3px;
  text-transform: uppercase;
}

.date .circle {
  background-color: var(--primary-color);
  color: var(--secondary-color);
  border-radius: 50%;
  height: 18px;
  width: 18px;
  display: inline-flex;
  align-items: center;
  justify-content: center;
  line-height: 18px;
  transition: all 0.5s ease-in;
  font-size: 12px;
}
js:
const hourEl = document.querySelector('.hour')
const minuteEl = document.querySelector('.minute')
const secondEl = document.querySelector('.second')
const timeEl = document.querySelector('.time')
const dateEl = document.querySelector('.date')
const toggle = document.querySelector('.toggle')

const days = ["Sunday", "Monday", "Tuesday", "Wednesday", "Thursday", "Friday", "Saturday"];
const months = ["Jan", "Feb", "Mar", "Apr", "May", "Jun", "Jul", "Aug", "Sep", "Oct", "Nov", "Dec"];

toggle.addEventListener('click', (e) => {
    const html = document.querySelector('html')
    if (html.classList.contains('dark')) {
        html.classList.remove('dark')
        e.target.innerHTML = 'Dark mode'
    } else {
        html.classList.add('dark')
        e.target.innerHTML = 'Light mode'
    }
})

function setTime() {
    const time = new Date();
    const month = time.getMonth()
    const day = time.getDay()
    const date = time.getDate()
    const hours = time.getHours()
    const hoursForClock = hours >= 13 ? hours % 12 : hours;
    const minutes = time.getMinutes()
    const seconds = time.getSeconds()
    const ampm = hours >= 12 ? 'PM' : 'AM'

    hourEl.style.transform = `translate(-50%, -100%) rotate(${scale(hoursForClock, 0, 12, 0, 360)}deg)`
    minuteEl.style.transform = `translate(-50%, -100%) rotate(${scale(minutes, 0, 60, 0, 360)}deg)`
    secondEl.style.transform = `translate(-50%, -100%) rotate(${scale(seconds, 0, 60, 0, 360)}deg)`

    timeEl.innerHTML = `${hoursForClock}:${minutes < 10 ? `0${minutes}` : minutes} ${ampm}`
    dateEl.innerHTML = `${days[day]}, ${months[month]} <span class="circle">${date}</span>`
}

// StackOverflow https://stackoverflow.com/questions/10756313/javascript-jquery-map-a-range-of-numbers-to-another-range-of-numbers
const scale = (num, in_min, in_max, out_min, out_max) => {
    return (num - in_min) * (out_max - out_min) / (in_max - in_min) + out_min;
}

setTime()

setInterval(setTime, 1000)

通过js实现动态添加DOM结构,绑定创建出DOM结构的
添加,删除按钮。实现监听事件。实现动态改变DOM结构
其他的就是设置css的相关属性,
html:
<link rel="stylesheet" href="https://cdnjs.cloudflare.com/ajax/libs/font-awesome/5.14.0/css/all.min.css" integrity="sha512-1PKOgIY59xJ8Co8+NE6FZ+LOAZKjy+KY8iq0G4B3CyeY6wYHN3yt9PW0XpSriVlkMXe40PTKnXrLnZ9+fkDaog==" crossorigin="anonymous" />
  </head>
  <body>
    <button class="add" id="add">
      <i class="fas fa-plus"></i> Add note
    </button>
    <script src="https://cdnjs.cloudflare.com/ajax/libs/marked/1.2.2/marked.min.js"></script>

  </body>
css:
@import url('https://fonts.googleapis.com/css2?family=Poppins:wght@200;400&display=swap');

* {
  box-sizing: border-box;
  outline: none;
}

body {
  background-color: #7bdaf3;
  font-family: 'Poppins', sans-serif;
  display: flex;
  flex-wrap: wrap;
  margin: 0;
  padding-top: 3rem;
}

.add {
  position: fixed;
  top: 1rem;
  right: 1rem;
  background-color: #9ec862;
  color: #fff;
  border: none;
  border-radius: 3px;
  padding: 0.5rem 1rem;
  cursor: pointer;
}

.add:active {
  transform: scale(0.98);
}

.note {
  background-color: #fff;
  box-shadow: 0 0 10px 4px rgba(0, 0, 0, 0.1);
  margin: 30px 20px;
  height: 400px;
  width: 400px;
  overflow-y: scroll;
}

.note .tools {
  background-color: #9ec862;
  display: flex;
  justify-content: flex-end;
  padding: 0.5rem;
}

.note .tools button {
  background-color: transparent;
  border: none;
  color: #fff;
  cursor: pointer;
  font-size: 1rem;
  margin-left: 0.5rem;
}

.note textarea {
  outline: none;
  font-family: inherit;
  font-size: 1.2rem;
  border: none;
  height: 400px;
  width: 100%;
  padding: 20px;
}

.main {
  padding: 20px;
}

.hidden {
  display: none;
}
js:
const addBtn = document.getElementById('add')

const notes = JSON.parse(localStorage.getItem('notes'))

if(notes) {
    notes.forEach(note => addNewNote(note))
}

addBtn.addEventListener('click', () => addNewNote())

function addNewNote(text = '') {
    const note = document.createElement('div')
    note.classList.add('note')

    note.innerHTML = `
    <div class="tools">
        <button class="edit"><i class="fas fa-edit"></i></button>
        <button class="delete"><i class="fas fa-trash-alt"></i></button>
    </div>

    <div class="main ${text ? "" : "hidden"}"></div>
    <textarea class="${text ? "hidden" : ""}"></textarea>
    `

    const editBtn = note.querySelector('.edit')
    const deleteBtn = note.querySelector('.delete')
    const main = note.querySelector('.main')
    const textArea = note.querySelector('textarea')

    textArea.value = text
    main.innerHTML = marked(text)

    deleteBtn.addEventListener('click', () => {
        note.remove()

        updateLS()
    })

    editBtn.addEventListener('click', () => {
        main.classList.toggle('hidden')
        textArea.classList.toggle('hidden')
    })

    textArea.addEventListener('input', (e) => {
        const { value } = e.target

        main.innerHTML = marked(value)

        updateLS()
    })

    document.body.appendChild(note)
}

function updateLS() {
    const notesText = document.querySelectorAll('textarea')

    const notes = []

    notesText.forEach(note => notes.push(note.value))

    localStorage.setItem('notes', JSON.stringify(notes))
}

搭建html结构,创建canvas标签,
绑定设置的结构比如+,-,颜色改变
动态设置并获取他的值,然后将这些值动态的
设置为canvas语法中设置渲染的宽度,以及设置
颜色的属性
html:
<canvas id="canvas" width="800" height="700"></canvas>
 <div class="toolbox">
<button id="decrease">-</button>
 <span id="size">10</span>
 <button id="increase">+</button>
 <input type="color" id="color">
 <button id="clear">X</button>
</div>
css:
@import url('https://fonts.googleapis.com/css2?family=Roboto:wght@400;700&display=swap');

* {
  box-sizing: border-box;
}

body {
  background-color: #f5f5f5;
  font-family: 'Roboto', sans-serif;
  display: flex;
  flex-direction: column;
  align-items: center;
  justify-content: center;
  height: 100vh;
  margin: 0;
}

canvas {
  border: 2px solid steelblue;
}

.toolbox {
  background-color: steelblue;
  border: 1px solid slateblue;
  display: flex;
  width: 804px;
  padding: 1rem;
}

.toolbox > * {
  background-color: #fff;
  border: none;
  display: inline-flex;
  align-items: center;
  justify-content: center;
  font-size: 2rem;
  height: 50px;
  width: 50px;
  margin: 0.25rem;
  padding: 0.25rem;
  cursor: pointer;
}

.toolbox > *:last-child {
  margin-left: auto;
}
js:
const canvas = document.getElementById('canvas');
const increaseBtn = document.getElementById('increase');
const decreaseBtn = document.getElementById('decrease');
const sizeEL = document.getElementById('size');
const colorEl = document.getElementById('color');
const clearEl = document.getElementById('clear');

const ctx = canvas.getContext('2d');

let size = 10
let isPressed = false
colorEl.value = 'black'
let color = colorEl.value
let x
let y

canvas.addEventListener('mousedown', (e) => {
    isPressed = true

    x = e.offsetX
    y = e.offsetY
})

document.addEventListener('mouseup', (e) => {
    isPressed = false

    x = undefined
    y = undefined
})

canvas.addEventListener('mousemove', (e) => {
    if(isPressed) {
        const x2 = e.offsetX
        const y2 = e.offsetY

        drawCircle(x2, y2)
        drawLine(x, y, x2, y2)

        x = x2
        y = y2
    }
})

function drawCircle(x, y) {
    ctx.beginPath();
    ctx.arc(x, y, size, 0, Math.PI * 2)
    ctx.fillStyle = color
    ctx.fill()
}

function drawLine(x1, y1, x2, y2) {
    ctx.beginPath()
    ctx.moveTo(x1, y1)
    ctx.lineTo(x2, y2)
    ctx.strokeStyle = color
    ctx.lineWidth = size * 2
    ctx.stroke()
}

function updateSizeOnScreen() {
    sizeEL.innerText = size
}

increaseBtn.addEventListener('click', () => {
    size += 5

    if(size > 50) {
        size = 50
    }

    updateSizeOnScreen()
})

decreaseBtn.addEventListener('click', () => {
    size -= 5

    if(size < 5) {
        size = 5
    }

    updateSizeOnScreen()
})

colorEl.addEventListener('change', (e) => color = e.target.value)

clearEl.addEventListener('click', () => ctx.clearRect(0,0, canvas.width, canvas.height))
✍在最后,如果觉得博主写的还行,期待🍟点赞 🍬评论 🍪收藏
如何在buildr项目中使用Ruby?我在很多不同的项目中使用过Ruby、JRuby、Java和Clojure。我目前正在使用我的标准Ruby开发一个模拟应用程序,我想尝试使用Clojure后端(我确实喜欢功能代码)以及JRubygui和测试套件。我还可以看到在未来的不同项目中使用Scala作为后端。我想我要为我的项目尝试一下buildr(http://buildr.apache.org/),但我注意到buildr似乎没有设置为在项目中使用JRuby代码本身!这看起来有点傻,因为该工具旨在统一通用的JVM语言并且是在ruby中构建的。除了将输出的jar包含在一个独特的、仅限ruby
我在我的Rails项目中使用Pow和powifygem。现在我尝试升级我的ruby版本(从1.9.3到2.0.0,我使用RVM)当我切换ruby版本、安装所有gem依赖项时,我通过运行railss并访问localhost:3000确保该应用程序正常运行以前,我通过使用pow访问http://my_app.dev来浏览我的应用程序。升级后,由于错误Bundler::RubyVersionMismatch:YourRubyversionis1.9.3,butyourGemfilespecified2.0.0,此url不起作用我尝试过的:重新创建pow应用程序重启pow服务器更新战俘
我已经像这样安装了一个新的Rails项目:$railsnewsite它执行并到达:bundleinstall但是当它似乎尝试安装依赖项时我得到了这个错误Gem::Ext::BuildError:ERROR:Failedtobuildgemnativeextension./System/Library/Frameworks/Ruby.framework/Versions/2.0/usr/bin/rubyextconf.rbcheckingforlibkern/OSAtomic.h...yescreatingMakefilemake"DESTDIR="cleanmake"DESTDIR="
假设我有这个范围:("aaaaa".."zzzzz")如何在不事先/每次生成整个项目的情况下从范围中获取第N个项目? 最佳答案 一种快速简便的方法:("aaaaa".."zzzzz").first(42).last#==>"aaabp"如果出于某种原因你不得不一遍又一遍地这样做,或者如果你需要避免为前N个元素构建中间数组,你可以这样写:moduleEnumerabledefskip(n)returnto_enum:skip,nunlessblock_given?each_with_indexdo|item,index|yieldit
我正在尝试创建一个带有项目符号字符的Ruby1.9.3字符串。str="•"+"helloworld"但是,当我输入它时,我收到有关非ASCII字符的语法错误。我该怎么做? 最佳答案 你可以把Unicode字符放在那里。str="\u2022"+"helloworld" 关于ruby-如何在Ruby字符串中插入项目符号字符?,我们在StackOverflow上找到一个类似的问题: https://stackoverflow.com/questions/1195
我的Rails站点使用了一个确实不是很好的gem。每次我需要做一些新的事情时,我最终不得不花费与向实际Rails项目添加代码一样多的时间来为gem添加功能。但我不介意,我将我的Gemfile设置为指向我的gem的GitHub分支(我尝试提交PR,但维护者似乎已经下台)。问题是我真的没有找到一种合理的方法来测试我添加到gem的新东西。在railsc中测试它会特别好,但我能想到的唯一方法是a)更改~/.rvm/gems/.../foo。rb,这看起来不对或者b)升级版本,推送到Github,然后运行bundleup,这除了耗时之外显然是一场灾难,因为我不确定我所做的promise是否正
我一直在尝试使用nanoc用于生成静态网站。我需要组织一个复杂的排列页面,我想让我的内容保持干燥。包含或合并的概念在nanoc系统中如何运作?我已阅读文档,但似乎找不到我想要的内容。例如:我如何获取两个部分内容项并将它们合并到一个新的内容项中。在staticmatic您可以在您的页面中执行以下操作。=partial('partials/shared/navigation')类似的约定在nanoc中如何运作? 最佳答案 这里是nanoc的作者。在nanoc中,部分是布局。因此,您可以拥有layouts/partials/shared/
我安装了ruby、yeoman,当我运行我的项目时,出现了这个错误:Warning:Running"compass:dist"(compass)taskWarning:YouneedtohaveRubyandCompassinstalledthistasktowork.Moreinfo:https://github.com/gruUse--forcetocontinue.Use--forcetocontinue.我有进入可变session目标的路径,但它不起作用。谁能帮帮我? 最佳答案 我必须运行这个:geminstallcom
我有一个包含多个组件的存储库,其中大部分是用JavaScript(Node.js)编写的,一个是用Ruby(RubyonRails)编写的。我想要一个.travis.yml文件来触发一个运行每个组件的所有测试的构建。根据thisTravisCIGoogleGroupthread,目前还没有官方支持。我的目录结构是这样的:.├──构建服务器├──核心├──扩展├──网络应用├──流浪文件├──package.json├──.travis.yml└──生成文件我希望能够运行特定版本的Ruby(2.2.2)和Node.js(0.12.2)。我已经有了一个make目标,所以maketest在每
前面一篇关于智能合约翻译文讲到了,是一种计算机程序,既然是程序,那就可以使用程序语言去编写智能合约了。而若想玩区块链上的项目,大部分区块链项目都是开源的,能看得懂智能合约代码,或找出其中的漏洞,那么,学习Solidity这门高级的智能合约语言是有必要的,当然,这都得在公链``````以太坊上,毕竟国内的联盟链有些是不兼容Solidity。Solidity是一种面向对象的高级语言,用于实现智能合约。智能合约是管理以太坊状态下的账户行为的程序。Solidity是运行在以太坊(Ethereum)虚拟机(EVM)上,其语法受到了c++、python、javascript影响。Solidity是静态类型