文章目录
我们在会开发项目的同时,也应该了解一下前端是如何部署项目的;
1、服务器或者虚拟机(后端已经搭建好的,这里就不讲述如何搭建服务器了)
2、Xshell 和 Xftp --> 存放静态文件和操作服务器
3、Windows系统
Xshell:是一个强大的安全终端模拟软件,可以在Windows界面下用来访问远端不同系统下的服务器。(作用就是用来连接远程服务器的)
Xftp:是一个功能强大的SFTP、FTP 文件传输软件。(作用是存放静态文件和上传静态资源)
使用Xshell连接服务器,既然想要在服务器上面放静态资源,像HTML,js等,就需要安装静态资源服务器。静态资源服务器有Apache和Nginx,这里我们选用nginx。
yum install -y pcre pcre-devel
yum install -y zlib zlib-devel
yum install gcc-c++
yum install -y openssl openssl-devel
wget -c https://nginx.org/download/nginx-0.1.18.tar.gz
找到安装包Nginx安装路径,并在目录下进行解压。
tar -zxvf nginx-0.1.18.tar.gz
进入解压好的Nginx目录下:
cd nginx-0.1.18
./configure --with-http_ssl_module
make
make install
找到安装目录:
whereis nginx
启动服务:
/usr/local/nginx/sbin/nginx
或者进入Nginx目录下启动:
./nginx
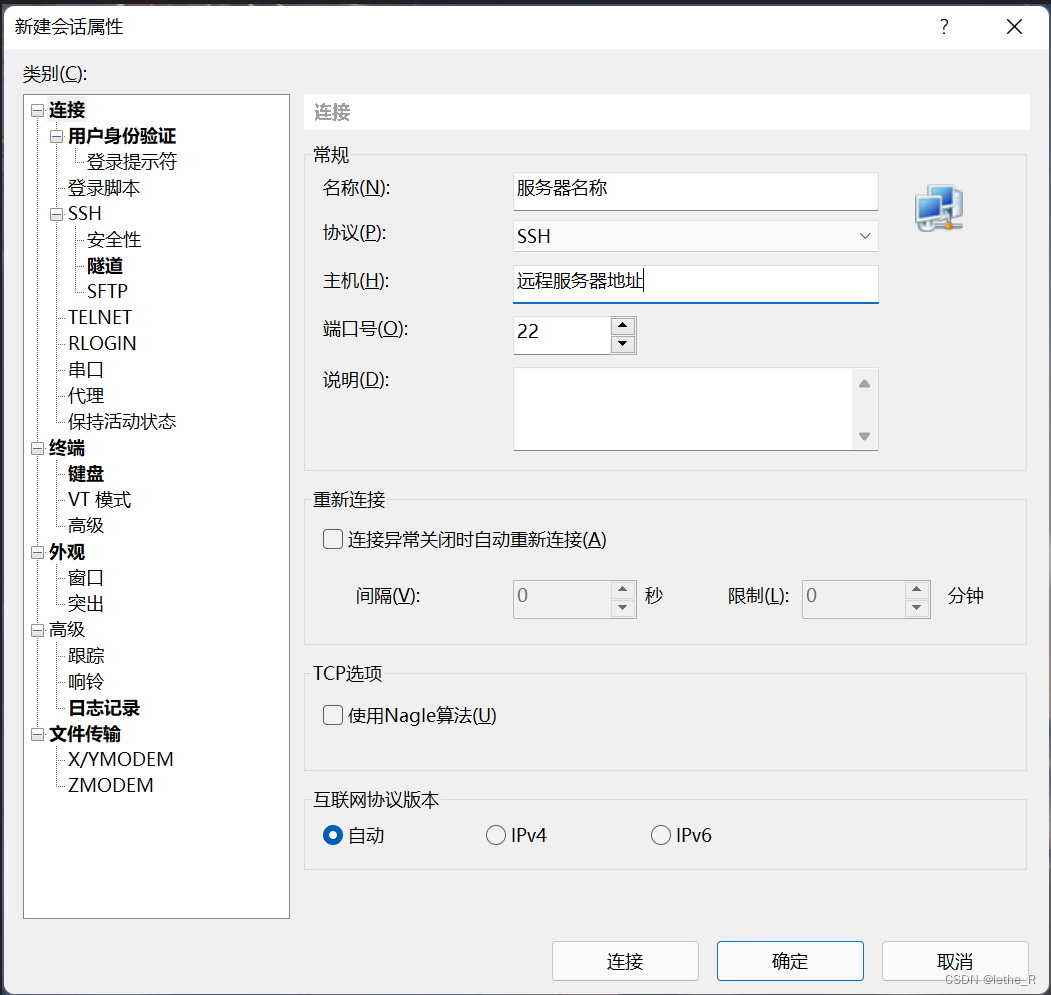
输入服务器名称、地址、端口号,连接成功后会让你输入账号和密码,账号一般是默认的root。
在Xshell中启动Nginx:
1、查找安装的路径:whereis nginx;
2、执行Nginx启动命令:/usr/local/nginx/sbin/nginx;
3、查看服务运行状态:ps -ef | grep nginx;
4、停止服务:kill 进程号; /usr/local/nginx/sbin/nginx -stop
5、重启服务:/usr/local/nginx/sbin/nginx -s reopen
连接Xftp,进行文件传输。服务器的根目录是 /root ,这里可以创建一个自己的项目文件目录进行静态资源文件的存放。直接把打包后的dist文件放在目标目录即可。
在Xhell中进行Nginx的配置:
配置命令:vim /usr/local/nginx/conf/nginx.conf(vim + nginx目录)
按insert键进入编辑模式,说明以及配置文件如下:
#全局块 :配置影响nginx全局的指令。一般有运行nginx服务器的用户组,nginx进程pid存放路径,日志存放路径,配置文件引入,允许生成worker process数等。
#user  nobody/root; #配置用户或者组,默认为nobody root
user root;
worker_processes  1;  #允许生成的进程数,默认是1

#error_log  logs/error.log;
#error_log  logs/error.log  notice;
#error_log  logs/error.log  info;

#pid        logs/nginx.pid; #指定nginx进程运行文件存放地址


events {  #event块:配置影响nginx服务器或与用户的网络连接。有每个进程的最大连接数,选取哪种事件驱动模型处理连接请求,是否允许同时接受多个网路连接,开启多个网络连接序列化等。
    accept_mutex on;   #设置网路连接序列化,防止惊群现象发生,默认为on
    multi_accept on;  #设置一个进程是否同时接受多个网络连接,默认为off
    #use epoll;      #事件驱动模型,select|poll|kqueue|epoll|resig|/dev/poll|eventport
    worker_connections  1024;    #最大连接数,默认为512
}


http { #http块:可以嵌套多个server,配置代理,缓存,日志定义等绝大多数功能和第三方模块的配置。如文件引入,mime-type定义,日志自定义,是否使用sendfile传输文件,连接超时时间,单连接请求数等。
    include       mime.types; #文件扩展名与文件类型映射表
    default_type  application/octet-stream;  #默认文件类型,默认为text/plain、octet-stream未知文件类型

    #log_format  main  '$remote_addr - $remote_user [$time_local] "$request" '
    #                  '$status $body_bytes_sent "$http_referer" '
    #                  '"$http_user_agent" "$http_x_forwarded_for"';

    #access_log  logs/access.log  main;

    sendfile        on; #开启高效文件传输模式
    #tcp_nopush     on;

    #keepalive_timeout  0;
    keepalive_timeout  65;#保持请求活跃时间

    #gzip  on;
	#error_page 404 https://www.baidu.com; #错误页

	#http全局块
    server {  #server块:配置虚拟主机的相关参数,一个http中可以有多个server。
		keepalive_requests 120; #单连接请求上限次数。
        listen       80; #监听端口
        server_name  127.0.0.1;#监听地址-->设置对应监听的域名xxx.com  www.baidu.com

        #charset koi8-r;

        #access_log  logs/host.access.log  main;

		#请求的url过滤,正则匹配,~为区分大小写,~*为不区分大小写。
        location / { #location块:配置请求的路由,以及各种页面的处理情况。
			#root path;  #根目录
			#index vv.txt;  #设置默认页
            root   html;
            index  index.html index.htm;
			#proxy_pass  http://mysvr;  #请求转向mysvr 定义的服务器列表-->可以填写自己的服务器地址
			#proxy_read_timeout 150; 代理连接超时时间
			#deny 127.0.0.1;  #拒绝的ip
			#allow 172.18.5.54; #允许的ip
        }

        #error_page  404              /404.html;

        # redirect server error pages to the static page /50x.html
        #
        error_page   500 502 503 504  /50x.html;
        location = /50x.html {
            root   html;
        }

        # proxy the PHP scripts to Apache listening on 127.0.0.1:80
        #
        #location ~ \.php$ {
        #    proxy_pass   http://127.0.0.1;
        #}

        # pass the PHP scripts to FastCGI server listening on 127.0.0.1:9000
        #
        #location ~ \.php$ {
        #    root           html;
        #    fastcgi_pass   127.0.0.1:9000;
        #    fastcgi_index  index.php;
        #    fastcgi_param  SCRIPT_FILENAME  /scripts$fastcgi_script_name;
        #    include        fastcgi_params;
        #}

        # deny access to .htaccess files, if Apache's document root
        # concurs with nginx's one
        #
        #location ~ /\.ht {
        #    deny  all;
        #}
    }


    # another virtual host using mix of IP-, name-, and port-based configuration
    #
    #server {
    #    listen       8000;
    #    listen       somename:8080;
    #    server_name  somename  alias  another.alias;

    #    location / {
    #        root   html;
    #        index  index.html index.htm;
    #    }
    #}


    # HTTPS server
    #
    #server {
    #    listen       443 ssl;
    #    server_name  localhost;

    #    ssl_certificate      cert.pem;
    #    ssl_certificate_key  cert.key;

    #    ssl_session_cache    shared:SSL:1m;
    #    ssl_session_timeout  5m;

    #    ssl_ciphers  HIGH:!aNULL:!MD5;
    #    ssl_prefer_server_ciphers  on;

    #    location / {
    #        root   html;
    #        index  index.html index.htm;
    #    }
    #}
 # 测试配置
    server {
        listen       8777;
        server_name  http://127.0.0.1/;

        gzip on; # 开启Gzip
        # gzip_static on; # 开启静态文件压缩 这句话不要
        gzip_min_length  1k; # 不压缩临界值,大于1K的才压缩
        gzip_buffers     4 16k;
        gzip_comp_level 5;
        gzip_types     application/javascript application/x-javascript application/xml application/xml+rss application/x-httpd-php text/plain text/javascript text/css image/jpeg image/gif image/png; # 进行压缩的文件类型
        gzip_http_version 1.1;
        gzip_vary on;
        gzip_proxied   expired no-cache no-store private auth;
        gzip_disable   "MSIE [1-6]\.";

        location / {
            root   /home/myProject/dist; # root表示根目录,这里的路径需要与Xftp上传的静态资源文件的路径一致
            index  index.html index.htm;
            try_files $uri $uri/ /index.html;
        }

        location @router {
            rewrite ^.*$ /index.html last;
        }
    }
}
修改完成后:wq 保存退出。
重启命令:/usr/local/nginx/sbin/nginx -s reopen
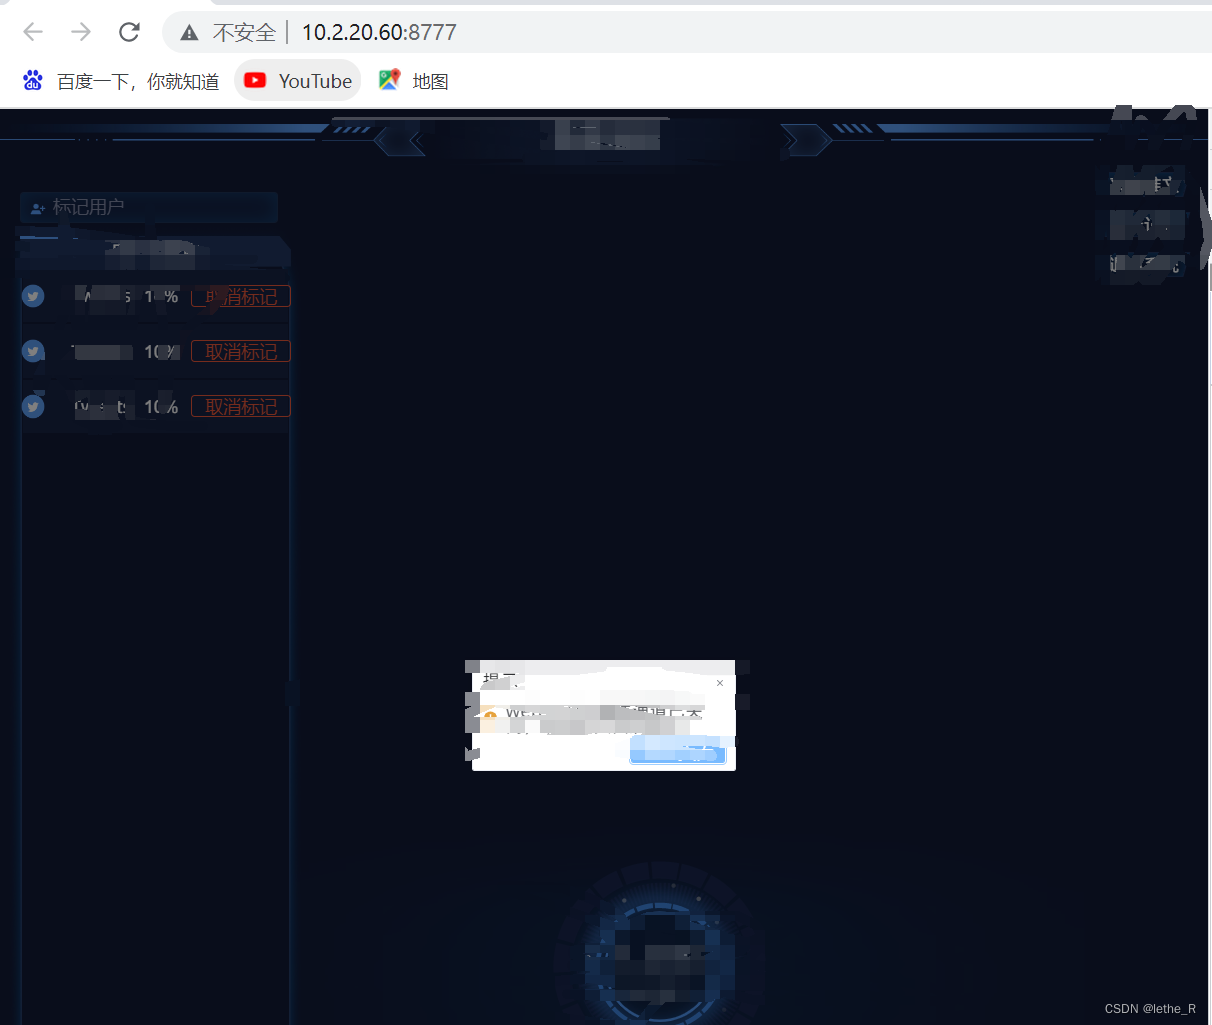
最后在浏览器中输入:http://127.0.0.1:8777/即可访问部署成功的项目;
我正在学习如何使用Nokogiri,根据这段代码我遇到了一些问题:require'rubygems'require'mechanize'post_agent=WWW::Mechanize.newpost_page=post_agent.get('http://www.vbulletin.org/forum/showthread.php?t=230708')puts"\nabsolutepathwithtbodygivesnil"putspost_page.parser.xpath('/html/body/div/div/div/div/div/table/tbody/tr/td/div
总的来说,我对ruby还比较陌生,我正在为我正在创建的对象编写一些rspec测试用例。许多测试用例都非常基础,我只是想确保正确填充和返回值。我想知道是否有办法使用循环结构来执行此操作。不必为我要测试的每个方法都设置一个assertEquals。例如:describeitem,"TestingtheItem"doit"willhaveanullvaluetostart"doitem=Item.new#HereIcoulddotheitem.name.shouldbe_nil#thenIcoulddoitem.category.shouldbe_nilendend但我想要一些方法来使用
我正在尝试使用ruby和Savon来使用网络服务。测试服务为http://www.webservicex.net/WS/WSDetails.aspx?WSID=9&CATID=2require'rubygems'require'savon'client=Savon::Client.new"http://www.webservicex.net/stockquote.asmx?WSDL"client.get_quotedo|soap|soap.body={:symbol=>"AAPL"}end返回SOAP异常。检查soap信封,在我看来soap请求没有正确的命名空间。任何人都可以建议我
关闭。这个问题是opinion-based.它目前不接受答案。想要改进这个问题?更新问题,以便editingthispost可以用事实和引用来回答它.关闭4年前。Improvethisquestion我想在固定时间创建一系列低音和高音调的哔哔声。例如:在150毫秒时发出高音调的蜂鸣声在151毫秒时发出低音调的蜂鸣声200毫秒时发出低音调的蜂鸣声250毫秒的高音调蜂鸣声有没有办法在Ruby或Python中做到这一点?我真的不在乎输出编码是什么(.wav、.mp3、.ogg等等),但我确实想创建一个输出文件。
给定这段代码defcreate@upgrades=User.update_all(["role=?","upgraded"],:id=>params[:upgrade])redirect_toadmin_upgrades_path,:notice=>"Successfullyupgradeduser."end我如何在该操作中实际验证它们是否已保存或未重定向到适当的页面和消息? 最佳答案 在Rails3中,update_all不返回任何有意义的信息,除了已更新的记录数(这可能取决于您的DBMS是否返回该信息)。http://ar.ru
我在我的项目目录中完成了compasscreate.和compassinitrails。几个问题:我已将我的.sass文件放在public/stylesheets中。这是放置它们的正确位置吗?当我运行compasswatch时,它不会自动编译这些.sass文件。我必须手动指定文件:compasswatchpublic/stylesheets/myfile.sass等。如何让它自动运行?文件ie.css、print.css和screen.css已放在stylesheets/compiled。如何在编译后不让它们重新出现的情况下删除它们?我自己编译的.sass文件编译成compiled/t
我想安装一个带有一些身份验证的私有(private)Rubygem服务器。我希望能够使用公共(public)Ubuntu服务器托管内部gem。我读到了http://docs.rubygems.org/read/chapter/18.但是那个没有身份验证-如我所见。然后我读到了https://github.com/cwninja/geminabox.但是当我使用基本身份验证(他们在他们的Wiki中有)时,它会提示从我的服务器获取源。所以。如何制作带有身份验证的私有(private)Rubygem服务器?这是不可能的吗?谢谢。编辑:Geminabox问题。我尝试“捆绑”以安装新的gem..
我正在寻找执行以下操作的正确语法(在Perl、Shell或Ruby中):#variabletoaccessthedatalinesappendedasafileEND_OF_SCRIPT_MARKERrawdatastartshereanditcontinues. 最佳答案 Perl用__DATA__做这个:#!/usr/bin/perlusestrict;usewarnings;while(){print;}__DATA__Texttoprintgoeshere 关于ruby-如何将脚
如何在buildr项目中使用Ruby?我在很多不同的项目中使用过Ruby、JRuby、Java和Clojure。我目前正在使用我的标准Ruby开发一个模拟应用程序,我想尝试使用Clojure后端(我确实喜欢功能代码)以及JRubygui和测试套件。我还可以看到在未来的不同项目中使用Scala作为后端。我想我要为我的项目尝试一下buildr(http://buildr.apache.org/),但我注意到buildr似乎没有设置为在项目中使用JRuby代码本身!这看起来有点傻,因为该工具旨在统一通用的JVM语言并且是在ruby中构建的。除了将输出的jar包含在一个独特的、仅限ruby
Rackup通过Rack的默认处理程序成功运行任何Rack应用程序。例如:classRackAppdefcall(environment)['200',{'Content-Type'=>'text/html'},["Helloworld"]]endendrunRackApp.new但是当最后一行更改为使用Rack的内置CGI处理程序时,rackup给出“NoMethodErrorat/undefinedmethod`call'fornil:NilClass”:Rack::Handler::CGI.runRackApp.newRack的其他内置处理程序也提出了同样的反对意见。例如Rack