dai ga hou啊!我是 😘😘😘是江迪呀。我们在进行微信小程序开发时,常常需要自定义一些东西,比如自定义顶部导航、自定义底部导航等等。那么知道这些自定义内容的具体位置、以及如何适配不同的机型就变得尤为重要。下面让我以在iPhone机型,来给大家介绍下微信小程序如何获取自定义内容的位置信息。
如果需要自定义顶部和底部导航。那么如何在自定义后能够适配不同的机型而不会出现样式问题呢?我们可以通过wx.getSystemInfo({})方法来获取页面的信息来保证样式的正确性。此方法常用于app.js文件中的onLanch()方法中,保证这些信息优先被加载,并把获取到的页面信息放到全局变量中,方便其他页面的获取使用。
在此之前需要开启自定义顶部和底部导航栏。如下所示:
{
  "pages": [
    "pages/index/index",
    "pages/index2/index2"
  ],
  //自定义顶部导航 "navigationStyle": "custom",
  "window": {
    "navigationStyle": "custom",
    "navigationBarTextStyle": "white",
    "backgroundTextStyle": "light"
  },
  //自定义底部导航 "navigationStyle": "custom",这里注意在设置自定义底部导航栏时,list中至少包含两个页面
  "tabBar": {
    "custom": true,
    "list": [
      {
        "pagePath": "pages/index/index",
        "text": "首页"
      },
      {
        "pagePath": "pages/index2/index2",
        "text": "首页2"
      }
    ]
  },
  "style": "v2",
  "sitemapLocation": "sitemap.json"
}
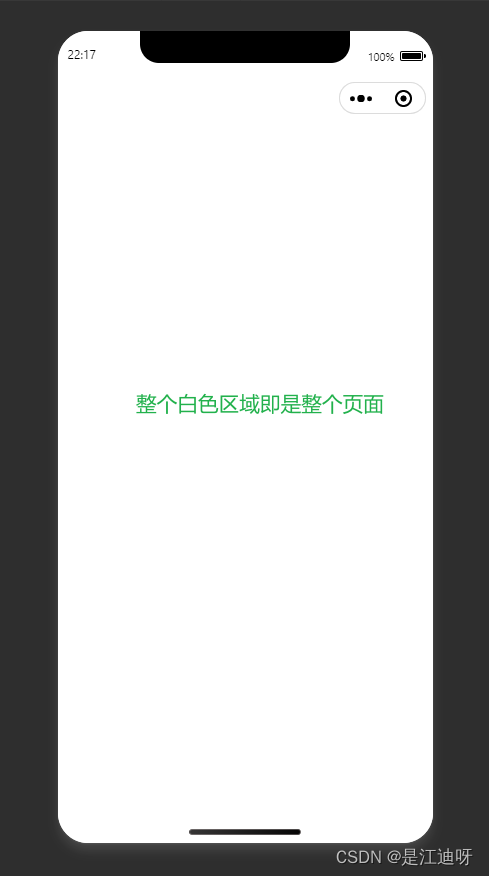
页面代码:
<view style="height: {{screenHeight}}px;background-color: aliceblue;">
</view>
页面js代码:
const app = getApp()
Page({
  data: {
    screenHeight: app.globalData.screenHeight,
  }
})
app.js文件代码:
    onLaunch: function() {
        wx.getSystemInfo({
            success: e => {
            	//获取整个页面的高度
                this.globalData.screenHeight = e.screenHeight;
              }
             },
        )}
状态栏就是手机最顶部显示时间、信号、电量等信息的区域。一般状态栏的信息我们不单独获取设置,因为顶部导航栏包含了状态栏。
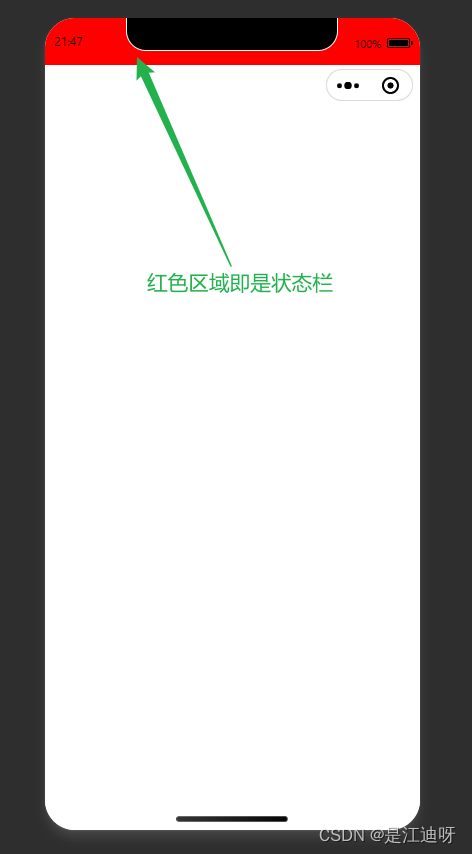
页面代码:
<!--index.wxml-->
<view style="height: {{screenHeight}}px;background-color: aliceblue;">
  <!--状态栏高度-->
  <view style="height: {{statusBarHeight}}px;background-color: red;"></view>
</view>
页面js代码:
// index.js
const app = getApp()
Page({
  data: {
    screenHeight: app.globalData.screenHeight,
    statusBarHeight: app.globalData.statusBarHeight
  }
})
app.js文件代码:
    onLaunch: function() {
	     wx.getSystemInfo({
           success: e => {
              this.globalData.screenHeight = e.screenHeight;
              //获取状态栏的高度
              this.globalData.StatusBar = e.statusBarHeight;
           }
	     },
	)}
顶部导航栏的高度是包含胶囊体的。
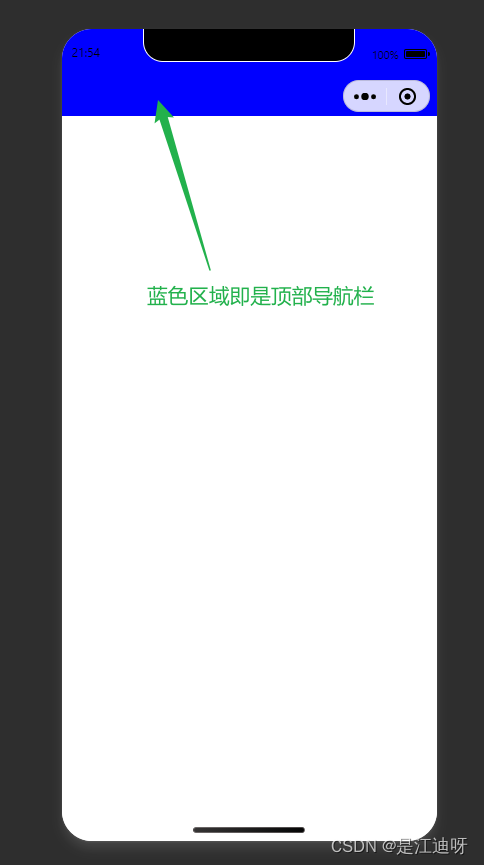
首先获取胶囊体的信息,如果不存在胶囊体,顶部导航栏高度 = 状态栏高度 + 50;如果存在顶部导航栏高度 = 胶囊体离页面顶部的距离 + 胶囊体离页面底部的距离 - 状态栏高度
页面代码:
<view style="height: {{screenHeight}}px;background-color: aliceblue;">
  <!--顶部导航高度-->
  <view style="height: {{customBar}}px;background-color: blue;"></view>
</view>
页面js代码:
const app = getApp()
Page({
  data: {
    screenHeight: app.globalData.screenHeight,
    customBar: app.globalData.CustomBar
  }
})
app.js代码:
// app.js
App({
  globalData:{
  },
  onLaunch: function() {
    wx.getSystemInfo({
    success: e => {
        let capsule = wx.getMenuButtonBoundingClientRect();
        if (capsule) {
          this.globalData.Custom = capsule;
          this.globalData.CustomBar = capsule.bottom + capsule.top - e.statusBarHeight;
        } else {
          this.globalData.CustomBar = e.statusBarHeight + 50;
        }
      }
     },
 )}
})
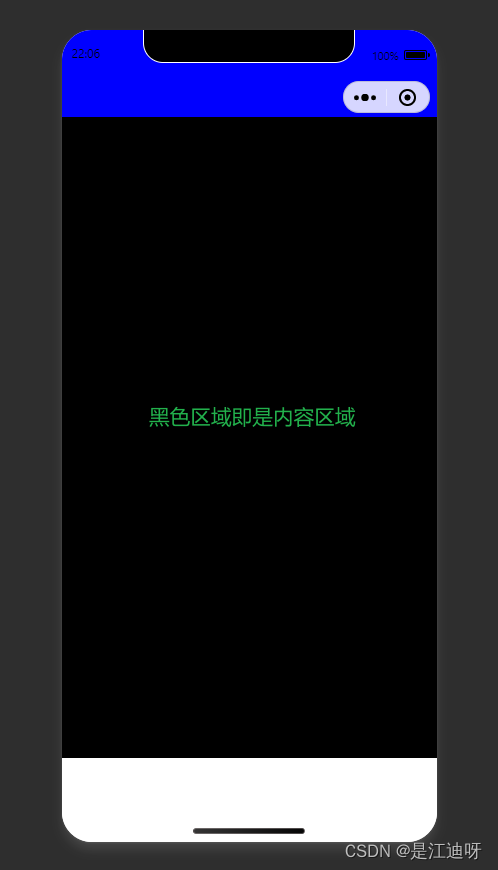
如果你做的小程序没有底部导航栏的话,那么内容区域 = 页面总高度 - 顶部导航栏高度
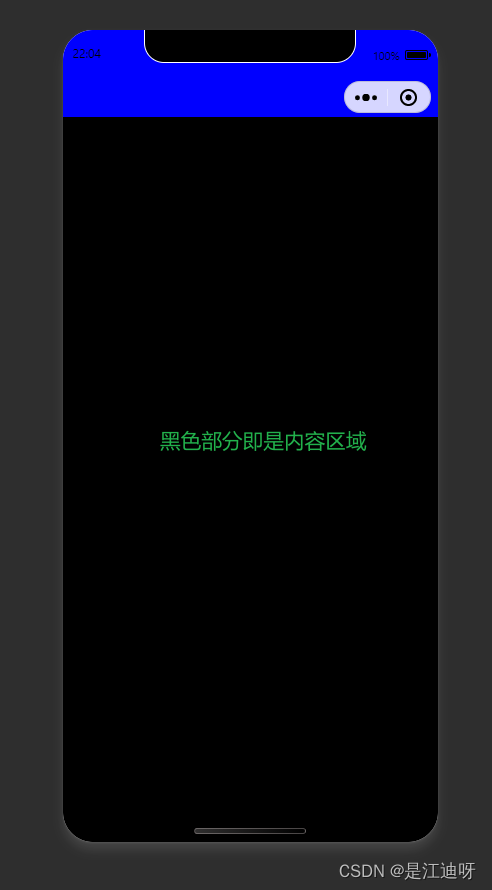
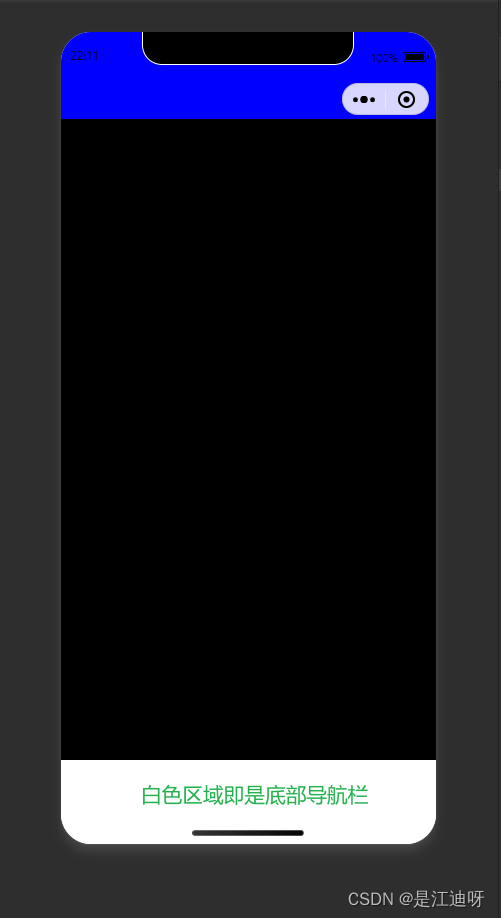
但是如果你需要底部导航的话那么内容区域 = 页面总高度 - 顶部导航栏高度 - 底部导航栏高度
页面代码:
  <view style="height:{{screenHeight}}px;width: 100%;background-color: rgb(255, 255, 255);">
    <!--顶部导航栏-->
    <view class="" style="height: {{CustomBar}}px;background-color: blue;"></view>
    <!--内容区域-->
    <view class="" style="height: {{screenHeight - CustomBar}}px;background-color: black;"></view>
    <!--内容区域 包含底部导航-->
    <view class="" style="height: {{screenHeight - CustomBar - tabBarHeight}}px;background-color: black;"></view>
  </view>
页面js代码:
const app = getApp()
Page({
  data: {
    screenHeight: app.globalData.screenHeight,
    CustomBar: app.globalData.CustomBar,
    tabBarHeight: app.globalData.tabBarHeight,
  }
})
app.js代码:
// app.js
App({
  globalData:{

  },
  onLaunch: function() {
    // 获取系统状态栏信息
    wx.getSystemInfo({
    success: e => {
        this.globalData.screenHeight = e.screenHeight;
        this.globalData.tabBarHeight = e.screenHeight - e.safeArea.bottom + 50
        let capsule = wx.getMenuButtonBoundingClientRect();
        if (capsule) {
          this.globalData.CustomBar = capsule.bottom + capsule.top - e.statusBarHeight;
        } else {
          this.globalData.CustomBar = e.statusBarHeight + 50;
        }
      }
     },
 )}
})
页面代码:
<view style="height: {{screenHeight}}px;background-color: aliceblue;">
  <!--顶部导航高度-->
  <view style="height: {{customBar}}px;background-color: blue;"></view>
  <!--内容高度 包含底部导航-->
  <view style="height: {{screenHeight - customBar - tabBar}}px;background-color: black;"></view>
  <!--底部导航高度-->
  <view style="height: {{tabBarHeight}}px;background-color: red;"></view>
</view>
页面js代码:
const app = getApp()
Page({
  data: {
    screenHeight: app.globalData.screenHeight,
    statusBarHeight: app.globalData.statusBarHeight,
    customBar: app.globalData.CustomBar,
    tabBar: app.globalData.tabBarHeight,
    tabBarHeight: app.globalData.tabBarHeight
  }
})
app.js代码:
    onLaunch: function() {
        wx.getSystemInfo({
            success: e => {
            	this.globalData.screenHeight = e.screenHeight;
            	this.globalData.tabBarHeight = e.screenHeight-e.safeArea.bottom + 50
				let capsule = wx.getMenuButtonBoundingClientRect();
		        if (capsule) {
		          this.globalData.Custom = capsule;
		          this.globalData.CustomBar = capsule.bottom + capsule.top - e.statusBarHeight;
		        } else {
		          this.globalData.CustomBar = e.statusBarHeight + 50;
		        }
              }
             },
        )}
这个底部导航栏之所以+50,我是从小程序框架中获取的,可以直接拿来用。

我们再做自定义顶部导航时,在一些场景下需要在导航中设置返回按钮以及其他信息:

这些按钮和信息需要和胶囊体对齐才完美,所以我们需要获取到胶囊体的位置信息。
// app.js
App({
  globalData:{
  },
  onLaunch: function() {
    // 获取系统状态栏信息
    wx.getSystemInfo({
    success: e => {
      	//胶囊体距离顶部距离
        this.globalData.capsuleTop =  wx.getMenuButtonBoundingClientRect().top;
        //胶囊体的高度
        this.globalData.capsuleHeight =  wx.getMenuButtonBoundingClientRect().height;
        //胶囊体的宽度
        this.globalData.capsuleWidth =  wx.getMenuButtonBoundingClientRect().width;
      }
     },
     wx.onKeyboardHeightChange((res) => {
      console.log('键盘高度111111:', res.height)
      wx.setStorageSync('keyBordHeight', res.height)
    })
 )}
})
我正在尝试设置一个puppet节点,但rubygems似乎不正常。如果我通过它自己的二进制文件(/usr/lib/ruby/gems/1.8/gems/facter-1.5.8/bin/facter)在cli上运行facter,它工作正常,但如果我通过由rubygems(/usr/bin/facter)安装的二进制文件,它抛出:/usr/lib/ruby/1.8/facter/uptime.rb:11:undefinedmethod`get_uptime'forFacter::Util::Uptime:Module(NoMethodError)from/usr/lib/ruby
我正在使用的第三方API的文档状态:"[O]urAPIonlyacceptspaddedBase64encodedstrings."什么是“填充的Base64编码字符串”以及如何在Ruby中生成它们。下面的代码是我第一次尝试创建转换为Base64的JSON格式数据。xa=Base64.encode64(a.to_json) 最佳答案 他们说的padding其实就是Base64本身的一部分。它是末尾的“=”和“==”。Base64将3个字节的数据包编码为4个编码字符。所以如果你的输入数据有长度n和n%3=1=>"=="末尾用于填充n%
我在我的项目中添加了一个系统来重置用户密码并通过电子邮件将密码发送给他,以防他忘记密码。昨天它运行良好(当我实现它时)。当我今天尝试启动服务器时,出现以下错误。=>BootingWEBrick=>Rails3.2.1applicationstartingindevelopmentonhttp://0.0.0.0:3000=>Callwith-dtodetach=>Ctrl-CtoshutdownserverExiting/Users/vinayshenoy/.rvm/gems/ruby-1.9.3-p0/gems/actionmailer-3.2.1/lib/action_mailer
我想向我的Controller传递一个参数,它是一个简单的复选框,但我不知道如何在模型的form_for中引入它,这是我的观点:{:id=>'go_finance'}do|f|%>Transferirde:para:Entrada:"input",:placeholder=>"Quantofoiganho?"%>Saída:"output",:placeholder=>"Quantofoigasto?"%>Nota:我想做一个额外的复选框,但我该怎么做,模型中没有一个对象,而是一个要检查的对象,以便在Controller中创建一个ifelse,如果没有检查,请帮助我,非常感谢,谢谢
我已经从我的命令行中获得了一切,所以我可以运行rubymyfile并且它可以正常工作。但是当我尝试从sublime中运行它时,我得到了undefinedmethod`require_relative'formain:Object有人知道我的sublime设置中缺少什么吗?我正在使用OSX并安装了rvm。 最佳答案 或者,您可以只使用“require”,它应该可以正常工作。我认为“require_relative”仅适用于ruby1.9+ 关于ruby-主要:Objectwhenrun
我有一些代码在几个不同的位置之一运行:作为具有调试输出的命令行工具,作为不接受任何输出的更大程序的一部分,以及在Rails环境中。有时我需要根据代码的位置对代码进行细微的更改,我意识到以下样式似乎可行:print"Testingnestedfunctionsdefined\n"CLI=trueifCLIdeftest_printprint"CommandLineVersion\n"endelsedeftest_printprint"ReleaseVersion\n"endendtest_print()这导致:TestingnestedfunctionsdefinedCommandLin
我有一个只接受一个参数的方法:defmy_method(number)end如果使用number调用方法,我该如何引发错误??通常,我如何定义方法参数的条件?比如我想在调用的时候报错:my_method(1) 最佳答案 您可以添加guard在函数的开头,如果参数无效则引发异常。例如:defmy_method(number)failArgumentError,"Inputshouldbegreaterthanorequalto2"ifnumbereputse.messageend#=>Inputshouldbegreaterthano
我使用Ember作为我的前端和GrapeAPI来为我的API提供服务。前端发送类似:{"service"=>{"name"=>"Name","duration"=>"30","user"=>nil,"organization"=>"org","category"=>nil,"description"=>"description","disabled"=>true,"color"=>nil,"availabilities"=>[{"day"=>"Saturday","enabled"=>false,"timeSlots"=>[{"startAt"=>"09:00AM","endAt"=>
我想获取模块中定义的所有常量的值:moduleLettersA='apple'.freezeB='boy'.freezeendconstants给了我常量的名字:Letters.constants(false)#=>[:A,:B]如何获取它们的值的数组,即["apple","boy"]? 最佳答案 为了做到这一点,请使用mapLetters.constants(false).map&Letters.method(:const_get)这将返回["a","b"]第二种方式:Letters.constants(false).map{|c
我正在阅读一本关于Ruby的书,作者在编写类初始化定义时使用的形式与他在本书前几节中使用的形式略有不同。它看起来像这样:classTicketattr_accessor:venue,:datedefinitialize(venue,date)self.venue=venueself.date=dateendend在本书的前几节中,它的定义如下:classTicketattr_accessor:venue,:datedefinitialize(venue,date)@venue=venue@date=dateendend在第一个示例中使用setter方法与在第二个示例中使用实例变量之间是
