目录
浏览该文章,建议先食用 异常问题 这一节
| 软件/框架 | 版本 |
|---|---|
| jdk | 19.0.2 |
| elasticsearch | 8.1.1 |
| ik-analyzer | 8.1.1 |
| laravel | 7.x-dev |
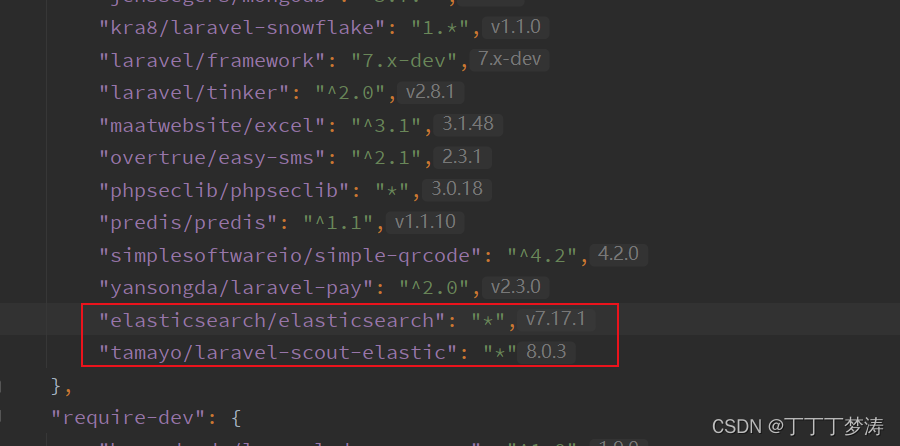
| elasticsearch/elasticsearch | 7.17.1 |
| tamayo/laravel-scout-elastic | 8.0.3 |
安装
下载:wget https://download.oracle.com/java/19/latest/jdk-19_linux-x64_bin.rpm
安装:rpm -ivh jdk-19_linux-x64_bin.rpm
查看版本
java -version
安装
下载:wget https://artifacts.elastic.co/downloads/elasticsearch/elasticsearch-8.1.1-x86_64.rpm
安装:rpm -ivh elasticsearch-8.1.1-x86_64.rpm
编辑配置项
vim /etc/elasticsearch/elasticsearch.yml
直接从最后一行添加如下内容:
#bootstrap.memory_lock: true
#network.host: localhost
http.port: 9200

bootstrap.memory_lock: false
network.host: 0.0.0.0
discovery.seed_hosts: ["127.0.0.1"]
cluster.initial_master_nodes: ["node-1"]

xpack.security.enabled: false
#xpack.security.http.ssl:
#  enabled: false
#  keystore.path: certs/http.p12

#解决[.geoip_databases]  index are active  问题
ingest.geoip.downloader.enabled: false
##允许跨域
http.cors.enabled: true
http.cors.allow-origin: "*"
保存并退出。
启动es服务
设置开机启动:systemctl enable elasticsearch
启动服务:systemctl start elasticsearch
提示错误:
问题描述:内存空间不足
解决方案:
vim /etc/elasticsearch/jvm.options
找到-Xms4g 和 -Xmx4g 打开注释并修改为:
-Xms512m
-Xmx512m
保存并退出。
重新启动es服务:
systemctl restart elasticsearch
提示错误:
问题描述:不能使用root用户,所以需要创建es专用用户和组
解决方案:
创建用户组:
groupadd elasticsearch
创建用户及所属组:
useradd -g elasticsearch elasticsearch
设置密码:
elasticsearch
设置 /opt/software/install/elasticsearch-8.6.2 目录权限为elasticsearch用户和组拥有:
chown -R elasticsearch:elasticsearch /opt/software/install/elasticsearch-8.6.2
切换到 elasticsearch 用户:
su elasticsearch
再次启动es服务:
systemctl restart elasticsearch
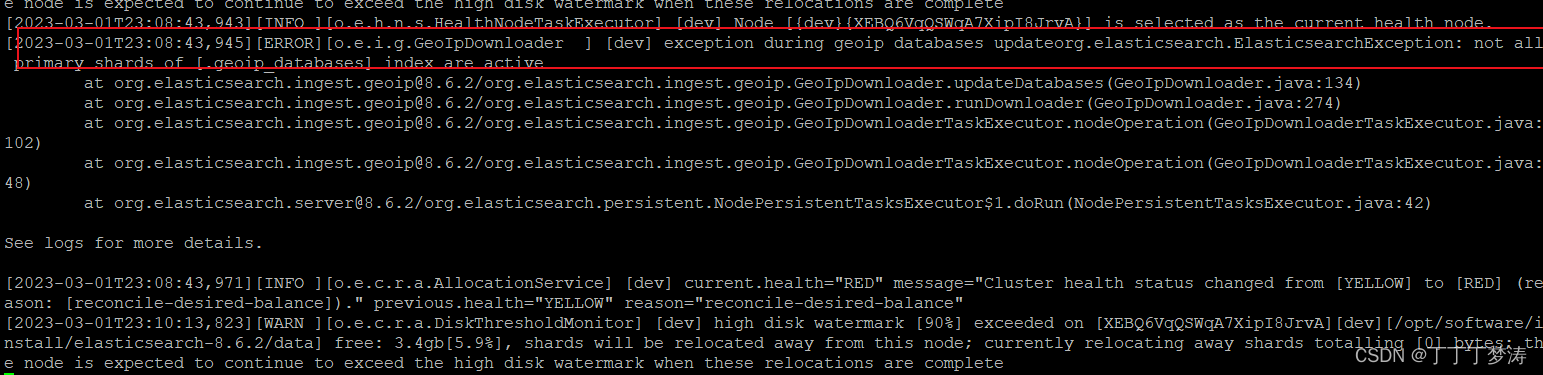
提示错误:
问题描述:exception during geoip databases updateorg.elasticsearch.ElasticsearchException: not all primary shards of [.geoip_databases] index are active
解决方案:
vim /opt/software/install/elasticsearch-8.6.2/config/elasticsearch.yml
在文件夹的最后一行添加:
#解决[.geoip_databases] index are active 问题
ingest.geoip.downloader.enabled: false
#允许跨域
http.cors.enabled: true
http.cors.allow-origin: “*”
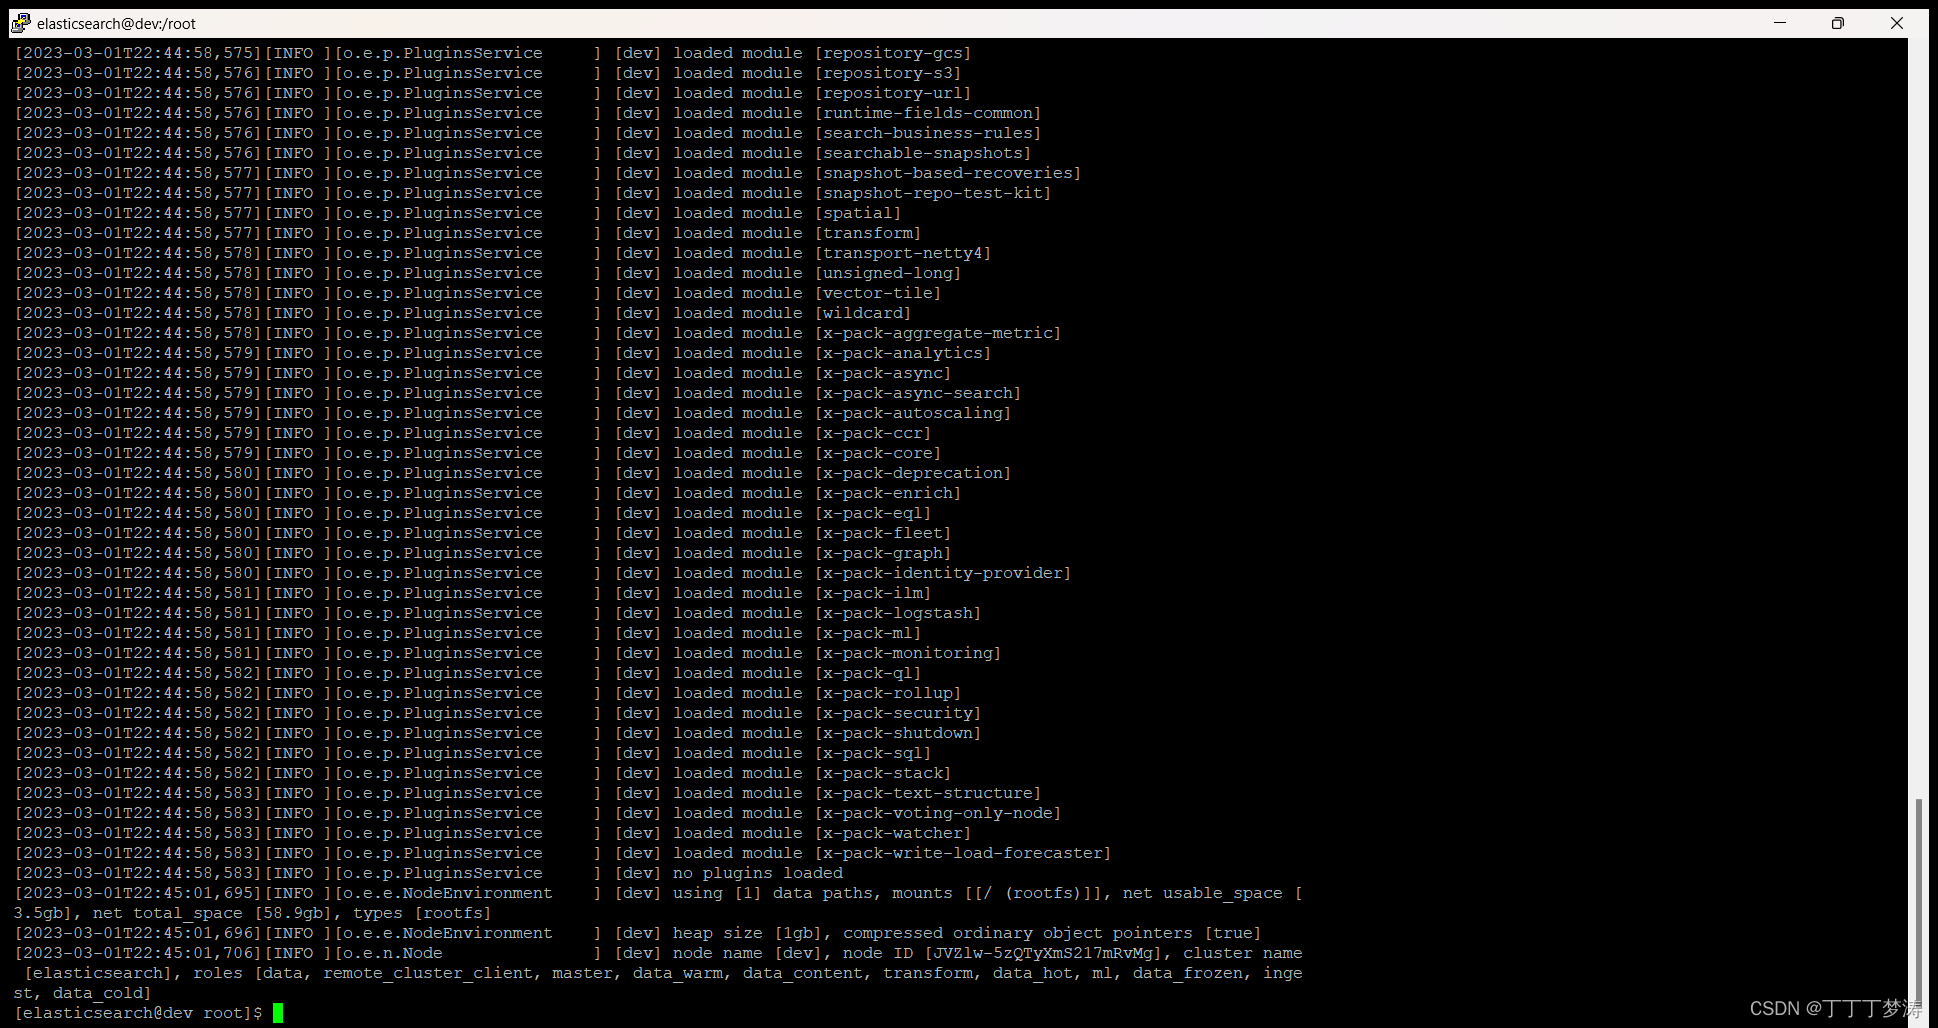
再次启动es服务:
systemctl restart elasticsearch
不再提示错误,表示启动成功:
执行命令:
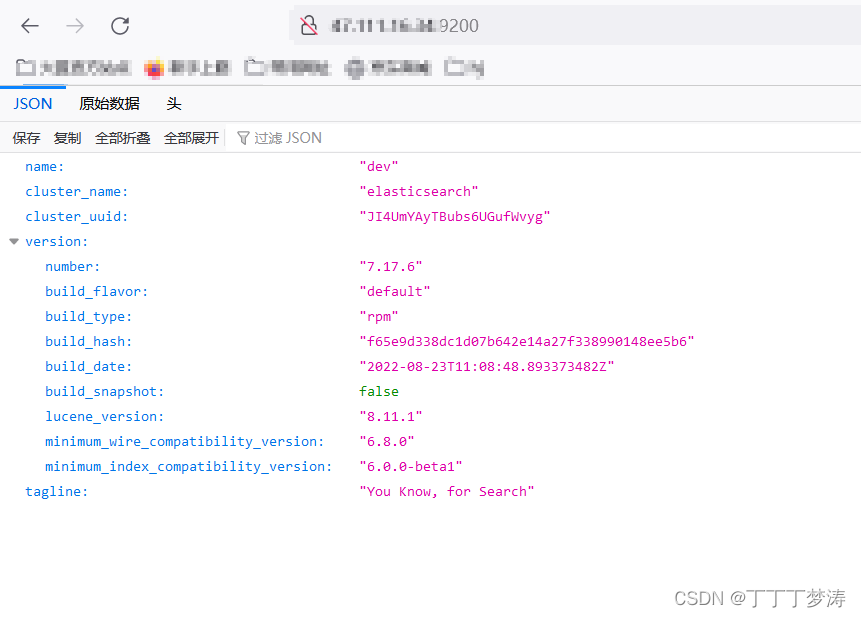
curl localhost:9200
说明es安装成功。
浏览器访问:ip:9200,也能得到上图结果:
如果用的是云服务器(如阿里云),需要配置安全组开放9200端口。
如果服务器开启了防火墙,需要开放9200端口。
注意:为避免出现问题,版本需要和es完全一致。
安装
/usr/share/elasticsearch/bin/elasticsearch-plugin install https://github.com/medcl/elasticsearch-analysis-ik/releases/download/v8.1.1/elasticsearch-analysis-ik-8.1.1.zip
重启es
systemctl restart elasticsearch
测试分词效果
curl -H 'Content-Type: application/json' -XGET 'localhost:9200/_analyze?pretty' -d '{"analyzer":"ik_max_word","text":"张三丰创建了武当派"}'
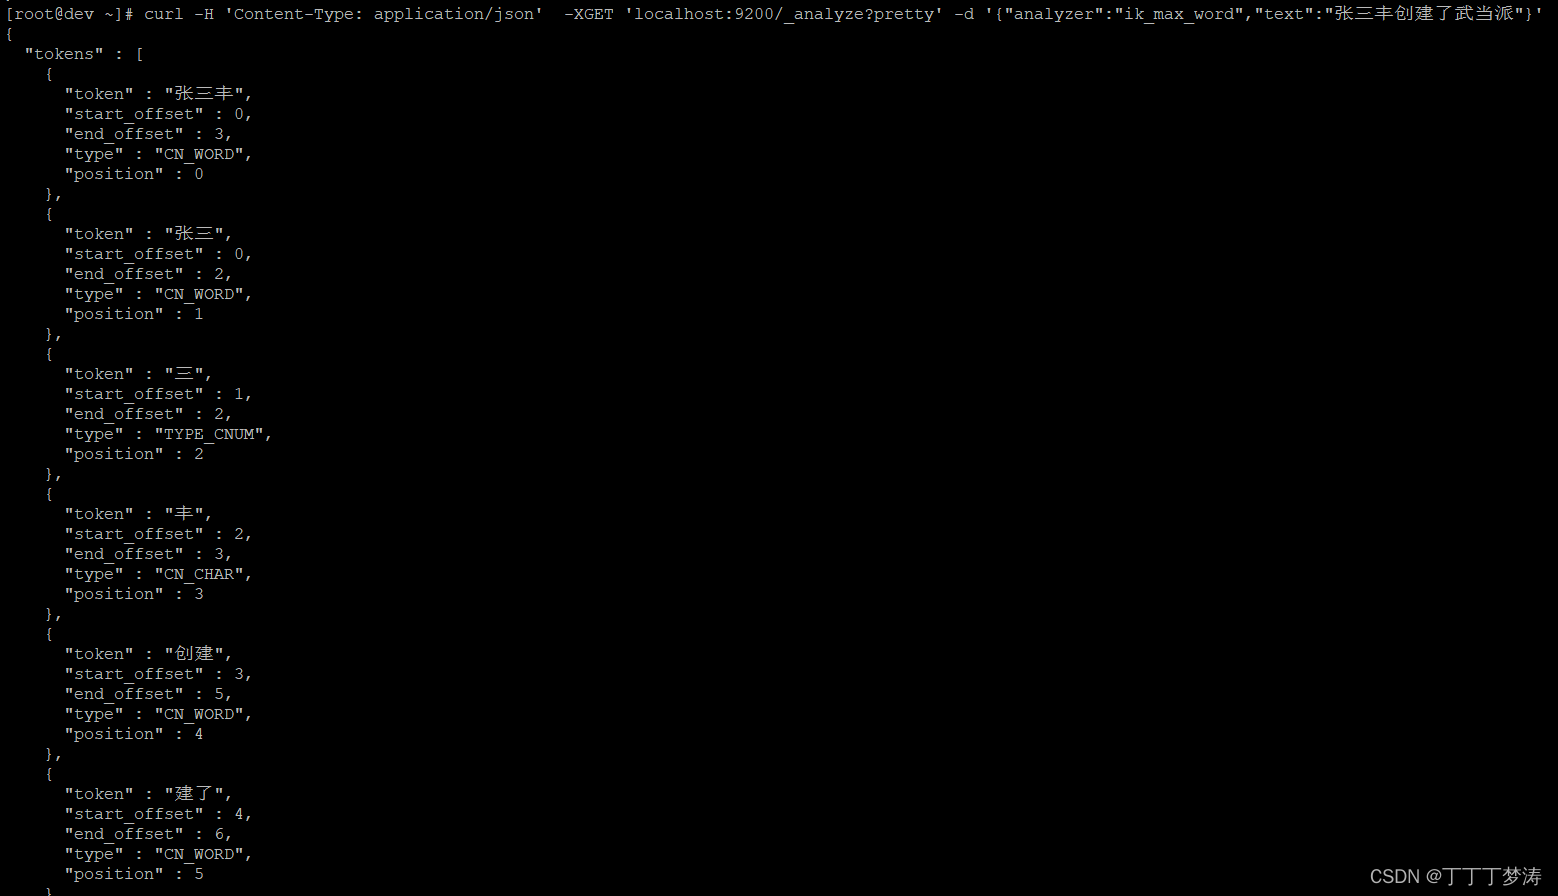
可以看到 分词效果还是不错的,但是“张三丰”这个名字却被分成了3个,还好强大的 analysis-ik 支持自定义词库,增加自定义词库:
vim /etc/elasticsearch/analysis-ik/IKAnalyzer.cfg.xml
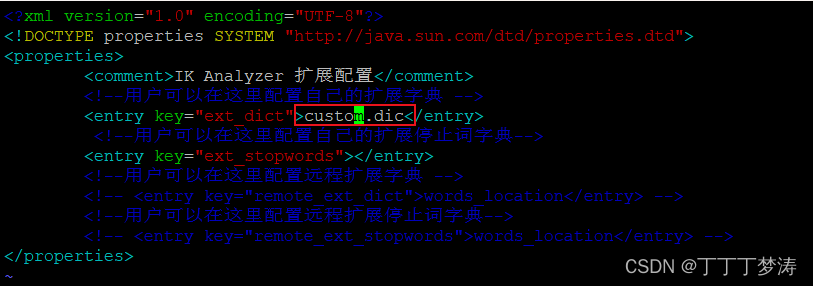
增加一个自定义词库,并向其中导入自定义内容,如通过名利写入:
echo ‘张三丰’ > /etc/elasticsearch/analysis-ik/custom.dic
再看下分词效果,明显好转:

安装
composer.json文件中require对象加入elasticsearch包和laravel-scout-elastic
执行 composer update 完成相关包下载。
需要注意的是:PHP7.2.* 版本安装的 elasticsearch/elasticsearch 版本为 7.11.0 ,php7.3.*安装的是 7.17.1,如果有多个。
在config/app.php 的 providers 数组中添加:
\Laravel\Scout\ScoutServiceProvider::class,
\Tamayo\LaravelScoutElastic\LaravelScoutElasticProvider::class,
执行命令:
php artisan vendor:publish --provider="Laravel\Scout\ScoutServiceProvider
config目录会生成一个scout.php配置文件。
修改scout.php配置文件
	'driver' => env('SCOUT_DRIVER', 'elasticsearch'),

 //在最后添加
 //配置elasticsearch引擎
 'elasticsearch' => [
      'index' => env('ELASTICSEARCH_INDEX', 'laravel'),//laravel就是索引的名字,可以随便起
      'hosts' => [
          env('ELASTICSEARCH_HOST', 'http://127.0.0.1:9200'),
      ],
  ]
env配置如下:
#elasticsearch
SCOUT_DRIVER=elasticsearch
ELASTICSEARCH_INDEX=laravel7
ELASTICSEARCH_HOST=http://127.0.0.1:9200
ELASTIC_CLIENT_APIVERSIONING=1
自动更新索引
执行命令:php artisan make:command ESInit
在 app\Console\Kernel.php 里增加ESInit类
protected $commands = [
	\App\Console\Commands\ESInit::class
];
编写ESInit类模板内容,完整代码如下:
	<?php

namespace App\Console\Commands;

use GuzzleHttp\Client;
use Illuminate\Console\Command;

class ESInit extends Command
{
    /**
     * The name and signature of the console command.
     *
     * @var string
     */
    protected $signature = 'es:init';

    /**
     * The console command description.
     *
     * @var string
     */
    protected $description = 'init laravel es for post';

    /**
     * Create a new command instance.
     *
     * @return void
     */
    public function __construct()
    {
        parent::__construct();
    }

    /**
     * Execute the console command.
     *
     * @return int
     */
    public function handle()
    {
        $client = new Client();
        // 创建模版
        $url = config('scout.elasticsearch.hosts')[0] . '/_template/tmp';
        try {
            $client->delete($url);
        } catch (\Exception $e) {
            $this->info("===delete模版出现错误===" . $e->getMessage());
        }

        /*
         * 这个模板作用于我要做用的索引
         * */
        $param = [
            'json' => [
                /*
                 * 这句是取在scout.php(scout是驱动)里我们配置好elasticsearch引擎的
                 * index项。
                 * PS:其实都是取数组项,scout本身就是return一个数组,
                 * scout.elasticsearch.index就是取
                 * scout[elasticsearch][index]
                 * */
                'template' => config('scout.elasticsearch.index'),
                'mappings' => [
                    '_default_' => [
                        'dynamic_templates' => [
                            [
                                'string' => [
                                    'match_mapping_type' => 'string',//传进来的是string
                                    'mapping' => [
                                        'type' => 'text',//把传进来的string按text(文本)处理
                                        'analyzer' => 'ik_smart',//用ik_smart进行解析(ik是专门解析中的插件)
                                        'fields' => [
                                            'keyword' => [
                                                'type' => 'keyword'
                                            ]
                                        ]
                                    ]
                                ]
                            ]
                        ]
                    ]
                ],
            ],
        ];
        try {
            $client->put($url, $param);
        } catch (\Exception $e) {
            $this->info("===put模版出现错误===" . $e->getMessage());
        }

        $this->info('============create template success============');

        //创建index
        $url = config('scout.elasticsearch.hosts')[0] . '/' . config('scout.elasticsearch.index');
        try {
            $client->delete($url);
        } catch (\Exception $e) {
            $this->info("===delete索引出现错误===" . $e->getMessage());
        }

        $param = [
            'json' => [
                'settings' => [
                    'refresh_interval' => '5s',
                    'number_of_shards' => 1,
                    'number_of_replicas' => 0,
                ],

                'mappings' => [
                    '_default_' => [
                        '_all' => [
                            'enabled' => false
                        ]
                    ]
                ]
            ]
        ];

        try {
            $client->put($url, $param);
        } catch (\Exception $e) {
            $this->info("===put索引出现错误===" . $e->getMessage());
        }
        $this->info('============create index success============');
    }
}
启动 ES自动更新索引服务
php artisan es:init
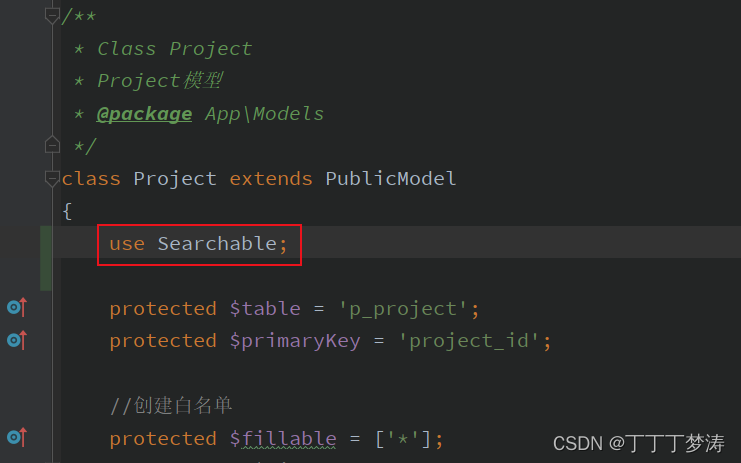
修改你要搜索的 model,以 Project 为例:
模型类 Project 引入 Searchable 工具类:use Searchable;
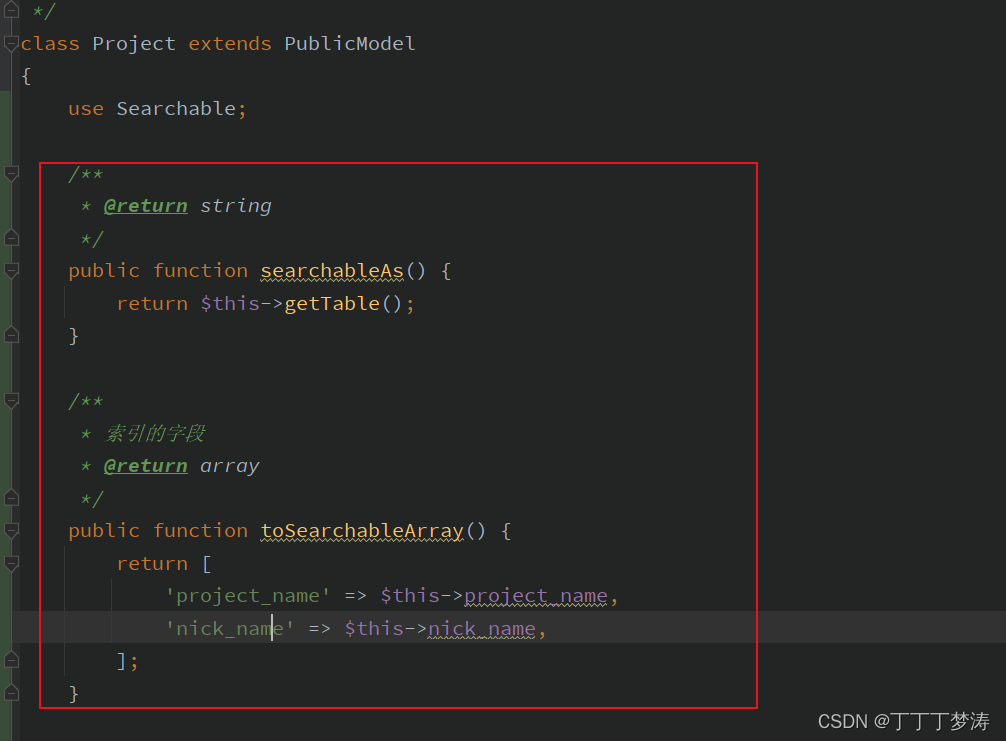
模型类 Project 中重写 searchableAs () 方法 toSearchableArray () 方法
/**
     * @return string
     */
    public function searchableAs() {
        return $this->getTable();
    }

    /**
     * 索引的字段
     * @return array
     */
    public function toSearchableArray() {
        return [
            'project_name' => $this->project_name,
            'nick_name' => $this->nick_name,
        ];
    }
导入数据处理:
php artisan scout:import "App\Models\Project"
出现上图情况,表示导入数据成功。
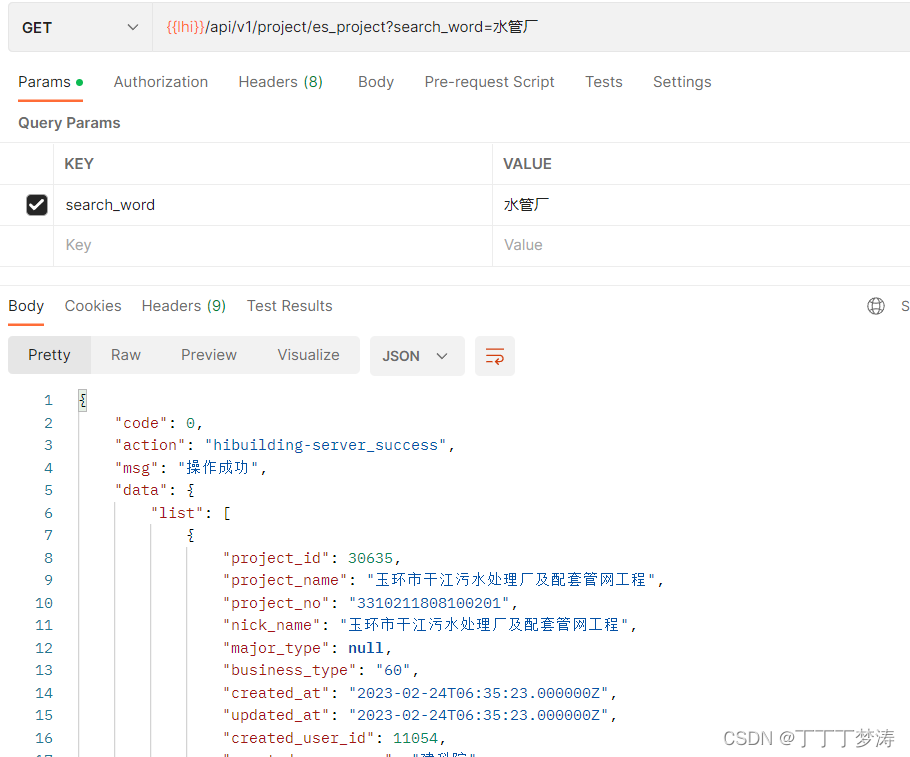
编写查询代码
//es测试
$route->get('es_project','ProjectController@esProject')->name('api_v1_esProject');
public function esProject(Request $request)
{
    return $this->success(
        $this->homeProjectServ->esProjectServ($request->all())
    );
}
public function esProjectServ(array $params)
{
    $searchWord = $params['search_word'] ?? '义厂';
    //DB::enableQueryLog();
    $list = $this->model->search($searchWord)->get()->toArray();
    //dd($searchWord, DB::getQueryLog());

    return ['list' => $list];
}
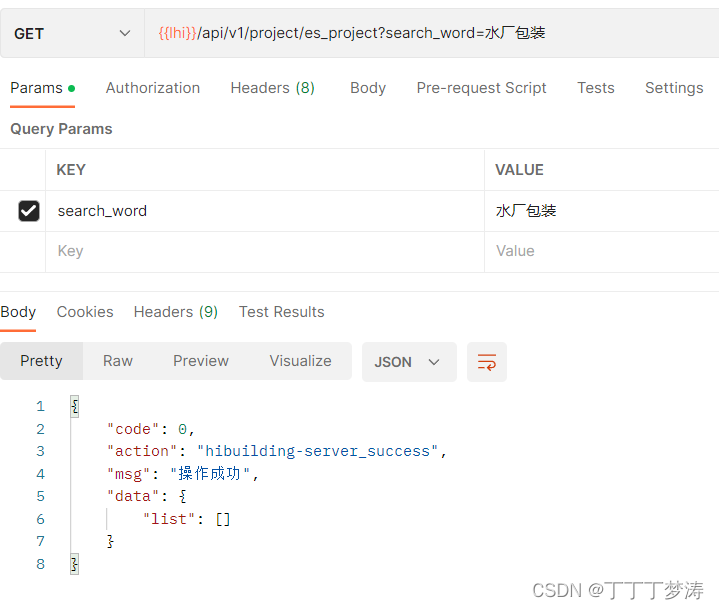 发现没查询到想要的结果,多方查找,终于找到问题所在,这篇文章 给出了答案,在文件 vendor/tamayo/laravel-scout-elastic/src/Engines/ElasticsearchEngine.php 中,第134行的前后两个 * 导致查询结果不达预期(可能是作者未考虑中文分词)。那么,找到问题就容易解决了,直接把前后 * 删掉即可
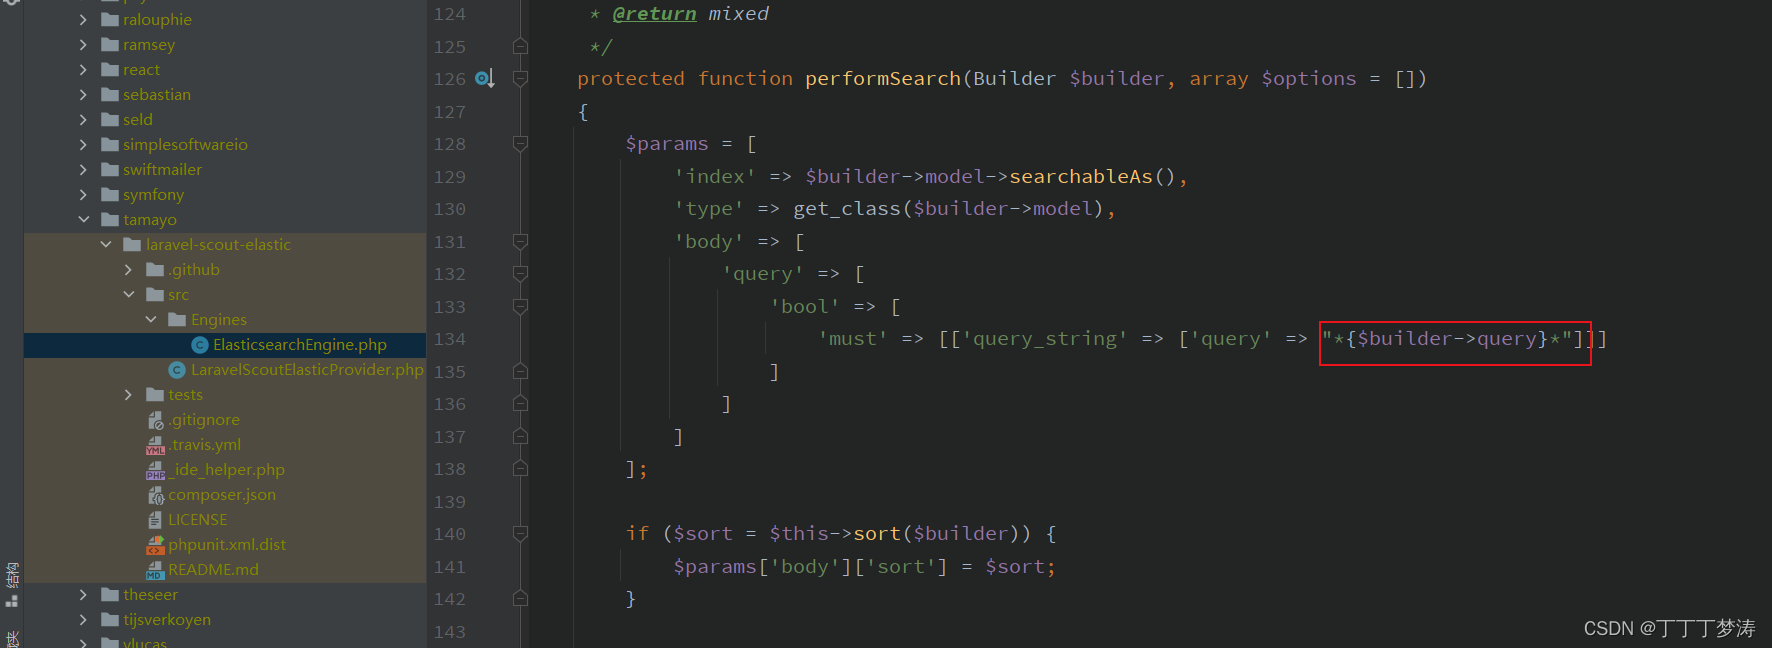

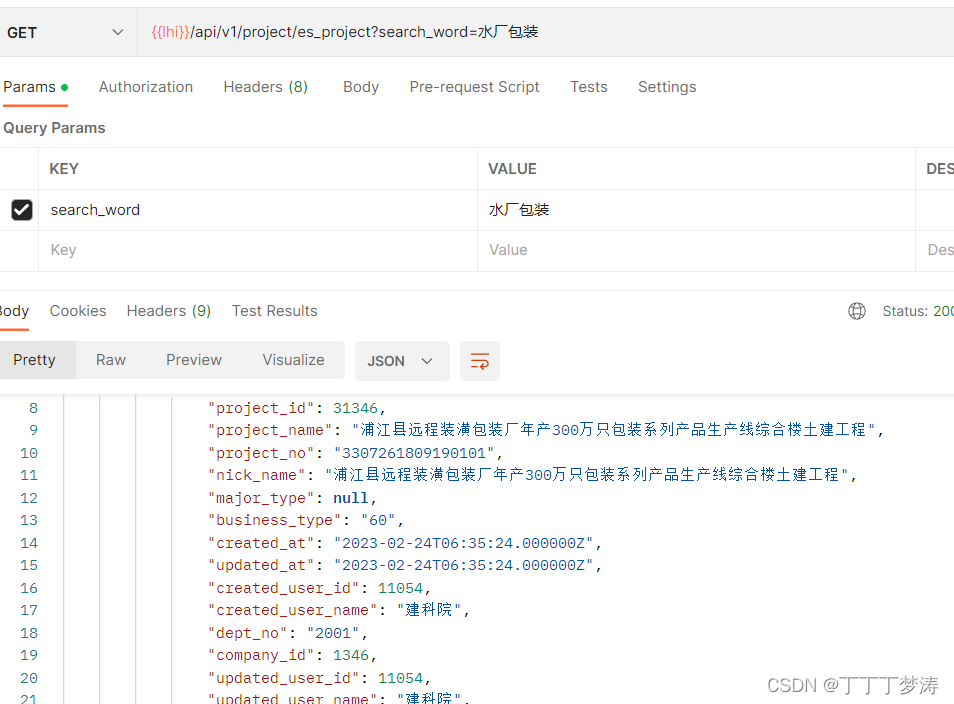 至此,es 安装、ik中文分词、在 laravel 中使用已经完成。
上面直接修改了 composer 下载的vendor包里的代码,是不优雅的,且在 composer install 或 composer update 后会被覆盖,那么有没有更好的处理方案呢?答案是有的,下面给出两种解决方案。两种方案都是基于重写包里对应方法的思想,方案一是通过AppServiceProvider的boot方法调用实现;方案二是通过自定义 provider 实现,下面是具体实现。
app/Libraries 目录下新增目录:CustomScoutElastic
创建类文件:app/Libraries/CustomScoutElastic/CustomElasticsearchEngine.php
该类为了重写 vendor 包内 vendor/tamayo/laravel-scout-elastic/src/Engines/ElasticsearchEngine.php 类内的 performSearch 方法。
<?php

namespace App\Libraries\CustomScoutElastic;

use Laravel\Scout\Builder;
use Tamayo\LaravelScoutElastic\Engines\ElasticsearchEngine;

/**
 * 自定义es引擎,重写 performSearch 方法,解决134行(本文件28行)*导致跨字符查询无结果的问题
 */
class CustomElasticsearchEngine extends ElasticsearchEngine
{
    /**
     * Perform the given search on the engine.
     *
     * @param  Builder  $builder
     * @param  array  $options
     * @return mixed
     */
    protected function performSearch(Builder $builder, array $options = [])
    {
        $params = [
            'index' => $builder->model->searchableAs(),
            'type' => get_class($builder->model),
            'body' => [
                'query' => [
                    'bool' => [
                        'must' => [['query_string' => ['query' => "{$builder->query}"]]]
                    ]
                ]
            ]
        ];

        if ($sort = $this->sort($builder)) {
            $params['body']['sort'] = $sort;
        }

        if (isset($options['from'])) {
            $params['body']['from'] = $options['from'];
        }

        if (isset($options['size'])) {
            $params['body']['size'] = $options['size'];
        }

        if (isset($options['numericFilters']) && count($options['numericFilters'])) {
            $params['body']['query']['bool']['must'] = array_merge(
                $params['body']['query']['bool']['must'],
                $options['numericFilters']
            );
        }

        if ($builder->callback) {
            return call_user_func(
                $builder->callback,
                $this->elastic,
                $builder->query,
                $params
            );
        }

        return $this->elastic->search($params);
    }
}
创建类文件:app/Libraries/CustomScoutElastic/CustomElasticsearch.php
该类继承并重写 vendor 包内 vendor/tamayo/laravel-scout-elastic/src/LaravelScoutElasticProvider.php 类内的 boot 方法
<?php

namespace App\Libraries\CustomScoutElastic;

use Elasticsearch\ClientBuilder;
use Laravel\Scout\EngineManager;
use Tamayo\LaravelScoutElastic\LaravelScoutElasticProvider;

class CustomElasticsearch extends LaravelScoutElasticProvider
{
    /**
     * 重写 laravel-scout-elastic 包 LaravelScoutElasticProvider 类 的 boot 方法
     * @throws \Exception
     */
    public function customBootFromLaravelScoutElasticProvider()
    {
        try {
            $this->ensureElasticClientIsInstalled();

            resolve(EngineManager::class)->extend('elasticsearch', function () {
                return new CustomElasticsearchEngine(
                    ClientBuilder::create()
                        ->setHosts(config('scout.elasticsearch.hosts'))
                        ->build()
                );
            });
        } catch (\Exception $e) {
            throw new \Exception($e->getMessage(), $e->getCode());
        }
    }
}
编辑文件:app/Providers/AppServiceProvider.php
use相关类(new时会自动引入),此文件boot()方法中加入相关内容,如下:
use App\Libraries\CustomScoutElastic\CustomElasticsearch;

/**
  * Bootstrap any application services.
  * @throws \Exception
  */
public function boot()
{
    try {
        //重写 laravel-scout-elastic 包 LaravelScoutElasticProvider 类 的 boot 方法
        $customElasticsearch = new CustomElasticsearch($this->app);
        $customElasticsearch->customBootFromLaravelScoutElasticProvider();
    } catch (\Exception $e) {
        throw new \Exception($e->getMessage(), $e->getCode());
    }
}
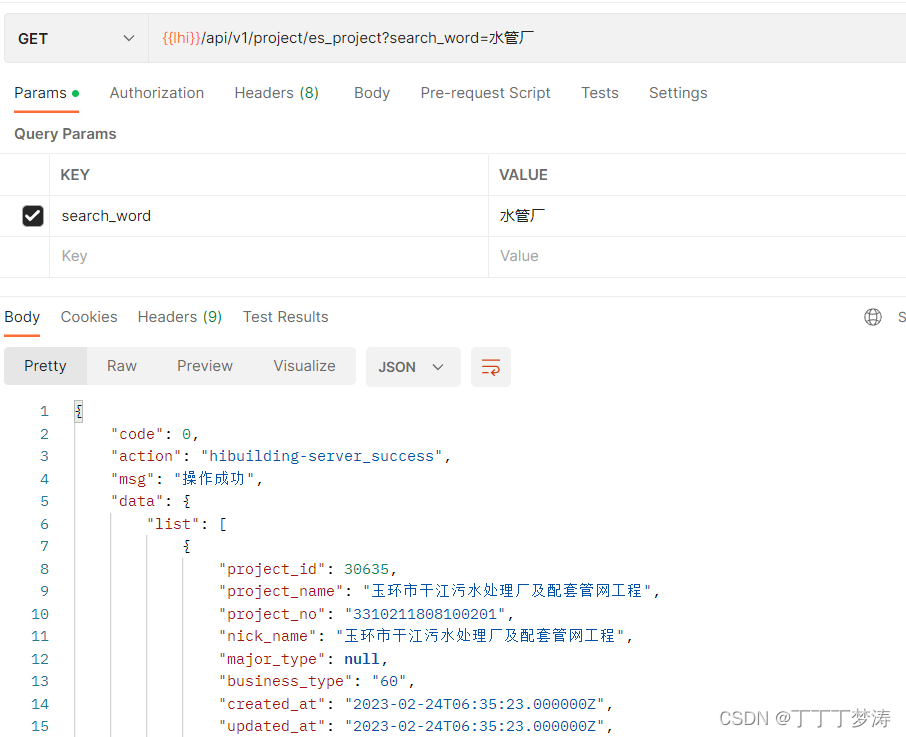
至此,不侵入vendor包代码的方案一就完成了,测试依然可用:
app/Libraries目录下新增目录:CustomScoutElastic
创建类文件:app/Libraries/CustomScoutElastic/CustomElasticsearchEngine.php
该类为了重写vendor包内 vendor/tamayo/laravel-scout-elastic/src/Engines/ElasticsearchEngine.php 类内的 performSearch 方法。
<?php

namespace App\Libraries\CustomScoutElastic;

use Laravel\Scout\Builder;
use Tamayo\LaravelScoutElastic\Engines\ElasticsearchEngine;

/**
 * 自定义es引擎,重写 performSearch 方法,解决134行(本文件28行)*导致跨字符查询无结果的问题
 */
class CustomElasticsearchEngine extends ElasticsearchEngine
{
    /**
     * Perform the given search on the engine.
     *
     * @param  Builder  $builder
     * @param  array  $options
     * @return mixed
     */
    protected function performSearch(Builder $builder, array $options = [])
    {
        $params = [
            'index' => $builder->model->searchableAs(),
            'type' => get_class($builder->model),
            'body' => [
                'query' => [
                    'bool' => [
                        'must' => [['query_string' => ['query' => "{$builder->query}"]]]
                    ]
                ]
            ]
        ];

        if ($sort = $this->sort($builder)) {
            $params['body']['sort'] = $sort;
        }

        if (isset($options['from'])) {
            $params['body']['from'] = $options['from'];
        }

        if (isset($options['size'])) {
            $params['body']['size'] = $options['size'];
        }

        if (isset($options['numericFilters']) && count($options['numericFilters'])) {
            $params['body']['query']['bool']['must'] = array_merge(
                $params['body']['query']['bool']['must'],
                $options['numericFilters']
            );
        }

        if ($builder->callback) {
            return call_user_func(
                $builder->callback,
                $this->elastic,
                $builder->query,
                $params
            );
        }

        return $this->elastic->search($params);
    }
}
App\Providers 目录下创建provider类文件:CustomLaravelScoutElasticProvider.php
具体路径为:app/Providers/CustomLaravelScoutElasticProvider.php
该类继承并重写 vendor 包内 vendor/tamayo/laravel-scout-elastic/src/LaravelScoutElasticProvider.php 类内的 boot 方法:
<?php

namespace App\Providers;


use App\Libraries\CustomScoutElastic\CustomElasticsearchEngine;
use Elasticsearch\ClientBuilder;
use Laravel\Scout\EngineManager;
use Tamayo\LaravelScoutElastic\LaravelScoutElasticProvider;

/**
 * 自定义 LaravelScoutElastic 服务提供者,用于重写 LaravelScoutElasticProvider 类的boot方法
 * 解决134行(本文件28行)*导致跨字符查询无结果的问题
 */
//class CustomLaravelScoutElasticProvider extends LaravelScoutElasticProvider
class CustomLaravelScoutElasticProvider extends LaravelScoutElasticProvider
{
    /**
     * Bootstrap the application services.
     * @throws \Exception
     */
    public function boot()
    {
        try {
            $this->ensureElasticClientIsInstalled();

            resolve(EngineManager::class)->extend('elasticsearch', function () {
                return new CustomElasticsearchEngine(
                    ClientBuilder::create()
                        ->setHosts(config('scout.elasticsearch.hosts'))
                        ->build()
                );
            });
        } catch (\Exception $e) {
            throw new \Exception($e->getMessage(), $e->getCode());
        }
    }

    /**
     * Register any application services.
     *
     * @return void
     */
    public function register()
    {
        //
    }
}
config/app.php 文件 providers 加载创建的 CustomLaravelScoutElasticProvider 类
\App\Providers\CustomLaravelScoutElasticProvider::class,
至此,不侵入 vendor 包代码的方案二就完成了,测试依然可用:
软件安装过程中遇到了各种各样的问题,最终确定了 es8.1.1 版本,注意 ik 版本需要和 es 版本绝对一致。
使用方案二过程中,如果代码都写好了,还是无效,建议清除 bootstrap/cache 内文件后重新请求,可能是 provider 缓存导致的。
很好奇,就使用rubyonrails自动化单元测试而言,你们正在做什么?您是否创建了一个脚本来在cron中运行rake作业并将结果邮寄给您?git中的预提交Hook?只是手动调用?我完全理解测试,但想知道在错误发生之前捕获错误的最佳实践是什么。让我们理所当然地认为测试本身是完美无缺的,并且可以正常工作。下一步是什么以确保他们在正确的时间将可能有害的结果传达给您? 最佳答案 不确定您到底想听什么,但是有几个级别的自动代码库控制:在处理某项功能时,您可以使用类似autotest的内容获得关于哪些有效,哪些无效的即时反馈。要确保您的提
我正在尝试使用ruby和Savon来使用网络服务。测试服务为http://www.webservicex.net/WS/WSDetails.aspx?WSID=9&CATID=2require'rubygems'require'savon'client=Savon::Client.new"http://www.webservicex.net/stockquote.asmx?WSDL"client.get_quotedo|soap|soap.body={:symbol=>"AAPL"}end返回SOAP异常。检查soap信封,在我看来soap请求没有正确的命名空间。任何人都可以建议我
我想安装一个带有一些身份验证的私有(private)Rubygem服务器。我希望能够使用公共(public)Ubuntu服务器托管内部gem。我读到了http://docs.rubygems.org/read/chapter/18.但是那个没有身份验证-如我所见。然后我读到了https://github.com/cwninja/geminabox.但是当我使用基本身份验证(他们在他们的Wiki中有)时,它会提示从我的服务器获取源。所以。如何制作带有身份验证的私有(private)Rubygem服务器?这是不可能的吗?谢谢。编辑:Geminabox问题。我尝试“捆绑”以安装新的gem..
我正在编写一个包含C扩展的gem。通常当我写一个gem时,我会遵循TDD的过程,我会写一个失败的规范,然后处理代码直到它通过,等等......在“ext/mygem/mygem.c”中我的C扩展和在gemspec的“扩展”中配置的有效extconf.rb,如何运行我的规范并仍然加载我的C扩展?当我更改C代码时,我需要采取哪些步骤来重新编译代码?这可能是个愚蠢的问题,但是从我的gem的开发源代码树中输入“bundleinstall”不会构建任何native扩展。当我手动运行rubyext/mygem/extconf.rb时,我确实得到了一个Makefile(在整个项目的根目录中),然后当
我有一个围绕一些对象的包装类,我想将这些对象用作散列中的键。包装对象和解包装对象应映射到相同的键。一个简单的例子是这样的:classAattr_reader:xdefinitialize(inner)@inner=innerenddefx;@inner.x;enddef==(other)@inner.x==other.xendenda=A.new(o)#oisjustanyobjectthatallowso.xb=A.new(o)h={a=>5}ph[a]#5ph[b]#nil,shouldbe5ph[o]#nil,shouldbe5我试过==、===、eq?并散列所有无济于事。
我有一些Ruby代码,如下所示:Something.createdo|x|x.foo=barend我想编写一个测试,它使用double代替block参数x,这样我就可以调用:x_double.should_receive(:foo).with("whatever").这可能吗? 最佳答案 specify'something'dox=doublex.should_receive(:foo=).with("whatever")Something.should_receive(:create).and_yield(x)#callthere
Sinatra新手;我正在运行一些rspec测试,但在日志中收到了一堆不需要的噪音。如何消除日志中过多的噪音?我仔细检查了环境是否设置为:test,这意味着记录器级别应设置为WARN而不是DEBUG。spec_helper:require"./app"require"sinatra"require"rspec"require"rack/test"require"database_cleaner"require"factory_girl"set:environment,:testFactoryGirl.definition_file_paths=%w{./factories./test/
最近,当我启动我的Rails服务器时,我收到了一长串警告。虽然它不影响我的应用程序,但我想知道如何解决这些警告。我的估计是imagemagick以某种方式被调用了两次?当我在警告前后检查我的git日志时。我想知道如何解决这个问题。-bcrypt-ruby(3.1.2)-better_errors(1.0.1)+bcrypt(3.1.7)+bcrypt-ruby(3.1.5)-bcrypt(>=3.1.3)+better_errors(1.1.0)bcrypt和imagemagick有关系吗?/Users/rbchris/.rbenv/versions/2.0.0-p247/lib/ru
在Rails4.0.2中,我使用s3_direct_upload和aws-sdkgems直接为s3存储桶上传文件。在开发环境中它工作正常,但在生产环境中它会抛出如下错误,ActionView::Template::Error(noimplicitconversionofnilintoString)在View中,create_cv_url,:id=>"s3_uploader",:key=>"cv_uploads/{unique_id}/${filename}",:key_starts_with=>"cv_uploads/",:callback_param=>"cv[direct_uplo
我遵循MichaelHartl的“RubyonRails教程:学习Web开发”,并创建了检查用户名和电子邮件长度有效性的测试(名称最多50个字符,电子邮件最多255个字符)。test/helpers/application_helper_test.rb的内容是:require'test_helper'classApplicationHelperTest在运行bundleexecraketest时,所有测试都通过了,但我看到以下消息在最后被标记为错误:ERROR["test_full_title_helper",ApplicationHelperTest,1.820016791]test