文章目录
在学习了一段时间OpenGL,和看过使用OpenGL相关的渲染框架之后,发现Imgui的身影基本上都存在,因此有必要了解一下Imgui库。
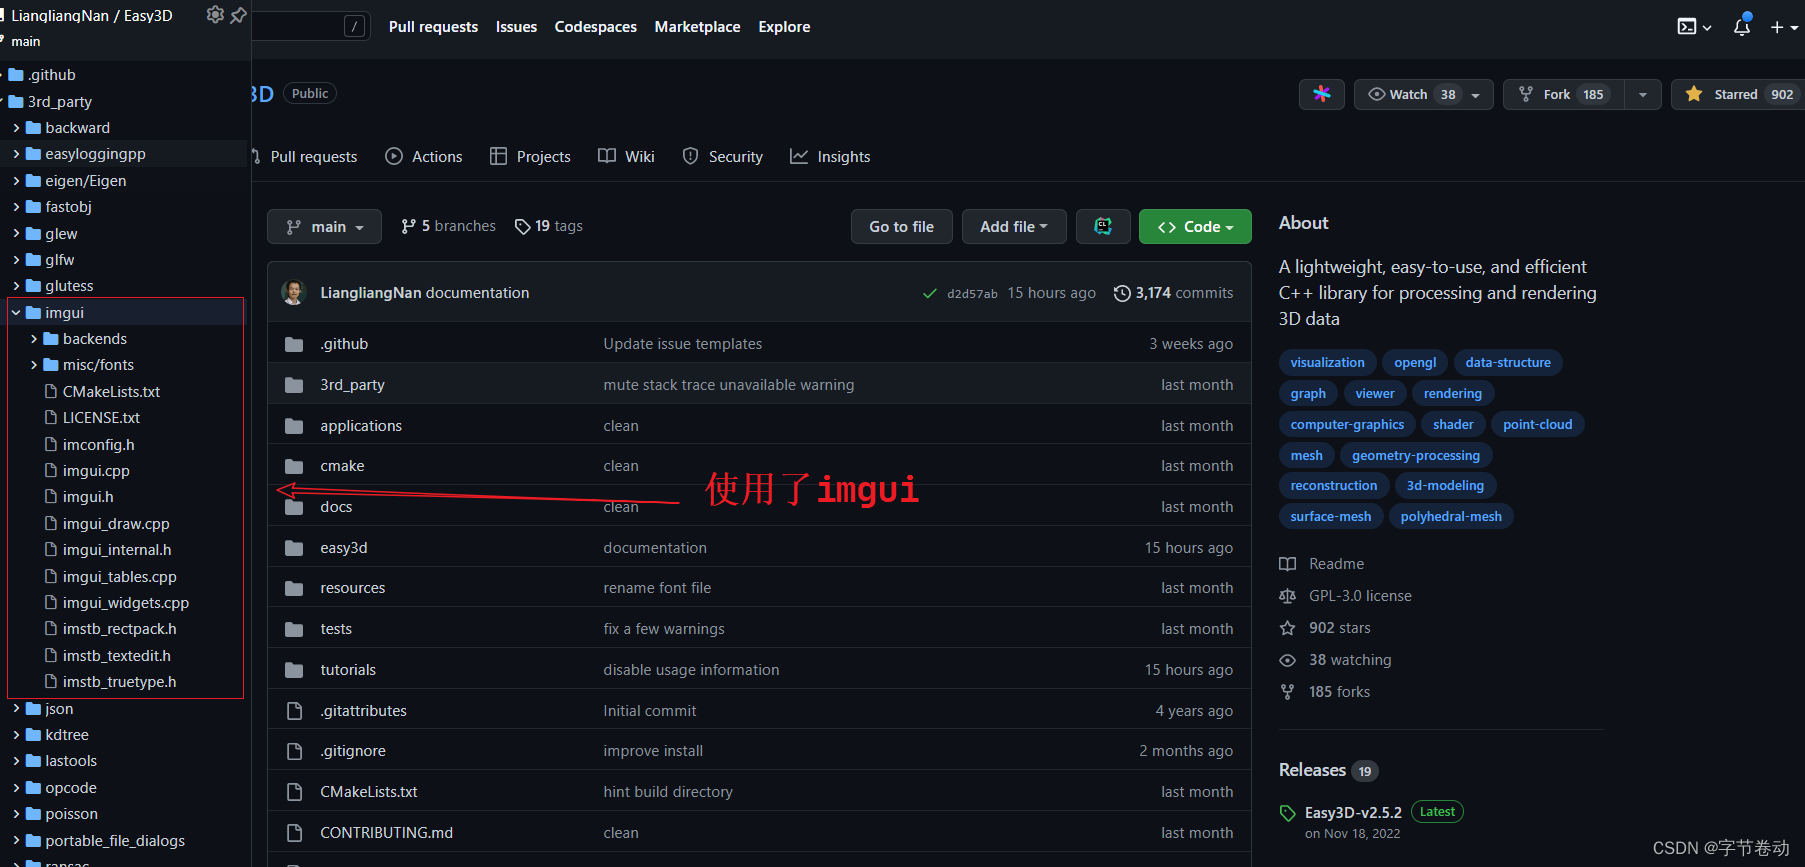
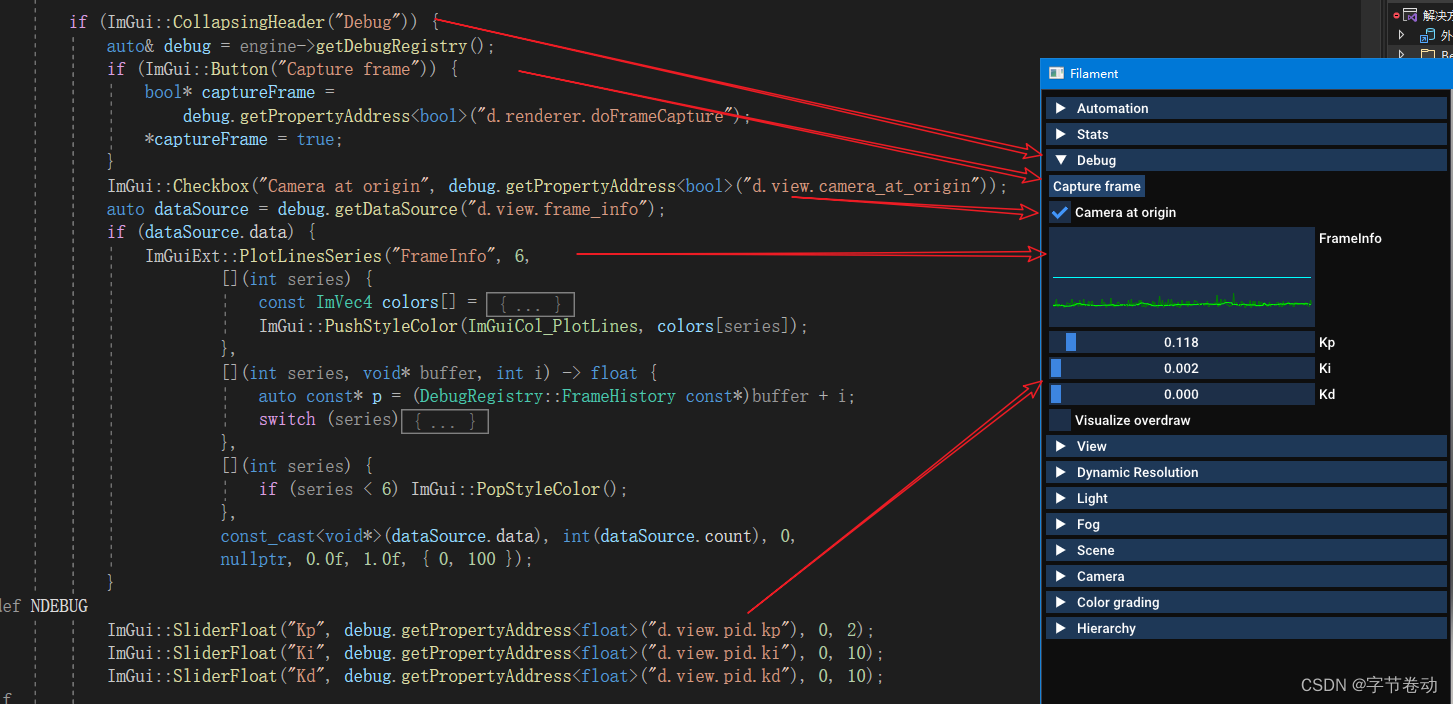
当我在研究Filament项目的时候,发现有使用ImGUI
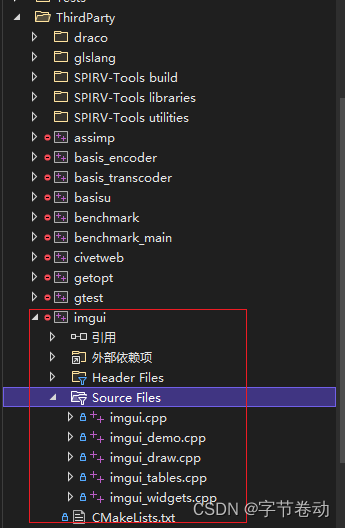
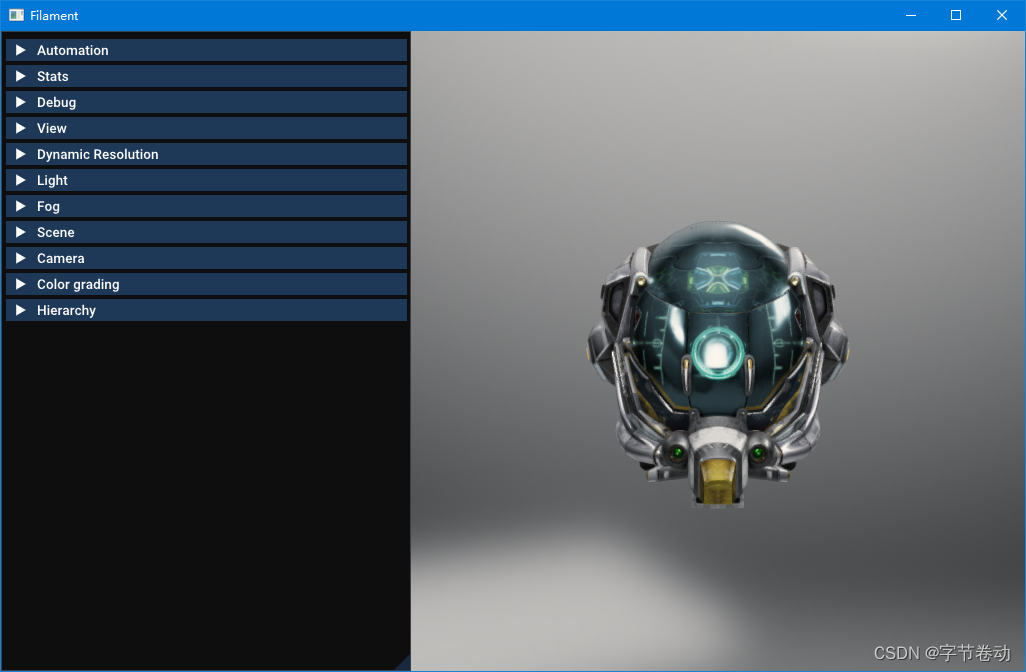
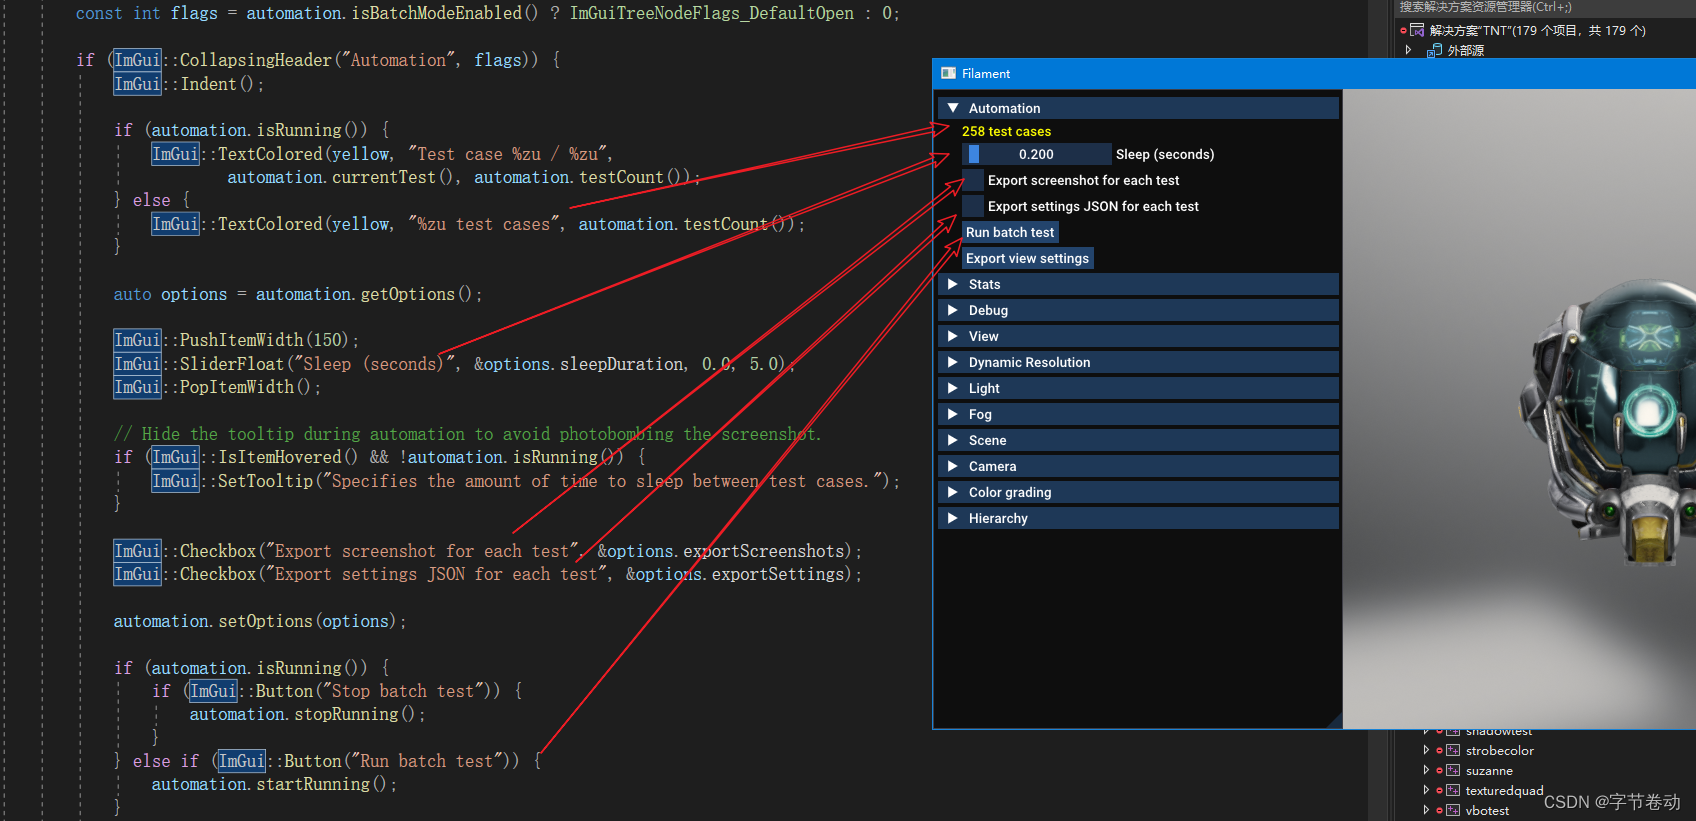
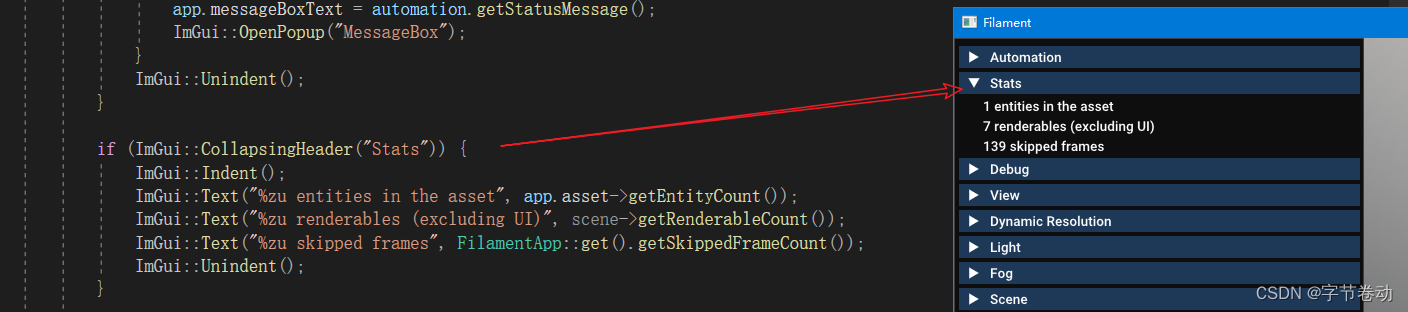
对应的代码如下:
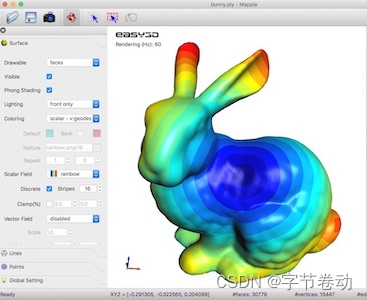
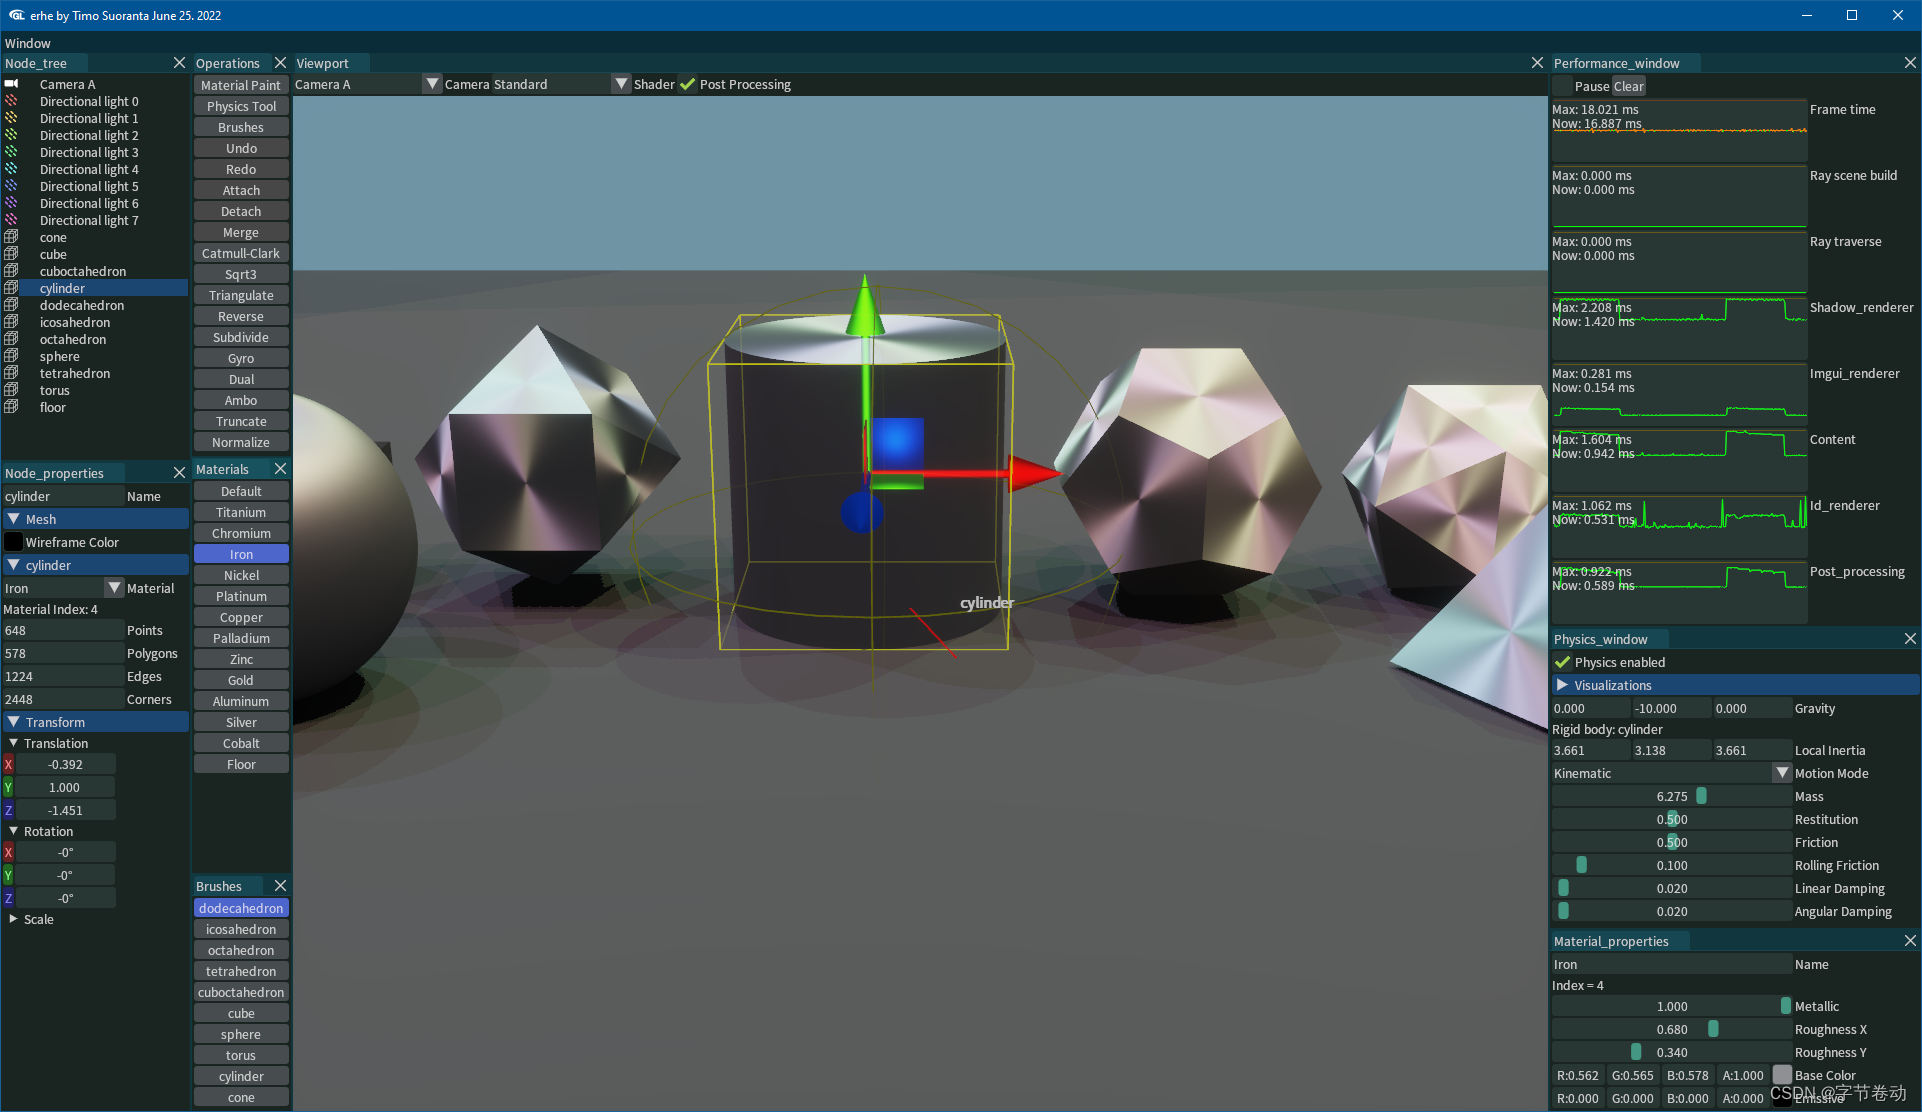
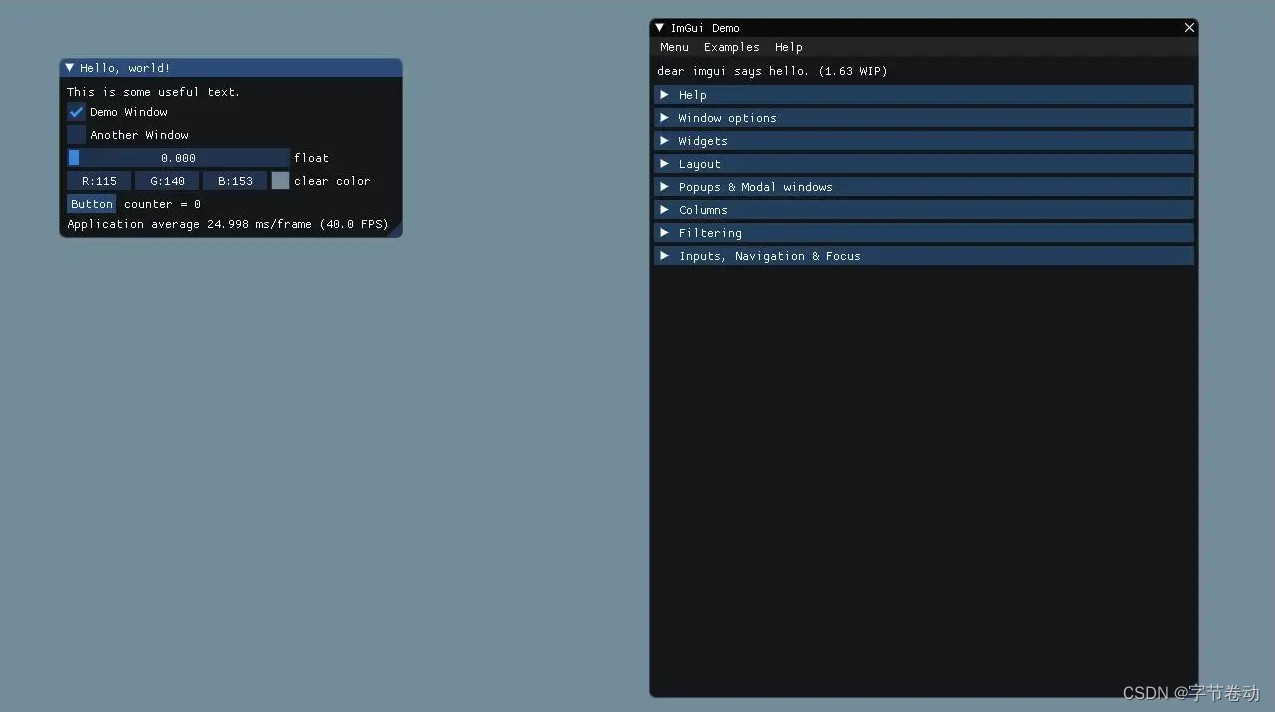
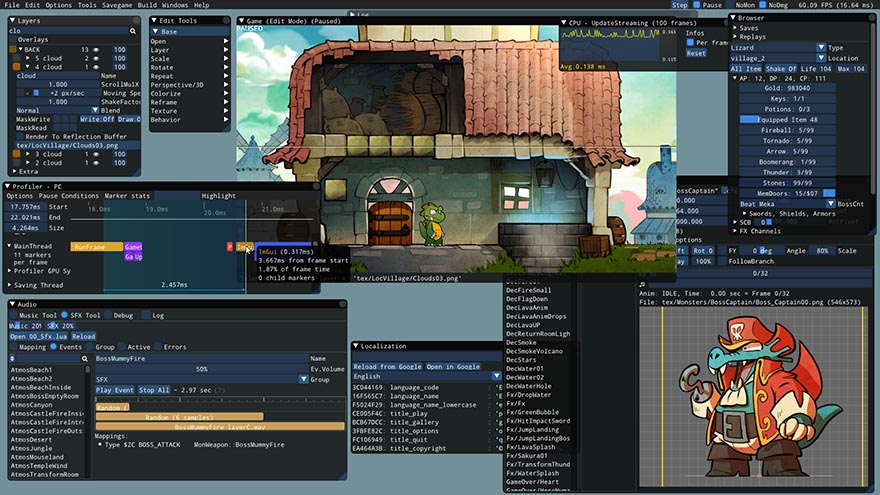
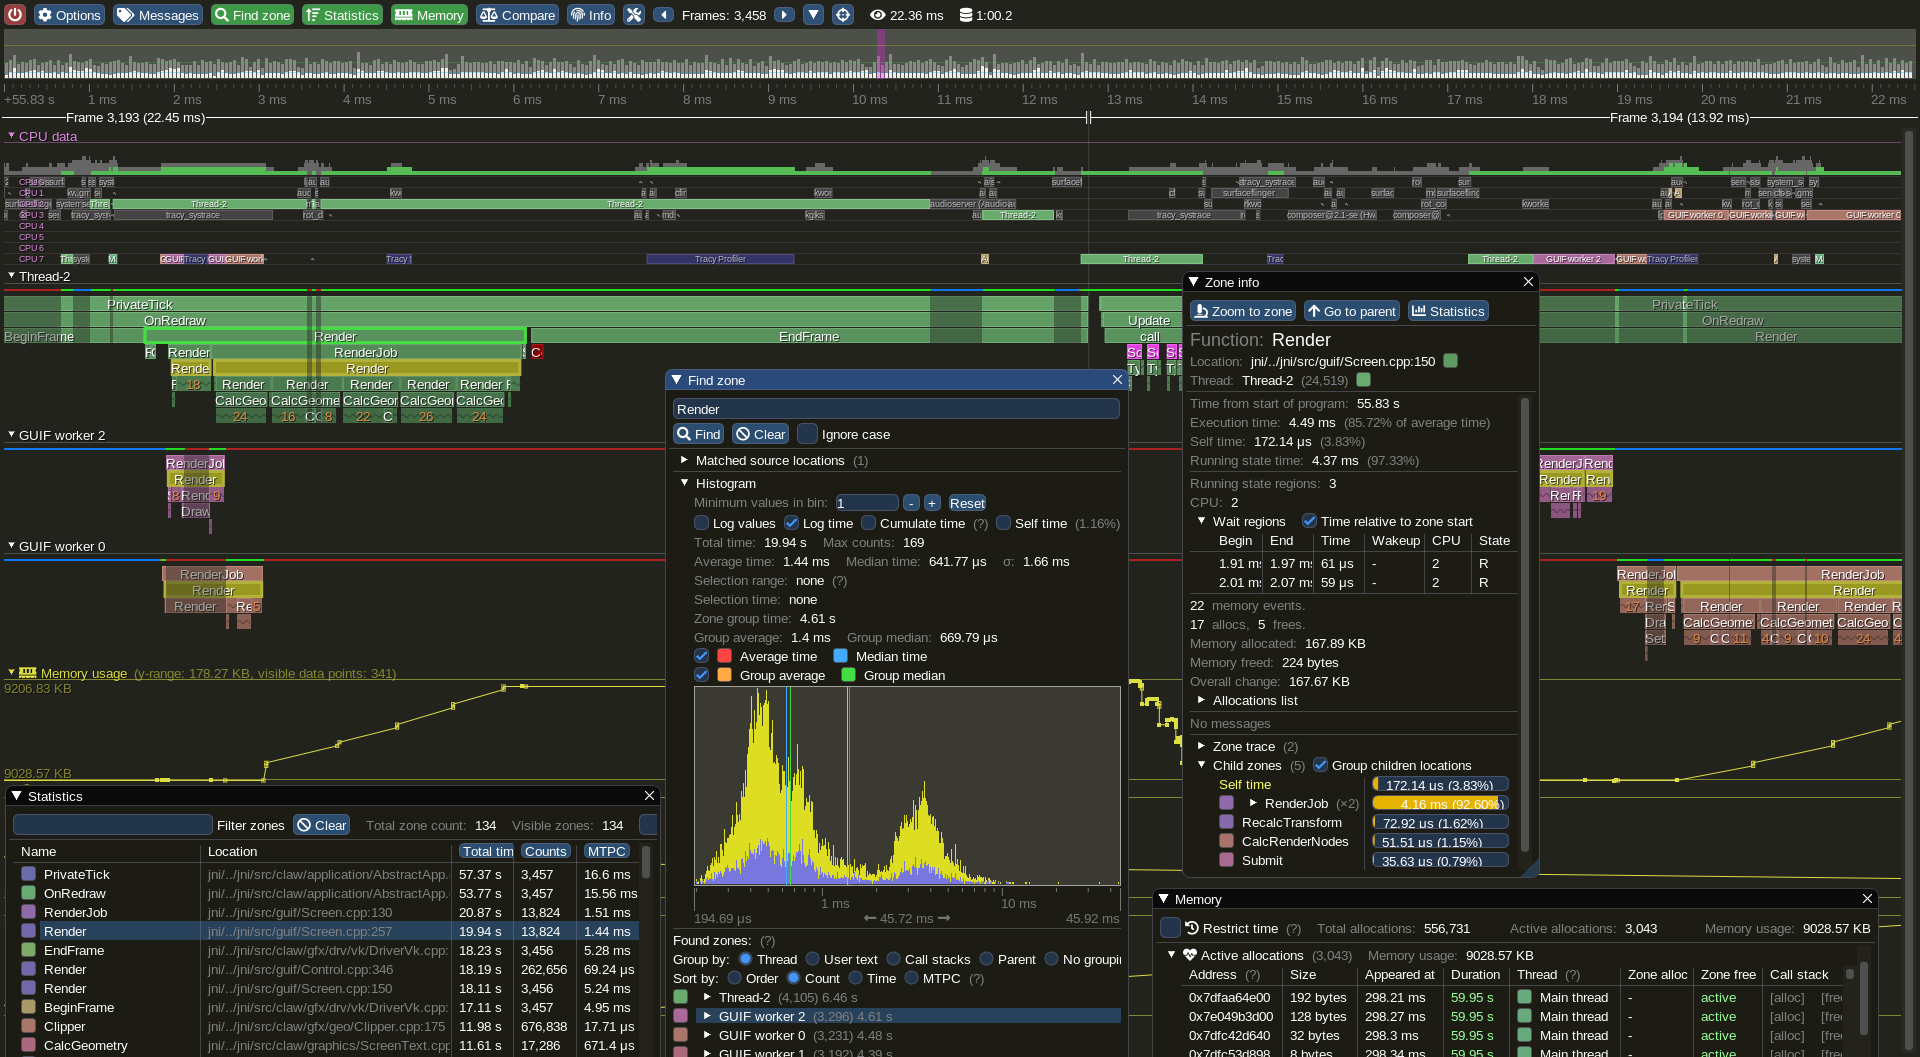
imgui是目前最流行的ui库,它长这样。
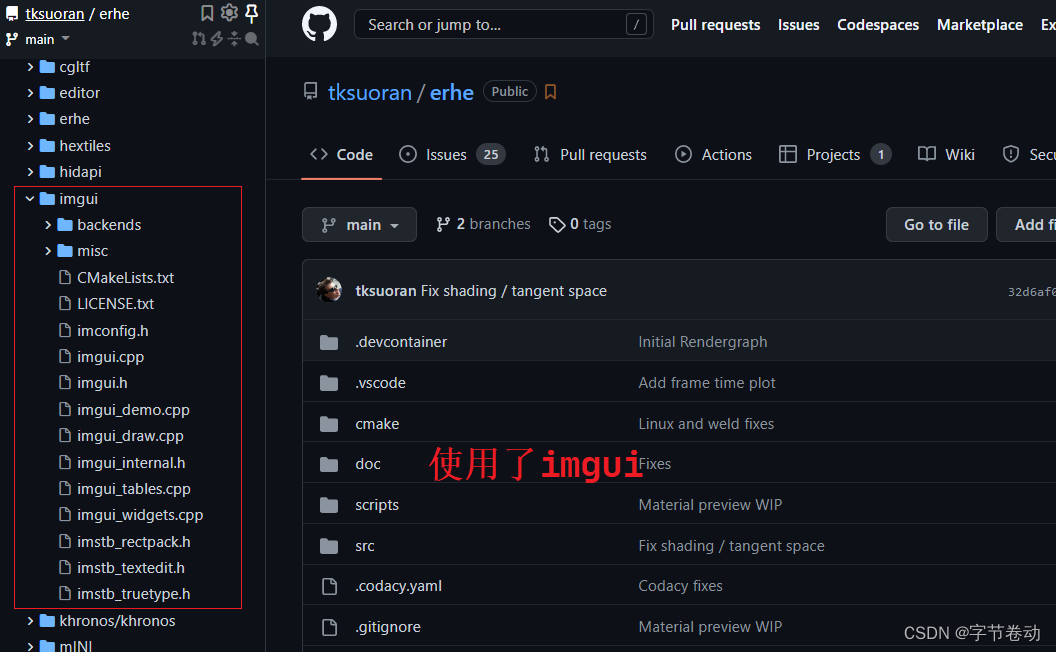
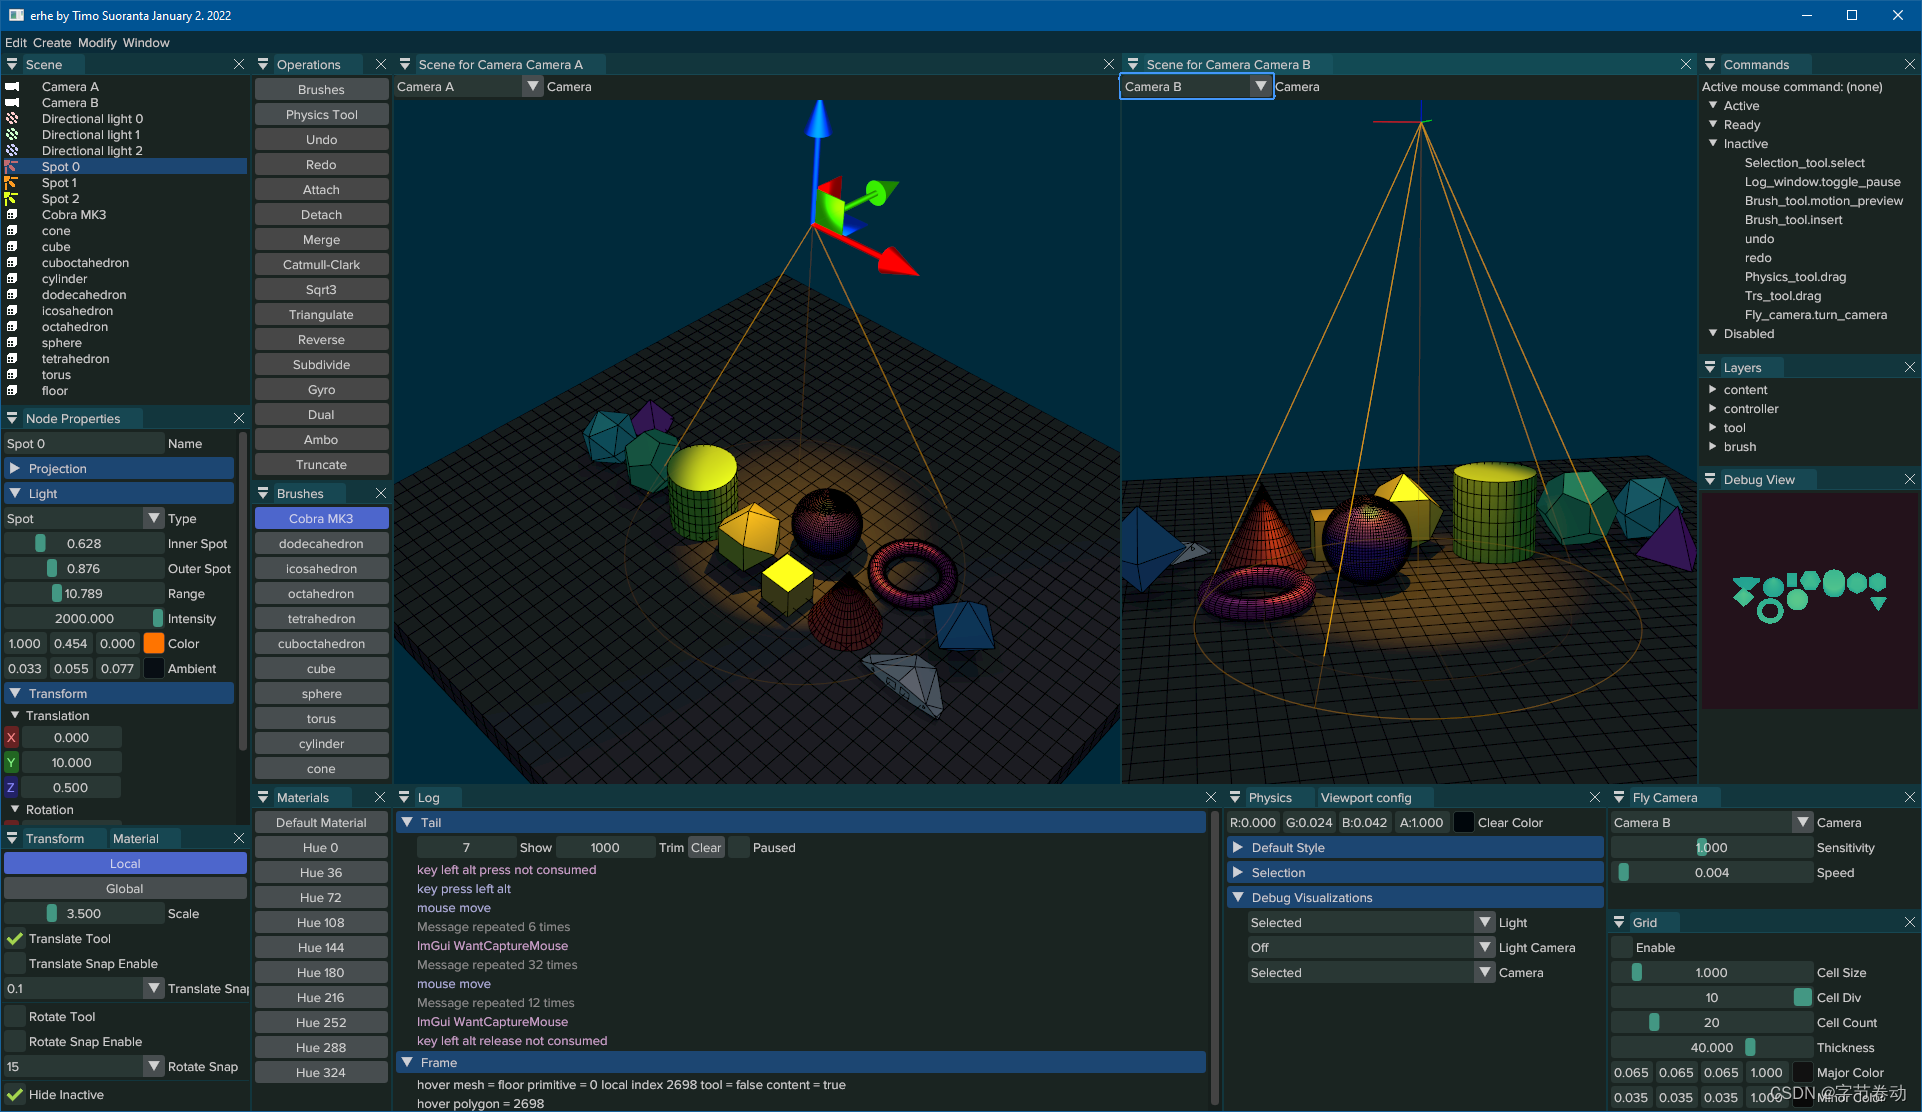
你能在各种开源引擎、工具、软件看见它,它的风格比较特别,让你一眼就知道,这个软件的界面是imgui做的。
Dear ImGui 是一个 用于C ++的无膨胀图形用户界面库. 它输出优化的顶点缓冲区,您可以随时在启用3D管线的应用程序中进行渲染。 它快速,可移植,与渲染器无关并且是独立的(无外部依赖性)。
Dear ImGui 被设计成 启用快速迭代 并 赋权程序员 以创建 内容创建工具和可视化/调试工具 (与普通最终用户的UI相对). 它有利于实现该目标的简单性和生产率,并且缺少通常在更高级的库中发现的某些功能。
Dear ImGui 特别适合集成到游戏引擎(用于工具),实时3D应用程序,全屏应用程序,嵌入式应用程序或非标准操作系统功能的控制台平台上的任何应用程序中。
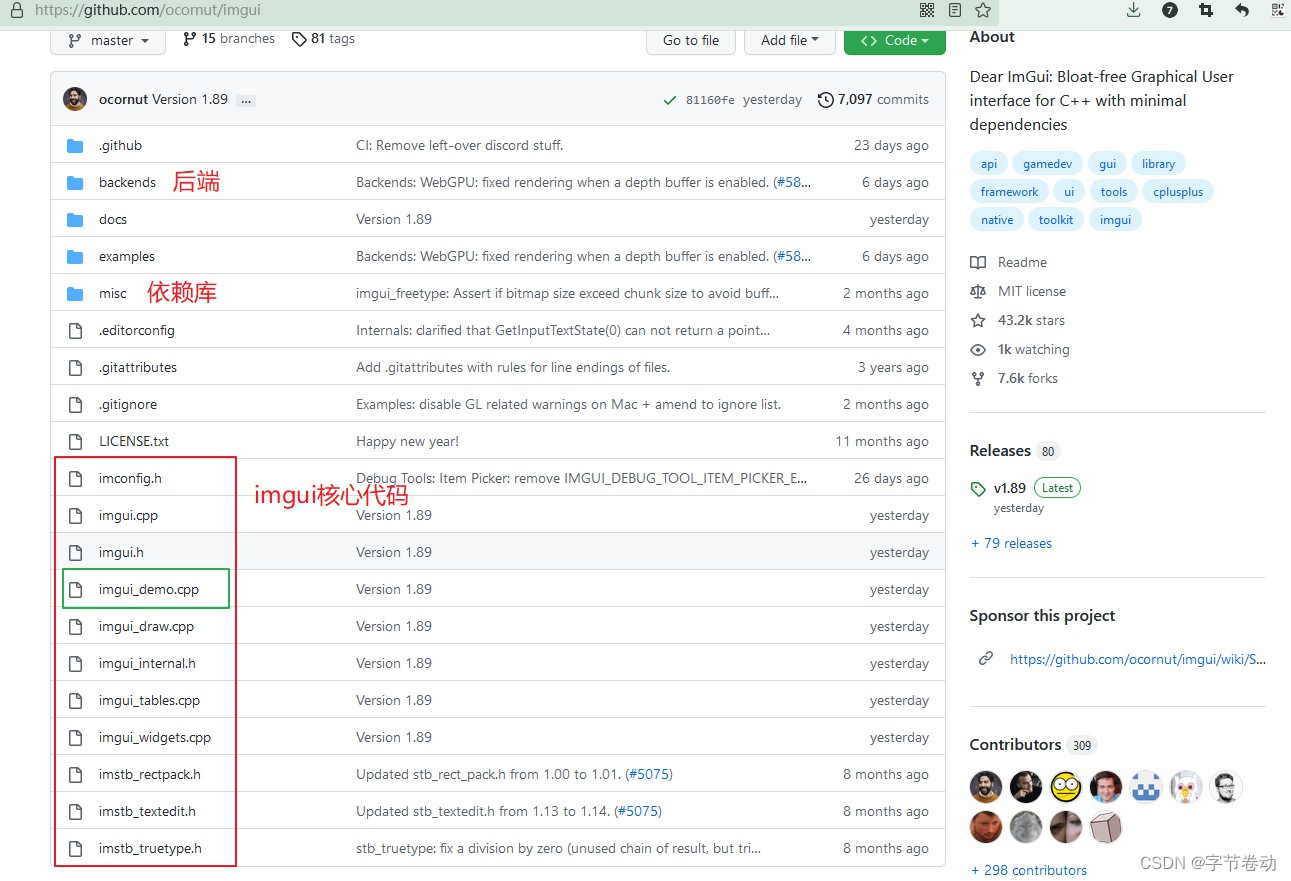
Dear ImGui 的核心是独立于几个与平台无关的文件 您可以轻松地在应用程序/引擎中进行编译。 它们都是存储库根文件夹中的所有文件(imgui.cpp,imgui.h,imgui_demo.cpp,imgui_draw.cpp等)。
不需要特定的构建过程. 您可以将.cpp文件添加到现有项目中。
您将需要一个后端来将Dear ImGui集成到您的应用程序中。 后端将鼠标/键盘/游戏板输入和各种设置传递给Dear ImGui,并负责渲染最终的顶点。
各种图形API和渲染平台的后端 提供在 backends/ 文件夹, 以及examples/ 文件夹. 有关详细信息,请参见本文档的集成部分。您也可以创建自己的backends后端。在您可以渲染纹理三角形的任何地方,您都可以渲染亲爱的Imgui。
在您的应用程序中设置 Dear ImGui 后,您可以在程序循环中的任何地方使用它:
ImGui::Text("Hello, world %d", 123);
if (ImGui::Button("Save"))
    MySaveFunction();
ImGui::InputText("string", buf, IM_ARRAYSIZE(buf));
ImGui::SliderFloat("float", &f, 0.0f, 1.0f);
渲染结果:
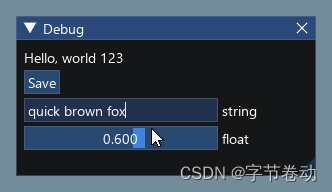
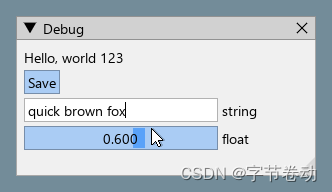
代码片段2:
// Create a window called "My First Tool", with a menu bar.
ImGui::Begin("My First Tool", &my_tool_active, ImGuiWindowFlags_MenuBar);
if (ImGui::BeginMenuBar())
{
    if (ImGui::BeginMenu("File"))
    {
        if (ImGui::MenuItem("Open..", "Ctrl+O")) { /* Do stuff */ }
        if (ImGui::MenuItem("Save", "Ctrl+S"))   { /* Do stuff */ }
        if (ImGui::MenuItem("Close", "Ctrl+W"))  { my_tool_active = false; }
        ImGui::EndMenu();
    }
    ImGui::EndMenuBar();
}

// Edit a color stored as 4 floats
ImGui::ColorEdit4("Color", my_color);

// Generate samples and plot them
float samples[100];
for (int n = 0; n < 100; n++)
    samples[n] = sinf(n * 0.2f + ImGui::GetTime() * 1.5f);
ImGui::PlotLines("Samples", samples, 100);

// Display contents in a scrolling region
ImGui::TextColored(ImVec4(1,1,0,1), "Important Stuff");
ImGui::BeginChild("Scrolling");
for (int n = 0; n < 50; n++)
    ImGui::Text("%04d: Some text", n);
ImGui::EndChild();
ImGui::End();
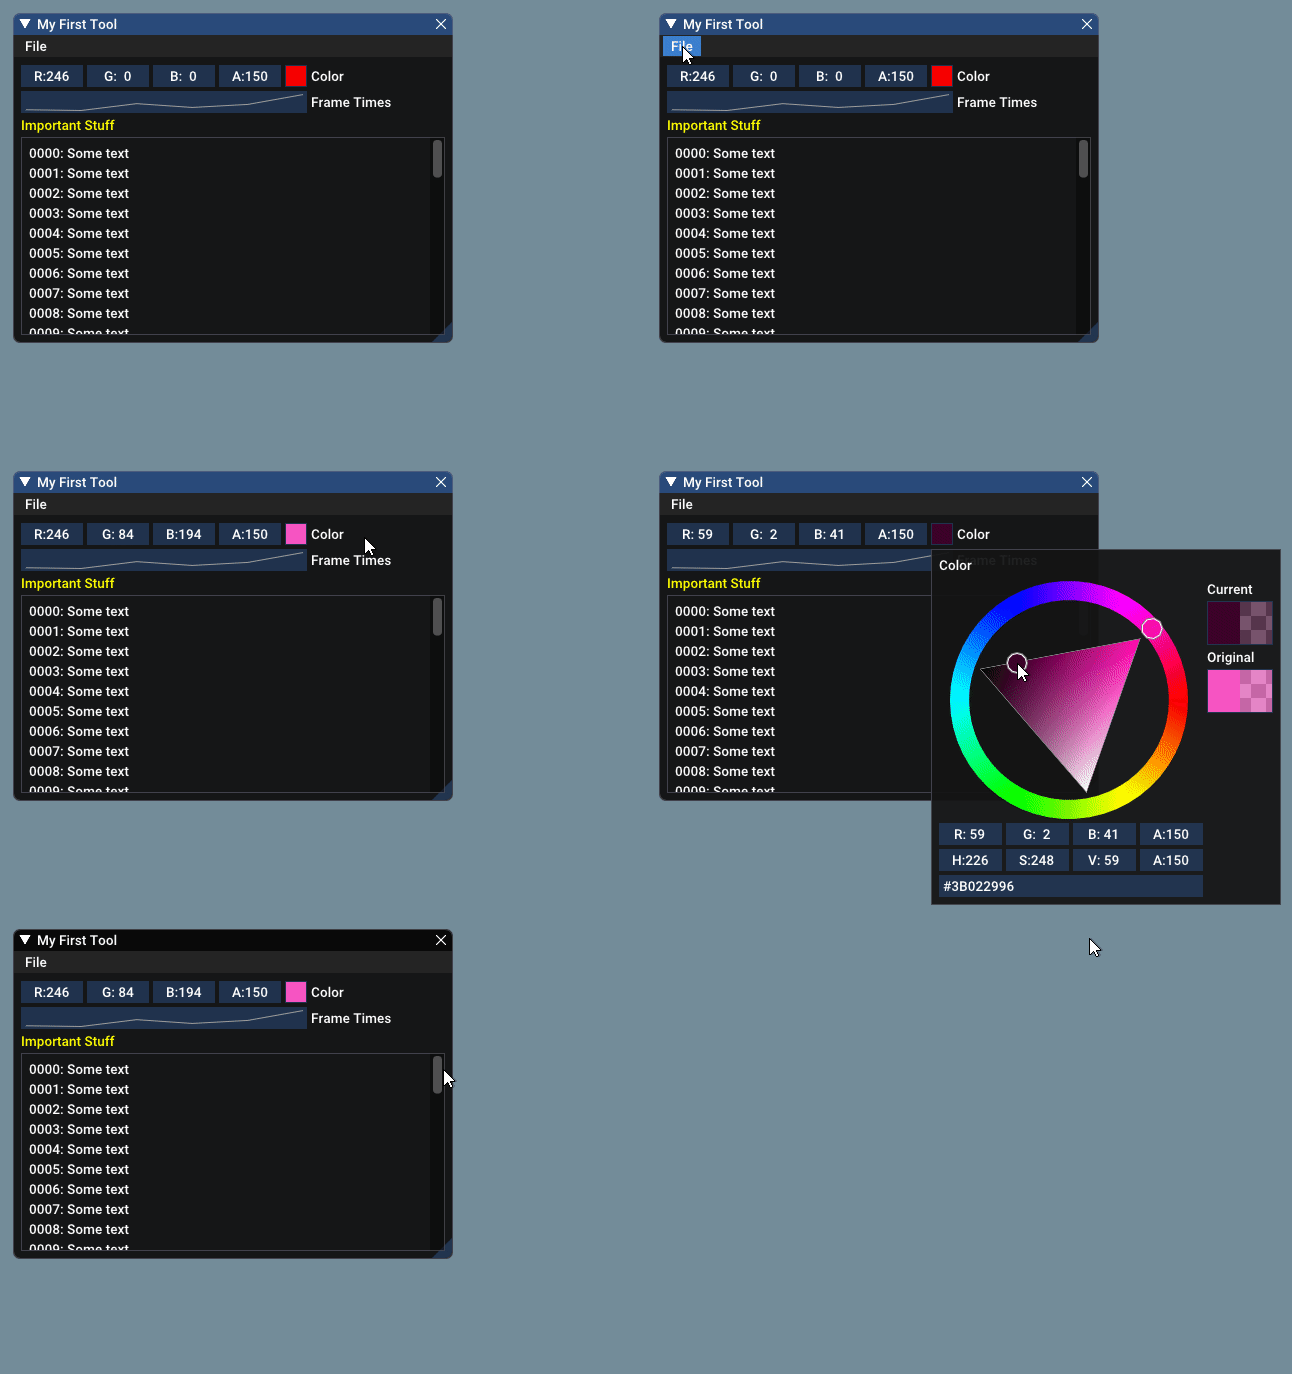
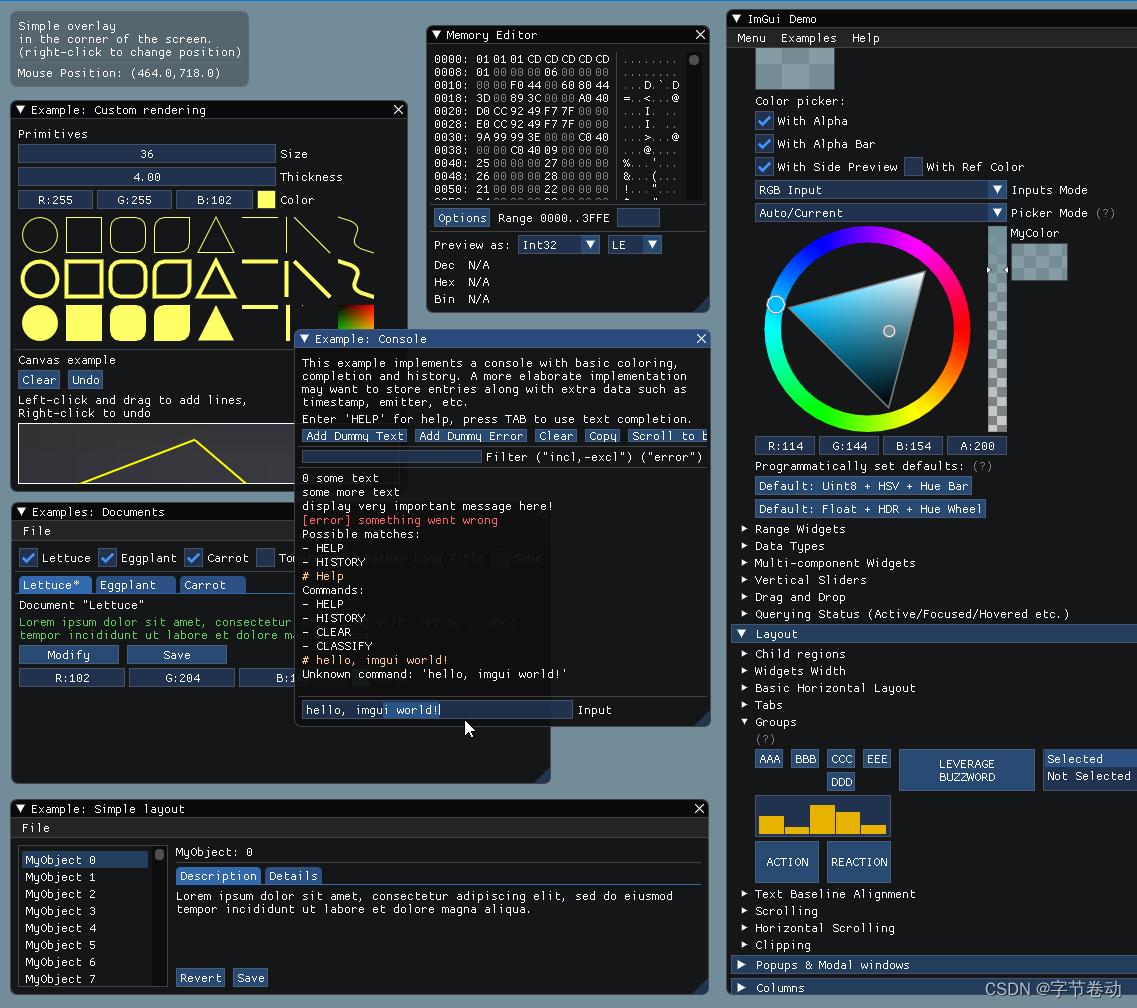
调用ImGui :: ShowDemoWindow()函数将创建一个演示窗口,其中展示了各种功能和示例。 该代码始终可在imgui_demo.cpp中参考。
在大多数平台上和使用C ++时, 您应该可以使用imgui_impl_xxxx后端的组合而无需进行修改 (e.g. imgui_impl_win32.cpp + imgui_impl_dx11.cpp). 如果您的引擎支持多个平台,请考虑使用更多的imgui_impl_xxxx文件,而不是重写它们:对您来说这将减少工作量,您可以立即运行Dear ImGui。 如果愿意,您可以_later_决定使用自定义引擎功能重写自定义后端。
将Dear ImGui集成到您的自定义引擎中只需1)连接鼠标/键盘/游戏手柄输入2)将一个纹理上载到GPU /渲染引擎3)提供可绑定纹理并渲染纹理三角形的渲染功能。 The examples/文件夹中填充了执行此操作的应用程序。 如果您是一位熟练的程序员,熟悉这些概念,则将您花费不到两个小时的时间将Dear ImGui集成到您的自定义引擎中. Make sure to spend time reading the FAQ, comments, and some of the examples/ application!
官方维护的后端/绑定(在存储库中):
第三方库 backends/bindings wiki page:
Useful widgets and extensions wiki page:
另请参阅Wiki,以获取更多链接和想法。
有关使用Dear ImGui的更多用户提交的项目的屏幕截图,请查看 Gallery Threads!
有关第三方窗口小部件和扩展的列表,请查看 Useful Widgets wiki 页面.
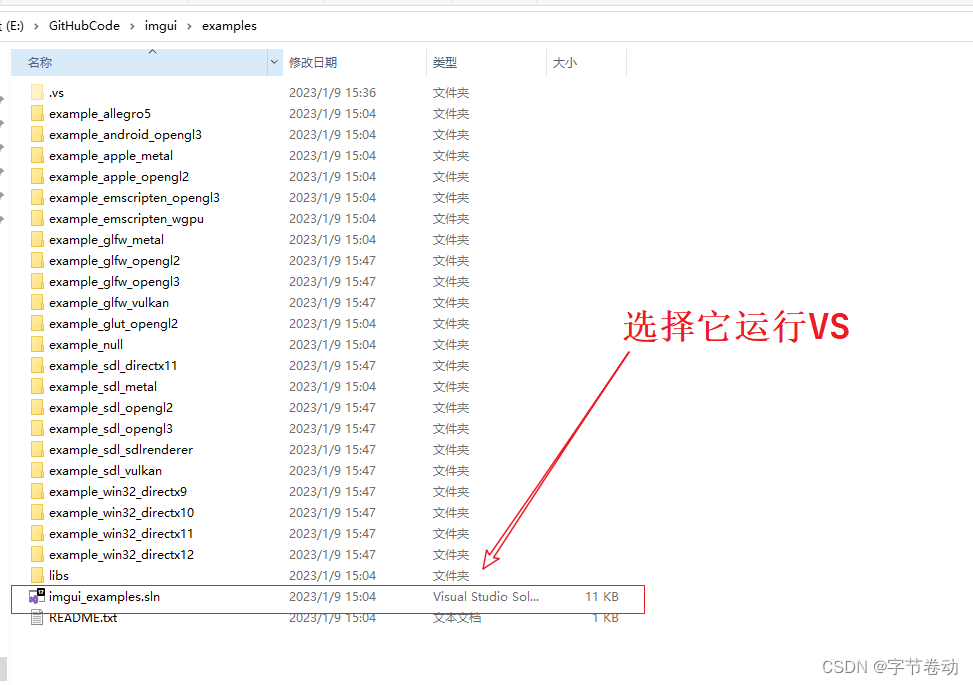
打开examples/imgui_examples.sln,
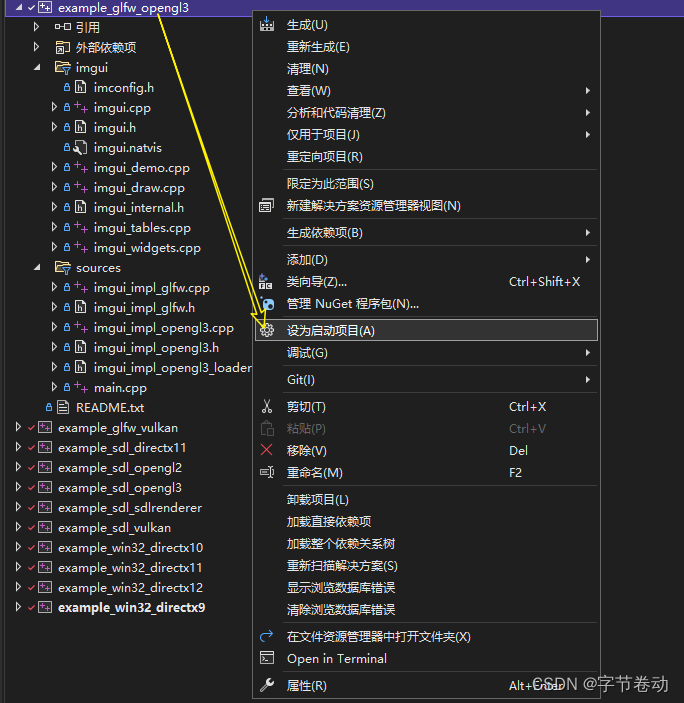
将example_glfw_opengl3设为启动项目
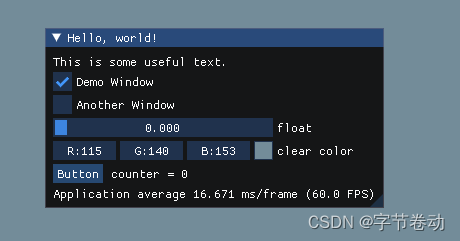
然后运行程序,弹出一个窗口,如下所示:

基本控件:Label、Text、CheckBox、Slider
窗体控件:树形控件、图片控件、ComboBox、列表控件、菜单栏等
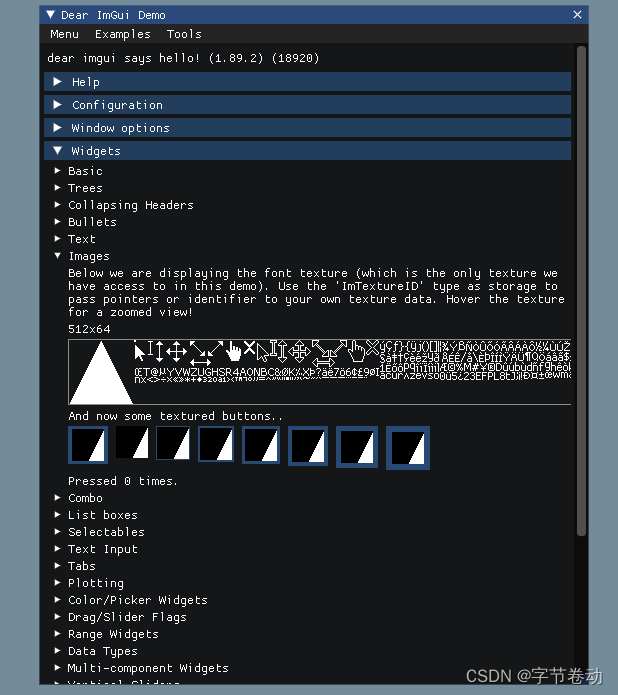
根据官方提供的demo来看,基本满足开发要求。
example_glfw_opengl3 项目结构如下
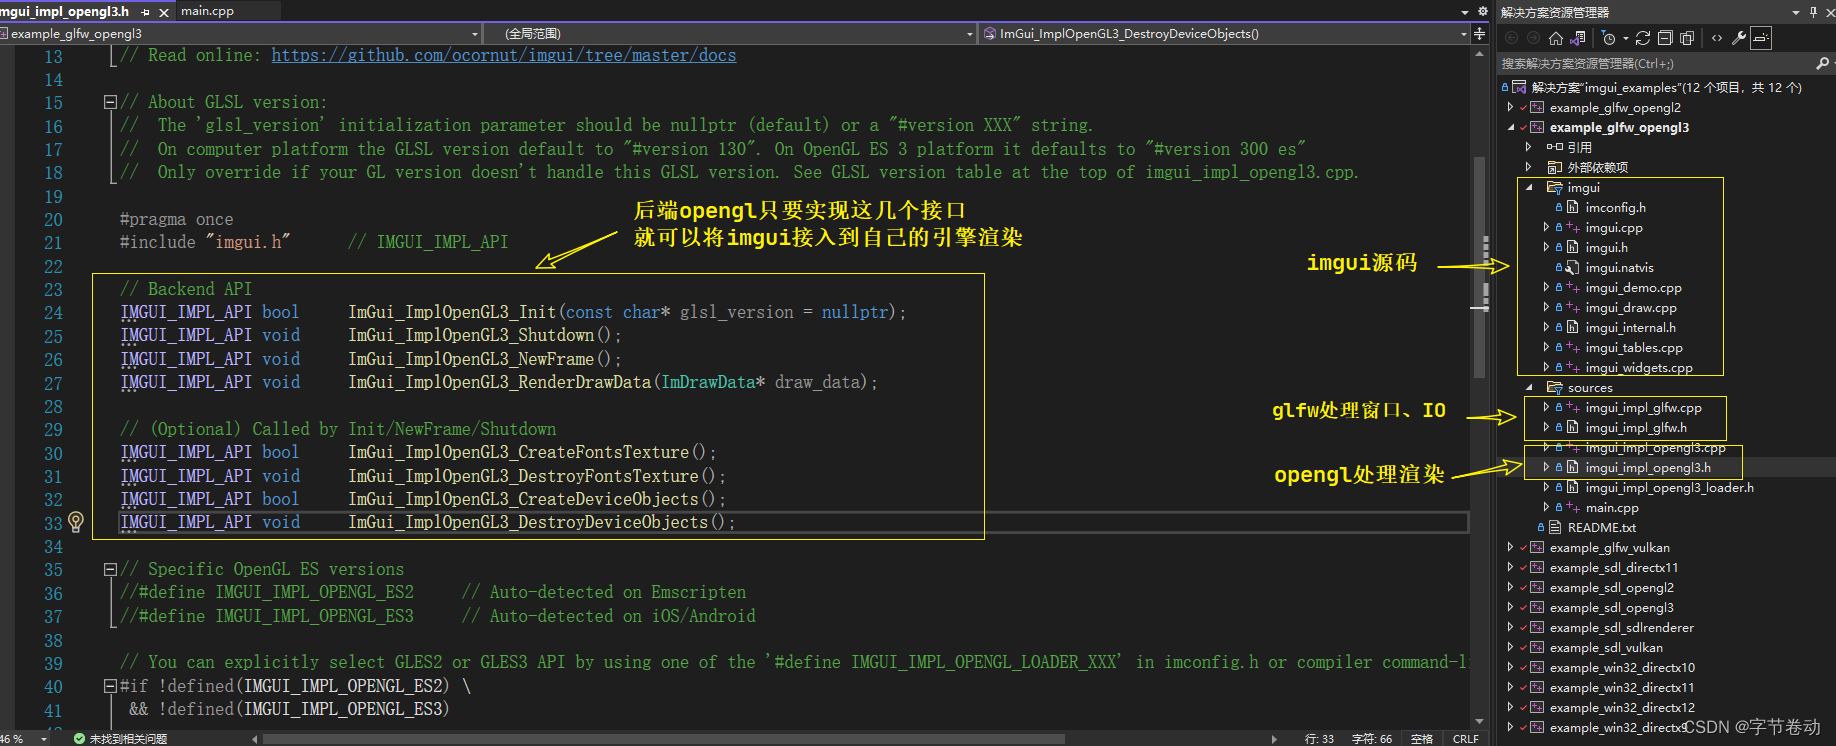
sources目录下就是后端代码。
imgui_impl_glfw.cpp 负责使用glfw创建Window和处理IO。
imgui_impl_opengl3.cpp负责处理渲染相关事情,可以看到只需要实现几个接口,就可以将imgui接入到自己的引擎项目中
代码并不多,分为以下几个步骤:
// Dear ImGui: standalone example application for GLFW + OpenGL 3, using programmable pipeline
// (GLFW is a cross-platform general purpose library for handling windows, inputs, OpenGL/Vulkan/Metal graphics context creation, etc.)
// If you are new to Dear ImGui, read documentation from the docs/ folder + read the top of imgui.cpp.
// Read online: https://github.com/ocornut/imgui/tree/master/docs

#include "imgui.h"
#include "imgui_impl_glfw.h"
#include "imgui_impl_opengl3.h"
#include <stdio.h>
#define GL_SILENCE_DEPRECATION
#if defined(IMGUI_IMPL_OPENGL_ES2)
#include <GLES2/gl2.h>
#endif
#include <GLFW/glfw3.h> // Will drag system OpenGL headers

// [Win32] Our example includes a copy of glfw3.lib pre-compiled with VS2010 to maximize ease of testing and compatibility with old VS compilers.
// To link with VS2010-era libraries, VS2015+ requires linking with legacy_stdio_definitions.lib, which we do using this pragma.
// Your own project should not be affected, as you are likely to link with a newer binary of GLFW that is adequate for your version of Visual Studio.
#if defined(_MSC_VER) && (_MSC_VER >= 1900) && !defined(IMGUI_DISABLE_WIN32_FUNCTIONS)
#pragma comment(lib, "legacy_stdio_definitions")
#endif

static void glfw_error_callback(int error, const char* description)
{
    fprintf(stderr, "Glfw Error %d: %s\n", error, description);
}

int main(int, char**)
{
    // 1. 初始化glfw 创建window
    // Setup window
    glfwSetErrorCallback(glfw_error_callback);
    if (!glfwInit())
        return 1;

    // Decide GL+GLSL versions
#if defined(IMGUI_IMPL_OPENGL_ES2)
    // GL ES 2.0 + GLSL 100
    const char* glsl_version = "#version 100";
    glfwWindowHint(GLFW_CONTEXT_VERSION_MAJOR, 2);
    glfwWindowHint(GLFW_CONTEXT_VERSION_MINOR, 0);
    glfwWindowHint(GLFW_CLIENT_API, GLFW_OPENGL_ES_API);
#elif defined(__APPLE__)
    // GL 3.2 + GLSL 150
    const char* glsl_version = "#version 150";
    glfwWindowHint(GLFW_CONTEXT_VERSION_MAJOR, 3);
    glfwWindowHint(GLFW_CONTEXT_VERSION_MINOR, 2);
    glfwWindowHint(GLFW_OPENGL_PROFILE, GLFW_OPENGL_CORE_PROFILE);  // 3.2+ only
    glfwWindowHint(GLFW_OPENGL_FORWARD_COMPAT, GL_TRUE);            // Required on Mac
#else
    // GL 3.0 + GLSL 130
    const char* glsl_version = "#version 130";
    glfwWindowHint(GLFW_CONTEXT_VERSION_MAJOR, 3);
    glfwWindowHint(GLFW_CONTEXT_VERSION_MINOR, 0);
    //glfwWindowHint(GLFW_OPENGL_PROFILE, GLFW_OPENGL_CORE_PROFILE);  // 3.2+ only
    //glfwWindowHint(GLFW_OPENGL_FORWARD_COMPAT, GL_TRUE);            // 3.0+ only
#endif

    // Create window with graphics context
    GLFWwindow* window = glfwCreateWindow(1280, 720, "Dear ImGui GLFW+OpenGL3 example", NULL, NULL);
    if (window == NULL)
        return 1;
    glfwMakeContextCurrent(window);
    // 开启垂直同步
    glfwSwapInterval(1); // Enable vsync


    // 2. 初始化imgui
    // Setup Dear ImGui context
    IMGUI_CHECKVERSION();
    ImGui::CreateContext();
    ImGuiIO& io = ImGui::GetIO(); (void)io;
    //io.ConfigFlags |= ImGuiConfigFlags_NavEnableKeyboard;     // Enable Keyboard Controls
    //io.ConfigFlags |= ImGuiConfigFlags_NavEnableGamepad;      // Enable Gamepad Controls

    // Setup Dear ImGui style
    ImGui::StyleColorsDark();
    //ImGui::StyleColorsLight();


    // 3. 初始化imgui后端
    // Setup Platform/Renderer backends
    ImGui_ImplGlfw_InitForOpenGL(window, true);
    ImGui_ImplOpenGL3_Init(glsl_version);

    // Load Fonts
    // - If no fonts are loaded, dear imgui will use the default font. You can also load multiple fonts and use ImGui::PushFont()/PopFont() to select them.
    // - AddFontFromFileTTF() will return the ImFont* so you can store it if you need to select the font among multiple.
    // - If the file cannot be loaded, the function will return NULL. Please handle those errors in your application (e.g. use an assertion, or display an error and quit).
    // - The fonts will be rasterized at a given size (w/ oversampling) and stored into a texture when calling ImFontAtlas::Build()/GetTexDataAsXXXX(), which ImGui_ImplXXXX_NewFrame below will call.
    // - Use '#define IMGUI_ENABLE_FREETYPE' in your imconfig file to use Freetype for higher quality font rendering.
    // - Read 'docs/FONTS.md' for more instructions and details.
    // - Remember that in C/C++ if you want to include a backslash \ in a string literal you need to write a double backslash \\ !
    //io.Fonts->AddFontDefault();
    //io.Fonts->AddFontFromFileTTF("c:\\Windows\\Fonts\\segoeui.ttf", 18.0f);
    //io.Fonts->AddFontFromFileTTF("../../misc/fonts/DroidSans.ttf", 16.0f);
    //io.Fonts->AddFontFromFileTTF("../../misc/fonts/Roboto-Medium.ttf", 16.0f);
    //io.Fonts->AddFontFromFileTTF("../../misc/fonts/Cousine-Regular.ttf", 15.0f);
    //ImFont* font = io.Fonts->AddFontFromFileTTF("c:\\Windows\\Fonts\\ArialUni.ttf", 18.0f, NULL, io.Fonts->GetGlyphRangesJapanese());
    //IM_ASSERT(font != NULL);

    // Our state
    bool show_demo_window = true;
    bool show_another_window = false;
    ImVec4 clear_color = ImVec4(0.45f, 0.55f, 0.60f, 1.00f);


    // 4. 主循环,在每一帧里创建GUI并渲染
    // Main loop
    while (!glfwWindowShouldClose(window))
    {
        // Poll and handle events (inputs, window resize, etc.)
        // You can read the io.WantCaptureMouse, io.WantCaptureKeyboard flags to tell if dear imgui wants to use your inputs.
        // - When io.WantCaptureMouse is true, do not dispatch mouse input data to your main application, or clear/overwrite your copy of the mouse data.
        // - When io.WantCaptureKeyboard is true, do not dispatch keyboard input data to your main application, or clear/overwrite your copy of the keyboard data.
        // Generally you may always pass all inputs to dear imgui, and hide them from your application based on those two flags.
        glfwPollEvents();

        // 开始新的一帧
        // Start the Dear ImGui frame
        ImGui_ImplOpenGL3_NewFrame();
        ImGui_ImplGlfw_NewFrame();
        ImGui::NewFrame();

        // 1. 显示大的demo窗口
        // 1. Show the big demo window (Most of the sample code is in ImGui::ShowDemoWindow()! You can browse its code to learn more about Dear ImGui!).
        if (show_demo_window)
            ImGui::ShowDemoWindow(&show_demo_window);

        // 2. 创建小的demo窗口,这里可以熟悉下按钮、选中框等的绘制
        // 2. Show a simple window that we create ourselves. We use a Begin/End pair to create a named window.
        {
            static float f = 0.0f;
            static int counter = 0;

            ImGui::Begin("Hello, world!");                          // Create a window called "Hello, world!" and append into it.

            ImGui::Text("This is some useful text.");               // Display some text (you can use a format strings too)
            ImGui::Checkbox("Demo Window", &show_demo_window);      // Edit bools storing our window open/close state
            ImGui::Checkbox("Another Window", &show_another_window);

            ImGui::SliderFloat("float", &f, 0.0f, 1.0f);            // Edit 1 float using a slider from 0.0f to 1.0f
            ImGui::ColorEdit3("clear color", (float*)&clear_color); // Edit 3 floats representing a color

            if (ImGui::Button("Button"))                            // Buttons return true when clicked (most widgets return true when edited/activated)
                counter++;
            ImGui::SameLine();
            ImGui::Text("counter = %d", counter);

            ImGui::Text("Application average %.3f ms/frame (%.1f FPS)", 1000.0f / ImGui::GetIO().Framerate, ImGui::GetIO().Framerate);
            ImGui::End();
        }

        // 3. 创建一个窗口 里面放个按钮
        // 3. Show another simple window.
        if (show_another_window)
        {
            ImGui::Begin("Another Window", &show_another_window);   // Pass a pointer to our bool variable (the window will have a closing button that will clear the bool when clicked)
            ImGui::Text("Hello from another window!");
            if (ImGui::Button("Close Me"))
                show_another_window = false;
            ImGui::End();
        }

        // 渲染
        // Rendering
        ImGui::Render();
        int display_w, display_h;
        glfwGetFramebufferSize(window, &display_w, &display_h);
        glViewport(0, 0, display_w, display_h);
        glClearColor(clear_color.x * clear_color.w, clear_color.y * clear_color.w, clear_color.z * clear_color.w, clear_color.w);
        glClear(GL_COLOR_BUFFER_BIT);
        ImGui_ImplOpenGL3_RenderDrawData(ImGui::GetDrawData());

        glfwSwapBuffers(window);
    }

    // Cleanup
    ImGui_ImplOpenGL3_Shutdown();
    ImGui_ImplGlfw_Shutdown();
    ImGui::DestroyContext();

    glfwDestroyWindow(window);
    glfwTerminate();

    return 0;
}
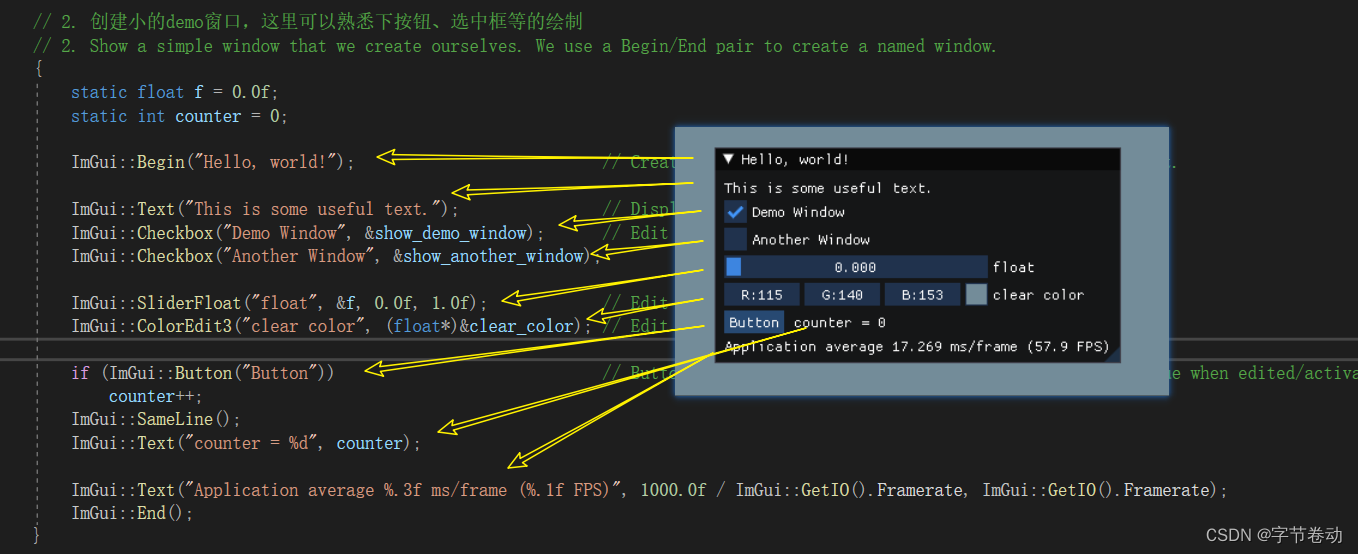
大窗口使用 ImGui::ShowDemoWindow(&show_demo_window); 代码在imgui_impl_opengl3.cpp中实现,比较复杂。
下面列举几个画面即可:

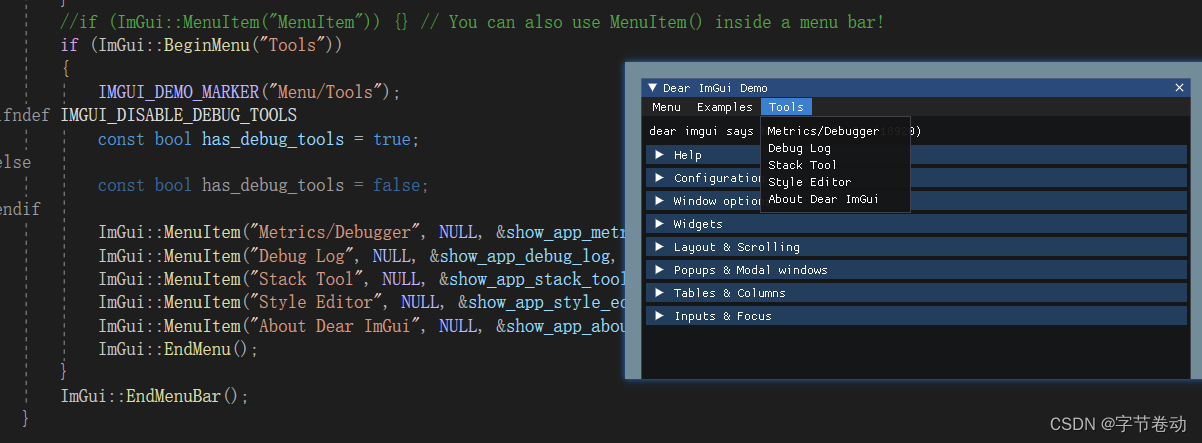
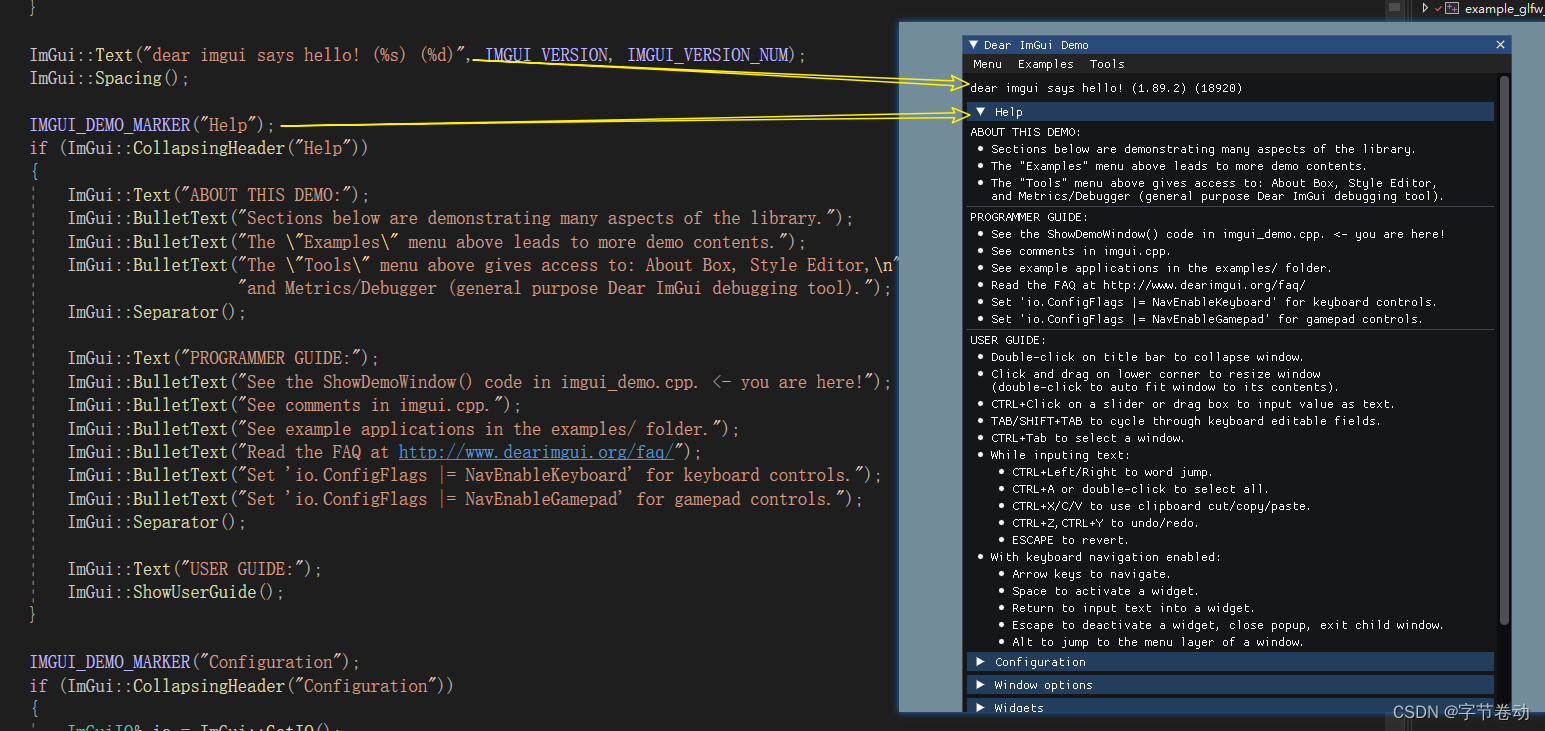
Dear ImGui: Code
https://www.github.com/ocornut/imgui
Dear ImGui: Issues/Forums
https://www.github.com/ocornut/imgui/issues
Dear ImGui: Wiki
https://github.com/ocornut/imgui/wiki
Dear ImGui Test Engine: Code
https://www.github.com/ocornut/imgui_test_engine
Dear ImGui Test Engine: Wiki
https://www.github.com/ocornut/imgui_test_engine/wiki
User Quotes
https://github.com/ocornut/imgui/wiki/Quotes
Software using Dear ImGui
https://github.com/ocornut/imgui/wiki/Software-using-Dear-ImGui
Demo binaries (win32)
https://www.dearimgui.org/binaries/
Frequently Asked Questions (FAQ)
https://www.dearimgui.org/faq/
Gamepad Navigation Controls Sheets (PS4/Xbox/Switch)
https://www.dearimgui.org/controls_sheets/
Licenses / Sales
https://www.dearimgui.org/licenses/
大家看完此篇文章之后,就会发现ImGui库还蛮简单入门的,快去实现你自己的渲染编辑器吧!
我想要做的是有2个不同的Controller,client和test_client。客户端Controller已经构建,我想创建一个test_clientController,我可以使用它来玩弄客户端的UI并根据需要进行调整。我主要是想绕过我在客户端中内置的验证及其对加载数据的管理Controller的依赖。所以我希望test_clientController加载示例数据集,然后呈现客户端Controller的索引View,以便我可以调整客户端UI。就是这样。我在test_clients索引方法中试过这个:classTestClientdefindexrender:template=>
我正在编写一个包含C扩展的gem。通常当我写一个gem时,我会遵循TDD的过程,我会写一个失败的规范,然后处理代码直到它通过,等等......在“ext/mygem/mygem.c”中我的C扩展和在gemspec的“扩展”中配置的有效extconf.rb,如何运行我的规范并仍然加载我的C扩展?当我更改C代码时,我需要采取哪些步骤来重新编译代码?这可能是个愚蠢的问题,但是从我的gem的开发源代码树中输入“bundleinstall”不会构建任何native扩展。当我手动运行rubyext/mygem/extconf.rb时,我确实得到了一个Makefile(在整个项目的根目录中),然后当
在我的Controller中,我通过以下方式在我的index方法中支持HTML和JSON:respond_todo|format|format.htmlformat.json{renderjson:@user}end在浏览器中拉起它时,它会自然地以HTML呈现。但是,当我对/user资源进行内容类型为application/json的curl调用时(因为它是索引方法),我仍然将HTML作为响应。如何获取JSON作为响应?我还需要说明什么? 最佳答案 您应该将.json附加到请求的url,提供的格式在routes.rb的路径中定义。这
我是一个Rails初学者,但我想从我的RailsView(html.haml文件)中查看Ruby变量的内容。我试图在ruby中打印出变量(认为它会在终端中出现),但没有得到任何结果。有什么建议吗?我知道Rails调试器,但更喜欢使用inspect来打印我的变量。 最佳答案 您可以在View中使用puts方法将信息输出到服务器控制台。您应该能够在View中的任何位置使用Haml执行以下操作:-puts@my_variable.inspect 关于ruby-on-rails-如何在我的R
我已经在Sinatra上创建了应用程序,它代表了一个简单的API。我想在生产和开发上进行部署。我想在部署时选择,是开发还是生产,一些方法的逻辑应该改变,这取决于部署类型。是否有任何想法,如何完成以及解决此问题的一些示例。例子:我有代码get'/api/test'doreturn"Itisdev"end但是在部署到生产环境之后我想在运行/api/test之后看到ItisPROD如何实现? 最佳答案 根据SinatraDocumentation:EnvironmentscanbesetthroughtheRACK_ENVenvironm
我们的git存储库中目前有一个Gemfile。但是,有一个gem我只在我的环境中本地使用(我的团队不使用它)。为了使用它,我必须将它添加到我们的Gemfile中,但每次我checkout到我们的master/dev主分支时,由于与跟踪的gemfile冲突,我必须删除它。我想要的是类似Gemfile.local的东西,它将继承从Gemfile导入的gems,但也允许在那里导入新的gems以供使用只有我的机器。此文件将在.gitignore中被忽略。这可能吗? 最佳答案 设置BUNDLE_GEMFILE环境变量:BUNDLE_GEMFI
我喜欢使用Textile或Markdown为我的项目编写自述文件,但是当我生成RDoc时,自述文件被解释为RDoc并且看起来非常糟糕。有没有办法让RDoc通过RedCloth或BlueCloth而不是它自己的格式化程序运行文件?它可以配置为自动检测文件后缀的格式吗?(例如README.textile通过RedCloth运行,但README.mdown通过BlueCloth运行) 最佳答案 使用YARD直接代替RDoc将允许您包含Textile或Markdown文件,只要它们的文件后缀是合理的。我经常使用类似于以下Rake任务的东西:
这似乎非常适得其反,因为太多的gem会在window上破裂。我一直在处理很多mysql和ruby-mysqlgem问题(gem本身发生段错误,一个名为UnixSocket的类显然在Windows机器上不能正常工作,等等)。我只是在浪费时间吗?我应该转向不同的脚本语言吗? 最佳答案 我在Windows上使用Ruby的经验很少,但是当我开始使用Ruby时,我是在Windows上,我的总体印象是它不是Windows原生系统。因此,在主要使用Windows多年之后,开始使用Ruby促使我切换回原来的系统Unix,这次是Linux。Rub
我正在玩HTML5视频并且在ERB中有以下片段:mp4视频从在我的开发环境中运行的服务器很好地流式传输到chrome。然而firefox显示带有海报图像的视频播放器,但带有一个大X。问题似乎是mongrel不确定ogv扩展的mime类型,并且只返回text/plain,如curl所示:$curl-Ihttp://0.0.0.0:3000/pr6.ogvHTTP/1.1200OKConnection:closeDate:Mon,19Apr201012:33:50GMTLast-Modified:Sun,18Apr201012:46:07GMTContent-Type:text/plain
rails中是否有任何规定允许站点的所有AJAXPOST请求在没有authenticity_token的情况下通过?我有一个调用Controller方法的JqueryPOSTajax调用,但我没有在其中放置任何真实性代码,但调用成功。我的ApplicationController确实有'request_forgery_protection'并且我已经改变了config.action_controller.consider_all_requests_local在我的environments/development.rb中为false我还搜索了我的代码以确保我没有重载ajaxSend来发送