掌握分寸感,找目标一致的人协同你,有效地调配资源,就可以提高效率。
写在前面的话:博主最近想要搭建自己的前端若依项目,因此此系列博客会做一些记录。我的项目gitee地址: https://gitee.com/xuruicong/rachel-front-show
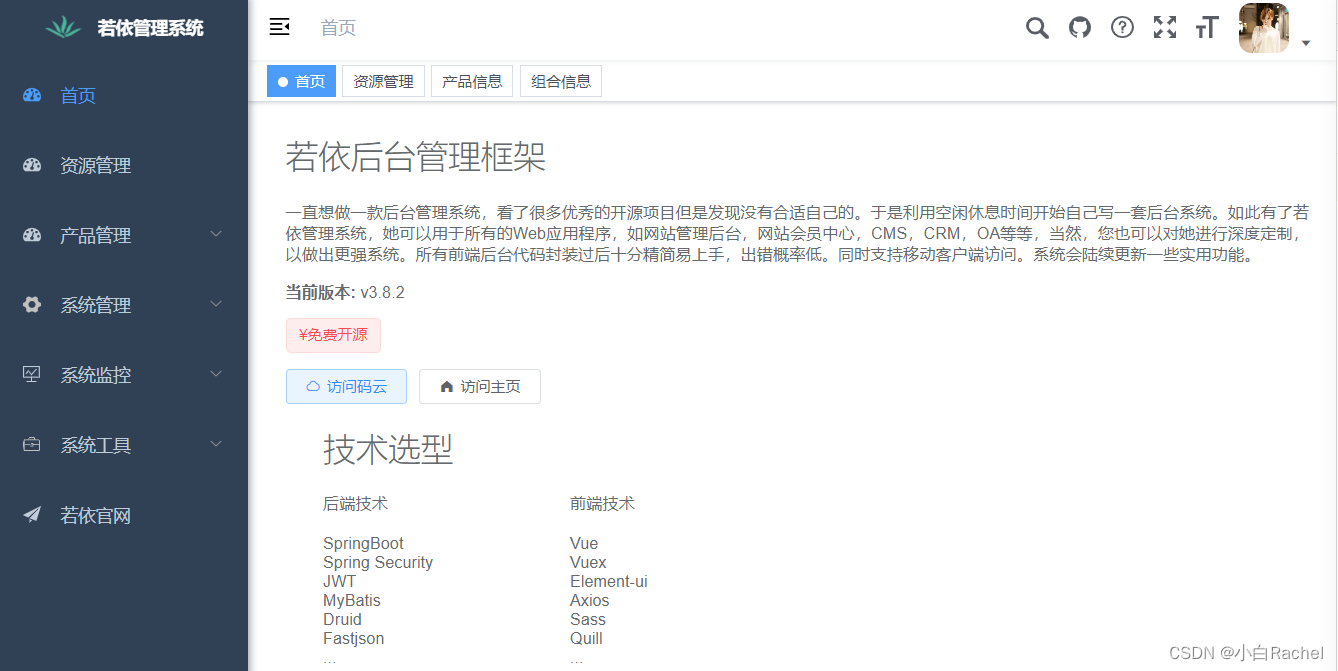
说明:只运行前端项目,只需要要下载官方项目http://www.ruoyi.vip/ 修改vue.config.js文件中的target: `http://localhost:8080`为:
target: `http://vue.ruoyi.vip/prod-api/`, 修改效果预览:

目录
(tips: 全局搜索sidebar-title)
src-->layout-->component-->sidebar--> Logo.vue
只需要修改对应的图标logo.png即可
(tips:全局搜索.sidebar-container)
src-->layout-->component-->sidebar--> SidebarItem.vue
src-->assets-->styles-->sidebar.scss
src-->assets-->styles--> variables.scss
// variable.scss
// 默认菜单主题风格
$base-menu-color: #333333; // 菜单全部字体颜色
$base-menu-color-active: #e60012; // 父级菜单激活的字体颜色
$base-menu-background: #fff; // 菜单栏背景颜色(非激活状态)
$base-logo-title-color: #e60012; // 系统标题颜色

$base-menu-light-color: rgba(0, 0, 0, 0.7);
$base-menu-light-background: #e60012; // 选中菜单的字体颜色
$base-logo-light-title-color: #fff; // 对应base-logo-title-color

$base-sub-menu-background: #f5f7fa; // 选中的菜单的子菜单背景颜色
$base-sub-menu-hover: #f7f0f1; // 子菜单hover背景颜色
如果还想要修改 激活的菜单的样式需要在sidebar.scss中添加和修改如下代码:
// sidebar.scss
.el-menu-item.is-active {
      color: #e60012 !important;
      background-color: $base-sub-menu-hover !important; // 点击菜单的颜色
      &:hover {
        background-color: $base-sub-menu-hover !important;
      }
    }

// menu hover
.submenu-title-noDropdown, .el-submenu__title {
      &:hover {
        background-color: $base-sub-menu-hover !important;
      }
}

& .theme-dark .nest-menu .el-submenu > .el-submenu__title,
& .theme-dark .el-submenu .el-menu-item {
      // background-color: $base-sub-menu-background !important;
      color: #333333 !important;
      background-color: #fff;

      &:hover {
        background-color: $base-sub-menu-hover !important;
      }
}
修改之后的效果如下:

src-->layout-->component-->Navbar.vue
<!-- <template v-if="device!=='mobile'">
        <search id="header-search" class="right-menu-item" />
        <el-tooltip content="源码地址" effect="dark" placement="bottom">
          <ruo-yi-git id="ruoyi-git" class="right-menu-item hover-effect" />
        </el-tooltip>
        <el-tooltip content="文档地址" effect="dark" placement="bottom">
          <ruo-yi-doc id="ruoyi-doc" class="right-menu-item hover-effect" />
        </el-tooltip>
        <screenfull id="screenfull" class="right-menu-item hover-effect" />
        <el-tooltip content="布局大小" effect="dark" placement="bottom">
          <size-select id="size-select" class="right-menu-item hover-effect" />
        </el-tooltip>
</template> -->(tips:全局搜索profile.jpg)
src-->store-->modules-->user.js
替换profile.jpg图片即可

src-->layout-->component-->Navbar.vue
注释掉面包屑部分,我们一会自己写
src-->component-->Hamburger--> index.vue

// humburger index.vue
<template>
<div style="padding: 0 15px; display: flex">
<img
src="../../assets/logo/svg.png"
@click="toggleClick"
:class="{ 'is-active': isActive }"
class="hamburger"
/>
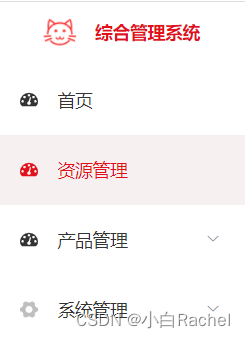
<div class="nabar-title">综合管理系统</div>
</div>
</template><style scoped>
.hamburger {
display: inline-block;
vertical-align: middle;
margin-top: 18px;
width: 16px;
color: #e60012;
height: 16px;
margin-left: 6px;
}
.hamburger.is-active {
transform: rotate(180deg);
}
.nabar-title {
margin-left: 18px;
height: 100%;
width: 200px;
line-height: 54px;
color: #e60012;
font-weight: 600;
vertical-align: middle;
}
</style>在全局settings文件中,若以框架已经定义了是否显示tagsView,设置属性为false即可。
/**
 * 是否显示 tagsView
*/
tagsView: true,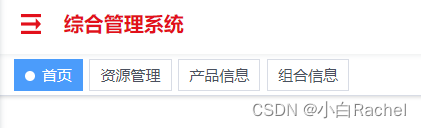

src-->layout-->component-->Navbar.vue
需要修改Navbar的高度,并添加面包屑
// Navbar.vue
<template>
<div class="navbar">
<div style="height: 50px; background: #fff">
<hamburger
id="hamburger-container"
:is-active="sidebar.opened"
class="hamburger-container"
@toggleClick="toggleSideBar"
/>
<!-- <breadcrumb
id="breadcrumb-container"
class="breadcrumb-container"
v-if="!topNav"
/>
<top-nav id="topmenu-container" class="topmenu-container" v-if="topNav" /> -->
<div class="right-menu">
<el-dropdown
class="avatar-container right-menu-item hover-effect"
trigger="click"
>
<div class="avatar-wrapper">
<img :src="avatar" class="user-avatar" />
<i class="el-icon-caret-bottom" />
</div>
<el-dropdown-menu slot="dropdown">
<router-link to="/user/profile">
<el-dropdown-item>个人中心</el-dropdown-item>
</router-link>
<!-- <el-dropdown-item @click.native="setting = true">
<span>布局设置</span>
</el-dropdown-item> -->
<el-dropdown-item divided @click.native="logout">
<span>退出登录</span>
</el-dropdown-item>
</el-dropdown-menu>
</el-dropdown>
</div>
</div>
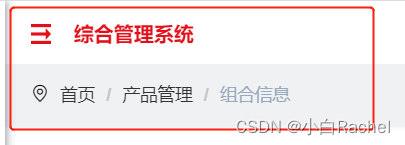
<!-- 自定义面包屑 -->
<div class="new-breadcrumb">
<i
class="el-icon-location-outline"
style="margin-left: 20px; margin-top: 16px"
></i>
<breadcrumb id="breadcrumb-container" class="breadcrumb-container" />
</div>
</div>
</template>// navbar的height:100px
.new-breadcrumb {
height: 50px;
background: rgb(240, 241, 243);
display: flex;
}由于修改了navbar的高从50px--->100px,会影响页面整个的高度。(整个页面的高度是100vh,下面内容app-main的高度就是100vh-navbar的高度)因此需要修改app-main高度
src--> layout-->components-->AppMain.vue
.app-main {
  /* 100= navbar  100  */
  min-height: calc(100vh - 100px);  // 原来是50px
  width: 100%;
  position: relative;
  overflow: hidden;
}
但是希望去掉首页/,因为不是所有页面都是通过首页进入的。
src-->components-->Breadcrumb-->index.vue
注释掉默认的首页即可
 // if (!this.isDashboard(first)) {
      //   matched = [{ path: '/index', meta: { title: '首页' }}].concat(matched)
      // }
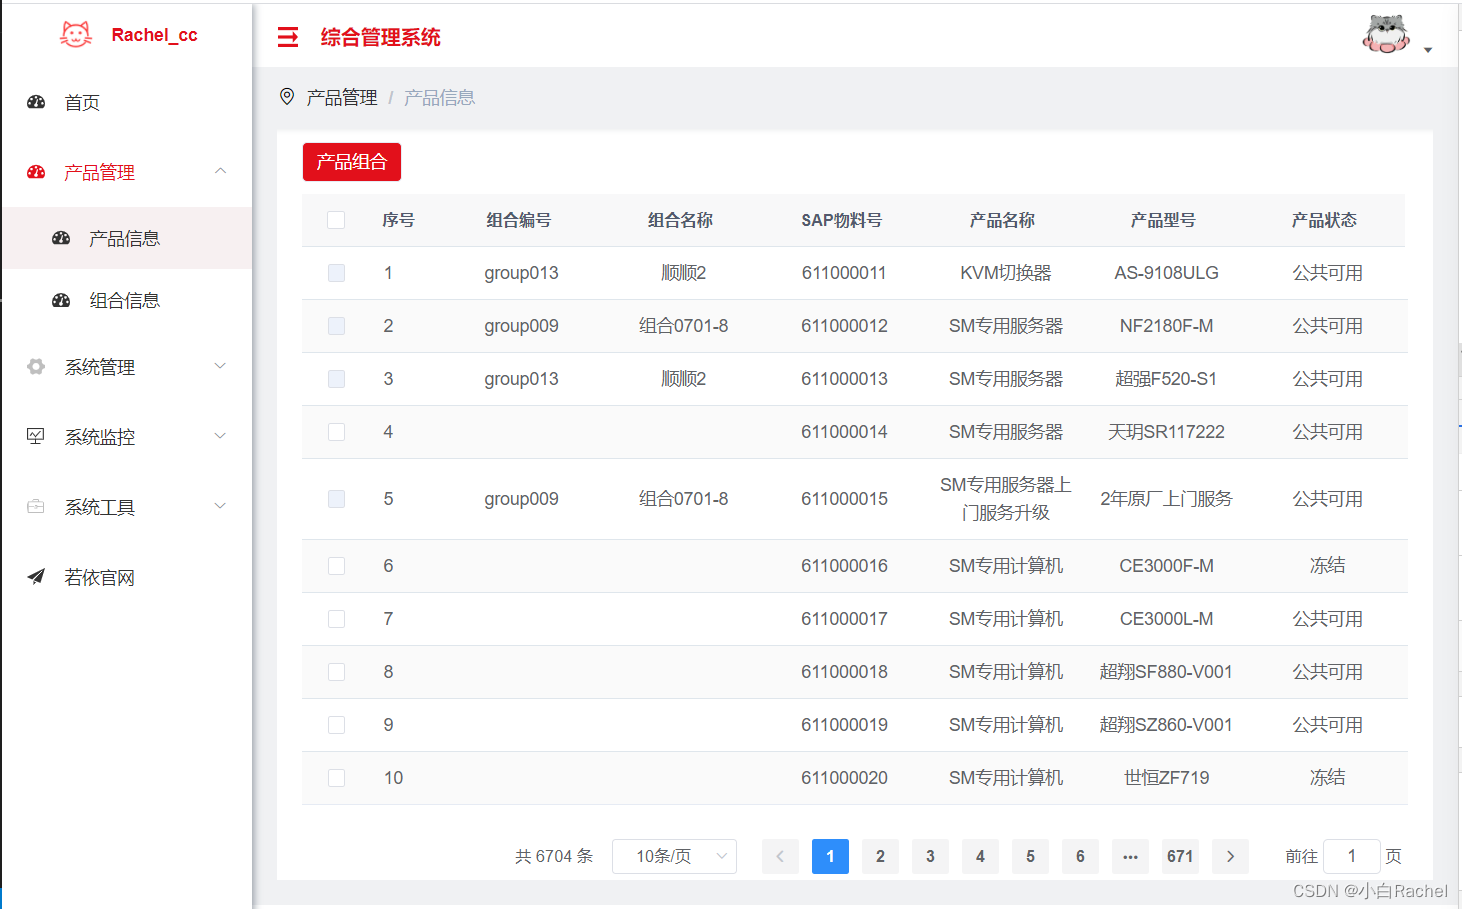
可以看到 ,所有页面都包含在app-container下的,如果需要修改样式则需呀修改全局的app-container样式。
src-->assets-->styles-->index.scss

//main-container全局样式
.app-content {
  border: 20px solid rgb(240, 241, 243);
  border-top: none;
}

.app-container {
  padding: 10px 20px;
}
最终页面效果如下:
如何在buildr项目中使用Ruby?我在很多不同的项目中使用过Ruby、JRuby、Java和Clojure。我目前正在使用我的标准Ruby开发一个模拟应用程序,我想尝试使用Clojure后端(我确实喜欢功能代码)以及JRubygui和测试套件。我还可以看到在未来的不同项目中使用Scala作为后端。我想我要为我的项目尝试一下buildr(http://buildr.apache.org/),但我注意到buildr似乎没有设置为在项目中使用JRuby代码本身!这看起来有点傻,因为该工具旨在统一通用的JVM语言并且是在ruby中构建的。除了将输出的jar包含在一个独特的、仅限ruby
我有一大串格式化数据(例如JSON),我想使用Psychinruby同时保留格式转储到YAML。基本上,我希望JSON使用literalstyle出现在YAML中:---json:|{"page":1,"results":["item","another"],"total_pages":0}但是,当我使用YAML.dump时,它不使用文字样式。我得到这样的东西:---json:!"{\n\"page\":1,\n\"results\":[\n\"item\",\"another\"\n],\n\"total_pages\":0\n}\n"我如何告诉Psych以想要的样式转储标量?解
我正在为一个项目制作一个简单的shell,我希望像在Bash中一样解析参数字符串。foobar"helloworld"fooz应该变成:["foo","bar","helloworld","fooz"]等等。到目前为止,我一直在使用CSV::parse_line,将列分隔符设置为""和.compact输出。问题是我现在必须选择是要支持单引号还是双引号。CSV不支持超过一个分隔符。Python有一个名为shlex的模块:>>>shlex.split("Test'helloworld'foo")['Test','helloworld','foo']>>>shlex.split('Test"
我在我的Rails项目中使用Pow和powifygem。现在我尝试升级我的ruby版本(从1.9.3到2.0.0,我使用RVM)当我切换ruby版本、安装所有gem依赖项时,我通过运行railss并访问localhost:3000确保该应用程序正常运行以前,我通过使用pow访问http://my_app.dev来浏览我的应用程序。升级后,由于错误Bundler::RubyVersionMismatch:YourRubyversionis1.9.3,butyourGemfilespecified2.0.0,此url不起作用我尝试过的:重新创建pow应用程序重启pow服务器更新战俘
我已经像这样安装了一个新的Rails项目:$railsnewsite它执行并到达:bundleinstall但是当它似乎尝试安装依赖项时我得到了这个错误Gem::Ext::BuildError:ERROR:Failedtobuildgemnativeextension./System/Library/Frameworks/Ruby.framework/Versions/2.0/usr/bin/rubyextconf.rbcheckingforlibkern/OSAtomic.h...yescreatingMakefilemake"DESTDIR="cleanmake"DESTDIR="
假设我有这个范围:("aaaaa".."zzzzz")如何在不事先/每次生成整个项目的情况下从范围中获取第N个项目? 最佳答案 一种快速简便的方法:("aaaaa".."zzzzz").first(42).last#==>"aaabp"如果出于某种原因你不得不一遍又一遍地这样做,或者如果你需要避免为前N个元素构建中间数组,你可以这样写:moduleEnumerabledefskip(n)returnto_enum:skip,nunlessblock_given?each_with_indexdo|item,index|yieldit
我有带有Logo图像的公司模型has_attached_file:logo我用他们的Logo创建了许多公司。现在,我需要添加新样式has_attached_file:logo,:styles=>{:small=>"30x15>",:medium=>"155x85>"}我是否应该重新上传所有旧数据以重新生成新样式?我不这么认为……或者有什么rake任务可以重新生成样式吗? 最佳答案 参见Thumbnail-Generation.如果rake任务不适合你,你应该能够在控制台中使用一个片段来调用重新处理!关于相关公司
项目介绍随着我国经济迅速发展,人们对手机的需求越来越大,各种手机软件也都在被广泛应用,但是对于手机进行数据信息管理,对于手机的各种软件也是备受用户的喜爱小学生兴趣延时班预约小程序的设计与开发被用户普遍使用,为方便用户能够可以随时进行小学生兴趣延时班预约小程序的设计与开发的数据信息管理,特开发了小程序的设计与开发的管理系统。小学生兴趣延时班预约小程序的设计与开发的开发利用现有的成熟技术参考,以源代码为模板,分析功能调整与小学生兴趣延时班预约小程序的设计与开发的实际需求相结合,讨论了小学生兴趣延时班预约小程序的设计与开发的使用。开发环境开发说明:前端使用微信微信小程序开发工具:后端使用ssm:VU
最近因为项目需要,需要将Android手机系统自带的某个系统软件反编译并更改里面某个资源,并重新打包,签名生成新的自定义的apk,下面我来介绍一下我的实现过程。APK修改,分为以下几步:反编译解包,修改,重打包,修改签名等步骤。安卓apk修改准备工作1.系统配置好JavaJDK环境变量2.需要root权限的手机(针对系统自带apk,其他软件免root)3.Auto-Sign签名工具4.apktool工具安卓apk修改开始反编译本文拿Android系统里面的Settings.apk做demo,具体如何将apk获取出来在此就不过多介绍了,直接进入主题:按键win+R输入cmd,打开命令窗口,并将路
我正在尝试创建一个带有项目符号字符的Ruby1.9.3字符串。str="•"+"helloworld"但是,当我输入它时,我收到有关非ASCII字符的语法错误。我该怎么做? 最佳答案 你可以把Unicode字符放在那里。str="\u2022"+"helloworld" 关于ruby-如何在Ruby字符串中插入项目符号字符?,我们在StackOverflow上找到一个类似的问题: https://stackoverflow.com/questions/1195