目录
大虾好吃吗的博客🦐🦐🦐
实验目标:根据拓扑图搭建环境,安装论坛,创建证书通过https访问,实现负载均衡与高可用。通过代理服务器实现跳板机功能,可以远程访问mysql主机、nfs主机、web主机。
实验拓扑图如下:

实验思路:根据拓扑图给出的信息,先搭建web服务器然后配置mysql、php、nfs,最后搭建代理服务器实现负载均衡。
1. nginx部署
[root@web1 ~]# rpm -ivh /media/nginx-rpm/* --nodeps --force

[root@web1 ~]# systemctl start nginx

[root@web1 ~]# systemctl enable nginx
2. 模拟创建私钥(本地当CA)
[root@web1 ~]# mkdir /etc/nginx/ssl_key

[root@web1 ~]# cd /etc/nginx/ssl_key

[root@web1 ssl_key]# openssl genrsa -idea -out server.key 2048 //新建秘钥
3. 生成证书,去掉私钥密码。(过程中会填写国家、省会、公司、邮箱等,随意填写即可)
[root@web1 ssl_key]# openssl req -days 3650 -x509 -sha256 -nodes -newkey rsa:2048 -keyout server.key -out server.crt 
编辑http配置文件,使用证书,指定根目录。
[root@web1 ssl_key]# cd /etc/nginx/conf.d/
[root@web1 conf.d]# rm -rf default.conf
[root@web1 conf.d]# vim blog.conf
server {
        listen 443 ssl;
        server_name blog.benet.com;
        ssl_certificate ssl_key/server.crt;
        ssl_certificate_key ssl_key/server.key;
        root /wordpress;
        index index.php index.html;

        location ~ \.php$ {
                root /wordpress;
                fastcgi_pass 192.168.1.10:9000; //php服务器主机
                fastcgi_index index.php;
                fastcgi_param SCRIPT_FILENAME $document_root$fastcgi_script_name;
                include fastcgi_params;
                }
        }
server {
        listen 80;
        server_name blog.benet.com;
#       rewrite .* https://blog.benet.com; //指定重定向(http转https)
#       rewrite .* https://$host$request_uri redirect;
#       rewrite .* https://$server_name$request_uri redirect;
        rewrite .* https://$server_name$1 redirect; //四条都可以重定向,一条即可。
        }
[root@web1 conf.d]# systemctl restart nginx[root@mysql ~]# rpm -ivh /media/mysql5.6-rpm/* --nodeps --force
[root@mysql ~]# systemctl start mysqld
[root@mysql ~]# systemctl enable mysqld
[root@mysql ~]# mysqladmin -uroot password
New password: //请输入新密码
Confirm new password: //请输入新密码
[root@mysql ~]# mysql -uroot -p123
//省略部分内容
mysql> create database blog;
Query OK, 1 row affected (0.00 sec)
mysql> grant all on blog.* to blog@'%' identified by '123456';
Query OK, 0 rows affected (0.00 sec)[root@php ~]# rpm -ivh /media/php-rpm/* --nodeps --force
[root@php ~]# vim /etc/php-fpm.d/www.conf
listen = 192.168.1.10:9000 //修改为php本机IP
listen.allowed_clients = 192.168.1.7,192.168.1.8 //修改为web主机IP
[root@php ~]# systemctl start php-fpm
[root@php ~]# systemctl enable php-fpm[root@nfs ~]# yum -y install nfs-utils rpcbind
[root@nfs ~]# cp -rp /media/wordpress-4.9.4-zh_CN.zip /
[root@nfs ~]# cd /
[root@nfs /]# unzip wordpress-4.9.4-zh_CN.zip //解压共享软件包
[root@nfs /]# vim /etc/exports
/wordpress 192.168.1.0/24(rw,sync,no_root_squash) //发布共享目录
[root@nfs /]# chmod -R 777 /wordpress
[root@nfs /]# systemctl start rpcbind nfs
[root@nfs /]# systemctl enable rpcbind nfs1. web1挂载
[root@web1 ~]# showmount -e 192.168.1.11 //检查目录是否正常共享

Export list for 192.168.1.11:

/wordpress 192.168.1.0/24

[root@web1 ~]# mkdir /wordpress

[root@web1 ~]# mount -t nfs 192.168.1.11:/wordpress /wordpress //web1挂载目录 
2. PHP挂载
[root@php ~]# mkdir /wordpress

[root@php ~]# mount -t nfs 192.168.1.11:/wordpress/ /wordpress //PHP挂载目录
修改测试机hosts文件通过域名访问。
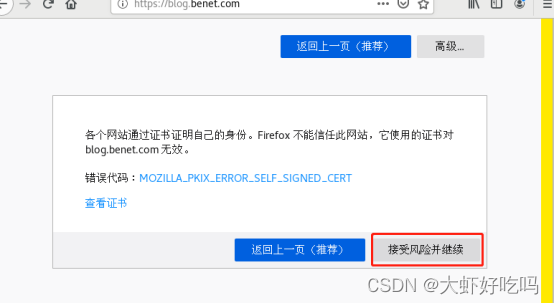
[root@client ~]# echo "192.168.1.7 blog.benet.com" >> /etc/hosts访问浏览器blog.benet.com可以直接转到https,这就是上面重定向的作用。因为本机创建的证书,所以会有风险警告,点击高级

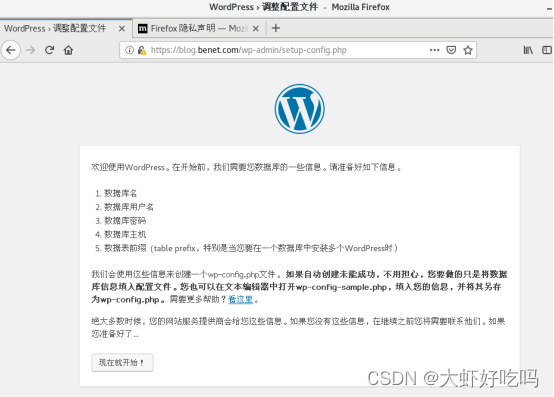
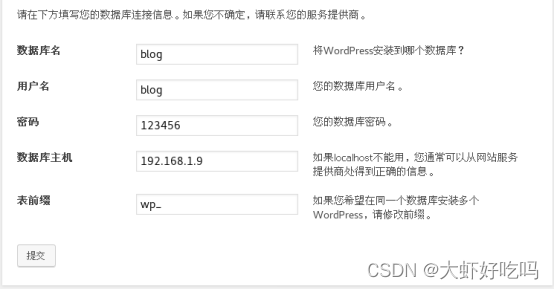
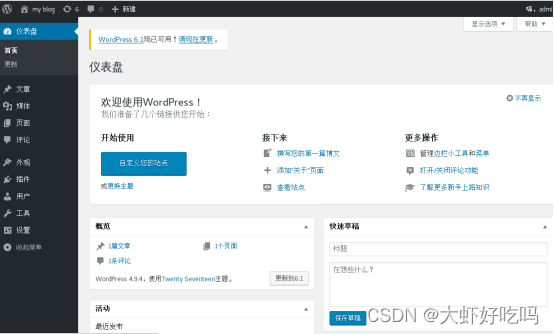
后面就是论坛的安装页面了,点击开始,输入数据库名、用户名密码及mysql服务器IP后点击提交,点击现在安装。

输入论坛信息后,点击安装,安装完成后点击登录就可以输入管理员用户密码登录了。

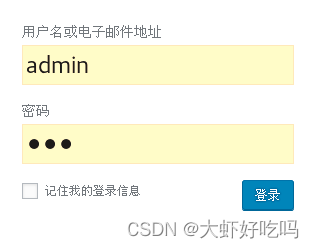
登录后就可以进行对论坛的编辑了。
经过上面的配置,lnmp和nfs就搭建好了,下面将实现负载均衡及高可用功能。
web1已经配置过了配置文件和证书,这里直接复制过来。
[root@web2 ~]# rpm -ivh /media/nginx-rpm/* --nodeps --force
[root@web2 ~]# cd /etc/nginx/conf.d/
[root@web2 conf.d]# rm -rf default.conf
[root@web2 conf.d]# scp -rp root@192.168.1.7:/etc/nginx/conf.d/blog.conf .
[root@web2 conf.d]# cd ..
[root@web2 nginx]# scp -rp root@192.168.1.7:/etc/nginx/ssl_key /etc/nginx //复制证书
[root@web2 nginx]# systemctl start nginx
[root@web2 nginx]# mkdir /wordpress
[root@web2 nginx]# mount -t nfs 192.168.1.11:/wordpress/ /wordpress //挂载论坛目录1. 负载均衡配置
[root@lb1 ~]# rpm -ivh /media/nginx-rpm/*  --nodeps --force
[root@lb1 ~]# cd /etc/nginx/conf.d/
[root@lb1 conf.d]# rm -rf default.conf
[root@lb1 conf.d]# vim lb.conf
upstream web {
        server 192.168.1.7:443;
        server 192.168.1.8:443;
        }
server {
        listen 443 ssl;
        server_name blog.benet.com;
        ssl_certificate ssl_key/server.crt;
        ssl_certificate_key ssl_key/server.key;
        location / {
                proxy_pass https://web;
                include nginx_params;
        }
}
server {
        listen 80;
        server_name blog.benet.com;
        return 302 https://$server_name$1;
        }
[root@lb1 conf.d]# cd ..
[root@lb1 nginx]# vim nginx_params
proxy_set_header Host $http_host;
proxy_set_header X-Real-IP $remote_addr;
proxy_set_header X-Forwarded-For $proxy_add_x_forwarded_for;
proxy_connect_timeout 30;
proxy_send_timeout 60;
proxy_read_timeout 60;

proxy_buffering on;
proxy_buffer_size 32k;
proxy_buffers 4 128k;
[root@lb1 conf.d]# scp -rp root@192.168.1.7:/etc/nginx/ssl_key /etc/nginx/ //复制证书
[root@lb1 conf.d]# nginx -t
[root@lb1 conf.d]# systemctl restart nginx
2. 高可用
[root@lb1 ~]# yum -y install keepalived
[root@lb1 ~]# vim /etc/keepalived/keepalived.conf
global_defs {
   router_id lb1 //修改路由名称
   vrrp_strict //删除此行
}
vrrp_instance VI_1 {
    state MASTER
    interface ens33 //指定网卡信息
    virtual_router_id 51
    priority 100
    advert_int 1
    authentication {
        auth_type PASS
        auth_pass 1111
    }
    virtual_ipaddress {
        192.168.1.200 //指定漂移地址
    }
}
[root@lb1 ~]# systemctl start keepalived
查看漂移地址
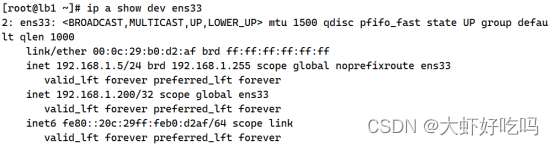
1. 负载均衡
[root@lb2 ~]# rpm -ivh /media/nginx-rpm/* --nodeps --force

[root@lb2 ~]# scp -rp root@192.168.1.5:/etc/nginx/* /etc/nginx/

[root@lb2 ~]# cd /etc/nginx/conf.d/

[root@lb2 conf.d]# rm -rf default.conf

[root@lb2 conf.d]# systemctl start nginx
2. 高可用
[root@lb2 ~]# yum -y install keepalived
[root@lb2 ~]# vim /etc/keepalived/keepalived.conf
global_defs {
   router_id lb2 //修改路由名称
   vrrp_strict //删除此行
}
vrrp_instance VI_1 {
    state BACKUP //指定为备份主机
    interface ens33 //指定网卡信息
    virtual_router_id 51
    priority 99 //指定优先级
    advert_int 1
    authentication {
        auth_type PASS
        auth_pass 1111
    }
    virtual_ipaddress {
        192.168.1.200 //指定漂移地址
    }
}
[root@lb2 ~]# systemctl start keepalived删掉之前配置的hosts文件,指定IP为漂移地址。
[root@client ~]# vim /etc/hosts
192.168.1.200 blog.benet.com
客户机访问blog.benet.com会自动转为https://blog.benet.com登录博客就成功了。

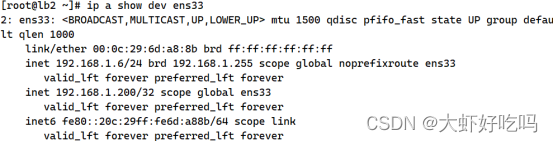
通过关闭lb1的keepalived,查看lb2主机的ip地址, 确认漂移地址转到lb2主机上。继续访问浏览器发现 可以正常访问。
开启lb1的 keepalived服务器,关闭nginx服务并访问网页会发现无法访问网页的问题,下面将解决这一问题。
[root@lb1 ~]# systemctl start keepalived
[root@lb1 ~]# systemctl stop nginx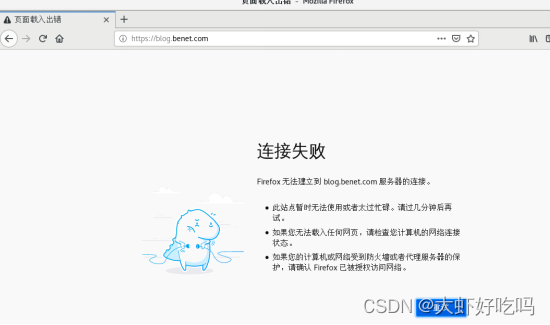
[root@lb1 ~]# mkdir /sh
[root@lb1 ~]# vim /sh/check_nginx_proxy.sh
#!/bin/bash
killall  -0  nginx
if  [ $? -ne 0 ];then
  systemctl stop keepalived
fi
[root@lb1 ~]# chmod +x /sh/check_nginx_proxy.sh
[root@lb1 ~]# vim /etc/keepalived/keepalived.conf //将脚本追踪模块添加到keepalived配置文件
vrrp_script check_nginx_proxy {
        script "/sh/check_nginx_proxy.sh"
        interval 2
        weight 5
        }
vrrp_instance VI_1 { //分别在此模块内和上方添加两个模块
    state MASTER
    interface ens33
    virtual_router_id 51
    priority 100
    advert_int 1
    authentication {
        auth_type PASS
        auth_pass 1111
    }
    virtual_ipaddress {
        192.168.1.200
    }
    track_script {
        check_nginx_proxy
        }
}
[root@lb1 ~]# systemctl restart keepalived
重启后验证关闭lb1主机的nginx服务,发现依旧可以访问论坛表明成功了。
[root@lb1 ~]# systemctl stop nginx
现lnmp的负载均衡及高可用功能均已实现,但客户机仍服务直接访问后放mysql及web等主机,通过客户机访问代理服务器转跳至目标主机。
分别连接web1、nfs主机,连接mysql数据库,客户端通过访问虚拟端口连接。
[root@lb1 ~]# vim /etc/nginx/nginx.conf
//在http字段上方添加
stream {
        upstream web1 {
                server 192.168.1.7:22;
        }
        upstream mysql {
                server 192.168.1.9:3306;
        }
        upstream nfs {
                server 192.168.1.11:22;
        }
        server {
                listen  5555;
                proxy_pass web1;
                proxy_connect_timeout 30;
                proxy_timeout 60;
        }
         server {
                listen 7777;
                proxy_pass mysql;
                proxy_connect_timeout 30;
                proxy_timeout 60;
        }
         server {
                listen 9999;
                proxy_pass nfs;
                proxy_connect_timeout 30;
                proxy_timeout 60;
        }
}
[root@lb1 ~]# nginx -t
[root@lb1 ~]# systemctl restart nginx
把此文件复制到lb2主机上,实现负载均衡。
[root@lb2 ~]# scp -rp  root@192.168.1.5:/etc/nginx/nginx.conf /etc/nginx/

[root@lb2 ~]# systemctl restart nginx连接web1服务器测试成功。

连接nfs服务器测试成功 。

mysql服务器因为指定的3306端口,先需要使用win端软件连接直接登录mysql数据库。
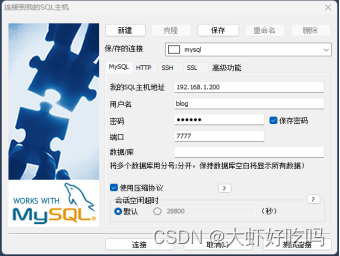
通过SQLyog连接就可以看到数据库表中的内容了。

以上便是实验的全部过程,注意分清主机名称,思考含义。出现问题排除问题,检查问题,重点关注配置文件。
我在app/helpers/sessions_helper.rb中有一个帮助程序文件,其中包含一个方法my_preference,它返回当前登录用户的首选项。我想在集成测试中访问该方法。例如,这样我就可以在测试中使用getuser_path(my_preference)。在其他帖子中,我读到这可以通过在测试文件中包含requiresessions_helper来实现,但我仍然收到错误NameError:undefinedlocalvariableormethod'my_preference'.我做错了什么?require'test_helper'require'sessions_hel
我的rails3.1.6应用程序中有一个自定义访问器方法,它为一个属性分配一个值,即使该值不存在。my_attr属性是一个序列化的哈希,除非为空白,否则应与给定值合并指定了值,在这种情况下,它将当前值设置为空值。(添加了检查以确保值是它们应该的值,但为简洁起见被删除,因为它们不是我的问题的一部分。)我的setter定义为:defmy_attr=(new_val)cur_val=read_attribute(:my_attr)#storecurrentvalue#makesureweareworkingwithahash,andresetvalueifablankvalueisgiven
我正在尝试在ruby脚本中连接到服务器https://www.xpiron.com/schedule。但是,当我尝试连接时:require'open-uri'doc=open('https://www.xpiron.com/schedule')我收到以下错误消息:OpenSSL::SSL::SSLError:SSL_connectreturned=1errno=0state=SSLv2/v3readserverhelloA:sslv3alertunexpectedmessagefrom/usr/local/lib/ruby/1.9.1/net/http.rb:678:in`conn
我正在使用Rails3.2.6和Stipe进行支付。是否有可能在不购买ssl证书的情况下进行付款。我可以使用Stripe页面作为我的支付页面吗? 最佳答案 您可以使用stripe.js在技术上跳过SSL但我强烈建议您设置SSL。它所做的是将信用卡信息直接传递给stripe,然后stripe会给你一个token,用于实际进行收费。这样做意味着信用卡信息永远不会接触您的服务器,您不必担心PCI合规性。但是,您仍应设置SSL以防止中间人攻击。您可以在https://stripe.com/docs/tutorials/forms找到有关如何
尝试通过SSL连接到ImgurAPI时出现错误。这是代码和错误:API_URI=URI.parse('https://api.imgur.com')API_PUBLIC_KEY='Client-ID--'ENDPOINTS={:image=>'/3/image',:gallery=>'/3/gallery'}#Public:Uploadanimage##args-Theimagepathfortheimagetoupload#defupload(image_path)http=Net::HTTP.new(API_URI.host)http.use_ssl=truehttp.verify
我编写了一个使用ruby线程的代码。require'rubygems'require'net/http'require'uri'defget_response()uri=URI.parse('https://..........')http=Net::HTTP.new(uri.host,uri.port)http.use_ssl=true----------endt1=[]15.timesdo|i|t1[i]=Thread.new{hit_mdm(i)sleep(rand(0)/10.0)}endt1.each{|t|t.join}代码工作正常,但是当程序执行到最后时它会抛出以下错
有没有办法在liquidtemplate中输出(用于调试/信息目的)可用对象和对象属性??也就是说,假设我正在使用jekyll站点生成工具,并且我在我的index.html模板中(据我所知,这是一个液体模板)。它可能看起来像这样{%forpostinsite.posts%}{{post.date|date_to_string}}»{{post.title}}{%endfor%}是否有任何我可以使用的模板标签会告诉我/输出名为post的变量在此模板(以及其他模板)中可用。此外,是否有任何模板标签可以告诉我post对象具有键date、title、url、摘录、永久链接等
我正在运行本地puma服务器,但无法在SSL下加载资源。我有一个本地签名的证书。我正在尝试使用以下配置运行服务器:puma-b'ssl://127.0.0.1:9292?key=/path/to/certs/localhost.unecrypted.key&cert=/path/to/certs/localhost.crt'现在,当我访问https://localhost:9292或https://127.0.0.1:9292时,浏览器只是旋转并且没有来自服务器的响应。不返回任何资源。它两次向我显示HTML标题标签,但几乎总是什么也得不到。有什么想法吗?其他想法?确实需要在本地运行此应
在安装了openssllib的linux机器上,当您执行带有“-nodes”选项的“opensslpkcs12”时,您将获得带有未加密私钥的输出,但如果您跳过–nodes选项,则输出将具有加密的私钥。e.g.opensslpkcs12-intest.pfx-outtest.pem你应该看到像下面这样加密的私钥-----BEGINENCRYPTEDPRIVATEKEY-----MIIFDjBABgkqhkiGG7s=-----ENDENCRYPTEDPRIVATEKEY-----如何使用ruby的开放ssl库实现上述目标?这就是我用ruby生成私钥的方式:@private_key
我尝试在我的应用中只使用:symbols作为关键词。我尝试在:symbol=>logic或string=>UI/languagespecific之间做出严格的决定但我也得到了每个JSON的一些“值”(即选项等),因为JSON中没有:symbols,所以我调用的所有哈希都具有“with_indifferent_access”属性。但是:数组是否有相同的东西?像那样a=['std','elliptic',:cubic].with_indifferent_accessa.include?:std=>true?编辑:将rails添加到标签 最佳答案