文章目录
以下为个人搭建的一个简单博客系统页面,以后会不断改进,并且与后端结合,形成一个完整的博客系统
该博客系统页面是由 HTML + CSS + JavaScript 搭建的,如果没有了解过这些知识的友友,可以通过本人之前写好的几篇相关文章入门
文章一:《超多动图带你入门 HTML》
文章二:《两万字入门 CSS》
该博客系统页面现由4个部分组成,分别为:博客列表页、博客详情页、博客登录页、博客编辑页
针对每个页面后面都会进行页面和代码的展示,并且代码中含有个人的注释。为了方便下载使用,下面附上该博客系统页面的 Gitee 链接
Gitee 链接: https://gitee.com/bbbbbge/blog-system
页面展示:
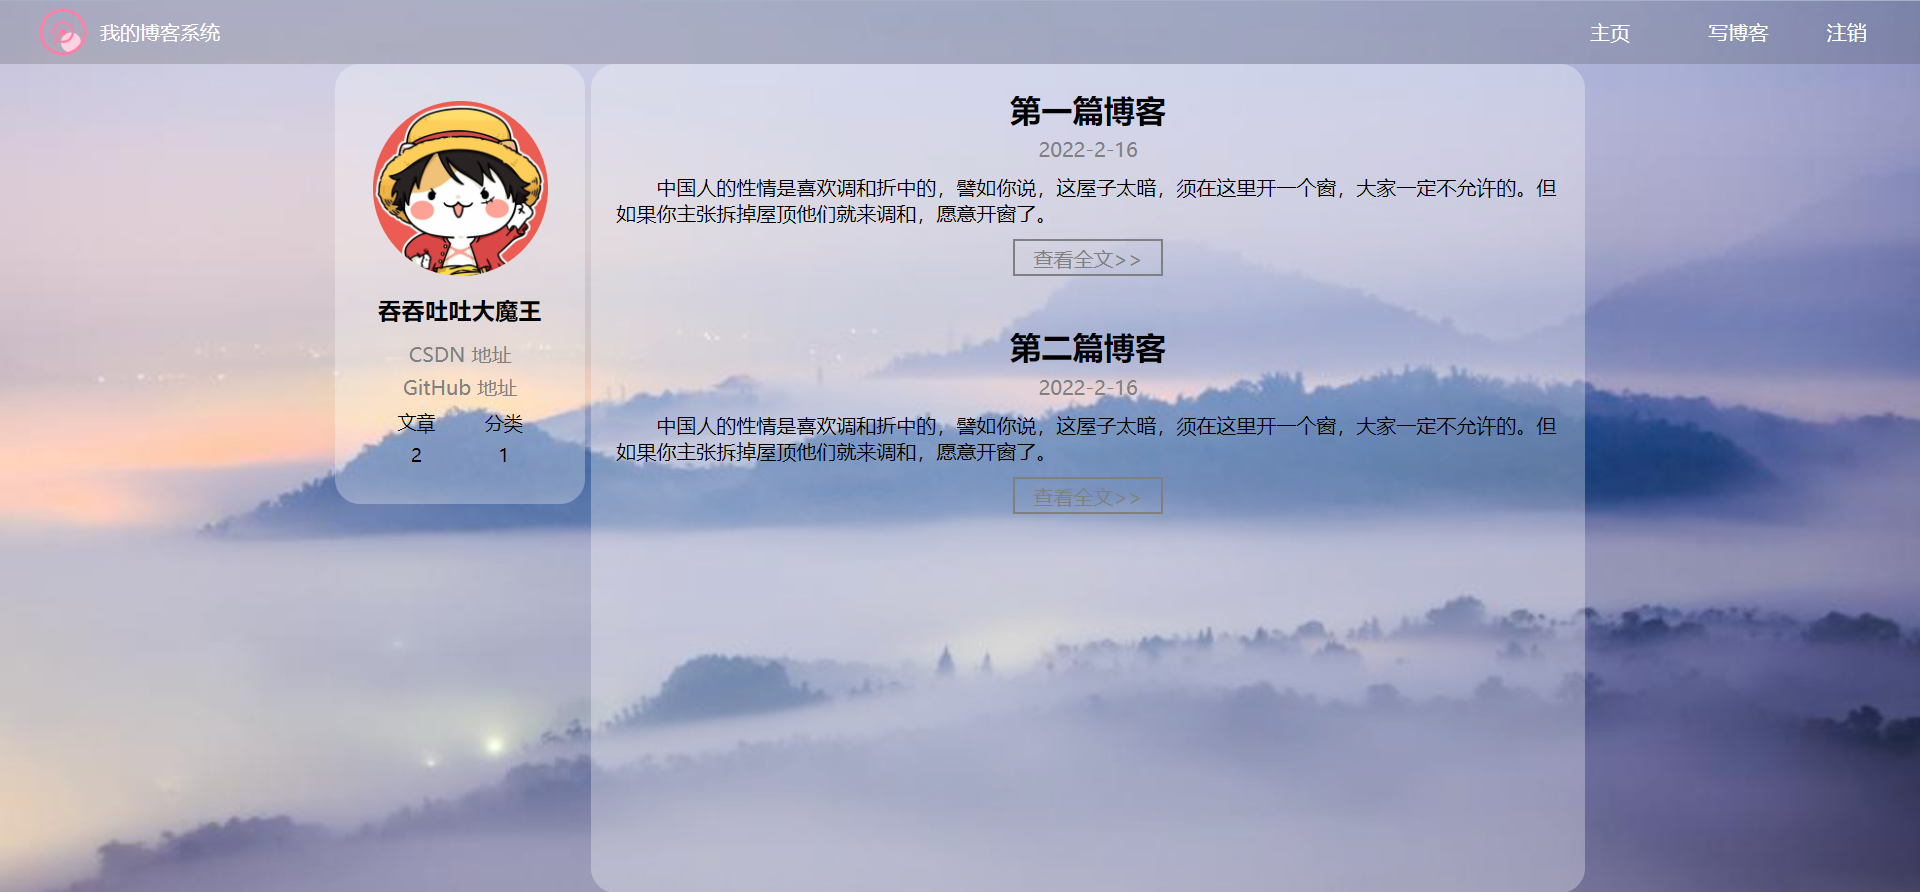
页面元素 HTML 代码: blog_list.html
<!DOCTYPE html>
<html lang="en">
<head>
<meta charset="UTF-8">
<meta http-equiv="X-UA-Compatible" content="IE=edge">
<meta name="viewport" content="width=device-width, initial-scale=1.0">
<title>博客列表页</title>
<link rel="stylesheet" href="css/common.css">
<link rel="stylesheet" href="css/blog_list.css">
</head>
<body>
<!-- 导航栏 -->
<div class="nav">
<img src="image/log.png" alt="">
<span class="title">我的博客系统</span>
<!-- 使用 span 把左右两侧的元素给撑开 -->
<span class="spacer"></span>
<a href="blog_list.html">主页</a>
<a href="blog_edit.html">写博客</a>
<a href="blog_login.html">注销</a>
</div>
<!-- 版心 -->
<div class="container">
<!-- 左侧区域,显示用户信息 -->
<div class="container-left">
<!-- 用户详情 -->
<div class="card">
<!-- 用户的头像 -->
<img src="image/head.jpg" alt="">
<!-- 用户名 -->
<h3>吞吞吐吐大魔王</h3>
<!-- 其它信息 -->
<a href="https://blog.csdn.net/weixin_51367845?type=blog">CSDN 地址</a>
<a href="#">GitHub 地址</a>
<!-- 文章分类 -->
<div class="counter">
<span>文章</span>
<span>分类</span>
</div>
<div class="counter">
<span>2</span>
<span>1</span>
</div>
</div>
</div>
<!-- 右侧区域,显示博客列表 -->
<div class="container-right">
<!-- 每个 blog 代表一篇博客 -->
<div class="blog">
<div class="title">第一篇博客</div>
<div class="date">2022-2-16</div>
<div class="desc">
中国人的性情是喜欢调和折中的,譬如你说,这屋子太暗,须在这里开一个窗,大家一定不允许的。但如果你主张拆掉屋顶他们就来调和,愿意开窗了。
</div>
<a href="blog_detail.html" class="detail">查看全文>></a>
</div>
<div class="blog">
<div class="title">第二篇博客</div>
<div class="date">2022-2-16</div>
<div class="desc">
中国人的性情是喜欢调和折中的,譬如你说,这屋子太暗,须在这里开一个窗,大家一定不允许的。但如果你主张拆掉屋顶他们就来调和,愿意开窗了。
</div>
<a href="blog_detail.html" class="detail">查看全文>></a>
</div>
</div>
</div>
</body>
</html>
专属页面样式 CSS 代码: blog_list.css
/* 这个 CSS 专门针对博客列表页来设置样式 */

.blog {
    width: 100%;
    padding: 10px 20px;
}

/* 博客的标题 */
.blog .title {
    text-align: center;
    font-size: 25px;
    font-weight: 700;
    padding-top: 10px;
    padding-bottom: 5px;
}

/* 博客的日期 */
.blog .date {
    text-align: center;
    padding-bottom: 10px;
    color: grey;
}

/* 博客的描述 */
.blog .desc {
    text-indent: 2em;
}

/* 查看博客详情的按钮 */
.blog .detail {
    display: block;
    width: 120px;
    color: grey;
    height: 30px;
    /* 设置边框 */
    border: 2px solid grey;
    /* 文字水平居中 */
    text-align: center;
    /* 文字垂直居中 */
    line-height: 30px;
    /* 去掉下划线 */
    text-decoration: none;
    /* 让按钮来到屏幕中间 */
    margin: 10px auto;
    /* 加上一个过度效果 */
    transition: all 1s;
}

/* 实现鼠标悬停在按钮上时有一个背景色切换的效果 */
.blog .detail:hover {
    background-color: grey;
    color: white;
}
页面展示:
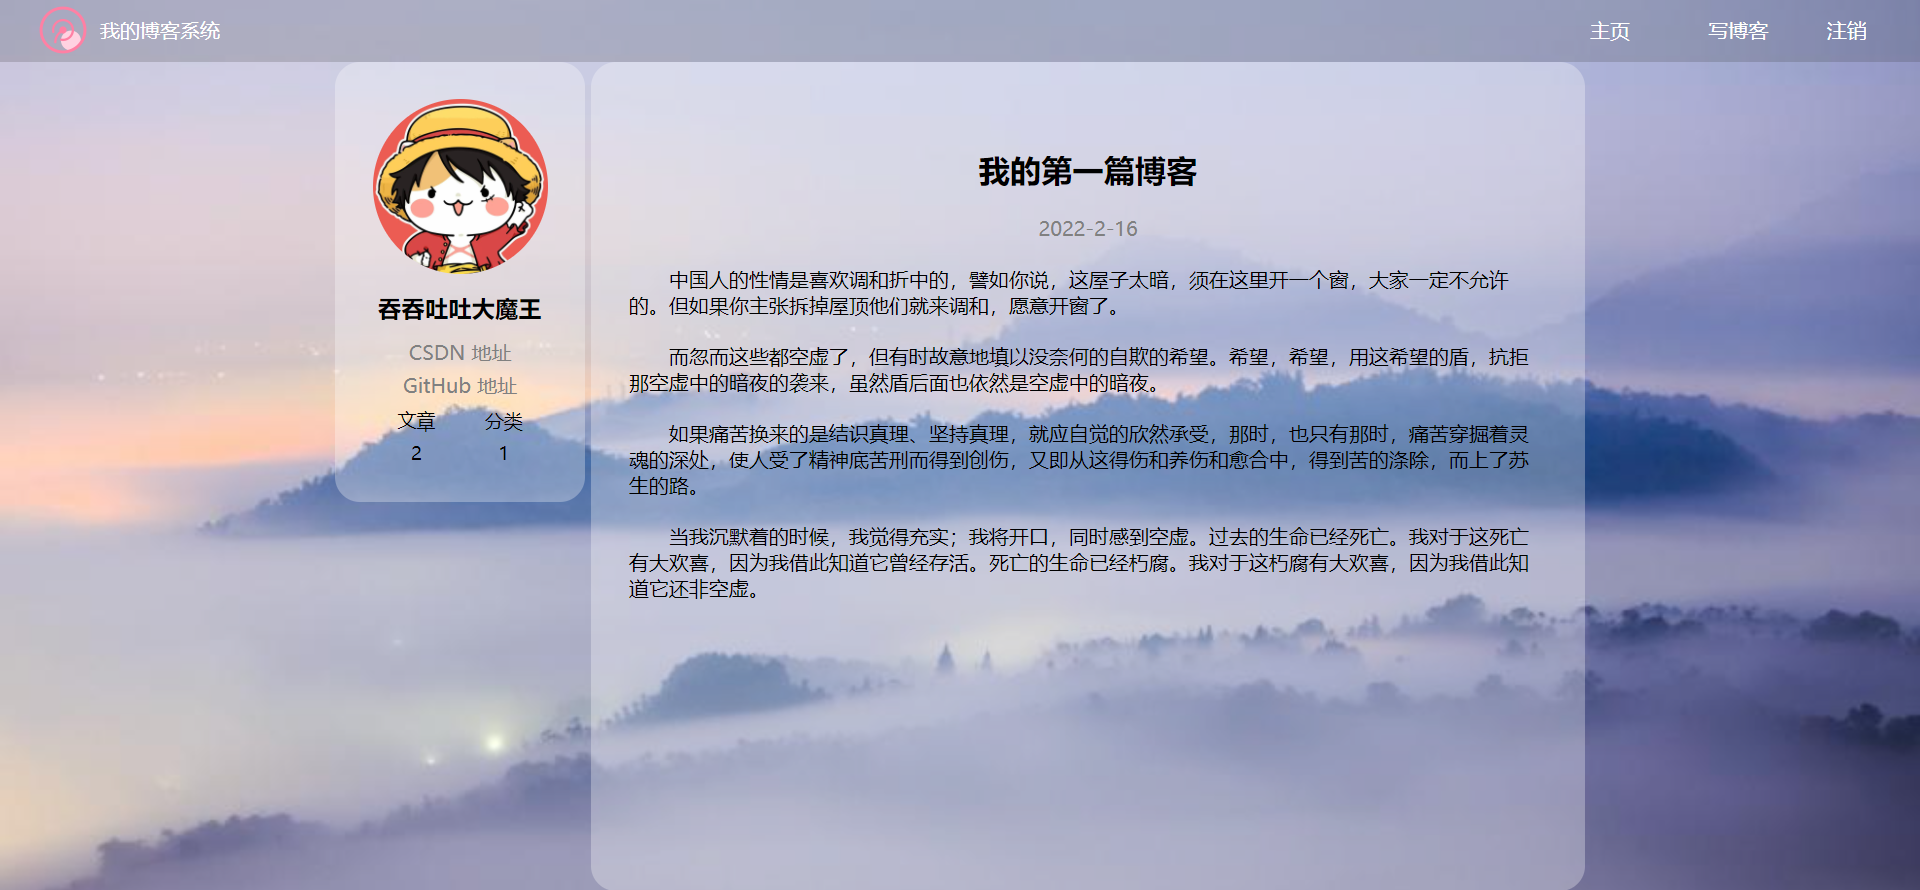
页面元素 HTML 代码: blog_detail.html
<!DOCTYPE html>
<html lang="en">
<head>
    <meta charset="UTF-8">
    <meta http-equiv="X-UA-Compatible" content="IE=edge">
    <meta name="viewport" content="width=device-width, initial-scale=1.0">
    <title>博客详情页</title>
    <link rel="stylesheet" href="css/common.css">
    <link rel="stylesheet" href="css/blog_detail.css">
</head>
<body>
    <!-- 导航栏 -->
    <div class="nav">
        <img src="image/log.png" alt="">
        <span class="title">我的博客系统</span>
         <!-- 使用 span 把左右两侧的元素给撑开 -->
         <span class="spacer"></span>
        <a href="blog_list.html">主页</a>
        <a href="blog_edit.html">写博客</a>
        <a href="blog_login.html">注销</a>
    </div>
    <!-- 版心 -->
    <div class="container">
        <!-- 左侧区域,显示用户信息 -->
        <div class="container-left">
            <!-- 用户详情 -->
            <div class="card">
                <!-- 用户的头像 -->
                <img src="image/head.jpg" alt="">
                <!-- 用户名 -->
                <h3>吞吞吐吐大魔王</h3>
                <!-- 其它信息 -->
                <a href="https://blog.csdn.net/weixin_51367845?type=blog">CSDN 地址</a>
                <a href="#">GitHub 地址</a>
                <!-- 文章分类 -->
                <div class="counter">
                    <span>文章</span>
                    <span>分类</span>
                </div>
                <div class="counter">
                    <span>2</span>
                    <span>1</span>
                </div>
            </div>
        </div>
        <!-- 右侧区域,显示博客列表 -->
        <div class="container-right">
            <!-- 使用这个 div 来放博客内容 -->
            <div class="blog-content">
                <!-- 博客的标题 -->
                <h3>我的第一篇博客</h3>
                <!-- 博客的日期 -->
                <div class="date">2022-2-16</div>
                <!-- 博客的内容 -->
                <div class="detail">
                    <p>
                        中国人的性情是喜欢调和折中的,譬如你说,这屋子太暗,须在这里开一个窗,大家一定不允许的。但如果你主张拆掉屋顶他们就来调和,愿意开窗了。
                    </p>
                    <p>
                        而忽而这些都空虚了,但有时故意地填以没奈何的自欺的希望。希望,希望,用这希望的盾,抗拒那空虚中的暗夜的袭来,虽然盾后面也依然是空虚中的暗夜。
                    </p>
                    <p>
                        如果痛苦换来的是结识真理、坚持真理,就应自觉的欣然承受,那时,也只有那时,痛苦穿掘着灵魂的深处,使人受了精神底苦刑而得到创伤,又即从这得伤和养伤和愈合中,得到苦的涤除,而上了苏生的路。
                    </p>
                    <p>
                        当我沉默着的时候,我觉得充实;我将开口,同时感到空虚。过去的生命已经死亡。我对于这死亡有大欢喜,因为我借此知道它曾经存活。死亡的生命已经朽腐。我对于这朽腐有大欢喜,因为我借此知道它还非空虚。
                    </p>
                </div>
        </div>
</body>
</html>
专属页面样式 CSS 代码: blog_detail.css
/* 这个 CSS 文件是用来放博客详情页的专属样式 */

.blog-content {
    padding: 30px;
}

/* 博客标题 */
.blog-content h3 {
    text-align: center;
    padding-top: 40px;
    padding-bottom: 20px;
    font-size: 25px;
}

/* 博客日期 */
.blog-content .date {
    text-align: center;
    padding-bottom: 10px;
    color: grey;
}

/* 博客内容 */
.blog-content p {
    text-indent: 2em;
    padding: 10px 0;
}
页面展示:
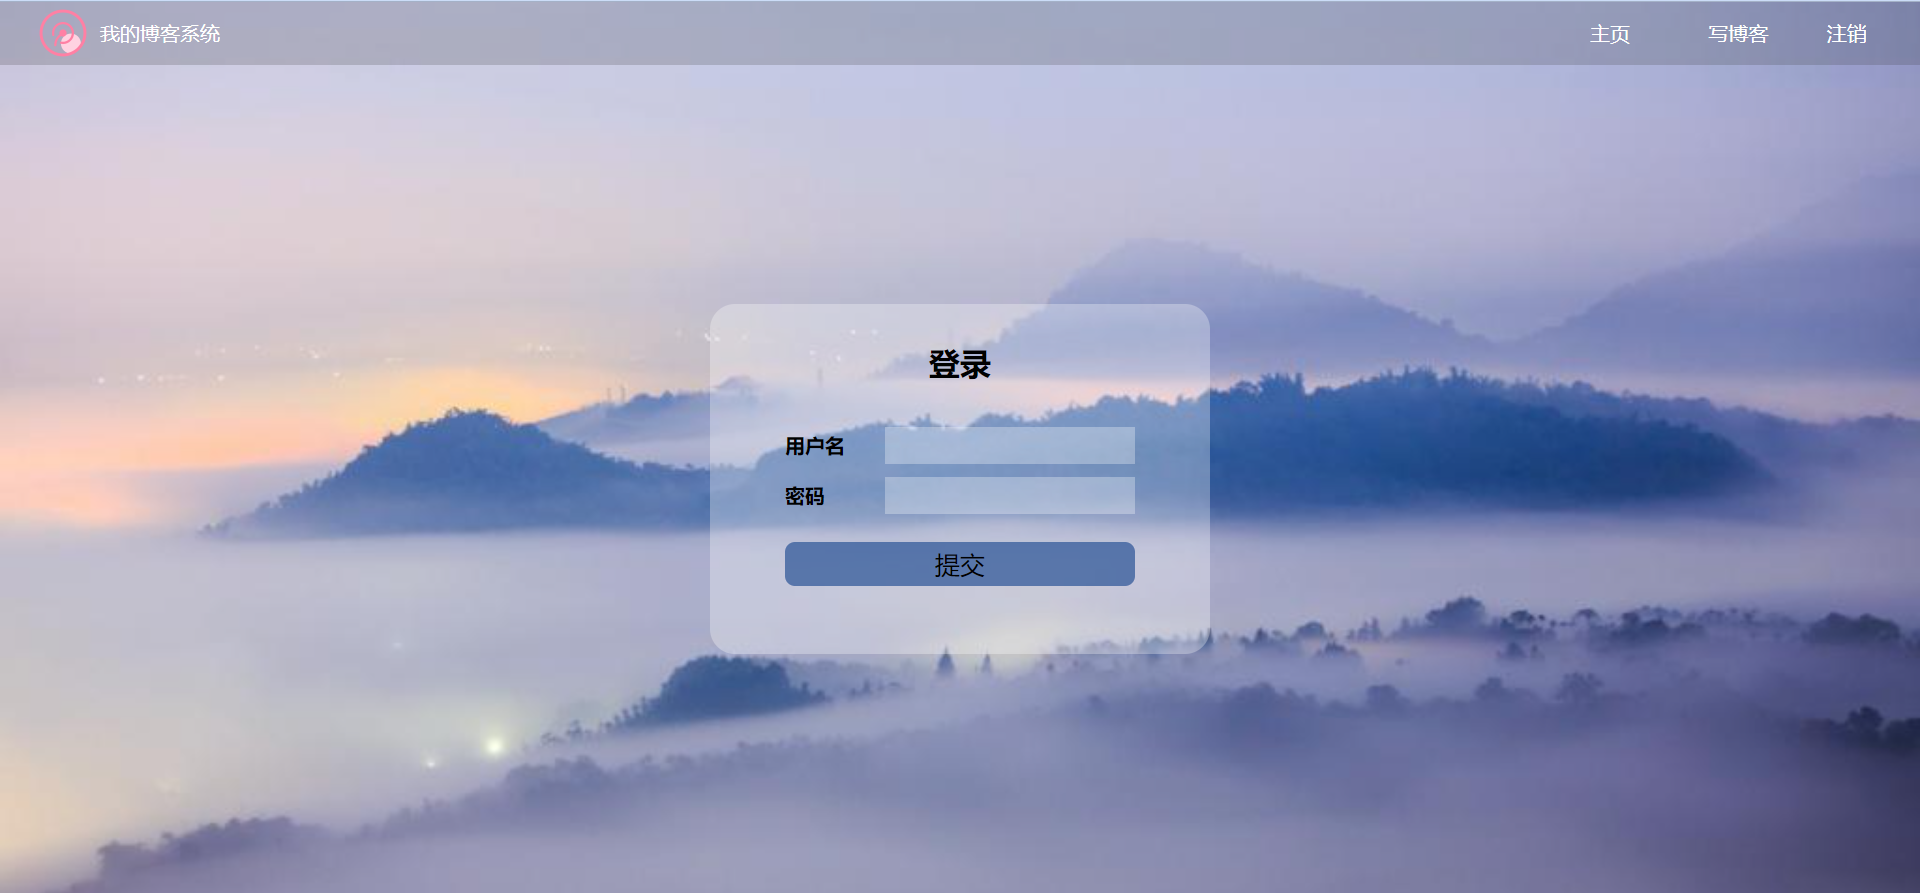
页面元素 HTML 代码: blog_login.html
<!DOCTYPE html>
<html lang="en">
<head>
    <meta charset="UTF-8">
    <meta http-equiv="X-UA-Compatible" content="IE=edge">
    <meta name="viewport" content="width=device-width, initial-scale=1.0">
    <title>登录页</title>
    <link rel="stylesheet" href="css/common.css">
    <link rel="stylesheet" href="css/blog-login.css">
</head>
<body>
    <!-- 导航栏 -->
    <div class="nav">
        <img src="image/log.png" alt="">
        <span class="title">我的博客系统</span>
         <!-- 使用 span 把左右两侧的元素给撑开 -->
         <span class="spacer"></span>
        <a href="blog_list.html">主页</a>
        <a href="blog_edit.html">写博客</a>
        <a href="blog_login.html">注销</a>
    </div>
    <!-- 登录页面的版心 -->
    <div class="login-container">
        <div class="login-dialog">
            <h3>登录</h3>
            <div class="row1">
                <span>用户名</span>
                <input type="text" id="username">
            </div>
            <div class="row1">
                <span>密码</span>
                <input type="password" id="password">
            </div>
            <div class="row2">
                <input type="button" value="提交" id="submit">
            </div>
        </div>
    </div>
</body>
</html>
专属页面样式 CSS 代码: blog_login.css
/* 这个 CSS 文件是放登陆页面的专属样式 */

/* 1. 设置版心,让这个版心将页面填充满 */
/* 2. 在版心中间位置,设置一个登陆区域 */
.login-container {
    width: 100%;
    height: calc(100% - 50px);

    display: flex;
    justify-content: center;
    align-items: center;
}

.login-container .login-dialog {
    width: 400px;
    height: 280px;
    background-color: rgba(255, 255, 255, 0.3);
    border-radius: 20px;
}

.login-dialog h3 {
    text-align: center;
    padding: 30px;
    font-size: 25px;
}

.login-dialog .row1 {
    height: 40px;
    display: flex;
    align-items: center;
    justify-content: center;
}

.login-dialog .row2 {
    height: 40px;
    display: flex;
    align-items: center;
    justify-content: center;
    padding-top: 30px;
}

.login-dialog .row1 span {
    width: 80px;
    font-weight: 700;
}

.login-dialog .row1 input {
    width: 200px;
    height: 30px;
    font-size: 15px;
    padding-left: 10px;
    background-color: rgba(255, 255, 255, 0.3);
    /* 去掉边框 */
    border: none;
    /* 去掉轮廓线(选中输入框时,外面的黑边) */
    outline: none;
}

.login-dialog .row2 input {
    width: 280px;
    height: 35px;
    border-radius: 8px;
    font-size: 20px;
    background-color: rgba(41, 83, 149, 0.7);
    border: none;
}

.login-dialog .row2 input:active {
    background-color: black;
    color: white;
}
页面展示:
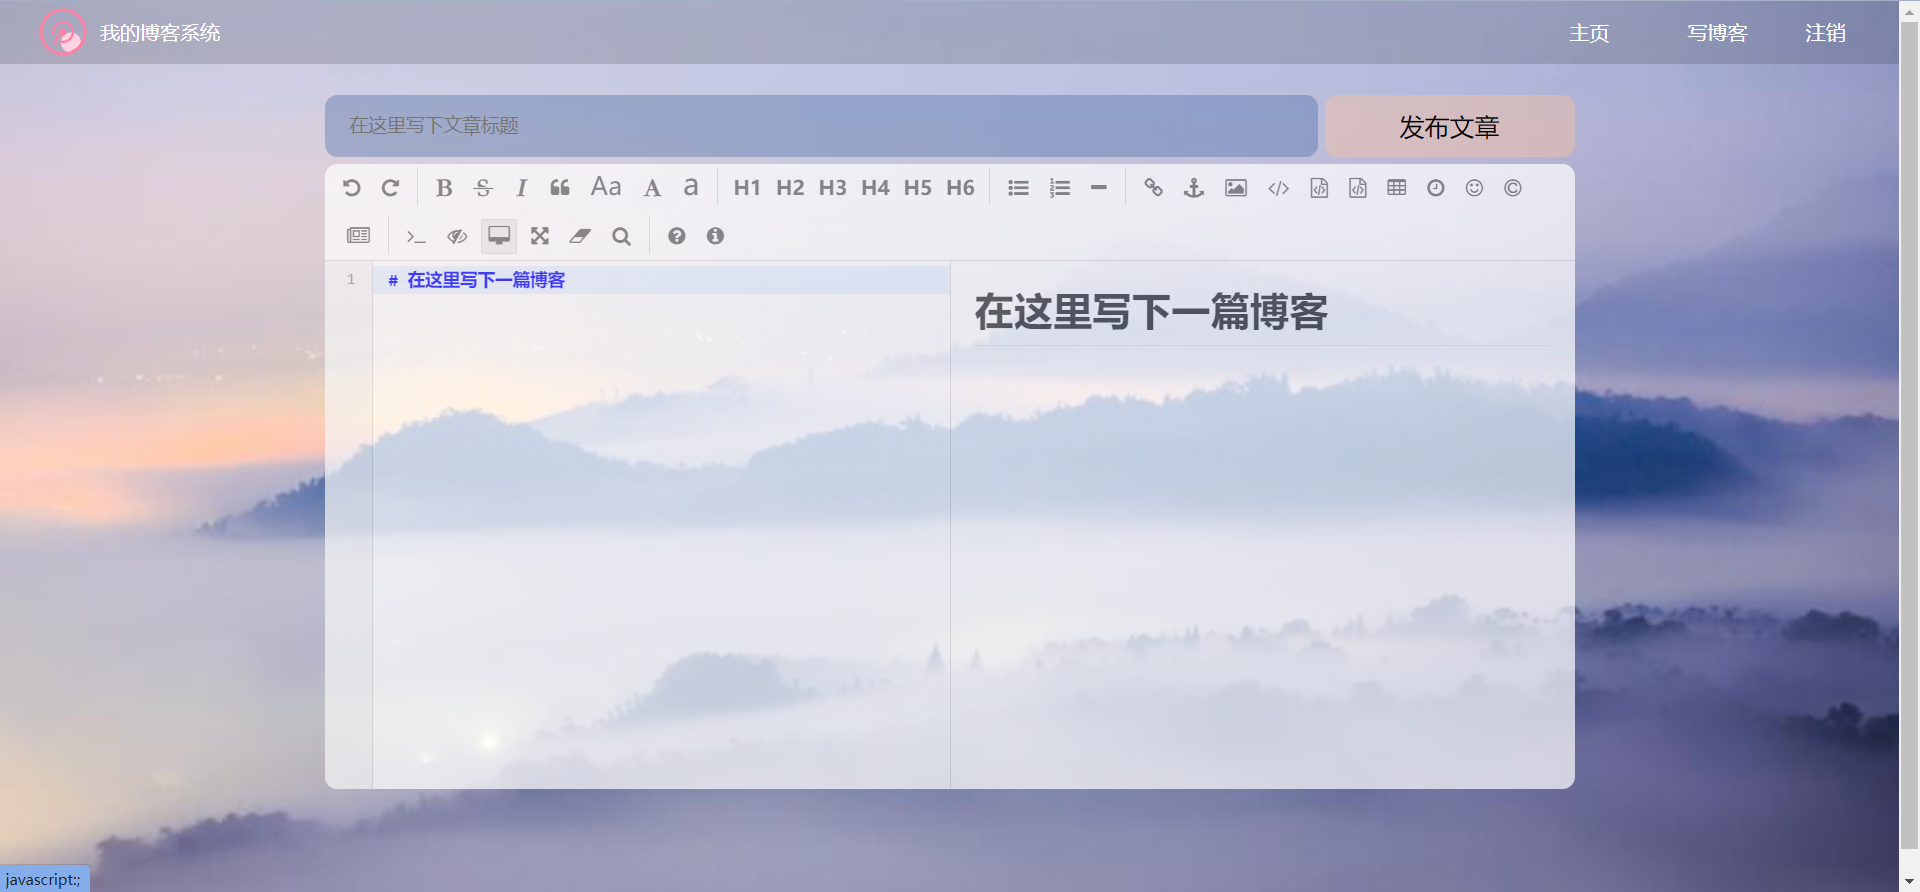
页面元素 HTML 代码: blog_edit.html
<!DOCTYPE html>
<html lang="en">
<head>
    <meta charset="UTF-8">
    <meta http-equiv="X-UA-Compatible" content="IE=edge">
    <meta name="viewport" content="width=device-width, initial-scale=1.0">
    <title>博客编辑页</title>
    <link rel="stylesheet" href="css/common.css">
    <link rel="stylesheet" href="css/blog_edit.css">
    <!-- 引入依赖 -->
    <link rel="stylesheet" href="editor.md-master/css/editormd.min.css">
    <script src="https://cdn.bootcdn.net/ajax/libs/jquery/3.6.0/jquery.min.js"></script>
    <script src="editor.md-master/lib/marked.min.js"></script>
    <script src="editor.md-master/lib/prettify.min.js"></script>
    <script src="editor.md-master/editormd.js"></script>
</head>
<body>
    <!-- 导航栏 -->
    <div class="nav">
        <img src="image/log.png" alt="">
        <span class="title">我的博客系统</span>
         <!-- 使用 span 把左右两侧的元素给撑开 -->
         <span class="spacer"></span>
        <a href="blog_list.html">主页</a>
        <a href="blog_edit.html">写博客</a>
        <a href="blog_login.html">注销</a>
    </div>
    <!-- 版心 -->
    <div class="blog-edit-container">
        <!-- 标题编辑区 -->
        <div class="title">
            <input type="text" placeholder="在这里写下文章标题" id="title">
            <input type="button" value="发布文章" id="submit">
        </div>
        <!-- 内容编辑区 -->
        <div id="editor">

        </div>
    </div>

    <script>
        // 初始化 editor.md
        let editor = editormd("editor", {
            // 这里的尺寸必须在这里设置,设置样式会被 editormd 自动覆盖
            width: "100%",
            // 设定编辑高度
            height: "500px",
            // 编辑页中的初始化内容
            markdown: "# 在这里写下一篇博客",
            //指定 editor.md 依赖的插件路径
            path: "editor.md-master/lib/"
        });
    </script>
</body>
</html>
专属页面样式 CSS 代码: blog_edit.css
/* 这个 CSS 文件放博客编辑的专属样式 */

/* 博客编辑页的版心 */
.blog-edit-container {
    width: 1000px;
    height: calc(100% - 50px);
    margin: 0 auto;
}

/* 标题编辑区 */
.blog-edit-container .title {
    margin-top: 20px;
    width: 100%;
    height: 60px;
    display: flex;
    align-items: center;
    justify-content: space-between;
}

.blog-edit-container .title #title {
    width: 795px;
    height: 50px;
    border-radius: 10px;
    padding-left: 20px;
    border: none;
    outline: none;
    background-color: rgba(41, 83, 149, 0.3);
    font-size: 15px;
}

.blog-edit-container .title #submit {
    width: 200px;
    height: 50px;
    border-radius: 10px;
    border: none;
    outline: none;
    background-color: rgba(255, 192 , 153, 0.4);
    font-size: 20px;
}

.blog-edit-container .title #submit:active {
    background-color: rgba(41, 83, 149, 0.3);
}

#editor {
    border-radius: 10px;
    border: none;
    opacity: 0.7;
}
公共页面样式 CSS 代码: common.css
/* 这个文件里面放4个页面公共的一些样式,比如背景、导航栏等 */

* {
    margin: 0;
    padding: 0;
    box-sizing: border-box;
}

html, body {
    /* 和父元素的一样高,body 的父亲是 html,html 的父亲是浏览器窗口 */
    height: 100%;
    /* 页面背景 */
    background-image: url(../image/background.jpg);
    background-position: center center;
    background-repeat: no-repeat;
    background-size: cover;
}

/* 导航栏 */
.nav {
    width: 100%;
    height: 50px;
    background-color: rgba(50, 50, 50, 0.2);
    color: #fff;
    display: flex;
    justify-content: start;
    align-items: center;
}

/* 导航栏中的 log */
.nav img {
    width: 40px;
    height: 40px;
    margin-left: 30px;
    margin-right: 10px;
}

/* 导航栏中的标题 */
.nav .title {
    width: 120px;
}

/* 导航栏中的占位符 */
.nav .spacer {
    height: 40px;
    width: calc(100% - 370px);
}

/* 导航栏中的链接 */
.nav a {
    width: 60px;
    margin: 20px;
    text-decoration: none;
    color: white;
}

/* 版心的样式 */
.container {
    height: calc(100% - 50px);
    width: 1000px;
    margin: 0 auto;
    /* 为了让版心里面的子元素能够以左右布局的方式显示,使用 flex 布局 */
    display: flex;
    align-items: center;
    justify-content: space-between;
}

/* 左侧区域样式 */
.container .container-left {
    height: 100%;
    width: 200px;
}

/* 右侧区域样式 */
.container .container-right {
    height: 100%;
    width: 795px;
    background-color: rgba(255, 255, 255, 0.3);
    border-radius: 20px;
}

/* 用户信息卡片,也会在多个页面中用到 */
.card {
    background-color: rgba(255, 255, 255, 0.3);
    border-radius: 20px;
    padding: 30px;
}

/* 用户头像 */
.card img {
    width: 140px;
    height: 140px;
    border-radius: 50%;
}

/* 用户名 */
.card h3 {
    text-align: center;
    padding: 10px 0;
}

/* 其它信息 */
.card a {
    /* a 标签是行内元素,设置尺寸、边距都可能失效,要转成块级元素 */
    display: block;
    text-decoration: none;
    text-align: center;
    color: grey;
    padding: 3px;
}

.card .counter {
    display: flex;
    justify-content: space-around;
    font-size: 15px;
    padding-top: 5px;
}
在博客编辑页中含有一个 markdown 编辑器,这个是直接引入了一个叫 editor.md 的开源的页面 markdown 编辑器组件,大家也可以使用其它的编辑器组件
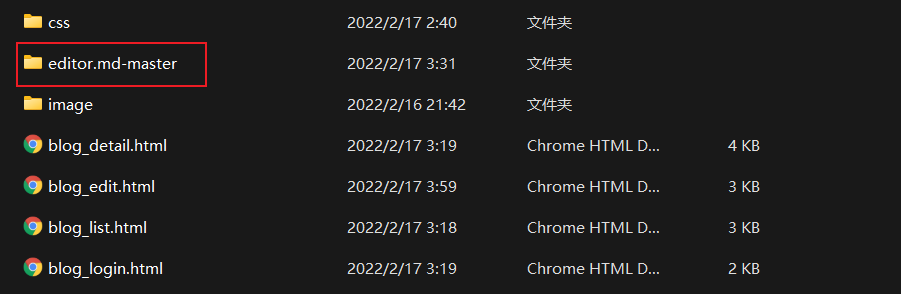
引入 editor.md 步骤:
下载 editor.md
大家直接进入该项目的官网进行下载即可
将下载好的 editor.md 接压缩到该博客项目中
在博客编辑页中引入 editor.md 依赖
<!-- 引入依赖 -->
<link rel="stylesheet" href="editor.md-master/css/editormd.min.css">
<script src="https://cdn.bootcdn.net/ajax/libs/jquery/3.6.0/jquery.min.js"></script>
<script src="editor.md-master/lib/marked.min.js"></script>
<script src="editor.md-master/lib/prettify.min.js"></script>
<script src="editor.md-master/editormd.js"></script>
在博客编辑页中,写个 JS 对 editor.md 进行初始化
// 初始化 editor.md
let editor = editormd("editor", {
    // 这里的尺寸必须在这里设置,设置样式会被 editormd 自动覆盖
    width: "100%",
    // 设定编辑高度
    height: "500px",
    // 编辑页中的初始化内容
    markdown: "# 在这里写下一篇博客",
    //指定 editor.md 依赖的插件路径
    path: "editor.md-master/lib/"
});
通过以上步骤,就可以将 editor.md 该 markdown 编辑器引入我们的博客编辑页了
该博客系统页面只是运用前段时间学习的前端知识做出来的一个简单的页面,往后会通过不断的学习来对该博客系统进行补充,期待它的成品!
有没有办法在这个简单的get方法中添加超时选项?我正在使用法拉第3.3。Faraday.get(url)四处寻找,我只能先发起连接后应用超时选项,然后应用超时选项。或者有什么简单的方法?这就是我现在正在做的:conn=Faraday.newresponse=conn.getdo|req|req.urlurlreq.options.timeout=2#2secondsend 最佳答案 试试这个:conn=Faraday.newdo|conn|conn.options.timeout=20endresponse=conn.get(url
我想在Ruby中创建一个用于开发目的的极其简单的Web服务器(不,不想使用现成的解决方案)。代码如下:#!/usr/bin/rubyrequire'socket'server=TCPServer.new('127.0.0.1',8080)whileconnection=server.acceptheaders=[]length=0whileline=connection.getsheaders想法是从命令行运行这个脚本,提供另一个脚本,它将在其标准输入上获取请求,并在其标准输出上返回完整的响应。到目前为止一切顺利,但事实证明这真的很脆弱,因为它在第二个请求上中断并出现错误:/usr/b
我意识到这可能是一个非常基本的问题,但我现在已经花了几天时间回过头来解决这个问题,但出于某种原因,Google就是没有帮助我。(我认为部分问题在于我是一个初学者,我不知道该问什么......)我也看过O'Reilly的RubyCookbook和RailsAPI,但我仍然停留在这个问题上.我找到了一些关于多态关系的信息,但它似乎不是我需要的(尽管如果我错了请告诉我)。我正在尝试调整MichaelHartl'stutorial创建一个包含用户、文章和评论的博客应用程序(不使用脚手架)。我希望评论既属于用户又属于文章。我的主要问题是:我不知道如何将当前文章的ID放入评论Controller。
我的工作要求我为某些测试自动生成电子邮件。我一直在四处寻找,但未能找到可以快速实现的合理解决方案。它需要在outlook而不是其他邮件服务器中,因为我们有一些奇怪的身份验证规则,我们需要保存草稿而不是仅仅发送邮件的选项。显然win32ole可以做到这一点,但我找不到任何相当简单的例子。 最佳答案 假设存储了Outlook凭据并且您设置为自动登录到Outlook,WIN32OLE可以很好地完成此操作:require'win32ole'outlook=WIN32OLE.new('Outlook.Application')message=
电脑0x0000001A蓝屏错误怎么U盘重装系统教学分享。有用户电脑开机之后遇到了系统蓝屏的情况。系统蓝屏问题很多时候都是系统bug,只有通过重装系统来进行解决。那么蓝屏问题如何通过U盘重装新系统来解决呢?来看看以下的详细操作方法教学吧。 准备工作: 1、U盘一个(尽量使用8G以上的U盘)。 2、一台正常联网可使用的电脑。 3、ghost或ISO系统镜像文件(Win10系统下载_Win10专业版_windows10正式版下载-系统之家)。 4、在本页面下载U盘启动盘制作工具:系统之家U盘启动工具。 U盘启动盘制作步骤: 注意:制作期间,U盘会被格式化,因此U盘中的重要文件请注
在应用开发中,有时候我们需要获取系统的设备信息,用于数据上报和行为分析。那在鸿蒙系统中,我们应该怎么去获取设备的系统信息呢,比如说获取手机的系统版本号、手机的制造商、手机型号等数据。1、获取方式这里分为两种情况,一种是设备信息的获取,一种是系统信息的获取。1.1、获取设备信息获取设备信息,鸿蒙的SDK包为我们提供了DeviceInfo类,通过该类的一些静态方法,可以获取设备信息,DeviceInfo类的包路径为:ohos.system.DeviceInfo.具体的方法如下:ModifierandTypeMethodDescriptionstatic StringgetAbiList()Obt
一、引擎主循环UE版本:4.27一、引擎主循环的位置:Launch.cpp:GuardedMain函数二、、GuardedMain函数执行逻辑:1、EnginePreInit:加载大多数模块int32ErrorLevel=EnginePreInit(CmdLine);PreInit模块加载顺序:模块加载过程:(1)注册模块中定义的UObject,同时为每个类构造一个类默认对象(CDO,记录类的默认状态,作为模板用于子类实例创建)(2)调用模块的StartUpModule方法2、FEngineLoop::Init()1、检查Engine的配置文件找出使用了哪一个GameEngine类(UGame
//1.验证返回状态码是否是200pm.test("Statuscodeis200",function(){pm.response.to.have.status(200);});//2.验证返回body内是否含有某个值pm.test("Bodymatchesstring",function(){pm.expect(pm.response.text()).to.include("string_you_want_to_search");});//3.验证某个返回值是否是100pm.test("Yourtestname",function(){varjsonData=pm.response.json
在前面两节的例子中,主界面窗口的尺寸和标签控件显示的矩形区域等,都是用C++代码编写的。窗口和控件的尺寸都是预估的,控件如果多起来,那就不好估计每个控件合适的位置和大小了。用C++代码编写图形界面的问题就是不直观,因此Qt项目开发了专门的可视化图形界面编辑器——QtDesigner(Qt设计师)。通过QtDesigner就可以很方便地创建图形界面文件*.ui,然后将ui文件应用到源代码里面,做到“所见即所得”,大大方便了图形界面的设计。本节就演示一下QtDesigner的简单使用,学习拖拽控件和设置控件属性,并将ui文件应用到Qt程序代码里。使用QtDesigner设计界面在开始菜单中找到「Q
需求:要创建虚拟机,就需要给他提供一个虚拟的磁盘,我们就在/opt目录下创建一个10G大小的raw格式的虚拟磁盘CentOS-7-x86_64.raw命令格式:qemu-imgcreate-f磁盘格式磁盘名称磁盘大小qemu-imgcreate-f磁盘格式-o?1.创建磁盘qemu-imgcreate-fraw/opt/CentOS-7-x86_64.raw10G执行效果#ls/opt/CentOS-7-x86_64.raw2.安装虚拟机使用virt-install命令,基于我们提供的系统镜像和虚拟磁盘来创建一个虚拟机,另外在创建虚拟机之前,提前打开vnc客户端,在创建虚拟机的时候,通过vnc