近期需要将pytorch模型运行到android手机上实验,在查阅网上博客后,发现大多数流程需要借助多个框架或软件,横跨多个编程语言、IDE。本文参考以下两篇博文,力求用更简洁的流程实现模型部署。
https://blog.csdn.net/xiaodidididi521/article/details/123985612
https://blog.csdn.net/m0_67391683/article/details/125401357
向两位作者表示感谢!本文进一步详细描述了实现流程。
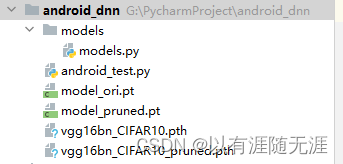
pytorch模型无法直接被Android调用,需要转化为特定格式.pt。本文使用pycharm IDE完成这一步,工程目录结构如下:

执行以下代码实现转换:
import torch.utils.data.distributed

'定义转化后的模型名称'
model_ori_pt ='model_ori.pt'
model_pruned_pt ='model_pruned.pt'

'加载pytorch模型'
model_ori = torch.load('vgg16bn_CIFAR10.pth')
model_pruned = torch.load('vgg16bn_CIFAR10_pruned.pth')

'模型在cpu上运行'
device = torch.device('cpu')
model_ori.to(device)
model_pruned.to(device)
model_ori.eval()
model_pruned.eval()

'定义输入图片的大小'
input_tensor = torch.rand(1, 3, 32, 32)

'转化模型并存储'
mobile_ori = torch.jit.trace(model_ori, input_tensor)
model_pruned = torch.jit.trace(model_pruned, input_tensor)
mobile_ori.save(model_ori_pt)
model_pruned.save(model_pruned_pt)
请注意,让模型在cpu上,或cuda上执行eval()均可,但要保证模型与input_tensor在同一设备上,否则将运行出错。运行后,会得到model_ori.pt与model_pruned.pt两个文件,即可以用于android上的文件。此时目录结构如下:
首先,需要在本地安装Android Studio,安装流程建议参照:
https://m.runoob.com/android/android-studio-install.html?ivk_sa=1024320u
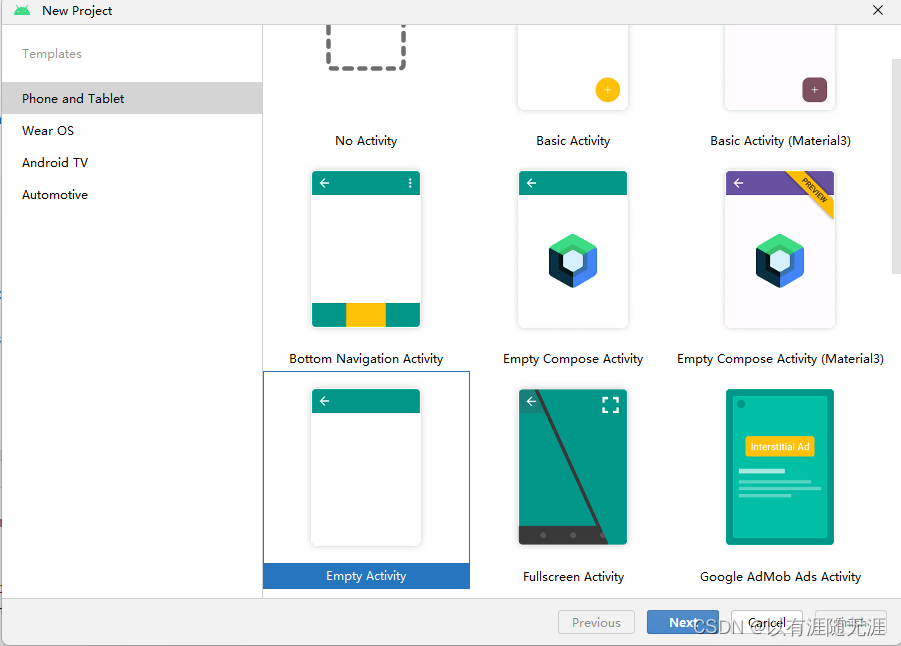
然后打开Android Studio新建Empy Activity
点击Next。
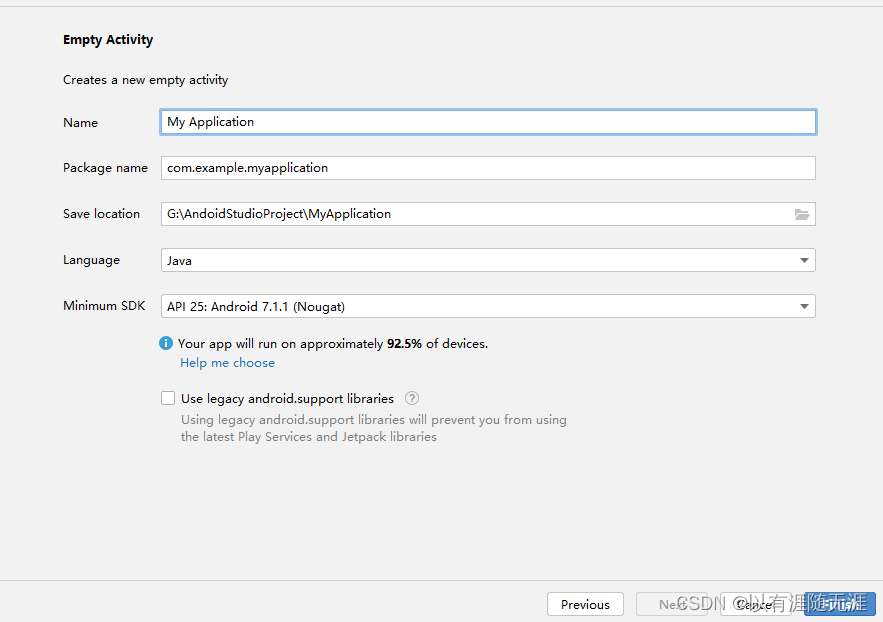
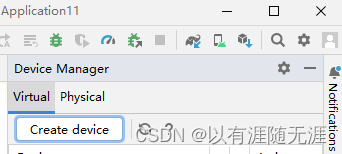
点击Finsh。SDK建议选择7.0以往的安卓版本。**首次新建工程底部会长时间出现加载进度条,请耐心等待加载完成。**接下来,我们需要有一部手机调试工程,本文使用Android Studio自带的模拟器。首先点击顶部工具栏的Device Manager。

点击create device
接下来选择机型、安卓版本、内存等,如不想麻烦可一直点击next。
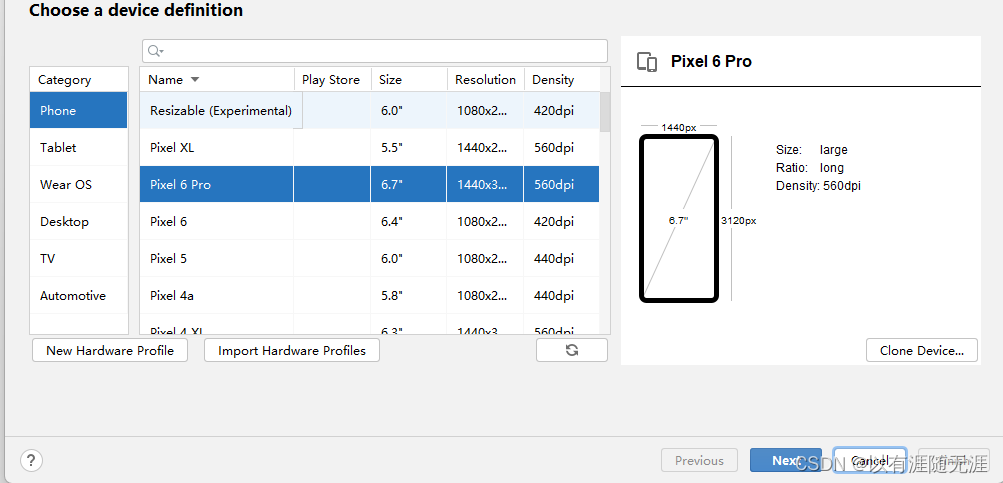
finsh后,Android Studio需要下载安卓版本包,需要耐心等待。下载完成后即可启动虚拟机。
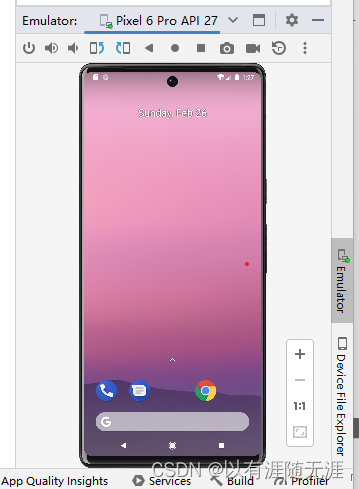
再shift+F10即可在模拟机里运行程序。
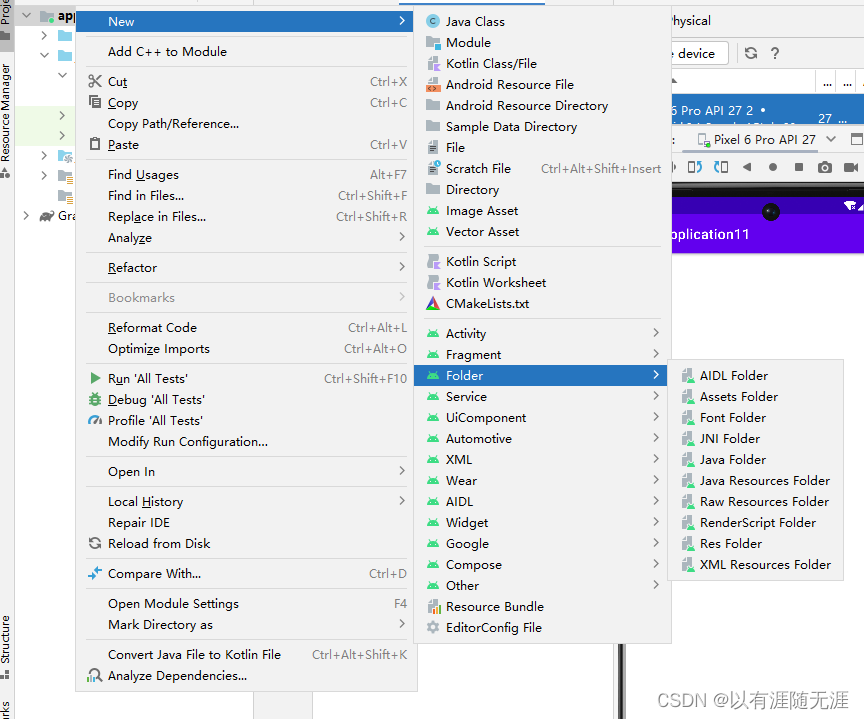
首先,新建assets文件夹,请不要直接新建,需右键app->Folder->Assets Folder。
之后将转化好的两个模型及侧视图放入assets文件夹。本文使用的是CIFAR10数据集,可在以下网址下载:
http://www.cs.toronto.edu/~kriz/cifar.html
然后在gradle Scripts 文件夹中的build.gradle(Module :app)文件中的depencies里添加:
implementation 'org.pytorch:pytorch_android:1.12.1'
implementation 'org.pytorch:pytorch_android_torchvision:1.12.1'
请注意**1.12.1是本文使用的pytorch版本,读者应该为对应的版本号。**然后点击工具栏下的sync now,再耐心等待运行按钮变绿。

双击res->layout->activity_main.xml并切换到code。

删除所有代码,复制以下代码段:
<?xml version="1.0" encoding="utf-8"?>
<FrameLayout xmlns:android="http://schemas.android.com/apk/res/android"
    xmlns:tools="http://schemas.android.com/tools"
    android:layout_width="match_parent"
    android:layout_height="match_parent"
    tools:context=".MainActivity">

    <ImageView
        android:id="@+id/image"
        android:layout_width="match_parent"
        android:layout_height="match_parent"
        android:scaleType="fitCenter" />

    <TextView
        android:id="@+id/text"
        android:layout_width="match_parent"
        android:layout_height="wrap_content"
        android:layout_gravity="top"
        android:textSize="24sp"
        android:textColor="@android:color/holo_red_light" />

</FrameLayout>
然后右键java里的com.example.工程名 文件夹,New->Java Class。本文新建的类名是CIfarClassed,类内代码:
package com.example.工程名;

public class CifarClassed {
    public static String[] IMAGENET_CLASSES = new String[]{
            "ddd",
            "automobile",
            "bird",
            "cat",
            "deer",
            "dog",
            "frog",
            "horse",
            "ship",
            "truck",
    };
}
最后打开java->com.example.工程名->MainActivity,删除原代码,用以下代码替代:
package com.example.dnna;

import android.content.Context;
import android.graphics.Bitmap;
import android.graphics.BitmapFactory;
import android.os.Bundle;
import android.util.Log;
import android.widget.ImageView;
import android.widget.TextView;

import org.pytorch.IValue;

import org.pytorch.Module;
import org.pytorch.Tensor;
import org.pytorch.torchvision.TensorImageUtils;
import org.pytorch.MemoryFormat;
import java.io.File;
import java.io.FileOutputStream;
import java.io.IOException;
import java.io.InputStream;
import java.io.OutputStream;

import androidx.appcompat.app.AppCompatActivity;

import com.example.dnna.CifarClassed;

public class MainActivity extends AppCompatActivity {

    @Override
    protected void onCreate(Bundle savedInstanceState) {
        super.onCreate(savedInstanceState);
        setContentView(R.layout.activity_main);

        Bitmap bitmap = null;
        Module module_ori = null;
        Module module_pruned = null;
        try {
            // creating bitmap from packaged into app android asset 'image.jpg',
            // app/src/main/assets/image.jpg
            bitmap = BitmapFactory.decodeStream(getAssets().open("x.png"));
            // loading serialized torchscript module from packaged into app android asset model.pt,
            // app/src/model/assets/model.pt
            module_ori = Module.load(assetFilePath(this, "model_ori.pt"));
            module_pruned = Module.load(assetFilePath(this, "model——pruned.pt"));
        } catch (IOException e) {
            Log.e("PytorchHelloWorld", "Error reading assets", e);
            finish();
        }

        // showing image on UI
        ImageView imageView = findViewById(R.id.image);
        imageView.setImageBitmap(bitmap);

        // preparing input tensor
        final Tensor inputTensor = TensorImageUtils.bitmapToFloat32Tensor(bitmap,
                TensorImageUtils.TORCHVISION_NORM_MEAN_RGB, TensorImageUtils.TORCHVISION_NORM_STD_RGB, MemoryFormat.CHANNELS_LAST);

        // running the model
        long startTime_ori = System.currentTimeMillis();
        final Tensor outputTensor_ori = module_ori.forward(IValue.from(inputTensor)).toTensor();
        long endTime_ori = System.currentTimeMillis();
        long InferenceTimeOri=endTime_ori - startTime_ori;

        long startTime_pruned = System.currentTimeMillis();
        final Tensor outputTensor_pruned = module_pruned.forward(IValue.from(inputTensor)).toTensor();
        long endTime_pruned = System.currentTimeMillis();
        long InferenceTimePruned=endTime_pruned - startTime_pruned;

        // getting tensor content as java array of floats
        final float[] scores = outputTensor_ori.getDataAsFloatArray();

        // searching for the index with maximum score
        float maxScore = -Float.MAX_VALUE;
        int maxScoreIdx = -1;
        for (int i = 0; i < scores.length; i++) {
            if (scores[i] > maxScore) {
                maxScore = scores[i];
                maxScoreIdx = i;
            }
        }
        System.out.println(maxScoreIdx);
        String className = CifarClassed.IMAGENET_CLASSES[maxScoreIdx];

        // showing className on UI
        TextView textView = findViewById(R.id.text);
        String tex="推理结果:"+className+"\n原始模型推理时间:"+InferenceTimeOri+"ms"+"\n剪枝模型推理时间:"+InferenceTimePruned+"ms";
        textView.setText(tex);
    }

    /**
     * Copies specified asset to the file in /files app directory and returns this file absolute path.
     *
     * @return absolute file path
     */
    public static String assetFilePath(Context context, String assetName) throws IOException {
        File file = new File(context.getFilesDir(), assetName);
        if (file.exists() && file.length() > 0) {
            return file.getAbsolutePath();
        }

        try (InputStream is = context.getAssets().open(assetName)) {
            try (OutputStream os = new FileOutputStream(file)) {
                byte[] buffer = new byte[4 * 1024];
                int read;
                while ((read = is.read(buffer)) != -1) {
                    os.write(buffer, 0, read);
                }
                os.flush();
            }
            return file.getAbsolutePath();
        }
    }
}
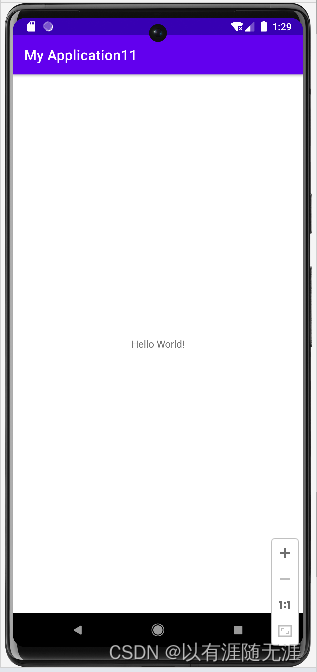
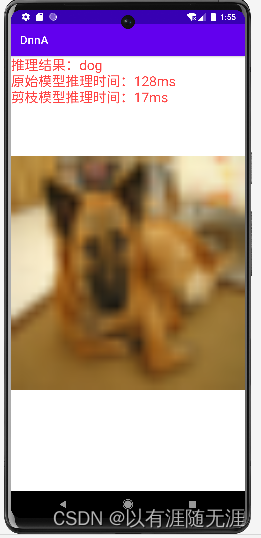
运行效果如下图:
本文的主要流程是:
本人目前希望提升自己的博客撰写水平,如读者在实现过程中遇到困难,或在阅读本文时感到困惑,欢迎留言或添加我的QQ:1106295085。我将在周日下午回复,并积极修改本文。
我正在学习如何使用Nokogiri,根据这段代码我遇到了一些问题:require'rubygems'require'mechanize'post_agent=WWW::Mechanize.newpost_page=post_agent.get('http://www.vbulletin.org/forum/showthread.php?t=230708')puts"\nabsolutepathwithtbodygivesnil"putspost_page.parser.xpath('/html/body/div/div/div/div/div/table/tbody/tr/td/div
总的来说,我对ruby还比较陌生,我正在为我正在创建的对象编写一些rspec测试用例。许多测试用例都非常基础,我只是想确保正确填充和返回值。我想知道是否有办法使用循环结构来执行此操作。不必为我要测试的每个方法都设置一个assertEquals。例如:describeitem,"TestingtheItem"doit"willhaveanullvaluetostart"doitem=Item.new#HereIcoulddotheitem.name.shouldbe_nil#thenIcoulddoitem.category.shouldbe_nilendend但我想要一些方法来使用
我有一个Ruby程序,它使用rubyzip压缩XML文件的目录树。gem。我的问题是文件开始变得很重,我想提高压缩级别,因为压缩时间不是问题。我在rubyzipdocumentation中找不到一种为创建的ZIP文件指定压缩级别的方法。有人知道如何更改此设置吗?是否有另一个允许指定压缩级别的Ruby库? 最佳答案 这是我通过查看rubyzip内部创建的代码。level=Zlib::BEST_COMPRESSIONZip::ZipOutputStream.open(zip_file)do|zip|Dir.glob("**/*")d
类classAprivatedeffooputs:fooendpublicdefbarputs:barendprivatedefzimputs:zimendprotecteddefdibputs:dibendendA的实例a=A.new测试a.foorescueputs:faila.barrescueputs:faila.zimrescueputs:faila.dibrescueputs:faila.gazrescueputs:fail测试输出failbarfailfailfail.发送测试[:foo,:bar,:zim,:dib,:gaz].each{|m|a.send(m)resc
很好奇,就使用rubyonrails自动化单元测试而言,你们正在做什么?您是否创建了一个脚本来在cron中运行rake作业并将结果邮寄给您?git中的预提交Hook?只是手动调用?我完全理解测试,但想知道在错误发生之前捕获错误的最佳实践是什么。让我们理所当然地认为测试本身是完美无缺的,并且可以正常工作。下一步是什么以确保他们在正确的时间将可能有害的结果传达给您? 最佳答案 不确定您到底想听什么,但是有几个级别的自动代码库控制:在处理某项功能时,您可以使用类似autotest的内容获得关于哪些有效,哪些无效的即时反馈。要确保您的提
假设我做了一个模块如下:m=Module.newdoclassCendend三个问题:除了对m的引用之外,还有什么方法可以访问C和m中的其他内容?我可以在创建匿名模块后为其命名吗(就像我输入“module...”一样)?如何在使用完匿名模块后将其删除,使其定义的常量不再存在? 最佳答案 三个答案:是的,使用ObjectSpace.此代码使c引用你的类(class)C不引用m:c=nilObjectSpace.each_object{|obj|c=objif(Class===objandobj.name=~/::C$/)}当然这取决于
我正在尝试使用ruby和Savon来使用网络服务。测试服务为http://www.webservicex.net/WS/WSDetails.aspx?WSID=9&CATID=2require'rubygems'require'savon'client=Savon::Client.new"http://www.webservicex.net/stockquote.asmx?WSDL"client.get_quotedo|soap|soap.body={:symbol=>"AAPL"}end返回SOAP异常。检查soap信封,在我看来soap请求没有正确的命名空间。任何人都可以建议我
关闭。这个问题是opinion-based.它目前不接受答案。想要改进这个问题?更新问题,以便editingthispost可以用事实和引用来回答它.关闭4年前。Improvethisquestion我想在固定时间创建一系列低音和高音调的哔哔声。例如:在150毫秒时发出高音调的蜂鸣声在151毫秒时发出低音调的蜂鸣声200毫秒时发出低音调的蜂鸣声250毫秒的高音调蜂鸣声有没有办法在Ruby或Python中做到这一点?我真的不在乎输出编码是什么(.wav、.mp3、.ogg等等),但我确实想创建一个输出文件。
我有一个模型:classItem项目有一个属性“商店”基于存储的值,我希望Item对象对特定方法具有不同的行为。Rails中是否有针对此的通用设计模式?如果方法中没有大的if-else语句,这是如何干净利落地完成的? 最佳答案 通常通过Single-TableInheritance. 关于ruby-on-rails-Rails-子类化模型的设计模式是什么?,我们在StackOverflow上找到一个类似的问题: https://stackoverflow.co
我在我的项目目录中完成了compasscreate.和compassinitrails。几个问题:我已将我的.sass文件放在public/stylesheets中。这是放置它们的正确位置吗?当我运行compasswatch时,它不会自动编译这些.sass文件。我必须手动指定文件:compasswatchpublic/stylesheets/myfile.sass等。如何让它自动运行?文件ie.css、print.css和screen.css已放在stylesheets/compiled。如何在编译后不让它们重新出现的情况下删除它们?我自己编译的.sass文件编译成compiled/t