学校开了一门移动应用开发课程,我一开始兴趣盎然,但是看到使用的环境是 Java 8 的时候心就凉了一半,在询问老师的意见之后决定使用现在比较常用的Android Studio完成学习,特此记录自学之路。
目录
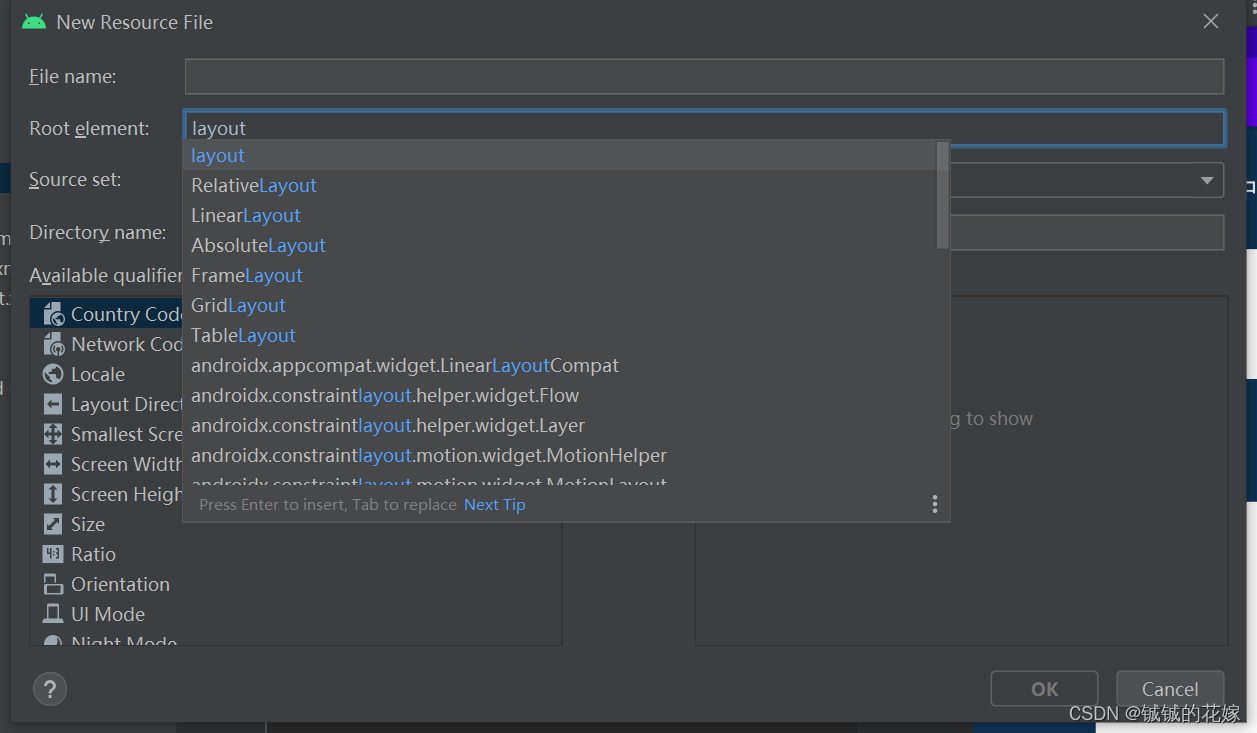
安卓的布局一般分为这几类:
在Android Studio中,创建布局文件时可以直接选布局类型。
一般会按照从上到下(垂直布局)或者从左到右(水平布局)的顺序把组件排列至窗口。
设置一个参照物,其他的几个组件都是按照跟参照物的相对位置决定自己的位置。
就一层一层叠到一起,有点像PS里的图层。
表格布局适用于那种行列比较有规律性的东西,这个类似于html中的表格布局。
类似表格布局,但是不完全一样,更加灵活。
这个是特别特别常用的一种布局,可以用很少量的代码完成比较复杂的功能。
我们开发的时候一般使用xml文件设计布局,当然也可用java完成。但是java一般不常用,因为特别麻烦,我们举一个例子,现在我要做下面这个图的效果。
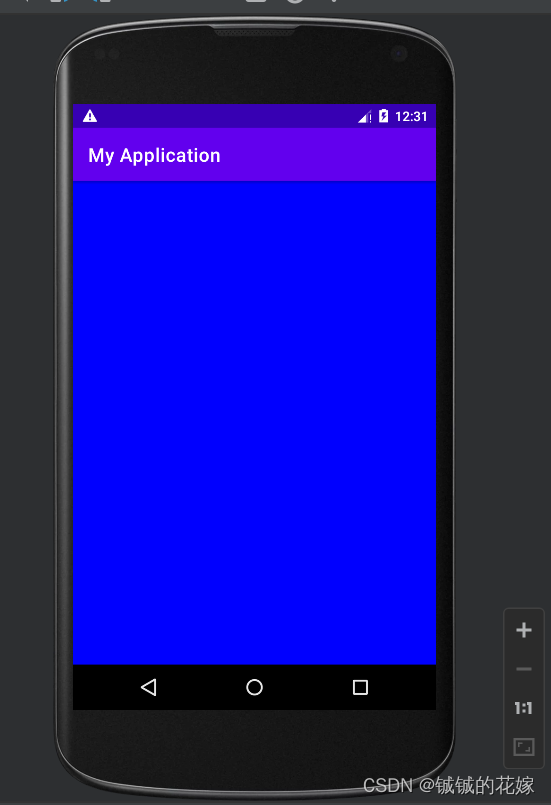
java代码如下,我们发现,每次都要创建一个新布局,写一大堆东西。而且界面代码何逻辑代码一般不放一起。
package com.example.myapplication;

import androidx.appcompat.app.AppCompatActivity;

import android.graphics.Color;
import android.os.Bundle;
import android.view.CollapsibleActionView;
import android.view.ViewGroup;
import android.widget.LinearLayout;

public class MainActivity extends AppCompatActivity {
    // Activity: 是一个类,AppCompatActivity也是算是Activity类。类似于一个可视化界面
    @Override   // 表示这个是重写,只要打开窗口,指定先执行它,所以有点类似于初始化代码
    public void onCreate(Bundle savedInstanceState) {
        super.onCreate(savedInstanceState);
        // 创建根布局
        LinearLayout ll = new LinearLayout(this);
        // 设置宽高
        ll.setLayoutParams(new LinearLayout.LayoutParams(ViewGroup.LayoutParams.MATCH_PARENT,
                ViewGroup.LayoutParams.MATCH_PARENT));
        // 设置背景
        ll.setBackgroundColor(Color.BLUE);
        // 应用根部局
        setContentView(ll);
    }
}
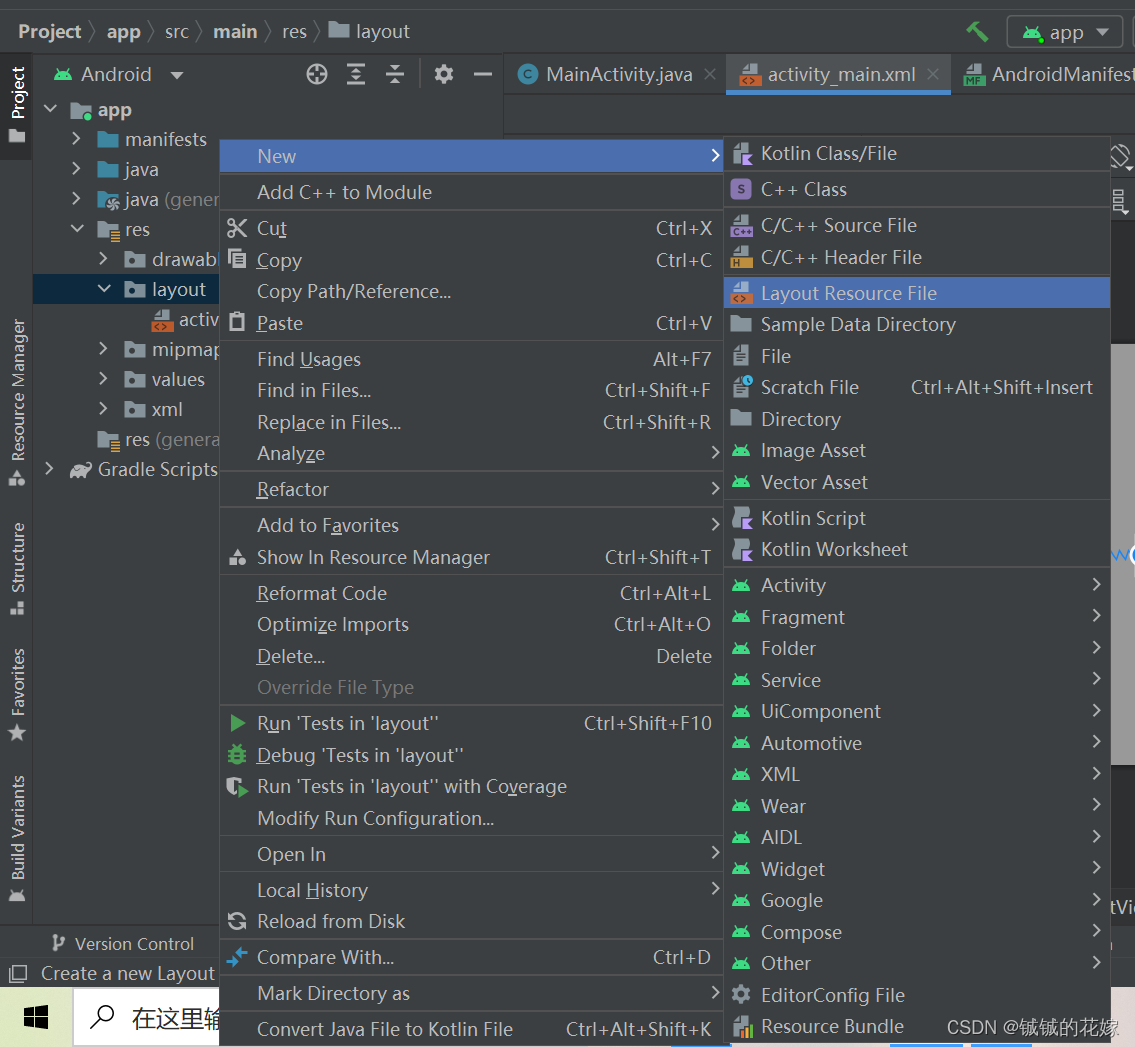
我们可以这么操作:
我们使用一个线性布局,主要是为了验证几个效果。
<?xml version="1.0" encoding="utf-8"?>
<LinearLayout xmlns:android="http://schemas.android.com/apk/res/android"
    android:orientation="vertical"
    android:layout_width="match_parent"
    android:layout_height="match_parent"
    android:layout_margin="20dp"
    android:padding="100dp">
    <!--    match_parent是指适应父容器的大小,就是说外面那个容器多大,这个就多大-->
    <!--    相对的时wrap_content,是指适应包裹内容的大小,就是说里面的东西多大,这个就多大-->
    <!--    width何height还可以固定大小,比如200dp,字体大小一般用sp,其他的可以不管-->

    <TextView
        android:layout_width="wrap_content"
        android:layout_height="0dp"
        android:text="hello world   hello world   hello world   hello world"
        android:background="#123456"
        android:textSize="30sp"
        android:textColor="#ffffff"
        android:layout_weight="4"/>
    <TextView
        android:layout_width="wrap_content"
        android:layout_height="0dp"
        android:text="world hello"
        android:background="#654321"
        android:textSize="20sp"
        android:textColor="#ffffff"
        android:layout_weight="1"
        android:gravity="center"/>

    <TextView
        android:layout_width="wrap_content"
        android:layout_height="0dp"
        android:text="world hello"
        android:background="#123321"
        android:textSize="20sp"
        android:textColor="#ffffff"
        android:layout_weight="1"
        android:layout_gravity="center"/>


<!--    线性布局有几个需要注意的属性:-->
<!--    1. orientation:    方向
            vertical horizontal-->
<!--    2. layout_weight:  权重-->
<!--    3. layout_gravity: 重力-->


</LinearLayout>
设计效果如下:
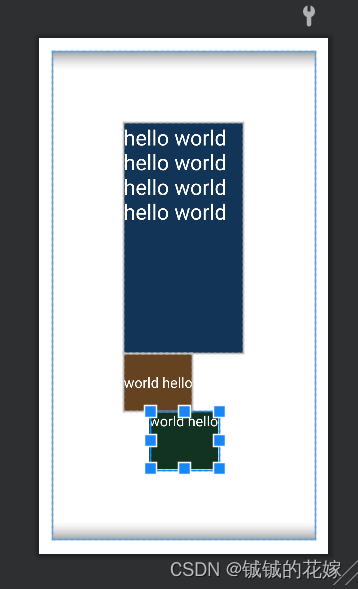
因为没有导入相关图标,效果跟想象中还是有差距的,不过图片换了效果应该还是可以的。
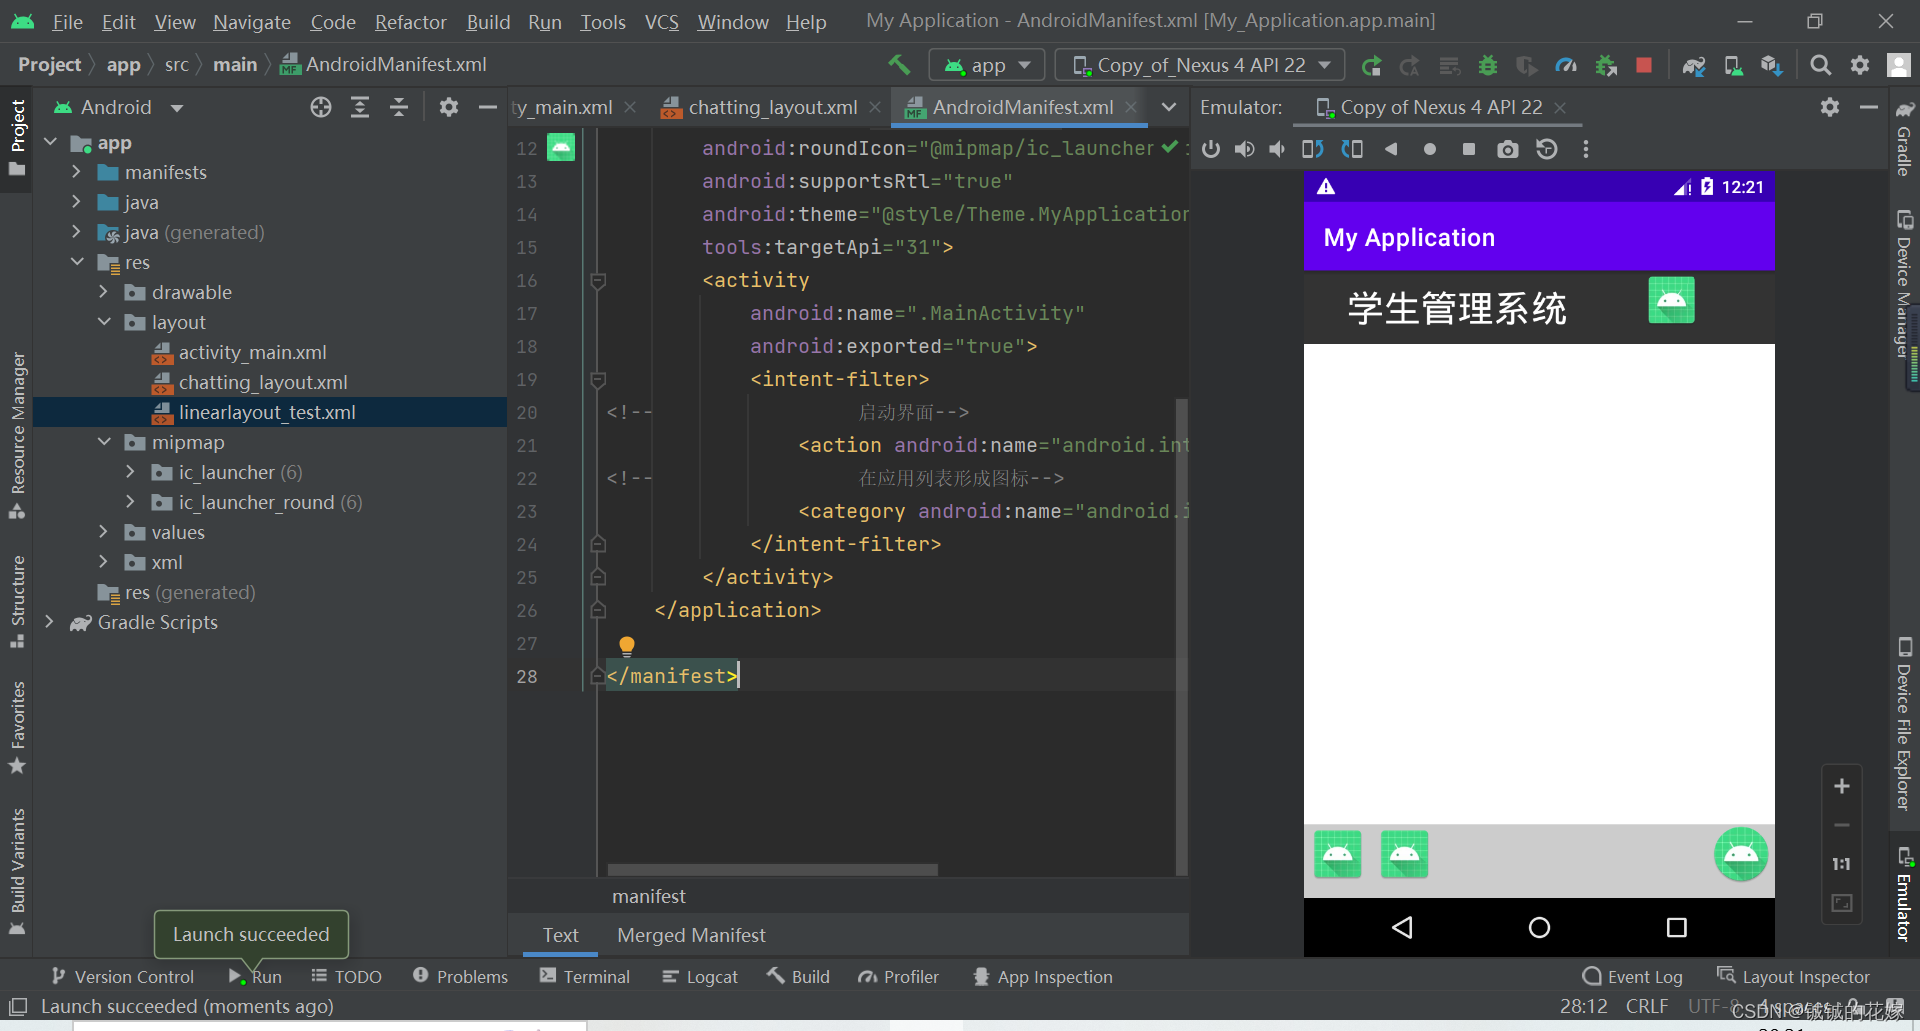
chatting_layout.xml
<?xml version="1.0" encoding="utf-8"?>
<LinearLayout xmlns:android="http://schemas.android.com/apk/res/android"
    android:orientation="vertical"
    android:layout_width="match_parent"
    android:layout_height="match_parent">

    <LinearLayout
        android:layout_width="match_parent"
        android:layout_height="60dp"
        android:orientation="horizontal"
        android:background="#333333"
        android:paddingLeft="20dp">

        <TextView
            android:layout_width="wrap_content"
            android:layout_height="wrap_content"
            android:text="<  "
            android:textColor="#ffffff"
            android:textSize="30dp"
            android:layout_gravity="center_vertical"
            />
        <TextView
            android:layout_width="wrap_content"
            android:layout_height="wrap_content"
            android:text="学生管理系统"
            android:textColor="#ffffff"
            android:textSize="30dp"
            android:layout_gravity="center_vertical"
            />
        <ImageView
            android:layout_width="wrap_content"
            android:layout_height="wrap_content"
            android:src="@mipmap/ic_launcher"
            android:layout_weight="0.5"/>
    </LinearLayout>

    <LinearLayout
        android:layout_width="match_parent"
        android:layout_height="match_parent"
        android:orientation="horizontal"
        android:layout_weight="1"/>

    <LinearLayout
        android:layout_width="match_parent"
        android:layout_height="60dp"
        android:orientation="horizontal"
        android:background="#cccccc">

        <ImageView
            android:layout_width="0dp"
            android:layout_height="wrap_content"
            android:src="@mipmap/ic_launcher"
            android:layout_weight="0.5"/>
        <ImageView
            android:layout_width="0dp"
            android:layout_height="wrap_content"
            android:src="@mipmap/ic_launcher"
            android:layout_weight="0.5"/>
        <TextView
            android:layout_width="wrap_content"
            android:layout_height="wrap_content"
            android:layout_weight="2"/>
        <ImageView
            android:layout_width="0dp"
            android:layout_height="wrap_content"
            android:src="@mipmap/ic_launcher_round"
            android:layout_weight="0.5"/>
    </LinearLayout>


</LinearLayout>
效果如下
使用相对布局的时候注意参照物,有父容器和其他控件(id控制)等选择。
创建一个相对布局xml文件。
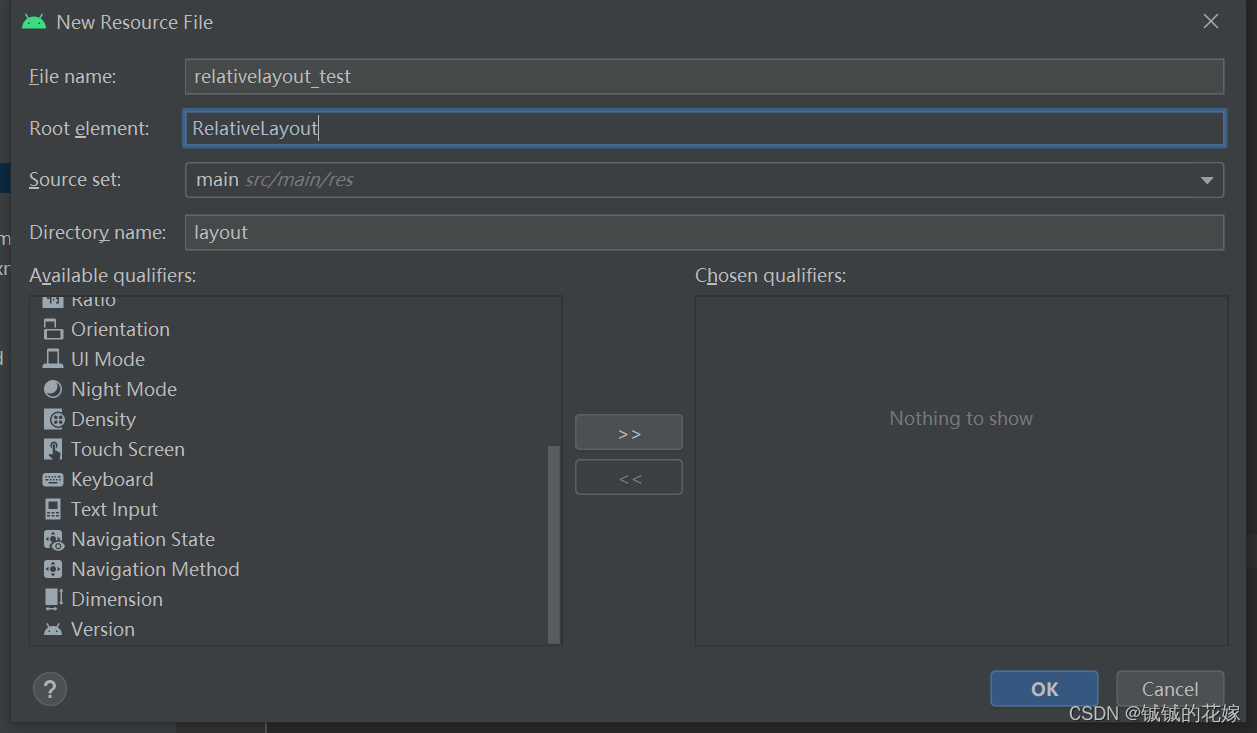
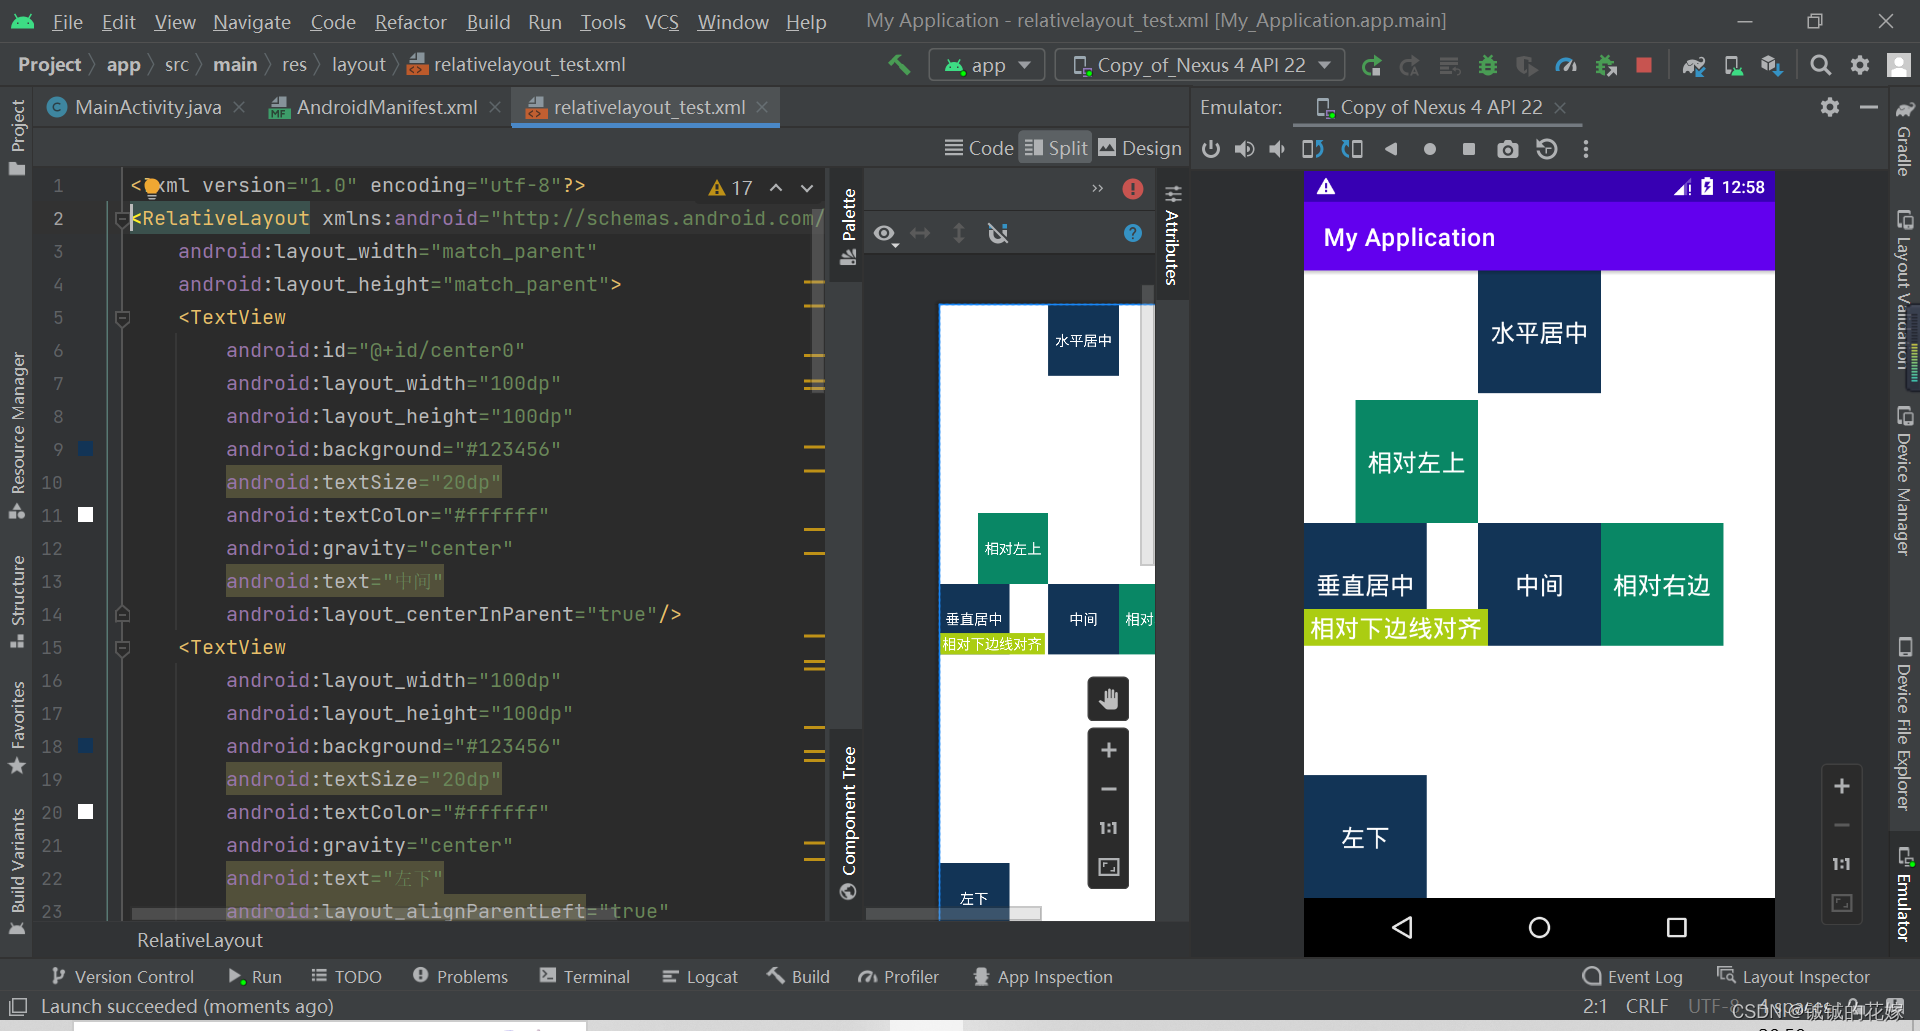
relativelayout_test.xml
<?xml version="1.0" encoding="utf-8"?>
<RelativeLayout xmlns:android="http://schemas.android.com/apk/res/android"
    android:layout_width="match_parent"
    android:layout_height="match_parent">
    <TextView
        android:id="@+id/center0"
        android:layout_width="100dp"
        android:layout_height="100dp"
        android:background="#123456"
        android:textSize="20dp"
        android:textColor="#ffffff"
        android:gravity="center"
        android:text="中间"
        android:layout_centerInParent="true"/>
    <TextView
        android:layout_width="100dp"
        android:layout_height="100dp"
        android:background="#123456"
        android:textSize="20dp"
        android:textColor="#ffffff"
        android:gravity="center"
        android:text="左下"
        android:layout_alignParentLeft="true"
        android:layout_alignParentBottom="true"/>

    <TextView
        android:layout_width="100dp"
        android:layout_height="100dp"
        android:background="#123456"
        android:textSize="20dp"
        android:textColor="#ffffff"
        android:gravity="center"
        android:text="水平居中"
        android:layout_centerHorizontal="true"/>

    <TextView
        android:layout_width="100dp"
        android:layout_height="100dp"
        android:background="#123456"
        android:textSize="20dp"
        android:textColor="#ffffff"
        android:gravity="center"
        android:text="垂直居中"
        android:layout_centerVertical="true"/>


    <TextView
        android:layout_width="100dp"
        android:layout_height="100dp"
        android:background="#098765"
        android:textSize="20dp"
        android:textColor="#ffffff"
        android:gravity="center"
        android:text="相对右边"
        android:layout_toRightOf="@+id/center0"
        android:layout_centerVertical="true"/>

    <TextView
        android:layout_width="100dp"
        android:layout_height="100dp"
        android:background="#098765"
        android:textSize="20dp"
        android:textColor="#ffffff"
        android:gravity="center"
        android:text="相对左上"
        android:layout_toLeftOf="@+id/center0"
        android:layout_above="@+id/center0"/>


    <TextView
        android:layout_width="150dp"
        android:layout_height="30dp"
        android:layout_alignBottom="@+id/center0"
        android:background="#abcd12"
        android:gravity="center"
        android:text="相对下边线对齐"
        android:textColor="#ffffff"
        android:textSize="20dp" />
</RelativeLayout>
效果如下:
对于具有离线功能的智能手机应用程序,我正在为Xml文件创建单向文本同步。我希望我的服务器将增量/差异(例如GNU差异补丁)发送到目标设备。这是计划:Time=0Server:hasversion_1ofXmlfile(~800kiB)Client:hasversion_1ofXmlfile(~800kiB)Time=1Server:hasversion_1andversion_2ofXmlfile(each~800kiB)computesdeltaoftheseversions(=patch)(~10kiB)sendspatchtoClient(~10kiBtransferred)Cl
我的代码目前看起来像这样numbers=[1,2,3,4,5]defpop_threepop=[]3.times{pop有没有办法在一行中完成pop_three方法中的内容?我基本上想做类似numbers.slice(0,3)的事情,但要删除切片中的数组项。嗯...嗯,我想我刚刚意识到我可以试试slice! 最佳答案 是numbers.pop(3)或者numbers.shift(3)如果你想要另一边。 关于ruby-多次弹出/移动ruby数组,我们在StackOverflow上找到一
我构建了两个需要相互通信和发送文件的Rails应用程序。例如,一个Rails应用程序会发送请求以查看其他应用程序数据库中的表。然后另一个应用程序将呈现该表的json并将其发回。我还希望一个应用程序将存储在其公共(public)目录中的文本文件发送到另一个应用程序的公共(public)目录。我从来没有做过这样的事情,所以我什至不知道从哪里开始。任何帮助,将不胜感激。谢谢! 最佳答案 无论Rails是什么,几乎所有Web应用程序都有您的要求,大多数现代Web应用程序都需要相互通信。但是有一个小小的理解需要你坚持下去,网站不应直接访问彼此
我尝试运行2.x应用程序。我使用rvm并为此应用程序设置其他版本的ruby:$rvmuseree-1.8.7-head我尝试运行服务器,然后出现很多错误:$script/serverNOTE:Gem.source_indexisdeprecated,useSpecification.Itwillberemovedonorafter2011-11-01.Gem.source_indexcalledfrom/Users/serg/rails_projects_terminal/work_proj/spohelp/config/../vendor/rails/railties/lib/r
刚入门rails,开始慢慢理解。有人可以解释或给我一些关于在application_controller中编码的好处或时间和原因的想法吗?有哪些用例。您如何为Rails应用程序使用应用程序Controller?我不想在那里放太多代码,因为据我了解,每个请求都会调用此Controller。这是真的? 最佳答案 ApplicationController实际上是您应用程序中的每个其他Controller都将从中继承的类(尽管这不是强制性的)。我同意不要用太多代码弄乱它并保持干净整洁的态度,尽管在某些情况下ApplicationContr
我是一个Rails初学者,但我想从我的RailsView(html.haml文件)中查看Ruby变量的内容。我试图在ruby中打印出变量(认为它会在终端中出现),但没有得到任何结果。有什么建议吗?我知道Rails调试器,但更喜欢使用inspect来打印我的变量。 最佳答案 您可以在View中使用puts方法将信息输出到服务器控制台。您应该能够在View中的任何位置使用Haml执行以下操作:-puts@my_variable.inspect 关于ruby-on-rails-如何在我的R
当我在我的Rails应用程序根目录中运行rakedoc:app时,API文档是使用/doc/README_FOR_APP作为主页生成的。我想向该文件添加.rdoc扩展名,以便它在GitHub上正确呈现。更好的是,我想将它移动到应用程序根目录(/README.rdoc)。有没有办法通过修改包含的rake/rdoctask任务在我的Rakefile中执行此操作?是否有某个地方可以查找可以修改的主页文件的名称?还是我必须编写一个新的Rake任务?额外的问题:Rails应用程序的两个单独文件/README和/doc/README_FOR_APP背后的逻辑是什么?为什么不只有一个?
是否可以为特定(或所有)项目使用多个布局?例如,我有几个项目,我想对其应用两种不同的布局。一个是绿色的,一个是蓝色的(但是)。我想将它们编译到我的输出目录中的两个不同文件夹中(例如v1和v2)。我一直在玩弄规则和编译block,但我不知道这是怎么回事。因为,每个项目在编译过程中只编译一次,我不能告诉nanoc第一次用layout1编译,第二次用layout2编译。我试过这样的东西,但它导致输出文件损坏。compile'*'doifitem.binary?#don’tfilterbinaryitemselsefilter:erblayout'layout1'layout'layout2'
是否可以在应用程序中包含的gem代码中知道应用程序的Rails文件系统根目录?这是gem来源的示例:moduleMyGemdefself.included(base)putsRails.root#returnnilendendActionController::Base.send:include,MyGem谢谢,抱歉我的英语不好 最佳答案 我发现解决类似问题的解决方案是使用railtie初始化程序包含我的模块。所以,在你的/lib/mygem/railtie.rbmoduleMyGemclassRailtie使用此代码,您的模块将在
无论您是想搭建桌面端、WEB端或者移动端APP应用,HOOPSPlatform组件都可以为您提供弹性的3D集成架构,同时,由工业领域3D技术专家组成的HOOPS技术团队也能为您提供技术支持服务。如果您的客户期望有一种在多个平台(桌面/WEB/APP,而且某些客户端是“瘦”客户端)快速、方便地将数据接入到3D应用系统的解决方案,并且当访问数据时,在各个平台上的性能和用户体验保持一致,HOOPSPlatform将帮助您完成。利用HOOPSPlatform,您可以开发在任何环境下的3D基础应用架构。HOOPSPlatform可以帮您打造3D创新型产品,HOOPSSDK包含的技术有:快速且准确的CAD