主机名 :node1
| IP地址 | 192.168.121.147 |
|---|---|
| 角色 | es01,redis01 |
主机名 :node2
| IP地址 | 192.168.121.148 |
|---|---|
| 角色 | es02,redis02 |
主机名 :node3
| IP地址 | 118.190.146.109 |
|---|---|
| 角色 | es03,tomcat,nginx |
三台机器都是CentOS 7.6,内存>=3G
1、设置主机名和hosts解析
cat >> /etc/hosts << EOF
192.168.121.147 node1
192.168.121.148 node2
118.190.146.109 node3
EOF
2、时间同步
3、部署jdk
三台机器都部署jdk,建议内存3G以上
 rpm -ivh jdk-8u144-linux-x64.rpm
 java -version

# vim /etc/yum.repos.d/elk.repo
[elk] name=elk 7.x
baseurl=https://mirrors.tuna.tsinghua.edu.cn/elasticstack/yum/elastic-7.x/
gpgcheck=0
这里我是用的都是离线rpm包
安装:# yum install -y elasticsearch-7.2.0
如果缺少epel源
yum -y install epel-release
node1节点的配置
# 备份
cp /etc/elasticsearch/elasticsearch.yml{,.bak}
grep '^[a-Z]' /etc/elasticsearch/elasticsearch.yml
#修改主节点相关配置
vim /etc/elasticsearch/elasticsearch.yml
cluster.name: my-elk
node.name: node1
path.data: /var/lib/elasticsearch
path.logs: /var/log/elasticsearch
network.host: 192.168.121.147 http.port: 9200
discovery.seed_hosts: ["node1", "node2", "node3"]
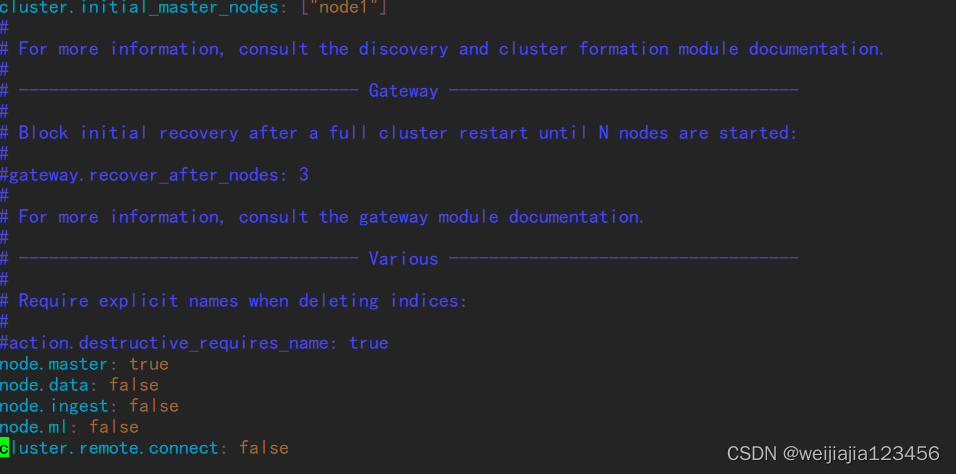
cluster.initial_master_nodes: ["node1"]
#行末添加
node.master: true
node.data: false
node.ingest: false node.ml: false
cluster.remote.connect: false
(1)安装head插件
yum install -y nodejs npm
(2)下载head插件
cd /var/lib/elasticsearch/
wget https://github.com/mobz/elasticsearch-head/archive/master.zip
#解压
yum install unzip
unzip master.zip
(3)安装依赖包
yum install openssl bzip2 unzip -y
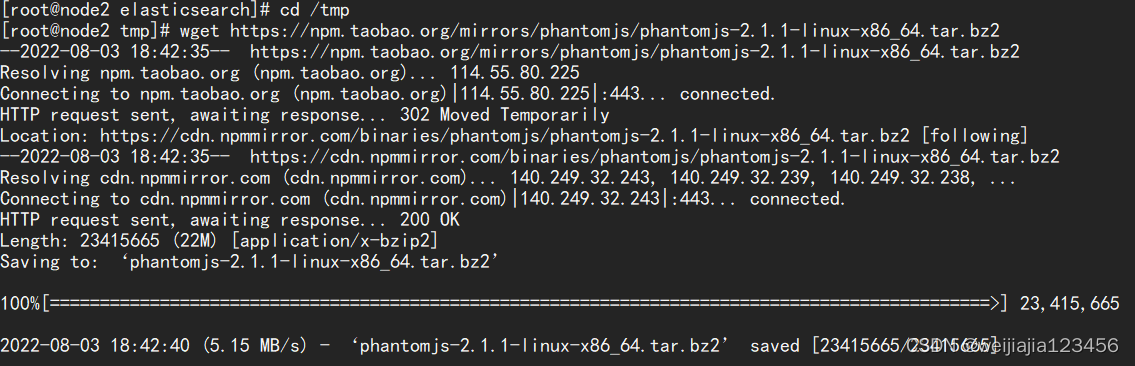
下载运行head必要的文件(放置在文件夹/tmp下)
cd /tmp
wget https://npm.taobao.org/mirrors/phantomjs/phantomjs-2.1.1-linux-x86_64.tar.bz2
用以下命令把下载到的包添加到npm cache目录中
npm cache add phantomjs
开始安装依赖:
cd -
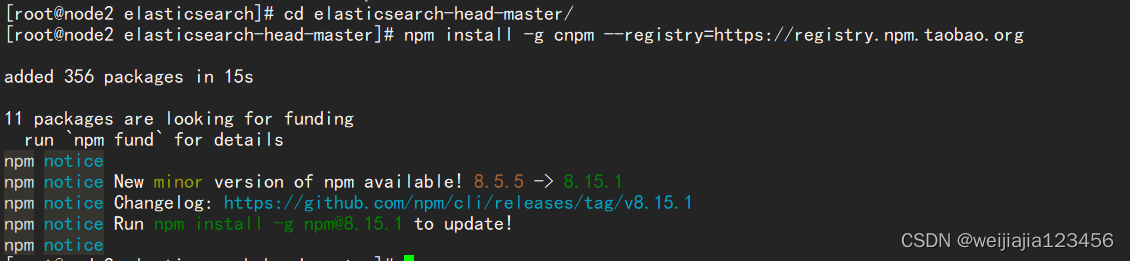
cd elasticsearch-head-master/
# 直接使用npm安装时间久,依赖网络,替换我淘宝的cnpm
npm install -g cnpm --registry=https://registry.npm.taobao.org
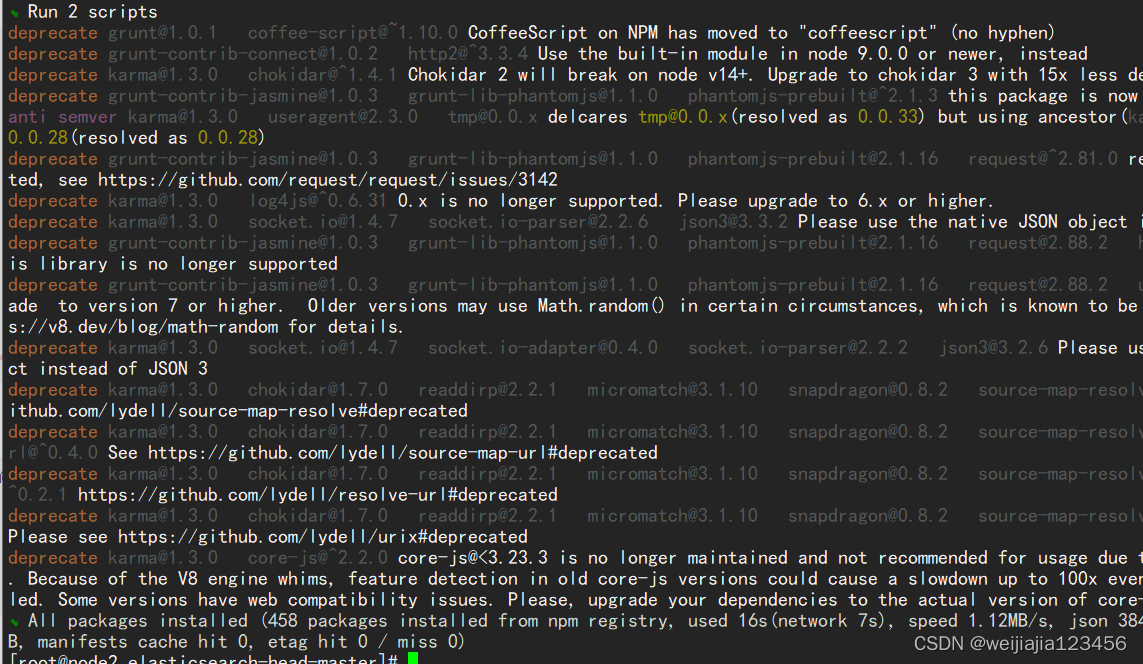
# 安装依赖
cnpm install
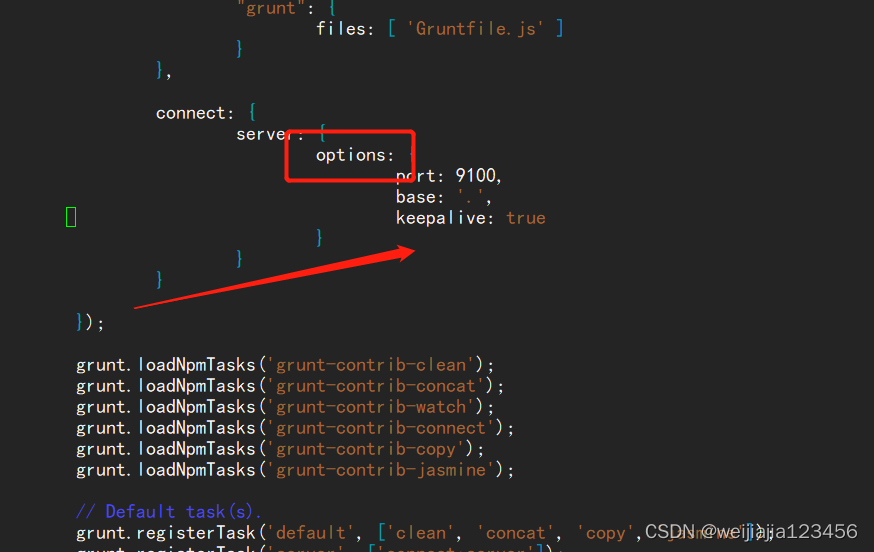
(4)修改配置文件
vim Gruntfile.js
#找到并修改
options: {
				port: 9100,
				base: '.',
				keepalive: true,
				 hostname: '*'
		 }
## 注意:true后面有逗号
修改elasticsearch-head默认连接地址,将localhost改为本机IP
 vim _site/app.js
 this.base_uri = this.config.base_uri || this.prefs.get("app-base_uri") || 	"http:192.168.121.148:9200";

(5)修改elasticSearch配置文件并启动ElasticSearch
修改elasticsearch的配置文件elasticsearch.yml,以允许跨域访问,在文末追加如下代码即可
http.cors.enabled: true
http.cors.allow-origin: "*"
重启:
systemctl restart elasticsearch
启动插件:
# cd /var/lib/elasticsearch/elasticsearch-head-master/
# nohup ./node_modules/grunt/bin/grunt server &
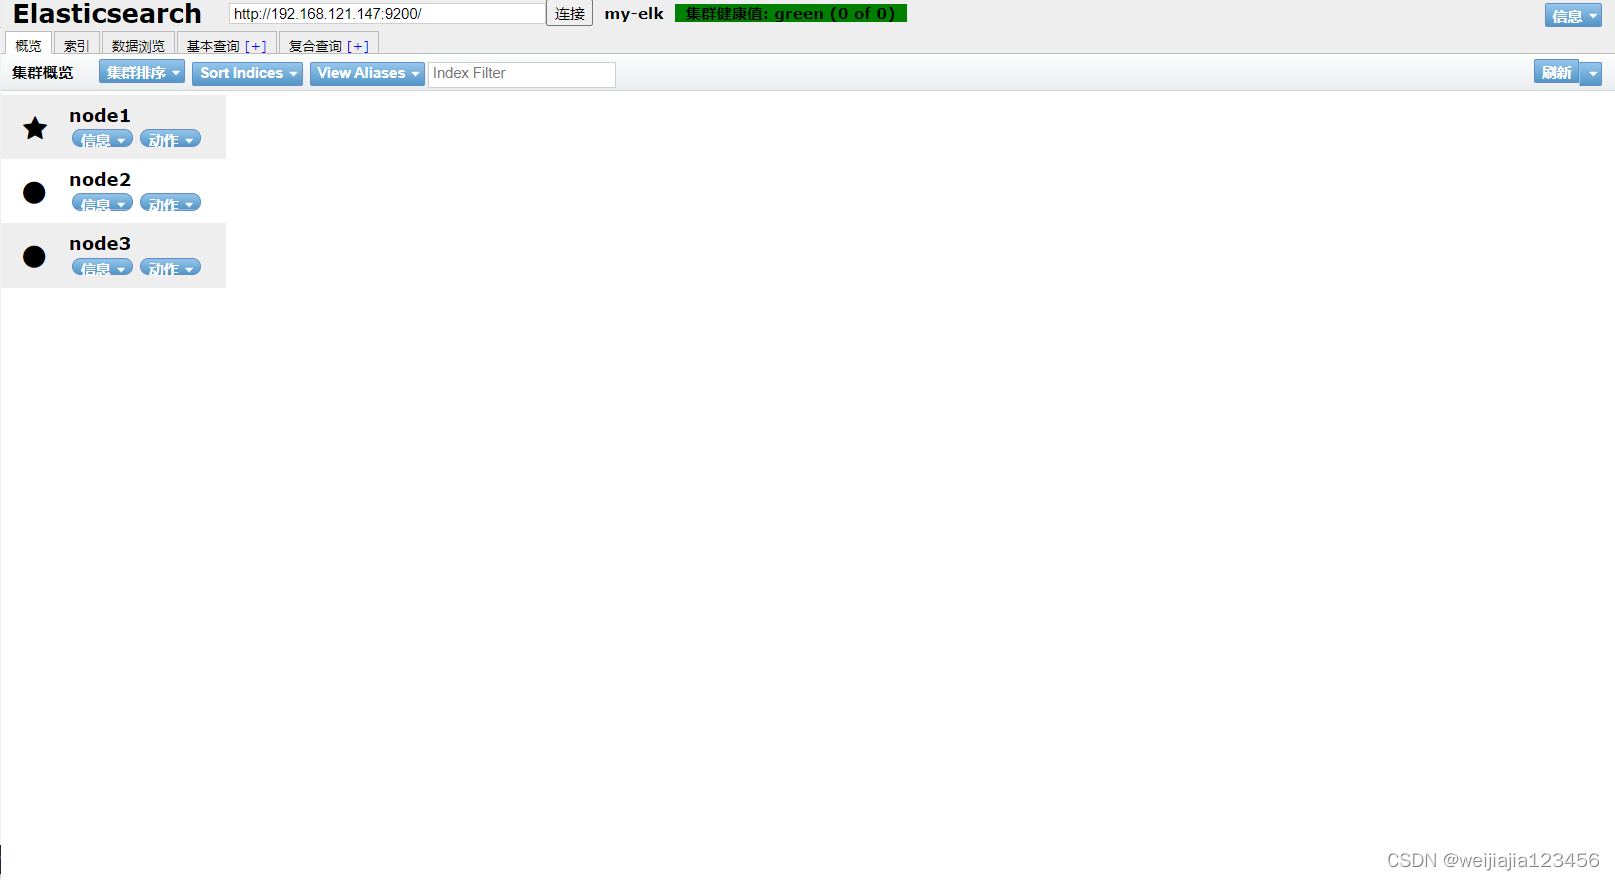
访问IP:9100就能看到我们集群信息
1、kibana安装配置
yum install -y https://mirrors.tuna.tsinghua.edu.cn/elasticstack/yum/elastic-7.x/7.2.0/kibana-7.2.0-x86_64.rpm
可以配置多个端口的kibana,每个系统单独开一个kibana端口号,比如财务系统kibana使用5601端
口、租赁系统kibana使用5602,然后nginx做代理访问配置。
[root@elk-node03 ~]# cp -r /etc/kibana/ /etc/cw-5601-kibana
[root@elk-node03 ~]# cp -r /etc/kibana/ /etc/zl-5602-kibana
vim /etc/cw-5601-kibana/kibana.yml
server.port: 5601
server.host: "0.0.0.0"
kibana.index: ".cw-kibana"
elasticsearch.hosts: ["http://192.168.121.147:9200"]
vim /etc/zl-5602-kibana/kibana.yml
server.port: 5602
server.host: "0.0.0.0"
kibana.index: ".zl-kibana"
elasticsearch.hosts: ["http://192.168.121.147:9200"]
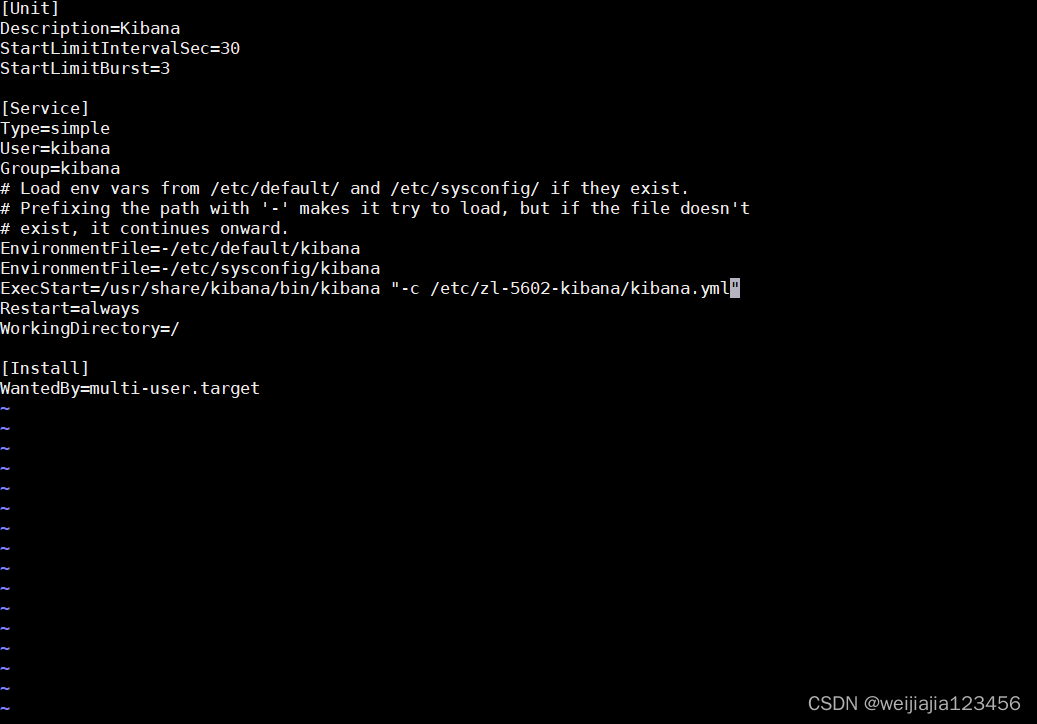
提供服务脚本:
cp -a /etc/systemd/system/kibana.service /etc/systemd/system/kibana_cw.service
修改:
ExecStart=/usr/share/kibana/bin/kibana "-c /etc/cw-5601-kibana/kibana.yml"
cp -a /etc/systemd/system/kibana.service /etc/systemd/system/kibana_zl.service
修改:
ExecStart=/usr/share/kibana/bin/kibana "-c /etc/zl-5602-kibana/kibana.yml"
启动服务:
systemctl daemon-reload
systemctl start kibana_cw.service kibana_zl.service
systemctl enable kibana_cw.service kibana_zl.service
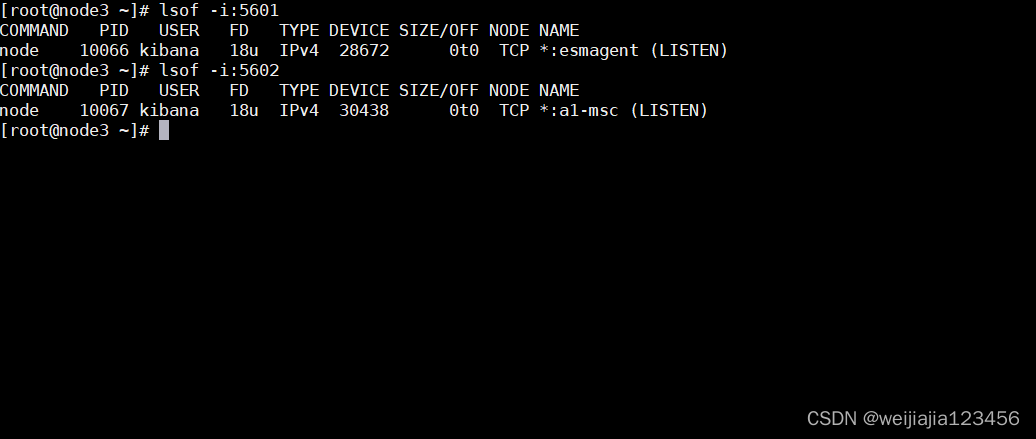
查看:
 lsof -i:5601
 lsof -i:5601
访问IP:5601

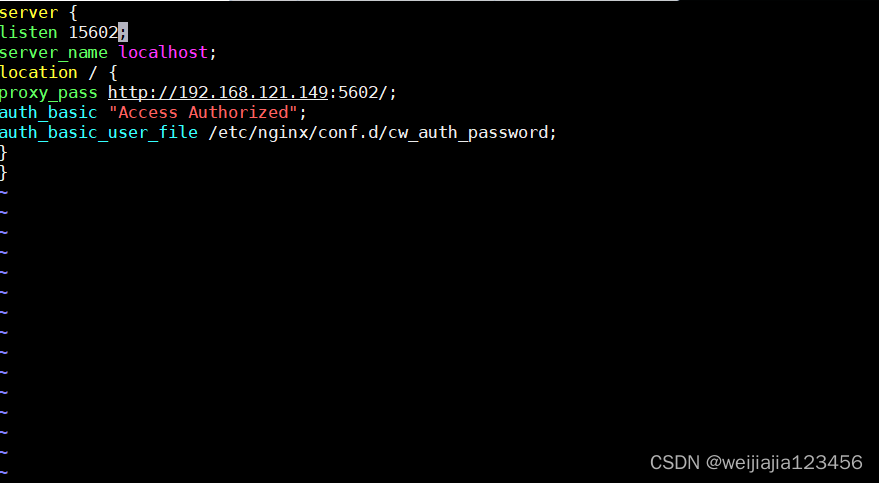
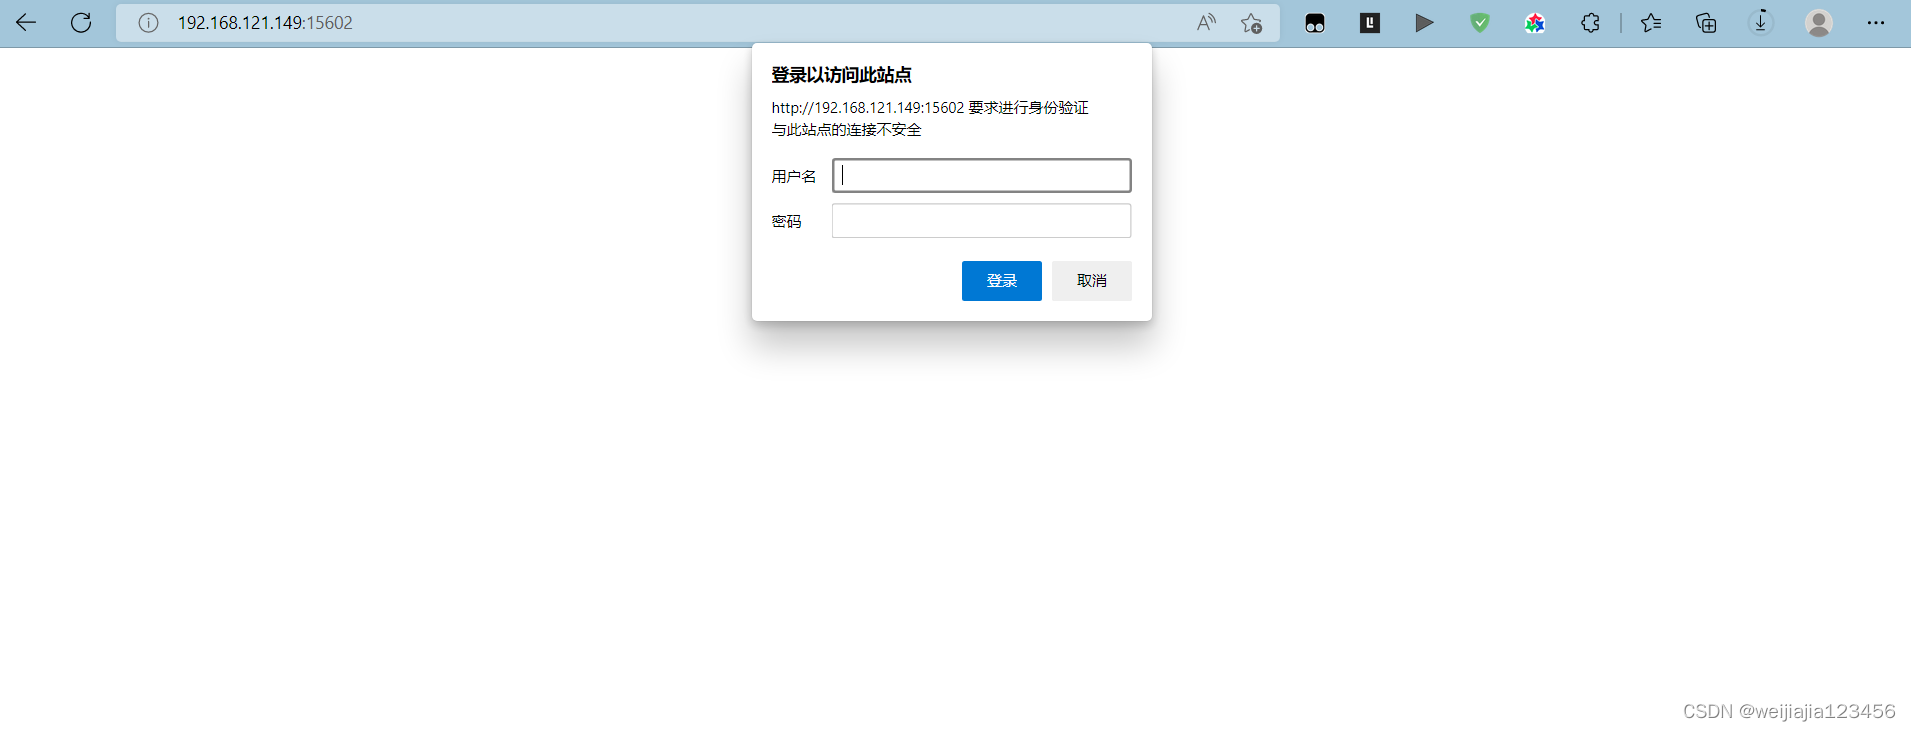
配置访问验证
# cat /etc/nginx/conf.d/cw_kibana.conf
server {
listen 15601;
server_name localhost;
location / {
proxy_pass http://192.168.150.13:5601/;
auth_basic "Access Authorized";
auth_basic_user_file /etc/nginx/conf.d/cw_auth_password;
}
}

# cat /etc/nginx/conf.d/zl_kibana.conf
server {
listen 15602;
server_name localhost;
location / {
proxy_pass http://192.168.150.13:5602/;
auth_basic "Access Authorized";
auth_basic_user_file /etc/nginx/conf.d/zl_auth_password;
}
}
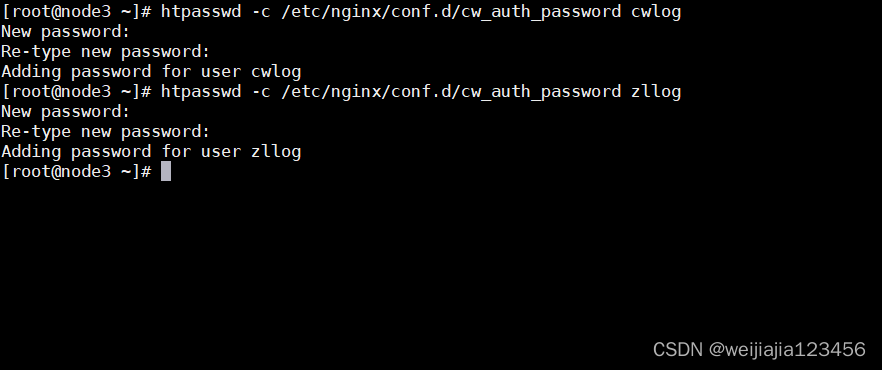
#下载工具
yum install httpd-tools
htpasswd -c /etc/nginx/conf.d/cw_auth_password cwlog
htpasswd -c /etc/nginx/conf.d/zl_auth_password zllog
启动nginx:
# nginx -t
# systemctl restart nginx
# systemctl enable nginx
访问IP:15601

LogStash由JRuby语言编写,基于消息(message-based)的简单架构,并运行在Java虚拟机
(JVM)上。不同于分离的代理端(agent)或主机端(server),LogStash可配置单一的代理端
(agent)与其它开源软件结合,以实现不同的功能。
logStash的四大组件
Shipper:发送事件(events)至LogStash;通常,远程代理端(agent)只需要运行这个组件即可;
Broker and Indexer:接收并索引化事件;
Search and Storage:允许对事件进行搜索和存储;
Web Interface:基于Web的展示界面
正是由于以上组件在LogStash架构中可独立部署,才提供了更好的集群扩展性。
LogStash主机分类
代理主机(agent host):作为事件的传递者(shipper),将各种日志数据发送至中心主机;只需运
行Logstash 代理(agent)程序;
中心主机(central host):可运行包括中间转发器(Broker)、索引器(Indexer)、搜索和存储器
(Search and Storage)、Web界面端(Web Interface)在内的各个组件,以实现对日志数据的接
收、处理和存储。
yum install -y https://mirrors.tuna.tsinghua.edu.cn/elasticstack/yum/elastic-7.x/ 7.2.0/logstash-7.2.0.rpm
在logstash的家目录创建三个文件夹。分别用来存放日志,conf配置文件和logstash服务主配置
mkdir /usr/share/logstash/{etc,config,logs}
cp /etc/logstash/log4j2.properties /usr/share/logstash/config/
cp /etc/logstash/logstash.yml /usr/share/logstash/config/
ln -sv /usr/share/logstash/bin/logstash /usr/bin/logstash
启动测试:
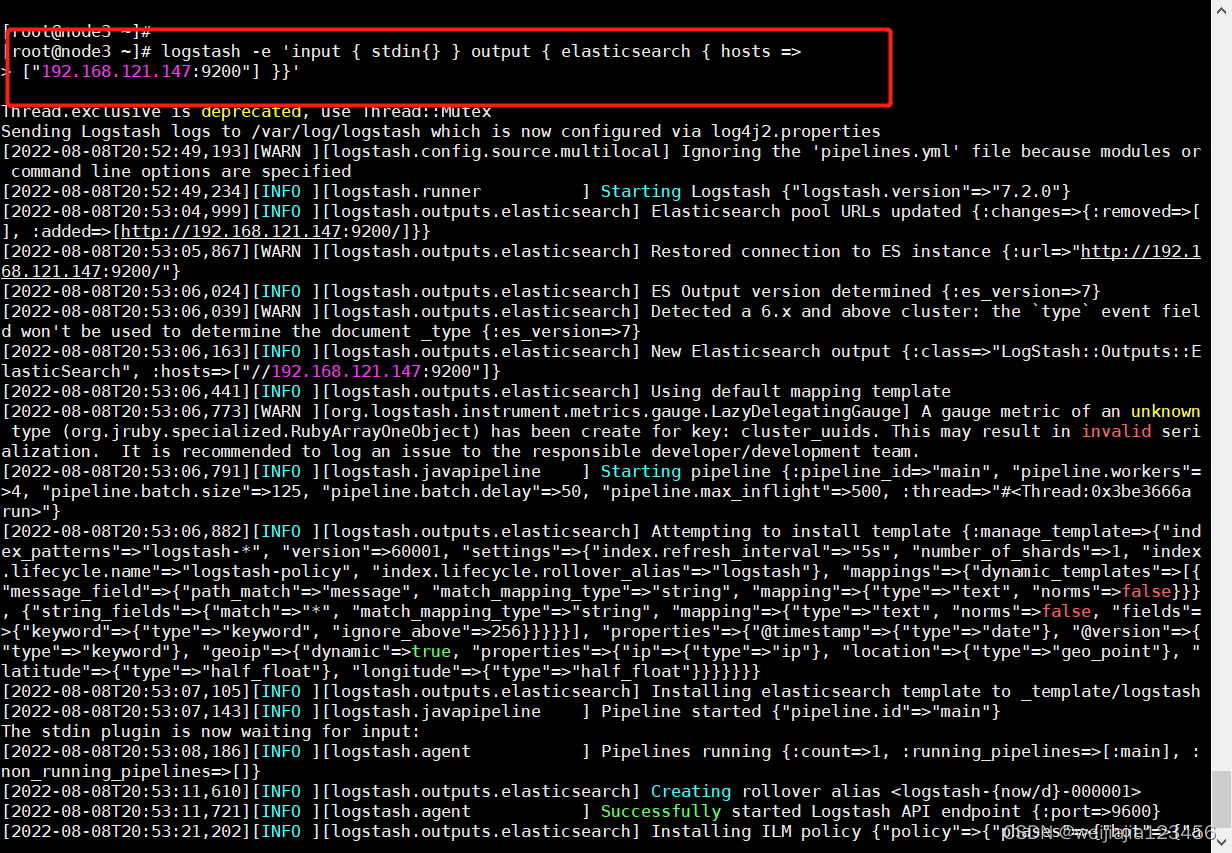
logstash -e 'input { stdin { } } output { stdout {} }'
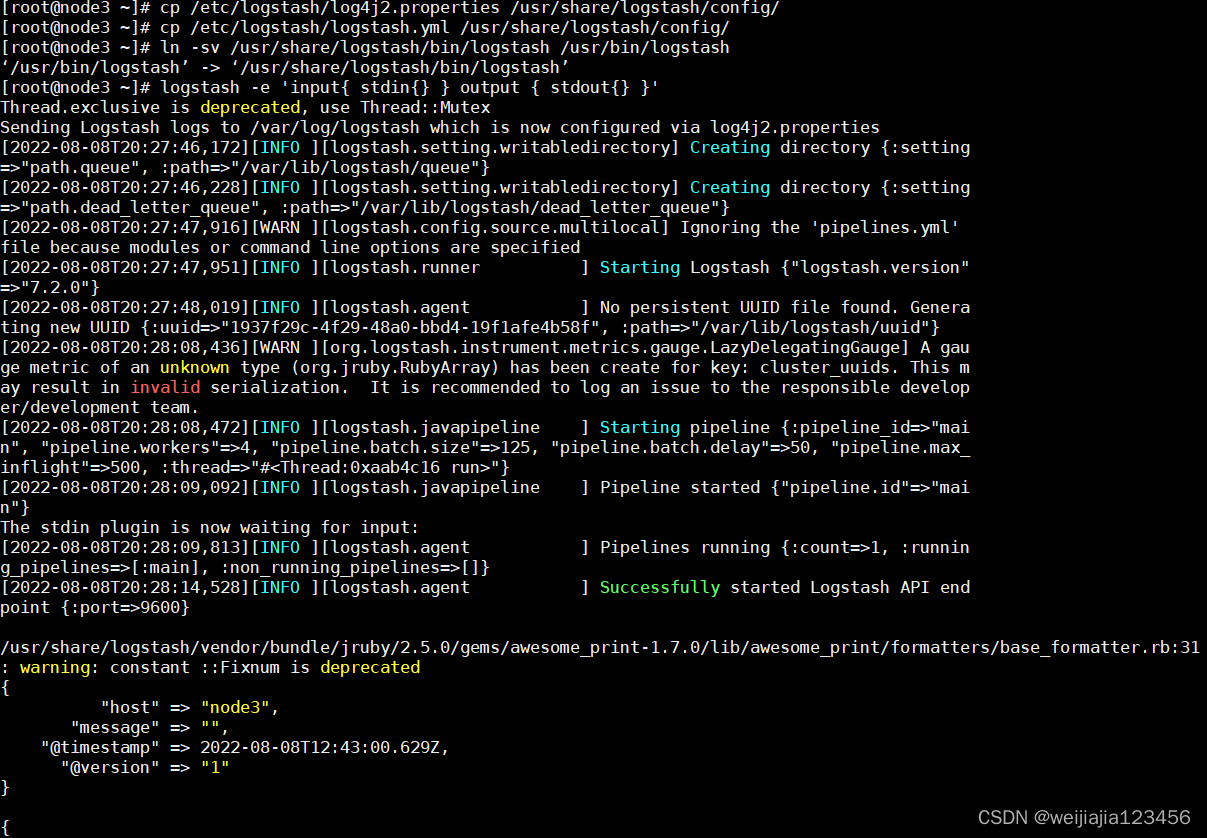
将屏幕输入的字符串输出到elasticsearch服务中
logstash -e 'input { stdin{} } output { elasticsearch { hosts =>["192.168.150.11:9200"] }}'
yum install http://nginx.org/packages/rhel/7/x86_64/RPMS/nginx-1.10.0-1.el7.ngx.x86_64.rpm
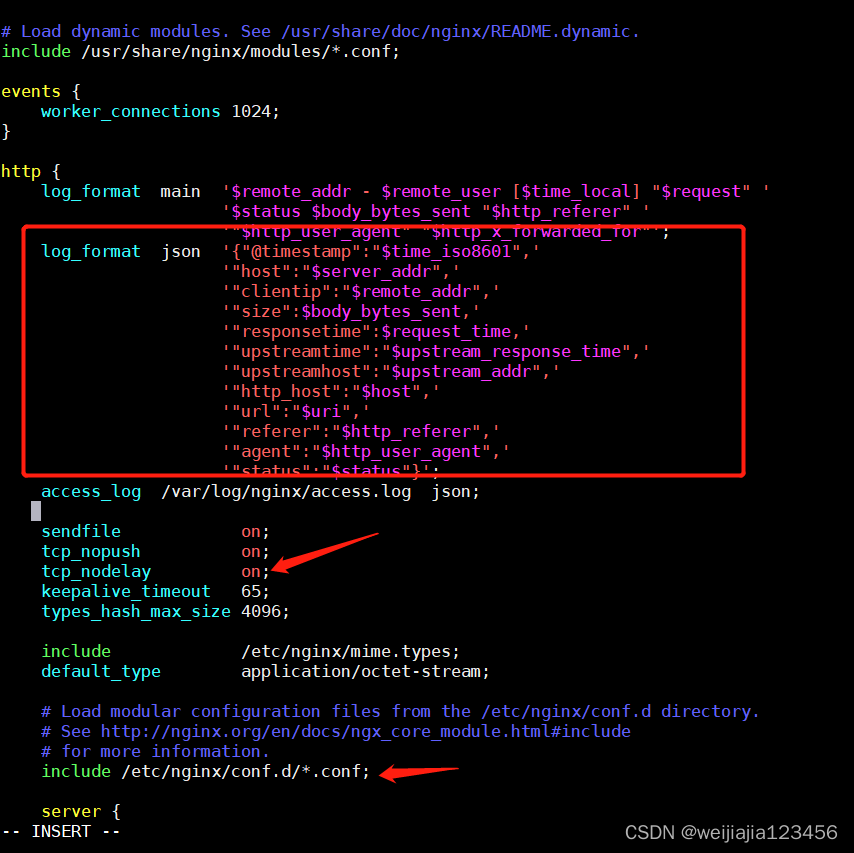
log_format access_json_log '{"@timestamp":"$time_local",'
'"http_host":"$http_host",'
'"clinetip":"$remote_addr",'
'"request":"$request",'
'"status":"$status",'
'"size":"$body_bytes_sent",'
'"upstream_addr":"$upstream_addr",'
'"upstream_status":"$upstream_status",' '"upstream_response_time":"$upstream_response_time",'
'"request_time":"$request_time",'
'"http_referer":"$http_referer",'
'"http_user_agent":"$http_user_agent",'
'"http_x_forwarded_for":"$http_x_forwarded_for"}';
access_log /var/log/nginx/access.log access_json_log;
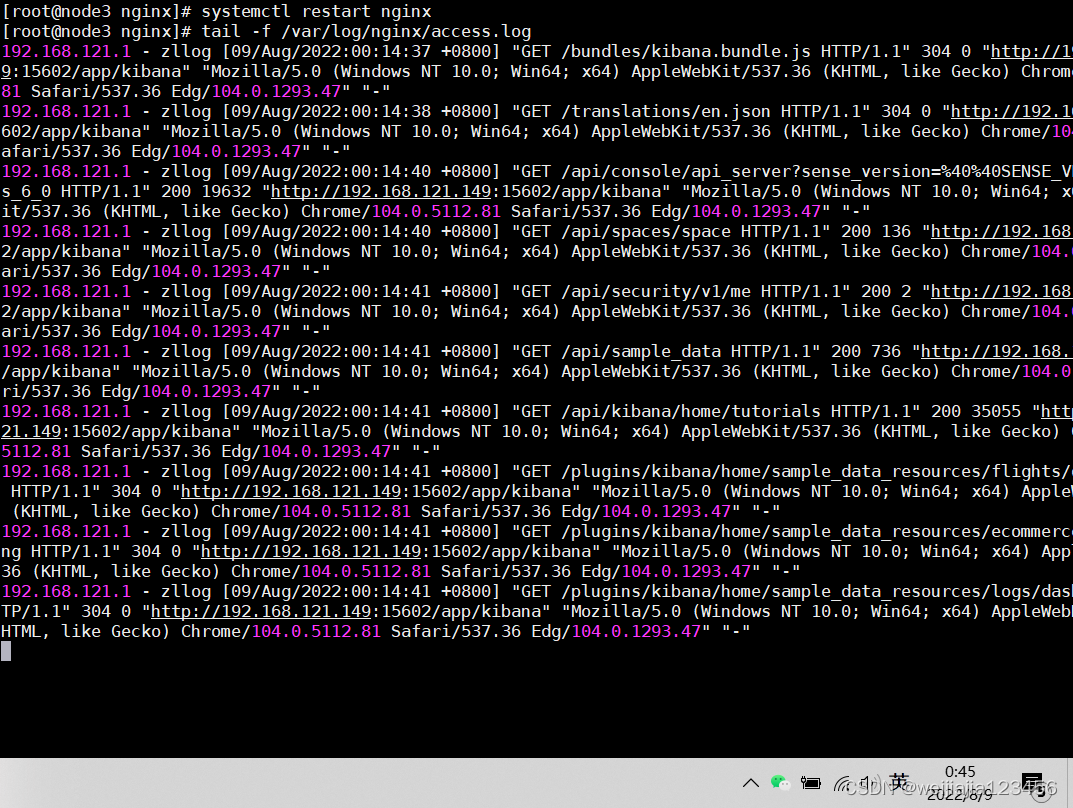
systemctl restart nginx
tail -f /var/log/nginx/access.log
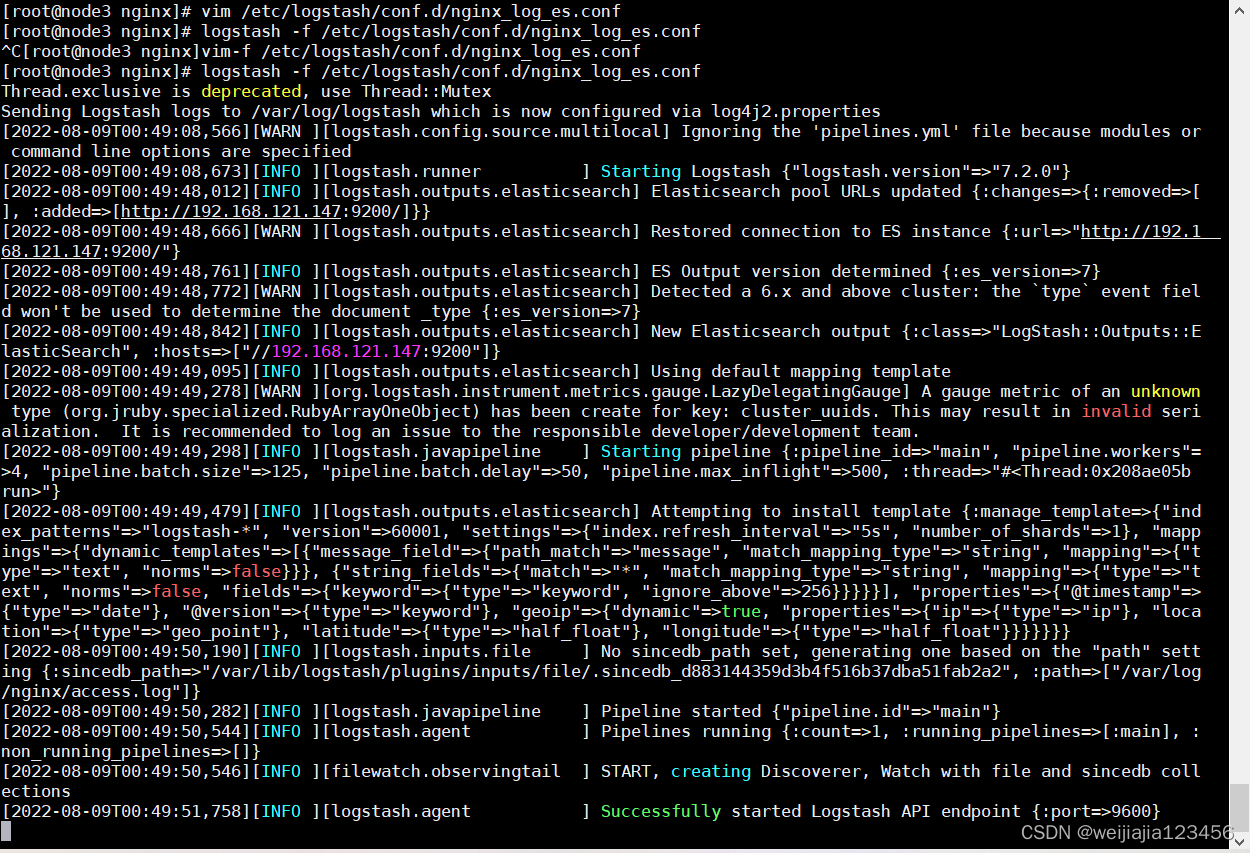
vim /etc/logstash/conf.d/nginx_log_es.conf
input {
  file {
    path => "/var/log/nginx/access.log"
    start_position => "end"
    type => "access_log"
  }
}
output {
  elasticsearch {
    hosts => ["10.0.0.71:9200"]
    index => "nginx_access_log_%{+YYYY-MM-dd}"
  }
}
logstash -f /etc/logstash/conf.d/nginx_log_es.conf
我想为Heroku构建一个Rails3应用程序。他们使用Postgres作为他们的数据库,所以我通过MacPorts安装了postgres9.0。现在我需要一个postgresgem并且共识是出于性能原因你想要pggem。但是我对我得到的错误感到非常困惑当我尝试在rvm下通过geminstall安装pg时。我已经非常明确地指定了所有postgres目录的位置可以找到但仍然无法完成安装:$envARCHFLAGS='-archx86_64'geminstallpg--\--with-pg-config=/opt/local/var/db/postgresql90/defaultdb/po
我打算为ruby脚本创建一个安装程序,但我希望能够确保机器安装了RVM。有没有一种方法可以完全离线安装RVM并且不引人注目(通过不引人注目,就像创建一个可以做所有事情的脚本而不是要求用户向他们的bash_profile或bashrc添加一些东西)我不是要脚本本身,只是一个关于如何走这条路的快速指针(如果可能的话)。我们还研究了这个很有帮助的问题:RVM-isthereawayforsimpleofflineinstall?但有点误导,因为答案只向我们展示了如何离线在RVM中安装ruby。我们需要能够离线安装RVM本身,并查看脚本https://raw.github.com/wayn
我有一个奇怪的问题:我在rvm上安装了rubyonrails。一切正常,我可以创建项目。但是在我输入“railsnew”时重新启动后,我有“程序'rails'当前未安装。”。SystemUbuntu12.04ruby-v"1.9.3p194"gemlistactionmailer(3.2.5)actionpack(3.2.5)activemodel(3.2.5)activerecord(3.2.5)activeresource(3.2.5)activesupport(3.2.5)arel(3.0.2)builder(3.0.0)bundler(1.1.4)coffee-rails(
我刚刚为fedora安装了emacs。我想用emacs编写ruby。为ruby提供代码提示、代码完成类型功能所需的工具、扩展是什么? 最佳答案 ruby-mode已经包含在Emacs23之后的版本中。不过,它也可以通过ELPA获得。您可能感兴趣的其他一些事情是集成RVM、feature-mode(Cucumber)、rspec-mode、ruby-electric、inf-ruby、rinari(用于Rails)等。这是我当前用于Ruby开发的Emacs配置:https://github.com/citizen428/emacs
我的瘦服务器配置了nginx,我的ROR应用程序正在它们上运行。在我发布代码更新时运行thinrestart会给我的应用程序带来一些停机时间。我试图弄清楚如何优雅地重启正在运行的Thin实例,但找不到好的解决方案。有没有人能做到这一点? 最佳答案 #Restartjustthethinserverdescribedbythatconfigsudothin-C/etc/thin/mysite.ymlrestartNginx将继续运行并代理请求。如果您将Nginx设置为使用多个上游服务器,例如server{listen80;server
我正在尝试在我的centos服务器上安装therubyracer,但遇到了麻烦。$geminstalltherubyracerBuildingnativeextensions.Thiscouldtakeawhile...ERROR:Errorinstallingtherubyracer:ERROR:Failedtobuildgemnativeextension./usr/local/rvm/rubies/ruby-1.9.3-p125/bin/rubyextconf.rbcheckingformain()in-lpthread...yescheckingforv8.h...no***e
我的最终目标是安装当前版本的RubyonRails。我在OSXMountainLion上运行。到目前为止,这是我的过程:已安装的RVM$\curl-Lhttps://get.rvm.io|bash-sstable检查已知(我假设已批准)安装$rvmlistknown我看到当前的稳定版本可用[ruby-]2.0.0[-p247]输入命令安装$rvminstall2.0.0-p247注意:我也试过这些安装命令$rvminstallruby-2.0.0-p247$rvminstallruby=2.0.0-p247我很快就无处可去了。结果:$rvminstall2.0.0-p247Search
我实际上是在尝试使用RVM在我的OSX10.7.5上更新ruby,并在输入以下命令后:rvminstallruby我得到了以下回复:Searchingforbinaryrubies,thismighttakesometime.Checkingrequirementsforosx.Installingrequirementsforosx.Updatingsystem.......Errorrunning'requirements_osx_brew_update_systemruby-2.0.0-p247',pleaseread/Users/username/.rvm/log/138121
由于fast-stemmer的问题,我很难安装我想要的任何rubygem。我把我得到的错误放在下面。Buildingnativeextensions.Thiscouldtakeawhile...ERROR:Errorinstallingfast-stemmer:ERROR:Failedtobuildgemnativeextension./System/Library/Frameworks/Ruby.framework/Versions/2.0/usr/bin/rubyextconf.rbcreatingMakefilemake"DESTDIR="cleanmake"DESTDIR=
我是Google云的新手,我正在尝试对其进行首次部署。我的第一个部署是RubyonRails项目。我基本上是在关注thisguideinthegoogleclouddocumentation.唯一的区别是我使用的是我自己的项目,而不是他们提供的“helloworld”项目。这是我的app.yaml文件runtime:customvm:trueentrypoint:bundleexecrackup-p8080-Eproductionconfig.ruresources:cpu:0.5memory_gb:1.3disk_size_gb:10当我转到我的项目目录并运行gcloudprevie