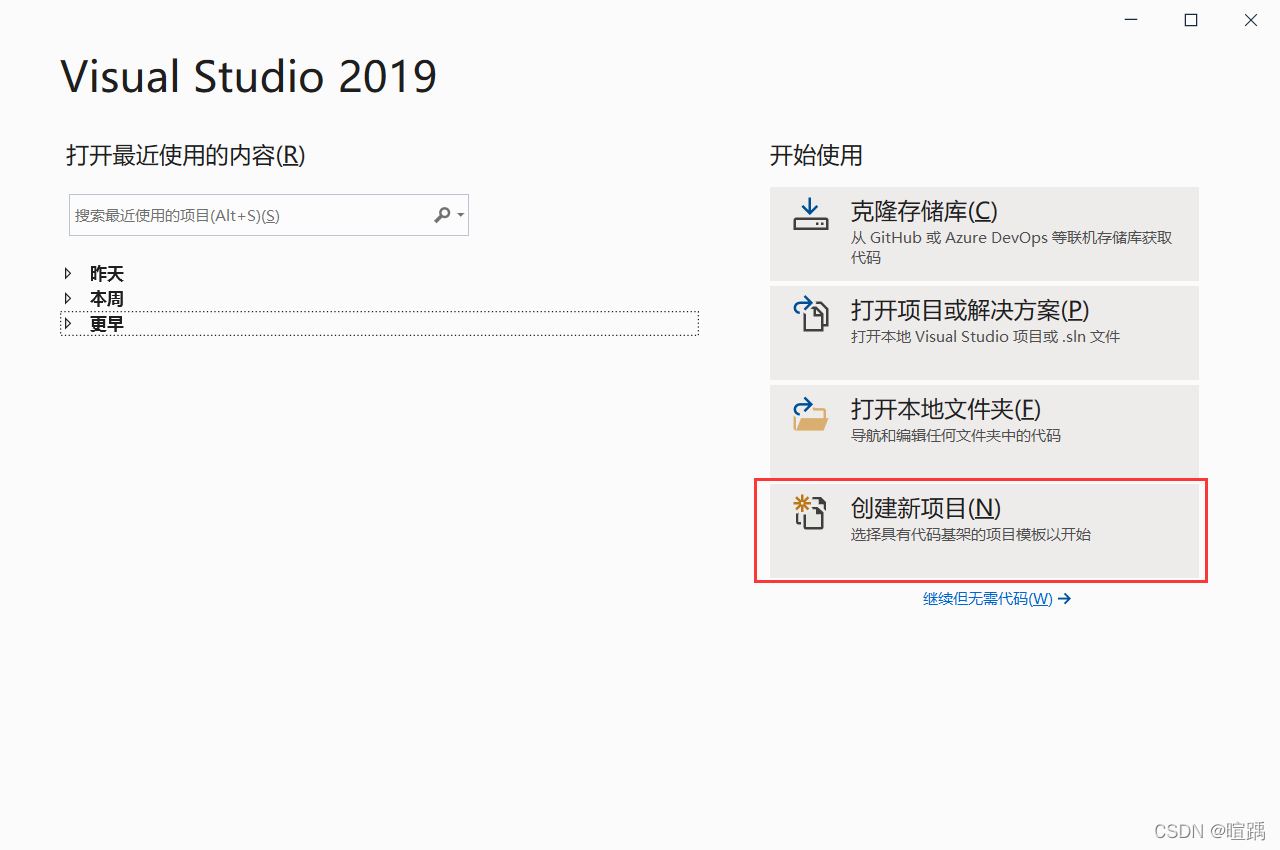
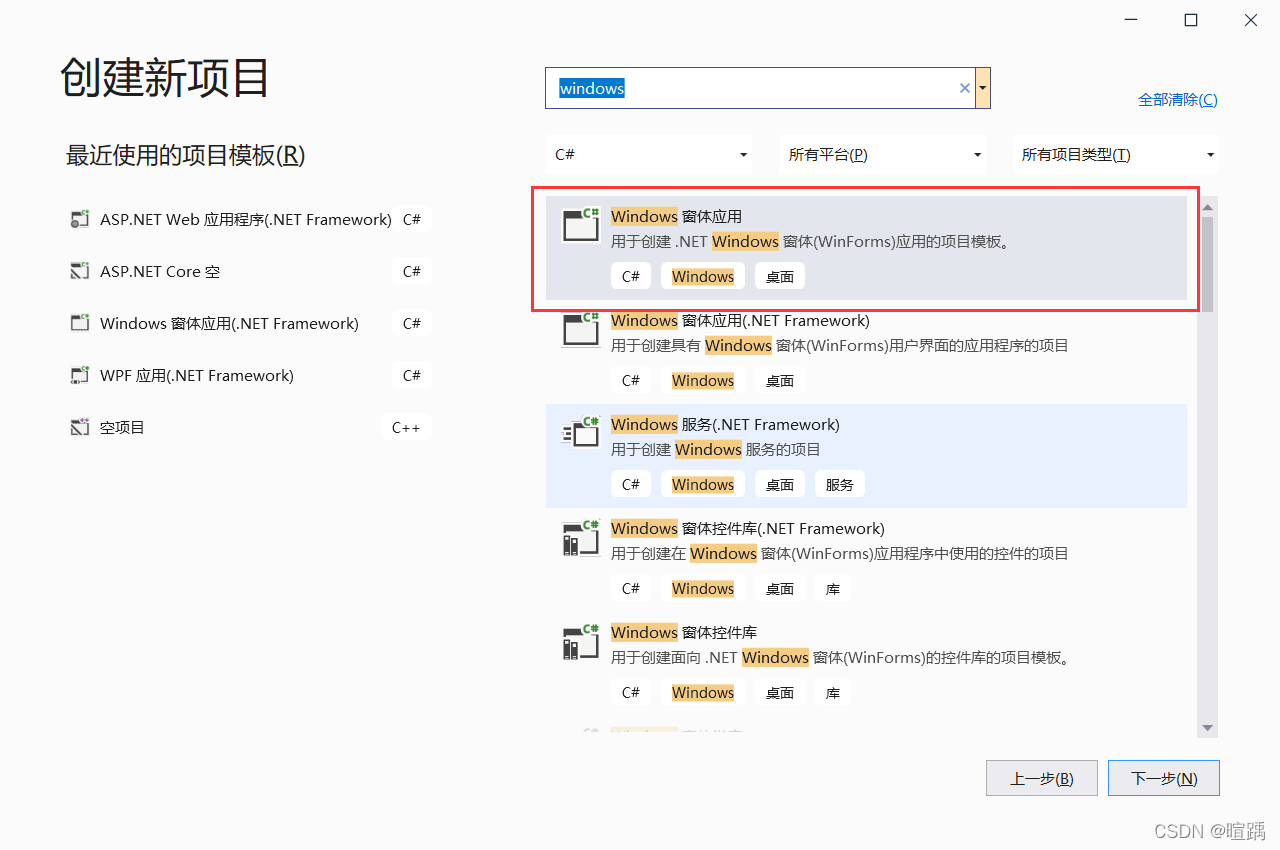
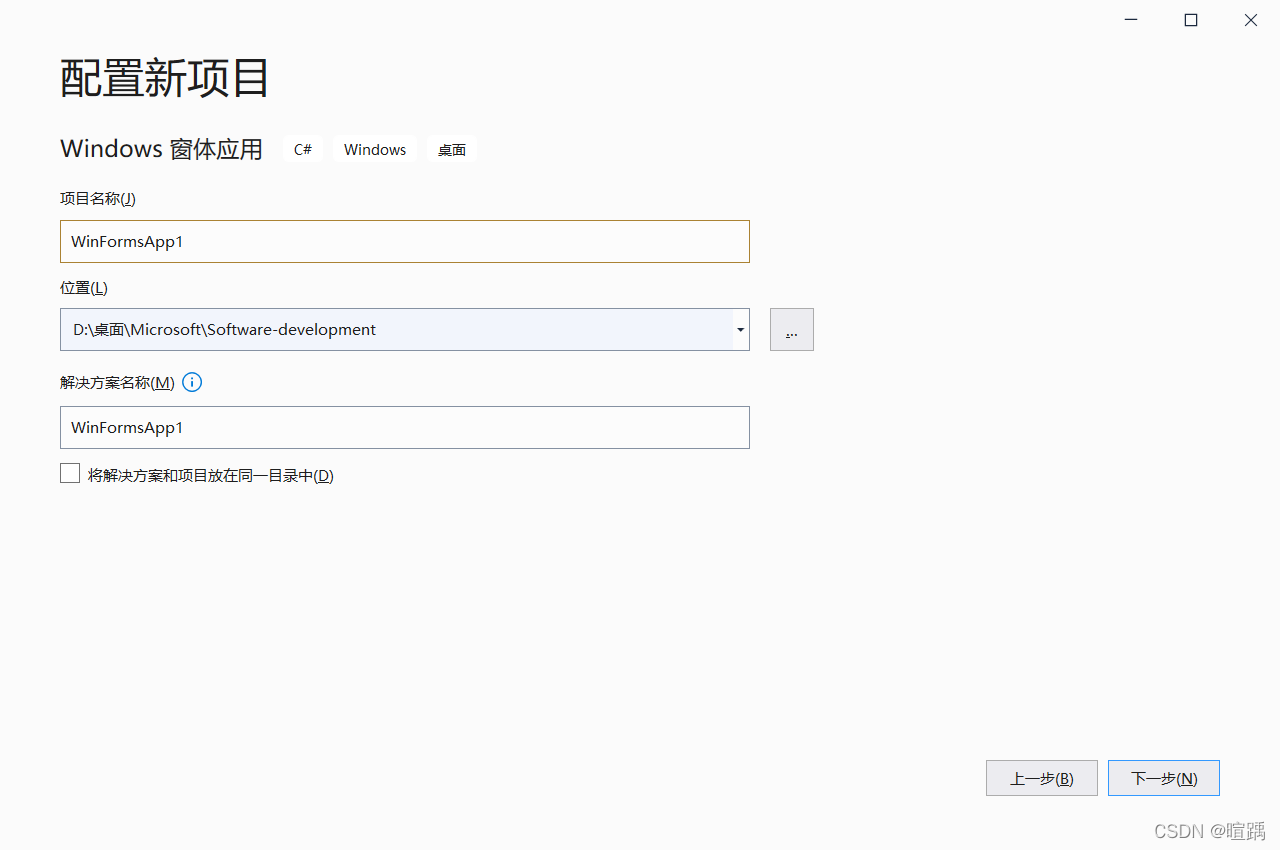
文章目录
WinForm是Windows Form的简称,是基于.NET Framework平台的客户端(PC软件)开发技术,一般使用C#编程。Windows应用程序与Windows操作系统的界面类似,每个界面都是由窗体构成的,并且能通过鼠标单击、键盘输入等操作完成相应的功能。
.NET Core 3.1后可完成Windows窗体应用程序的创建。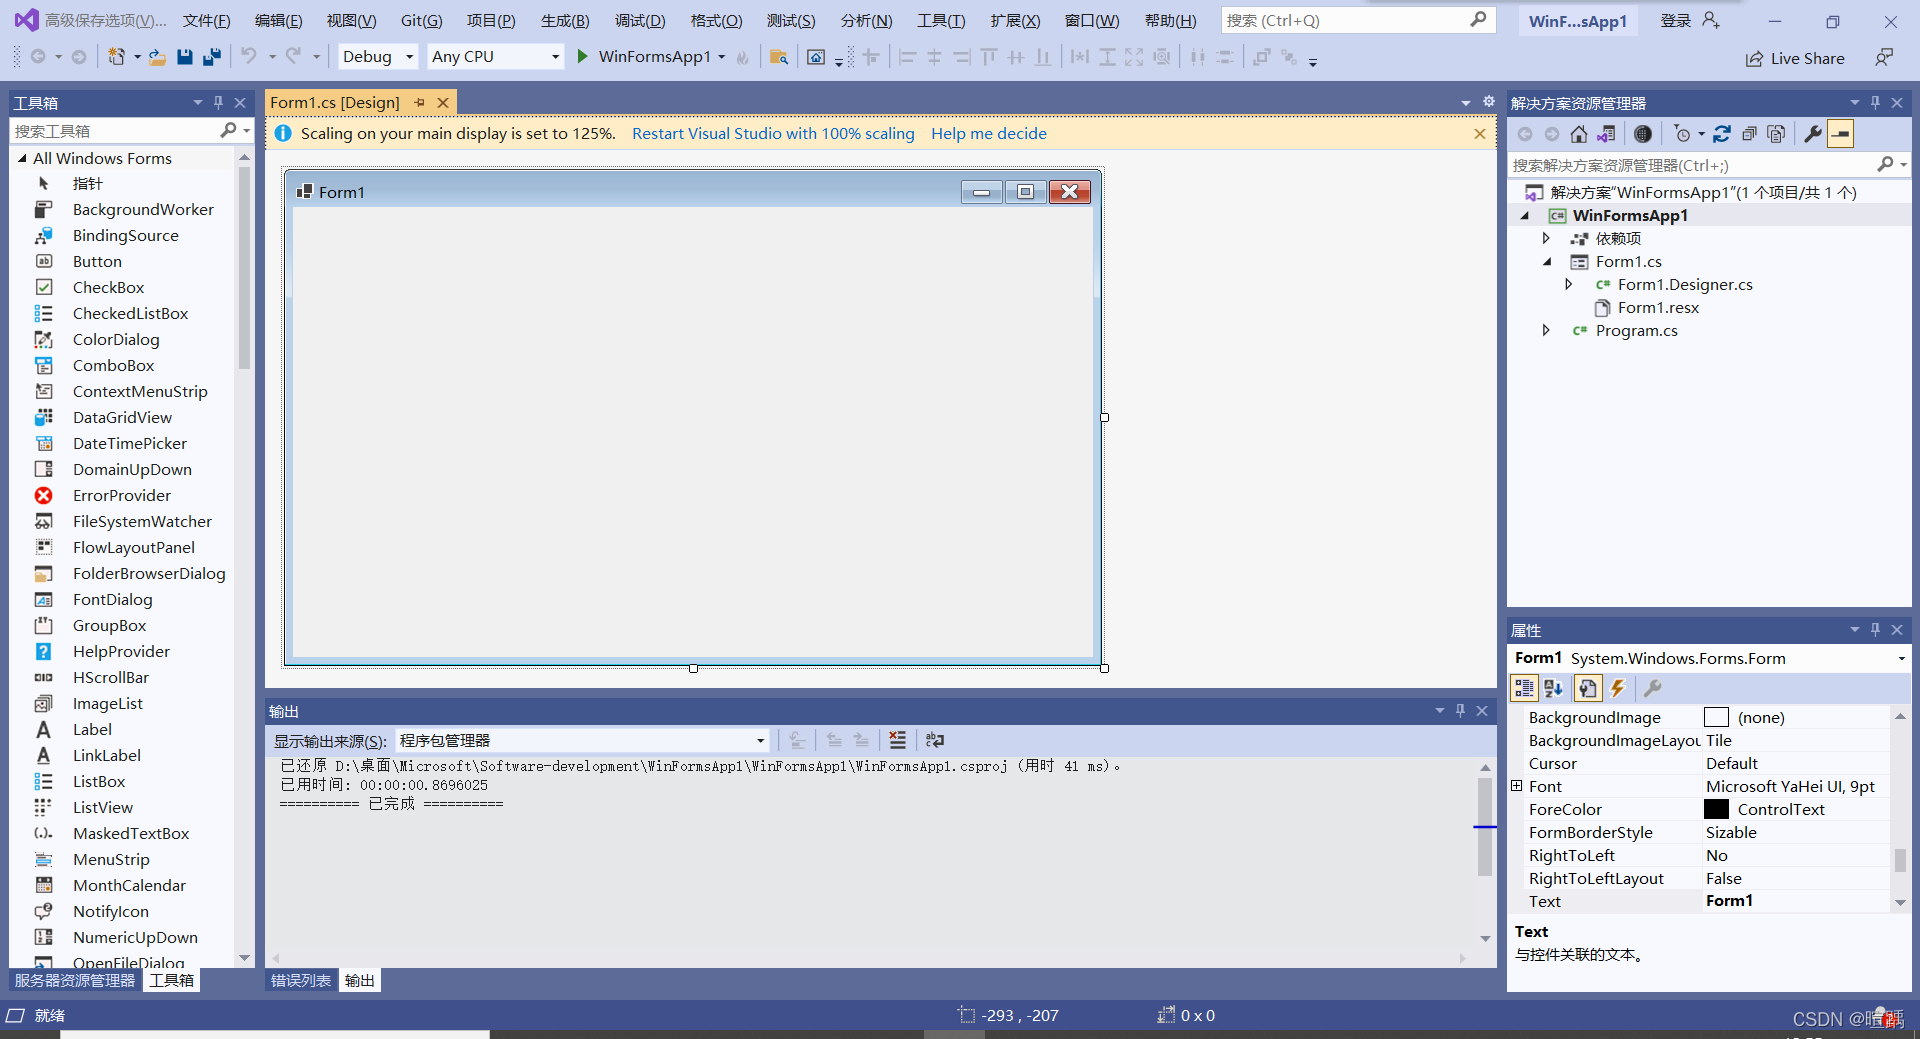
在每一个Windows窗体应用程序的项目文件夹中,都会有一个默认的窗体程序Form1.cs,并且在项目的Program.cs文件中指定要运行的窗体。
Program.cs 文件的代码如下。
using System;
using System.Collections.Generic;
using System.Linq;
using System.Threading.Tasks;
using System.Windows.Forms;

namespace WinFormsApp1
{
    static class Program
    {
        /// <summary>
        ///  The main entry point for the application.
        /// </summary>
        [STAThread]
        static void Main()
        {
            Application.SetHighDpiMode(HighDpiMode.SystemAware);
            // 用于启动应用程序中可视的样式,如果控件和操作系统支持,那么 控件的绘制就能根据显不风格来实现
            Application.EnableVisualStyles();
            // 控件支持UseCompatibleTextRenderingproperty属性,该方法将此属性设置为默认值
            Application.SetCompatibleTextRenderingDefault(false);
            // 用于设置在当前项目中要启动的窗体,new Form1()即为要启动的窗体
            Application.Run(new Form1());
        }
    }
}
在Windows窗体应用程序中界面是由不同类型的控件构成的,系统中默认的控件全部存放到工具箱中,工具箱在视图选项卡下,如下图所示。
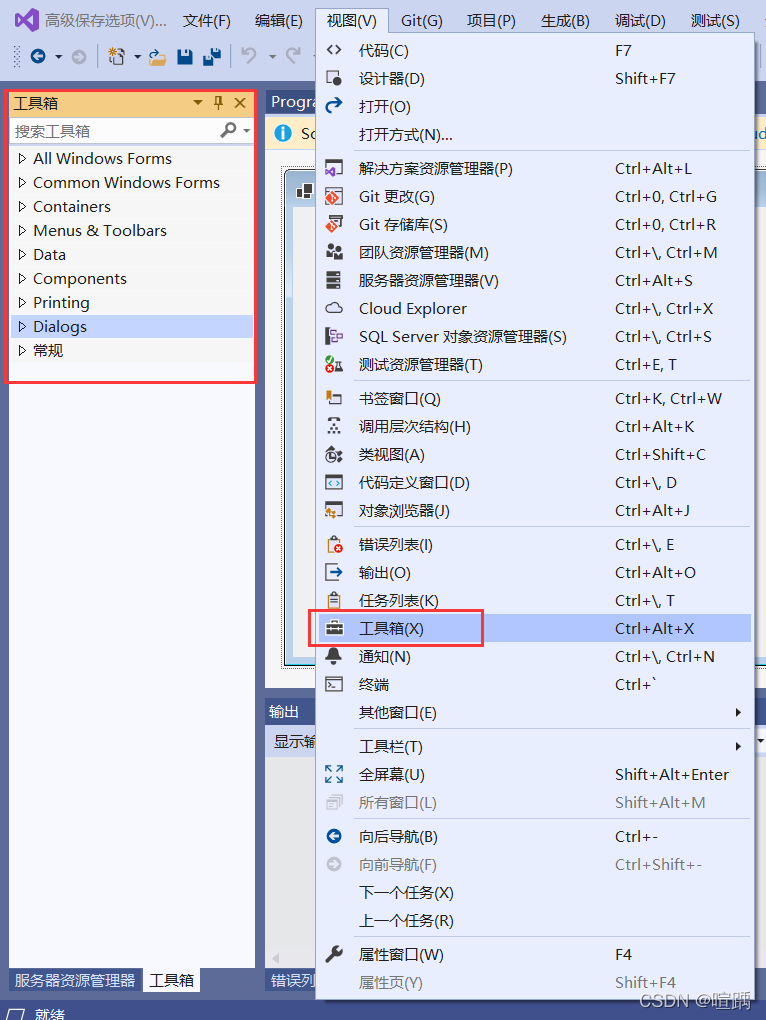
在工具箱中将控件划分为公共控件、容器、菜单和工具栏、数据、组件、打印、对话框等。
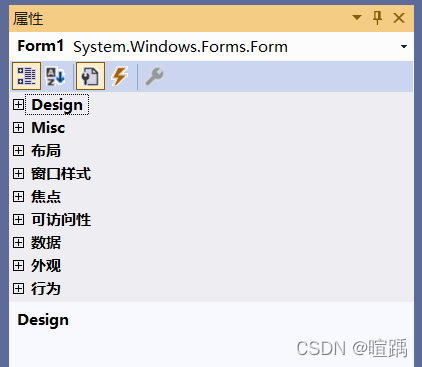
每一个Windows窗体应用程序都是由若干个窗体构成的,窗体中的属性主要用于设置窗体的外观。
在Windows窗体应用程序中右击窗体,在弹出的右键菜单中选择属性,弹出如下图所示的属性面板。
窗体的常用属性如下表所示。
| 属性 | 作用 |
|---|---|
Design:Name | 用来获取或设置窗体的名称 |
布局:WindowState | 获取或设置窗体的初始可视状态,取值有3种,即Normal(正常)、Minimized(最小化)、Maximized(最大化),默认为Normal,即正常显示 |
布局:StartPosition | 获取或设置窗体第一次出现时的位置,取值有5种,即Manual(窗体位置由Location属性决定)、CenterScreen(屏幕居中)、WindowsDefaultLocation( Windows默认位置)、WindowsDefaultBounds(Windows默认位置,边界由Windows决定)、CenterParent(在父窗体中居中),默认为WindowsDefaultLocation |
窗口样式:Icon | 获取或设置窗体上显示的图标 |
窗口样式:MaximizeBox | 获取或设置窗体标题栏右上角是否有最大化按钮,默认为True |
窗口样式:MinimizeBox | 获取或设置窗体标题栏右上角是否有最小化按钮,默认为True |
外观:Text | 获取或设置窗口标题栏中的文字 |
外观:BackColor | 获取或设置窗体的背景色 |
外观:BackgroundImage | 获取或设置窗体的背景图像 |
外观:BackgroundImageLayout | 获取或设置图像布局,取值有 5 种,即None(图片居左显示)、Tile(图像重复,默认值)、Stretch(拉伸)、Center(居中)、Zoom(按比例放大到合适大小) |
外观:Font | 获取或设置窗体上文字的字体 |
外观:ForeColor | 获取或设置窗体上文字的颜色 |
行为:Enabled | 获取或设置窗体是否可用 |
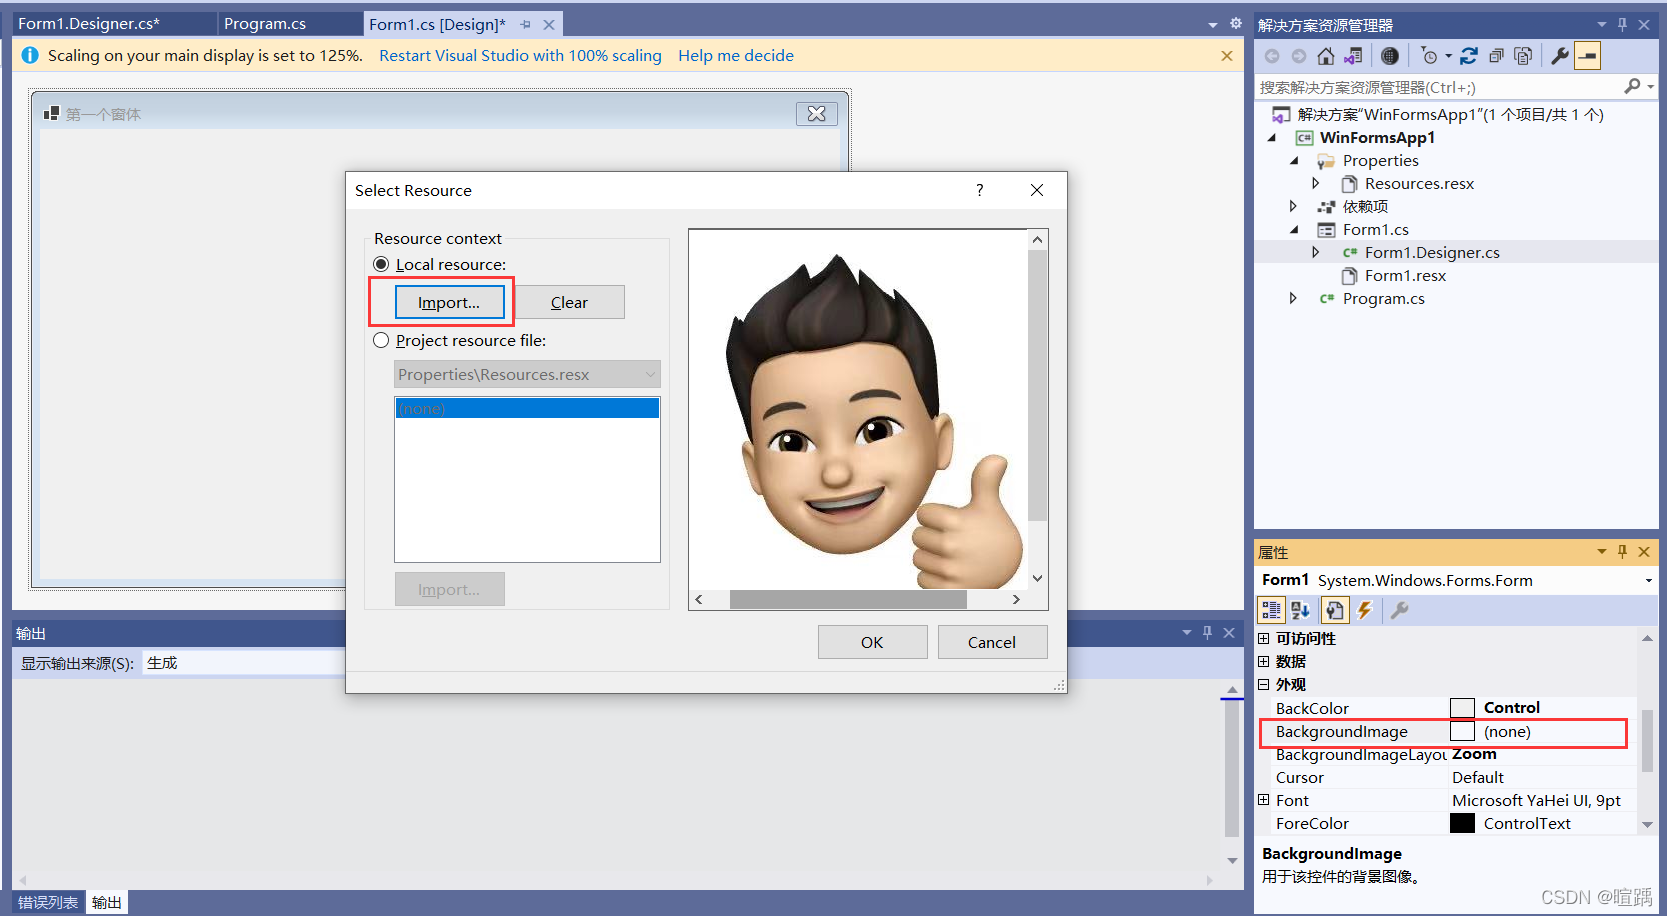
下面实现一个简单的Windows窗体应用程序,部分属性取值如下。
| 属性 | 属性值 |
|---|---|
| Name | Form1 |
| StartPosition | CenterScreen |
| Text | 第一个窗体 |
| MaximizeBox | False |
| MinimizeBox | False |
| Backgroundimage | example.jpg |
| BackgroundlmageLayout | Stretch |
在上述属性中除了背景图片 (Backgroundimage) 属性以外,其他属性直接添加上表中对应的属性值即可。设置背景图片属性 (Backgroimdlmage)的方法是单击Backgroundimage属性后的按钮,在弹出的对话框中单击“导入”按钮。
每一个Windows窗体应用程序在运行时仅能指定一个启动窗体,设置启动窗体的方式是在项目的Program.cs文件中指定。具体的代码如下。
using System;
using System.Collections.Generic;
using System.Linq;
using System.Threading.Tasks;
using System.Windows.Forms;

namespace WinFormsApp1
{
    static class Program
    {
        /// <summary>
        ///  The main entry point for the application.
        /// </summary>
        [STAThread]
        static void Main()
        {
            Application.SetHighDpiMode(HighDpiMode.SystemAware);
            Application.EnableVisualStyles();
            Application.SetCompatibleTextRenderingDefault(false);
            Application.Run(new Form1());
        }
    }
}
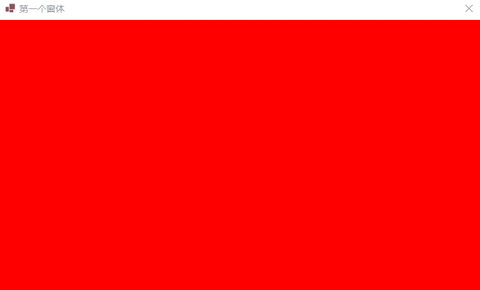
最后按Ctrl+F5键运行程序,效果如下图所示。

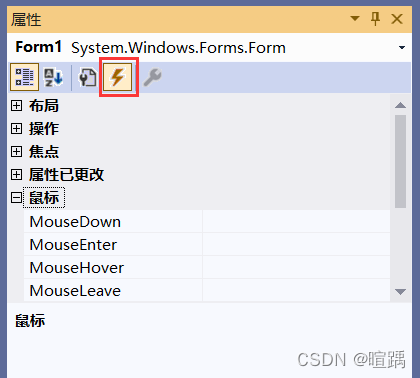
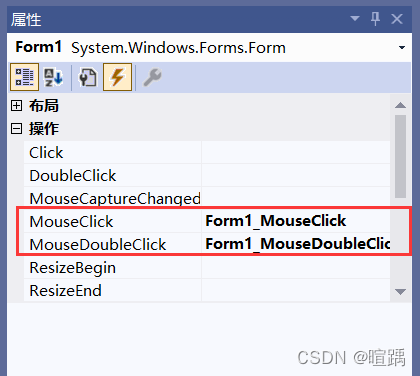
在窗体属性面板中单击闪电图标即可查看到窗体中的事件,如下图所示。
| 事件 | 作用 |
|---|---|
行为:Load | 窗体加载事件,在运行窗体时即可执行该事件 |
操作:MouseClick | 鼠标单击事件 |
操作:MouseDoubleClick | 鼠标双击事件 |
鼠标:MouseMove | 鼠标移动事件 |
钥匙:KeyDown | 键盘按下事件 |
钥匙:KeyUp | 键盘释放事件 |
行为:FormClosing | 窗体关闭事件,关闭窗体时发生 |
行为:FormClosed | 窗体关闭事件,关闭窗体后发生 |
下面的例子通过事件操作改变窗体背景颜色。
using System;
using System.Collections.Generic;
using System.ComponentModel;
using System.Data;
using System.Drawing;
using System.Linq;
using System.Text;
using System.Threading.Tasks;
using System.Windows.Forms;
namespace WinFormsApp1
{
    public partial class Form1 : Form
    {
        public Form1()
        {
            InitializeComponent();
        }

        private void Form1_MouseClick(object sender, MouseEventArgs e)
        {

        }

        private void Form1_MouseDoubleClick(object sender, MouseEventArgs e)
        {

        }

        private void Form1_Load(object sender, EventArgs e)
        {

        }
    }
}
using System;
using System.Collections.Generic;
using System.ComponentModel;
using System.Data;
using System.Drawing;
using System.Linq;
using System.Text;
using System.Threading.Tasks;
using System.Windows.Forms;

namespace WinFormsApp1
{
    public partial class Form1 : Form
    {
        public Form1()
        {
            InitializeComponent();
        }

        private void Form1_MouseClick(object sender, MouseEventArgs e)
        {
            //设置窗体背景颜色为黑色
            this.BackColor = Color.Black;
        }

        private void Form1_MouseDoubleClick(object sender, MouseEventArgs e)
        {
            //设置窗体背景颜色为蓝色
            this.BackColor = Color.Blue;
        }

        private void Form1_Load(object sender, EventArgs e)
        {
            //设置窗体颜色为红色
            this.BackColor = Color.Red;
        }
    }
}
Program.cs类中将Form1窗体设置为启动窗体。using System;
using System.Collections.Generic;
using System.Linq;
using System.Threading.Tasks;
using System.Windows.Forms;
namespace WinFormsApp1
{
static class Program
{
/// <summary>
/// The main entry point for the application.
/// </summary>
[STAThread]
static void Main()
{
Application.SetHighDpiMode(HighDpiMode.SystemAware);
Application.EnableVisualStyles();
Application.SetCompatibleTextRenderingDefault(false);
// 设置启动窗体
Application.Run(new Form1());
}
}
}
自定义的窗体都继承自System.Windows.Form类,能使用Form类中已有的成员,包括属性、方法、事件等。
| 方法 | 作用 |
|---|---|
| void Show() | 显示窗体 |
| void Hide() | 隐藏窗体 |
| DialogResult ShowDialog() | 以对话框模式显示窗体 |
| void CenterToParent() | 使窗体在父窗体边界内居中 |
| void CenterToScreen() | 使窗体在当前屏幕上居中 |
| void Activate() | 激活窗体并给予它焦点 |
| void Close() | 关闭窗体 |
下面的例子实现在一个窗体中打开另外一个窗体。
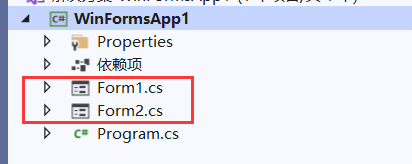
using System;
using System.Collections.Generic;
using System.ComponentModel;
using System.Data;
using System.Drawing;
using System.Linq;
using System.Text;
using System.Threading.Tasks;
using System.Windows.Forms;

namespace WinFormsApp1
{
    public partial class Form1 : Form
    {
        public Form1()
        {
            InitializeComponent();
        }

        private void Form1_MouseClick(object sender, MouseEventArgs e)
        {
            //创建Form2窗体实例
            Form2 form2 = new Form2();
            //打开form2窗体
            form2.Show();
        }
    }
}
using System;
using System.Collections.Generic;
using System.ComponentModel;
using System.Data;
using System.Drawing;
using System.Text;
using System.Windows.Forms;
namespace WinFormsApp1
{
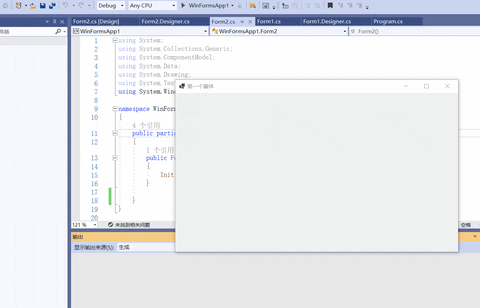
public partial class Form2 : Form
{
public Form2()
{
InitializeComponent();
}
private void Form2_MouseClick(object sender, MouseEventArgs e)
{
//将窗体居中
this.CenterToScreen();
}
private void Form2_MouseDoubleClick(object sender, MouseEventArgs e)
{
//关闭窗体
this.Close();
}
}
}
using System;
using System.Collections.Generic;
using System.Linq;
using System.Threading.Tasks;
using System.Windows.Forms;

namespace WinFormsApp1
{
    static class Program
    {
        /// <summary>
        ///  The main entry point for the application.
        /// </summary>
        [STAThread]
        static void Main()
        {
            Application.SetHighDpiMode(HighDpiMode.SystemAware);
            Application.EnableVisualStyles();
            Application.SetCompatibleTextRenderingDefault(false);
            //设置启动窗体
            Application.Run(new Form1());
        }
    }
}
在使用窗体中的方法时需要注意,如果是当前窗体需要调用方法直接使用 this关键字代表当前窗体,通过this.方法名(参数列表)的方式调用即可。如果要操作其他窗体,则需要用窗体的实例来调用方法。
在Windows窗体应用程序中向用户提示操作时采用消息框弹出的形式。消息框是通过McssageBox类来实现的,定义了 Show 的多个重载方法,该方法的作用就是弹出一个消息框。由于Show方法是一个静态的方法,因此调用该方法只需要使用MessageBox.Show(参数)的形式即可弹出消息框。
| 方法 | 说明 |
|---|---|
| DialogResult Show(string text) | 指定消息框中显示的文本(text) |
| DialogResult Show(string text, string caption) | 指定消息框中显示的文本(text)以及消息框的标题(caption) |
| DialogResult Show(string text, string caption, MessageBoxButtons buttons) | 指定消息框中显示的文本(text)、消息框的 标题(caption)以及消息框中显示的按钮 (buttons) |
| DialogResult Show(string text, string caption, MessageBoxButtons buttons, MessageBoxIcon icon) | 指定消息框中显示的文本(text)、消息框的 标题(caption )、消息框中显示的按钮 (buttons)以及消息框中显示的图标(icon) |
在上面所列出方法的参数中涉及两个枚举类型MessageBoxButtons和MessageBoxIcon。
MessageBoxButtons枚举类型主要用于设置消息框中显示的按钮,具体的枚举值如下:
MessageBoxIcon枚举类型主要用于设置消息框中显示的图标,具体的枚举值如下。
i组成的图标。调用 MessageBox 类中的Show方法将返回一个DialogResult类型的值。DialogResult也是一个枚举类型,是消息框的返回值,通过单击消息框中不同的按钮得到不同的消息框返回值。具体值如下。
下面的例子实现通过消息框提示打开新窗体。
using System;
using System.Collections.Generic;
using System.ComponentModel;
using System.Data;
using System.Drawing;
using System.Linq;
using System.Text;
using System.Threading.Tasks;
using System.Windows.Forms;

namespace WinFormsApp1
{
    public partial class Form1 : Form
    {
        public Form1()
        {
            InitializeComponent();
        }

        private void Form1_MouseClick(object sender, MouseEventArgs e)
        {
            //弹出消息框,并获取消息框的返回值
            DialogResult dr = MessageBox.Show("是否打开新窗体?", "提示", MessageBoxButtons.YesNo, MessageBoxIcon.Warning);
            //如果消息框返回值是Yes,显示新窗体
            if (dr == DialogResult.Yes)
            {
                Form2 form2 = new Form2();
                form2.Show();
            }
            //如果消息框返回值是No,关闭当前窗体
            else if (dr == DialogResult.No)
            {
                //关闭当前窗体
                this.Close();
            }
        }
    }
}
在Windows窗体应用程序中每个窗体都是由若干个控件构成的。控件就是指能输入文本的位置、能选择的位置、能单击的位置、图片显示的位置等。其中:
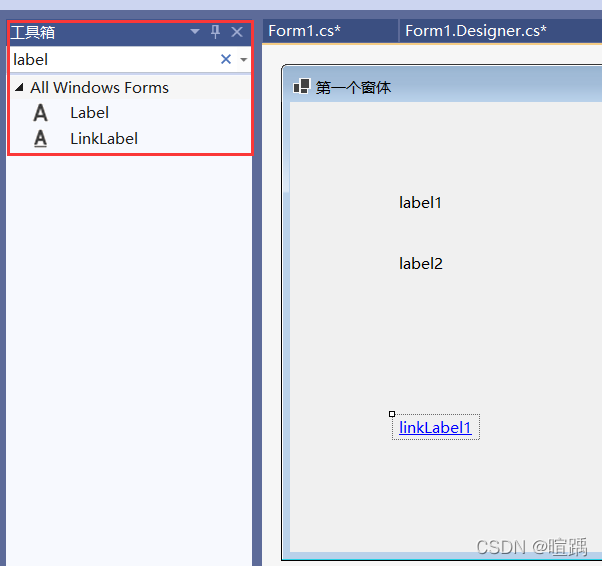
通常使用标签控件来显示文本,标签控件王要分为普通的标签(Label)和超链接形式的标签(LinkLabel) 。
| 属性名 | 作用 |
|---|---|
| Name | 标签对象的名称,区别不同标签唯一标志 |
| Text | 标签对象上显示的文本 |
| Font | 标签中显示文本的样式 |
| ForeColor | 标签中显示文本的颜色 |
| BackColor | 标签的背景颜色 |
| Image | 标签中显示的图片 |
| AutoSize | 标签的大小是否根据内容自动调整,True为自动调整,False为用户自定义大小 |
| Size | 指定标签控件的大小 |
| Visible | 标签是否可见,True 为可见,False 为不可见 |
普通标签控件(Label)中的事件与窗体的事件类似,常用的事件主要有鼠标单击事件、 鼠标双击事件、标签上文本改变的事件等。
超链接标签控件(LinkLabel)也具有相同的属性和事件,主要应用的事件是鼠标单击事件。
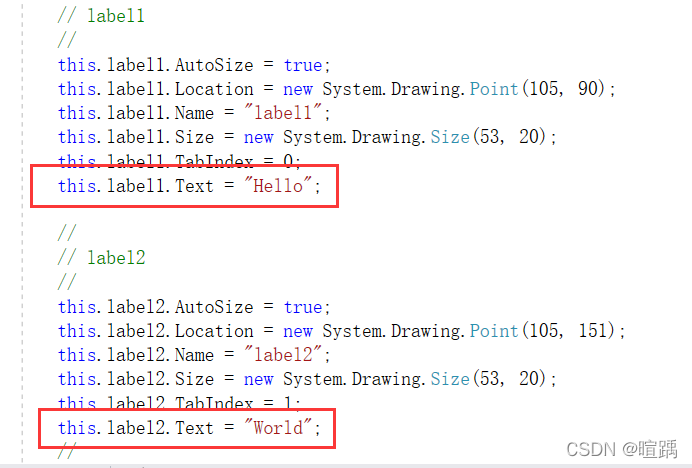
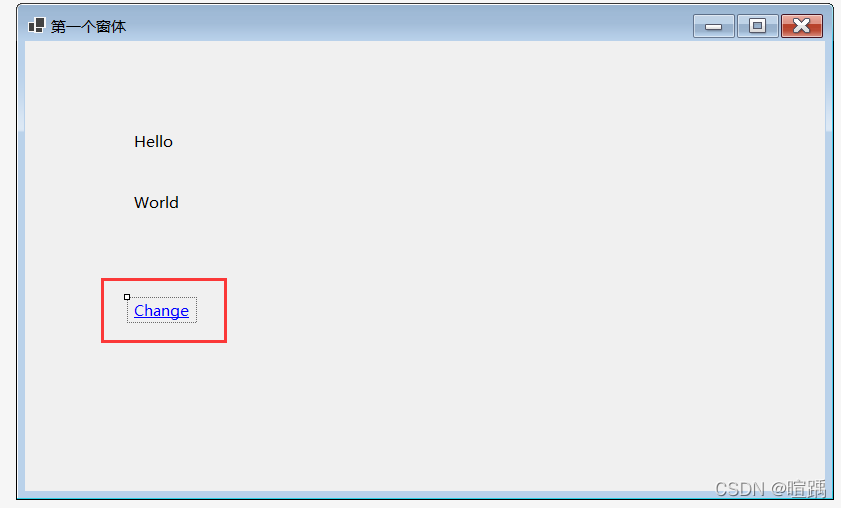
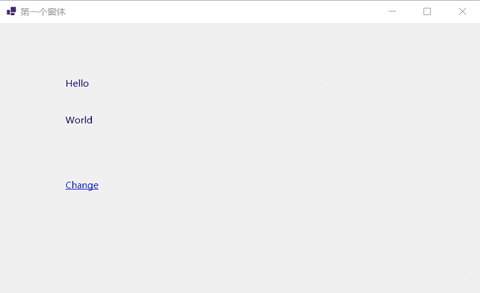
下面的例子实现通过超链接单击事件交换两个普通标签的文本信息。
using System;
using System.Collections.Generic;
using System.ComponentModel;
using System.Data;
using System.Drawing;
using System.Linq;
using System.Text;
using System.Threading.Tasks;
using System.Windows.Forms;

namespace WinFormsApp1
{
    public partial class Form1 : Form
    {
        public Form1()
        {
            InitializeComponent();
        }
		// 超链接点击事件
        private void linkLabel1_LinkClicked(object sender, LinkLabelLinkClickedEventArgs e)
        {
            //交换标签上的信息。
            string temp = label1.Text;
            label1.Text = label2.Text;
            label2.Text = temp;
        }
    }
}
文本框(TextBox)是在窗体中输入信息时最常用的控件,通过设置文本框属性可以实现多行文本框、密码框等。
| 属性名 | 作用 |
|---|---|
| Text | 文本框对象中显示的文本 |
| MaxLength | 在文本框中最多输入的文本的字符个数 |
| WordWrap | 文本框中的文本是否自动换行,如果是True,则自动换行,如果是False,则不能自动换行 |
| PasswordChar | 将文本框中出现的字符使用指定的字符替换,通常会使用*字符 |
| Multiline | 指定文本框是否为多行文本框,如果为True,则为多行文本框,如果为False,则为单行文本框 |
| ReadOnly | 指定文本框中的文本是否可以更改,如果为True,则不能更改,即只读文本框,如果为False,则允许更改文本框中的文本 |
| Lines | 指定文本框中文本的行数 |
| ScrollBars | 指定文本框中是否有滚动条,如果为True,则有滚动条,如果为False, 则没有滚动条 |
文本框控件最常使用的事件是文本改变事件(TextChange),即在文本框控件中的内容改变时触发该事件。
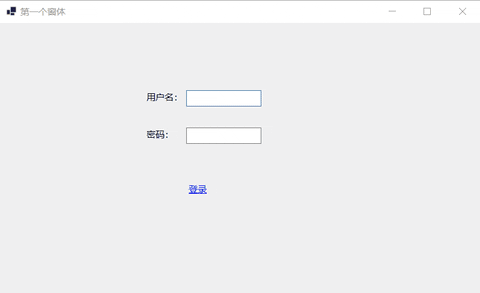
下面的例子实现简单的登录窗体。
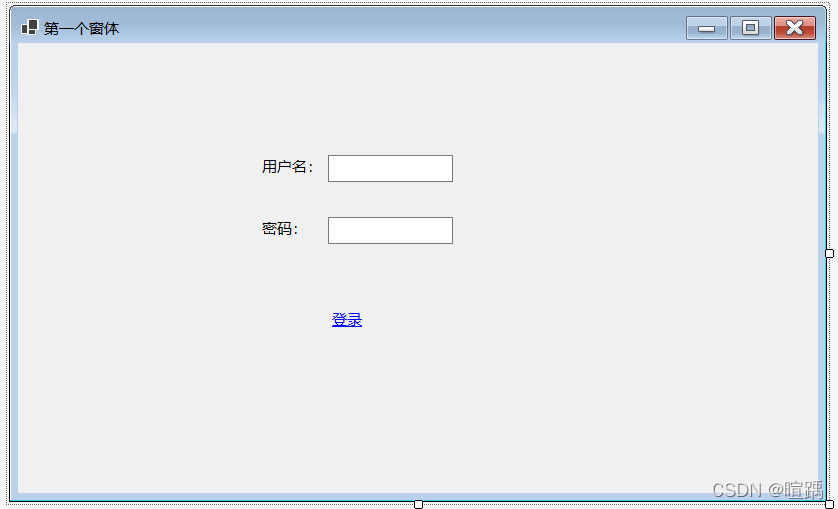
            // textBox1
            //
            this.textBox1.Location = new System.Drawing.Point(310, 112);
            this.textBox1.Name = "textBox1";
            this.textBox1.Size = new System.Drawing.Size(125, 27);
            this.textBox1.TabIndex = 0;
            //
            // textBox2
            //
            this.textBox2.Location = new System.Drawing.Point(310, 174);
            this.textBox2.Name = "textBox2";
			// 密码框,将用户输入的密码用*替代
            this.textBox2.PasswordChar = '*';
            this.textBox2.Size = new System.Drawing.Size(125, 27);
            this.textBox2.TabIndex = 1;
            //
            // label1
            //
            this.label1.AutoSize = true;
            this.label1.Location = new System.Drawing.Point(240, 113);
            this.label1.Name = "label1";
            this.label1.Size = new System.Drawing.Size(69, 20);
            this.label1.TabIndex = 2;
            this.label1.Text = "用户名:";
            //
            // label2
            //
            this.label2.AutoSize = true;
            this.label2.Location = new System.Drawing.Point(240, 175);
            this.label2.Name = "label2";
            this.label2.Size = new System.Drawing.Size(54, 20);
            this.label2.TabIndex = 3;
            this.label2.Text = "密码:";
            //
            // linkLabel1
            //
            this.linkLabel1.AutoSize = true;
            this.linkLabel1.Location = new System.Drawing.Point(310, 266);
            this.linkLabel1.Name = "linkLabel1";
            this.linkLabel1.Size = new System.Drawing.Size(39, 20);
            this.linkLabel1.TabIndex = 4;
            this.linkLabel1.TabStop = true;
            this.linkLabel1.Text = "登录";
            this.linkLabel1.LinkClicked += new System.Windows.Forms.LinkLabelLinkClickedEventHandler(this.linkLabel1_LinkClicked);
using System;
using System.Collections.Generic;
using System.ComponentModel;
using System.Data;
using System.Drawing;
using System.Linq;
using System.Text;
using System.Threading.Tasks;
using System.Windows.Forms;

namespace WinFormsApp1
{
    public partial class Form1 : Form
    {
        public Form1()
        {
            InitializeComponent();
        }

        private void linkLabel1_LinkClicked(object sender, LinkLabelLinkClickedEventArgs e)
        {
            //获取用户名
            string username = textBox1.Text;
            //获取密码
            string password = textBox2.Text;
            //判断用户名密码是否正确
            if ("Kint".Equals(username) && "1111".Equals(password))
            {
                MessageBox.Show("登录成功!");
            }
            else
            {
                MessageBox.Show("登录失败!");
            }
        }
    }
}
按钮主要用于提交页面的内容,或者是确认某种操作等。常用的属性包括在按钮中显示的文字 (Text) 以及按钮外观设置的属性,最常用的事件是单击事件。
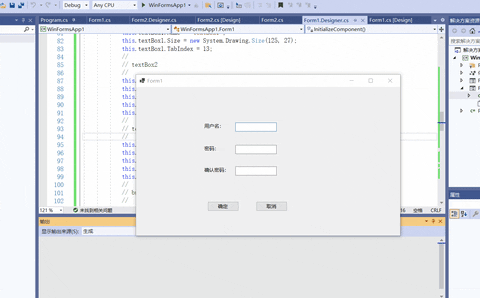
下面的例子实现一个简单的用户注册功能,并将提交的注册信息显示在新窗体的文本框中。


using System;
using System.Collections.Generic;
using System.ComponentModel;
using System.Data;
using System.Drawing;
using System.Linq;
using System.Text;
using System.Threading.Tasks;
using System.Windows.Forms;

namespace WinFormsApp1
{
    public partial class Form1 : Form
    {
        public Form1()
        {
            InitializeComponent();
        }
        //“确定”按钮的单击事件,用于判断注册信息并跳转到新窗口显示注册信息
        private void button1_Click(object sender, EventArgs e)
        {
            string name = textBox1.Text;
            string pwd = textBox2.Text;
            string repwd = textBox3.Text;
            if (string.IsNullOrEmpty(name))
            {
                MessageBox.Show("用户名不能为空!");
                return;
            }
            else if (string.IsNullOrEmpty(textBox2.Text))
            {
                MessageBox.Show("密码不能为空!");
                return;
            }
            else if (!textBox2.Text.Equals(textBox3.Text))
            {
                MessageBox.Show("两次输入的密码不一致!");
                return;
            }
            //将用户名和密码传递到Form2中
            Form2 form2 = new Form2(name, pwd);
            form2.Show();
        }
        //“取消”按钮的事件,用于关闭窗体
        private void button2_Click(object sender, EventArgs e)
        {
            //关闭窗体
            this.Close();
        }
    }
}
using System;
using System.Collections.Generic;
using System.ComponentModel;
using System.Data;
using System.Drawing;
using System.Text;
using System.Windows.Forms;

namespace WinFormsApp1
{
    public partial class Form2 : Form
    {
        public Form2(string name, string pwd)
        {
            InitializeComponent();
            label2.Text = "用户名:" + name;
            label3.Text = "密  码:" + pwd;
        }
    }
}
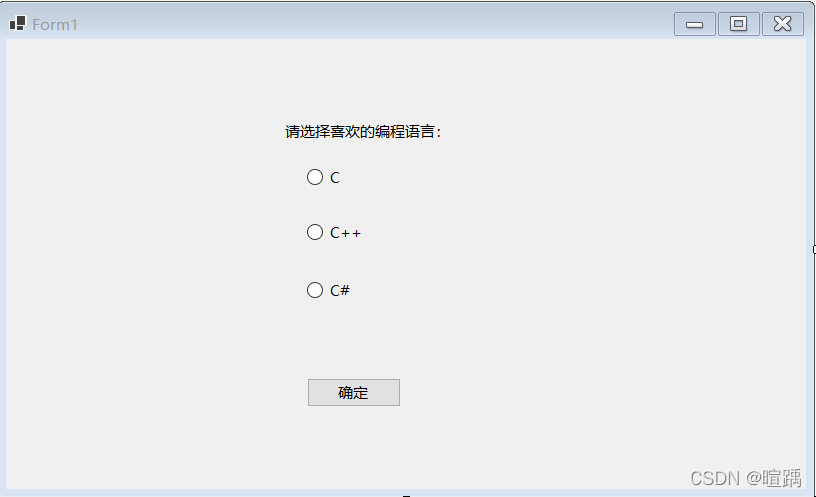
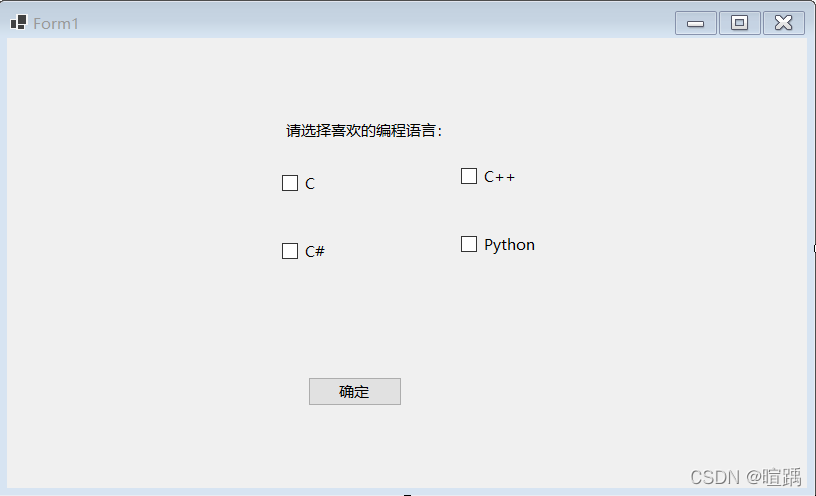
RadioButton是单选按钮控件,多个RadioButton控件可以为一组,这一组内的RadioButton控件只能有一个被选中。
下面通过一个例子使用单选按钮控件。
using System;
using System.Collections.Generic;
using System.ComponentModel;
using System.Data;
using System.Drawing;
using System.Linq;
using System.Text;
using System.Threading.Tasks;
using System.Windows.Forms;

namespace WinFormsApp1
{
    public partial class Form1 : Form
    {
        public Form1()
        {
            InitializeComponent();
        }
		// 单击“确定”按钮的事件
        private void button1_Click(object sender, EventArgs e)
        {
            string msg = "";
            if (radioButton1.Checked)
            {
                msg = radioButton1.Text;
            }
            else if (radioButton2.Checked)
            {
                msg = radioButton2.Text;
            }
            else if (radioButton3.Checked)
            {
                msg = radioButton3.Text;
            }
            MessageBox.Show("您喜欢的编程语言是:" + msg, "提示");
        }
    }
}
Checked属性可用于判断单选按钮是否被选中。如果该属性的返回值为True,则代表选中;如果返回值为False,则表示未选中。

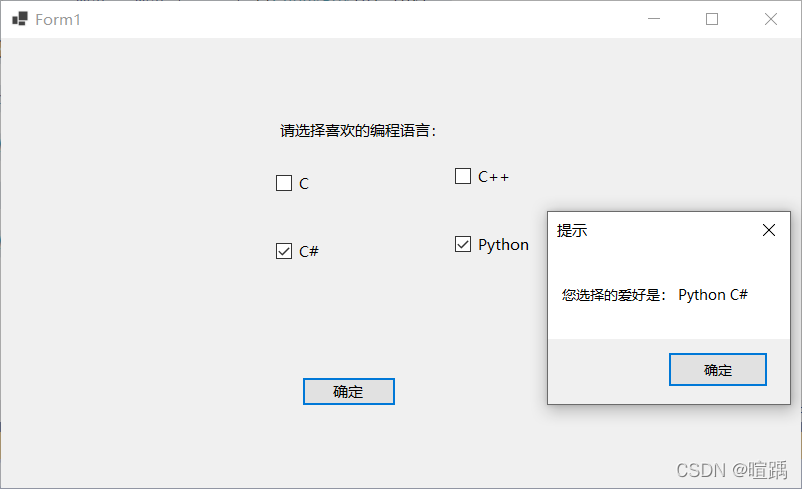
复选框主要的属性有:
主要的事件就是CheckedChanged事件。
下面通过一个例子使用复选框控件。
using System;
using System.Collections.Generic;
using System.ComponentModel;
using System.Data;
using System.Drawing;
using System.Linq;
using System.Text;
using System.Threading.Tasks;
using System.Windows.Forms;

namespace WinFormsApp1
{
    public partial class Form1 : Form
    {
        public Form1()
        {
            InitializeComponent();
        }

        private void button1_Click(object sender, EventArgs e)
        {
            string msg = "";
            // 界面上的每一个控件都继承自Control类
            foreach (Control c in Controls)
            {
                //判断控件是否为复选框控件
                if (c is CheckBox)
                {
                    if (((CheckBox)c).Checked)
                    {
                        msg = msg + " " + ((CheckBox)c).Text;
                    }
                }
            }
            if (msg != "")
            {
                MessageBox.Show("您选择的爱好是:" + msg, "提示");
            }
            else
            {
                MessageBox.Show("您没有选择爱好", "提示");
            }
        }
    }
}
复选列表框显示的效果与复选框类似,但在选择多个选项时操作比一般的复选框更方便。
下面通过一个例子使用复选列表框控件。

			// checkedListBox1
            //
            this.checkedListBox1.FormattingEnabled = true;
			// 设置可选项
            this.checkedListBox1.Items.AddRange(new object[] {
            "苹果",
            "香蕉",
            "梨"});
            this.checkedListBox1.Location = new System.Drawing.Point(275, 135);
            this.checkedListBox1.Name = "checkedListBox1";
            this.checkedListBox1.Size = new System.Drawing.Size(165, 136);
            this.checkedListBox1.TabIndex = 18;
            //
using System;
using System.Collections.Generic;
using System.ComponentModel;
using System.Data;
using System.Drawing;
using System.Linq;
using System.Text;
using System.Threading.Tasks;
using System.Windows.Forms;
namespace WinFormsApp1
{
    public partial class Form1 : Form
    {
        public Form1()
        {
            InitializeComponent();
        }
        private void button1_Click(object sender, EventArgs e)
        {
            string msg = "";
            for (int i = 0; i < checkedListBox1.CheckedItems.Count; i++)
            {
                msg = msg + " " + checkedListBox1.CheckedItems[i].ToString();
            }
            if (msg != "")
            {
                MessageBox.Show("您购买的水果有:" + msg, "提示");
            }
            else
            {
                MessageBox.Show("您没有选购水果!", "提示");
            }
        }
    }
}
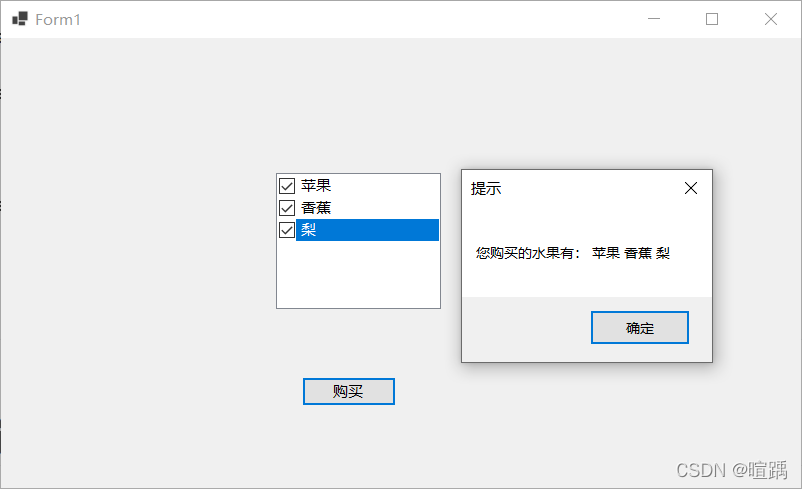
在使用复选列表框控件时需要注意获取列表中的项使用的是Checkedltems属性,获取当前选中的文本(上图中蓝色的区域)使用的是 Selectedltem属性。
列表框 (ListBox) 将所提供的内容以列表的形式显示出来,可以选择其中的一项或多项内容。
| 属性名 | 作用 |
|---|---|
| MultiColumn | 获取或设置列表框是否支持多列,如果设置为 True,则表示支持多列; 如果设置为 False,则表示不支持多列,默认为 False |
| Items | 获取或设置列表框控件中的值 |
| SelectedItems | 获取列表框中所有选中项的集合 |
| SelectedItem | 获取列表框中当前选中的项 |
| SelectedIndex | 获取列表框中当前选中项的索引,索引从 0 开始 |
| SelectionMode | 获取或设置列表框中选择的模式,当值为 One 时,代表只能选中一项, 当值为 MultiSimple 时,代表能选择多项,当值为 None 时,代表不能选 择,当值为 MultiExtended 时,代表能选择多项,但要在按下 Shift 键后 再选择列表框中的项 |
列表框还提供了一些方法来操作列表框中的选项,由于列表框中的选项是一个集合形式的,列表项的操作都是用Items属性进行的。
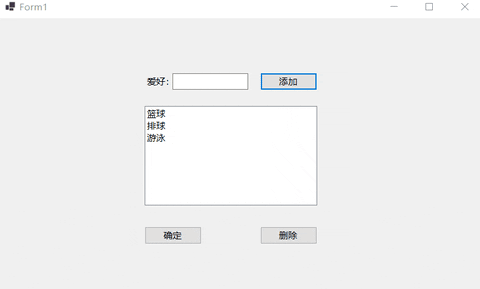
Items.Add 方法用于向列表框中添加项;Items.Insert 方法用于向列表框中的指定位置添加项;Items.Remove 方法用于移除列表框中的项。下面通过一个例子使用列表框控件。
            // listBox1
            //
            this.listBox1.FormattingEnabled = true;
            this.listBox1.ItemHeight = 20;
            this.listBox1.Location = new System.Drawing.Point(241, 145);
            this.listBox1.Name = "listBox1";
            this.listBox1.Size = new System.Drawing.Size(285, 164);
            this.listBox1.TabIndex = 18;
            this.listBox1.Items.AddRange(new object[] {"篮球","排球","游泳" });
            //
using System;
using System.Collections.Generic;
using System.ComponentModel;
using System.Data;
using System.Drawing;
using System.Linq;
using System.Text;
using System.Threading.Tasks;
using System.Windows.Forms;

namespace WinFormsApp1
{
    public partial class Form1 : Form
    {
        public Form1()
        {
            InitializeComponent();
        }
        // 将文本框中的值添加到列表框中
        private void button1_Click(object sender, EventArgs e)
        {
            // 当文本框中的值不为空时将其添加到列表框中
            if (textBox1.Text != "")
            {
                listBox1.Items.Add(textBox1.Text);
            }
            else
            {
                MessageBox.Show("请添加爱好!");
            }
        }
        // 将列表框中的选中项删除
        private void button3_Click(object sender, EventArgs e)
        {
            // 由于列表框控件中允许多选所以需要循环删除所有已选项
            int count = listBox1.SelectedItems.Count;
            List<string> itemValues = new List<string>();
            if (count != 0)
            {
                for (int i = 0; i < count; i++)
                {
                    itemValues.Add(listBox1.SelectedItems[i].ToString());
                }
                foreach (string item in itemValues)
                {
                    listBox1.Items.Remove(item);
                }
            }
            else
            {
                MessageBox.Show("请选择需要删除的爱好!");
            }
        }
    }
}
我需要在客户计算机上运行Ruby应用程序。通常需要几天才能完成(复制大备份文件)。问题是如果启用sleep,它会中断应用程序。否则,计算机将持续运行数周,直到我下次访问为止。有什么方法可以防止执行期间休眠并让Windows在执行后休眠吗?欢迎任何疯狂的想法;-) 最佳答案 Here建议使用SetThreadExecutionStateWinAPI函数,使应用程序能够通知系统它正在使用中,从而防止系统在应用程序运行时进入休眠状态或关闭显示。像这样的东西:require'Win32API'ES_AWAYMODE_REQUIRED=0x0
对于具有离线功能的智能手机应用程序,我正在为Xml文件创建单向文本同步。我希望我的服务器将增量/差异(例如GNU差异补丁)发送到目标设备。这是计划:Time=0Server:hasversion_1ofXmlfile(~800kiB)Client:hasversion_1ofXmlfile(~800kiB)Time=1Server:hasversion_1andversion_2ofXmlfile(each~800kiB)computesdeltaoftheseversions(=patch)(~10kiB)sendspatchtoClient(~10kiBtransferred)Cl
Rackup通过Rack的默认处理程序成功运行任何Rack应用程序。例如:classRackAppdefcall(environment)['200',{'Content-Type'=>'text/html'},["Helloworld"]]endendrunRackApp.new但是当最后一行更改为使用Rack的内置CGI处理程序时,rackup给出“NoMethodErrorat/undefinedmethod`call'fornil:NilClass”:Rack::Handler::CGI.runRackApp.newRack的其他内置处理程序也提出了同样的反对意见。例如Rack
我想用ruby编写一个小的命令行实用程序并将其作为gem分发。我知道安装后,Guard、Sass和Thor等某些gem可以从命令行自行运行。为了让gem像二进制文件一样可用,我需要在我的gemspec中指定什么。 最佳答案 Gem::Specification.newdo|s|...s.executable='name_of_executable'...endhttp://docs.rubygems.org/read/chapter/20 关于ruby-在Ruby中编写命令行实用程序
我构建了两个需要相互通信和发送文件的Rails应用程序。例如,一个Rails应用程序会发送请求以查看其他应用程序数据库中的表。然后另一个应用程序将呈现该表的json并将其发回。我还希望一个应用程序将存储在其公共(public)目录中的文本文件发送到另一个应用程序的公共(public)目录。我从来没有做过这样的事情,所以我什至不知道从哪里开始。任何帮助,将不胜感激。谢谢! 最佳答案 无论Rails是什么,几乎所有Web应用程序都有您的要求,大多数现代Web应用程序都需要相互通信。但是有一个小小的理解需要你坚持下去,网站不应直接访问彼此
我尝试运行2.x应用程序。我使用rvm并为此应用程序设置其他版本的ruby:$rvmuseree-1.8.7-head我尝试运行服务器,然后出现很多错误:$script/serverNOTE:Gem.source_indexisdeprecated,useSpecification.Itwillberemovedonorafter2011-11-01.Gem.source_indexcalledfrom/Users/serg/rails_projects_terminal/work_proj/spohelp/config/../vendor/rails/railties/lib/r
刚入门rails,开始慢慢理解。有人可以解释或给我一些关于在application_controller中编码的好处或时间和原因的想法吗?有哪些用例。您如何为Rails应用程序使用应用程序Controller?我不想在那里放太多代码,因为据我了解,每个请求都会调用此Controller。这是真的? 最佳答案 ApplicationController实际上是您应用程序中的每个其他Controller都将从中继承的类(尽管这不是强制性的)。我同意不要用太多代码弄乱它并保持干净整洁的态度,尽管在某些情况下ApplicationContr
我是一个Rails初学者,但我想从我的RailsView(html.haml文件)中查看Ruby变量的内容。我试图在ruby中打印出变量(认为它会在终端中出现),但没有得到任何结果。有什么建议吗?我知道Rails调试器,但更喜欢使用inspect来打印我的变量。 最佳答案 您可以在View中使用puts方法将信息输出到服务器控制台。您应该能够在View中的任何位置使用Haml执行以下操作:-puts@my_variable.inspect 关于ruby-on-rails-如何在我的R
如何在ruby中调用C#dll? 最佳答案 我能想到几种可能性:为您的DLL编写(或找人编写)一个COM包装器,如果它还没有,则使用Ruby的WIN32OLE库来调用它;看看RubyCLR,其中一位作者是JohnLam,他继续在Microsoft从事IronRuby方面的工作。(估计不会再维护了,可能不支持.Net2.0以上的版本);正如其他地方已经提到的,看看使用IronRuby,如果这是您的技术选择。有一个主题是here.请注意,最后一篇文章实际上来自JohnLam(看起来像是2009年3月),他似乎很自在地断言RubyCL
这似乎非常适得其反,因为太多的gem会在window上破裂。我一直在处理很多mysql和ruby-mysqlgem问题(gem本身发生段错误,一个名为UnixSocket的类显然在Windows机器上不能正常工作,等等)。我只是在浪费时间吗?我应该转向不同的脚本语言吗? 最佳答案 我在Windows上使用Ruby的经验很少,但是当我开始使用Ruby时,我是在Windows上,我的总体印象是它不是Windows原生系统。因此,在主要使用Windows多年之后,开始使用Ruby促使我切换回原来的系统Unix,这次是Linux。Rub