#reading the images
tumor = []
path = 'D:\\data\\Tumor_detection\\archive\\brain_tumor_dataset\\yes\\*.jpg'#*表示所有
for f in glob.iglob(path):#遍历所有的yes图片
    img = cv2.imread(f)
    img = cv2.resize(img, (128, 128))#相当于reshape改变图片大小
    b, g, r = cv2.split(img)#分割为单独的通道
    img = cv2.merge([r, g, b])#改变通道顺序
    tumor.append(img)

healthy = []
path = 'D:\\data\\Tumor_detection\\archive\\brain_tumor_dataset\\no\\*.jpg'#*表示所有
for f in glob.iglob(path):#遍历所有的yes图片
    img = cv2.imread(f)
    img = cv2.resize(img, (128, 128))#类似于reshape改变图片大小
    b, g, r = cv2.split(img)#分割为单独的通道
    img = cv2.merge([r, g, b])#改变通道顺序
    healthy.append(img)

#our images
#改变数据形式
tumor = np.array(tumor, dtype=np.float32)
healthy = np.array(healthy, dtype=np.float32)
print(tumor.shape)#(154, 128, 128, 3)154表示154张图, 128 rows, 128 columns
print(healthy.shape)#(91, 128, 128, 3)91表示91张图, 128 rows, 128 columns
All = np.concatenate((healthy, tumor))
print(All.shape)#(245, 128, 128, 3)
plt.imshow(healthy[0])
plt.show()
np.random.choice(5, 3)#[0, 5)中随机选3个int, e.g.[1 3 0]
def plot_random(healthy, tumor, num=5):
    #随机返回5张healthy和tumor
    healthy_imgs = healthy[np.random.choice(healthy.shape[0], 5, replace=False)]
    tumor_imgs = tumor[np.random.choice(tumor.shape[0], 5, replace=False)]

    plt.figure(figsize=(16, 9))#fix size
    #显示healthy
    for i in range(num):
        plt.subplot(1, num, i+1)
        plt.title('healthy')
        plt.imshow(healthy_imgs[i])
    # 打开显示的图片
    plt.show()
    ##显示tumor
    for i in range(num):
        plt.subplot(1, num, i+1)
        plt.title('tumor')
        plt.imshow(tumor_imgs[i])
    #打开显示的图片
    plt.show()

plot_random(healthy=healthy, tumor=tumor)
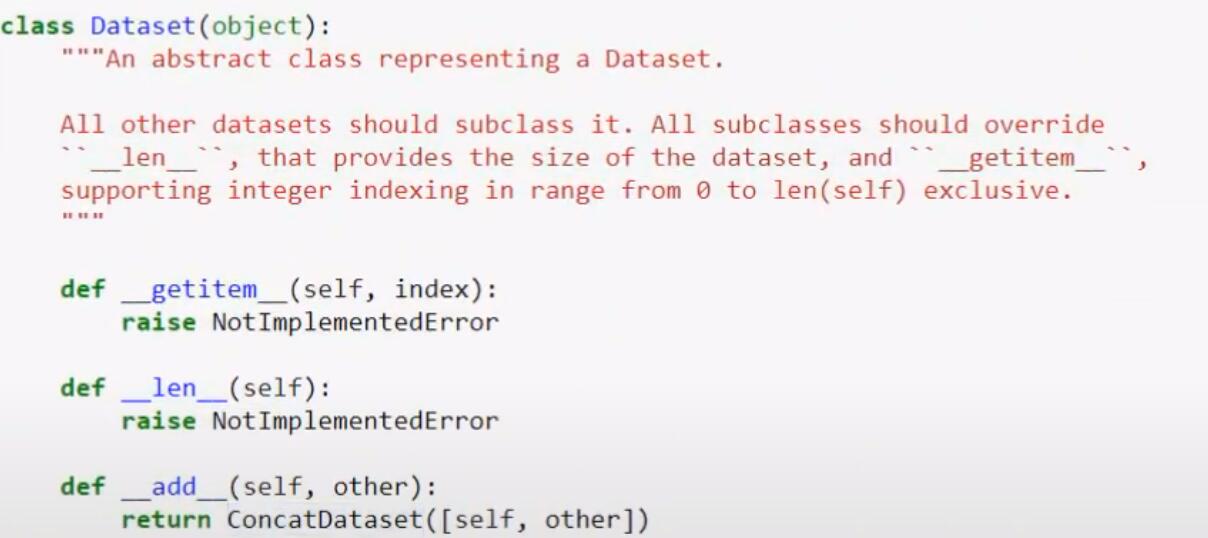
class MRI(Dataset):
    def __init__(self, scores):
        self.x = scores
    def __getitem__(self, index):
        return self.x[index]
    def __len__(self):
        return len(self.x)

s1 = [1, 2, 3, 4]
d1 = MRI(s1)#s1代入构造函数中的scores
print(d1.x)#[1, 2, 3, 4]
print(d1[2])#自动调用getitem, 输出3

s2 = [100, 200, 300, 400]
d2 = MRI(s2)
#会自动调用父类中的__add__
d = d1 + d2
class MRI(Dataset):
    def __init__(self):
        # reading the images
        tumor = []
        path = 'D:\\data\\Tumor_detection\\archive\\brain_tumor_dataset\\yes\\*.jpg'  # *表示所有
        for f in glob.iglob(path):  # 遍历所有的yes图片
            img = cv2.imread(f)
            img = cv2.resize(img, (128, 128))  # 相当于reshape改变图片大小
            b, g, r = cv2.split(img)  # 分割为单独的通道
            img = cv2.merge([r, g, b])  # 改变通道顺序
            tumor.append(img)

        healthy = []
        path = 'D:\\data\\Tumor_detection\\archive\\brain_tumor_dataset\\no\\*.jpg'  # *表示所有
        for f in glob.iglob(path):  # 遍历所有的yes图片
            img = cv2.imread(f)
            img = cv2.resize(img, (128, 128))  # 相当于reshape改变图片大小
            b, g, r = cv2.split(img)  # 分割为单独的通道
            img = cv2.merge([r, g, b])  # 改变通道顺序
            healthy.append(img)

        # our images
        # 改变数据形式
        tumor = np.array(tumor, dtype=np.float32)
        healthy = np.array(healthy, dtype=np.float32)

        # our labels
        tumor_label = np.ones(tumor.shape[0], dtype=np.float32)  # tumor的label用1, 这里生成一堆1; tumor.shape[0]表示有多少张tumor图片
        healthy_label = np.zeros(healthy.shape[0], dtype=np.float32)  # healthy的label用0, 这里生成一堆0

        #定义实例变量; 并且连接
        #在第0轴连接: e.g.(100, 512, 512, 3)和(200, 512, 512, 3)-->(300, 512, 512, 3)最后得到300张图片[第0轴是图片数量]
        self.images = np.concatenate((tumor, healthy), axis=0)
        self.labels = np.concatenate((tumor_label, healthy_label))


    def __len__(self):
        return self.images.shape[0]#在定义类时实例变量都要加self;这里返回有多少张图
    #不仅返回image, 也要返回label; 这里返回一个包含两者的字典
    def __getitem__(self, index):


        #不仅要返回对应的图片, 也要返回label
        sample = {'image': self.images[index], 'label': self.labels[index]}
        return sample

    def normalize(self):
        self.images = self.images/255.0#255是np.max(mri)

mri = MRI()
print(len(mri))
print(mri.__getitem__(5)['image'])#打印图片的矩阵
print(mri.__getitem__(5)['image'].shape)#(128, 128, 3)宽128高128通道3
print(mri.__getitem__(5)['label'])#打印label值
mri = MRI()

index = list(range(len(mri)))#获取一个从0到244的list
random.shuffle(index)#打乱index元素的顺序
for idx in index:#遍历乱序的index
    sample = mri[idx]
    img = sample['image']
    label = sample['label']
    print(img.shape)
    plt.title(label)
    #只接受格式为W H C的数据
    #如果报错尝试reshape, e.g. img = img.reshape(img.shape[1], img.shape[2], img.shape[0])
    plt.imshow(img)
    plt.show()

it = iter(mri)#iter是生成迭代器的函数
for i in range(10):
    sample = next(it)#表示获取下一个包含图片以及标签的字典
    img = sample['image']
    label = sample['label']
    print(img.shape)
    plt.title(label)
    plt.imshow(img)
    plt.show()

#使用dataloader
dataloader = DataLoader(mri, batch_size=10 ,shuffle=True)
for sample in dataloader:
    img = sample["image"]
    print(img.shape)#torch.Size([10, 128, 128, 3]), 多了第一个维度为batch_size
class CNN(nn.Module):
    def __init__(self):
        super(CNN, self).__init__()
        self.cnn_model = nn.Sequential(
            #out_channels就是过滤器/卷积核
            nn.Conv2d(in_channels=3, out_channels=6, kernel_size=5),
            nn.Tanh(),#非线性函数, 简单的数学运算
            nn.AvgPool2d(kernel_size=2, stride=5),
            #第二个卷积的通道数变为第一个的out
            nn.Conv2d(in_channels=6, out_channels=16, kernel_size=5),
            nn.Tanh(),
            nn.AvgPool2d(kernel_size=2, stride=5),
        )
        #全连接层Full Connection全连接神经网络
        self.fc_model = nn.Sequential(
            #一张128X128X3的图像经过cnn_model后得到256个值[一个矩阵]
            nn.Linear(in_features=256, out_features=120),
            nn.Tanh(),
            #上面的out_features作为下一次的in_features
            nn.Linear(in_features=120, out_features=84),
            nn.Tanh(),
            #神经网络的末端只需要一个神经元判断结果
            nn.Linear(in_features=84, out_features=1),
        )

    #向前传播, 输入的x是正确的图像
    def forward(self, x):
        x = self.cnn_model(x)
        x = x.view(x.size(0), -1)#将数据展平
        x = self.fc_model(x)
        x = F.sigmoid(x)

        return x
model = CNN()
print(model)#打印出整个神经网络的结构
print(model.cnn_model)#打印定义的cnn部分
print(model.cnn_model[0])#打印cnn第1个操作的细节:Conv2d(3, 6, kernel_size=(5, 5), stride=(1, 1))
print(model.cnn_model[0].weight)#cnn第1个操作的权重/filter/卷积核
print(model.cnn_model[0].weight.shape)#卷积核的形状:torch.Size([6, 3, 5, 5]): 6个卷积核, 3通道, 卷积核大小5X5
print(model.cnn_model[0].weight[0].shape)#第1个卷积核的形状: torch.Size([3, 5, 5])
print(model.cnn_model[0].weight[0][0])#第1个卷积核的首个通道
print(model.cnn_model[0].weight[0][2])#第1个卷积核的第2个通道
print(model.cnn_model[0].weight[0][2])#第1个卷积核的第3个通道

print(model.fc_model)#打印定义的fc_model部分
print(model.fc_model[0])#Linear(in_features=256, out_features=120, bias=True)
print(model.fc_model[0].weight.shape)#torch.Size([120, 256])


x = torch.tensor([1, 2, 3, 4, 5, 6, 7, 8, 9, 10, 11, 12, 13, 14, 15, 16])
x = x.reshape((2, 2, 2, 2))#2个数据点,2通道, 2X2的尺寸
print(x.size())#torch.Size([2, 2, 2, 2]), 打印出shape
print(x.size(0))#2, 获取第一个维度的数据, 2个数据点

print(x.view(-1))#摊平数据:tensor([ 1,  2,  3,  4,  5,  6,  7,  8,  9, 10, 11, 12, 13, 14, 15, 16])
print(x.view(x.size(0), -1))#根据第一个维度(数据点数量)摊平数据, 这里得到一个两行的矩阵 [因为有2个数据点]
mri_dataset = MRI()
mri_dataset.normalize()#把所有数据变成0-1之间的的
device = torch.device('cuda:0')#使用gpu计算
model = CNN().to(device)#把这个模型放入gpu

dataloader = DataLoader(mri_dataset, batch_size=32, shuffle=False)

model.eval()
outputs = []
y_true = []

with torch.no_grad():#停止梯度计算(在测试期间不计算任何梯度, 不需要计算开销和内存开销, 只是通过神经网络的数据并获得其输出)

    for D in dataloader:
        #数据默认在cpu上, 所有要使用一个to(device)
        image = D['image']
        image = image.reshape(image.shape[0], image.shape[3], image.shape[1], image.shape[2]).to(device)
        label = D['label'].to(device)

        y_hat = model(image)#y_hat存在于gpu

        #这里有32个numpy array (1 batch)
        outputs.append(y_hat.cpu().detach().numpy())
        y_true.append(y_hat.cpu().detach().numpy())

outputs = np.concatenate(outputs, axis=0).squeeze()
y_true = np.concatenate(y_true, axis=0).squeeze()

#大于0.5的被设为1[health],小于0.5的被设为0[tumor]
def threshold(scores,threshold=0.50, minimum=0, maximum = 1.0):
    x = np.array(list(scores))
    x[x >= threshold] = maximum
    x[x < threshold] = minimum
    return x

#y_true是真实的情况, threshold(outputs)是预测的情况
print(accuracy_score(y_true.round(), threshold(outputs)))#0.3714285
mri_dataset = MRI()
mri_dataset.normalize()#把所有数据变成0-1之间的的
device = torch.device('cuda:0')#使用gpu计算
model = CNN().to(device)#把这个模型放入gpu

model.eval()
outputs = []
y_true = []

eta = 0.0001#lreaning rate
EPOCH = 400
#优化器:如何在错误的表面上行走, 找到全局最小值
optimizer = torch.optim.Adam(model.parameters(), lr=eta)
dataloader = DataLoader(mri_dataset, batch_size=32, shuffle=True)
model.train()

for epoch in range(1, EPOCH):
    losses = []
    for D in dataloader:
        optimizer.zero_grad()#每一次epoc都清零优化器
        data = D['image'].to(device)
        data = data.reshape(data.shape[0], data.shape[3], data.shape[1], data.shape[2]).to(device)
        label = D['label'].to(device)
        y_hat = model(data)
        #print(y_hat.shape)#torch.Size([32, 1])
        #print(y_hat.squeeze().shape)#torch.Size([32])
        #print(label.shape)#torch.Size([32])
        # define loss function
        error = nn.BCELoss()#定义的error对象
        #将32个预测值和32个lable合起来
        loss = torch.sum(error(y_hat.squeeze(), label))
        #计算方向传播, 之后要用优化器更新数据
        loss.backward()
        optimizer.step()
        losses.append(loss.item())
    if (epoch+1) % 10 == 0:#每10个epoch打印一次avg losses
        print('Train Epoch: {}\tLoss: {:.6f}'.format(epoch+1, np.mean(losses)))

#对这个训练后的模型评估
model.eval()
dataloader = DataLoader(mri_dataset, batch_size=32, shuffle=False)
outputs = []
y_true = []
with torch.no_grad():
    for D in dataloader:
        image = D['image'].to(device)
        label = D['label'].to(device)

        image = image.reshape(image.shape[0], image.shape[3], image.shape[1], image.shape[2]).to(device)
        y_hat = model(image)

        outputs.append(y_hat.cpu().detach().numpy())
        y_true.append(label.cpu().detach().numpy())

outputs = np.concatenate(outputs, axis=0)
y_true = np.concatenate(y_true, axis=0)

#大于0.5的被设为1[health],小于0.5的被设为0[tumor]
def threshold(scores,threshold=0.50, minimum=0, maximum = 1.0):
    x = np.array(list(scores))
    x[x >= threshold] = maximum
    x[x < threshold] = minimum
    return x

#y_true是真实的情况, threshold(outputs)是预测的情况
print(accuracy_score(y_true, threshold(outputs)))#1.0
我收到这个错误:RuntimeError(自动加载常量Apps时检测到循环依赖当我使用多线程时。下面是我的代码。为什么会这样?我尝试多线程的原因是因为我正在编写一个HTML抓取应用程序。对Nokogiri::HTML(open())的调用是一个同步阻塞调用,需要1秒才能返回,我有100,000多个页面要访问,所以我试图运行多个线程来解决这个问题。有更好的方法吗?classToolsController0)app.website=array.join(',')putsapp.websiteelseapp.website="NONE"endapp.saveapps=Apps.order("
目录前言滤波电路科普主要分类实际情况单位的概念常用评价参数函数型滤波器简单分析滤波电路构成低通滤波器RC低通滤波器RL低通滤波器高通滤波器RC高通滤波器RL高通滤波器部分摘自《LC滤波器设计与制作》,侵权删。前言最近需要学习放大电路和滤波电路,但是由于只在之前做音乐频谱分析仪的时候简单了解过一点点运放,所以也是相当从零开始学习了。滤波电路科普主要分类滤波器:主要是从不同频率的成分中提取出特定频率的信号。有源滤波器:由RC元件与运算放大器组成的滤波器。可滤除某一次或多次谐波,最普通易于采用的无源滤波器结构是将电感与电容串联,可对主要次谐波(3、5、7)构成低阻抗旁路。无源滤波器:无源滤波器,又称
最近在学习CAN,记录一下,也供大家参考交流。推荐几个我觉得很好的CAN学习,本文也是在看了他们的好文之后做的笔记首先是瑞萨的CAN入门,真的通透;秀!靠这篇我竟然2天理解了CAN协议!实战STM32F4CAN!原文链接:https://blog.csdn.net/XiaoXiaoPengBo/article/details/116206252CAN详解(小白教程)原文链接:https://blog.csdn.net/xwwwj/article/details/105372234一篇易懂的CAN通讯协议指南1一篇易懂的CAN通讯协议指南1-知乎(zhihu.com)视频推荐CAN总线个人知识总
深度学习部署:Windows安装pycocotools报错解决方法1.pycocotools库的简介2.pycocotools安装的坑3.解决办法更多Ai资讯:公主号AiCharm本系列是作者在跑一些深度学习实例时,遇到的各种各样的问题及解决办法,希望能够帮助到大家。ERROR:Commanderroredoutwithexitstatus1:'D:\Anaconda3\python.exe'-u-c'importsys,setuptools,tokenize;sys.argv[0]='"'"'C:\\Users\\46653\\AppData\\Local\\Temp\\pip-instal
我完全不是程序员,正在学习使用Ruby和Rails框架进行编程。我目前正在使用Ruby1.8.7和Rails3.0.3,但我想知道我是否应该升级到Ruby1.9,因为我真的没有任何升级的“遗留”成本。缺点是什么?我是否会遇到与普通gem的兼容性问题,或者甚至其他我不太了解甚至无法预料的问题? 最佳答案 你应该升级。不要坚持从1.8.7开始。如果您发现不支持1.9.2的gem,请避免使用它们(因为它们很可能不被维护)。如果您对gem是否兼容1.9.2有任何疑问,您可以在以下位置查看:http://www.railsplugins.or
我想知道我的代码是否在rspec下运行。这可能吗?原因是我正在加载一些错误记录器,这些记录器在测试期间会被故意错误(expect{x}.toraise_error)弄得乱七八糟。我查看了我的ENV变量,没有(明显的)测试环境变量的迹象。 最佳答案 在spec_helper.rb的开头添加:ENV['RACK_ENV']='test'现在您可以在代码中检查RACK_ENV是否经过测试。 关于ruby-检测由RSpec、Ruby运行的代码,我们在StackOverflow上找到一个类似的问题
我正在使用rubydaemongem。想知道如何向停止操作添加一些额外的步骤?希望我能检测到停止被调用,并向其添加一些额外的代码。任何人都知道我如何才能做到这一点? 最佳答案 查看守护程序gem代码,它似乎没有用于此目的的明显扩展点。但是,我想知道(在守护进程中)您是否可以捕获守护进程在发生“停止”时发送的KILL/TERM信号...?trap("TERM")do#executeyourextracodehereend或者你可以安装一个at_exit钩子(Hook):-at_exitdo#executeyourextracodehe
如何学习ruby的正则表达式?(对于假人) 最佳答案 http://www.rubular.com/在Ruby中使用正则表达式时是一个很棒的工具,因为它可以立即将结果可视化。 关于ruby-我如何学习ruby的正则表达式?,我们在StackOverflow上找到一个类似的问题: https://stackoverflow.com/questions/1881231/
我有一个定义类的Ruby脚本。我希望脚本执行语句BoolParser.generate:file_base=>'bool_parser'仅当脚本作为可执行文件被调用时,而不是当它被irbrequire(或通过-r在命令行上传递)时。我可以用什么来包装上面的语句,以防止它在我的Ruby文件加载时执行? 最佳答案 条件$0==__FILE__...!/usr/bin/ruby1.8classBoolParserdefself.generate(args)p['BoolParser.generate',args]endendif$0==_
我有以下字符串,我想检测那里的换行符。但是Ruby的字符串方法include?检测不到它。我正在运行Ruby1.9.2p290。我哪里出错了?"/'ædres/\nYour".include?('\n')=>false 最佳答案 \n需要在双引号内,否则无法转义。>>"\n".include?'\n'=>false>>"\n".include?"\n"=>true 关于Ruby无法检测字符串中的换行符,我们在StackOverflow上找到一个类似的问题: h