npm install create-react-app -g
create-react-app my-app-client
create-react-app 是创建单页面程序的脚手架
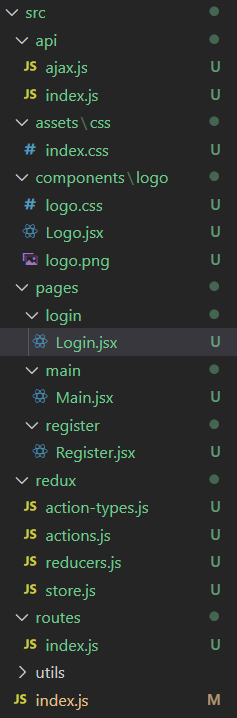
创建好项目之后,删掉 src 目录下的文件,按照以下结构创建目录,根据具体项目情况进行更改
npm install antd -S
Ant Design 是企业级的 UI 设计语言和 React 组件库
npm install react-router-dom -S
使用路由进行不同页面间的切换
使用示例:
ReactDOM.render(
  <Provider store={store}>
    <HashRouter>
      <div className="container">
        <Switch>
          {routes.map((route) => (
            <Route key={route.path} {...route} />
          ))}
        </Switch>
      </div>
    </HashRouter>
  </Provider>,
  document.getElementById("root")
);
在 routes/index.js 中,引入需要的组件并导出路由配置对象
import Register from "../pages/register/Register";
import Login from "../pages/login/Login";
import Main from "../pages/main/Main";

export const routes = [
  {
    path: "/register",
    component: Register,
  },
  {
    path: "/login",
    component: Login,
  },
  {
    path: "",
    component: Main,
  },
];
npm install redux react-redux redux-thunk -S
npm install redux-devtools-extension -D
示例:
<Layout>
  <Header>
    <Logo />
  </Header>
  <Content>
    <Input type="text"/>
  </Content>
  <Footer>
    <Button type="primary">注册</Button>
  </Footer>
</Layout>
在自己想要使用 antd 的组件中可使用 import {} from "antd" 即可引入组件样式,任意使用
数据通过 state 储存,通过绑定输入框 onChange 事件更新数据
state = {
    username: "",
    password: "",
    againPassword: "",
    type: "",
  };
handleChange = (name, value) => {
    this.setState({
      [name]: value,
    });
  };
和注册组件相同的方式完成登录组件
注意:注册和登录组件中的路由跳转使用 this.props.history 中的 replace() 或者 push() 方法实现,区别是 replace 不能回退,push 可以回退
express myapp-server -e
修改 bin/www 中的端口号为 4000,避免与前端的监听端口号 3000 冲突
npm install nodemon -D
安装之后将 package.json 中的 scripts.start 改为 nodemon ./bin/www,启动之后每次修改代码保存即可立即重启
npm install mongoose blueimp-md5 -S
常见操作:save,find,findOne,findByIdAndUpdate,delete(remove 已经过时)
blueimp-md5 库用来对密码进行 md5 加密,库导出的是函数,直接使用 blueimp-md5(password)即可返回加密结果
使用操作 mongodb 数据库的 mongoose 模块向外暴露一个数据库操作的类,这样在路由中如果需要操作数据库只需要引入类直接使用
const mongoose = require("mongoose");

mongoose.connect("mongodb://localhost:27017/school-chat");
const connection = mongoose.connection;
connection.on("connected", () => {
  console.log("数据库连接成功");
});

const userSchema = mongoose.Schema({
  username: { type: String, required: true },
  password: { type: String, required: true },
  type: { type: String, required: true },
  ...
});
const UserModel = mongoose.model("user", userSchema);

exports.UserModel = UserModel;
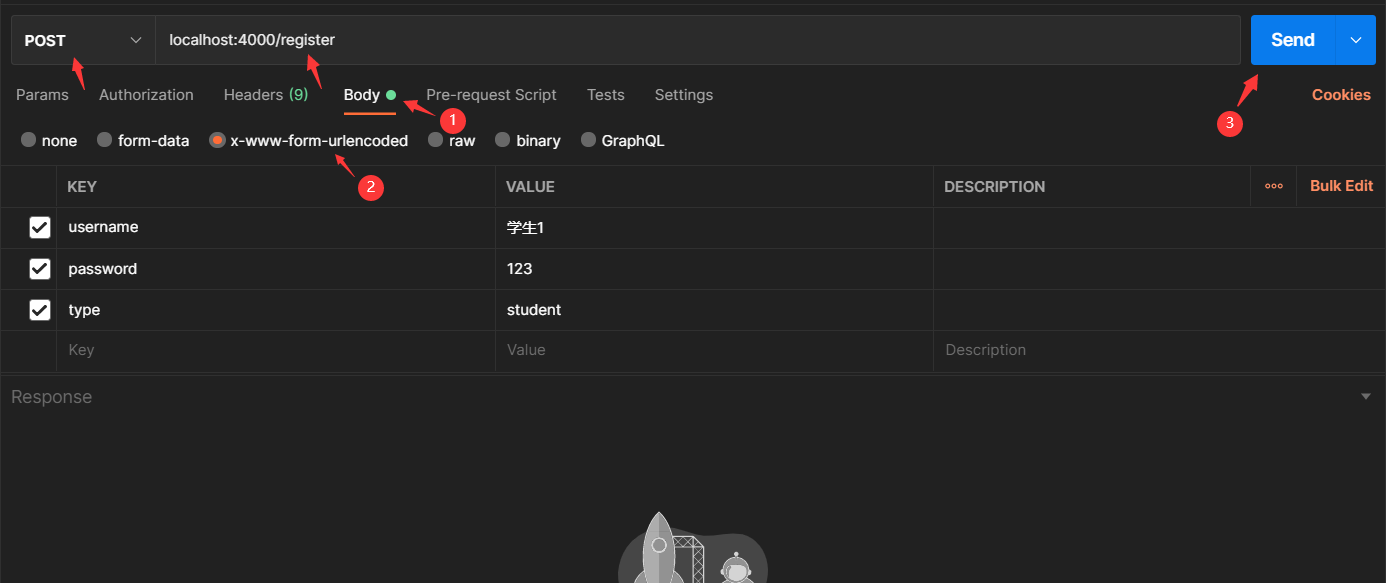
在 routes/index.js 中编写后端所有的路由,路由中返回的对象储存在前端 ajax 请求的响应体中
注册首先需要在数据库中查找用户是否存在,不存在才新建一条文档
router.post("/register", (req, res) => {
  const { username, password, type } = req.body;
  UserModel.findOne({ username }, (err, user) => {
    if (user) {
      res.send({ code: 1, msg: `用户“${username}”已存在` });
    } else {
      const userModel = new UserModel({ username, password: md5(password), type });
      userModel.save((err, user) => {
        res.cookie("userid", user._id, { maxAge: 1000 * 3600 * 24 * 7 });
        res.send({ code: 0, data: { _id: user._id, username, type } });
      });
    }
  });
});
登录首先需要在数据库中查找用户是否存在,存在才返回相应的信息
router.post("/login", (req, res) => {
  const { username, password } = req.body;
  UserModel.findOne({ username, password: md5(password) }, filter, (err, user) => {
    if (user) {
      res.cookie("userid", user._id, { maxAge: 1000 * 3600 * 24 * 7 });
      res.send({ code: 0, data: user });
    } else {
      res.send({ code: 1, msg: "用户名或密码不正确" });
    }
  });
});
npm install axios -S
主流请求分为 GET 请求和 POST 请求,GET 请求需要根据 data 对象拼接出请求的 url
export default function ajax(url = "", data = {}, type = "GET") {
  if (type === "GET") {
    let queryStr = "";
    for (let key in data) {
      queryStr += `${key}=${data[key]}&`;
    }
    if (queryStr !== "") {
      queryStr = queryStr.slice(0, -1);
      return axios.get(`${url}?${queryStr}`);
    }
  } else {
    return axios.post(url, data);
  }
}
通过前面封装的请求函数,将项目中所有用到的请求都封装成函数在 api/index.js 中
export const reqRegister = (user) => ajax("/register", user, "POST");
export const reqLogin = (username, password) => ajax("/login", { username, password }, "POST");
export const reqUpdate = (user) => ajax("/update", user, "POST");
...
在 redux/actions.js 中编写多个 action creator:同步 action,异步 action
export const register = (user) => {
  const { username, password, againPassword, type } = user;
  if (!username) {
    return errorMsg("用户名不能为空!");
  }
  if (password !== againPassword) {
    return errorMsg("两次密码不一致!");
  }
  return async (dispatch) => {
    const response = await reqRegister({ username, password, type });
    const result = response.data;
    if (result.code === 0) {
      dispatch(authSuccess(result.data));
    } else {
      dispatch(errorMsg(result.msg));
    }
  };
};
异步 action 分发授权成功的同步 action(请求),在分发之前进行前端验证,如果失败就不分发同步 action,直接返回对应的同步 action,因为请求返回的值的类型的 Promise,所以需要使用 es7 中的 async 和 await 关键词,authSuccess 和 errorMsg 同步 action 返回包含 action type 的对象
在 redux/reducers.js 中编写所有的 reducer 函数,然后使用 combineReducers 函数结合起来暴露出去
function user(state = initUser, action) {
  switch (action.type) {
    case AUTH_SUCCESS:
      return { ...action.data, redirectTo: "/" };
    case ERROR_MSG:
      return { ...state, msg: action.data };
    default:
      return state;
  }
}

export default combineReducers({
  user,
});
根据老的 user state 和指定的 action 返回新的 state
import { createStore, applyMiddleware } from "redux";
import thunk from "redux-thunk";
import { composeWithDevTools } from "redux-devtools-extension";
import reducers from "./reducers";

export default createStore(reducers, composeWithDevTools(applyMiddleware(thunk)));
最后,在 redux/store.js 中暴露编写 redux 最核心部分,向外暴露 store 对象,代码比较固定,在大部分项目中几乎不变
登录和注册点击发送请求的时候会出现浏览器跨域报错,意思是 3000 端口向 4000 端口发送请求
一个简单的解决办法是使用代理:在 package.json 中配置 "proxy": "http://localhost:4000",意思是配置一个在 3000 端口可以向 4000 端口转发请求的代理,浏览器识别不出代理
将 redux 作用在在注册和登录组件上:
export default connect(
  (state) => ({
    user: state.user,
  }),
  { register }
)(Register);
其中 user 中的状态可以通过 this.props.user 获取,比如 this.props.user.msg,然后就可以将 redux 中的状态展现在组件中
注册操作可使用 this.props.register(this.state) 进行登录
作为新的阿里云用户,您可以50免费试用多种优惠,价值高达1,700美元(或8,500美元)。这将让您了解和体验阿里云平台上提供的一系列产品和服务。如果您以个人身份注册免费试用,您将获得价值1,700美元的优惠。但是,如果您是注册公司,您可以选择企业免费试用,提交基本信息通过企业实名注册验证,即可开始价值$8,500的免费试用!本教程介绍了如何设置您的帐户并使用您的免费试用版。关于免费试用在我们开始此试用之前,您还必须遵守以下条款和条件才能访问您的免费试用:只有在一年内创建的账户才有资格获得阿里云免费试用。通过此免费试用优惠,用户可以免费试用免费试用活动页面上列出的每种产品一次。如果您有多个帐
我在我的项目中有一个用户和一个管理员角色。我使用Devise创建了身份验证。在我的管理员角色中,我没有任何确认。在我的用户模型中,我有以下内容:devise:database_authenticatable,:confirmable,:recoverable,:rememberable,:trackable,:validatable,:timeoutable,:registerable#Setupaccessible(orprotected)attributesforyourmodelattr_accessible:email,:username,:prename,:surname,:
我有一个将某些事件写入队列的Rails3应用。现在我想在服务器上创建一个服务,每x秒轮询一次队列,并按计划执行其他任务。除了创建ruby脚本并通过cron作业运行它之外,还有其他稳定的替代方案吗? 最佳答案 尽管启动基于Rails的持久任务是一种选择,但您可能希望查看更有序的系统,例如delayed_job或Starling管理您的工作量。我建议不要在cron中运行某些东西,因为启动整个Rails堆栈的开销可能很大。每隔几秒运行一次它是不切实际的,因为Rails上的启动时间通常为5-15秒,具体取决于您的硬件。不过,每天这样做几
我需要从站点抓取数据,但它需要我先登录。我一直在使用hpricot成功地抓取其他网站,但我是使用mechanize的新手,我真的对如何使用它感到困惑。我看到这个例子经常被引用:require'rubygems'require'mechanize'a=Mechanize.newa.get('http://rubyforge.org/')do|page|#Clicktheloginlinklogin_page=a.click(page.link_with(:text=>/LogIn/))#Submittheloginformmy_page=login_page.form_with(:act
完成这个有困难。我正在使用seed.rb+factory_girl来使用rakedb:seed填充数据库。(我知道固定装置存在,但我想以这种方式完成,这只是一个示例,数据库将填充复杂的关联对象。)我的种子.rb:require'factory_girl_rails'["QM","CDC","SI","QS"].eachdo|n|FactoryGirl.create(:grau,nome:n)end还有我的/factories/graus.rbFactoryGirl.definedofactory:graudonomeendend但是当我运行时:rakedb:seed我得到:rakeab
我为Devise用户和管理员提供了不同的模型。我也在使用Basecamp风格的子域。除了我需要能够以用户或管理员身份进行身份验证的一些Controller和操作外,一切都运行良好。目前我有authenticate_user!在我的application_controller.rb中设置,对于那些只有管理员才能访问的Controller和操作,我使用skip_before_filter跳过它。不幸的是,我不能简单地指定每个Controller的身份验证要求,因为我仍然需要一些Controller和操作才能被用户或管理员访问。我尝试了一些方法都无济于事。看来,如果我移动authentica
我想用一个(自己的)omniauth提供商来衡量每秒可以登录多少次。我需要了解此omniauth/oauth请求的性能如何,以及此身份验证是否具有可扩展性?到目前为止我得到了什么:defperformance_auth(user_count=10)bm=Benchmark.realtimedouser_count.timesdo|n|forkdoclick_on'Logout'omniauth_config_mock(:provider=>"foo",:uid=>n,:email=>"foo#{n}@example.net")visit"/account/auth/foo/"enden
我正在使用carrierwave上传视频然后有一个名为thumb的版本,带有自定义处理器,可以获取视频并使用streamio-ffmpeg创建屏幕截图。视频和文件都已正确上传,但在调用uploader.url(:thumb)时我得到:ArgumentError:Versionthumbdoesn'texist!VideoUploader.rbrequire'carrierwave/processing/mime_types'require'streamio-ffmpeg'classVideoUploader5)File.renamethumb_path,current_pathendd
我正在使用Ruby和Eventmachine库编写一个应用程序。我真的很喜欢非阻塞I/O和事件驱动系统的想法,我遇到的问题是日志记录。我正在使用Ruby的标准记录器库。并不是说日志记录需要永远,但它似乎不应该阻塞,但它确实阻塞了。是否有某个库将Ruby的标准记录器实现扩展为非阻塞的,或者我应该只调用EM::defer进行日志记录调用?有没有办法让eventmachine已经为我做这件事? 最佳答案 我最终将记录器包装在一个启动线程并具有FIFO队列的单例类中。日志记录会将日志信息转储到队列中,线程只是循环,从队列中拉出内容并使用真正
我正在使用Deviseauthtokengem用于验证我的Rails应用程序的某些部分。但是,当我尝试使用注册路径创建新用户时,出现以下错误{"errors":["Authorizedusersonly."]}。这是我用于测试的rspec代码,it'createsauserusingemail/passwordcombo'dopostapi_user_registration_path,{email:'xxx',password:'yyy',password_confirmation:'yyy'}putslast_response.bodyexpect(last_response.bo