导航:
目录
3.1.3、把renren-fast复制到子模块,并加入父工程
3.1.5、创建后台管理系统的数据库gulimall_admin
3.1.6、修改renren-fast的配置文件,设置数据库
3.2. product模块的逆向工程搭建,人人开源代码生成器
3.2.5、修改生成信息generator.properties
3.2.6、controller模板中去掉@RequiresPermissions注解
3.3.1、修改生成器properties和yml,生成coupon模块代码
3.3.3、创建yml,删除resources的src文件夹
3.3.5、同方法生成gulimall-member/gulimall-order/gulimall-ware的代码
虚拟机VMware、centos7.
查看是否安装docker:
docker
# 1. 卸载之前的docker
 sudo yum remove docker \
                  docker-client \
                  docker-client-latest \
                  docker-common \
                  docker-latest \
                  docker-latest-logrotate \
                  docker-logrotate \
                  docker-engine

# 2.需要的安装包
yum install -y yum-utils

# 3.设置镜像的仓库
yum-config-manager \
    --add-repo \
    https://download.docker.com/linux/centos/docker-ce.repo
# 默认是从国外的,不推荐
# 推荐使用国内的
yum-config-manager \
    --add-repo \
    https://mirrors.aliyun.com/docker-ce/linux/centos/docker-ce.repo
# 更新yum软件包索引
yum makecache

# 4.安装docker相关的 docker-ce 社区版 而ee是企业版
yum install docker-ce docker-ce-cli containerd.io
# 5、启动docker
docker systemctl start docker
# 6. 使用docker version查看是否按照成功
docker version
配置阿里云镜像加速
因为docker hub是国外网站,需要配置国内镜像进行加速。
1、登录阿里云找到容器服务
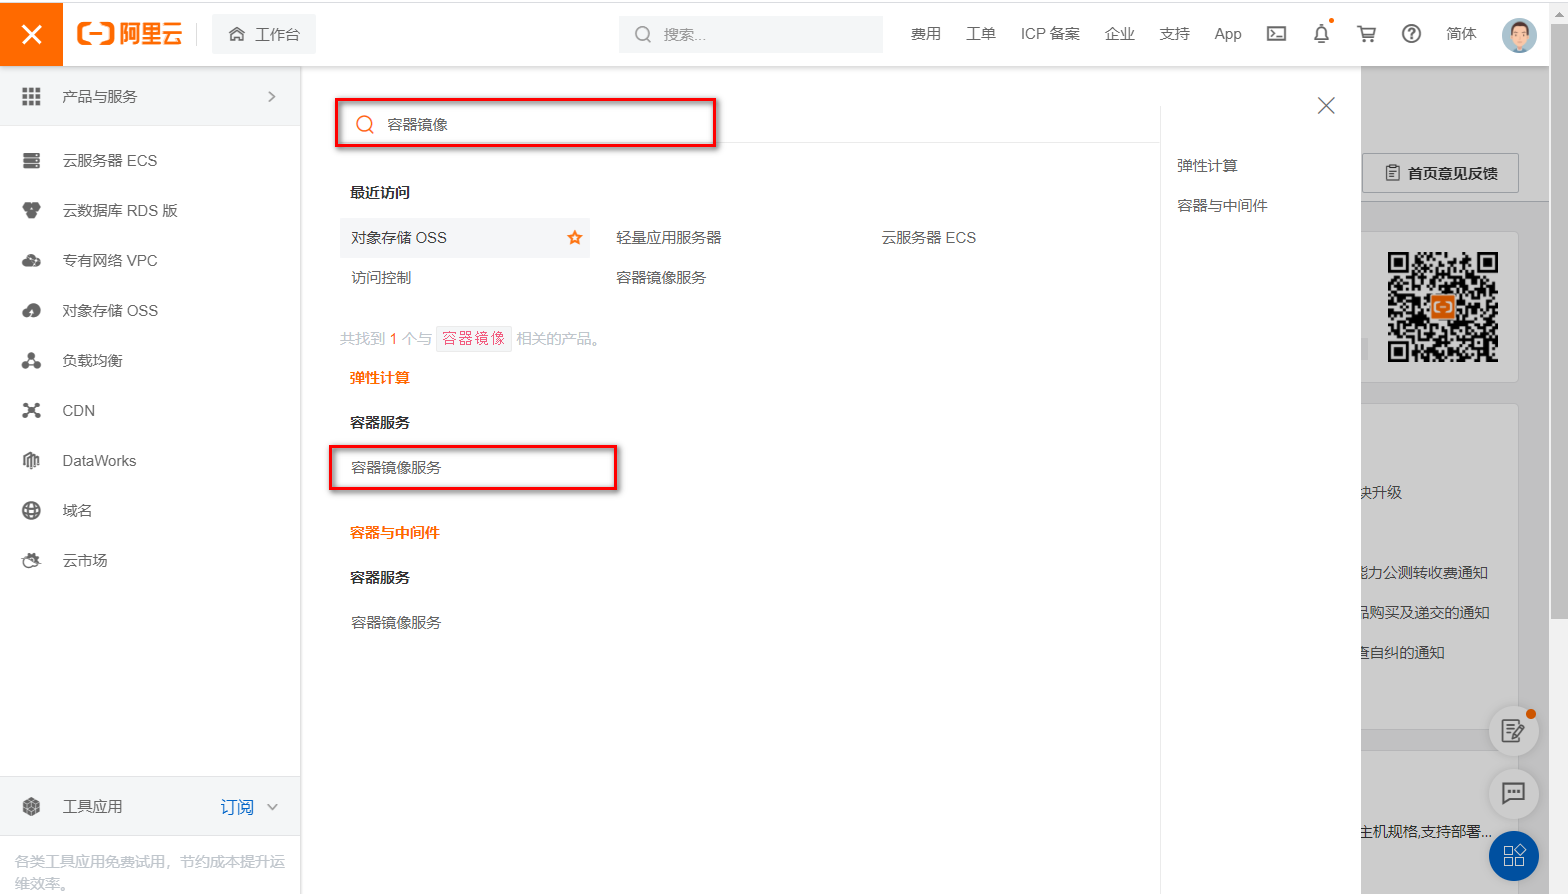
2、找到镜像加速器
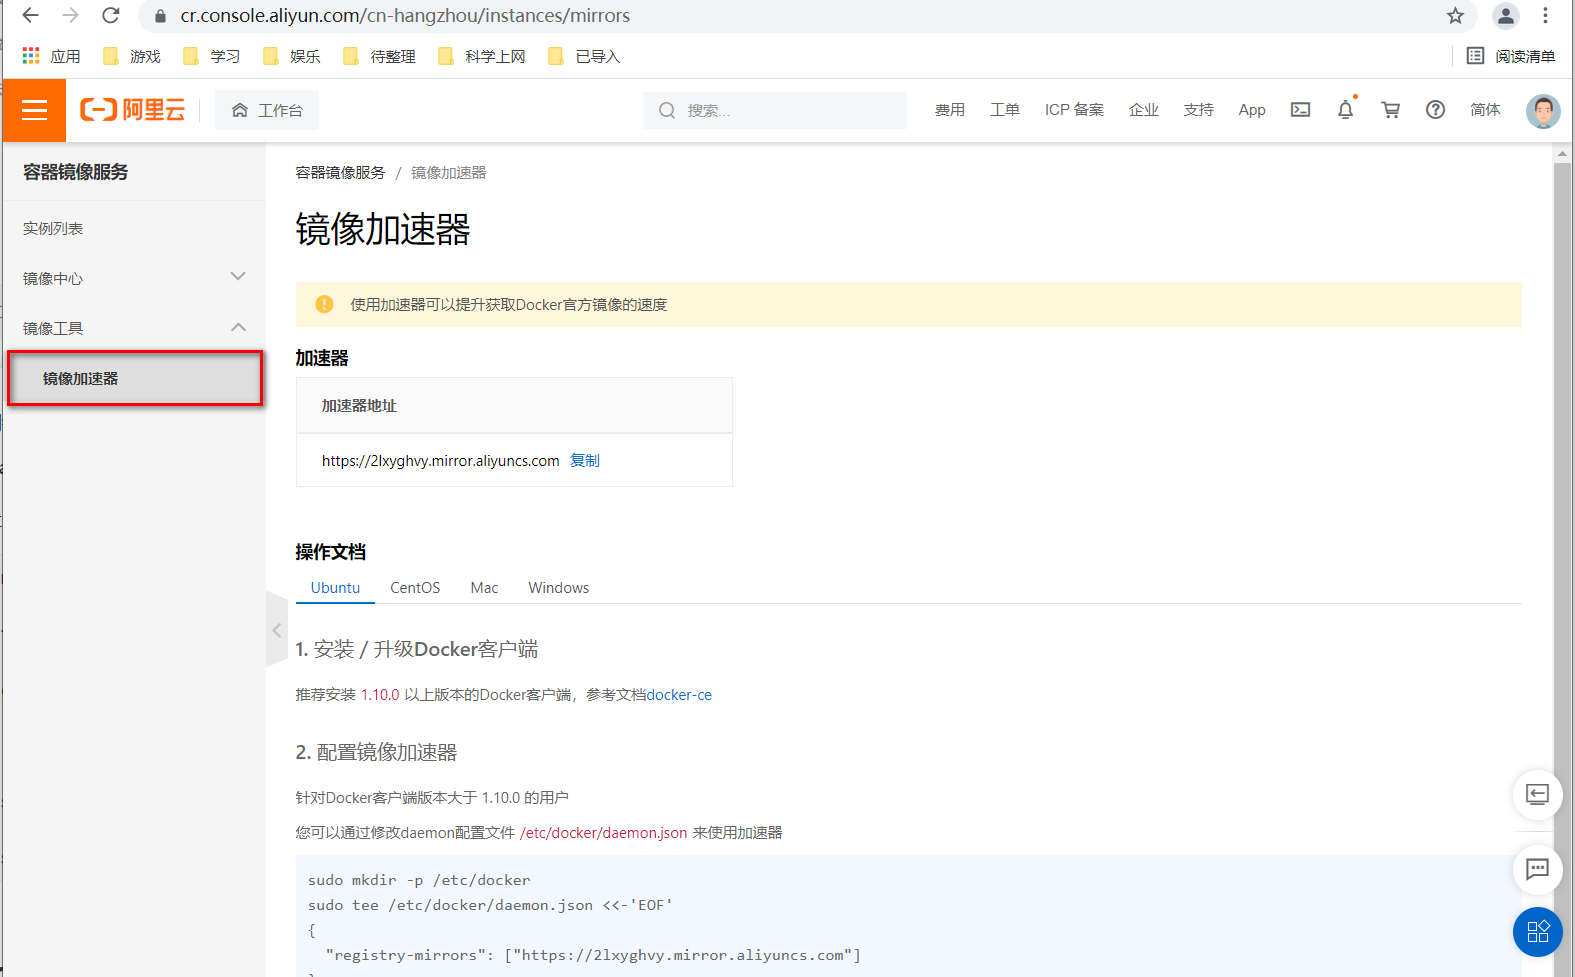
3、配置使用,输入到ssh回车
sudo mkdir -p /etc/docker

sudo tee /etc/docker/daemon.json <<-'EOF'
{
  "registry-mirrors": ["https://2lxyghvy.mirror.aliyuncs.com"]
}
EOF

sudo systemctl daemon-reload

sudo systemctl restart docker
docker pull mysql:5.7.25

# 运行容器
sudo docker run -p 3306:3306 --name mysql01 \
-v /mydata/mysql/log:/var/log/mysql \
-v /mydata/mysql/data:/var/lib/mysql \
-v /mydata/mysql/conf:/etc/mysql \
-e MYSQL_ROOT_PASSWORD=1234 \
-d mysql:5.7.25
# 参数说明 -p 3312:3306 将容器的3306端口映射到主机的3312端口
# -v 宿主机文件目录:容器内目录  将容器内文件挂载到宿主机上
# -e MYSQL_ROOT_PASSWORD=root 设置mysql密码为root
# -d 后台启动
# --name 给启动容器起名字

# 使用docker ps 查看启动的容器
# 进入配置文件挂载的目录下
cd /mydata/mysql/conf

# 配置文件my.cnf
vim my.cnf
主要修改编码为utf8
# 新增配置文件内容
[client]
default-character-set=utf8
[mysql]
default-character-set=utf8
[mysqld]
init_connect='SET collation_connection = utf8_unicode_ci'
init_connect='SET NAMES utf8'
character-set-server=utf8
collation-server=utf8_unicode_ci
skip-character-set-client-handshake
skip-name-resolve
# 修改配置文件之后,重启容器
docker restart mysql01
设置自启动:
docker update mysql01 --restart=always
如果直接挂载的话docker会以为挂载的是一个目录,所以我们先创建一个文件然后再挂载,在虚拟机中。
# 1、创建配置文件
mkdir -p /mydata/redis/conf
touch /mydata/redis/conf/redis.conf
# 2、下载镜像
docker pull redis
# 3、启动容器
docker run -p 6379:6379 --name redis \
-v /mydata/redis/data:/data  \
-v /mydata/redis/conf/redis.conf:/etc/redis/redis.conf \
-d redis redis-server /etc/redis/redis.conf
# 4、进入redis客户端
docker exec -it redis redis-cli
修改redis配置文件
vi /mydata/redis/conf/redis.confaof持久化方式、或设置密码,如果配置后无法打开redis,尝试删除注释
appendonly yes
#requirepass xxxxxx # 配置redis密码
# 保存
docker restart redis

# 进入redis客户端
docker exec -it redis redis-cli
#auth xxxxxx #如果有设置密码
回顾aof和rdb持久化方式:
设置redis容器在docker启动的时候启动
docker update redis --restart=always
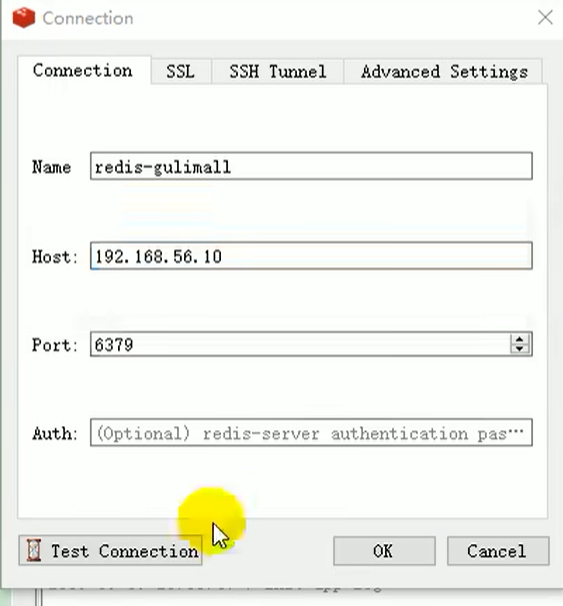
安装redis-desktop-manager-0.8.8.384并连接
首先安装jdk11、maven
java -version
mvn -version
maven3.6.1下载:
https://maven.apache.org/download.cgi

在/usr/local/ 下上传:
cd /usr/local/
解压:
tar -zxvf apache-maven-3.6.1-bin.tar.gz
配置maven的阿里云镜像、jdk11
cd apache-maven-3.6.1   #进入apache-maven-3.6.1目录
mkdir ck    #创建ck目录
cd conf            # 进入conf目录
vi settings.xm # settings.xm文件
修改对应标签:
  <mirrors>
	<mirror>
	<id>nexus-aliyun</id>
	<mirrorOf>central</mirrorOf>
	<name>Nexus aliyun</name>
	<url>http://maven.aliyun.com/nexus/content/groups/public</url>
	</mirror>
  </mirrors>


 <profiles>
    <id>jdk-11</id>
    <activation>
        <activeByDefault>true</activeByDefault>
        <jdk>11</jdk>
    </activation>
    <properties>
        <project.build.sourceEncoding>UTF-8</project.build.sourceEncoding>
        <maven.compiler.source>11</maven.compiler.source>
        <maven.compiler.target>11</maven.compiler.target>
        <maven.compiler.compilerVersion>11</maven.compiler.compilerVersion>
    </properties>
  </profiles>
IDEA安装插件mybatisX。
下载地址Download Visual Studio Code - Mac, Linux, Windows
vscode用于前端管理系统,在vsCode里安装以下插件
2.6.2、关闭Eslink强检查
打开vue项目/build/webpack.base.conf.js,注释:
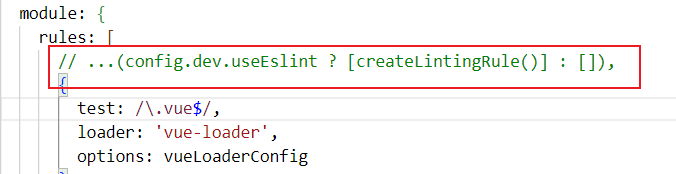
这样就能少去很多没必要的报错,例如.vue注释空格报错
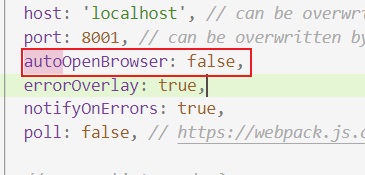
vue项目运行命令npm run dev导致自动打开浏览器
解决办法:
1、在config文件夹找到index.js文件夹
2、把autoOpenBrowser: true
3、改为autoOpenBrowser: false
我项目初始化的时候,没有按照雷神用Spring Boot Initilizr。而是按照周阳在springcloud课程里面手动依赖管理的方式初始化的项目。
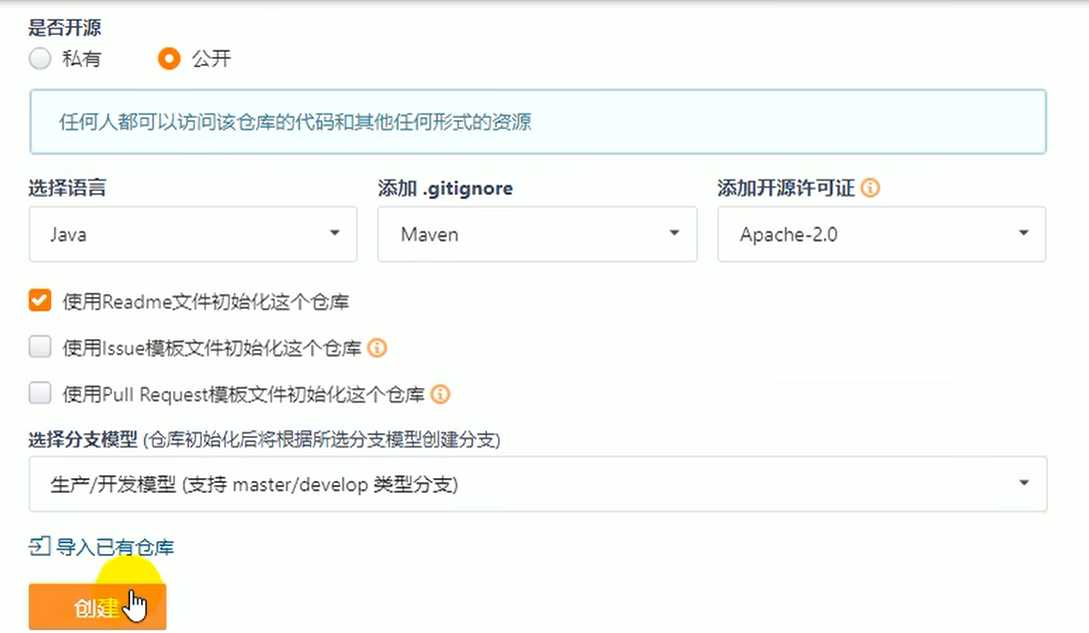
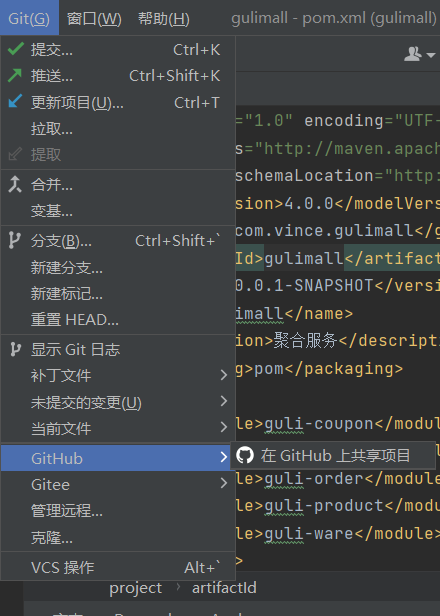
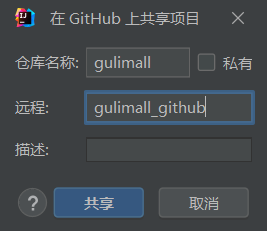
码云创建Maven仓库
设置Maven开发模板;分支类型为“生产、开发模型” ,使开发分支时用dev分支,发布后使用master分支:
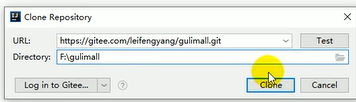
通过仓库地址克隆项目到本地:

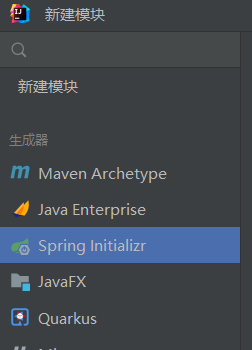
新建maven模块 gulimall-xxx,导入依赖pom.xml
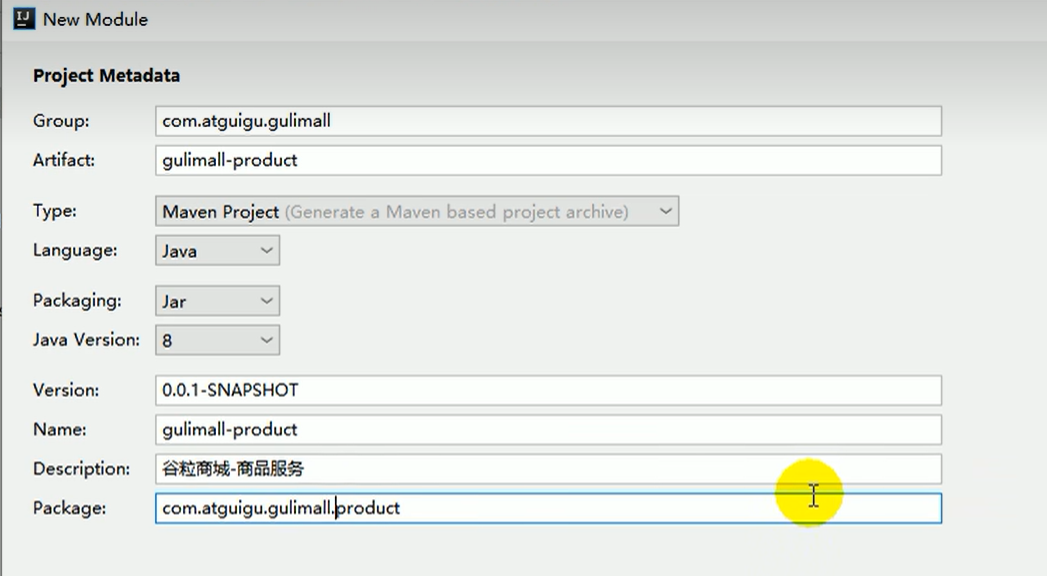
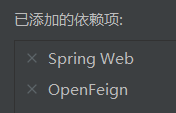
导入依赖
    <dependencies>
        <!--openfeign-->
        <dependency>
            <groupId>org.springframework.cloud</groupId>
            <artifactId>spring-cloud-starter-openfeign</artifactId>
        </dependency>
        <!--web-->
        <dependency>
            <groupId>org.springframework.boot</groupId>
            <artifactId>spring-boot-starter-web</artifactId>
        </dependency>
        <dependency>
            <groupId>org.springframework.boot</groupId>
            <artifactId>spring-boot-starter-actuator</artifactId>
        </dependency>
    </dependencies>
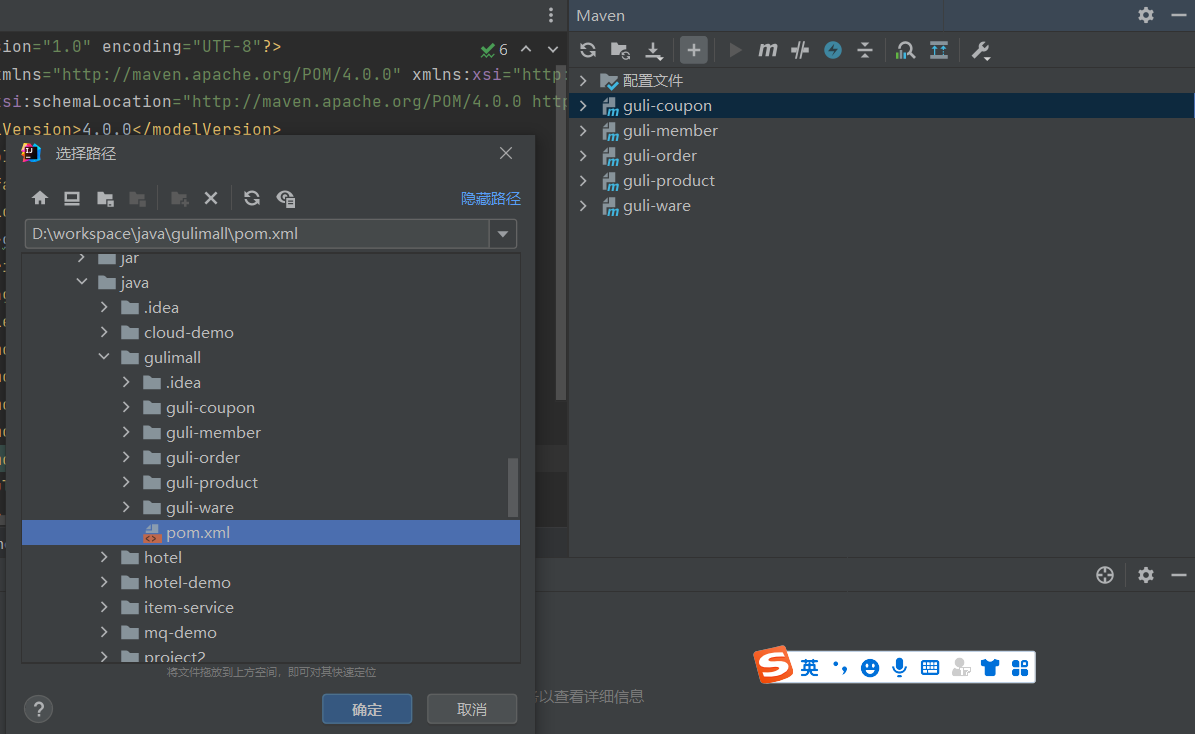
父工程的pom.xml,并把父工程添加到maven
**/mvnw
**/mvnw.cmd

**/.mvn
**/target/

.idea

**/.gitignore
也可以直接把这些文件删除,这些文件是用不到的
先右键项目-git-add,然后提交本地库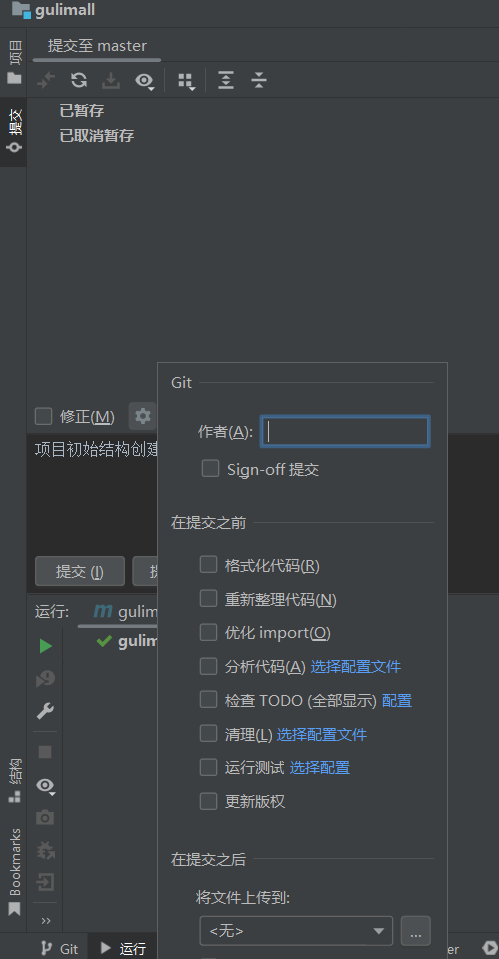
填写提交信息、点击commit
注意:所有数据库表是没有外键的,商城项目外键复杂影响性能。
0.使用powerDesigner设计表:

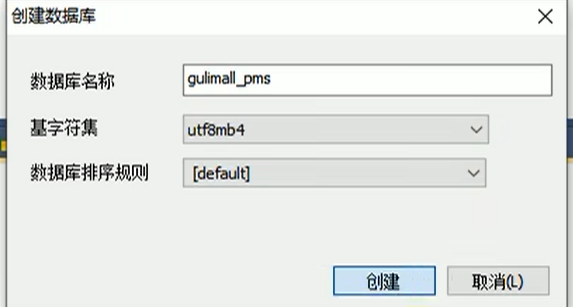
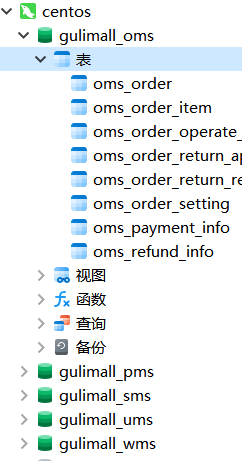
1.创建数据库gulimall_oms,gulimall_pms,gulimall_sms,gulimall_ums,gulimall_wms,基字符集选择utf8mb4
2.使用Navicat或SQLyog分别创建五个数据库,编码utf8mb4。
3.双击打开数据库,新建查询,将sql语句复制粘贴运行:
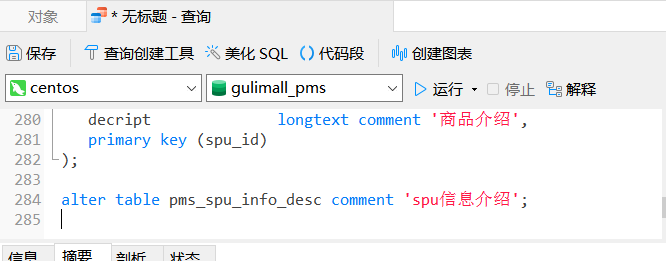
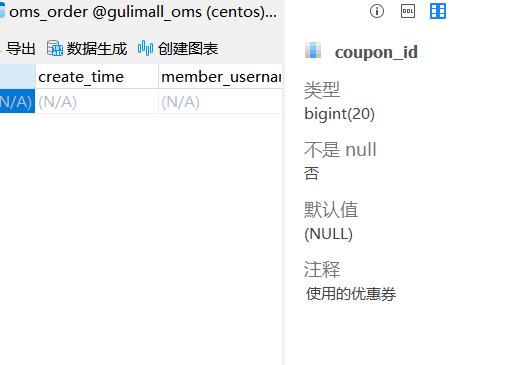
随便点开一个表,发现没有中文乱码:
注意:不能将对应sql文件拉进点开的数据库自动运行sql语句,因为sql文件编码是gbk,直接拖进去会导致中文乱码
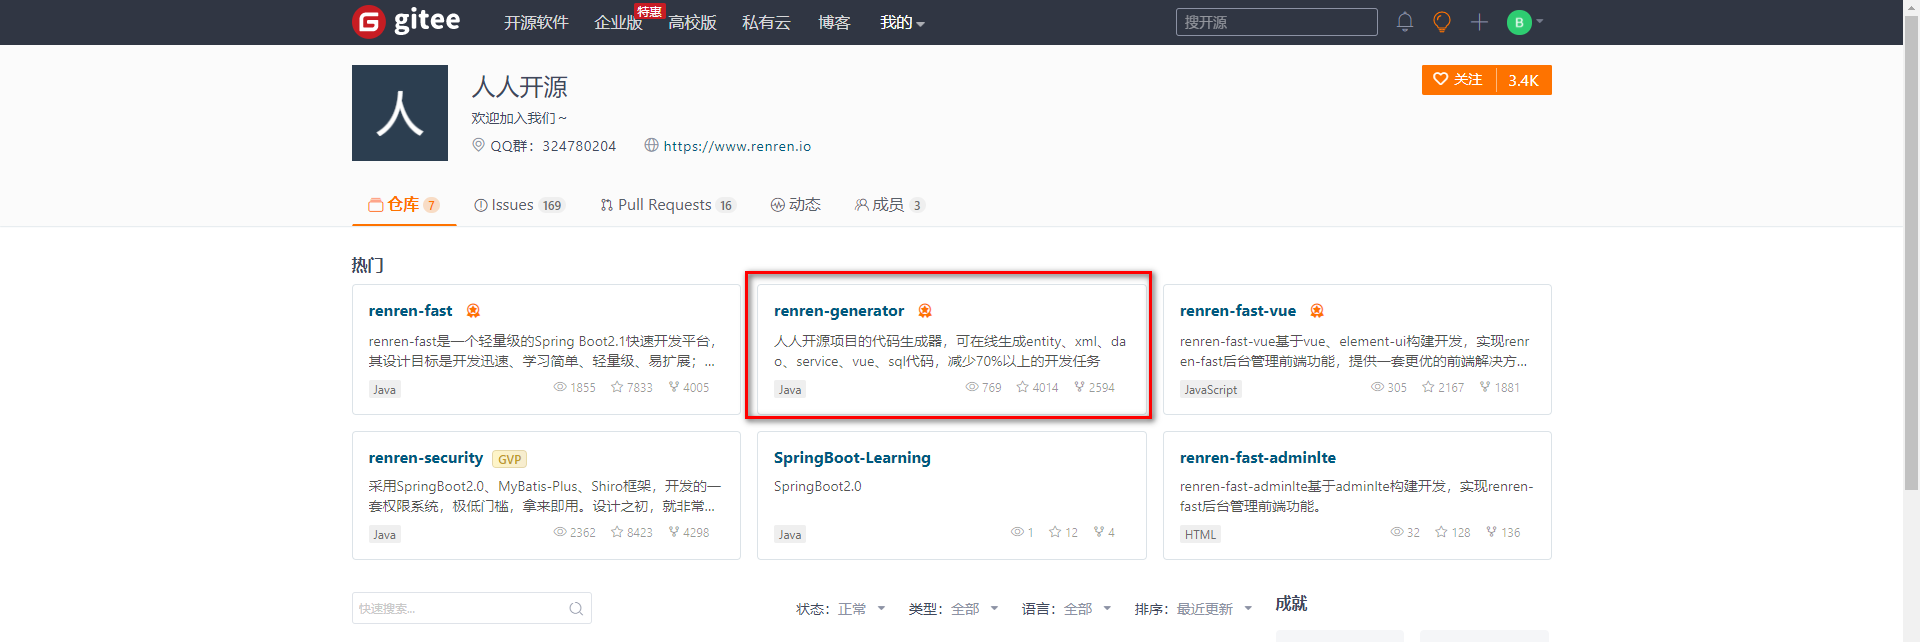
码云上搜索人人开源,找到renren-fast(后台管理系统的后端),renren-fast-vue(后台管理系统的前端), 克隆到本地。
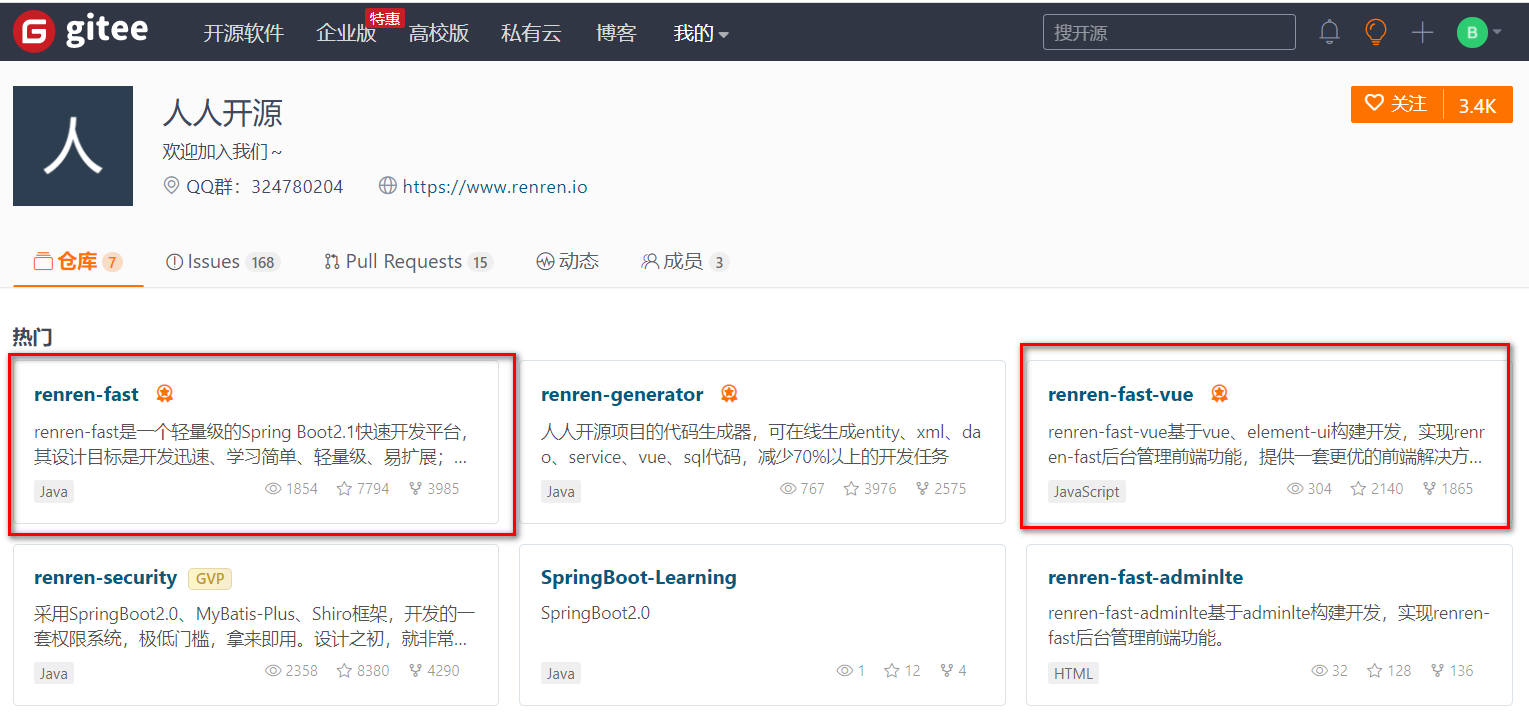
- renren-fast是一个轻量级的,前后端分离的Java快速开发平台,能快速开发项目并交付
- renren-fast-vue基于vue、element-ui构建开发,实现renren-fast后台管理前端功能,提供一套更优的前端解决方案
- renren-security是一个轻量级的,前后端分离的Java快速开发平台,能快速开发项目并交付
- renren-generator是人人开源项目的代码生成器,可在线生成基础增删改查相关的entity、xml、dao、service、html、js、sql代码,减少70%以上的开发任务,
克隆:
桌面右键git bash克隆两个项目:
git clone https://gitee.com/renrenio/renren-fast.git
git clone https://gitee.com/renrenio/renren-fast-vue.git
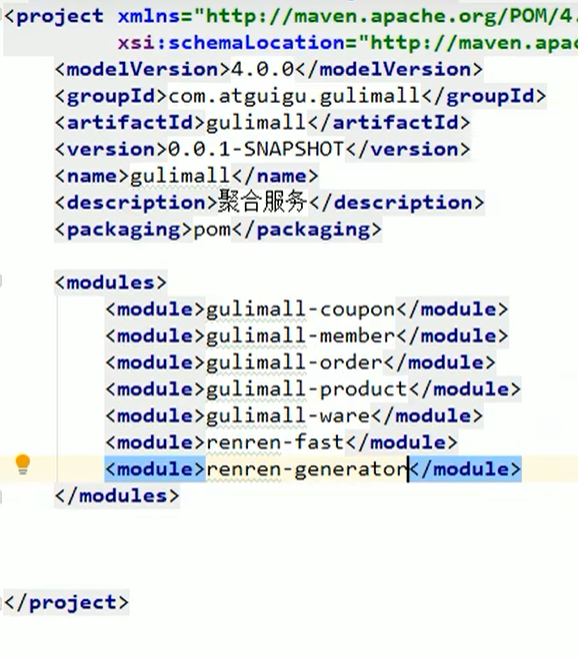
把后端renren-fast文件夹复制到谷粒商城项目中并加入父工程:
<?xml version="1.0" encoding="UTF-8"?>
<project xmlns="http://maven.apache.org/POM/4.0.0" xmlns:xsi="http://www.w3.org/2001/XMLSchema-instance"
xsi:schemaLocation="http://maven.apache.org/POM/4.0.0 https://maven.apache.org/xsd/maven-4.0.0.xsd">
<modelVersion>4.0.0</modelVersion>
<groupId>com.vince.gulimall</groupId>
<artifactId>gulimall</artifactId>
<version>0.0.1-SNAPSHOT</version>
<name>gulimall</name>
<description>聚合服务</description>
<packaging>pom</packaging>
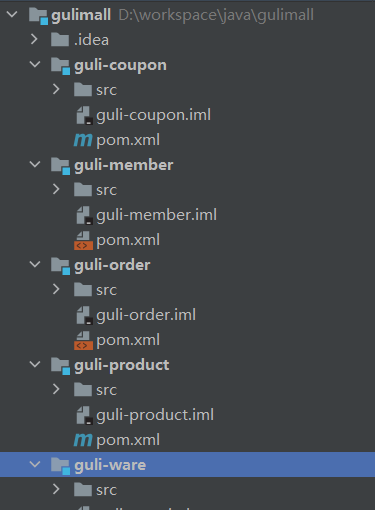
<modules>
<module>guli-coupon</module>
<module>guli-member</module>
<module>guli-order</module>
<module>guli-product</module>
<module>guli-ware</module>
<module>renren-fast</module>
</modules>
</project>
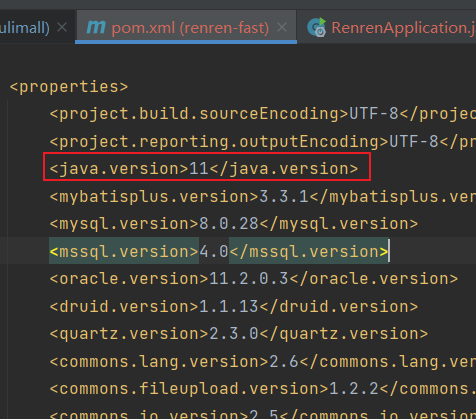
然后在idea项目结构里设置项目jdk为11,把renren_fast的pom里jdk改为11:
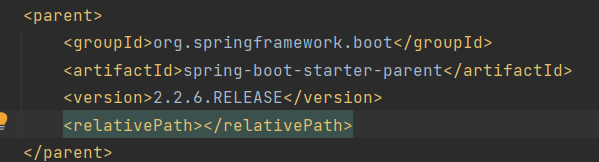
'parent.relativePath' of POM io.renren:renren-fast:3.0.0
报错原因:子模块的parent写的并不是子模块的上一级,而是继承了springboot
解决方法:将其他模块pom的parent复制粘贴到renren-fast的pom
	<parent>
		<groupId>org.springframework.boot</groupId>
		<artifactId>spring-boot-starter-parent</artifactId>
		<version>2.7.3</version>
		<relativePath/> <!-- lookup parent from repository -->
</parent><!-- https://mvnrepository.com/artifact/com.spotify/docker-maven-plugin -->
<dependency>
<groupId>com.spotify</groupId>
<artifactId>docker-maven-plugin</artifactId>
<version>0.4.14</version>
</dependency>
<dependency>
<groupId>org.codehaus.mojo</groupId>
<artifactId>wagon-maven-plugin</artifactId>
<version>1.0</version>
</dependency>
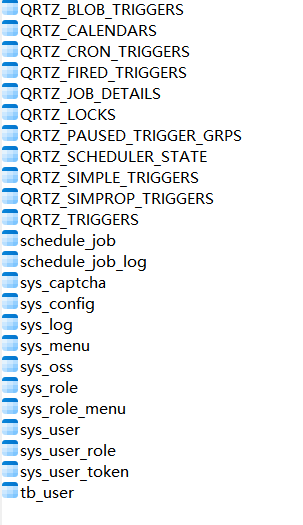
sql文件在renren-fast/db/ 目录下,找到其中的mysql.sql 复制,运行。
查看application.yml,发现当前环境为dev
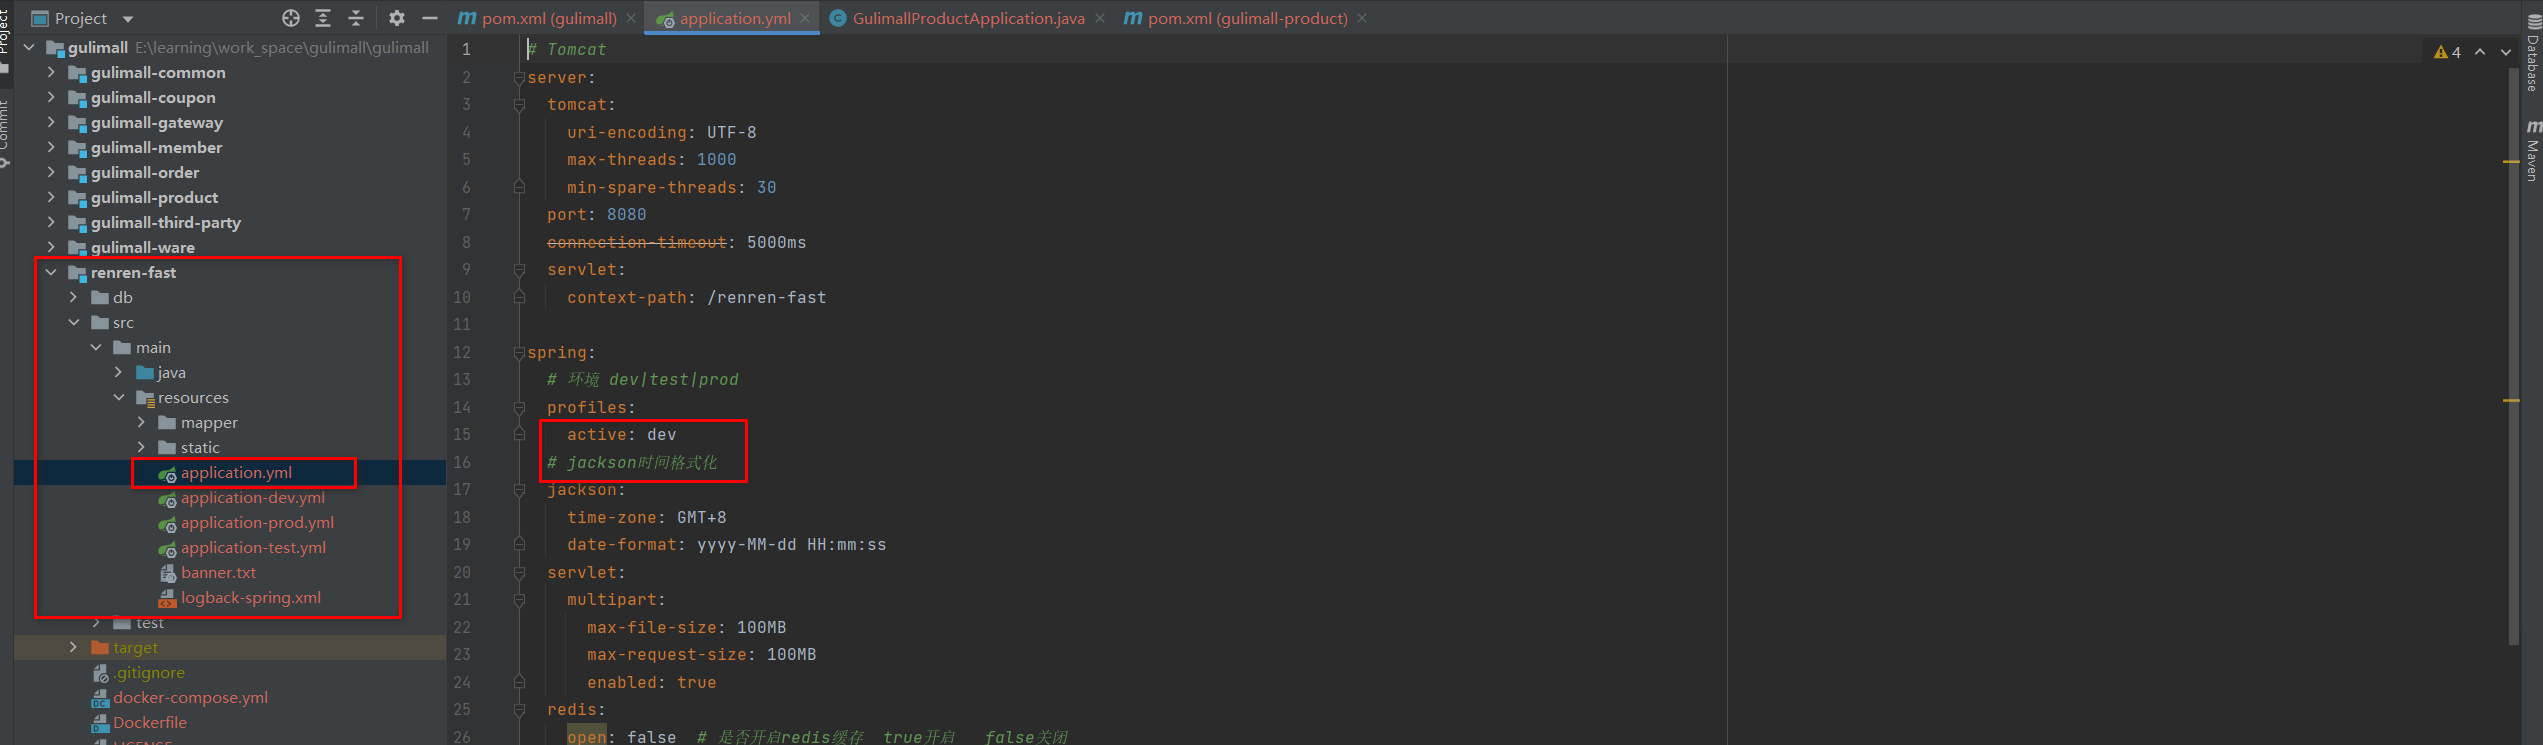
修改application-dev.yml, 配置成自己的linux的数据库信息,别忘了数据库名为gulimall_admin:

如果报错ssl错误,在url后面加&useSSL=false
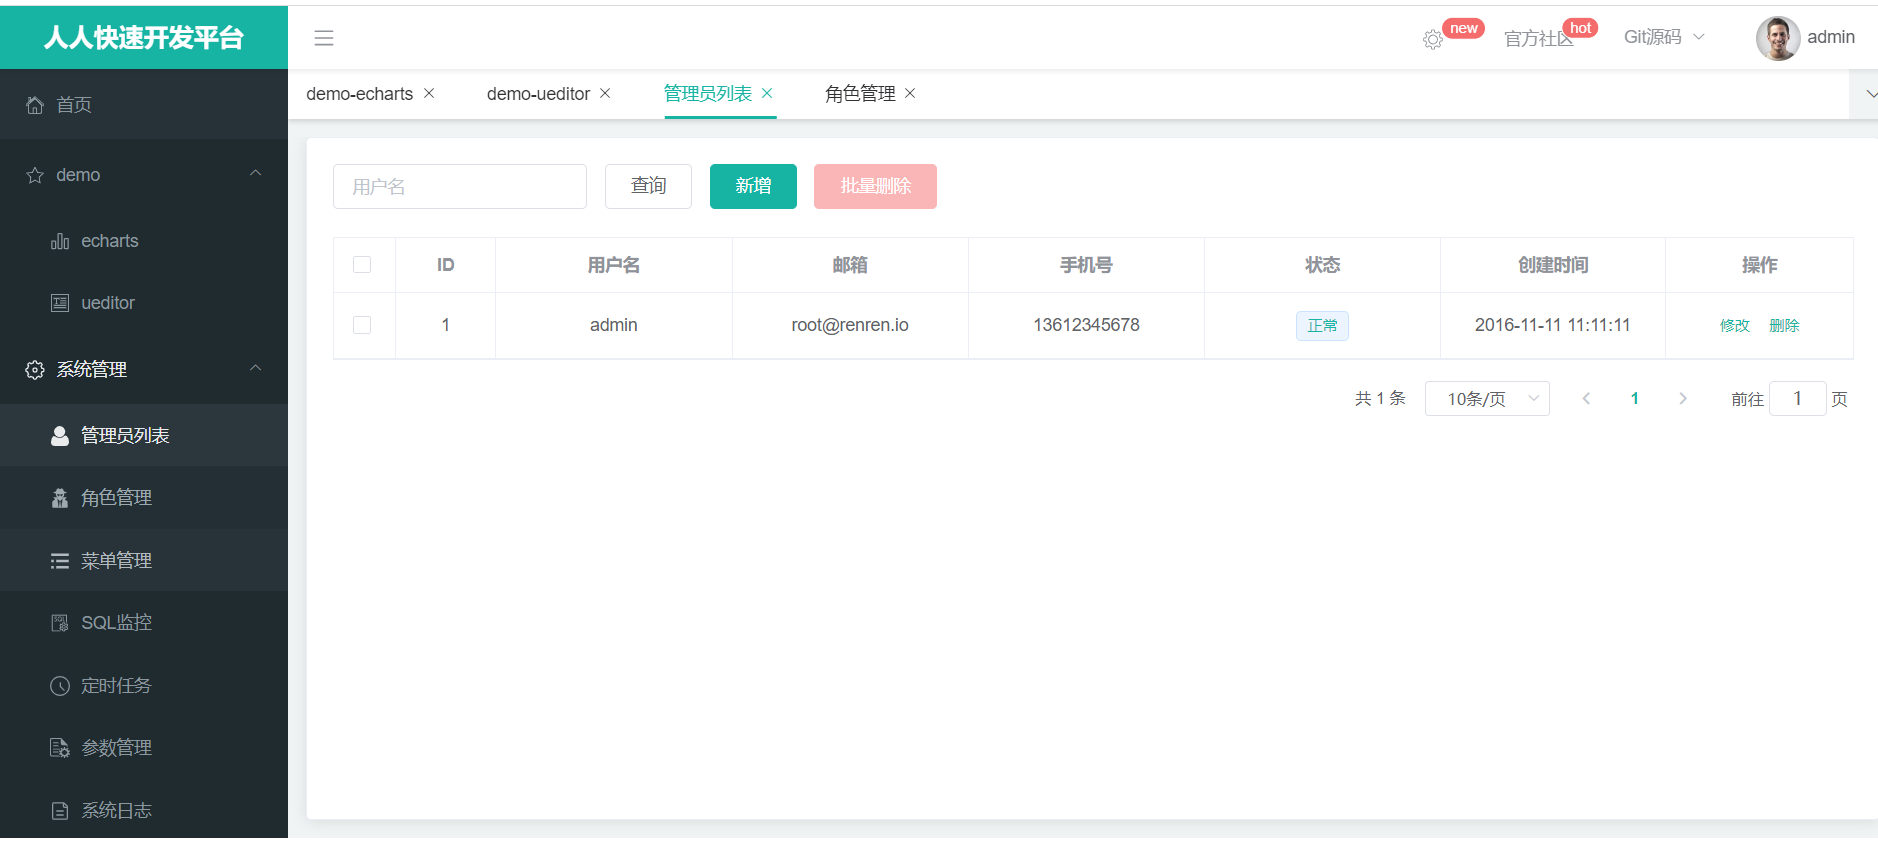
http://localhost:8080/renren-fast/
测试成功
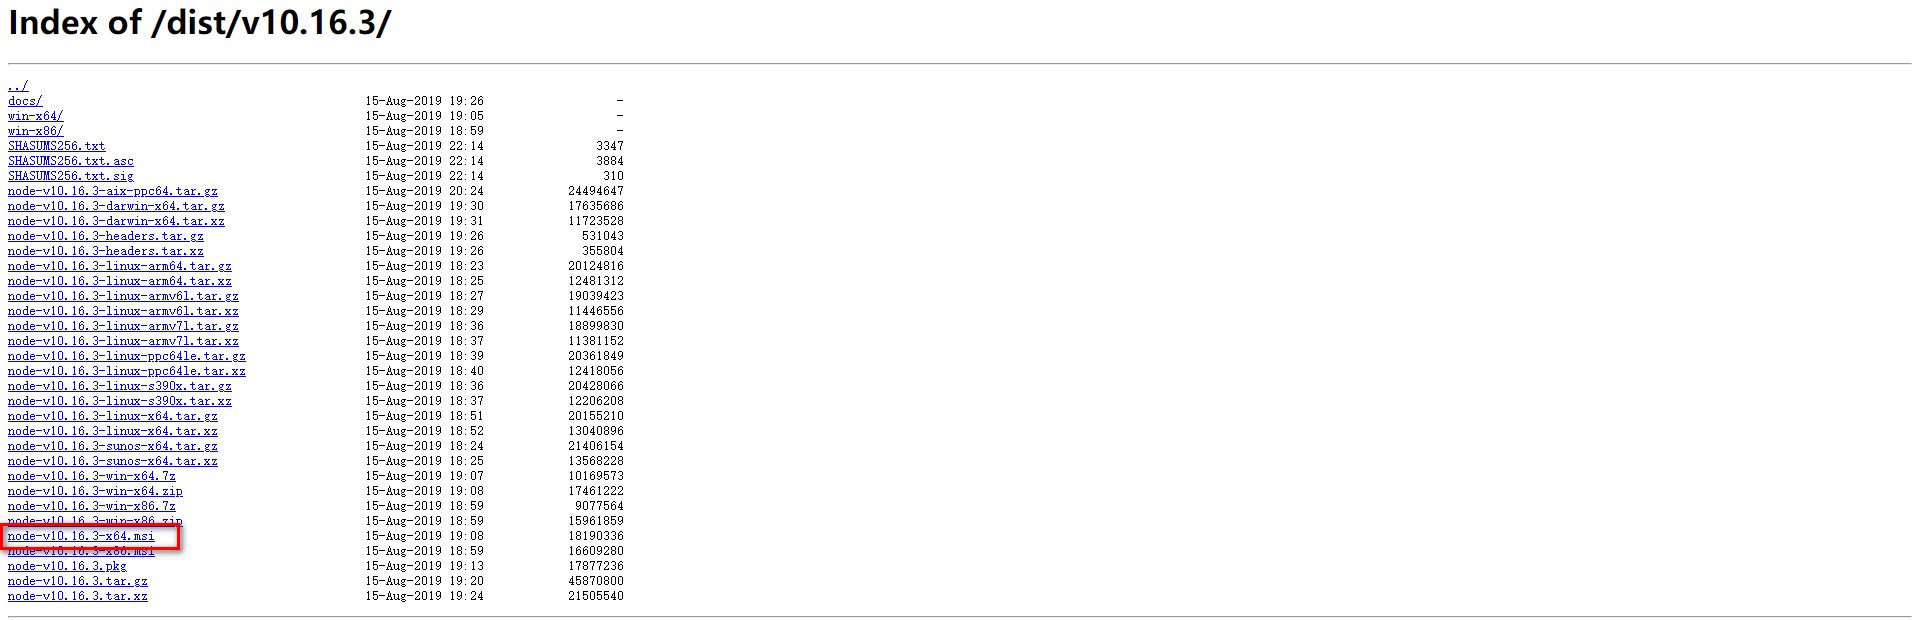
安装node.js
下载地址https://nodejs.org/dist/v10.16.3/,下载之后直接安装即可。安装后检查node.js

配置淘宝镜像
npm config set registry http://registry.npm.taobao.org/
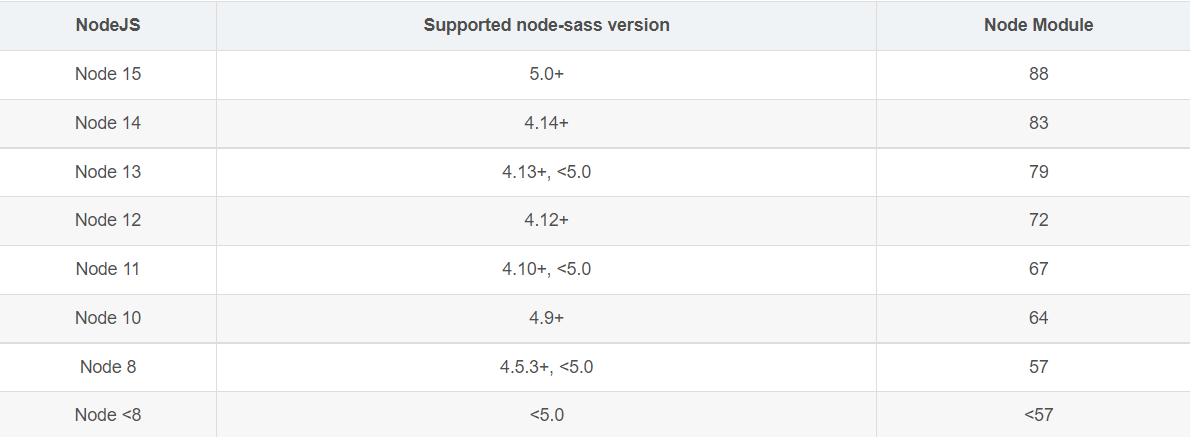
设置node-sass版本:
npm install node-sass@4.14注意:一定要保证nodejs版本和node-sass匹配,不想浪费时间就下载我前面指定的版本。
加载项目依赖并运行项目:
运行vue项目之前,运行npm install命令,加载项目依赖
点击左下角打开控制台、点击终端 :
安装npm依赖
npm install
运行项目
npm run dev
报错解决:
如果npm install卡着不动,重启windows、管理员cmd窗口试试。
版本很重要,建议下载我前面的版本。
为什么运行命令是npm run dev?
在项目目录下,我们可以看到一个名为package.json的文件,该文件是对项目、模块包的描述,在package.json文件中,有一个scripts的字段:
  "scripts": {
    "dev": "webpack-dev-server --inline --progress --config build/webpack.dev.conf.js",
    "start": "npm run dev",
    "build": "node build/build.js"
  },
修改后运行命令就是npm run serve:
// 运行npm run serve的scripts字段
  "scripts": {
    "serve": "vue-cli-service serve",
    "build": "vue-cli-service build",
    "lint": "vue-cli-service lint"
  },
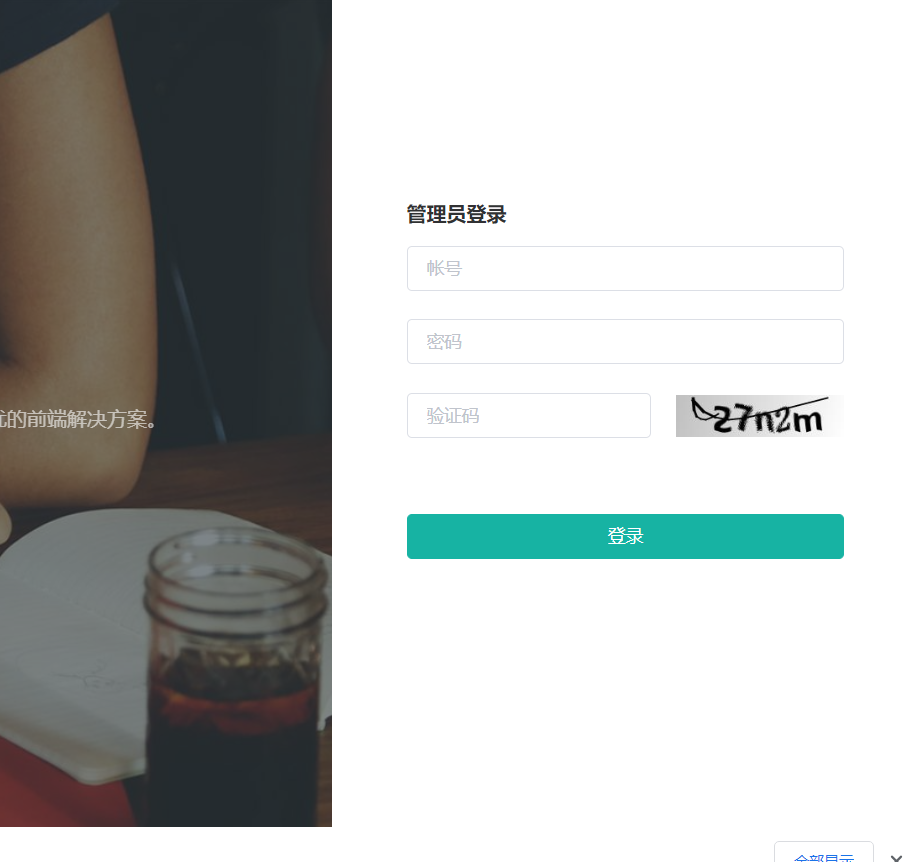
运行成功:
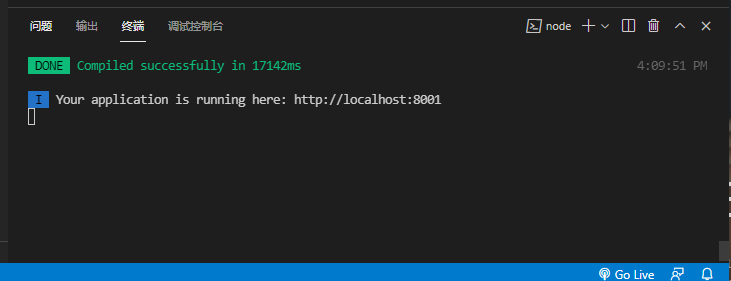
访问http://localhost:8001,测试成功,账号密码是admin、admin。
报错解决:
如果不显示验证码是因为后台没有运行成功、检查idea是否数据库报错、检查虚拟机docker ps数据库是否运行。
另外centos默认会隔一两天自动改ip地址,想关闭参考下面文章的2.6:
git clone https://gitee.com/renrenio/renren-generator.git删除其中的.git文件,复制到父工程中,父工程pom.xml中添加代码生成器为子模块
修改renren-generator的配置文件application.yml,配置自己的数据源,注意修改数据库名gulimall_pms(生成商品系统)
先生成gulimall-pms商品系统,就数据库名为商品系统的数据库表
spring:
  datasource:
    type: com.alibaba.druid.pool.DruidDataSource
    #MySQL配置
    driverClassName: com.mysql.cj.jdbc.Driver
    url: jdbc:mysql://192.168.xxx.xxx:3306/gulimall_pms?useUnicode=true&characterEncoding=UTF-8&serverTimezone=Asia/Shanghai&useSSL=false
    username: root
password: 1234踩坑:ssl报错就在url后面加&useSSL=false、数据库连接出错检查虚拟机开机情况、数据库信息填写错误
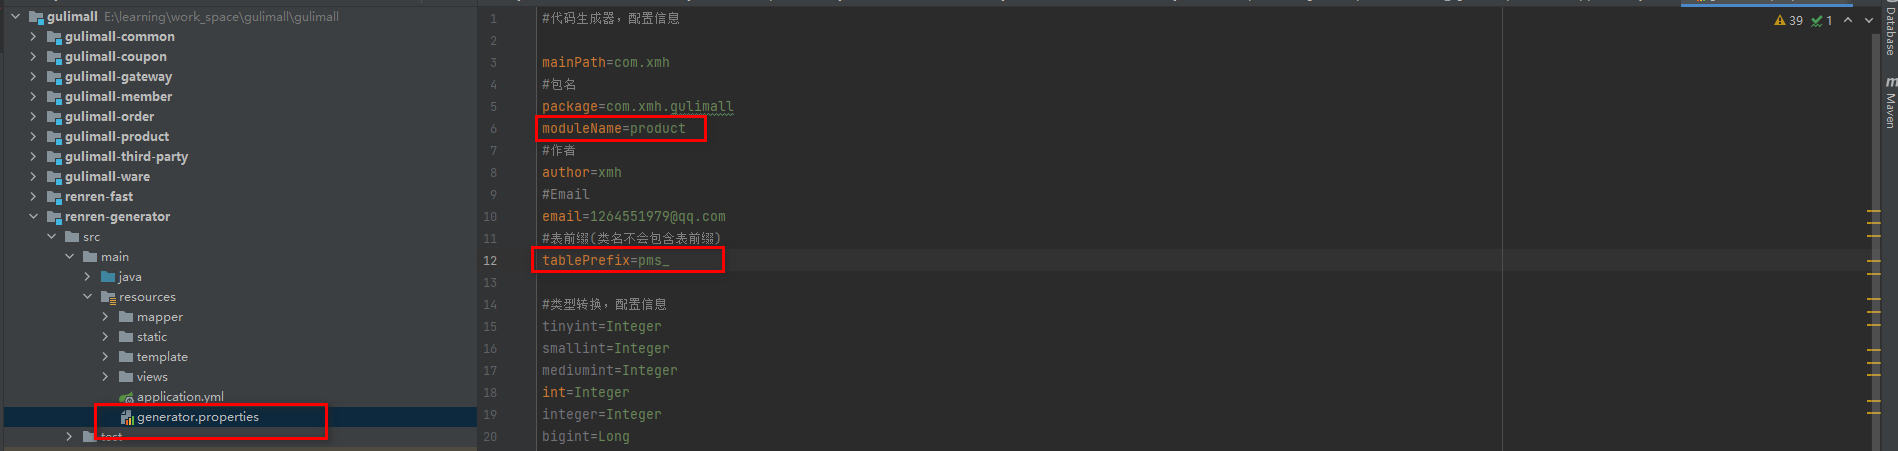
这里先配置商品的相关信息:
注意只修改下面内容,其他内容不用变。
#代码生成器,配置信息

mainPath=com.vince
#包名
package=com.vince.gulimall
moduleName=product
#作者
author=vince
#Email
email=xxxxx@qq.com
#表前缀(类名不会包含表前缀)
tablePrefix=pms_
如果引入spring-boot-starter-parent 2.2.6.RELEASE爆红,参考问题2
修改src/main/resources/template/Controller.java.vm
删除导入@RequiresPermissions注解的语句

注释掉该位置,此处的注释是shiro提供的,我们以后要用spring security

注意:这里注释要用//,ctrl+/的注释是#。
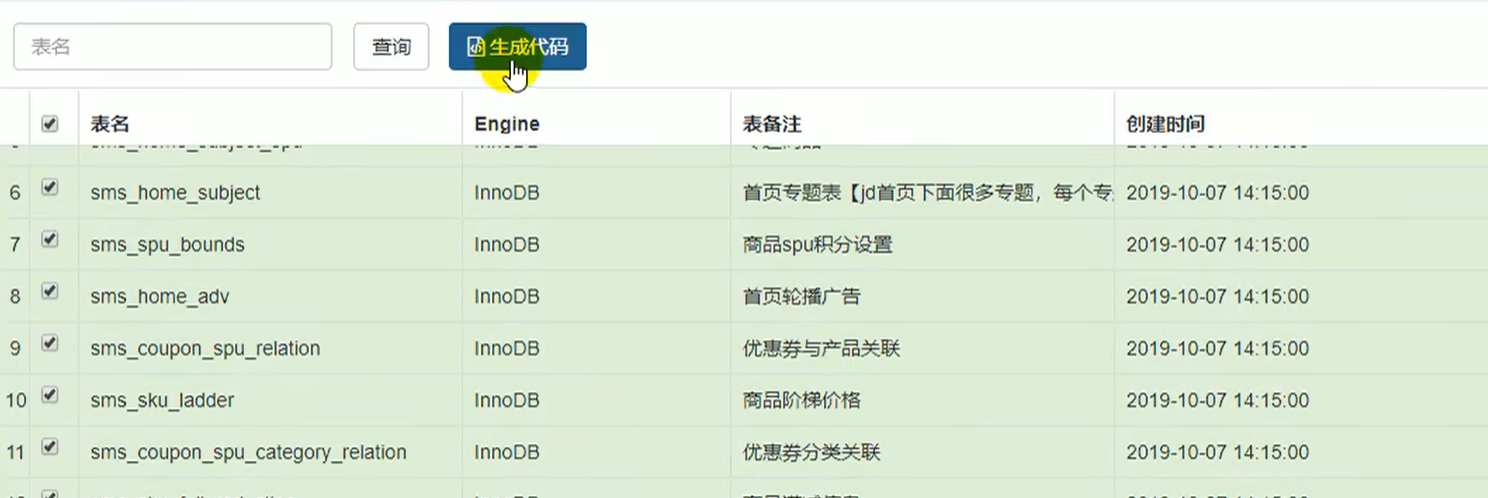
访问localhost:80,选中所有表,生成代码
选择每页显示30条后,再全选生成
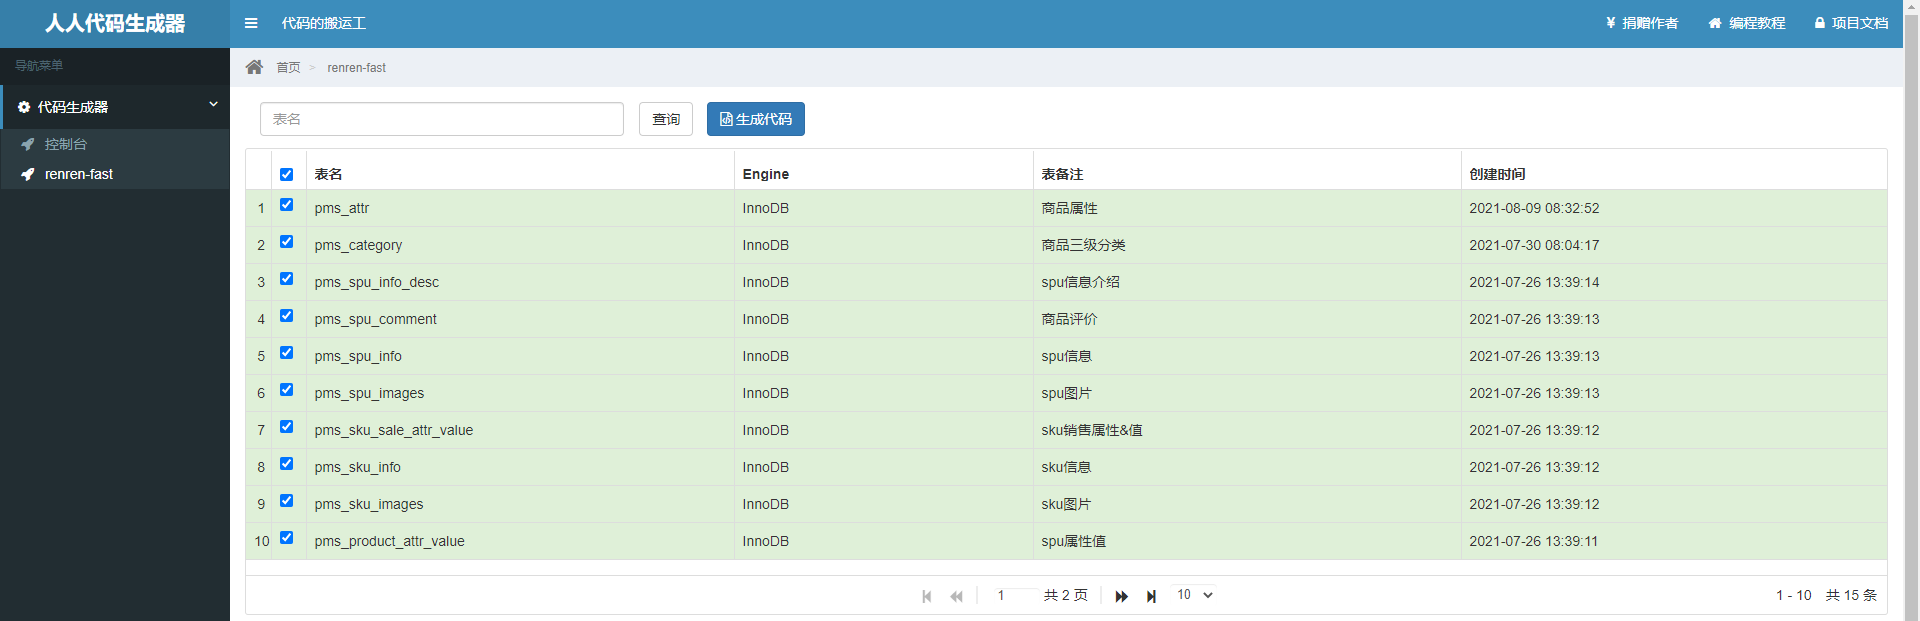
注意:如果表备注里中文乱码,重写运行sql文件里的语句, 复制粘贴运行,因为sql文件编码是gbk
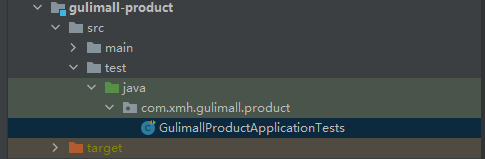
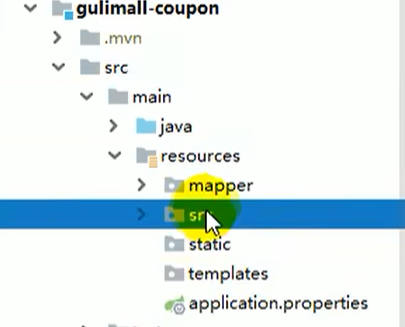
解压生成的代码,把mian文件夹复制到guli-product/src下
删除前端代码:\resources\src\(前端文件,用不到)
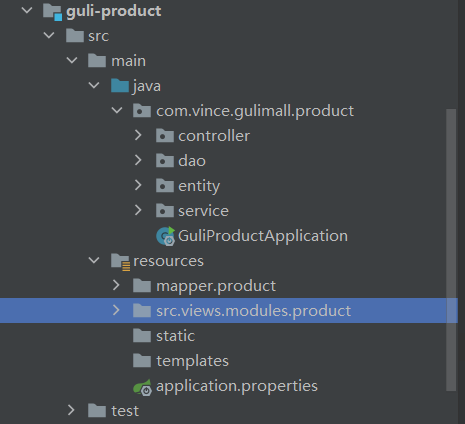
如果之前没有创建application.yml和启动类,手动创建
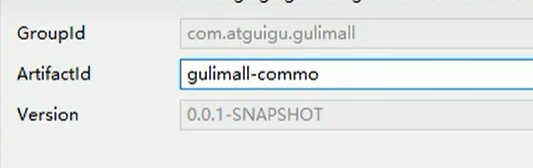
新建gulimall-common的Maven模块,用来引入每一个微服务公共的依赖、bean、工具类等
让所有gulimall-xxx的pom引用guli-common的依赖:
        <dependency>
            <groupId>com.vince.gulimall</groupId>
            <artifactId>gulimall-ware</artifactId>
            <version>0.0.1-SNAPSHOT</version>
        </dependency>
在gulimall-common引入公共依赖
<?xml version="1.0" encoding="UTF-8"?>
<project xmlns="http://maven.apache.org/POM/4.0.0"
         xmlns:xsi="http://www.w3.org/2001/XMLSchema-instance"
         xsi:schemaLocation="http://maven.apache.org/POM/4.0.0 http://maven.apache.org/xsd/maven-4.0.0.xsd">
    <parent>
        <artifactId>gulimall</artifactId>
        <groupId>com.vince.gulimall</groupId>
        <version>0.0.1-SNAPSHOT</version>
    </parent>
    <modelVersion>4.0.0</modelVersion>

    <groupId>com.vince.gulimall</groupId>
    <artifactId>gulimall-common</artifactId>
    <version>0.0.1-SNAPSHOT</version>

    <!-- 统一管理jar包版本 -->
    <properties>
        <maven.compiler.source>11</maven.compiler.source>
        <maven.compiler.target>11</maven.compiler.target>
        <mybatis-plus.version>3.4.1</mybatis-plus.version>
        <lombok.version>1.18.8</lombok.version>
        <httpcore.version>4.4.14</httpcore.version>
        <commons.lang.version>2.6</commons.lang.version>
        <jakarta.validation.api>2.0.2</jakarta.validation.api>
    </properties>

    <dependencies>
        <dependency>
            <groupId>com.baomidou</groupId>
            <artifactId>mybatis-plus-boot-starter</artifactId>
            <version>${mybatis-plus.version}</version>
        </dependency>
        <dependency>
            <groupId>org.projectlombok</groupId>
            <artifactId>lombok</artifactId>
            <version>${lombok.version}</version>
        </dependency>
        <dependency>
            <groupId>org.apache.httpcomponents</groupId>
            <artifactId>httpcore</artifactId>
            <version>${httpcore.version}</version>
        </dependency>
        <dependency>
            <groupId>commons-lang</groupId>
            <artifactId>commons-lang</artifactId>
            <version>${commons.lang.version}</version>
        </dependency>
        <dependency>
            <groupId>jakarta.validation</groupId>
            <artifactId>jakarta.validation-api</artifactId>
            <version>${jakarta.validation.api}</version>
            <scope>compile</scope>
        </dependency>

        <dependency>
            <groupId>javax.servlet</groupId>
            <artifactId>servlet-api</artifactId>
            <version>2.5</version>
            <scope>provided</scope>
        </dependency>
        <dependency>
            <groupId>mysql</groupId>
            <artifactId>mysql-connector-java</artifactId>
            <version>8.0.28</version>
        </dependency>
        <dependency>
            <groupId>com.alibaba.cloud</groupId>
            <artifactId>spring-cloud-starter-alibaba-nacos-discovery</artifactId>
        </dependency>
        <dependency>
            <groupId>com.alibaba.cloud</groupId>
            <artifactId>spring-cloud-starter-alibaba-nacos-config</artifactId>
        </dependency>
    </dependencies>
    <dependencyManagement>
        <dependencies>
            <dependency>
                <groupId>com.alibaba.cloud</groupId>
                <artifactId>spring-cloud-alibaba-dependencies</artifactId>
                <version>2021.0.1.0</version>
                <type>pom</type>
                <scope>import</scope>
            </dependency>
        </dependencies>
    </dependencyManagement>
</project>注意SpringCloud和springboot和版本兼容问题,不匹配就是给后面埋雷,建议用老师的版本或我的版本。我这里版本都是最新的,springboot版本2.7.4,SpringCloud版本2021.0.4,SpringCloudAlibaba版本2021.0.1.0
Release Train Boot Version 2021.0.x aka Jubilee 2.6.x, 2.7.x (Starting with 2021.0.3) 2020.0.x aka Ilford 2.4.x, 2.5.x (Starting with 2020.0.3) Hoxton 2.2.x, 2.3.x (Starting with SR5) Greenwich 2.1.x Finchley 2.0.x Edgware 1.5.x Dalston 1.5.x
Spring Cloud Alibaba Version Spring Cloud Version Spring Boot Version 2021.0.4.0* Spring Cloud 2021.0.4 2.6.11 2021.0.1.0 Spring Cloud 2021.0.1 2.6.3 2021.1 Spring Cloud 2020.0.1 2.4.2
从renren-fast模块的common包下,复制粘贴这些包和类:
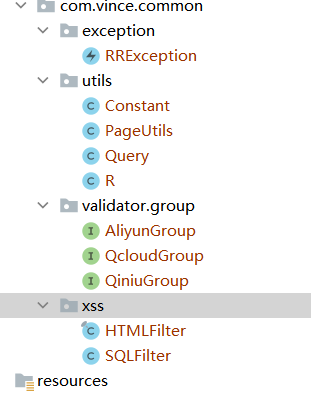
然后把引入上面这些类的报错文件中,重新导入,例如:
import io.renren.common.xss.SQLFilter;改成
import com.vince.common.xss.SQLFilter;如果第六步没有删除在controller模板中删除@RequiresPermissions注解:
ctrl+x删除gulimall-product里所有controller中的@RequiresPermissions注解
import org.apache.shiro.authz.annotation.RequiresPermissions;
@RequiresPermissions("product:attr:list")
现在所有报错都已经清理完毕。
如果之前注释了controller模板(在renren-generator的resources-template-Controller.java.vm里)里的@RequiresPermissions注解,这里就不用删除了。
上面解决报错问题后,common模块的utils包下有个结果类R:
public class R extends HashMap<String, Object> {
	private static final long serialVersionUID = 1L;

	public R() {
		put("code", 0);
		put("msg", "success");
	}

	public static R error() {
		return error(HttpStatus.SC_INTERNAL_SERVER_ERROR, "未知异常,请联系管理员");
	}

	public static R error(String msg) {
		return error(HttpStatus.SC_INTERNAL_SERVER_ERROR, msg);
	}

	public static R error(int code, String msg) {
		R r = new R();
		r.put("code", code);
		r.put("msg", msg);
		return r;
	}

	public static R ok(String msg) {
		R r = new R();
		r.put("msg", msg);
		return r;
	}

	public static R ok(Map<String, Object> map) {
		R r = new R();
		r.putAll(map);
		return r;
	}

	public static R ok() {
		return new R();
	}

	public R put(String key, Object value) {
		super.put(key, value);
		return this;
	}
}
controller使用方法:
返回成功数据:
return R.ok().put("data", (Object)"响应的数据");返回错误数据:
return R.error(500,"错误消息,在msg里").put("data",(Object)"错误数据,在data里,常为List<String>,存多个错误原因");
common模块的pom.xml加入依赖:
        <dependency>
            <groupId>mysql</groupId>
            <artifactId>mysql-connector-java</artifactId>
            <version>8.0.28</version>
        </dependency>
product模块的application.yml
server:
  port: 10000
spring:
  datasource:
    username: root
    password: 1234
    url: jdbc:mysql://xxxx:3306/gulimall_pms?userUnicode=true&characterEncoding=UTF-8&useSSL=false&serverTimezone=Asia/Shanghai
    driver-class-name: com.mysql.jdbc.Driver

mybatis-plus:
  configuration:
    #数据库下划线和实体类驼峰统一
    map-underscore-to-camel-case: true
    log-impl: org.apache.ibatis.logging.stdout.StdOutImpl
  global-config:
    db-config:
      id-type: auto
    banner: false
  #告诉mp,sql映射文件的位置,默认值classpath*:/mapper/**/*.xml。
#  classpath表示只引用现在模块的类路径。lasspath*表示不止引用现在模块的类路径,还包括依赖jar包的类路径
  mapper-locations: classpath:/mapper/**/*.xml
3、测试
测试
@SpringBootTest
class GulimallProductApplicationTests {

    @Autowired
    BrandService brandService;

    @Test
    public void testBrand(){
        BrandEntity brandEntity = new BrandEntity();
        brandEntity.setName("华为");
        brandService.save(brandEntity);
        System.out.println("保存成功");
        List<BrandEntity> list = brandService.list(new LambdaQueryWrapper<BrandEntity>().eq(BrandEntity::getName, "华为"));
        System.out.println(list);
    }

}

运行项目,访问http://localhost:10000/product/brand/list
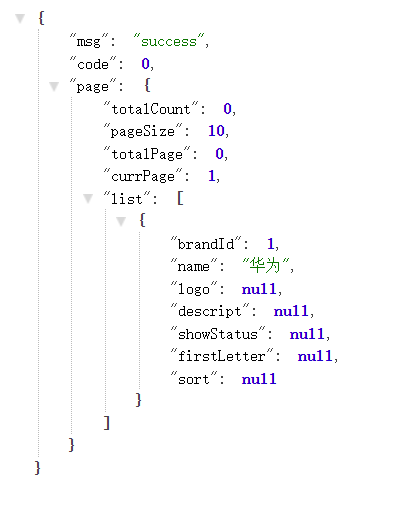
同方法测试删改。
按照字母序从上往下配置,coupon是7000,member是8000,order是9000,product是10000,ware是11000。
修改生成器配置,模块名和表前缀:
#代码生成器,配置信息

mainPath=com.vince
#包名
package=com.vince.gulimall
moduleName=coupon
#作者
author=vince
#Email
email=xxx@qq.com
#表前缀(类名不会包含表前缀)
tablePrefix=sms_
修改yml的数据库名

运行生成器模块,访问http://localhost/
每页显示100条、全选生成:
生成coupon的代码,main文件夹复制到工程中,并在gulimall-coupon工程中引入gulimall-common依赖
        <dependency>
            <groupId>com.vince.gulimall</groupId>
            <artifactId>gulimall-common</artifactId>
            <version>0.0.1-SNAPSHOT</version>
</dependency>从product复制过去,只需要修改数据库名字。
server:
  port: 7000
spring:
  datasource:
    username: root
    password: 1234
    url: jdbc:mysql://xxxx.134:3306/gulimall_sms?userUnicode=true&characterEncoding=UTF-8&useSSL=false&serverTimezone=Asia/Shanghai
    driver-class-name: com.mysql.jdbc.Driver

mybatis-plus:
  configuration:
    #数据库下划线和实体类驼峰统一
    map-underscore-to-camel-case: true
    log-impl: org.apache.ibatis.logging.stdout.StdOutImpl
  global-config:
    db-config:
      id-type: auto
    banner: false
  #告诉mp,sql映射文件的位置,默认值classpath*:/mapper/**/*.xml。
  #  classpath表示只引用现在模块的类路径。lasspath*表示不止引用现在模块的类路径,还包括依赖jar包的类路径
  mapper-locations: classpath:/mapper/**/*.xml
删除resources下的src
访问http://localhost:7000/coupon/coupon/list测试
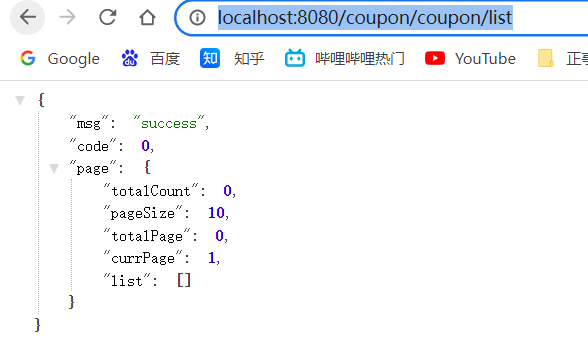
测试成功!
生成:
修改generator.properties的模块名和表前缀(ums_,oms_,wms_)、yml数据库名、运行生成器模块,访问http://localhost/
每页显示100条、全选生成。
配置生成后的模块:
复制粘贴生成代码,pom引入common模块依赖、yml修改数据库名、删除resources下的src
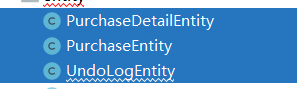
ware模块多一条,删除这三个实体类和对应的dao、service、controller、resources.mapper.ware
测试:
测试member、ums:http://localhost:8000/member/growthchangehistory/list
测试order、oms:http://localhost:9000/order/order/list
测试ware、wms: http://localhost:11000/ware/wareinfo/list
如何在buildr项目中使用Ruby?我在很多不同的项目中使用过Ruby、JRuby、Java和Clojure。我目前正在使用我的标准Ruby开发一个模拟应用程序,我想尝试使用Clojure后端(我确实喜欢功能代码)以及JRubygui和测试套件。我还可以看到在未来的不同项目中使用Scala作为后端。我想我要为我的项目尝试一下buildr(http://buildr.apache.org/),但我注意到buildr似乎没有设置为在项目中使用JRuby代码本身!这看起来有点傻,因为该工具旨在统一通用的JVM语言并且是在ruby中构建的。除了将输出的jar包含在一个独特的、仅限ruby
在rails源中:https://github.com/rails/rails/blob/master/activesupport/lib/active_support/lazy_load_hooks.rb可以看到以下内容@load_hooks=Hash.new{|h,k|h[k]=[]}在IRB中,它只是初始化一个空哈希。和做有什么区别@load_hooks=Hash.new 最佳答案 查看rubydocumentationforHashnew→new_hashclicktotogglesourcenew(obj)→new_has
我的主要目标是能够完全理解我正在使用的库/gem。我尝试在Github上从头到尾阅读源代码,但这真的很难。我认为更有趣、更温和的踏脚石就是在使用时阅读每个库/gem方法的源代码。例如,我想知道RubyonRails中的redirect_to方法是如何工作的:如何查找redirect_to方法的源代码?我知道在pry中我可以执行类似show-methodmethod的操作,但我如何才能对Rails框架中的方法执行此操作?您对我如何更好地理解Gem及其API有什么建议吗?仅仅阅读源代码似乎真的很难,尤其是对于框架。谢谢! 最佳答案 Ru
我的假设是moduleAmoduleBendend和moduleA::Bend是一样的。我能够从thisblog找到解决方案,thisSOthread和andthisSOthread.为什么以及什么时候应该更喜欢紧凑语法A::B而不是另一个,因为它显然有一个缺点?我有一种直觉,它可能与性能有关,因为在更多命名空间中查找常量需要更多计算。但是我无法通过对普通类进行基准测试来验证这一点。 最佳答案 这两种写作方法经常被混淆。首先要说的是,据我所知,没有可衡量的性能差异。(在下面的书面示例中不断查找)最明显的区别,可能也是最著名的,是你的
几个月前,我读了一篇关于rubygem的博客文章,它可以通过阅读代码本身来确定编程语言。对于我的生活,我不记得博客或gem的名称。谷歌搜索“ruby编程语言猜测”及其变体也无济于事。有人碰巧知道相关gem的名称吗? 最佳答案 是这个吗:http://github.com/chrislo/sourceclassifier/tree/master 关于ruby-寻找通过阅读代码确定编程语言的rubygem?,我们在StackOverflow上找到一个类似的问题:
我正在玩HTML5视频并且在ERB中有以下片段:mp4视频从在我的开发环境中运行的服务器很好地流式传输到chrome。然而firefox显示带有海报图像的视频播放器,但带有一个大X。问题似乎是mongrel不确定ogv扩展的mime类型,并且只返回text/plain,如curl所示:$curl-Ihttp://0.0.0.0:3000/pr6.ogvHTTP/1.1200OKConnection:closeDate:Mon,19Apr201012:33:50GMTLast-Modified:Sun,18Apr201012:46:07GMTContent-Type:text/plain
我目前正在使用以下方法获取页面的源代码:Net::HTTP.get(URI.parse(page.url))我还想获取HTTP状态,而无需发出第二个请求。有没有办法用另一种方法做到这一点?我一直在查看文档,但似乎找不到我要找的东西。 最佳答案 在我看来,除非您需要一些真正的低级访问或控制,否则最好使用Ruby的内置Open::URI模块:require'open-uri'io=open('http://www.example.org/')#=>#body=io.read[0,50]#=>"["200","OK"]io.base_ur
有这些railscast。http://railscasts.com/episodes/218-making-generators-in-rails-3有了这个,你就会知道如何创建样式表和脚手架生成器。http://railscasts.com/episodes/216-generators-in-rails-3通过这个,您可以了解如何添加一些文件来修改脚手架View。我想把两者结合起来。我想创建一个生成器,它也可以创建脚手架View。有点像RyanBates漂亮的生成器或web_app_themegem(https://github.com/pilu/web-app-theme)。我
前言作为一名程序员,自己的本质工作就是做程序开发,那么程序开发的时候最直接的体现就是代码,检验一个程序员技术水平的一个核心环节就是开发时候的代码能力。众所周知,程序开发的水平提升是一个循序渐进的过程,每一位程序员都是从“菜鸟”变成“大神”的,所以程序员在程序开发过程中的代码能力也是根据平时开发中的业务实践来积累和提升的。提高代码能力核心要素程序员要想提高自身代码能力,尤其是新晋程序员的代码能力有很大的提升空间的时候,需要针对性的去提高自己的代码能力。提高代码能力其实有几个比较关键的点,只要把握住这些方面,就能很好的、快速的提高自己的一部分代码能力。1、多去阅读开源项目,如有机会可以亲自参与开源
之前在培训新生的时候,windows环境下配置opencv环境一直教的都是网上主流的vsstudio配置属性表,但是这个似乎对新生来说难度略高(虽然个人觉得完全是他们自己的问题),加之暑假之后对cmake实在是爱不释手,且这样配置确实十分简单(其实都不需要配置),故斗胆妄言vscode下配置CV之法。其实极为简单,图比较多所以很长。如果你看此文还配不好,你应该思考一下是不是自己的问题。闲话少说,直接开始。0.CMkae简介有的人到大二了都不知道cmake是什么,我不说是谁。CMake是一个开源免费并且跨平台的构建工具,可以用简单的语句来描述所有平台的编译过程。它能够根据当前所在平台输出对应的m