环境说明
| 系统平台 | IP | 需要安装的服务 |
|---|---|---|
| centos8 | 192.168.118.130 | nginx-1.20.2 |
| centos8 | 192.168.118.131 | mysql-5.7.34 |
| centos8 | 192.168.118.132 | php-8.1.11 |
安装准备
#修改主机名
[root@localhost ~]# hostnamectl set-hostname nginx
[root@localhost ~]# bash

#关闭防火墙和selinux
[root@nginx ~]# setenforce 0
[root@nginx ~]# sed -ri 's/^(SELINUX=).*/\1disabled/g' /etc/selinux/config
[root@nginx ~]# systemctl disable --now firewalld.service

#创建nginx用户
[root@nginx ~]# useradd -rMs /sbin/nologin nginx

#安装所需要的依赖包
[root@nginx ~]# dnf -y install pcre-devel openssl openssl-devel gd-devel gcc gcc-c++ make wget vim

#下载nginx源码包,并解压
[root@nginx ~]# wget http://nginx.org/download/nginx-1.20.2.tar.gz
[root@nginx ~]# tar -xf nginx-1.20.2.tar.gz
[root@nginx ~]# cd nginx-1.20.2/
[root@nginx nginx-1.20.2]#
开始安装
#配置
[root@nginx nginx-1.20.2]# ./configure \
--prefix=/usr/local/nginx \
--user=nginx \
--group=nginx \
--with-debug \
--with-http_ssl_module \
--with-http_realip_module \
--with-http_image_filter_module \
--with-http_gunzip_module \
--with-http_gzip_static_module \
--with-http_stub_status_module

#编译安装
[root@nginx nginx-1.20.2]# make -j $(grep 'processor' /proc/cpuinfo | wc -l)
[root@nginx nginx-1.20.2]# make install

#安装成功
[root@nginx nginx-1.20.2]# cd /usr/local/nginx/
[root@nginx nginx]# ls
conf  html  logs  sbin
配置文件
#配置环境变量
[root@nginx ~]# echo "export PATH=$PATH:/usr/local/nginx/sbin" > /etc/profile.d/nginx.sh
[root@nginx ~]# source /etc/profile.d/nginx.sh

#编写service文件
[root@nginx ~]# vim /usr/lib/systemd/system/nginx.service
[Unit]
Description=nginx server daemon
After=network.target

[Service]
Type=forking
ExecStart=/usr/local/nginx/sbin/nginx
ExecStop=/usr/local/nginx/sbin/nginx -s stop
ExecReload=/bin/kill -HUP \$MAINPID

[Install]
WantedBy=multi-user.target
[root@nginx ~]# systemctl daemon-reload
启动服务,开机自启
[root@nginx ~]# systemctl enable --now nginx.service
Created symlink /etc/systemd/system/multi-user.target.wants/nginx.service → /usr/lib/systemd/system/nginx.service.
[root@nginx ~]# systemctl status nginx.service
● nginx.service - nginx server daemon
   Loaded: loaded (/usr/lib/systemd/system/nginx.service; enabled; vendor preset: disable>
   Active: active (running) since Tue 2022-10-11 15:42:27 CST; 36s ago
#修改主机名
[root@localhost ~]# hostnamectl set-hostname mysql
[root@localhost ~]# bash

#关闭防火墙和selinux
[root@mysql ~]# setenforce 0
[root@mysql ~]# sed -ri 's/^(SELINUX=).*/\1disabled/g' /etc/selinux/config
[root@mysql ~]# systemctl disable --now firewalld.service

#创建mysql用户
[root@mysql ~]# useradd -rMs /sbin/nologin mysql

#安装所需要的依赖包
[root@mysql ~]# dnf -y install ncurses-devel openssl-devel openssl cmake mariadb-devel ncurses-compat-libs

#下载mysql源码包,并解压
[root@mysql ~]# wget https://downloads.mysql.com/archives/get/p/23/file/mysql-5.7.34-linux-glibc2.12-x86_64.tar
[root@mysql ~]# tar xf mysql-5.7.34-linux-glibc2.12-x86_64.tar.gz -C /usr/local/

#更改属主属组
[root@mysql ~]# cd /usr/local/
[root@mysql local]# mv mysql-5.7.34-linux-glibc2.12-x86_64/ mysql
[root@mysql local]# chown -R mysql.mysql mys

#头文件
[root@mysql local]# cd mysql/
[root@mysql mysql]# ls
LICENSE  README  bin  docs  include  lib  man  share  support-files
[root@mysql mysql]# ln -sv /usr/local/mysql/include/ /usr/include/mysql/
'/usr/include/mysql/include' -> '/usr/local/mysql/include/'

#库文件
[root@mysql mysql]# echo '/usr/local/mysql/lib' > /etc/ld.so.conf.d/mysql.conf
[root@mysql mysql]# ldconfig

#帮助文档
[root@mysql mysql]# vim /etc/man_db.conf
MANDATORY_MANPATH                       /usr/man
MANDATORY_MANPATH                       /usr/share/man
MANDATORY_MANPATH                       /usr/local/share/man
MANDATORY_MANPATH                       /usr/local/mysql/man     #添加此行

#设置环境变量
[root@mysql ~]# echo 'export PATH=/usr/local/mysql/bin:$PATH' > /etc/profile.d/mysql.sh
[root@mysql ~]# source /etc/profile.d/mysql.sh

#创建数据存放目录
[root@mysql ~]# mkdir /opt/data
[root@mysql ~]# chown -R mysql.mysql /opt/data/
配置mysql
#初始化数据库
[root@mysql ~]# mysqld --initialize --user mysql --datadir /opt/data/
2022-10-11T08:23:11.162927Z 0 [Warning] TIMESTAMP with implicit DEFAULT value is deprecated. Please use --explicit_defaults_for_timestamp server option (see documentation for more details).
2022-10-11T08:23:11.306836Z 0 [Warning] InnoDB: New log files created, LSN=45790
2022-10-11T08:23:11.336846Z 0 [Warning] InnoDB: Creating foreign key constraint system tables.
2022-10-11T08:23:11.399613Z 0 [Warning] No existing UUID has been found, so we assume that this is the first time that this server has been started. Generating a new UUID: f1a03ac7-493d-11ed-b17e-000c290801b6.
2022-10-11T08:23:11.400267Z 0 [Warning] Gtid table is not ready to be used. Table 'mysql.gtid_executed' cannot be opened.
2022-10-11T08:23:11.789141Z 0 [Warning] CA certificate ca.pem is self signed.
2022-10-11T08:23:11.906371Z 1 [Note] A temporary password is generated for root@localhost: Dd1?:lsqyr3s

#保存密码
[root@mysql ~]# echo 'Dd1?:lsqyr3s' > mysqlpass

#查询到还有mariadb的软件包,将他们卸载
[root@mysql ~]# rpm -qa |grep mariadb
mariadb-connector-c-devel-3.1.11-2.el8_3.x86_64
mariadb-connector-c-config-3.1.11-2.el8_3.noarch
mariadb-devel-10.3.28-1.module_el8.3.0+757+d382997d.x86_64
mariadb-connector-c-3.1.11-2.el8_3.x86_64
[root@mysql ~]# dnf -y remove mariadb*

#生成配置文件
[root@mysql ~]# cat > /etc/my.cnf <<EOF
[mysqld]
basedir = /usr/local/mysql
datadir = /opt/data
socket = /tmp/mysql.sock
port = 3306
pid-file = /opt/data/mysql.pid
user = mysql
skip-name-resolve
EOF

#配置启动脚本
[root@mysql ~]# vim /usr/lib/systemd/system/mysqld.service
[Unit]
Description=mysql server daemon
After=network.target sshd-keygen.target

[Service]
Type=forking
ExecStart=/usr/local/mysql/support-files/mysql.server start
ExecStop=/usr/local/mysql/support-files/mysql.server stop
ExecReload=/bin/kill -HUP $MAINPID

[Install]
WantedBy=multi-user.target
[root@mysql ~]# systemctl daemon-reload

#开启mysql并开机自启
[root@mysql ~]# systemctl enable --now mysqld.service
[root@mysql ~]# ss -antl
State     Recv-Q    Send-Q       Local Address:Port       Peer Address:Port    Process
LISTEN    0         128                0.0.0.0:22              0.0.0.0:*
LISTEN    0         128                   [::]:22                 [::]:*
LISTEN    0         80                       *:3306                  *:*

#进入mysql,更改密码
[root@mysql ~]# cat mysqlpass
Dd1?:lsqyr3s
[root@mysql ~]# mysql -uroot -p'Dd1?:lsqyr3s'
mysql: [Warning] Using a password on the command line interface can be insecure.
Welcome to the MySQL monitor.  Commands end with ; or \g.
Your MySQL connection id is 2
Server version: 5.7.34

Copyright (c) 2000, 2021, Oracle and/or its affiliates.

Oracle is a registered trademark of Oracle Corporation and/or its
affiliates. Other names may be trademarks of their respective
owners.

Type 'help;' or '\h' for help. Type '\c' to clear the current input statement.

mysql> set password = password('123456');
Query OK, 0 rows affected, 1 warning (0.00 sec)

mysql> exit
Bye
#修改主机名
[root@localhost ~]# hostnamectl set-hostname php
[root@localhost ~]# bash

#关闭防火墙和selinux
[root@php ~]# setenforce 0
[root@php ~]# sed -ri 's/^(SELINUX=).*/\1disabled/g' /etc/selinux/config
[root@php ~]# systemctl disable --now firewalld.service
[root@php ~]# reboot

#配置yum源
[root@php yum.repos.d]# wget -O /etc/yum.repos.d/CentOS-Base.repo https://mirrors.aliyun.com/repo/Centos-vault-8.5.2111.repo
[root@php yum.repos.d]# sed -i -e '/mirrors.cloud.aliyuncs.com/d' -e '/mirrors.aliyuncs.com/d' /etc/yum.repos.d/CentOS-Base.repo

#安装所需要的依赖包
[root@php ~]# dnf -y install epel-release
[root@php ~]# dnf -y install libxml2 libxml2-devel openssl openssl-devel bzip2 bzip2-devel libcurl libcurl-devel libicu-devel libjpeg libjpeg-devel libpng libpng-devel openldap-devel  pcre-devel freetype freetype-devel gmp gmp-devel libmcrypt libmcrypt-devel readline readline-devel libxslt libxslt-devel mhash mhash-devel php-mysqlnd libsqlite3x-devel libzip-devel wget gcc gcc-c++ make
[root@php ~]# dnf -y install http://mirror.centos.org/centos/8-stream/PowerTools/x86_64/os/Packages/oniguruma-devel-6.8.2-2.el8.x86_64.rpm

#下载mysql源码包,并解压
[root@php ~]# wget https://www.php.net/distributions/php-8.1.11.tar.gz
[root@php ~]# tar xf php-8.1.11.tar.gz

#编译安装
[root@php ~]# cd php-8.1.11/
[root@php php-8.1.11]# ./configure --prefix=/usr/local/php \
 --with-config-file-path=/etc \
 --enable-fpm \
 --disable-debug \
 --disable-rpath \
 --enable-shared \
 --enable-soap \
 --with-openssl \
 --enable-bcmath \
 --with-iconv \
 --with-bz2 \
 --enable-calendar \
 --with-curl \
 --enable-exif  \
 --enable-ftp \
 --enable-gd \
 --with-jpeg \
 --with-zlib-dir \
 --with-freetype \
 --with-gettext \
 --enable-mbstring \
 --enable-pdo \
 --with-mysqli=mysqlnd \
 --with-pdo-mysql=mysqlnd \
 --with-readline \
 --enable-shmop \
 --enable-simplexml \
 --enable-sockets \
 --with-zip \
 --enable-mysqlnd-compression-support \
 --with-pear \
 --enable-pcntl \
 --enable-posix
[root@php php-8.1.11]# make && make install
[root@php php-8.1.11]# cd /usr/local/php/
[root@php php]# ls
bin  etc  include  lib  php  sbin  var

#配置文件
[root@php php]# cd etc/
[root@php etc]# ls
pear.conf  php-fpm.conf.default  php-fpm.d
[root@php etc]# cp php-fpm.conf.default php-fpm.conf

[root@php etc]# cd php-fpm.d/
[root@php php-fpm.d]# ls
www.conf.default
[root@php php-fpm.d]# cp www.conf.default www.conf

#头文件
[root@php ~]# ln -sv /usr/local/php /usr/include/php
'/usr/include/php' -> '/usr/local/php'

#库文件
[root@php ~]# echo "/usr/local/php/lib" > /etc/ld.so.conf.d/php.conf
[root@php ~]# ldconfig

#编写service文件
[root@php ~]# cat > /usr/lib/systemd/system/php.service << EOF
[Unit]
Description=php server daemon
After=network.target

[Service]
Type=forking
ExecStart=/usr/local/php/sbin/php-fpm
ExecStop=ps -ef |grep php |grep -v grep|awk '{print$2}'|xargs kill
ExecReload=/bin/kill -HUP $MAINPID

[Install]
WantedBy=multi-user.target
EOF
[root@php ~]# systemctl daemon-reload

#开启php服务并开机自启
[root@php ~]# systemctl enable --now php.service
Created symlink /etc/systemd/system/multi-user.target.wants/php.service → /usr/lib/systemd/system/php.service.
[root@php ~]# ss -antl
State     Recv-Q    Send-Q       Local Address:Port       Peer Address:Port    Process
LISTEN    0         128                0.0.0.0:22              0.0.0.0:*
LISTEN    0         128              127.0.0.1:9000            0.0.0.0:*
LISTEN    0         128                   [::]:22                 [::]:*
nginx端配置
#配置php网页
[root@nginx ~]# vim /usr/local/nginx/html/index.php
<?php
    phpinfo();
?>

#修改配置文件
[root@nginx ~]# vim /usr/local/nginx/conf/nginx.conf
...
        location / {
            root   html;
            index  index.php index.html index.htm;  #查找index,在此行添加index.php
        }
...
#65-71行,取消所有注释
        location ~ \.php$ {
             root           /var/www/html;      #指向php端index.php文件位置
             fastcgi_pass   192.168.118.132:9000;       #php服务器ip地址
             fastcgi_index  index.php;
             fastcgi_param  SCRIPT_FILENAME  $document_root$fastcgi_script_name; #将/scripts更改为$document_root
             include        fastcgi_params;
         }

#重启服务
[root@nginx ~]# systemctl restart nginx.service
php端配置
#在php端上配置网站
[root@php ~]# mkdir -p /var/www/html
[root@php ~]# vim /var/www/html/index.php
<?php
    phpinfo();
?>

#修改配置文件
[root@php ~]# vim /usr/local/php/etc/php-fpm.d/www.conf
...
listen = 192.168.118.132:9000		#修改为php本机IP
...
;listen.allowed_clients = 192.168.118.130	#允许指定ip访问(nginx服务端IP)
...

#重启服务生效配置
[root@php ~]# systemctl restart php.service
[root@php ~]# ss -antl
State     Recv-Q    Send-Q         Local Address:Port       Peer Address:Port   Process
LISTEN    0         128                  0.0.0.0:22              0.0.0.0:*
LISTEN    0         128          192.168.118.132:9000            0.0.0.0:*
LISTEN    0         128                     [::]:22                 [::]:*
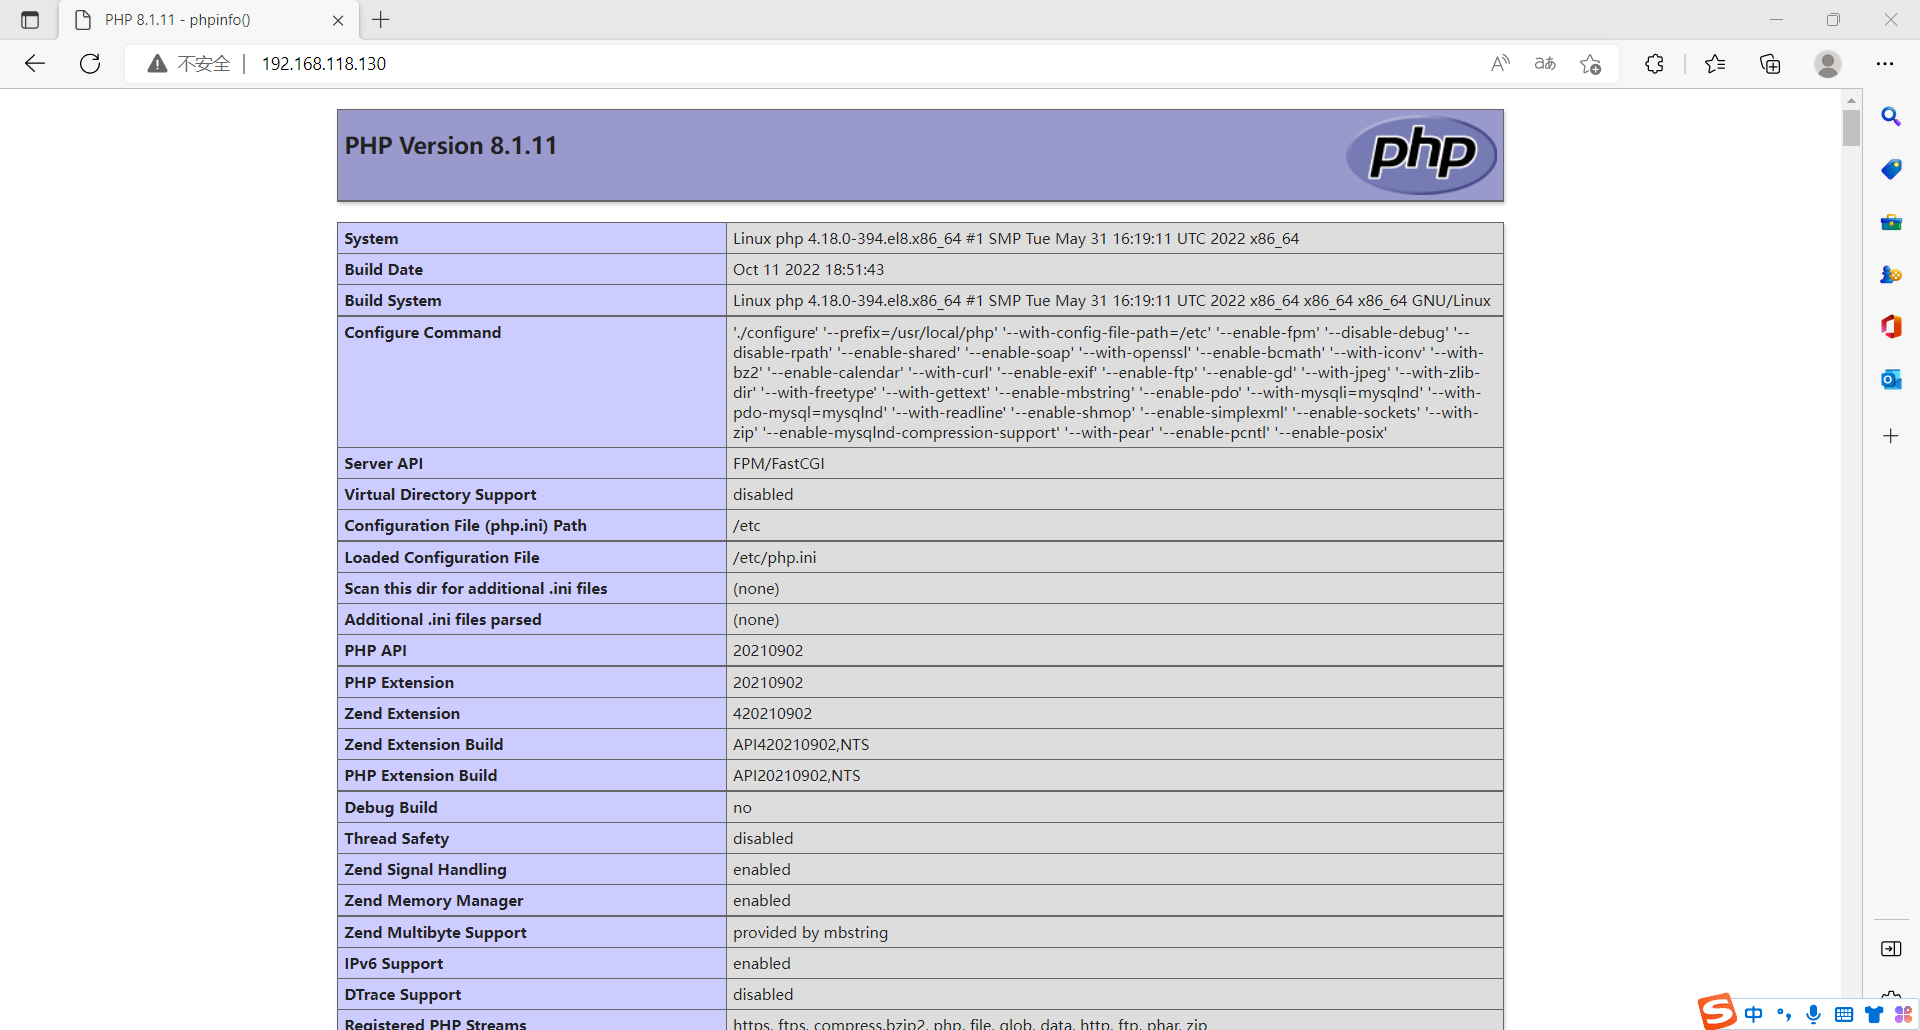
浏览器访问
我是Google云的新手,我正在尝试对其进行首次部署。我的第一个部署是RubyonRails项目。我基本上是在关注thisguideinthegoogleclouddocumentation.唯一的区别是我使用的是我自己的项目,而不是他们提供的“helloworld”项目。这是我的app.yaml文件runtime:customvm:trueentrypoint:bundleexecrackup-p8080-Eproductionconfig.ruresources:cpu:0.5memory_gb:1.3disk_size_gb:10当我转到我的项目目录并运行gcloudprevie
我可以在Azure网站上部署RubyonRails吗? 最佳答案 还没有。目前仅支持.NET和PHP。 关于ruby-on-rails-RubyonRails可以部署在Azure网站上吗?,我们在StackOverflow上找到一个类似的问题: https://stackoverflow.com/questions/12964010/
前置步骤我们都操作完了,这篇开始介绍jenkins的集成。话不多说,看操作1、登录进入jenkins后会让你选择安装插件,选择第一个默认的就行。安装完成后设置账号密码,重新登录。2、配置JDK和Git都需要执行路径,所以需要先把执行路径找到,先进入服务器的docker容器,2.1JDK的路径root@69eef9ee86cf:/usr/bin#echo$JAVA_HOME/usr/local/openjdk-82.2Git的路径root@69eef9ee86cf:/#whichgit/usr/bin/git3、先配置JDK和Git。点击:ManageJenkins>>GlobalToolCon
深度学习部署:Windows安装pycocotools报错解决方法1.pycocotools库的简介2.pycocotools安装的坑3.解决办法更多Ai资讯:公主号AiCharm本系列是作者在跑一些深度学习实例时,遇到的各种各样的问题及解决办法,希望能够帮助到大家。ERROR:Commanderroredoutwithexitstatus1:'D:\Anaconda3\python.exe'-u-c'importsys,setuptools,tokenize;sys.argv[0]='"'"'C:\\Users\\46653\\AppData\\Local\\Temp\\pip-instal
Ocra无法处理需要“tk”的应用程序require'tk'puts'nope'用奥克拉http://github.com/larsch/ocra不起作用(如链接中的一个问题所述)问题:https://github.com/larsch/ocra/issues/29(Ocra是1.9的"new"rubyscript2exe,本质上它用于将rb脚本部署为可执行文件)唯一的问题似乎是缺少tcl的DLL文件我不认为这是一个问题据我所知,问题是缺少tk的DLL文件如果它们是已知的,则可以在执行ocra时将它们包括在内有没有办法知道tk工作所需的DLL依赖项? 最佳答
我有一个类unzipper.rb,它使用Rubyzip解压文件。在我的本地环境中,我可以成功解压缩文件,而无需使用require'zip'明确包含依赖项但是在Heroku上,我得到一个NameError(uninitializedconstantUnzipper::Zip)我只能通过使用明确的require来解决问题:为什么这在Heroku环境中是必需的,但在本地主机上却不是?我的印象是Rails自动需要所有gem。app/services/unzipper.rbrequire'zip'#OnlyrequiredforHeroku.Workslocallywithout!class
出于某种原因,heroku尝试要求dm-sqlite-adapter,即使它应该在这里使用Postgres。请注意,这发生在我打开任何URL时-而不是在gitpush本身期间。我构建了一个默认的Facebook应用程序。gem文件:source:gemcuttergem"foreman"gem"sinatra"gem"mogli"gem"json"gem"httparty"gem"thin"gem"data_mapper"gem"heroku"group:productiondogem"pg"gem"dm-postgres-adapter"endgroup:development,:t
如何使用Capistrano将Rails应用程序部署到无法访问外部网络或存储库的生产或暂存服务器?我已经设法完成部署的一半,并意识到Capistrano没有在我的本地机器上下载gitrepo,但它首先连接到远程服务器并尝试在那里下载Git存储库。我希望有一个类似Javaee的构建系统,其中创建可交付成果并将该可交付成果发送到服务器。就像您构建.ear文件并将其部署到您想要的任何服务器上一样。显然在RoR中,你被迫(据我所知)在该服务器上构建应用程序,在那里创建一个gem存储库,在那里克隆最新的分支等等。有什么方法可以将准备运行的包发送到远程服务器吗? 最佳答
集成背景我们当前集群使用的是ClouderaCDP,Flink版本为ClouderaVersion1.14,整体Flink安装目录以及配置文件结构与社区版本有较大出入。直接根据Streampark官方文档进行部署,将无法配置FlinkHome,以及后续整体Flink任务提交到集群中,因此需要进行针对化适配集成,在满足使用需求上,尽量提供完整的Streampark使用体验。集成步骤版本匹配问题解决首先解决无法识别Cloudera中的FlinkHome问题,根据报错主要明确到的事情是无法读取到Flink版本、lib下面的jar包名称无法匹配。修改对象:修改源码:(解决无法匹配clouderajar
我正在寻找一种可靠的方式来部署Rack应用程序(在本例中为Sinatra应用程序)。请求将花费一些时间(0.25-0.5秒等待代理HTTP请求)并且可能会有相当大的流量。我应该使用传统的mongrel集群设置吗?使用HAProxy作为负载均衡器?恩金克斯?架子?您使用过哪些解决方案,有哪些优势? 最佳答案 Nginx/unicornFTW!前面的Nginx提供静态文件和unicorn处理Sinatra应用程序。优点:性能、使用unixsocks的良好负载平衡以及无需停机即可部署/升级(您可以在不停机的情况下升级Ruby/Nginx/