文章目录
这篇文章主要是实现上示功能。
首先创建数据库(只能创建一次)
然后输入用户名密码,店家注册,将数据插入数据库
点击记住密码能够在下次登录时自动输入用户名密码
最后点击登录能够进入登录界面。
ps:这里有个bug就是得注册两次才能生效,不太理解哪里有问题了,以后知道了再来补…
问题找到了
没关数据库,所以会有点bug:
 cursor.close();
 database.close();
及时关闭,就可以解决bug了。
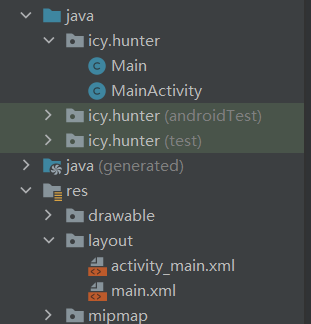
首先我们看看布局文件:
就是一个简单的登录界面的布局。
<?xml version="1.0" encoding="utf-8"?>
<LinearLayout
    xmlns:android="http://schemas.android.com/apk/res/android"
    android:layout_width="match_parent"
    android:layout_height="match_parent"
    android:orientation="vertical"
    >


    <LinearLayout
        android:layout_width="wrap_content"
        android:layout_height="wrap_content"
        android:orientation="horizontal">

        <TextView
            android:id="@+id/textView"
            android:layout_width="wrap_content"
            android:layout_height="wrap_content"
            android:layout_weight="1"
            android:text="用户名:"
            android:textSize="20sp"

            />

        <EditText
            android:id="@+id/uname"
            android:layout_width="281dp"
            android:layout_height="wrap_content"
            android:ems="10"
            android:inputType="textPersonName" />
    </LinearLayout>

    <LinearLayout
        android:layout_width="wrap_content"
        android:layout_height="wrap_content"
        android:orientation="horizontal">

        <TextView
            android:id="@+id/textView2"
            android:layout_width="wrap_content"
            android:layout_height="wrap_content"
            android:layout_weight="1"
            android:text="密    码:"
            android:textSize="20sp"

            />

        <EditText
            android:id="@+id/upwd"
            android:layout_width="281dp"
            android:layout_height="wrap_content"
            android:ems="10"
            android:inputType="textPersonName" />
    </LinearLayout>
    <CheckBox
        android:id="@+id/cb"
        android:layout_width="match_parent"
        android:layout_height="wrap_content"
        android:text="记住密码" />

    <Button
        android:id="@+id/createdb"
        android:layout_width="match_parent"
        android:layout_height="wrap_content"
        android:text="创建数据库"/>

    <Button
        android:id="@+id/register"
        android:layout_width="match_parent"
        android:layout_height="wrap_content"
        android:text="注册" />
    <Button
        android:id="@+id/login"
        android:layout_width="match_parent"
        android:layout_height="wrap_content"
        android:text="登录" />
</LinearLayout>
就是一个简单的登录成功界面的布局
<?xml version="1.0" encoding="utf-8"?>
<androidx.constraintlayout.widget.ConstraintLayout xmlns:android="http://schemas.android.com/apk/res/android"
    xmlns:tools="http://schemas.android.com/tools"
    android:layout_width="match_parent"
    android:layout_height="match_parent">


    <TextView
        android:id="@+id/textView3"
        android:layout_width="wrap_content"
        android:layout_height="wrap_content"
        android:text="欢迎光临!"
        android:textSize="50sp"
        tools:layout_editor_absoluteX="131dp"
        tools:layout_editor_absoluteY="62dp" />
</androidx.constraintlayout.widget.ConstraintLayout>
内容结构应该比较清晰,按钮绑定各自对应的事件。
稍微解释一下部分代码:
 Cursor cursor = database.rawQuery(
         "select * from userTb where uname = ?", new String[]{userName});
表明查询语句,查询到的内容在cursor中,其中?的位置用userName这个字符串来表示,简单来说就是让sql语句写起来方便一点的写法。
String String_upwd = cursor.getString(cursor.getColumnIndex("upwd"));
表明获取查询内容中的upwd字段的内容。
package icy.hunter;

import androidx.appcompat.app.AppCompatActivity;
import androidx.fragment.app.Fragment;
import androidx.viewpager2.widget.ViewPager2;

import android.content.Intent;
import android.content.SharedPreferences;
import android.database.Cursor;
import android.database.sqlite.SQLiteDatabase;
import android.os.Bundle;
import android.util.Log;
import android.view.View;
import android.widget.Button;
import android.widget.CheckBox;
import android.widget.EditText;
import android.widget.ImageView;
import android.widget.LinearLayout;
import android.widget.Toast;

import java.util.ArrayList;


public class MainActivity extends AppCompatActivity{
    private CheckBox cb;
    private EditText uname;
    private EditText upwd;
    private static final String SP_INFO = "myuser";
    private static final String USER_ID = "UserId";
    private static final String USERPWD = "UserPwd";
    @Override
    protected void onCreate(Bundle savedInstanceState) {
        super.onCreate(savedInstanceState);
        setContentView(R.layout.activity_main);

        this.uname = findViewById(R.id.uname);
        this.upwd = findViewById(R.id.upwd);
        this.cb = findViewById(R.id.cb);
        Button bt_create = findViewById(R.id.createdb);
        Button bt_register = findViewById(R.id.register);
        Button bt_login = findViewById(R.id.login);

        //        记录保存数据情况
        checkIfRemember();
//        创建数据库
        bt_create.setOnClickListener(new View.OnClickListener() {
            @Override
            public void onClick(View v) {
                SQLiteDatabase db = SQLiteDatabase.openOrCreateDatabase("data/data/icy.hunter/user.db", null);
                String sql = "create table userTb(uid integer primary key autoincrement, uname text, upwd text)";
                db.execSQL(sql);
                Toast.makeText(MainActivity.this, "创建数据库以及表成功!", Toast.LENGTH_LONG).show();
            }
        });

        //插入数据库
        bt_register.setOnClickListener(new View.OnClickListener() {
            @Override
            public void onClick(View v) {
                SQLiteDatabase db = SQLiteDatabase.openOrCreateDatabase("data/data/icy.hunter/user.db", null);
                String userName = uname.getText().toString().trim();
                String userPass = upwd.getText().toString().trim();
                if(userName.equals("")||userPass.equals("")){
                    Toast.makeText(MainActivity.this, "用户名或者密码为空,请重新输入!", Toast.LENGTH_LONG).show();
                }else{
                    String sql = "insert into userTb(uname, upwd) values('"+userName+"', '"+userPass+"')";
                    db.execSQL(sql);
                    Toast.makeText(MainActivity.this, "注册用户成功!", Toast.LENGTH_LONG).show();
                }
            }
        });


        bt_login.setOnClickListener(new View.OnClickListener() {
            @Override
            public void onClick(View v) {
                String userName = uname.getText().toString().trim();
                String userPass = upwd.getText().toString().trim();

                SQLiteDatabase database = SQLiteDatabase.openDatabase("data/data/icy.hunter/user.db", null,
                        SQLiteDatabase.OPEN_READONLY);
                Cursor cursor = database.rawQuery(
                        "select * from userTb where uname = ?", new String[]{userName});
                int success = 0;
                while (cursor.moveToNext()) {
                    String String_upwd = cursor.getString(cursor.getColumnIndex("upwd"));
                    if(userPass.equals(String_upwd)){
                        success = 1;
                        Toast.makeText(MainActivity.this, userName+"用户登录成功!", Toast.LENGTH_LONG).show();
                        Intent it = new Intent(MainActivity.this, Main.class);
                        startActivity(it);
                    }
                }
                if(success == 0){
                    Toast.makeText(MainActivity.this, userName+"用户名或密码错误或用户不存在", Toast.LENGTH_LONG).show();
                }
            }
        });
    }

    //存数据
    public void rememberMe(String uid, String pwd){
        SharedPreferences sp = getSharedPreferences(SP_INFO, MODE_PRIVATE);
        SharedPreferences.Editor editor = sp.edit();
        editor.putString(USER_ID, uid);
        editor.putString(USERPWD, pwd);
        editor.commit();
    }
    //读数据
    public void checkIfRemember(){
        SharedPreferences sp = getSharedPreferences(SP_INFO, MODE_PRIVATE);
        String uidStr = sp.getString(USER_ID, null);
        String pwdStr = sp.getString(USERPWD, null);
        if(uidStr != null && pwdStr != null){
            uname.setText(uidStr);
            upwd.setText(pwdStr);
            cb.setChecked(true);
        }
    }

    @Override
    protected void onStop() {
        super.onStop();
            String uidStr = upwd.getText().toString().trim();
            String pwdStr = uname.getText().toString().trim();
            if(cb.isChecked()){
                rememberMe(uidStr, pwdStr);
            }
    }
}
为了跳转而设定的activity。
package icy.hunter;

import android.os.Bundle;

import androidx.annotation.Nullable;
import androidx.appcompat.app.AppCompatActivity;

public class Main extends AppCompatActivity {
    @Override
    protected void onCreate(@Nullable Bundle savedInstanceState) {
        super.onCreate(savedInstanceState);
        setContentView(R.layout.main);
    }
}
然后我们可以看一下数据库文件和密码记录的文件。
首先我们可以重启一下虚拟机,防止生成的文件没刷新出来…
注意要查看文件虚拟机必须要启动,否则是看不到的。
点击右下角
然后进入data/data滑到最下面。
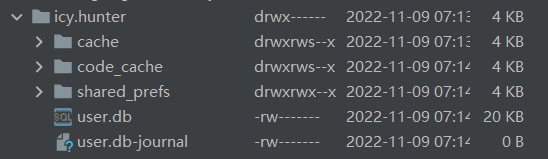
这里就是存数据的地方了。
可以看到我们存的数据库user.db出现了

这里就是记住密码的文件了
点开可以看到:
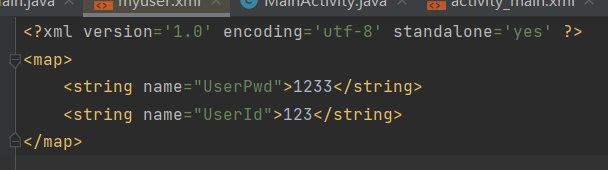
里面就是我们存储记住密码的键值对。
一些实现的细节还请详细阅读代码。
代码已打包好可0积分放心下载:
对于具有离线功能的智能手机应用程序,我正在为Xml文件创建单向文本同步。我希望我的服务器将增量/差异(例如GNU差异补丁)发送到目标设备。这是计划:Time=0Server:hasversion_1ofXmlfile(~800kiB)Client:hasversion_1ofXmlfile(~800kiB)Time=1Server:hasversion_1andversion_2ofXmlfile(each~800kiB)computesdeltaoftheseversions(=patch)(~10kiB)sendspatchtoClient(~10kiBtransferred)Cl
我的代码目前看起来像这样numbers=[1,2,3,4,5]defpop_threepop=[]3.times{pop有没有办法在一行中完成pop_three方法中的内容?我基本上想做类似numbers.slice(0,3)的事情,但要删除切片中的数组项。嗯...嗯,我想我刚刚意识到我可以试试slice! 最佳答案 是numbers.pop(3)或者numbers.shift(3)如果你想要另一边。 关于ruby-多次弹出/移动ruby数组,我们在StackOverflow上找到一
我构建了两个需要相互通信和发送文件的Rails应用程序。例如,一个Rails应用程序会发送请求以查看其他应用程序数据库中的表。然后另一个应用程序将呈现该表的json并将其发回。我还希望一个应用程序将存储在其公共(public)目录中的文本文件发送到另一个应用程序的公共(public)目录。我从来没有做过这样的事情,所以我什至不知道从哪里开始。任何帮助,将不胜感激。谢谢! 最佳答案 无论Rails是什么,几乎所有Web应用程序都有您的要求,大多数现代Web应用程序都需要相互通信。但是有一个小小的理解需要你坚持下去,网站不应直接访问彼此
我尝试运行2.x应用程序。我使用rvm并为此应用程序设置其他版本的ruby:$rvmuseree-1.8.7-head我尝试运行服务器,然后出现很多错误:$script/serverNOTE:Gem.source_indexisdeprecated,useSpecification.Itwillberemovedonorafter2011-11-01.Gem.source_indexcalledfrom/Users/serg/rails_projects_terminal/work_proj/spohelp/config/../vendor/rails/railties/lib/r
刚入门rails,开始慢慢理解。有人可以解释或给我一些关于在application_controller中编码的好处或时间和原因的想法吗?有哪些用例。您如何为Rails应用程序使用应用程序Controller?我不想在那里放太多代码,因为据我了解,每个请求都会调用此Controller。这是真的? 最佳答案 ApplicationController实际上是您应用程序中的每个其他Controller都将从中继承的类(尽管这不是强制性的)。我同意不要用太多代码弄乱它并保持干净整洁的态度,尽管在某些情况下ApplicationContr
我将应用程序升级到Rails4,一切正常。我可以登录并转到我的编辑页面。也更新了观点。使用标准View时,用户会更新。但是当我添加例如字段:name时,它不会在表单中更新。使用devise3.1.1和gem'protected_attributes'我需要在设备或数据库上运行某种更新命令吗?我也搜索过这个地方,找到了许多不同的解决方案,但没有一个会更新我的用户字段。我没有添加任何自定义字段。 最佳答案 如果您想允许额外的参数,您可以在ApplicationController中使用beforefilter,因为Rails4将参数
我是一个Rails初学者,但我想从我的RailsView(html.haml文件)中查看Ruby变量的内容。我试图在ruby中打印出变量(认为它会在终端中出现),但没有得到任何结果。有什么建议吗?我知道Rails调试器,但更喜欢使用inspect来打印我的变量。 最佳答案 您可以在View中使用puts方法将信息输出到服务器控制台。您应该能够在View中的任何位置使用Haml执行以下操作:-puts@my_variable.inspect 关于ruby-on-rails-如何在我的R
当我在我的Rails应用程序根目录中运行rakedoc:app时,API文档是使用/doc/README_FOR_APP作为主页生成的。我想向该文件添加.rdoc扩展名,以便它在GitHub上正确呈现。更好的是,我想将它移动到应用程序根目录(/README.rdoc)。有没有办法通过修改包含的rake/rdoctask任务在我的Rakefile中执行此操作?是否有某个地方可以查找可以修改的主页文件的名称?还是我必须编写一个新的Rake任务?额外的问题:Rails应用程序的两个单独文件/README和/doc/README_FOR_APP背后的逻辑是什么?为什么不只有一个?
我意识到这可能是一个非常基本的问题,但我现在已经花了几天时间回过头来解决这个问题,但出于某种原因,Google就是没有帮助我。(我认为部分问题在于我是一个初学者,我不知道该问什么......)我也看过O'Reilly的RubyCookbook和RailsAPI,但我仍然停留在这个问题上.我找到了一些关于多态关系的信息,但它似乎不是我需要的(尽管如果我错了请告诉我)。我正在尝试调整MichaelHartl'stutorial创建一个包含用户、文章和评论的博客应用程序(不使用脚手架)。我希望评论既属于用户又属于文章。我的主要问题是:我不知道如何将当前文章的ID放入评论Controller。
我在新的Debian6VirtualBoxVM上安装RVM时遇到问题。我已经安装了所有需要的包并使用下载了安装脚本(curl-shttps://rvm.beginrescueend.com/install/rvm)>rvm,但以单个用户身份运行时bashrvm我收到以下错误消息:ERROR:Unabletocheckoutbranch.安装在这里停止,并且(据我所知)没有安装RVM的任何文件。如果我以root身份运行脚本(对于多用户安装),我会收到另一条消息:Successfullycheckedoutbranch''安装程序继续并指示成功,但未添加.rvm目录,甚至在修改我的.bas