文章目录
PyTorch 是现在非常流行使用的深度学习框架,在我们日常学习过程中用到 PyTorch 的机会很多。
尤其是在科研工作中,由于其使用便利,文档丰富而全面,构建一个实验非常迅速,所以选择使用 PyTorch 的人也非常多。
但是在深度学习模型的应用层面,我们需要将模型在实际使用场景中进行部署,这时候用 Python 写的模型需要根据需求设置到不同的平台上进行调用,甚至是不同的编程语言去进行调用,这时候模型的转换会是一个非常大的问题。
所以出现了 ONNX,这东西建立了一个通用的框架,不管你是 PyTorch 训练出来的模型,还是 Tensorflow,亦或是 PaddlePaddle,都可以统一转换为 ONNX 格式,方便进行模型的部署调用。
本文的素材来源主要是 PyTorch 和 ONNX 的官网,有兴趣的同学可以直接去看官网文档:
PyTorch 的 ONNX 使用示例:
https://pytorch.org/docs/stable/onnx.html#example-alexnet-from-pytorch-to-onnx
ONNX 官网:
https://onnx.ai/
这里列出本文案例实际使用的主要环境配置:
这里安装 onnx 可以使用以下命令:
conda install -c conda-forge onnx
安装结果如下,可以看到这里同时安装了 protobuf:
The following packages will be downloaded:

    package                    |            build
    ---------------------------|-----------------
    libprotobuf-3.20.1         |       h7755175_0         2.4 MB  conda-forge
    onnx-12.0.0                |   py38h5c4532e_0         8.1 MB  conda-forge
    protobuf-3.20.1            |   py38haa244fe_0         237 KB  conda-forge
    six-1.16.0                 |     pyh6c4a22f_0          14 KB  conda-forge
    typing-extensions-4.3.0    |       hd8ed1ab_0           8 KB  conda-forge
    ------------------------------------------------------------
                                           Total:        10.8 MB

The following NEW packages will be INSTALLED:

  libprotobuf        conda-forge/win-64::libprotobuf-3.20.1-h7755175_0
  onnx               conda-forge/win-64::onnx-12.0.0-py38h5c4532e_0
  protobuf           conda-forge/win-64::protobuf-3.20.1-py38haa244fe_0
  six                conda-forge/noarch::six-1.16.0-pyh6c4a22f_0
  typing-extensions  conda-forge/noarch::typing-extensions-4.3.0-hd8ed1ab_0
安装 onnxruntime-gpu 使用以下命令:
pip install onnxruntime-gpu
这里我们和官网的示例一样,尝试保存一个预训练完成的 AlexNet
import torch
import torchvision

dummy_input = torch.randn(1, 3, 224, 224, device="cuda")
model = torchvision.models.alexnet(weights=torchvision.models.AlexNet_Weights.IMAGENET1K_V1).cuda()

input_names = [ "actual_input_1" ] + [ "learned_%d" % i for i in range(16) ]
output_names = [ "output1" ]

torch.onnx.export(model, dummy_input, "alexnet.onnx", verbose=True, input_names=input_names,
                  output_names=output_names)
该脚本会将一个 AlexNet 的预训练模型输出为 alexnet.onnx 文件,存储在运行目录下
第一次运行的时候会有个下载模型的过程,时间稍长
调用 torch.onnx.export() 函数会运行一次模型,来追踪模型的执行,然后输出这个被追踪的模型到特定的文件中
参数 model 表示要存储的模型
参数 dummy_input 表示虚拟输入
参数 input_names 定义了输入层的名字,还有中间各层的名字
参数 “alexnet.onnx” 表示要存储的文件名字
参数 verbose=True 表示转化的同时打印一个具有可读性的模型表示,打印效果如下
Exported graph: graph(%actual_input_1 : Float(1, 3, 224, 224, strides=[150528, 50176, 224, 1], requires_grad=0, device=cuda:0),
      %learned_0 : Float(64, 3, 11, 11, strides=[363, 121, 11, 1], requires_grad=1, device=cuda:0),
      %learned_1 : Float(64, strides=[1], requires_grad=1, device=cuda:0),
      %learned_2 : Float(192, 64, 5, 5, strides=[1600, 25, 5, 1], requires_grad=1, device=cuda:0),
      %learned_3 : Float(192, strides=[1], requires_grad=1, device=cuda:0),
      %learned_4 : Float(384, 192, 3, 3, strides=[1728, 9, 3, 1], requires_grad=1, device=cuda:0),
      %learned_5 : Float(384, strides=[1], requires_grad=1, device=cuda:0),
      %learned_6 : Float(256, 384, 3, 3, strides=[3456, 9, 3, 1], requires_grad=1, device=cuda:0),
      %learned_7 : Float(256, strides=[1], requires_grad=1, device=cuda:0),
      %learned_8 : Float(256, 256, 3, 3, strides=[2304, 9, 3, 1], requires_grad=1, device=cuda:0),
      %learned_9 : Float(256, strides=[1], requires_grad=1, device=cuda:0),
      %learned_10 : Float(4096, 9216, strides=[9216, 1], requires_grad=1, device=cuda:0),
      %learned_11 : Float(4096, strides=[1], requires_grad=1, device=cuda:0),
      %learned_12 : Float(4096, 4096, strides=[4096, 1], requires_grad=1, device=cuda:0),
      %learned_13 : Float(4096, strides=[1], requires_grad=1, device=cuda:0),
      %learned_14 : Float(1000, 4096, strides=[4096, 1], requires_grad=1, device=cuda:0),
      %learned_15 : Float(1000, strides=[1], requires_grad=1, device=cuda:0)):
  %input : Float(1, 64, 55, 55, strides=[193600, 3025, 55, 1], requires_grad=0, device=cuda:0) = onnx::Conv[dilations=[1, 1], group=1, kernel_shape=[11, 11], pads=[2, 2, 2, 2], strides=[4, 4], onnx_name="Conv_0"](%actual_input_1, %learned_0, %learned_1) # F:\Softwares\Anaconda3\envs\python3.8pytorch\lib\site-packages\torch\nn\modules\conv.py:453:0
  %onnx::MaxPool_18 : Float(1, 64, 55, 55, strides=[193600, 3025, 55, 1], requires_grad=1, device=cuda:0) = onnx::Relu[onnx_name="Relu_1"](%input) # F:\Softwares\Anaconda3\envs\python3.8pytorch\lib\site-packages\torch\nn\functional.py:1455:0
  %input.4 : Float(1, 64, 27, 27, strides=[46656, 729, 27, 1], requires_grad=1, device=cuda:0) = onnx::MaxPool[ceil_mode=0, kernel_shape=[3, 3], pads=[0, 0, 0, 0], strides=[2, 2], onnx_name="MaxPool_2"](%onnx::MaxPool_18) # F:\Softwares\Anaconda3\envs\python3.8pytorch\lib\site-packages\torch\nn\functional.py:782:0
  %input.8 : Float(1, 192, 27, 27, strides=[139968, 729, 27, 1], requires_grad=0, device=cuda:0) = onnx::Conv[dilations=[1, 1], group=1, kernel_shape=[5, 5], pads=[2, 2, 2, 2], strides=[1, 1], onnx_name="Conv_3"](%input.4, %learned_2, %learned_3) # F:\Softwares\Anaconda3\envs\python3.8pytorch\lib\site-packages\torch\nn\modules\conv.py:453:0
  %onnx::MaxPool_21 : Float(1, 192, 27, 27, strides=[139968, 729, 27, 1], requires_grad=1, device=cuda:0) = onnx::Relu[onnx_name="Relu_4"](%input.8) # F:\Softwares\Anaconda3\envs\python3.8pytorch\lib\site-packages\torch\nn\functional.py:1455:0
  %input.12 : Float(1, 192, 13, 13, strides=[32448, 169, 13, 1], requires_grad=1, device=cuda:0) = onnx::MaxPool[ceil_mode=0, kernel_shape=[3, 3], pads=[0, 0, 0, 0], strides=[2, 2], onnx_name="MaxPool_5"](%onnx::MaxPool_21) # F:\Softwares\Anaconda3\envs\python3.8pytorch\lib\site-packages\torch\nn\functional.py:782:0
  %input.16 : Float(1, 384, 13, 13, strides=[64896, 169, 13, 1], requires_grad=0, device=cuda:0) = onnx::Conv[dilations=[1, 1], group=1, kernel_shape=[3, 3], pads=[1, 1, 1, 1], strides=[1, 1], onnx_name="Conv_6"](%input.12, %learned_4, %learned_5) # F:\Softwares\Anaconda3\envs\python3.8pytorch\lib\site-packages\torch\nn\modules\conv.py:453:0
  %onnx::Conv_24 : Float(1, 384, 13, 13, strides=[64896, 169, 13, 1], requires_grad=1, device=cuda:0) = onnx::Relu[onnx_name="Relu_7"](%input.16) # F:\Softwares\Anaconda3\envs\python3.8pytorch\lib\site-packages\torch\nn\functional.py:1455:0
  %input.20 : Float(1, 256, 13, 13, strides=[43264, 169, 13, 1], requires_grad=0, device=cuda:0) = onnx::Conv[dilations=[1, 1], group=1, kernel_shape=[3, 3], pads=[1, 1, 1, 1], strides=[1, 1], onnx_name="Conv_8"](%onnx::Conv_24, %learned_6, %learned_7) # F:\Softwares\Anaconda3\envs\python3.8pytorch\lib\site-packages\torch\nn\modules\conv.py:453:0
  %onnx::Conv_26 : Float(1, 256, 13, 13, strides=[43264, 169, 13, 1], requires_grad=1, device=cuda:0) = onnx::Relu[onnx_name="Relu_9"](%input.20) # F:\Softwares\Anaconda3\envs\python3.8pytorch\lib\site-packages\torch\nn\functional.py:1455:0
  %input.24 : Float(1, 256, 13, 13, strides=[43264, 169, 13, 1], requires_grad=0, device=cuda:0) = onnx::Conv[dilations=[1, 1], group=1, kernel_shape=[3, 3], pads=[1, 1, 1, 1], strides=[1, 1], onnx_name="Conv_10"](%onnx::Conv_26, %learned_8, %learned_9) # F:\Softwares\Anaconda3\envs\python3.8pytorch\lib\site-packages\torch\nn\modules\conv.py:453:0
  %onnx::MaxPool_28 : Float(1, 256, 13, 13, strides=[43264, 169, 13, 1], requires_grad=1, device=cuda:0) = onnx::Relu[onnx_name="Relu_11"](%input.24) # F:\Softwares\Anaconda3\envs\python3.8pytorch\lib\site-packages\torch\nn\functional.py:1455:0
  %input.28 : Float(1, 256, 6, 6, strides=[9216, 36, 6, 1], requires_grad=1, device=cuda:0) = onnx::MaxPool[ceil_mode=0, kernel_shape=[3, 3], pads=[0, 0, 0, 0], strides=[2, 2], onnx_name="MaxPool_12"](%onnx::MaxPool_28) # F:\Softwares\Anaconda3\envs\python3.8pytorch\lib\site-packages\torch\nn\functional.py:782:0
  %onnx::Flatten_30 : Float(1, 256, 6, 6, strides=[9216, 36, 6, 1], requires_grad=1, device=cuda:0) = onnx::AveragePool[kernel_shape=[1, 1], strides=[1, 1], onnx_name="AveragePool_13"](%input.28) # F:\Softwares\Anaconda3\envs\python3.8pytorch\lib\site-packages\torch\nn\functional.py:1214:0
  %input.32 : Float(1, 9216, strides=[9216, 1], requires_grad=1, device=cuda:0) = onnx::Flatten[axis=1, onnx_name="Flatten_14"](%onnx::Flatten_30) # F:\Softwares\Anaconda3\envs\python3.8pytorch\lib\site-packages\torchvision\models\alexnet.py:50:0
  %input.36 : Float(1, 4096, strides=[4096, 1], requires_grad=1, device=cuda:0) = onnx::Gemm[alpha=1., beta=1., transB=1, onnx_name="Gemm_15"](%input.32, %learned_10, %learned_11) # F:\Softwares\Anaconda3\envs\python3.8pytorch\lib\site-packages\torch\nn\modules\linear.py:114:0
  %onnx::Gemm_33 : Float(1, 4096, strides=[4096, 1], requires_grad=1, device=cuda:0) = onnx::Relu[onnx_name="Relu_16"](%input.36) # F:\Softwares\Anaconda3\envs\python3.8pytorch\lib\site-packages\torch\nn\functional.py:1455:0
  %input.40 : Float(1, 4096, strides=[4096, 1], requires_grad=1, device=cuda:0) = onnx::Gemm[alpha=1., beta=1., transB=1, onnx_name="Gemm_17"](%onnx::Gemm_33, %learned_12, %learned_13) # F:\Softwares\Anaconda3\envs\python3.8pytorch\lib\site-packages\torch\nn\modules\linear.py:114:0
  %onnx::Gemm_35 : Float(1, 4096, strides=[4096, 1], requires_grad=1, device=cuda:0) = onnx::Relu[onnx_name="Relu_18"](%input.40) # F:\Softwares\Anaconda3\envs\python3.8pytorch\lib\site-packages\torch\nn\functional.py:1455:0
  %output1 : Float(1, 1000, strides=[1000, 1], requires_grad=1, device=cuda:0) = onnx::Gemm[alpha=1., beta=1., transB=1, onnx_name="Gemm_19"](%onnx::Gemm_35, %learned_14, %learned_15) # F:\Softwares\Anaconda3\envs\python3.8pytorch\lib\site-packages\torch\nn\modules\linear.py:114:0
  return (%output1)
代码如下:
import onnx

# Load the ONNX model
model = onnx.load("alexnet.onnx")

# Check that the model is well formed
onnx.checker.check_model(model)

# Print a human readable representation of the graph
print(onnx.helper.printable_graph(model.graph))
运行后没有报错,表示读取成功
打印出来模型看看:
graph torch_jit (
  %actual_input_1[FLOAT, 1x3x224x224]
) initializers (
  %learned_0[FLOAT, 64x3x11x11]
  %learned_1[FLOAT, 64]
  %learned_2[FLOAT, 192x64x5x5]
  %learned_3[FLOAT, 192]
  %learned_4[FLOAT, 384x192x3x3]
  %learned_5[FLOAT, 384]
  %learned_6[FLOAT, 256x384x3x3]
  %learned_7[FLOAT, 256]
  %learned_8[FLOAT, 256x256x3x3]
  %learned_9[FLOAT, 256]
  %learned_10[FLOAT, 4096x9216]
  %learned_11[FLOAT, 4096]
  %learned_12[FLOAT, 4096x4096]
  %learned_13[FLOAT, 4096]
  %learned_14[FLOAT, 1000x4096]
  %learned_15[FLOAT, 1000]
) {
  %input = Conv[dilations = [1, 1], group = 1, kernel_shape = [11, 11], pads = [2, 2, 2, 2], strides = [4, 4]](%actual_input_1, %learned_0, %learned_1)
  %onnx::MaxPool_18 = Relu(%input)
  %input.4 = MaxPool[ceil_mode = 0, kernel_shape = [3, 3], pads = [0, 0, 0, 0], strides = [2, 2]](%onnx::MaxPool_18)
  %input.8 = Conv[dilations = [1, 1], group = 1, kernel_shape = [5, 5], pads = [2, 2, 2, 2], strides = [1, 1]](%input.4, %learned_2, %learned_3)
  %onnx::MaxPool_21 = Relu(%input.8)
  %input.12 = MaxPool[ceil_mode = 0, kernel_shape = [3, 3], pads = [0, 0, 0, 0], strides = [2, 2]](%onnx::MaxPool_21)
  %input.16 = Conv[dilations = [1, 1], group = 1, kernel_shape = [3, 3], pads = [1, 1, 1, 1], strides = [1, 1]](%input.12, %learned_4, %learned_5)
  %onnx::Conv_24 = Relu(%input.16)
  %input.20 = Conv[dilations = [1, 1], group = 1, kernel_shape = [3, 3], pads = [1, 1, 1, 1], strides = [1, 1]](%onnx::Conv_24, %learned_6, %learned_7)
  %onnx::Conv_26 = Relu(%input.20)
  %input.24 = Conv[dilations = [1, 1], group = 1, kernel_shape = [3, 3], pads = [1, 1, 1, 1], strides = [1, 1]](%onnx::Conv_26, %learned_8, %learned_9)
  %onnx::MaxPool_28 = Relu(%input.24)
  %input.28 = MaxPool[ceil_mode = 0, kernel_shape = [3, 3], pads = [0, 0, 0, 0], strides = [2, 2]](%onnx::MaxPool_28)
  %onnx::Flatten_30 = AveragePool[kernel_shape = [1, 1], strides = [1, 1]](%input.28)
  %input.32 = Flatten[axis = 1](%onnx::Flatten_30)
  %input.36 = Gemm[alpha = 1, beta = 1, transB = 1](%input.32, %learned_10, %learned_11)
  %onnx::Gemm_33 = Relu(%input.36)
  %input.40 = Gemm[alpha = 1, beta = 1, transB = 1](%onnx::Gemm_33, %learned_12, %learned_13)
  %onnx::Gemm_35 = Relu(%input.40)
  %output1 = Gemm[alpha = 1, beta = 1, transB = 1](%onnx::Gemm_35, %learned_14, %learned_15)
  return %output1
}
代码如下:
import onnxruntime as ort
import numpy as np

ort_session = ort.InferenceSession("alexnet.onnx", providers=['CUDAExecutionProvider'])

outputs = ort_session.run(
    None,
    {"actual_input_1": np.random.randn(1, 3, 224, 224).astype(np.float32)},
)
print(outputs[0].shape)
这里的输入维度是 (1, 3, 224, 224) 表示
Batch size:1
Channels:3
Height:224
Wight:224
输出维度是 (1, 1000) 表示
Batch size:1
Dimension:1000
这里仅预测了一个样本,而 AlexNet 是在 ImageNet 上完成的预训练,这个数据集有 1000 个类别,所以输出在第二个维度上是 1000
先下载一个想要测试的图片,放到运行目录下,比如:

代码如下:
import torch, cv2
import numpy as np
import torch.nn.functional as F
from torchvision import models
import matplotlib.pyplot as plt
import os
import onnxruntime as ort

os.environ["KMP_DUPLICATE_LIB_OK"]="TRUE"

def preict_one_img(img_path):
    img = cv2.imdecode(np.fromfile(img_path, dtype=np.uint8), 1)
    img = cv2.resize(img, (224, 224))
    img = cv2.cvtColor(img, cv2.COLOR_BGR2RGB) # 把图片BGR变成RGB
    print(img.shape)

    img = np.transpose(img,(2,0,1))
    img = np.expand_dims(img, 0)
    img = img.astype(np.float32)
    img /= 255
    print(img.shape)

    outputs = ort_session.run(
        None,
        {"actual_input_1": img.astype(np.float32)},
    )
    print(np.max(outputs[0]))
    print(np.argmax(outputs[0]))

    out = torch.tensor(outputs[0],dtype=torch.float64)
    out = F.softmax(out, dim=1)
    proba, class_id = torch.max(out, 1)

    proba = float(proba[0])
    class_id = int(class_id)
    img = img.squeeze(0)
    new_img = np.transpose(img, (1, 2, 0))
    plt.imshow(new_img)
    plt.title("predicted class: %s .  probability: %3f" % (classes[class_id], proba))
    plt.show()

if __name__ == '__main__':
    classes = models.AlexNet_Weights.IMAGENET1K_V1.value.meta["categories"]
    device = torch.device("cuda" if torch.cuda.is_available() else "cpu")
    img_path = "./cat_224x224.jpg"
    model_path = "./alexnet.onnx"
    ort_session = ort.InferenceSession(model_path, providers=['CUDAExecutionProvider'])
    preict_one_img(img_path)
测试结果如下:
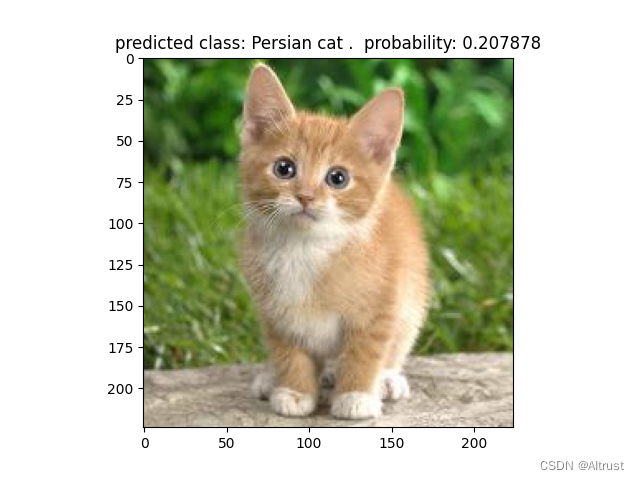
预测结果是一只波斯猫
我需要在客户计算机上运行Ruby应用程序。通常需要几天才能完成(复制大备份文件)。问题是如果启用sleep,它会中断应用程序。否则,计算机将持续运行数周,直到我下次访问为止。有什么方法可以防止执行期间休眠并让Windows在执行后休眠吗?欢迎任何疯狂的想法;-) 最佳答案 Here建议使用SetThreadExecutionStateWinAPI函数,使应用程序能够通知系统它正在使用中,从而防止系统在应用程序运行时进入休眠状态或关闭显示。像这样的东西:require'Win32API'ES_AWAYMODE_REQUIRED=0x0
关闭。这个问题是opinion-based.它目前不接受答案。想要改进这个问题?更新问题,以便editingthispost可以用事实和引用来回答它.关闭4年前。Improvethisquestion我想在固定时间创建一系列低音和高音调的哔哔声。例如:在150毫秒时发出高音调的蜂鸣声在151毫秒时发出低音调的蜂鸣声200毫秒时发出低音调的蜂鸣声250毫秒的高音调蜂鸣声有没有办法在Ruby或Python中做到这一点?我真的不在乎输出编码是什么(.wav、.mp3、.ogg等等),但我确实想创建一个输出文件。
我有一个模型:classItem项目有一个属性“商店”基于存储的值,我希望Item对象对特定方法具有不同的行为。Rails中是否有针对此的通用设计模式?如果方法中没有大的if-else语句,这是如何干净利落地完成的? 最佳答案 通常通过Single-TableInheritance. 关于ruby-on-rails-Rails-子类化模型的设计模式是什么?,我们在StackOverflow上找到一个类似的问题: https://stackoverflow.co
我需要从一个View访问多个模型。以前,我的links_controller仅用于提供以不同方式排序的链接资源。现在我想包括一个部分(我假设)显示按分数排序的顶级用户(@users=User.all.sort_by(&:score))我知道我可以将此代码插入每个链接操作并从View访问它,但这似乎不是“ruby方式”,我将需要在不久的将来访问更多模型。这可能会变得很脏,是否有针对这种情况的任何技术?注意事项:我认为我的应用程序正朝着单一格式和动态页面内容的方向发展,本质上是一个典型的网络应用程序。我知道before_filter但考虑到我希望应用程序进入的方向,这似乎很麻烦。最终从任何
我有一个包含模块的模型。我想在模块中覆盖模型的访问器方法。例如:classBlah这显然行不通。有什么想法可以实现吗? 最佳答案 您的代码看起来是正确的。我们正在毫无困难地使用这个确切的模式。如果我没记错的话,Rails使用#method_missing作为属性setter,因此您的模块将优先,阻止ActiveRecord的setter。如果您正在使用ActiveSupport::Concern(参见thisblogpost),那么您的实例方法需要进入一个特殊的模块:classBlah
刚入门rails,开始慢慢理解。有人可以解释或给我一些关于在application_controller中编码的好处或时间和原因的想法吗?有哪些用例。您如何为Rails应用程序使用应用程序Controller?我不想在那里放太多代码,因为据我了解,每个请求都会调用此Controller。这是真的? 最佳答案 ApplicationController实际上是您应用程序中的每个其他Controller都将从中继承的类(尽管这不是强制性的)。我同意不要用太多代码弄乱它并保持干净整洁的态度,尽管在某些情况下ApplicationContr
我有一个表单,其中有很多字段取自数组(而不是模型或对象)。我如何验证这些字段的存在?solve_problem_pathdo|f|%>... 最佳答案 创建一个简单的类来包装请求参数并使用ActiveModel::Validations。#definedsomewhere,atthesimplest:require'ostruct'classSolvetrue#youcouldevencheckthesolutionwithavalidatorvalidatedoerrors.add(:base,"WRONG!!!")unlesss
我想向我的Controller传递一个参数,它是一个简单的复选框,但我不知道如何在模型的form_for中引入它,这是我的观点:{:id=>'go_finance'}do|f|%>Transferirde:para:Entrada:"input",:placeholder=>"Quantofoiganho?"%>Saída:"output",:placeholder=>"Quantofoigasto?"%>Nota:我想做一个额外的复选框,但我该怎么做,模型中没有一个对象,而是一个要检查的对象,以便在Controller中创建一个ifelse,如果没有检查,请帮助我,非常感谢,谢谢
我有一些非常大的模型,我必须将它们迁移到最新版本的Rails。这些模型有相当多的验证(User有大约50个验证)。是否可以将所有这些验证移动到另一个文件中?说app/models/validations/user_validations.rb。如果可以,有人可以提供示例吗? 最佳答案 您可以为此使用关注点:#app/models/validations/user_validations.rbrequire'active_support/concern'moduleUserValidationsextendActiveSupport:
对于Rails模型,是否可以/建议让一个类的成员不持久保存到数据库中?我想将用户最后选择的类型存储在session变量中。由于我无法从我的模型中设置session变量,我想将值存储在一个“虚拟”类成员中,该成员只是将值传递回Controller。你能有这样的类(class)成员吗? 最佳答案 将非持久属性添加到Rails模型就像任何其他Ruby类一样:classUser扩展解释:在Ruby中,所有实例变量都是私有(private)的,不需要在赋值前定义。attr_accessor创建一个setter和getter方法:classUs