此教程适合若依前后端分离项目,其他项目可以在扩展列表中进行查找。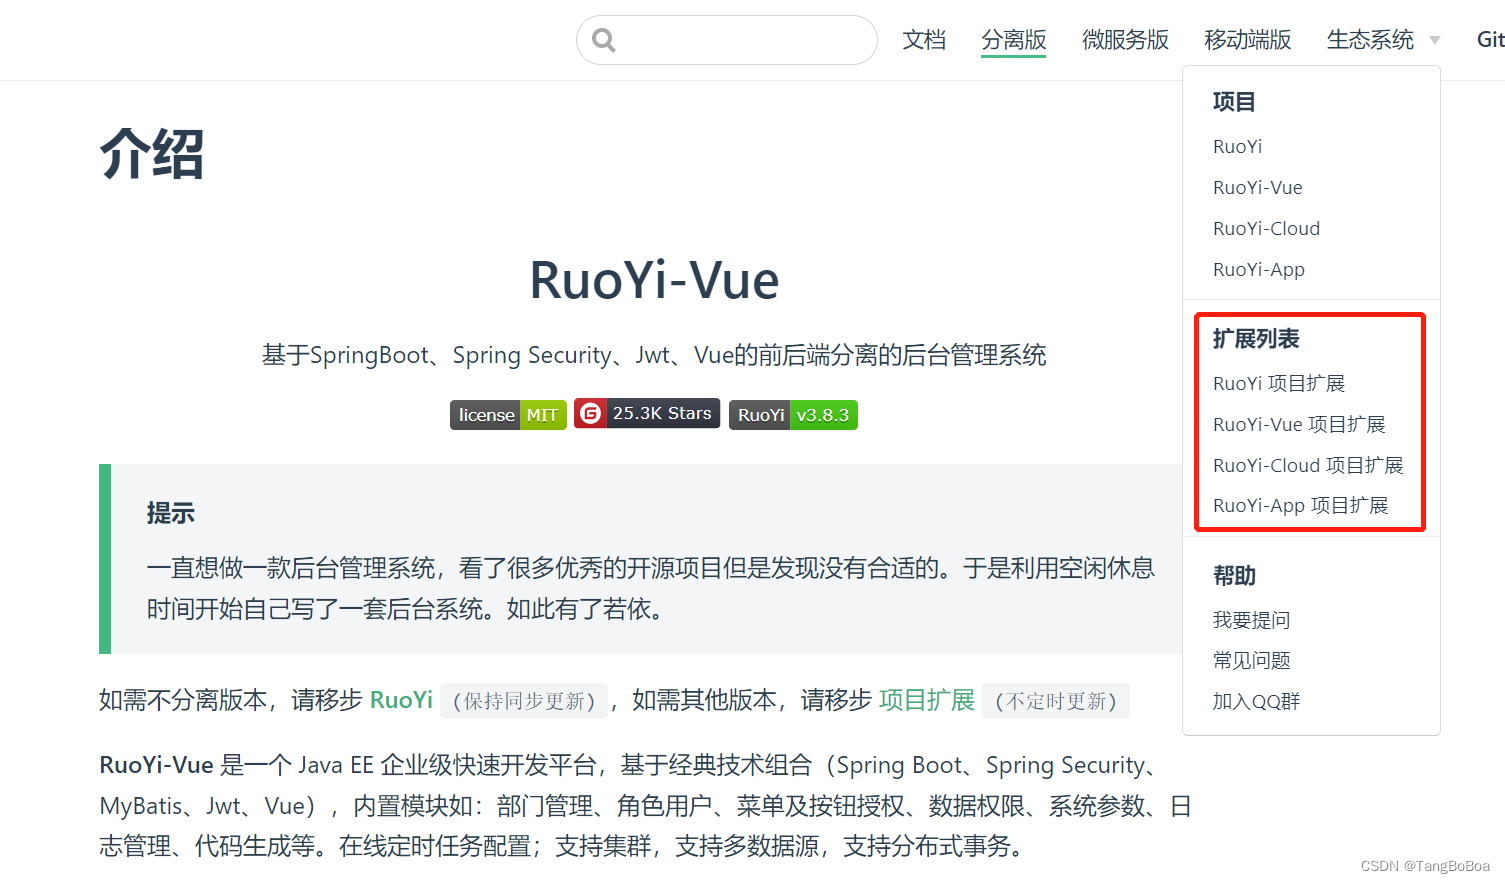
近期公司里需要对很久以前的RuoYi-Vue前后端分离项目扩展出flowable的功能,当然这个重任也是落在了我的身上(不然也不会有这篇文章),然后我在官网看到了RuoYi-Vue-Flowable这个项目,按照文档提供的迁移方式对于我们这个老版本的项目来说无法正常运行,所以我联系了作者并更新了一下文档,打算在网上在发布一篇(毕竟有的人懒得看官方文档)。
官方项目地址:https://gitee.com/tony2y/RuoYi-flowable
把项目拉到本地后下面开始整合教程,整合教程分为前端和后端两个模块。
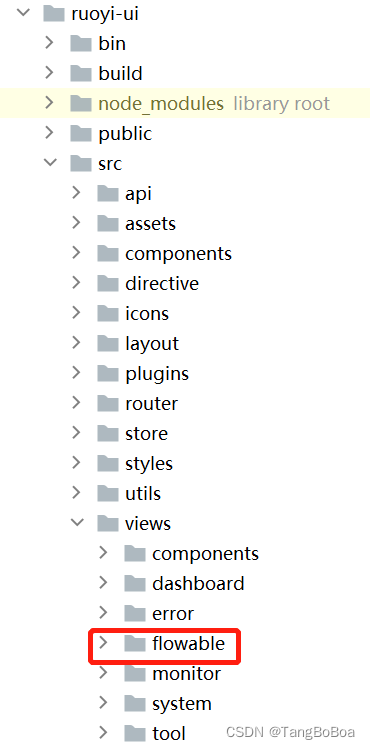
1.1 把目录ruoyi-ui/src/views/下的flowable文件夹移动到你自己前端项目中的/src/views/文件下。
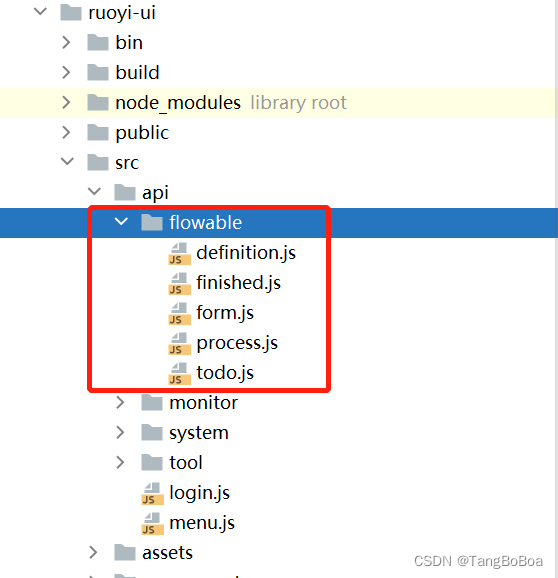
1.2 移动页面配套的js文件,将ruoyi-ui/src/api/下的flowable文件夹移动到自己项目中的/src/api/文件下。
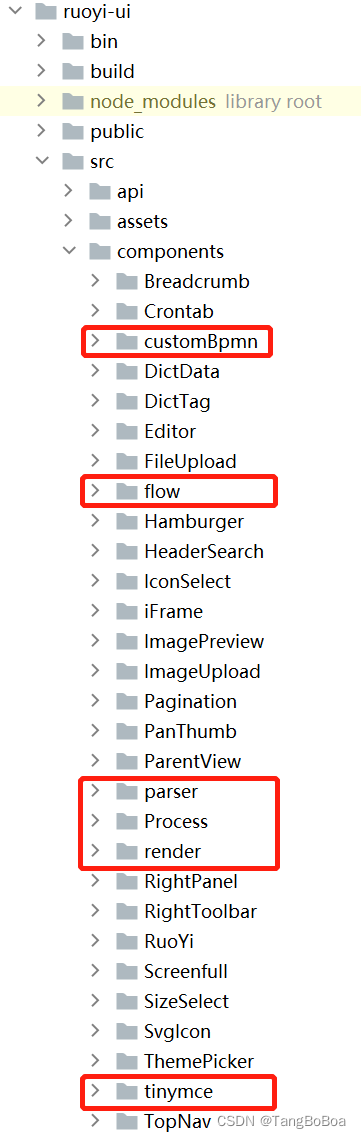
将ruoyi-ui/src/components目录下的customBpmn,flow,parser,Process,render,tinymce文件夹移动到自己项目中的/src/components文件下。
3.1 将ruoyi-ui/src/views/tool中的build文件夹移动到自己项目中的/src/views/tool文件下,存在则覆盖。

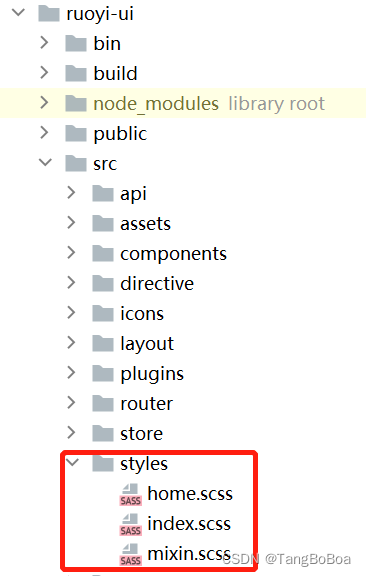
3.2 迁移表单设计器相关样式,将ruoyi-ui/src下的styles文件移动到自己项目中的/src文件夹下。
3.3 修改ruoyi-ui/src/utils/index.js中的deepClone函数。

修改为如下内容,存在该函数做修改,不存在做新增。
// 深拷贝对象
export function deepClone(obj) {
  const _toString = Object.prototype.toString

  // null, undefined, non-object, function
  if (!obj || typeof obj !== 'object') {
    return obj
  }

  // DOM Node
  if (obj.nodeType && 'cloneNode' in obj) {
    return obj.cloneNode(true)
  }

  // Date
  if (_toString.call(obj) === '[object Date]') {
    return new Date(obj.getTime())
  }

  // RegExp
  if (_toString.call(obj) === '[object RegExp]') {
    const flags = []
    if (obj.global) { flags.push('g') }
    if (obj.multiline) { flags.push('m') }
    if (obj.ignoreCase) { flags.push('i') }

    return new RegExp(obj.source, flags.join(''))
  }

  const result = Array.isArray(obj) ? [] : obj.constructor ? new obj.constructor() : {}

  for (const key in obj) {
    result[key] = deepClone(obj[key])
  }

  return result
}
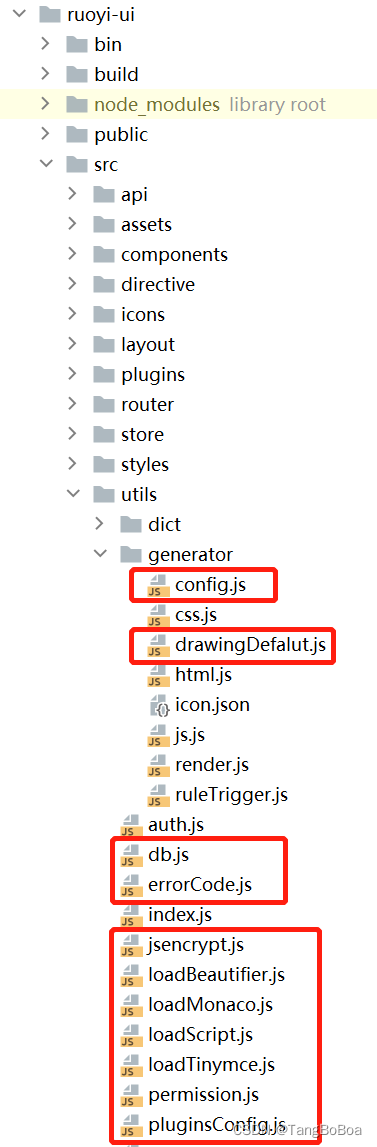
3.4 迁移或替换相关js文件,存在则替换,不存在则新增,将ruoyi-ui/src/utils/generator,ruoyi-ui/src/utils文件夹中对应下图红框的js文件移动到自己项目中对应的文件夹中。
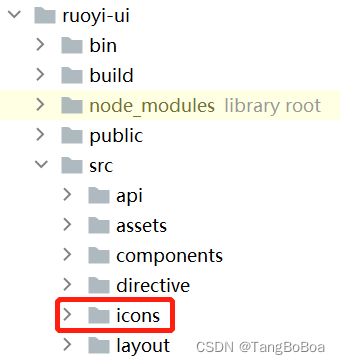
3.5 迁移表单设计器相关图标,将ruoyi-ui/src下的icons文件移动到自己项目中的/src文件夹下。
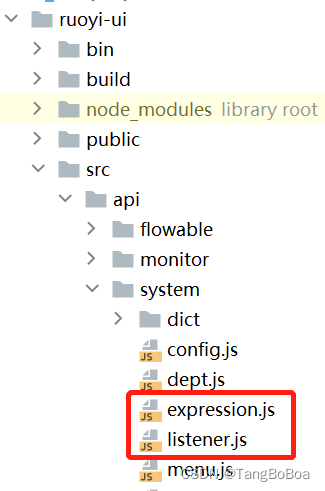
4.1 相关页面迁移,将ruoyi-ui/src/views/system下的expression,listener文件夹移动到自己项目中的/src/views/system文件夹下。

4.2 相关js文件迁移,将ruoyi-ui/src/api/system下的expression.js,listener.js文件移动到自己项目中的/src/api/system文件夹下。
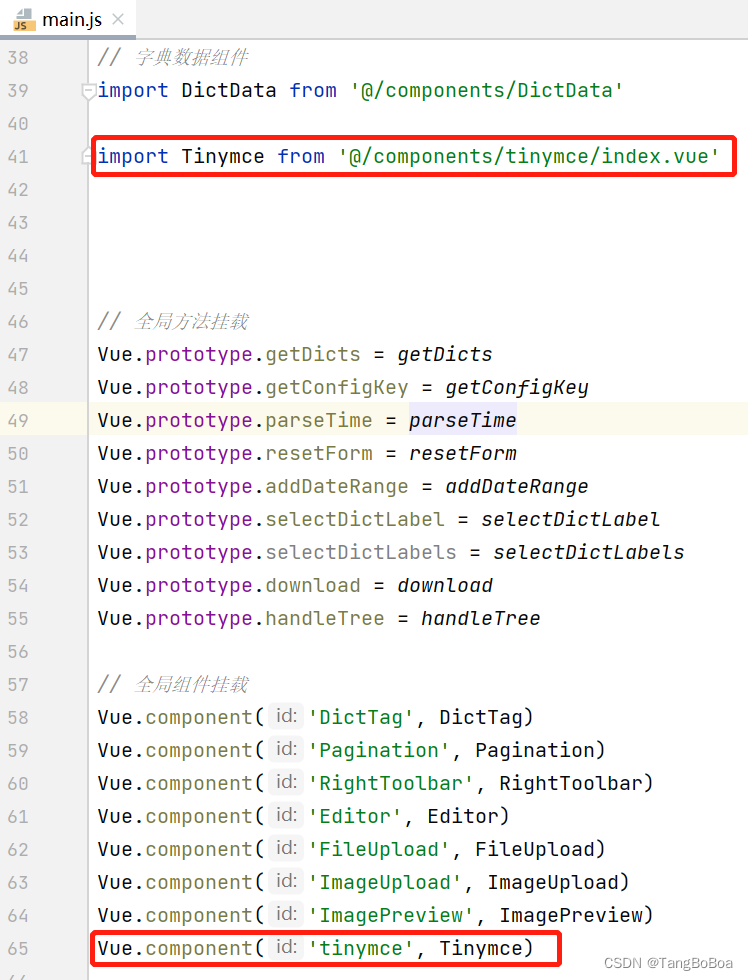
main.js中结合上图添加如下代码。
import Tinymce from '@/components/tinymce/index.vue'

Vue.component('tinymce', Tinymce)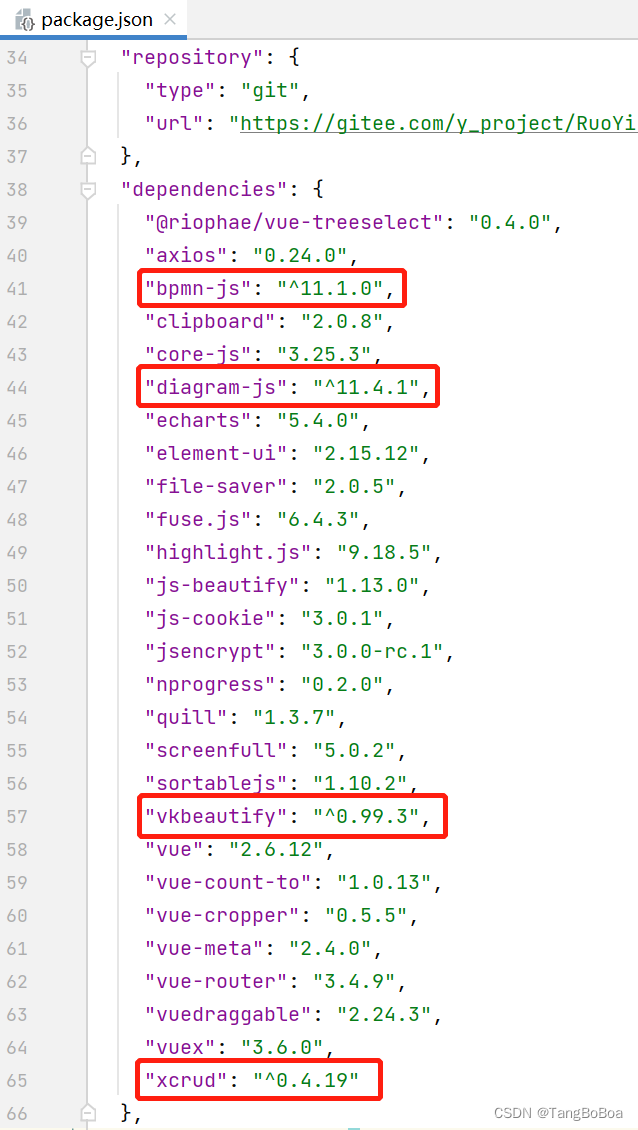
package.json中结合上图添加如下依赖。
"bpmn-js": "^11.1.0",
"diagram-js": "^11.4.1",
"xcrud": "^0.4.19",
"vkbeautify": "^0.99.3",在ruoyi-ui/src/router/index.js文件中添加路由配置,不同的ruoyi版本路由写法不一致,请参照自己项目路由进行添加。
参考如下:
  {
    path: '/flowable',
    component: Layout,
    hidden: true,
    children: [
      {
        path: 'definition/model/',
        component: () => import('@/views/flowable/definition/model'),
        name: 'Model',
        meta: { title: '流程设计', icon: '' }
      }
    ]
  },
  {
    path: '/flowable',
    component: Layout,
    hidden: true,
    children: [
      {
        path: 'task/finished/detail/index',
        component: () => import('@/views/flowable/task/finished/detail/index'),
        name: 'FinishedRecord',
        meta: { title: '流程详情', icon: '' }
      }
    ]
  },
  {
    path: '/flowable',
    component: Layout,
    hidden: true,
    children: [
      {
        path: 'task/myProcess/detail/index',
        component: () => import('@/views/flowable/task/myProcess/detail/index'),
        name: 'MyProcessRecord',
        meta: { title: '流程详情', icon: '' }
      }
    ]
  },
  {
    path: '/flowable',
    component: Layout,
    hidden: true,
    children: [
      {
        path: 'task/myProcess/send/index',
        component: () => import('@/views/flowable/task/myProcess/send/index'),
        name: 'SendRecord',
        meta: { title: '流程发起', icon: '' }
      }
    ]
  },
  {
    path: '/flowable',
    component: Layout,
    hidden: true,
    children: [
      {
        path: 'task/todo/detail/index',
        component: () => import('@/views/flowable/task/todo/detail/index'),
        name: 'TodoRecord',
        meta: { title: '流程处理', icon: '' }
      }
    ]
  },
  {
    path: '/tool',
    component: Layout,
    hidden: true,
    children: [
      {
        path: 'build/index',
        component: () => import('@/views/tool/build/index'),
        name: 'FormBuild',
        meta: { title: '表单配置', icon: '' }
      }
    ]
}删除node_modules文件夹,控制台执行npm install下载完毕后启动项目即可。
由于加入了流程校验器,迁移项目后启动错误请执行以下命令
npm install create-bpmnlint-plugin -D<!-- properties -->
<properties>
<flowable.version>6.7.2</flowable.version>
</properties>
<!-- dependency -->
<dependency>
<groupId>com.ruoyi</groupId>
<artifactId>ruoyi-flowable</artifactId>
<version>${ruoyi.version}</version>
</dependency>
<dependency>
<groupId>io.swagger</groupId>
<artifactId>swagger-annotations</artifactId>
<version>1.5.21</version>
<scope>compile</scope>
</dependency>
<dependency>
<groupId>org.flowable</groupId>
<artifactId>flowable-spring-boot-starter</artifactId>
<version>${flowable.version}</version>
</dependency>
<dependency>
<groupId>com.baomidou</groupId>
<artifactId>mybatis-plus-boot-starter</artifactId>
<version>3.4.0</version>
</dependency>
<!--el表达式计算-->
<dependency>
<groupId>com.googlecode.aviator</groupId>
<artifactId>aviator</artifactId>
<version>5.3.3</version>
</dependency>
<!--modules -->
<modules>
<module>ruoyi-flowable</module>
</modules>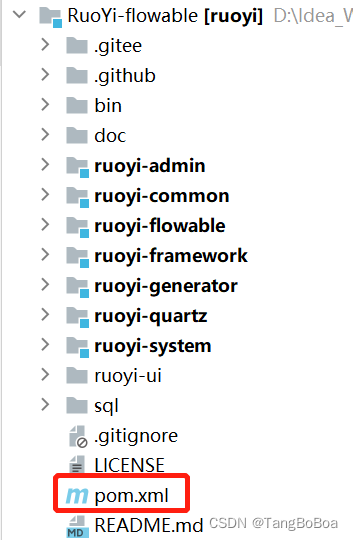

<dependency>
    <groupId>com.ruoyi</groupId>
    <artifactId>ruoyi-flowable</artifactId>
</dependency>根据若依项目的版本不同,缺少的实体类,mapper,service也会有所不同,所以需要根据flowable项目中所提示缺少的类进行针对性的拷贝,如果为service接口记得补全对应的controller。
application.yml文件中添加如下配置
# flowable相关表
flowable:
  # true 会对数据库中所有表进行更新操作。如果表不存在,则自动创建(建议开发时使用)
  database-schema-update: false
  # 关闭定时任务JOB
async-executor-activate: false数据源地址后需要加上nullCatalogMeansCurrent=true,保证自动创建flowable表时不会报错。
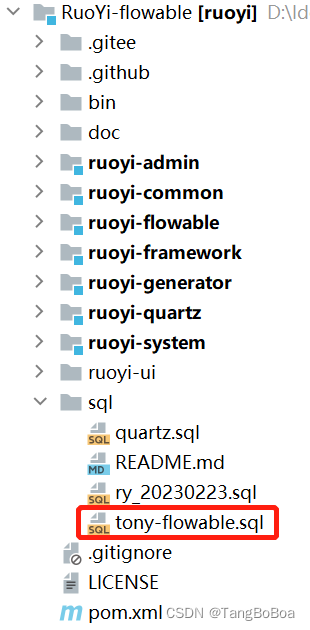
新建一个库执行tony-flowable.sql文件,flowable项目中少什么表就将对应的表导入到自己的数据库中,mysql数据库版本要用5.7。
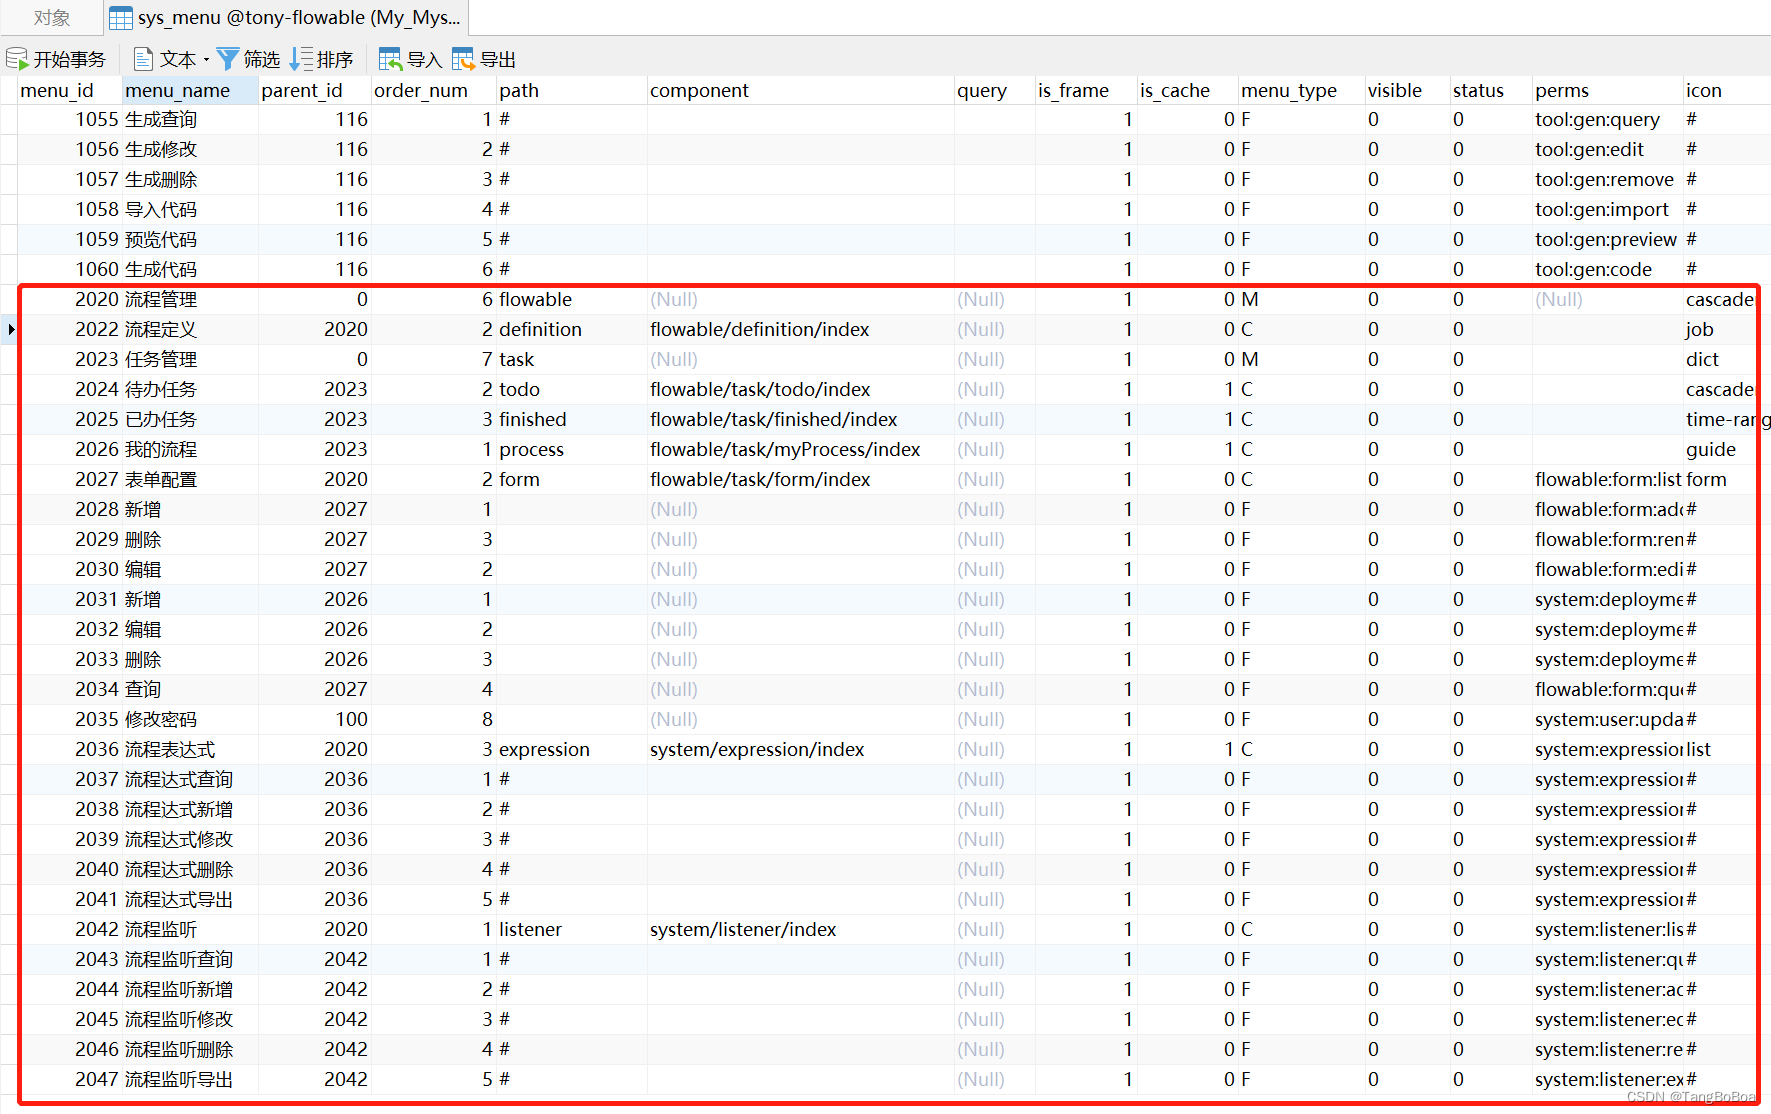
将sys_menu对应下图红框中的菜单数据加入到自己的表中。
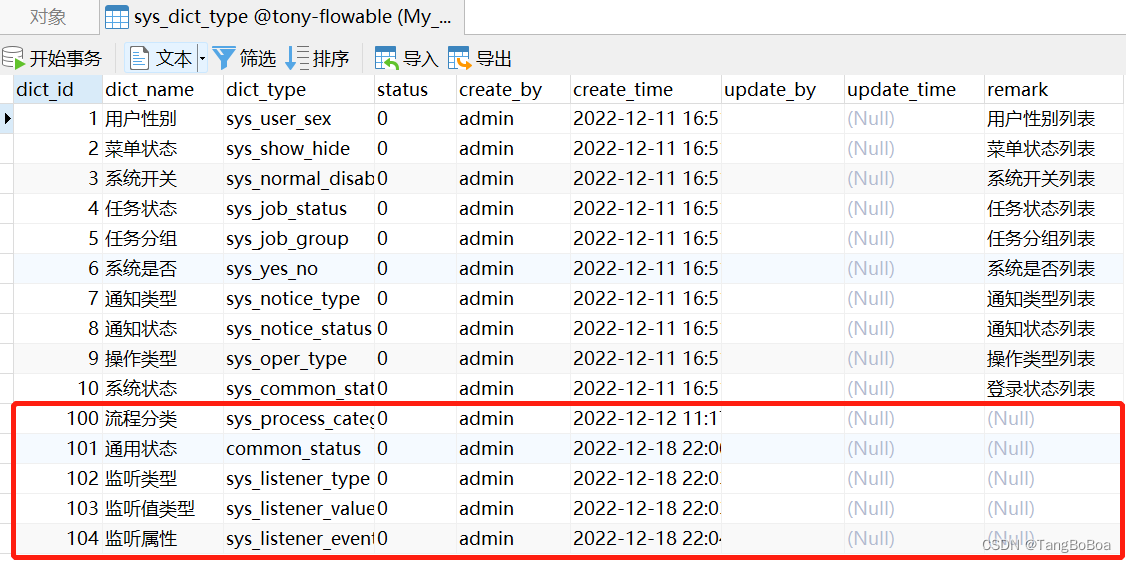
将sys_dict_type对应下图红框中的字典类型数据添加到自己的表中。
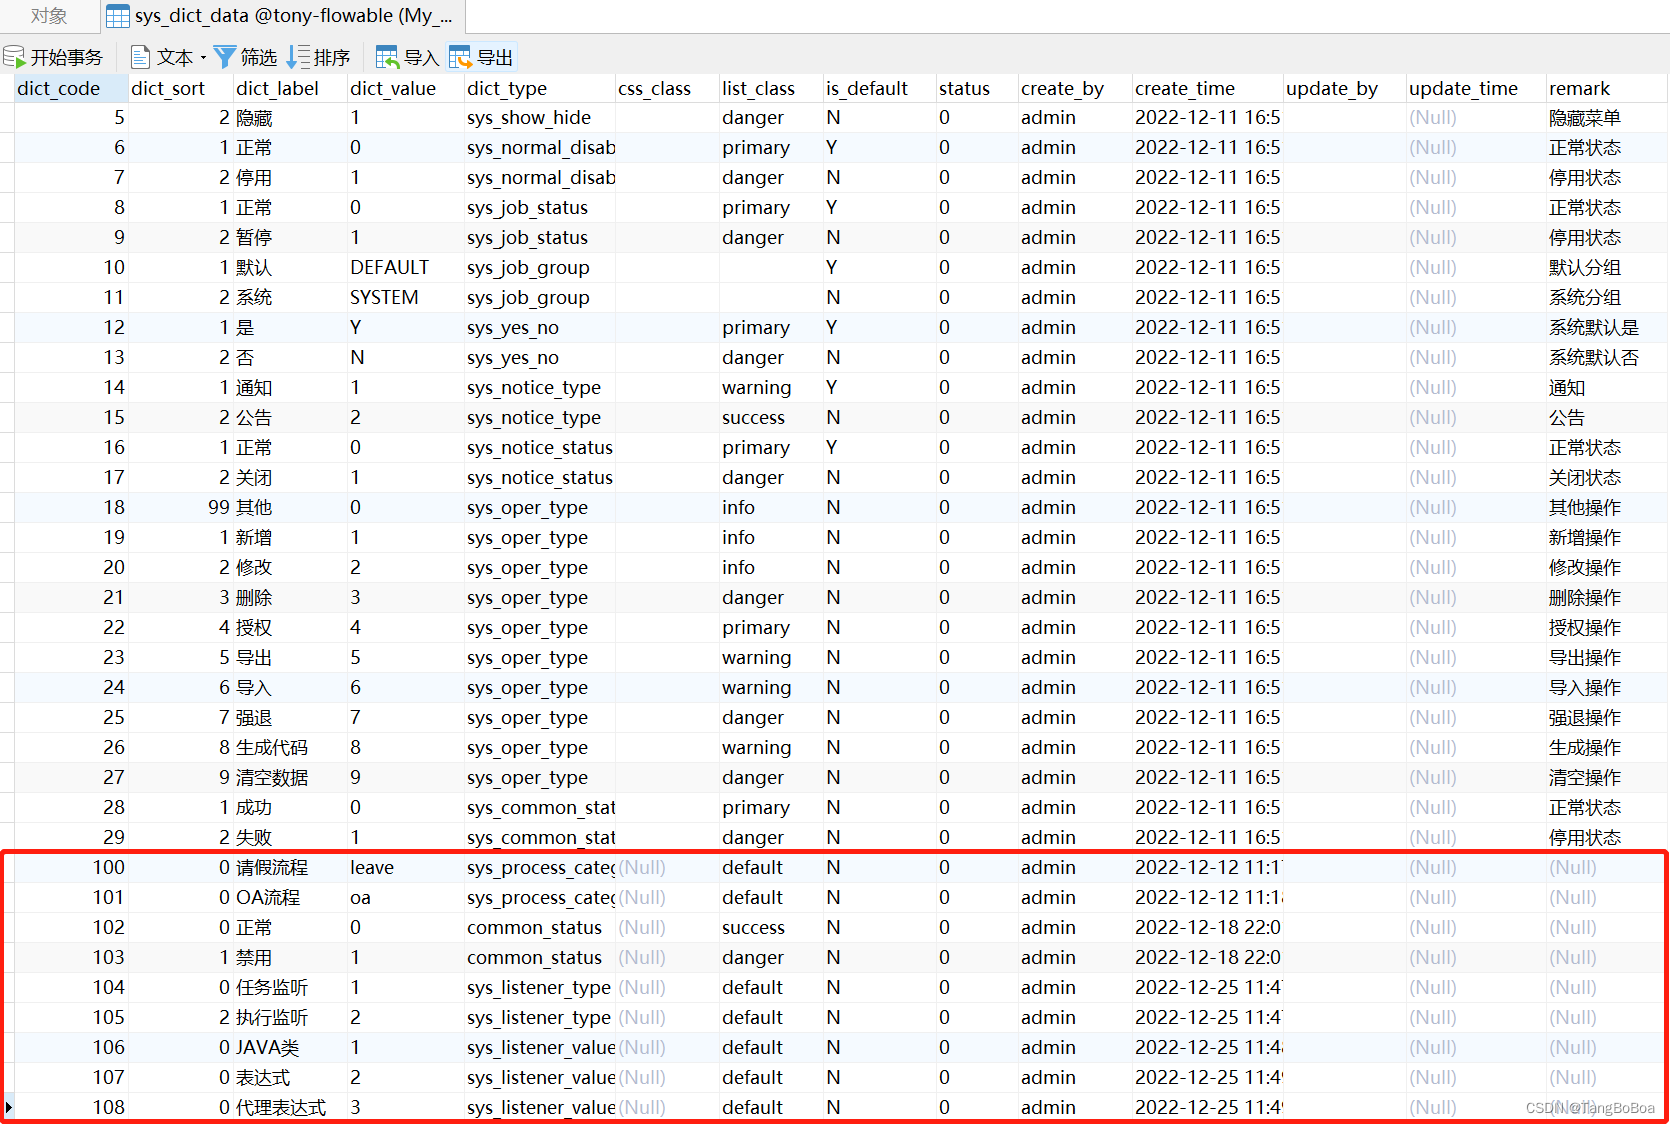
将sys_dict_data对应下图红框中的字典数据添加到自己的表中。
第一次启动时需要把yml配置文件中的database-schema-update设置为true,这样会自动创建flowable中所需要的全部表。
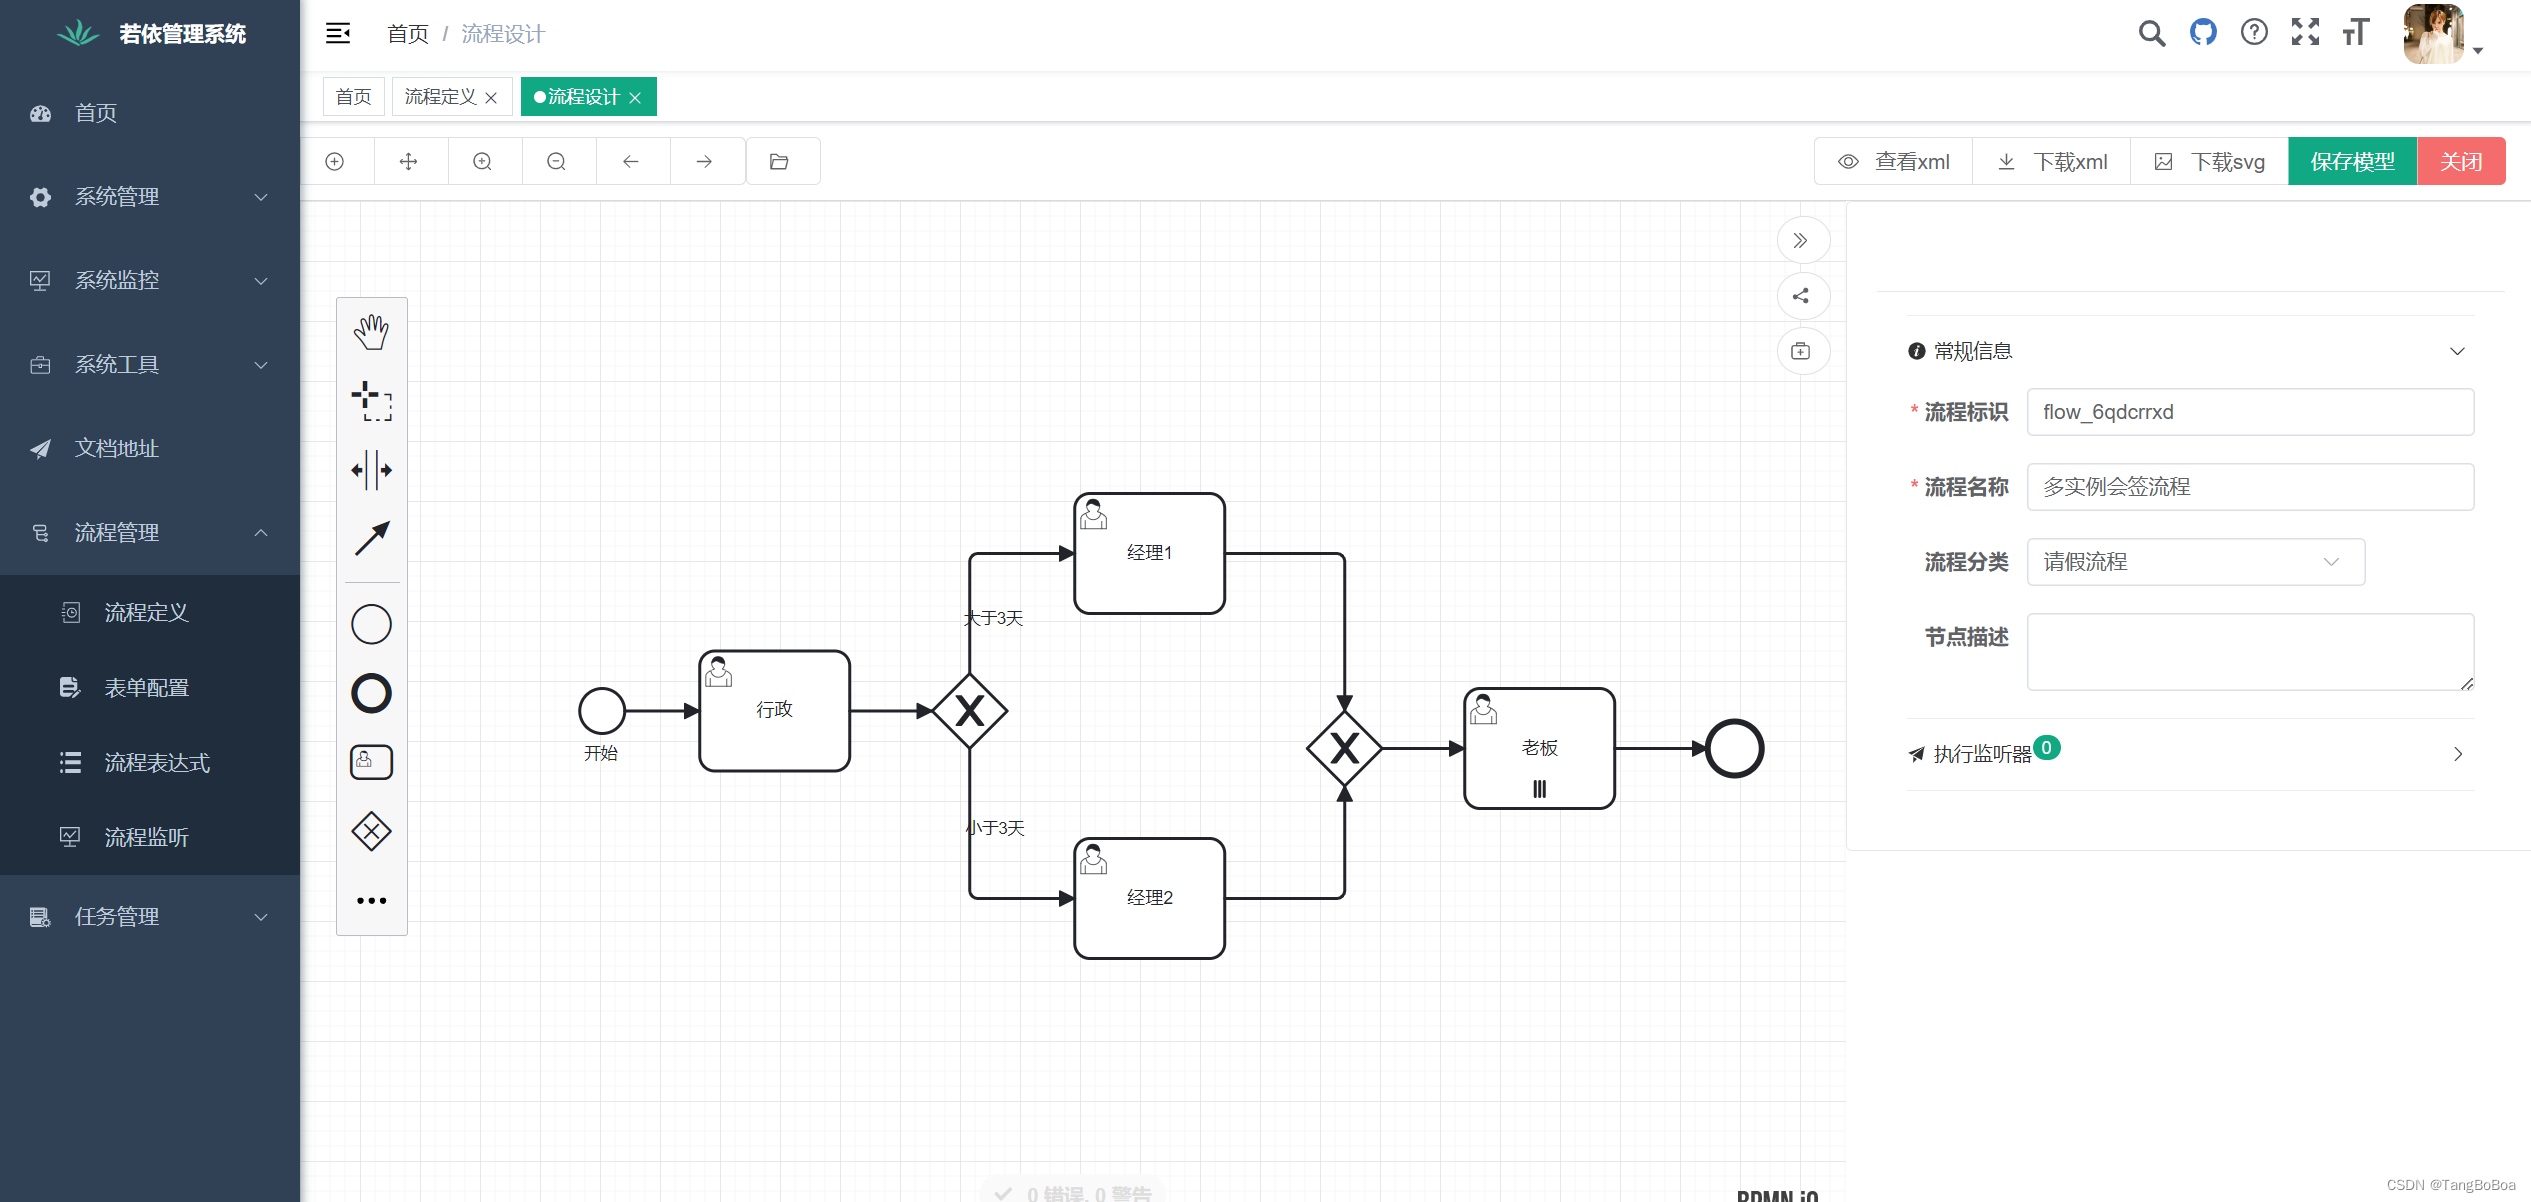
完成上述操作后就可以在自己项目中正常使用了。
我在从html页面生成PDF时遇到问题。我正在使用PDFkit。在安装它的过程中,我注意到我需要wkhtmltopdf。所以我也安装了它。我做了PDFkit的文档所说的一切......现在我在尝试加载PDF时遇到了这个错误。这里是错误:commandfailed:"/usr/local/bin/wkhtmltopdf""--margin-right""0.75in""--page-size""Letter""--margin-top""0.75in""--margin-bottom""0.75in""--encoding""UTF-8""--margin-left""0.75in""-
我在我的项目目录中完成了compasscreate.和compassinitrails。几个问题:我已将我的.sass文件放在public/stylesheets中。这是放置它们的正确位置吗?当我运行compasswatch时,它不会自动编译这些.sass文件。我必须手动指定文件:compasswatchpublic/stylesheets/myfile.sass等。如何让它自动运行?文件ie.css、print.css和screen.css已放在stylesheets/compiled。如何在编译后不让它们重新出现的情况下删除它们?我自己编译的.sass文件编译成compiled/t
我花了三天的时间用头撞墙,试图弄清楚为什么简单的“rake”不能通过我的规范文件。如果您遇到这种情况:任何文件夹路径中都不要有空格!。严重地。事实上,从现在开始,您命名的任何内容都没有空格。这是我的控制台输出:(在/Users/*****/Desktop/LearningRuby/learn_ruby)$rake/Users/*******/Desktop/LearningRuby/learn_ruby/00_hello/hello_spec.rb:116:in`require':cannotloadsuchfile--hello(LoadError) 最佳
关闭。这个问题需要detailsorclarity.它目前不接受答案。想改进这个问题吗?通过editingthispost添加细节并澄清问题.关闭8年前。Improvethisquestion在首页我有:汽车:VolvoSaabMercedesAudistatic_pages_spec.rb中的测试代码:it"shouldhavetherightselect"dovisithome_pathit{shouldhave_select('cars',:options=>['volvo','saab','mercedes','audi'])}end响应是rspec./spec/request
在Rails4.0.2中,我使用s3_direct_upload和aws-sdkgems直接为s3存储桶上传文件。在开发环境中它工作正常,但在生产环境中它会抛出如下错误,ActionView::Template::Error(noimplicitconversionofnilintoString)在View中,create_cv_url,:id=>"s3_uploader",:key=>"cv_uploads/{unique_id}/${filename}",:key_starts_with=>"cv_uploads/",:callback_param=>"cv[direct_uplo
使用Ruby1.9.2运行IDE提示说需要gemruby-debug-base19x并提供安装它。但是,在尝试安装它时会显示消息Failedtoinstallgems.Followinggemswerenotinstalled:C:/ProgramFiles(x86)/JetBrains/RubyMine3.2.4/rb/gems/ruby-debug-base19x-0.11.30.pre2.gem:Errorinstallingruby-debug-base19x-0.11.30.pre2.gem:The'linecache19'nativegemrequiresinstall
我知道全局变量$!包含最新的异常对象,但我对下面的语法感到困惑。谁能帮助我理解以下语法?rescue$! 最佳答案 此构造可防止异常停止您的程序并使堆栈跟踪冒泡。它还会将该异常作为值返回,这很有用。a=get_me_datarescue$!在此行之后,a将保存请求的数据或异常。然后您可以分析该异常并采取相应措施。defget_me_dataraise'Nodataforyou'enda=get_me_datarescue$!puts"Executioncarrieson"pa#>>Executioncarrieson#>>#更现实的
项目介绍随着我国经济迅速发展,人们对手机的需求越来越大,各种手机软件也都在被广泛应用,但是对于手机进行数据信息管理,对于手机的各种软件也是备受用户的喜爱小学生兴趣延时班预约小程序的设计与开发被用户普遍使用,为方便用户能够可以随时进行小学生兴趣延时班预约小程序的设计与开发的数据信息管理,特开发了小程序的设计与开发的管理系统。小学生兴趣延时班预约小程序的设计与开发的开发利用现有的成熟技术参考,以源代码为模板,分析功能调整与小学生兴趣延时班预约小程序的设计与开发的实际需求相结合,讨论了小学生兴趣延时班预约小程序的设计与开发的使用。开发环境开发说明:前端使用微信微信小程序开发工具:后端使用ssm:VU
我在我正在处理的一些代码中发现了这一点。它旨在解决从磁盘读取key文件的要求。在生产环境中,key文件的内容位于环境变量中。旧代码:key=File.read('path/to/key.pem')新代码:key=File.read('|echo$KEY_VARIABLE')这是如何工作的? 最佳答案 来自IOdocs:Astringstartingwith“|”indicatesasubprocess.Theremainderofthestringfollowingthe“|”isinvokedasaprocesswithappro
我今天看到了一个ruby代码片段。[1,2,3,4,5,6,7].inject(:+)=>28[1,2,3,4,5,6,7].inject(:*)=>5040这里的注入(inject)和之前看到的完全不一样,比如[1,2,3,4,5,6,7].inject{|sum,x|sum+x}请解释一下它是如何工作的? 最佳答案 没有魔法,符号(方法)只是可能的参数之一。这是来自文档:#enum.inject(initial,sym)=>obj#enum.inject(sym)=>obj#enum.inject(initial){|mem
