无论是使用Docker-distribution去自建仓库,还是通过官方镜像跑容器的方式去自建仓库,通过前面的演示我们可以发现其是非常的简陋的,还不如直接使用官方的Docker Hub去管理镜像来得方便,至少官方的Docker Hub能够通过web界面来管理镜像,还能在web界面执行搜索,还能基于Dockerfile利用Webhooks和Automated Builds实现自动构建镜像的功能,用户不需要在本地执行docker build,而是把所有build上下文的文件作为一个仓库推送到github上,让Docker Hub可以从github上去pull这些文件来完成自动构建。
但无论官方的Docker Hub有多强大,它毕竟是在国外,所以速度是最大的瓶颈,我们很多时候是不可能去考虑使用官方的仓库的,但是上面说的两种自建仓库方式又十分简陋,不便管理,所以后来就出现了一个被 CNCF 组织青睐的项目,其名为Harbor。
Harbor是由VMWare在Docker Registry的基础之上进行了二次封装,加进去了很多额外程序,而且提供了一个非常漂亮的web界面。
Project Harbor是一个开源的可信云本地注册项目,用于存储、标记和扫描上下文。
Harbor扩展了开源Docker分发版,增加了用户通常需要的功能,如安全、身份和管理。
Harbor支持高级特性,如用户管理、访问控制、活动监视和实例之间的复制。
Harbor的核心功能是存储和管理Artifact
访问控制:访问控制是多个用户使用同一个仓库存储Artifact时的基本需求,也是Harbor早期版本提供的主要功能之一
镜像签名:镜像在本质上是软件的封装形式,从安全角度来看,开发人员在部署镜像前需要保证镜像内容的完整性(integrity)
镜像扫描:容器镜像打包了代码、软件及其所需的运行环境,已发布的软件及其依赖的库都可能存在安全漏洞
高级管理功能:Harbor在版本迭代中还根据社区反馈,为管理员及用户提供了很多高级管理功能以支持更加复杂的使用场景,包括Artifact复制策略、存储配额管理、Tag保留策略(Artifact保留策略)和垃圾回收等
Harbor在物理机上部署是非常难的,而为了简化Harbor的应用,Harbor官方直接把Harbor做成了在容器中运行的应用,而且这个容器在Harbor中依赖类似redis、mysql、pgsql等很多存储系统,所以它需要编排很多容器协同起来工作,因此VMWare Harbor在部署和使用时,需要借助于Docker的单机编排工具(Docker compose)来实现。
Compose是一个用于定义和运行多容器Docker应用程序的工具。使用Compose,您可以使用一个YAML文件来配置应用程序的服务。然后,使用一个命令创建并启动配置中的所有服务。
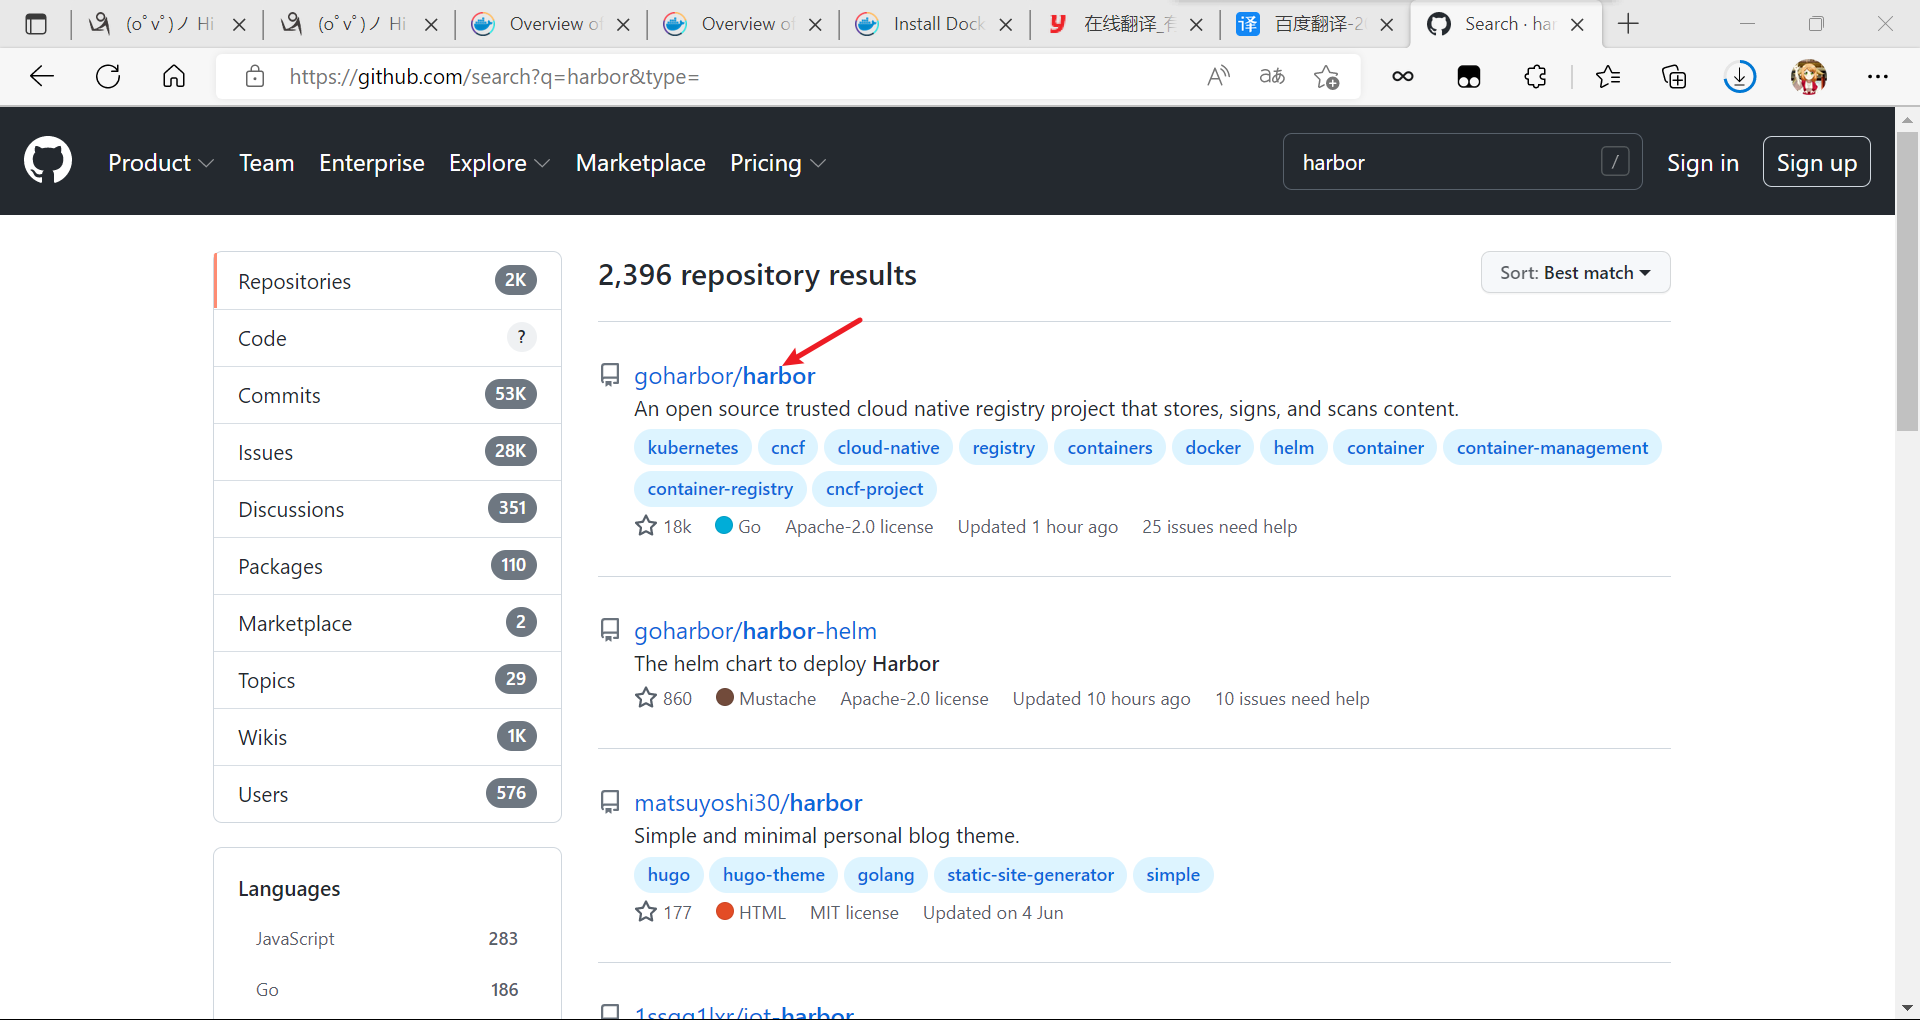
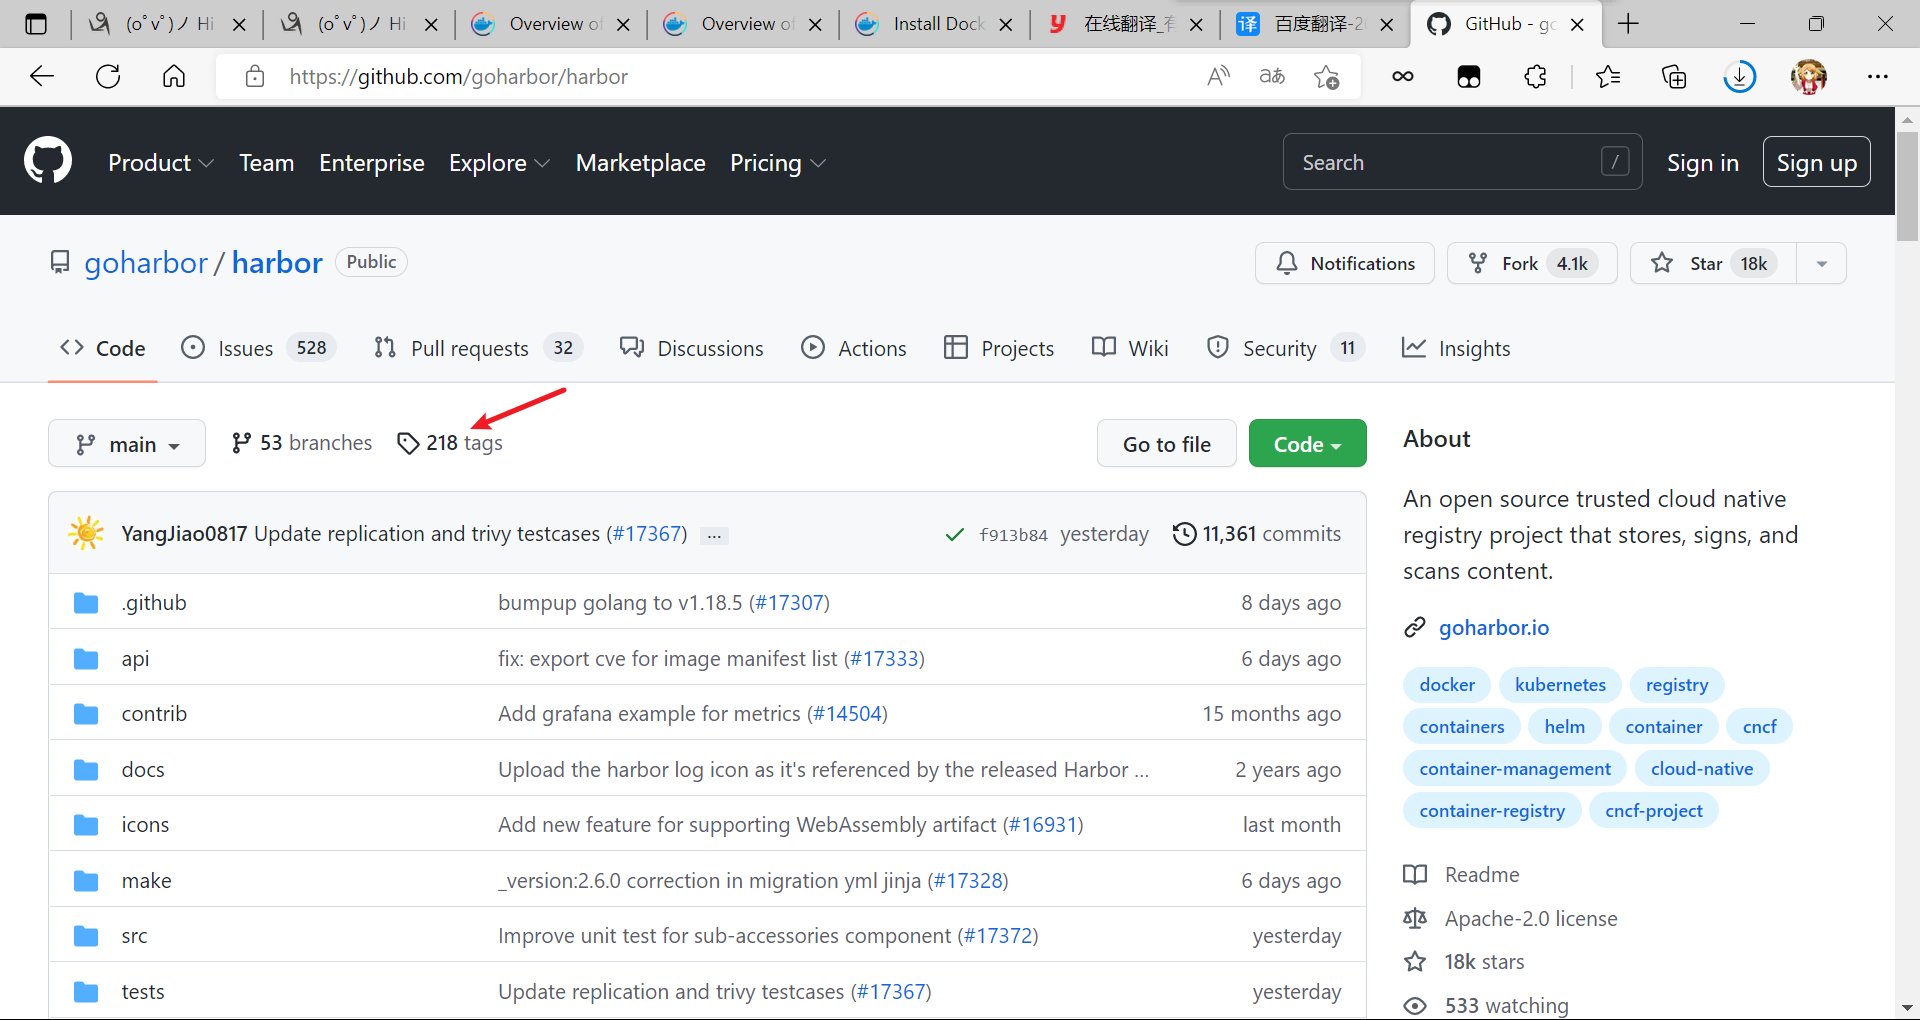
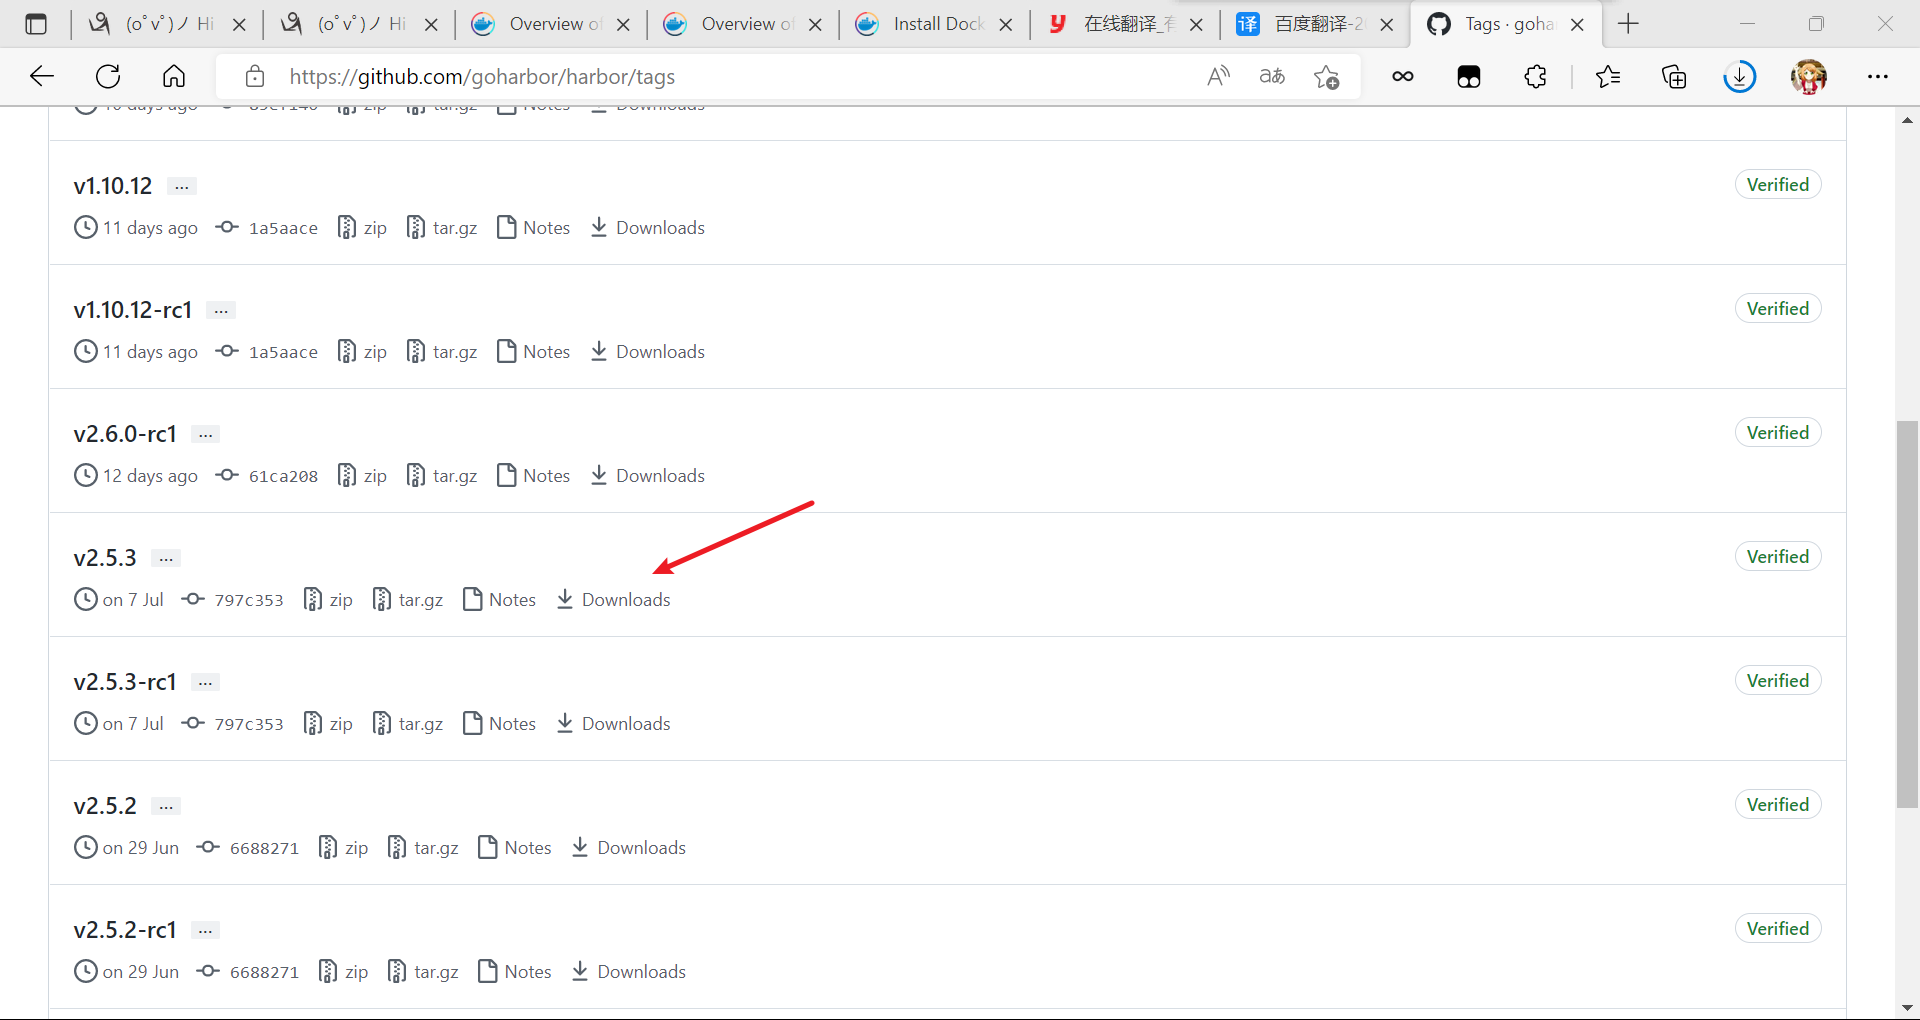
提前进入Harbor官方文档(https://github.com/goharbor/harbor)下载harbor-offline-installer-v2.5.3这个包,操作如下:
在左上角输入harbor搜索

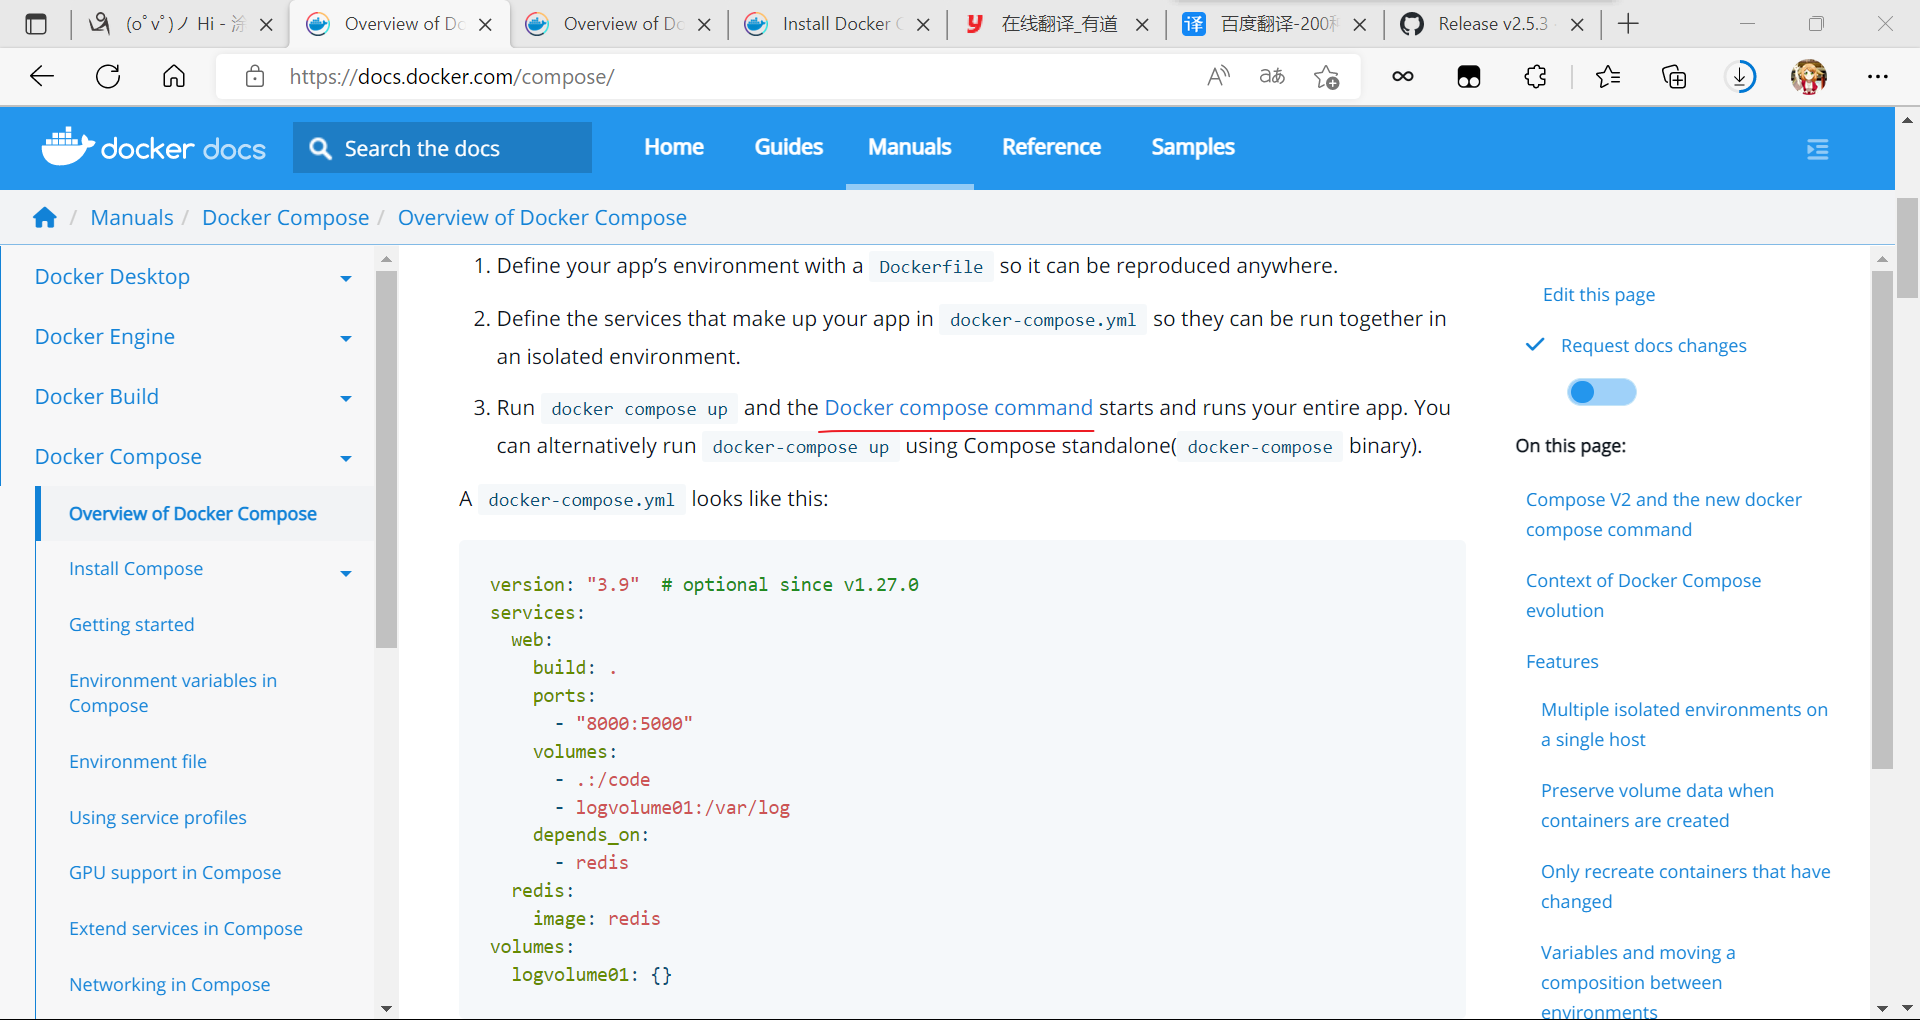
进入 Docker compose官方文档(https://docs.docker.com/compose/)进行部署操作
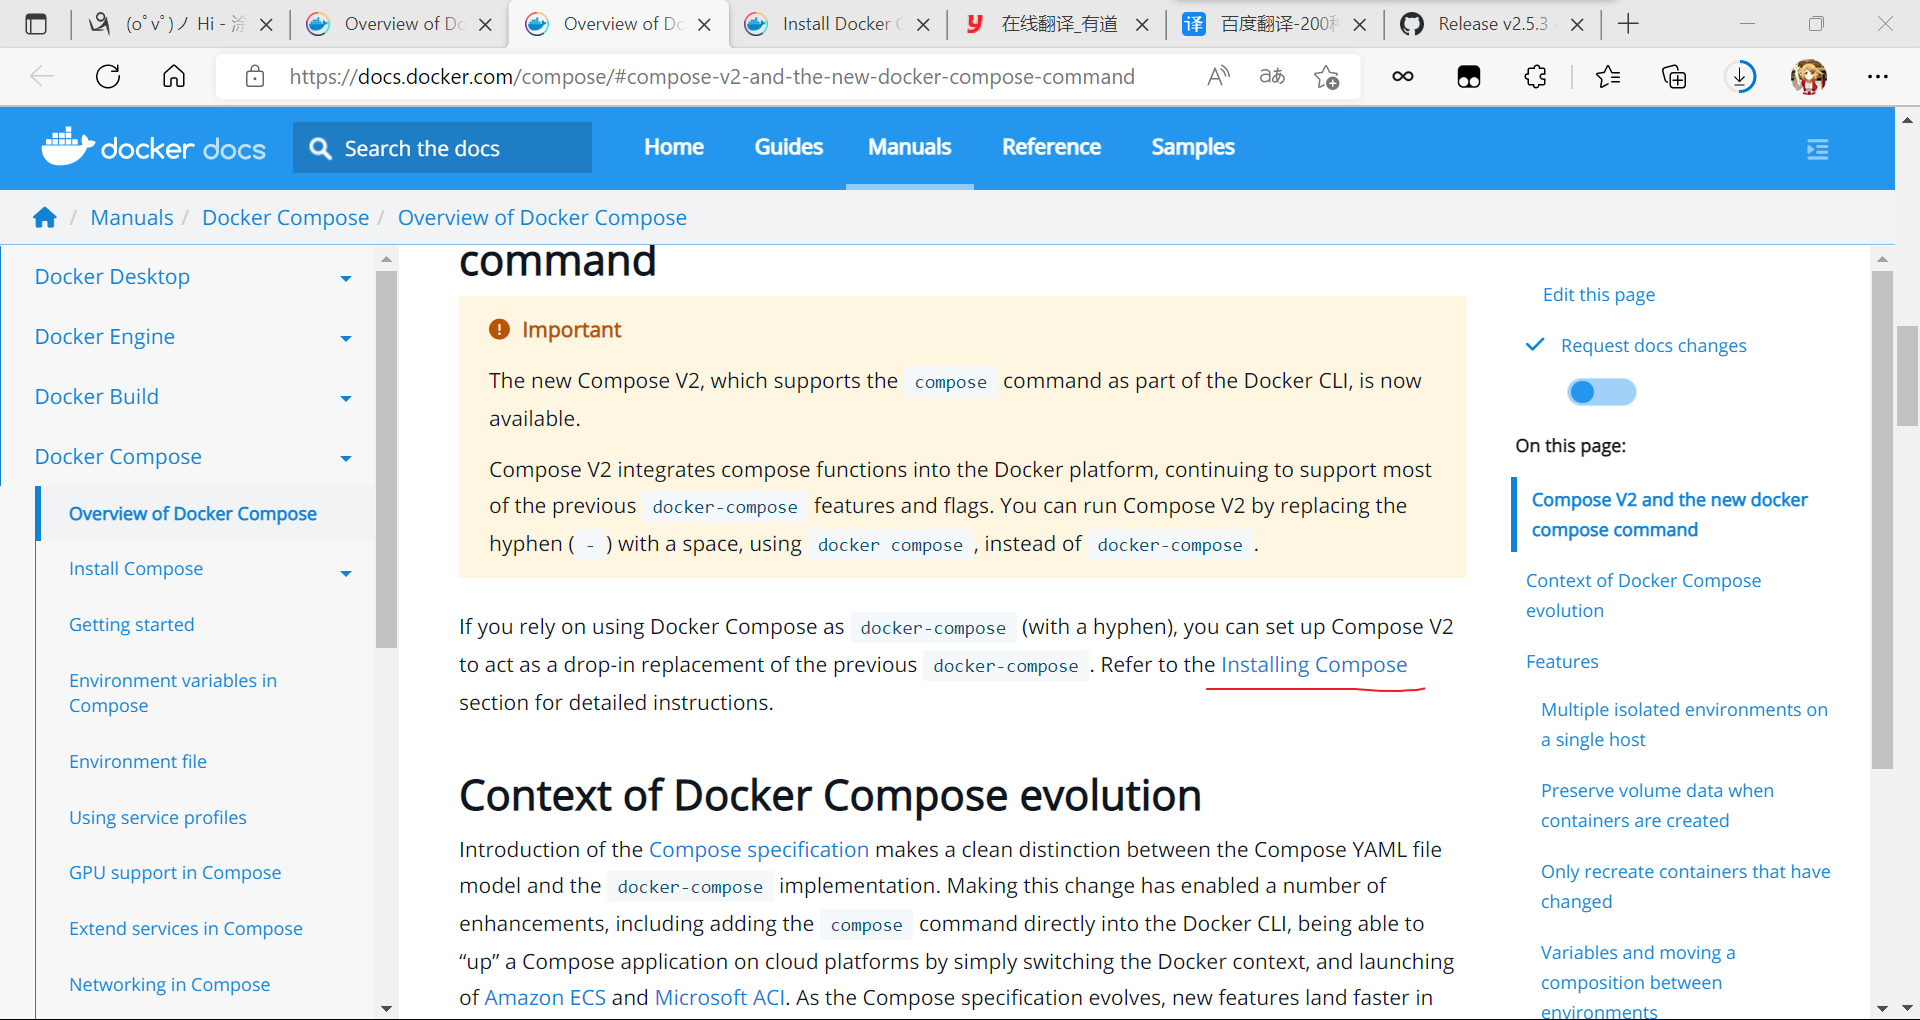
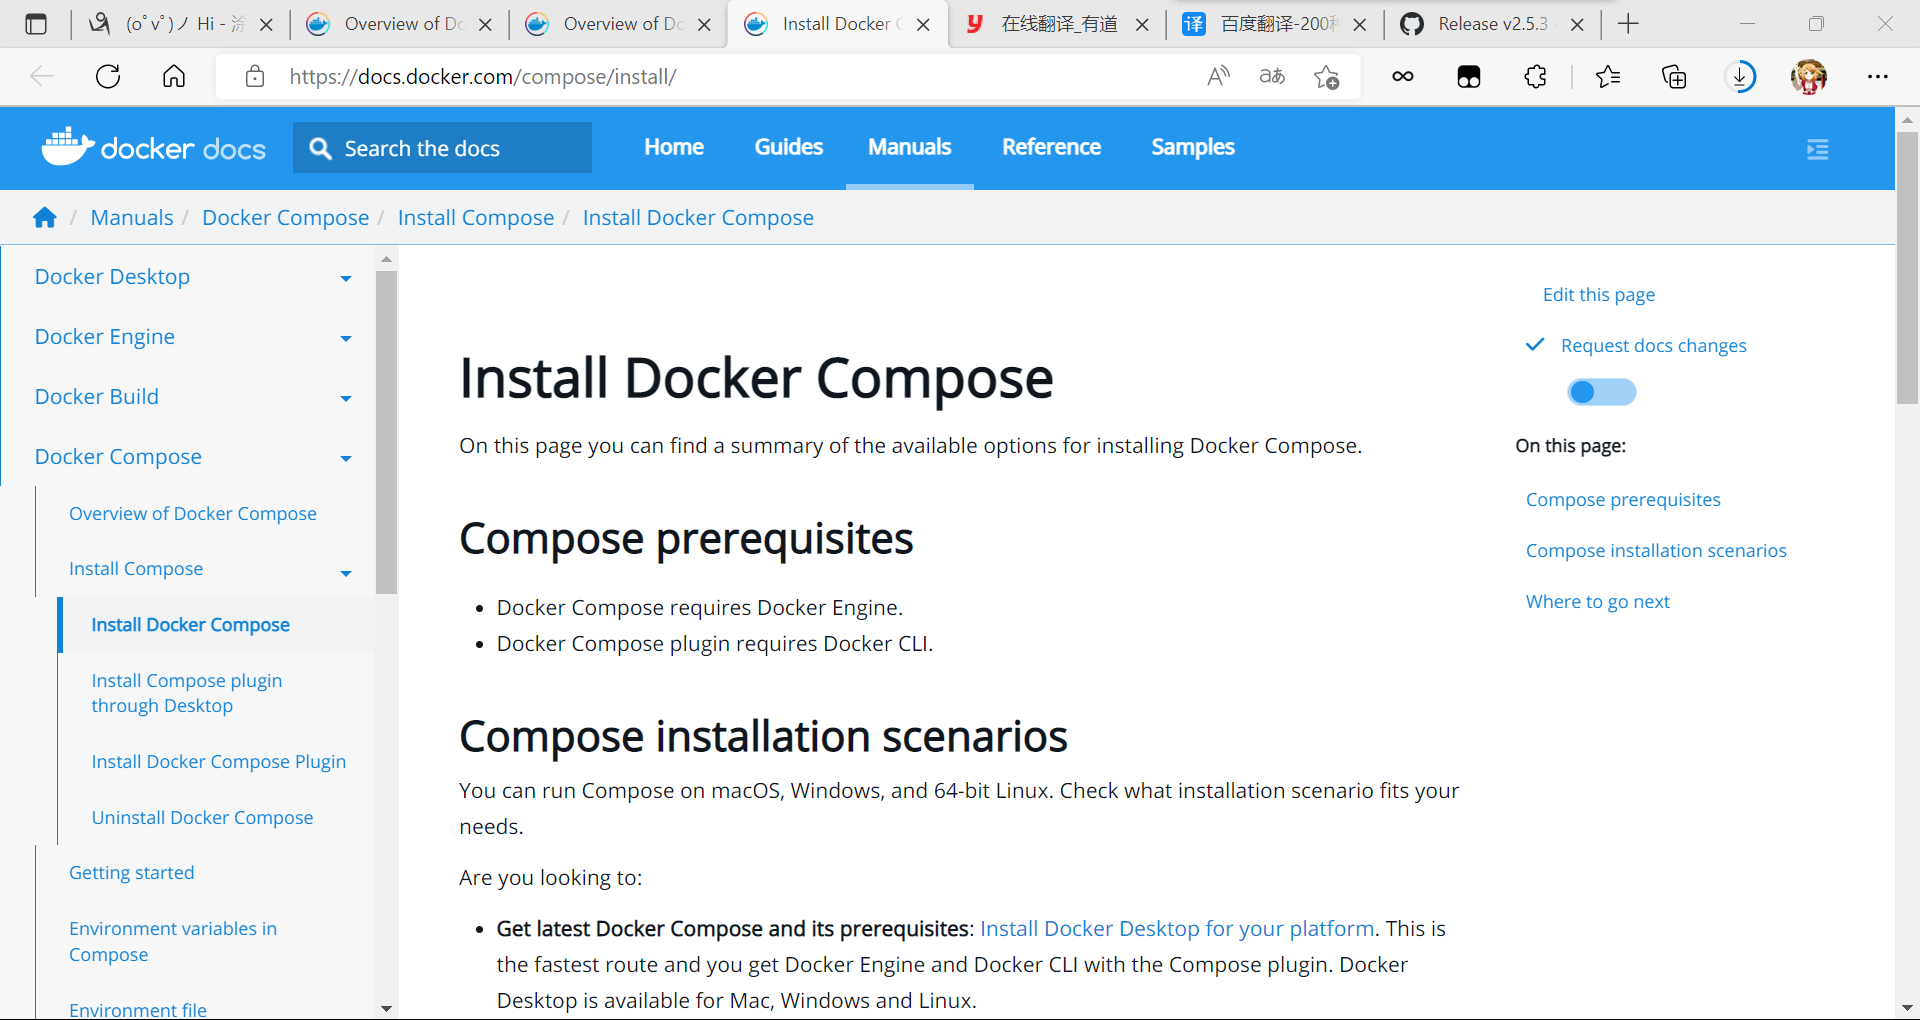
分别开启两台机子,一台为客户端,一台为镜像仓库端
client为客户端,harbor为镜像仓库端
需要保证两台机子都要有docker
客户端:
[root@localhost ~]# hostnamectl set-hostname client
[root@localhost ~]# bash
[root@client ~]# which docker
/usr/bin/docker
[root@client yum.repos.d]# ls
CentOS-Base.repo  docker-ce.repo
[root@client yum.repos.d]#  scp docker-ce.repo 192.168.222.251:/etc/yum.repos.d/
The authenticity of host '192.168.222.251 (192.168.222.251)' can't be established.
ECDSA key fingerprint is SHA256:y11UDaNXs3AnvVUnZQfAim2VHAplF09YOvQp2NemHyk.
Are you sure you want to continue connecting (yes/no/[fingerprint])? y
Please type 'yes', 'no' or the fingerprint: yes
Warning: Permanently added '192.168.222.251' (ECDSA) to the list of known hosts.
root@192.168.222.251's password:
docker-ce.repo                                             100% 2261     1.0MB/s   00:00
//将客户端的docker传给镜像仓库端
镜像仓库端:
[root@localhost2 ~]# hostnamectl set-hostname harbor
[root@localhost2 ~]# bash
[root@harbor ~]# cd /etc/yum.repos.d/
[root@harbor yum.repos.d]# ls
CentOS-Base.repo  docker-ce.repo  mysql-community-source.repo  mysql-community.repo
//查看是否有docker镜像仓库
[root@harbor yum.repos.d]# dnf -y install docker-ce
//进行安装
在刚刚那个页面的基础上往下翻
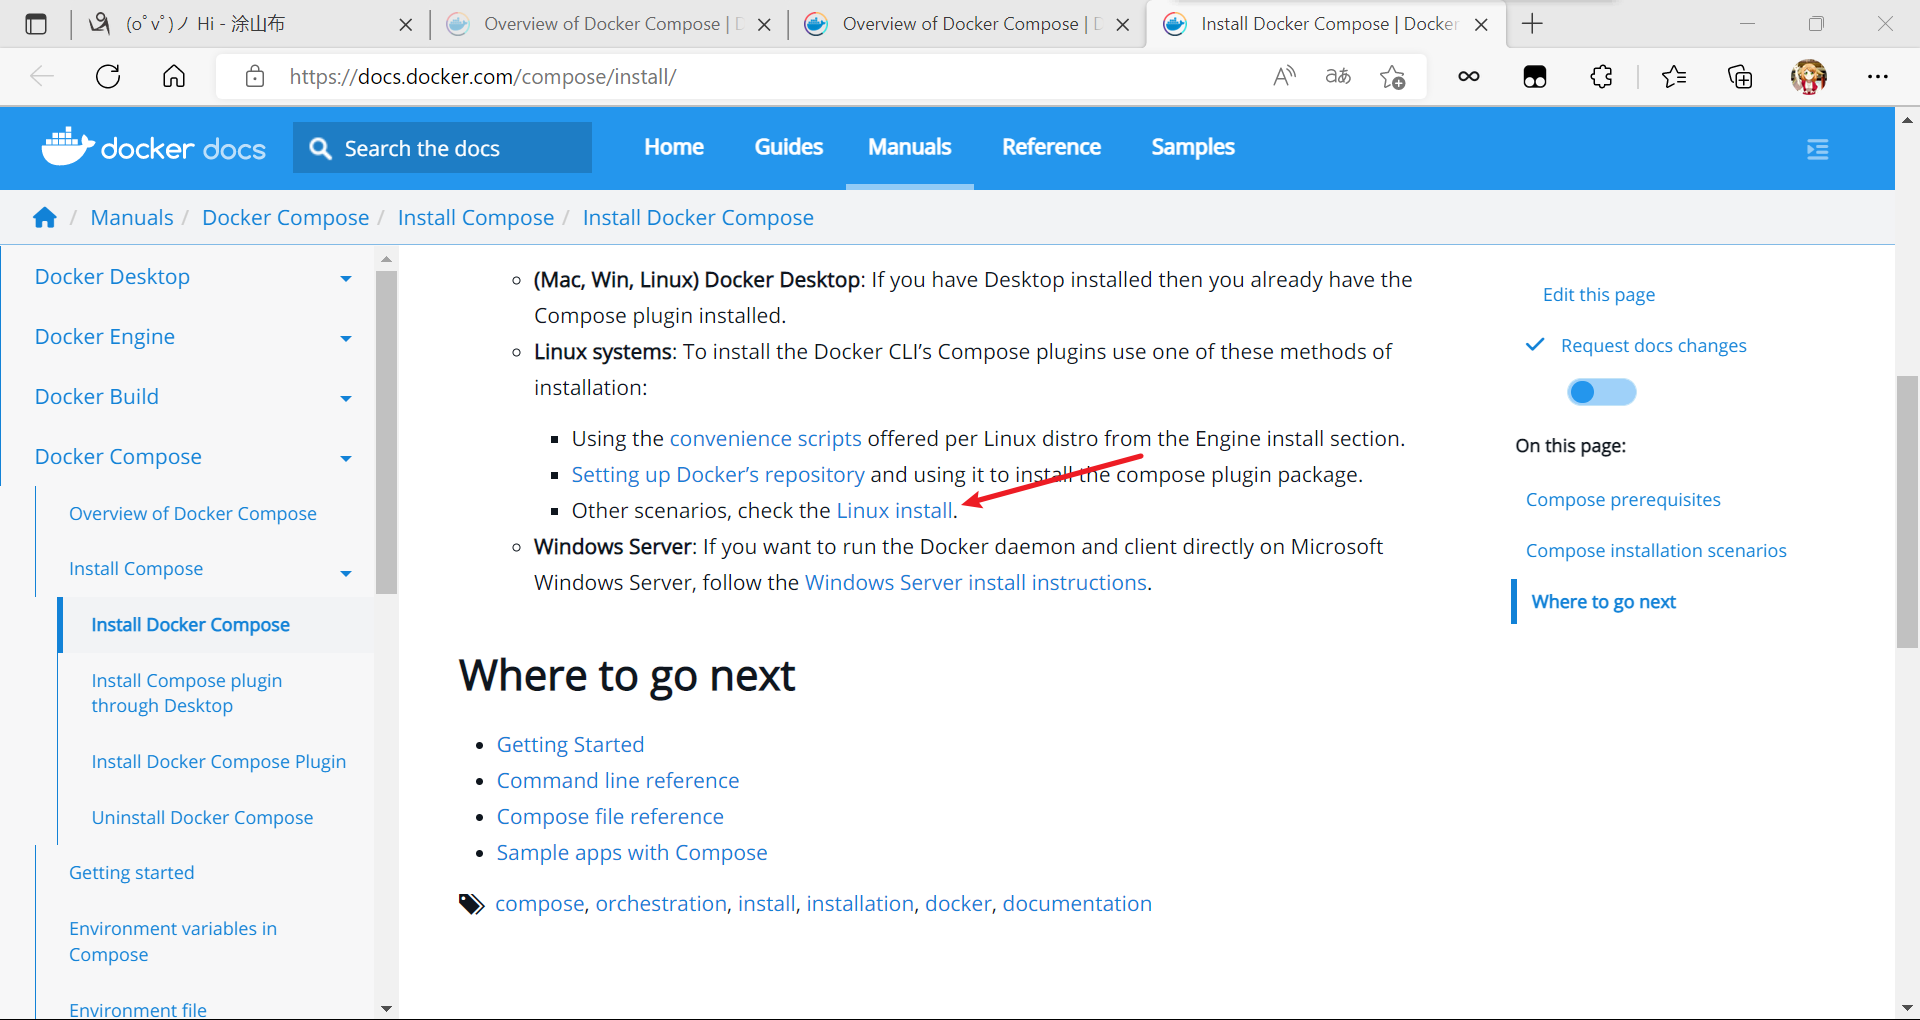
往下翻,进行手动安装
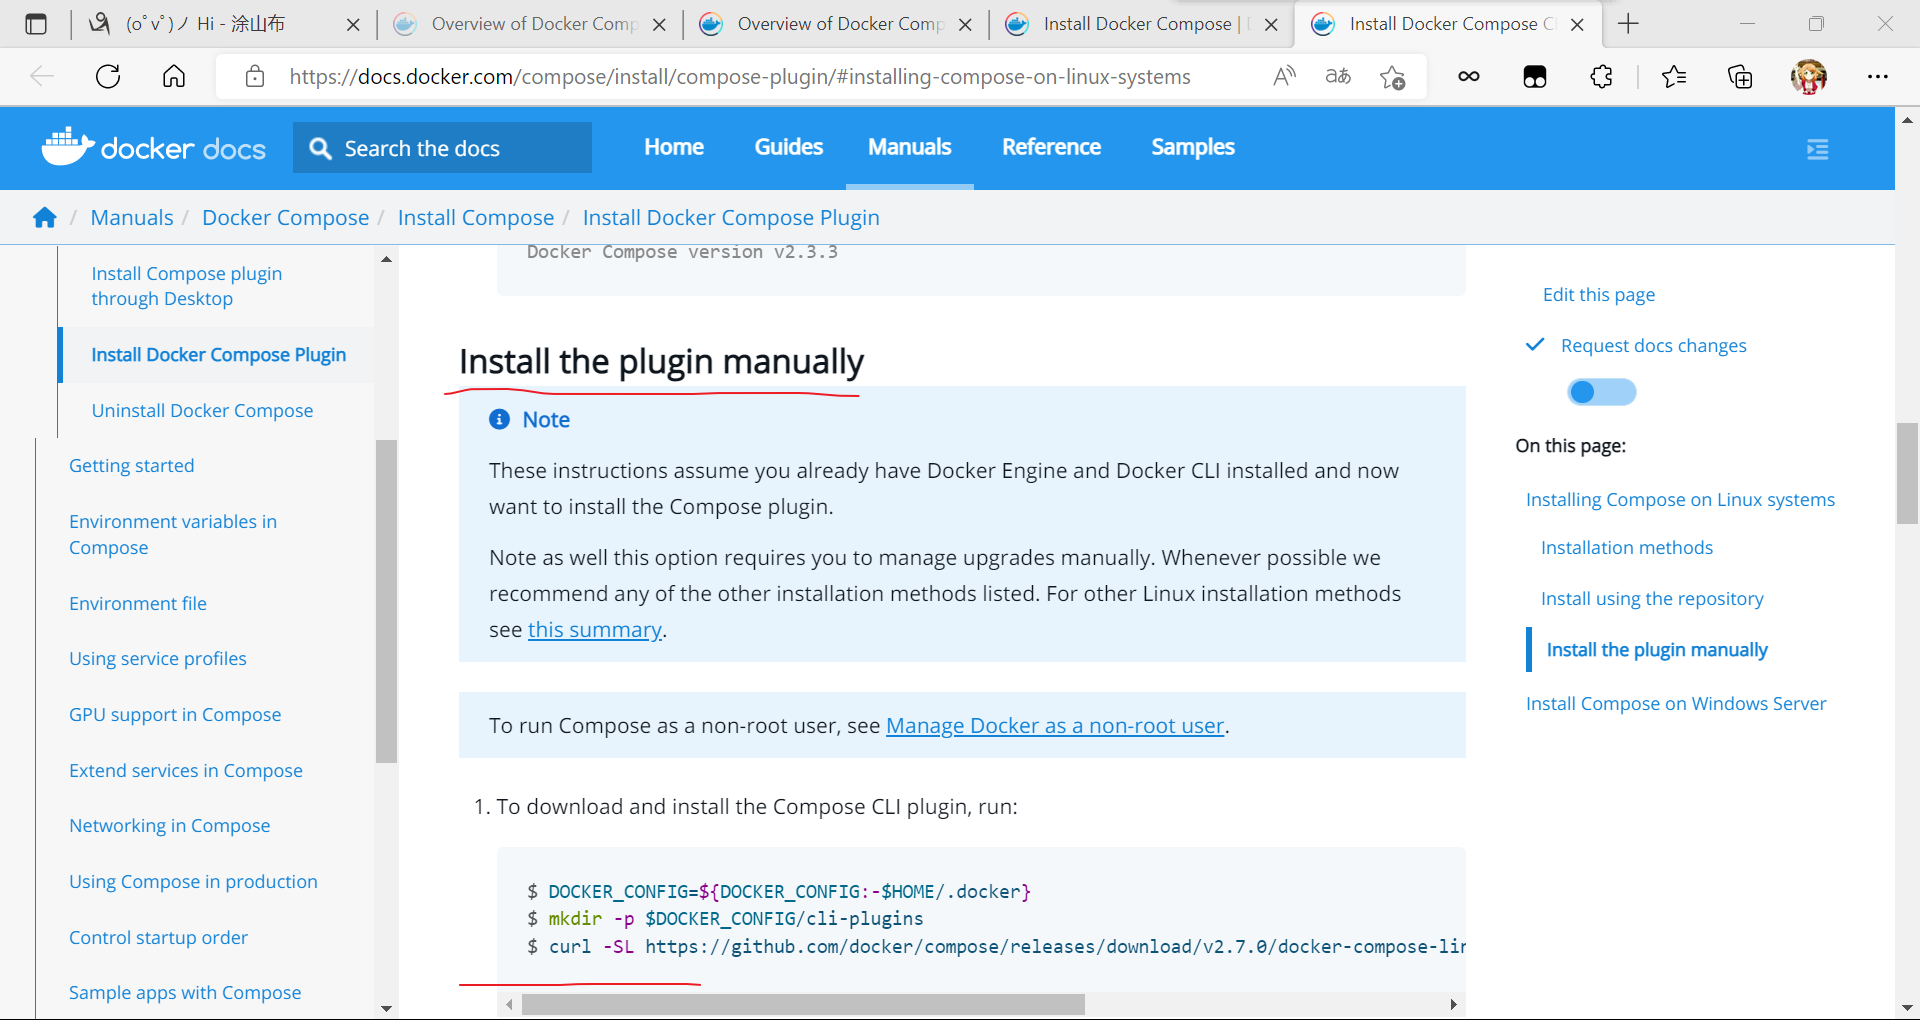
[root@harbor ~]# DOCKER_CONFIG=${DOCKER_CONFIG:-$HOME/.docker}
[root@harbor ~]# mkdir -p $DOCKER_CONFIG/cli-plugins //创建.docker
[root@harbor ~]# ls -a
.              .bash_profile  .docker         .wget-hsts
..             .bashrc        .mysql_history  anaconda-ks.cfg
.bash_history  .config        .tcshrc         mysql57-community-release-el7-11.noarch.rpm
.bash_logout   .cshrc         .viminfo
[root@harbor ~]# ls .docker/
cli-plugins
[root@harbor cli-plugins]# ls  //将提前下载好的包拉取进来
docker-compose
[root@harbor cli-plugins]# chmod +x docker-compose //赋予执行权限
[root@harbor cli-plugins]# ll
total 25188
-rwxr-xr-x 1 root root 25792512 Aug 11 22:07 docker-compose
[root@harbor cli-plugins]# ./docker-compose --help  //此下面的命令都可以使用

Usage:  docker compose [OPTIONS] COMMAND

Docker Compose

Options:
      --ansi string                Control when to print ANSI control characters
                                   ("never"|"always"|"auto") (default "auto")
      --compatibility              Run compose in backward compatibility mode
      --env-file string            Specify an alternate environment file.
  -f, --file stringArray           Compose configuration files
      --profile stringArray        Specify a profile to enable
      --project-directory string   Specify an alternate working directory
                                   (default: the path of the, first specified, Compose
                                   file)
  -p, --project-name string        Project name

Commands:
  build       Build or rebuild services
  convert     Converts the compose file to platform's canonical format
  cp          Copy files/folders between a service container and the local filesystem
  create      Creates containers for a service.
  down        Stop and remove containers, networks
  events      Receive real time events from containers.
  exec        Execute a command in a running container.
  images      List images used by the created containers
  kill        Force stop service containers.
  logs        View output from containers
  ls          List running compose projects
  pause       Pause services
  port        Print the public port for a port binding.
  ps          List containers
  pull        Pull service images
  push        Push service images
  restart     Restart containers
  rm          Removes stopped service containers
  run         Run a one-off command on a service.
  start       Start services
  stop        Stop services
  top         Display the running processes
  unpause     Unpause services
  up          Create and start containers
  version     Show the Docker Compose version information

Run 'docker compose COMMAND --help' for more information on a command.
[root@harbor cli-plugins]# pwd
/root/.docker/cli-plugins
//目前是当前用户可以使用这个命令
[root@harbor cli-plugins]# ln -sv /root/.docker/cli-plugins/docker-compose /usr/bin/
'/usr/bin/docker-compose' -> '/root/.docker/cli-plugins/docker-compose'
//做个软链接使其在系统的其他地方也可以使用
[root@harbor cli-plugins]# cd
[root@harbor ~]# which docker-compose
/usr/bin/docker-compose
[root@harbor ~]# docker compose version
Docker Compose version v2.7.0
//查看版本
[root@harbor ~]# cd /usr/src/
[root@harbor src]# ls
debug  harbor-offline-installer-v2.5.3.tgz  kernels
//将之前下载好的包拉进这里面
[root@harbor src]# tar xf harbor-offline-installer-v2.5.3.tgz -C /usr/local/
[root@harbor src]# ls /usr/local/
bin  etc  games  harbor  include  lib  lib64  libexec  sbin  share  src
[root@harbor src]# cd /usr/local/harbor/
[root@harbor harbor]# ls
LICENSE  common.sh  harbor.v2.5.3.tar.gz  harbor.yml.tmpl  install.sh  prepare
[root@harbor harbor]# cp harbor.yml.tmpl harbor.yml
[root@harbor harbor]# vim harbor.yml
[root@harbor harbor]# hostnamectl set-hostname harbor.example.com
[root@harbor harbor]# bash
//可以提前修改一下主机名
hostname: harbor.example.com  //修改为主机名
#https:    //注释掉证书相关的
  # https port for harbor, default is 443
  # port: 443
  # The path of cert and key files for nginx
  #certificate: /your/certificate/path
  #private_key: /your/private/key/path
harbor_admin_password: Harbor12345  //此为网页访问时的登录密码
database:
  # The password for the root user of Harbor DB. Change this before any production use.
  password: root123  //数据库的密码
  data_volume: /data //数据存放的目录
   # insecure The flag to skip verifying registry certificate
  insecure: false  //不安全的功能关闭了(验证证书的)
 # are all valid.
    rotate_size: 200M   //日志滚动(每天会自动保存一定数量的日志会重命名为一个不同名字的文件)
    # The directory on your host that store log
    location: /var/log/harbor  //日志存放
[root@harbor harbor]# ls
LICENSE  common.sh  harbor.v2.5.3.tar.gz  harbor.yml  harbor.yml.tmpl  install.sh  prepare
[root@harbor harbor]# ./install.sh
//执行这个脚本
....
[Step 5]: starting Harbor ...
[+] Running 10/10
 ⠿ Network harbor_harbor        Created                                                 0.1s
 ⠿ Container harbor-log         Started                                                 0.8s
 ⠿ Container redis              Started                                                 1.9s
 ⠿ Container registryctl        Started                                                 1.9s
 ⠿ Container registry           Started                                                 2.1s
 ⠿ Container harbor-portal      Started                                                 2.1s
 ⠿ Container harbor-db          Started                                                 2.0s
 ⠿ Container harbor-core        Started                                                 2.8s
 ⠿ Container harbor-jobservice  Started                                                 3.7s
 ⠿ Container nginx              Started                                                 3.8s
✔ ----Harbor has been installed and started successfully.----
[root@harbor harbor]# ss -antl
State     Recv-Q    Send-Q        Local Address:Port         Peer Address:Port    Process
LISTEN    0         128                 0.0.0.0:22                0.0.0.0:*
LISTEN    0         128               127.0.0.1:1514              0.0.0.0:*
LISTEN    0         128                    [::]:22                   [::]:*
LISTEN    0         128                    [::]:80                   [::]:*
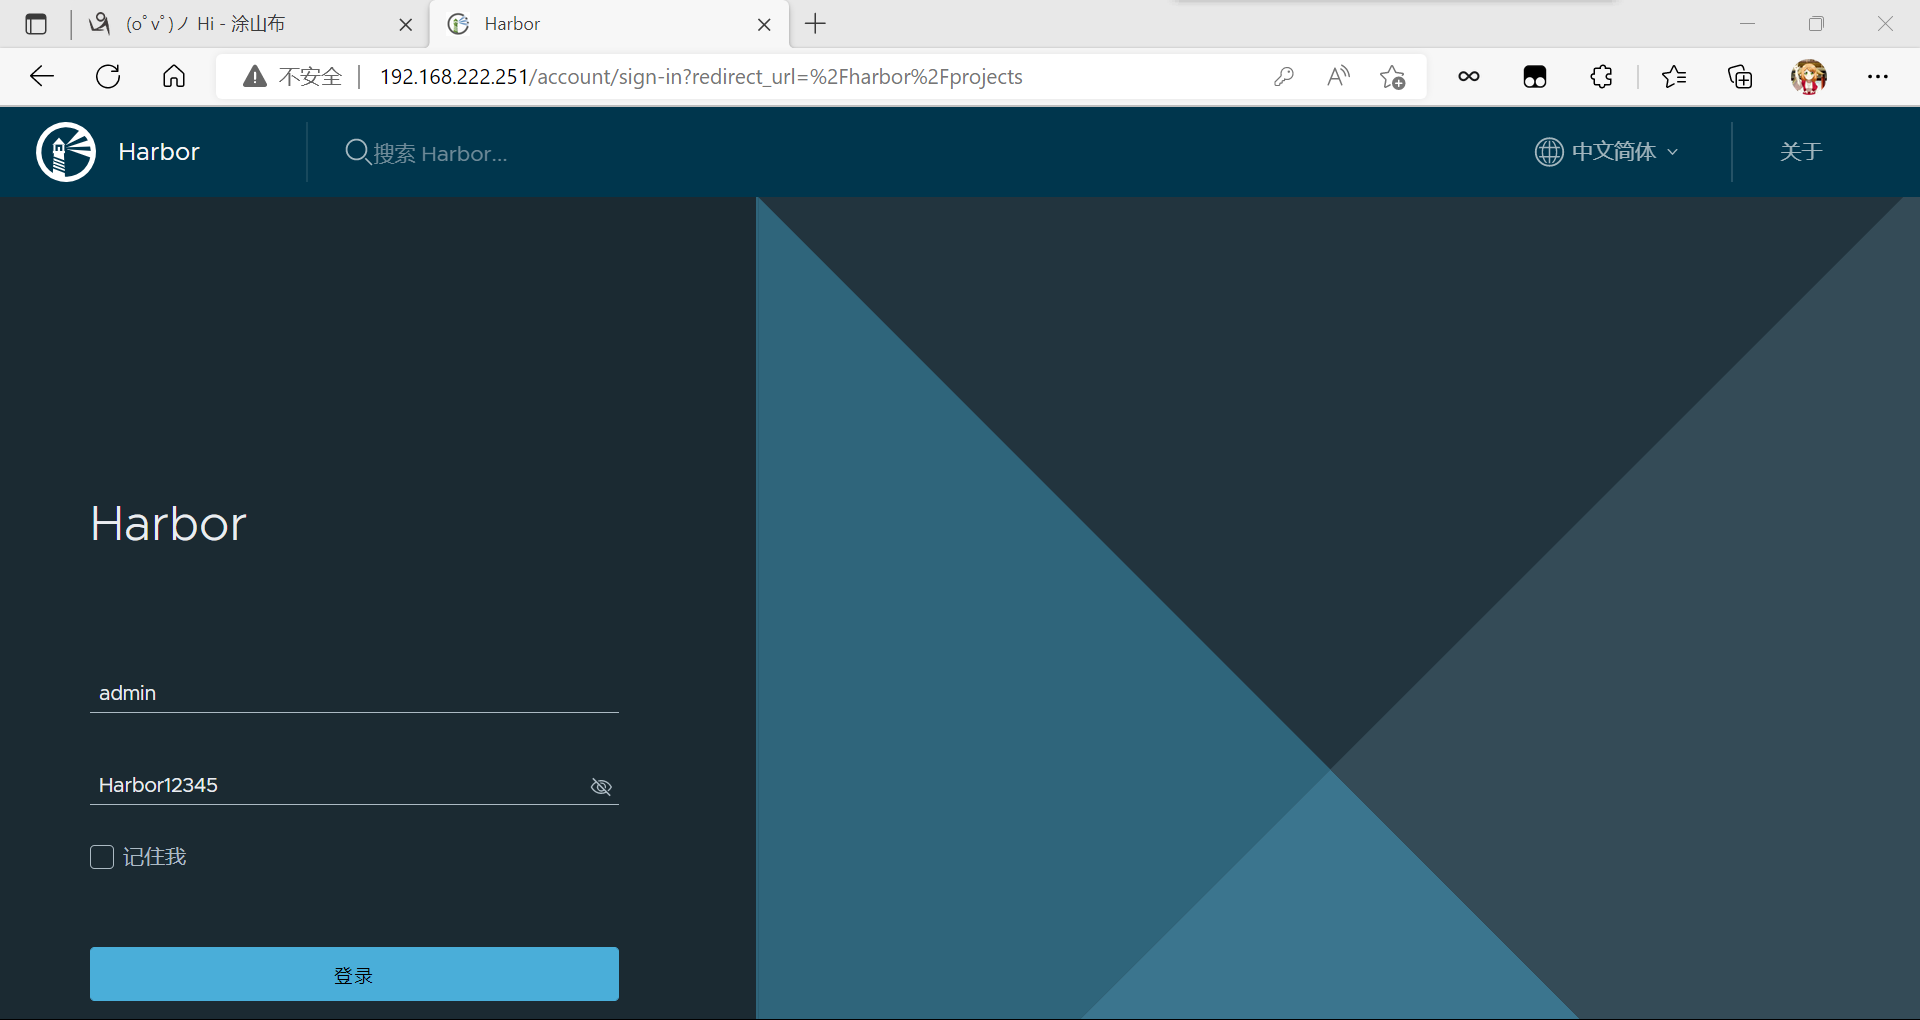
使用IP登录管理Harbor:
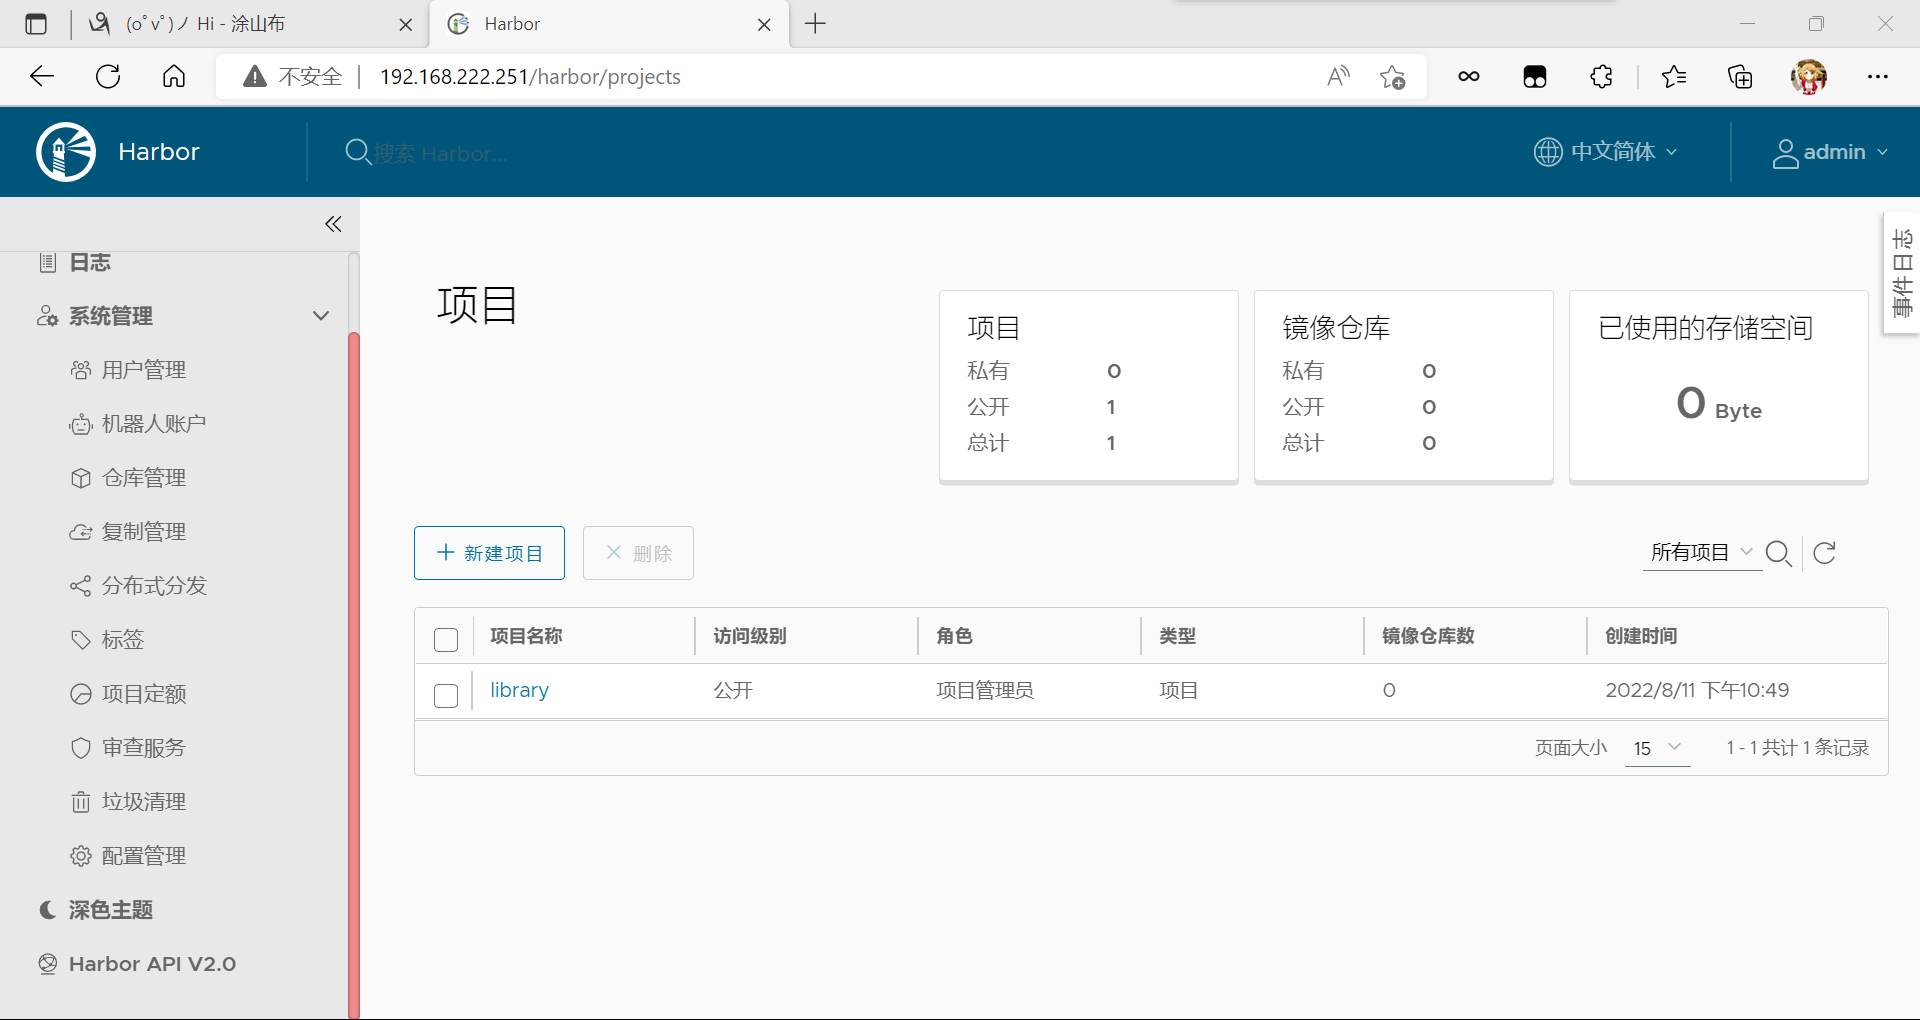
登录成功后界面:
使用Harbor的注意事项:
[root@harbor ~]# docker ps
CONTAINER ID   IMAGE                                COMMAND                  CREATED          STATUS                    PORTS                                   NAMES
27d358705acf   goharbor/harbor-jobservice:v2.5.3    "/harbor/entrypoint.…"   10 minutes ago   Up 10 minutes (healthy)                                           harbor-jobservice
917a7155677e   goharbor/nginx-photon:v2.5.3         "nginx -g 'daemon of…"   10 minutes ago   Up 10 minutes (healthy)   0.0.0.0:80->8080/tcp, :::80->8080/tcp   nginx
6230fed03071   goharbor/harbor-core:v2.5.3          "/harbor/entrypoint.…"   10 minutes ago   Up 10 minutes (healthy)                                           harbor-core
290772e4a195   goharbor/harbor-registryctl:v2.5.3   "/home/harbor/start.…"   10 minutes ago   Up 10 minutes (healthy)                                           registryctl
a78c22de9b73   goharbor/redis-photon:v2.5.3         "redis-server /etc/r…"   10 minutes ago   Up 10 minutes (healthy)                                           redis
ef4560266151   goharbor/registry-photon:v2.5.3      "/home/harbor/entryp…"   10 minutes ago   Up 10 minutes (healthy)                                           registry
282d2180241e   goharbor/harbor-db:v2.5.3            "/docker-entrypoint.…"   10 minutes ago   Up 10 minutes (healthy)                                           harbor-db
383c26c94150   goharbor/harbor-portal:v2.5.3        "nginx -g 'daemon of…"   10 minutes ago   Up 10 minutes (healthy)                                           harbor-portal
7fcbe6d544c9   goharbor/harbor-log:v2.5.3           "/bin/sh -c /usr/loc…"   11 minutes ago   Up 10 minutes (healthy)   127.0.0.1:1514->10514/tcp               harbor-log
[root@harbor ~]# cd /usr/local/harbor/
[root@harbor harbor]# ls
LICENSE  common.sh           harbor.v2.5.3.tar.gz  harbor.yml.tmpl  prepare
common   docker-compose.yml  harbor.yml            install.sh
[root@harbor harbor]# docker-compose stop
[+] Running 9/9
 ⠿ Container harbor-jobservice  Stopped                                                 0.3s
 ⠿ Container nginx              Stopped                                                 0.4s
 ⠿ Container registryctl        Stopped                                                10.2s
 ⠿ Container harbor-portal      Stopped                                                 0.2s
 ⠿ Container harbor-core        Stopped                                                 0.3s
 ⠿ Container harbor-db          Stopped                                                 0.3s
 ⠿ Container redis              Stopped                                                 0.3s
 ⠿ Container registry           Stopped                                                 0.3s
 ⠿ Container harbor-log         Stopped                                                10.2s
[root@harbor harbor]# docker-compose start
[+] Running 9/9
 ⠿ Container harbor-log         Started                                                 0.7s
 ⠿ Container harbor-db          Started                                                 1.3s
 ⠿ Container redis              Started                                                 1.0s
 ⠿ Container registry           Started                                                 0.9s
 ⠿ Container registryctl        Started                                                 1.2s
 ⠿ Container harbor-portal      Started                                                 1.0s
 ⠿ Container harbor-core        Started                                                 0.6s
 ⠿ Container nginx              Started                                                 1.1s
 ⠿ Container harbor-jobservice  Started                                                 0.9s
[root@harbor ~]# vim harbor.sh   //设置脚本使其开机自启
[root@harbor ~]# cat harbor.sh
#!/bin/bash

/usr/local/harbor && docker-compose start
[root@harbor ~]# chmod +x harbor.sh  //给脚本赋予执行权限
[root@harbor ~]# ll
total 8
-rw-------. 1 root root 1081 Jul 19 16:17 anaconda-ks.cfg
-rwxr-xr-x  1 root root   55 Aug 12 12:15 harbor.sh
[root@harbor ~]# reboot  //重启虚拟机
[root@harbor ~]# docker ps   //查看状态
CONTAINER ID   IMAGE                                COMMAND                  CREATED        STATUS                             PORTS                                   NAMES
27d358705acf   goharbor/harbor-jobservice:v2.5.3    "/harbor/entrypoint.…"   14 hours ago   Up 11 seconds (health: starting)                                           harbor-jobservice
917a7155677e   goharbor/nginx-photon:v2.5.3         "nginx -g 'daemon of…"   14 hours ago   Up 11 seconds (health: starting)   0.0.0.0:80->8080/tcp, :::80->8080/tcp   nginx
6230fed03071   goharbor/harbor-core:v2.5.3          "/harbor/entrypoint.…"   14 hours ago   Up 11 seconds (health: starting)                                           harbor-core
290772e4a195   goharbor/harbor-registryctl:v2.5.3   "/home/harbor/start.…"   14 hours ago   Up 11 seconds (health: starting)                                           registryctl
a78c22de9b73   goharbor/redis-photon:v2.5.3         "redis-server /etc/r…"   14 hours ago   Up 11 seconds (health: starting)                                           redis
ef4560266151   goharbor/registry-photon:v2.5.3      "/home/harbor/entryp…"   14 hours ago   Up 11 seconds (health: starting)                                           registry
282d2180241e   goharbor/harbor-db:v2.5.3            "/docker-entrypoint.…"   14 hours ago   Up 12 seconds (health: starting)                                           harbor-db
383c26c94150   goharbor/harbor-portal:v2.5.3        "nginx -g 'daemon of…"   14 hours ago   Up 11 seconds (health: starting)                                           harbor-portal
7fcbe6d544c9   goharbor/harbor-log:v2.5.3           "/bin/sh -c /usr/loc…"   14 hours ago   Up 12 seconds (health: starting)   127.0.0.1:1514->10514/tcp               harbor-log
//成功实现开机自启
给自己搭建的私有仓库上传镜像
[root@harbor ~]# hostname
harbor.example.com
//在镜像仓库端查看主机名
[root@client ~]# vim /etc/hosts
//在客户端这边添加一个镜像仓库端的映射
192.168.222.251 harbor.example.com
[root@client ~]# ping harbor.example.com
PING harbor.example.com (192.168.222.251) 56(84) bytes of data.
64 bytes from harbor.example.com (192.168.222.251): icmp_seq=1 ttl=64 time=0.994 ms
64 bytes from harbor.example.com (192.168.222.251): icmp_seq=2 ttl=64 time=3.12 ms
64 bytes from harbor.example.com (192.168.222.251): icmp_seq=3 ttl=64 time=1.75 ms
^C
--- harbor.example.com ping statistics ---
3 packets transmitted, 3 received, 0% packet loss, time 2004ms
rtt min/avg/max/mdev = 0.994/1.955/3.119/0.879 ms
//实现客户端与镜像仓库端想通
[root@client ~]# vim /etc/docker/daemon.json
 "insecure-registries":["harbor.example.com"]
//因为没有证书所以我们在客户端无法直接登录要在客户端进行设置一下
[root@client ~]# systemctl restart docker //重启docker
[root@client ~]# docker pull  lvnanhai66/httpd:2.0
2.0: Pulling from lvnanhai66/httpd
a1d0c7532777: Pull complete
3189de0706ae: Pull complete
4db75e208cea: Pull complete
Digest: sha256:f8e25d4e1d8688526dfdff8919da43c667f708159ebcd3e7d6b5c9993f280ef6
Status: Downloaded newer image for lvnanhai66/httpd:2.0
docker.io/lvnanhai66/httpd:2.0
[root@client ~]# docker images
REPOSITORY         TAG       IMAGE ID       CREATED      SIZE
lvnanhai66/httpd   2.0       523de2557ebe   2 days ago   768MB
//此处我是拉取了自己制作的镜像,这里也可以拉取其他镜像
[root@client ~]# docker login harbor.example.com
Username: admin
Password:
WARNING! Your password will be stored unencrypted in /root/.docker/config.json.
Configure a credential helper to remove this warning. See
https://docs.docker.com/engine/reference/commandline/login/#credentials-store

Login Succeeded
//进行登录仓库,要指定仓库的名称
[root@client ~]# docker tag lvnanhai66/httpd:2.0 harbor.example.com/library/httpd:3.0
//把自己刚刚拉取的镜像进行封装一下
[root@client ~]# docker images
REPOSITORY                         TAG       IMAGE ID       CREATED      SIZE
lvnanhai66/httpd                   2.0       523de2557ebe   2 days ago   768MB
harbor.example.com/library/httpd   3.0       523de2557ebe   2 days ago   768MB
//列出一下镜像
[root@client ~]# docker push harbor.example.com/library/httpd:3.0
The push refers to repository [harbor.example.com/library/httpd]
b873763b4ca4: Pushed
0fabae23f82c: Pushed
74ddd0ec08fa: Pushed
3.0: digest: sha256:f8e25d4e1d8688526dfdff8919da43c667f708159ebcd3e7d6b5c9993f280ef6 size: 950
//把镜像进行上传
查看上传的镜像:
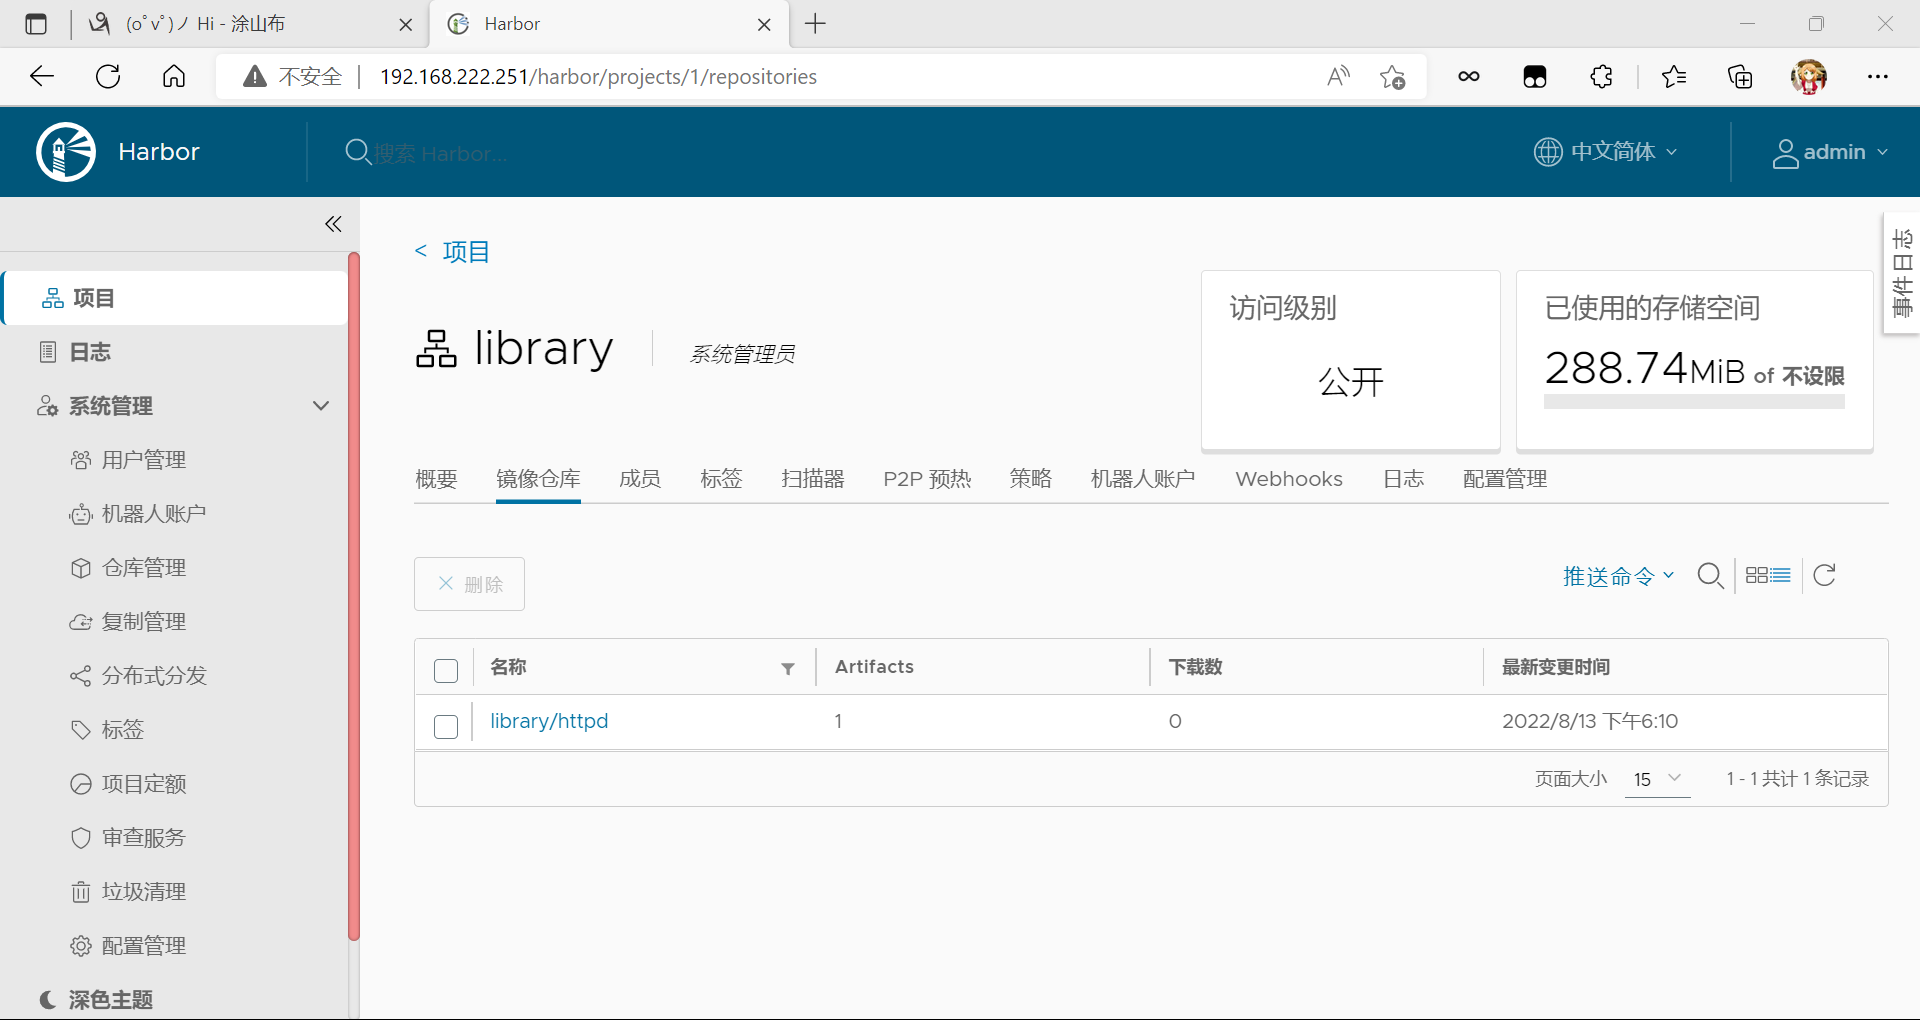
可以看见刚刚上传的镜像
我是Google云的新手,我正在尝试对其进行首次部署。我的第一个部署是RubyonRails项目。我基本上是在关注thisguideinthegoogleclouddocumentation.唯一的区别是我使用的是我自己的项目,而不是他们提供的“helloworld”项目。这是我的app.yaml文件runtime:customvm:trueentrypoint:bundleexecrackup-p8080-Eproductionconfig.ruresources:cpu:0.5memory_gb:1.3disk_size_gb:10当我转到我的项目目录并运行gcloudprevie
我可以在Azure网站上部署RubyonRails吗? 最佳答案 还没有。目前仅支持.NET和PHP。 关于ruby-on-rails-RubyonRails可以部署在Azure网站上吗?,我们在StackOverflow上找到一个类似的问题: https://stackoverflow.com/questions/12964010/
前置步骤我们都操作完了,这篇开始介绍jenkins的集成。话不多说,看操作1、登录进入jenkins后会让你选择安装插件,选择第一个默认的就行。安装完成后设置账号密码,重新登录。2、配置JDK和Git都需要执行路径,所以需要先把执行路径找到,先进入服务器的docker容器,2.1JDK的路径root@69eef9ee86cf:/usr/bin#echo$JAVA_HOME/usr/local/openjdk-82.2Git的路径root@69eef9ee86cf:/#whichgit/usr/bin/git3、先配置JDK和Git。点击:ManageJenkins>>GlobalToolCon
深度学习部署:Windows安装pycocotools报错解决方法1.pycocotools库的简介2.pycocotools安装的坑3.解决办法更多Ai资讯:公主号AiCharm本系列是作者在跑一些深度学习实例时,遇到的各种各样的问题及解决办法,希望能够帮助到大家。ERROR:Commanderroredoutwithexitstatus1:'D:\Anaconda3\python.exe'-u-c'importsys,setuptools,tokenize;sys.argv[0]='"'"'C:\\Users\\46653\\AppData\\Local\\Temp\\pip-instal
Ocra无法处理需要“tk”的应用程序require'tk'puts'nope'用奥克拉http://github.com/larsch/ocra不起作用(如链接中的一个问题所述)问题:https://github.com/larsch/ocra/issues/29(Ocra是1.9的"new"rubyscript2exe,本质上它用于将rb脚本部署为可执行文件)唯一的问题似乎是缺少tcl的DLL文件我不认为这是一个问题据我所知,问题是缺少tk的DLL文件如果它们是已知的,则可以在执行ocra时将它们包括在内有没有办法知道tk工作所需的DLL依赖项? 最佳答
我有一个类unzipper.rb,它使用Rubyzip解压文件。在我的本地环境中,我可以成功解压缩文件,而无需使用require'zip'明确包含依赖项但是在Heroku上,我得到一个NameError(uninitializedconstantUnzipper::Zip)我只能通过使用明确的require来解决问题:为什么这在Heroku环境中是必需的,但在本地主机上却不是?我的印象是Rails自动需要所有gem。app/services/unzipper.rbrequire'zip'#OnlyrequiredforHeroku.Workslocallywithout!class
出于某种原因,heroku尝试要求dm-sqlite-adapter,即使它应该在这里使用Postgres。请注意,这发生在我打开任何URL时-而不是在gitpush本身期间。我构建了一个默认的Facebook应用程序。gem文件:source:gemcuttergem"foreman"gem"sinatra"gem"mogli"gem"json"gem"httparty"gem"thin"gem"data_mapper"gem"heroku"group:productiondogem"pg"gem"dm-postgres-adapter"endgroup:development,:t
如何使用Capistrano将Rails应用程序部署到无法访问外部网络或存储库的生产或暂存服务器?我已经设法完成部署的一半,并意识到Capistrano没有在我的本地机器上下载gitrepo,但它首先连接到远程服务器并尝试在那里下载Git存储库。我希望有一个类似Javaee的构建系统,其中创建可交付成果并将该可交付成果发送到服务器。就像您构建.ear文件并将其部署到您想要的任何服务器上一样。显然在RoR中,你被迫(据我所知)在该服务器上构建应用程序,在那里创建一个gem存储库,在那里克隆最新的分支等等。有什么方法可以将准备运行的包发送到远程服务器吗? 最佳答
目录:一、简介二、HQL的执行流程三、索引四、索引案例五、Hive常用DDL操作六、Hive常用DML操作七、查询结果插入到表八、更新和删除操作九、查询结果写出到文件系统十、HiveCLI和Beeline命令行的基本使用十一、Hive配置一、简介Hive是一个构建在Hadoop之上的数据仓库,它可以将结构化的数据文件映射成表,并提供类SQL查询功能,用于查询的SQL语句会被转化为MapReduce作业,然后提交到Hadoop上运行。特点:简单、容易上手(提供了类似sql的查询语言hql),使得精通sql但是不了解Java编程的人也能很好地进行大数据分析;灵活性高,可以自定义用户函数(UDF)和
集成背景我们当前集群使用的是ClouderaCDP,Flink版本为ClouderaVersion1.14,整体Flink安装目录以及配置文件结构与社区版本有较大出入。直接根据Streampark官方文档进行部署,将无法配置FlinkHome,以及后续整体Flink任务提交到集群中,因此需要进行针对化适配集成,在满足使用需求上,尽量提供完整的Streampark使用体验。集成步骤版本匹配问题解决首先解决无法识别Cloudera中的FlinkHome问题,根据报错主要明确到的事情是无法读取到Flink版本、lib下面的jar包名称无法匹配。修改对象:修改源码:(解决无法匹配clouderajar
