完整的pom文件放在后面
1.springboot项目的总(父)依赖大全
<parent>
        <artifactId>spring-boot-dependencies</artifactId>
        <groupId>org.springframework.boot</groupId>
        <version>2.3.3.RELEASE</version>
</parent>
当我们使用 spring 或 spring-boot 开发项目时,需要引入很多依赖,包括 spring 本身的组件、各种 spring-boot-starter、以及其它第三方依赖(如:slf4j、redis)。依赖多了,版本的选择是个问题,就怕哪个版本选择的不对导致出现一些意想不到的 BUG。
spring-boot-dependencies的作用主要是起到约束版本的作用,在这个包里面声明了各种版本号,供子项目去引用。类似spring-cloud-dependencies和spring-cloud-alibaba-dependencies则是去声明cloud和cloud-alibaba组件的版本。具体有些什么可以点进去看看就知道了。如果当下面的< dependency >中用到就可以不用配置版本号< version >
2.可执行的 Web 应用且内含SpringBoot核心启动器,包含各种springboot的配置日志等,创建项目时会自动引入该依赖
支持注解:@controller、@Service、@Component、@Resource 是spring的,所以spring boot创建完成后就可以使用(由spring-boot-starter支持)
支持注解:@RestController、@RequestMapping、@ResponseBody、@JsonFormat(由spring-boot-starter-web支持)
		<!--Spring Boot Web-->
        <dependency>
            <groupId>org.springframework.boot</groupId>
            <artifactId>spring-boot-starter-web</artifactId>
        </dependency>
spring-boot-starter-web 是什么?
spring-boot-starter-web是一个依赖库,Spring Boot 是在 Spring 的基础上创建的一个开原框架,它提供了 spring-boot-starter-web (web场景启动器)来为web开发予以支持。spring-boot-starter-web 为什么提供了嵌入的Servlet容器以及SpringMVC提供了大量自动配置,可以适用于大多数web开发场景。
只要我们在Spring Boot 项目中的 pom.xml 中引入了spring-boot-starter-web依赖,即使不进行任何配置,也可以使用Spring MVC 进行 Web 开发。Spring Web的启动程序使用Spring MVC, REST和Tomcat作为默认的嵌入式服务器。单个spring-boot-starter-web依赖关系可传递地获取与Web开发相关的所有依赖关系。它还减少了构建依赖项计数。
配置了该依赖就不用再配置
<dependency>
    <groupId>org.springframework.boot</groupId>
    <artifactId>spring-boot-starter</artifactId>
</dependency>
因为spring-boot-starter-web包含了spring-boot-starter等,可以点进去看看
3.junit测试,创建项目时会自动引入该依赖
用于编写springboot Test测试类SpringBoot Test测试类的使用
<dependency>
    <groupId>org.springframework.boot</groupId>
    <artifactId>spring-boot-starter-test</artifactId>
    <scope>test</scope>
    <!--junit-vintage-engine提供了Junit3与Junit4的运行平台-->
    <!--这个是JUnit5中为了支持使用JUint4所做的一个过度
       也就是说,你只需要在你的JUnit4旧项目中添加这个依赖,
       就能完美过渡,而不用修改之前代码
       这里用不到,自然也就排除了。当然,这里,它无关紧要
			-->
    <exclusions>
        <exclusion>
            <groupId>org.junit.vintage</groupId>
            <artifactId>junit-vintage-engine</artifactId>
        </exclusion>
    </exclusions>
</dependency>
当使用exclusion进行排除则该项目不支持Junit3和Junit4,如果使用就会报错,如下:

因为SpringBoot推荐用junit5进行单元测试,SpringBoot给我默认提供测试类
//@SpringBootTest默认回去找启动类,默认可以不配置,当项目有多个启动类的时候才需要配置
@SpringBootTest
class SpringbootexceptionandjunitApplicationTests {

   @Test
   void contextLoads() {
   }

}
4.mysql数据配置
配置mysql依赖时,不写版本号xx.xx.xx的话,就会引入mysql依赖的默认版本
SpringBoot2.1.x以后默认使用的是mysql 8版本,
SpringBoot2.1.x之前默认使用的是mysql 5.x版本
在配置数据源的时候,就有差异了:
配置低版本 5.xx.xx:
spring.datasource.driver-class-name=com.mysql.jdbc.Driver
spring.datasource.url=jdbc:mysql://localhost:3306/student?useUnicode=true&characterEncoding=UTF-8&useSSL=false
spring.datasource.username=root
spring.datasource.password=123456
配置高版本 8.xx.xx:
spring.datasource.driver-class-name=com.mysql.cj.jdbc.Driver
spring.datasource.url=jdbc:mysql://localhost:3306/student?serverTimezone=GMT%2B8&useUnicode=true&characterEncoding=UTF-8&useSSL=false
spring.datasource.username=root
spring.datasource.password=123456
		<!--MySQL 连接组件-->
        <dependency>
            <groupId>mysql</groupId>
            <artifactId>mysql-connector-java</artifactId>
        </dependency>
5.mybatis
数据处理层持久层框架,连接数据库
着重点放在了编写sql上,而不是通过jdbc传统方式来不断操作Connection、Statment、ResultSet
注解@Mapper 指定映射接口
application.yaml配置文件中配置自动识别的xml:
mybatis:
mapper-locations: classpath:mapper/**/*.xml
type-aliases-package: run.leave.mapper
		<!--MyBaits-->
        <dependency>
            <groupId>org.mybatis.spring.boot</groupId>
            <artifactId>mybatis-spring-boot-starter</artifactId>
            <version>2.1.2</version>
        </dependency>
8.Druid连接池
druid和druid-spring-boot-starter 的区别与报错Cannot resolve configuration property ‘spring.datasource.xxx解决
		<!--Druid-->
        <dependency>
            <groupId>com.alibaba</groupId>
            <artifactId>druid</artifactId>
            <version>1.2.2</version>
        </dependency>

        <!--    Druid Spring Boot 组件-->
        <dependency>
            <groupId>com.alibaba</groupId>
            <artifactId>druid-spring-boot-starter</artifactId>
            <version>1.2.2</version>
        </dependency>
在yaml文件中配置使用:
spring:
  datasource:
    #   数据源基本配置
    url: jdbc:mysql://localhost:3306/hotel?useUnicode=true&characterEncoding=utf-8&serverTimezone=Asia/Shanghai
    username: root
    password: 123456
    driver-class-name: com.mysql.cj.jdbc.Driver
    type: com.alibaba.druid.pool.DruidDataSource
  #   数据源其他配置
    druid:
      #     配置初始化大小、最小、最大线程数
      initialSize: 5
      minIdle: 5
      #     CPU核数+1,也可以大些但不要超过20,数据库加锁时连接过多性能下降
      maxActive: 20
      #     最大等待时间,内网:800,外网:1200(三次握手1s)
      maxWait: 60000
      timeBetweenEvictionRunsMillis: 60000
      #     配置一个连接在池中最大空间时间,单位是毫秒
      minEvictableIdleTimeMillis: 300000
      validationQuery: SELECT 1
      testWhileIdle: true
      #     设置从连接池获取连接时是否检查连接有效性,true检查,false不检查
      testOnBorrow: true
      #     设置从连接池归还连接时是否检查连接有效性,true检查,false不检查
      testOnReturn: true
      #     可以支持PSCache(提升写入、查询效率)
      poolPreparedStatements: true
      #   配置监控统计拦截的filters,去掉后监控界面sql无法统计,'wall'用于防火墙
      filters: stat,wall,log4j
      #     保持长连接
      keepAlive: true
      maxPoolPreparedStatementPerConnectionSize: 20
      useGlobalDataSourceStat: true
      connectionProperties: druid.stat.mergeSql=true;druid.stat.slowSqlMillis=500
7.Json格式转换工具Fastjson
Fastjson 是一个 Java 库,可以将 Java 对象转换为 JSON 格式,当然它也可以将 JSON 字符串转换为 Java 对象。
Java中 Json、String、jsonObject、jsonArray格式之间互相转换
		<dependency>
            <groupId>com.alibaba</groupId>
            <artifactId>fastjson</artifactId>
            <version>1.2.78</version>
        </dependency>
8.lombook
lombok最优秀的就是注解了,一个注解就干掉了很多代码
实体类中的注解.
@Data :直接可以省略了Get、Set方法
@Slf4j :不需要单独引入日志依赖和配置日志,直接 log.info( ) 打印日志
如何在IDE编译器 中使用lombok插件??
idea中可以直接在编译器中搜索下载,就不多阐述了
eclipse则需要从官网下载lombok.jar包,然后双击启动jar包,逐步操作,指向eclisp.exe,重启eclipse即可
		<!--LomBok-->
        <dependency>
            <groupId>org.projectlombok</groupId>
            <artifactId>lombok</artifactId>
        </dependency>
9.面向切面编程AOP
支持的注解:@AspectJ、@Pointcut、通知注解(如:@Before、@After等)、@Aspect和自定义注解
spring-boot-starter-aop及其使用场景说明
SpringBoot 中的 Aop 注解使用+ 自定义注解
		<!--Spring Boot Aop-->
        <dependency>
            <groupId>org.springframework.boot</groupId>
            <artifactId>spring-boot-starter-aop</artifactId>
        </dependency>
10.Validation校验参数的实现
支持的注解:@Max,@Min等
常用注解和demo
		<!--Spring Validation-->
        <dependency>
            <groupId>org.springframework.boot</groupId>
            <artifactId>spring-boot-starter-validation</artifactId>
        </dependency>
11.Actuator 监控
主要是服务器运维使用,开发过程不常用
springboot 监控 Actuator 的设置
		<!--Spring Boot Actuator-->
        <dependency>
            <groupId>org.springframework.boot</groupId>
            <artifactId>spring-boot-starter-actuator</artifactId>
        </dependency>
12.hutool工具包
提供了很多封装方法供开发者使用
		<!--Hutool-->
        <dependency>
            <groupId>cn.hutool</groupId>
            <artifactId>hutool-all</artifactId>
            <version>5.4.7</version>
        </dependency>
13.jupiter
其依赖包含了junit-jupiter-api、junit-jupiter-engine、junit-vintage-engine
Junit-jupiter-api 和 junit-jupiter-engine 的区别
总结Junit4,Junit5,Jupiter之间的联系 值得一看
		<!--Junit-->
        <dependency>
            <groupId>org.junit.jupiter</groupId>
            <artifactId>junit-jupiter</artifactId>
            <scope>test</scope>
        </dependency>
14.打包配置
用于生成部署到服务器的包
JAVA项目在服务器部署过程
	<build>
        <plugins>
            <plugin>
                <groupId>org.springframework.boot</groupId>
                <artifactId>spring-boot-maven-plugin</artifactId>
                <executions>
                    <execution>
                        <goals>
                            <goal>repackage</goal>
                        </goals>
                    </execution>
                </executions>
            </plugin>
        </plugins>
    </build>
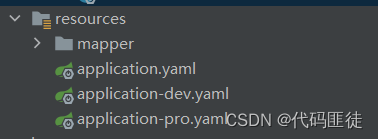
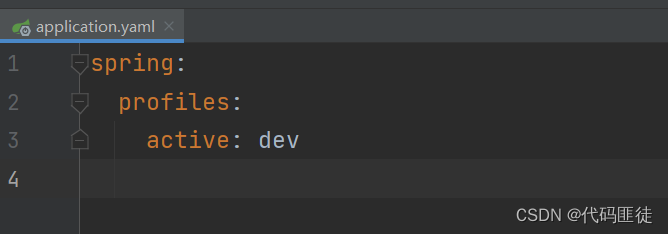
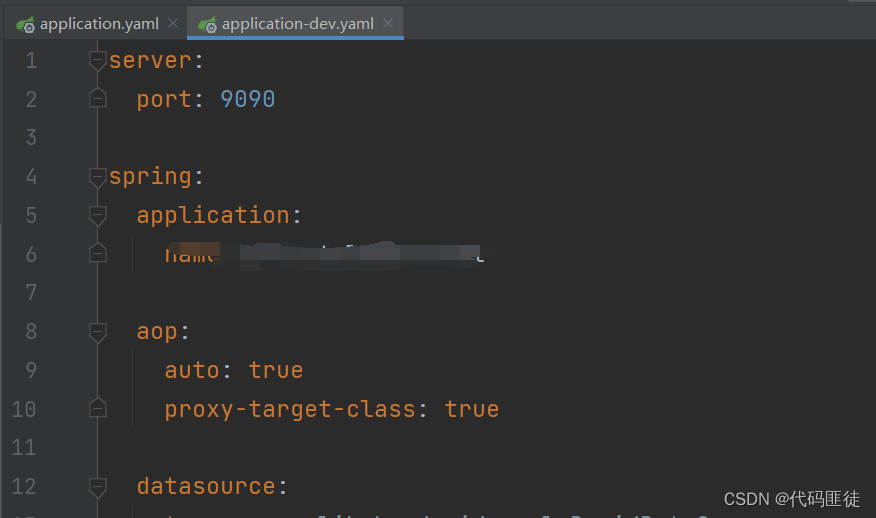
15.多yaml文件配置
指定其使用那个文件,不配置下面的profiles,但创建的文件格式形如这样也是可用的
	<profiles>
        <profile>
            <id>dev</id>
            <activation>
                <activeByDefault>true</activeByDefault>
            </activation>
            <properties>
                <profilesActive>dev</profilesActive>
            </properties>
        </profile>
        <profile>
            <id>pro</id>
            <properties>
                <profilesActive>pro</profilesActive>
            </properties>
        </profile>
    </profiles>
16.使用properties标签统一编码和JAVA版本
<!--统一编码和JAVA版本-->
    <properties>
        <project.build.sourceEncoding>UTF-8</project.build.sourceEncoding>
        <maven.compiler.source>1.8</maven.compiler.source>
        <maven.compiler.target>1.8</maven.compiler.target>
        <java.version>1.8</java.version>
    </properties>
17.mybatis-plus
在mybatis基础上的升级版工具,避免了使用mybatis时需要编写大量的xml文件
<dependency>
    <groupId>com.baomidou</groupId>
    <artifactId>mybatis-plus-boot-starter</artifactId>
    <version>3.4.2</version>
</dependency>
18.springboot热部署
修改java代码后,不用重启项目就能直接最新测试,省略了不断修改代码不断重启项目的麻烦
<dependency>
    <groupId>org.springframework.boot</groupId>
    <artifactId>spring-boot-devtools</artifactId>
    <optional>true</optional>
</dependency>
<?xml version="1.0" encoding="UTF-8"?>
<project xmlns="http://maven.apache.org/POM/4.0.0"
         xmlns:xsi="http://www.w3.org/2001/XMLSchema-instance"
         xsi:schemaLocation="http://maven.apache.org/POM/4.0.0 http://maven.apache.org/xsd/maven-4.0.0.xsd">
    <modelVersion>4.0.0</modelVersion>

    <groupId>包名</groupId>
    <artifactId>项目名</artifactId>
    <version>项目版本号</version>

    <parent>
        <artifactId>spring-boot-dependencies</artifactId>
        <groupId>org.springframework.boot</groupId>
        <version>2.3.3.RELEASE</version>
    </parent>

	<!--统一编码和JAVA版本-->
    <properties>
        <project.build.sourceEncoding>UTF-8</project.build.sourceEncoding>
        <maven.compiler.source>1.8</maven.compiler.source>
        <maven.compiler.target>1.8</maven.compiler.target>
        <java.version>1.8</java.version>
    </properties>

    <dependencies>

        <!--MySQL 连接组件-->
        <dependency>
            <groupId>mysql</groupId>
            <artifactId>mysql-connector-java</artifactId>
        </dependency>

        <!--MyBaits-->
        <dependency>
            <groupId>org.mybatis.spring.boot</groupId>
            <artifactId>mybatis-spring-boot-starter</artifactId>
            <version>2.1.2</version>
        </dependency>

        <!--Druid-->
        <dependency>
            <groupId>com.alibaba</groupId>
            <artifactId>druid</artifactId>
            <version>1.2.2</version>
        </dependency>

        <!--    Druid Spring Boot 组件-->
        <dependency>
            <groupId>com.alibaba</groupId>
            <artifactId>druid-spring-boot-starter</artifactId>
            <version>1.2.2</version>
        </dependency>

        <!--Spring Boot Aop-->
        <dependency>
            <groupId>org.springframework.boot</groupId>
            <artifactId>spring-boot-starter-aop</artifactId>
        </dependency>

        <!--Spring Validation-->
        <dependency>
            <groupId>org.springframework.boot</groupId>
            <artifactId>spring-boot-starter-validation</artifactId>
        </dependency>

        <!--Spring Boot 测试-->
        <dependency>
            <groupId>org.springframework.boot</groupId>
            <artifactId>spring-boot-starter-test</artifactId>
            <scope>test</scope>
            <exclusions>
                <exclusion>
                    <groupId>org.junit.vintage</groupId>
                    <artifactId>junit-vintage-engine</artifactId>
                </exclusion>
            </exclusions>
        </dependency>

        <!--Junit-->
        <dependency>
            <groupId>org.junit.jupiter</groupId>
            <artifactId>junit-jupiter</artifactId>
            <scope>test</scope>
        </dependency>

        <!--LomBok-->
        <dependency>
            <groupId>org.projectlombok</groupId>
            <artifactId>lombok</artifactId>
        </dependency>

        <!--Hutool-->
        <dependency>
            <groupId>cn.hutool</groupId>
            <artifactId>hutool-all</artifactId>
            <version>5.4.7</version>
        </dependency>

        <!--Spring Boot Web-->
        <dependency>
            <groupId>org.springframework.boot</groupId>
            <artifactId>spring-boot-starter-web</artifactId>
        </dependency>

        <!--Spring Boot Actuator-->
        <dependency>
            <groupId>org.springframework.boot</groupId>
            <artifactId>spring-boot-starter-actuator</artifactId>
        </dependency>

        <!-- https://mvnrepository.com/artifact/com.alibaba/fastjson -->
        <dependency>
            <groupId>com.alibaba</groupId>
            <artifactId>fastjson</artifactId>
            <version>1.2.78</version>
        </dependency>


        <!--Junit测试-->
        <dependency>
            <groupId>junit</groupId>
            <artifactId>junit</artifactId>
            <scope>test</scope>
        </dependency>

    </dependencies>

    <build>
        <plugins>
            <plugin>
                <groupId>org.springframework.boot</groupId>
                <artifactId>spring-boot-maven-plugin</artifactId>
                <executions>
                    <execution>
                        <goals>
                            <goal>repackage</goal>
                        </goals>
                    </execution>
                </executions>
            </plugin>
        </plugins>
    </build>

    <profiles>
        <profile>
            <id>dev</id>
            <activation>
                <activeByDefault>true</activeByDefault>
            </activation>
            <properties>
                <profilesActive>dev</profilesActive>
            </properties>
        </profile>
        <profile>
            <id>pro</id>
            <properties>
                <profilesActive>pro</profilesActive>
            </properties>
        </profile>
    </profiles>

</project>
大约一年前,我决定确保每个包含非唯一文本的Flash通知都将从模块中的方法中获取文本。我这样做的最初原因是为了避免一遍又一遍地输入相同的字符串。如果我想更改措辞,我可以在一个地方轻松完成,而且一遍又一遍地重复同一件事而出现拼写错误的可能性也会降低。我最终得到的是这样的:moduleMessagesdefformat_error_messages(errors)errors.map{|attribute,message|"Error:#{attribute.to_s.titleize}#{message}."}enddeferror_message_could_not_find(obje
如何在buildr项目中使用Ruby?我在很多不同的项目中使用过Ruby、JRuby、Java和Clojure。我目前正在使用我的标准Ruby开发一个模拟应用程序,我想尝试使用Clojure后端(我确实喜欢功能代码)以及JRubygui和测试套件。我还可以看到在未来的不同项目中使用Scala作为后端。我想我要为我的项目尝试一下buildr(http://buildr.apache.org/),但我注意到buildr似乎没有设置为在项目中使用JRuby代码本身!这看起来有点傻,因为该工具旨在统一通用的JVM语言并且是在ruby中构建的。除了将输出的jar包含在一个独特的、仅限ruby
我有一个在Linux服务器上运行的ruby脚本。它不使用rails或任何东西。它基本上是一个命令行ruby脚本,可以像这样传递参数:./ruby_script.rbarg1arg2如何将参数抽象到配置文件(例如yaml文件或其他文件)中?您能否举例说明如何做到这一点?提前谢谢你。 最佳答案 首先,您可以运行一个写入YAML配置文件的独立脚本:require"yaml"File.write("path_to_yaml_file",[arg1,arg2].to_yaml)然后,在您的应用中阅读它:require"yaml"arg
我在我的Rails项目中使用Pow和powifygem。现在我尝试升级我的ruby版本(从1.9.3到2.0.0,我使用RVM)当我切换ruby版本、安装所有gem依赖项时,我通过运行railss并访问localhost:3000确保该应用程序正常运行以前,我通过使用pow访问http://my_app.dev来浏览我的应用程序。升级后,由于错误Bundler::RubyVersionMismatch:YourRubyversionis1.9.3,butyourGemfilespecified2.0.0,此url不起作用我尝试过的:重新创建pow应用程序重启pow服务器更新战俘
我已经像这样安装了一个新的Rails项目:$railsnewsite它执行并到达:bundleinstall但是当它似乎尝试安装依赖项时我得到了这个错误Gem::Ext::BuildError:ERROR:Failedtobuildgemnativeextension./System/Library/Frameworks/Ruby.framework/Versions/2.0/usr/bin/rubyextconf.rbcheckingforlibkern/OSAtomic.h...yescreatingMakefilemake"DESTDIR="cleanmake"DESTDIR="
我正在尝试修改当前依赖于定义为activeresource的gem:s.add_dependency"activeresource","~>3.0"为了让gem与Rails4一起工作,我需要扩展依赖关系以与activeresource的版本3或4一起工作。我不想简单地添加以下内容,因为它可能会在以后引起问题:s.add_dependency"activeresource",">=3.0"有没有办法指定可接受版本的列表?~>3.0还是~>4.0? 最佳答案 根据thedocumentation,如果你想要3到4之间的所有版本,你可以这
我收到这个错误:RuntimeError(自动加载常量Apps时检测到循环依赖当我使用多线程时。下面是我的代码。为什么会这样?我尝试多线程的原因是因为我正在编写一个HTML抓取应用程序。对Nokogiri::HTML(open())的调用是一个同步阻塞调用,需要1秒才能返回,我有100,000多个页面要访问,所以我试图运行多个线程来解决这个问题。有更好的方法吗?classToolsController0)app.website=array.join(',')putsapp.websiteelseapp.website="NONE"endapp.saveapps=Apps.order("
我已经在Sinatra上创建了应用程序,它代表了一个简单的API。我想在生产和开发上进行部署。我想在部署时选择,是开发还是生产,一些方法的逻辑应该改变,这取决于部署类型。是否有任何想法,如何完成以及解决此问题的一些示例。例子:我有代码get'/api/test'doreturn"Itisdev"end但是在部署到生产环境之后我想在运行/api/test之后看到ItisPROD如何实现? 最佳答案 根据SinatraDocumentation:EnvironmentscanbesetthroughtheRACK_ENVenvironm
假设我有这个范围:("aaaaa".."zzzzz")如何在不事先/每次生成整个项目的情况下从范围中获取第N个项目? 最佳答案 一种快速简便的方法:("aaaaa".."zzzzz").first(42).last#==>"aaabp"如果出于某种原因你不得不一遍又一遍地这样做,或者如果你需要避免为前N个元素构建中间数组,你可以这样写:moduleEnumerabledefskip(n)returnto_enum:skip,nunlessblock_given?each_with_indexdo|item,index|yieldit
?博客主页:https://xiaoy.blog.csdn.net?本文由呆呆敲代码的小Y原创,首发于CSDN??学习专栏推荐:Unity系统学习专栏?游戏制作专栏推荐:游戏制作?Unity实战100例专栏推荐:Unity实战100例教程?欢迎点赞?收藏⭐留言?如有错误敬请指正!?未来很长,值得我们全力奔赴更美好的生活✨------------------❤️分割线❤️-------------------------