Java程序很大一部分要操作数据库,为了提高性能操作数据库的时候,又不得不使用数据库连接池。
Druid 是阿里巴巴开源平台上一个数据库连接池实现,结合了 C3P0、DBCP 等 DB 池的优点,同时加入了日志监控。
Druid 可以很好的监控 DB 池连接和 SQL 的执行情况,天生就是针对监控而生的 DB 连接池。
Druid已经在阿里巴巴部署了超过600个应用,经过一年多生产环境大规模部署的严苛考验。
Spring Boot 2.0 以上默认使用 Hikari 数据源,可以说 Hikari 与 Driud 都是当前 Java Web 上最优秀的数据源,我们来重点介绍 Spring Boot 如何集成 Druid 数据源,如何实现数据库监控。
Github地址:https://github.com/alibaba/druid/

<!-- druid begin -->
<dependency>
    <groupId>com.alibaba</groupId>
    <artifactId>druid</artifactId>
    <version>1.2.8</version>
</dependency>
<!-- druid end -->

<!-- log4j begin -->
<dependency>
    <groupId>log4j</groupId>
    <artifactId>log4j</artifactId>
    <version>1.2.17</version>
</dependency>
<!-- log4j begin -->
# 端口
server:
  port: 9603

# 服务名
spring:
  application:
    name: kgcmall96-user

  # 数据源配置
  datasource:
    driver-class-name: com.mysql.cj.jdbc.Driver
    url: jdbc:mysql://localhost:3306/kh96_alibaba_kgcmalldb?useUnicode=true&characterEncoding=utf-8&useSSL=false&serverTimezone=GMT
    username: root
    password: root
    #2、切换数据源;之前已经说过 Spring Boot 2.0 以上默认使用 com.zaxxer.hikari.HikariDataSource 数据源,但可以 通过 spring.datasource.type 指定数据源。
    # 指定数据源类型
    type: com.alibaba.druid.pool.DruidDataSource
    # 数据源其他配置
    # 初始化时建立物理连接的个数。初始化发生在显示调用init方法,或者第一次getConnection时
    initialSize: 5
    # 最小连接池数量
    minIdle: 5
    # 最大连接池数量
    maxActive: 20
    # 获取连接时最大等待时间,单位毫秒。
    maxWait: 60000
    # 配置间隔多久才进行一次检测,检测需要关闭的空闲连接,单位是毫秒
    timeBetweenEvictionRunsMillis: 60000
    # 配置一个连接在池中最小生存的时间,单位是毫秒
    minEvictableIdleTimeMillis: 300000
    # 用来检测连接是否有效的sql,要求是一个查询语句。如果validationQuery为null,testOnBorrow、testOnReturn、testWhileIdle都不会其作用。
    validationQuery: SELECT 1 FROM DUAL
    # 建议配置为true,不影响性能,并且保证安全性。申请连接的时候检测,如果空闲时间大于timeBetweenEvictionRunsMillis,执行validationQuery检测连接是否有效
    testWhileIdle: true
    # 申请连接时执行validationQuery检测连接是否有效,做了这个配置会降低性能。
    testOnBorrow: false
    # 归还连接时执行validationQuery检测连接是否有效,做了这个配置会降低性能
    testOnReturn: false
    # 是否缓存preparedStatement,也就是PSCache。PSCache对支持游标的数据库性能提升巨大,比如说oracle。在mysql下建议关闭
    poolPreparedStatements: false
    maxPoolPreparedStatementPerConnectionSize: 20
    # 合并多个DruidDataSource的监控数据
    useGlobalDataSourceStat: true
    # 配置监控统计拦截的filters,去掉后监控界面sql无法统计
    # 属性性类型是字符串,通过别名的方式配置扩展插件,常用的插件有:监控统计用的filter:stat日志用的filter:log4j防御sql注入的filter:wall
    filters: stat,wall,log4j
    # 通过connectProperties属性来打开mergeSql功能;慢SQL记录
    connectionProperties: druid.stat.mergeSql=true;druid.stat.slowSqlMillis=500

  # jpa配置
  jpa:
    hibernate:
      ddl-auto: update
    show-sql: true
在网上随便搜的一个;
log4j.rootLogger=DEBUG, stdout
# Console output...
log4j.appender.stdout=org.apache.log4j.ConsoleAppender
log4j.appender.stdout.layout=org.apache.log4j.PatternLayout
log4j.appender.stdout.layout.ConversionPattern=%5p [%t] - %m%n
/**
 * @author : huayu
 * @date   : 29/11/2022
 * @param  :
 * @return :
 * @description :  Druid数据源配置类
 */
@Configuration
public class DruidConfig {

    @Bean
    @ConfigurationProperties(prefix = "spring.datasource")
    public DataSource dataSource() {
        return new DruidDataSource();
    }

    /**
     * 配置后台管理
     */
    @Bean
    public ServletRegistrationBean statViewServlet() {
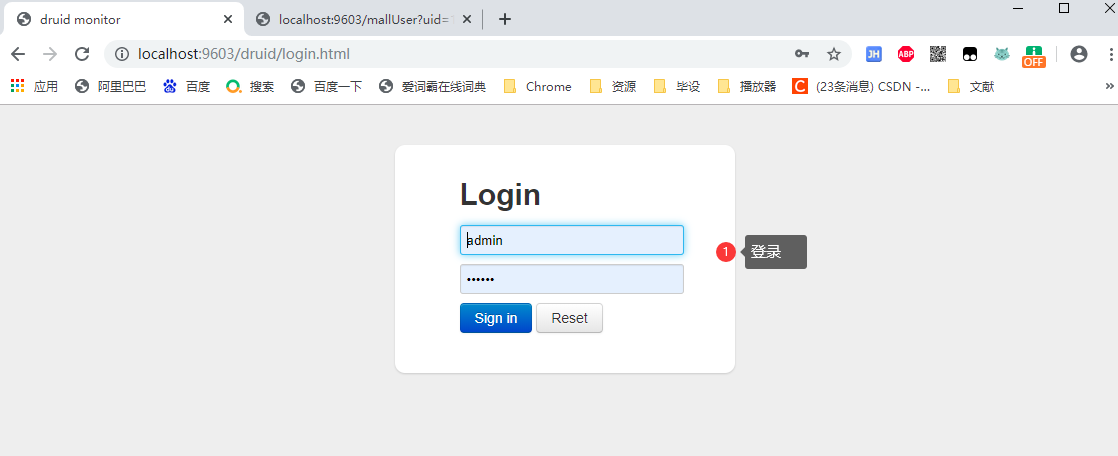
        ServletRegistrationBean bean = new ServletRegistrationBean(new StatViewServlet(), "/druid/*");

        // 初始化参数
        Map<String, String> initParams = new HashMap<>();
        initParams.put("loginUsername", "admin");
        initParams.put("loginPassword", "123456");
        // 是否允许访问
        initParams.put("allow", "");
        bean.setInitParameters(initParams);
        return bean;
    }

    /**
     * 配置web监控的过滤器
     */
    @Bean
    public FilterRegistrationBean webStatFilter() {
        FilterRegistrationBean bean = new FilterRegistrationBean();

        bean.setFilter(new WebStatFilter());
        // 初始化参数
        Map<String, String> initParams = new HashMap<>();
        // 排除过滤,静态文件等
        initParams.put("exclusions", "*.css,*.js,/druid/*");

        bean.setInitParameters(initParams);

        bean.setUrlPatterns(Arrays.asList("/*"));

        return bean;
    }
}
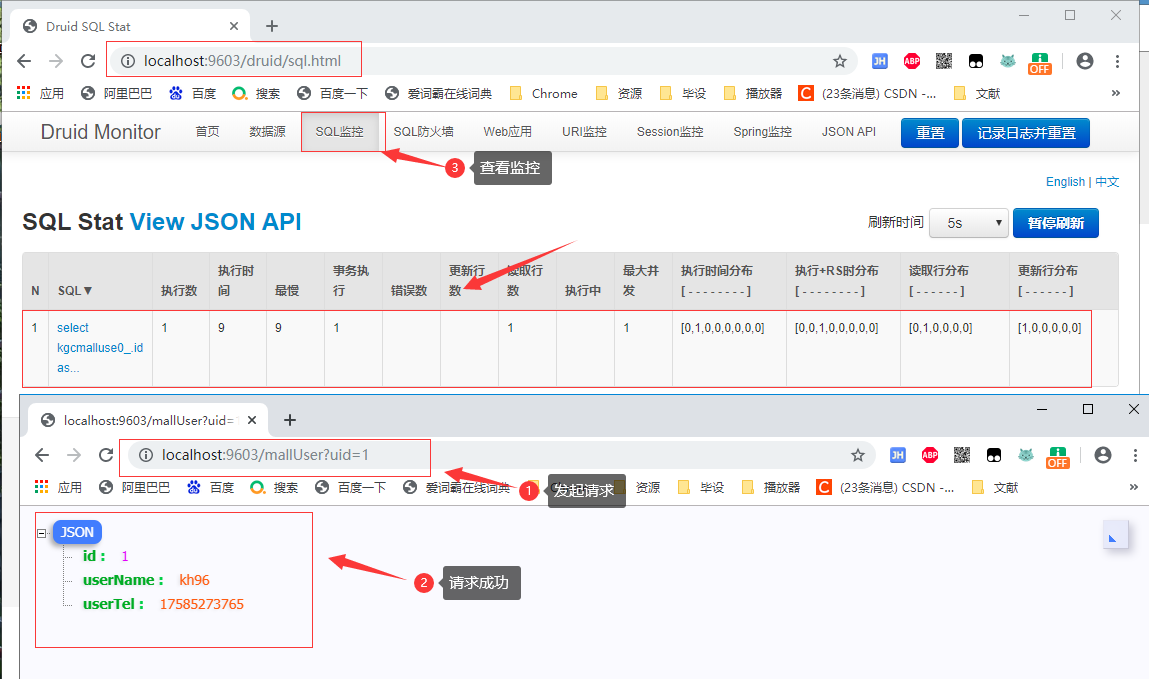
测试代码不在赘述,就简单写一个测试请求就好;
Spring Security 是针对Spring项目的安全框架,也是Spring Boot底层安全模块默认的技术选型,他可以实现强大的Web安全控制,对于安全控制,我们仅需要引入 spring-boot-starter-security 模块,进行少量的配置,即可实现强大的安全管理!
记住几个类:
Spring Security的两个主要目标是 “认证” 和 “授权”(访问控制)。
“认证”(Authentication)
身份验证是关于验证您的凭据,如用户名/用户ID和密码,以验证您的身份。
身份验证通常通过用户名和密码完成,有时与身份验证因素结合使用。
“授权” (Authorization)
授权发生在系统成功验证您的身份后,最终会授予您访问资源(如信息,文件,数据库,资金,位置,几乎任何内容)的完全权限。
这个概念是通用的,而不是只在Spring Security 中存在。
<!--  thymeleaf  -->
<dependency>
    <groupId>org.springframework.boot</groupId>
    <artifactId>spring-boot-starter-thymeleaf</artifactId>
</dependency>
<!--  security -->
<dependency>
    <groupId>org.springframework.boot</groupId>
    <artifactId>spring-boot-starter-security</artifactId>
</dependency>

<!--   security-thymeleaf整合包  -->
<dependency>
    <groupId>org.thymeleaf.extras</groupId>
    <artifactId>thymeleaf-extras-springsecurity5</artifactId>
    <version>3.0.4.RELEASE</version>
</dependency>
# 关闭模板缓存
spring:
  thymeleaf:
    cache: false
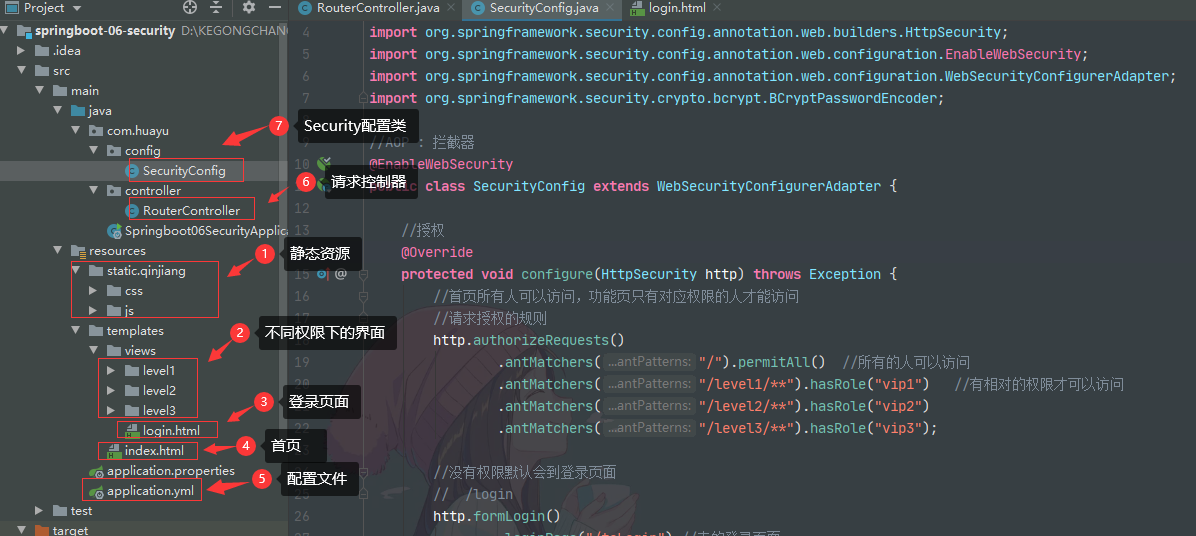
创建这几个文件;

1.html(这几个html的代码都是一样的)
<!DOCTYPE html>
<html lang="en" xmlns:th="http://www.thymeleaf.org">
<head>
    <meta charset="UTF-8">
    <meta name="viewport" content="width=device-width, initial-scale=1, maximum-scale=1">
    <title>首页</title>
    <!--semantic-ui-->
    <link href="https://cdn.bootcss.com/semantic-ui/2.4.1/semantic.min.css" rel="stylesheet">
    <link th:href="@{/qinjiang/css/qinstyle.css}" rel="stylesheet">
</head>
<body>

<!--主容器-->
<div class="ui container">

    <div th:replace="~{index::nav-menu}"></div>

    <div class="ui segment" style="text-align: center">
        <h3>Level-1-1</h3>
    </div>

</div>

<script th:src="@{/qinjiang/js/jquery-3.1.1.min.js}"></script>
<script th:src="@{/qinjiang/js/semantic.min.js}"></script>

</body>
</html>
<!DOCTYPE html>
<html lang="en" xmlns:th="http://www.thymeleaf.org">
<head>
    <meta charset="UTF-8">
    <meta name="viewport" content="width=device-width, initial-scale=1, maximum-scale=1">
    <title>登录</title>
    <!--semantic-ui-->
    <link href="https://cdn.bootcss.com/semantic-ui/2.4.1/semantic.min.css" rel="stylesheet">
</head>
<body>

<!--主容器-->
<div class="ui container">

    <div class="ui segment">

        <div style="text-align: center">
            <h1 class="header">登录</h1>
        </div>

        <div class="ui placeholder segment">
            <div class="ui column very relaxed stackable grid">
                <div class="column">
                    <div class="ui form">
                        <form th:action="@{/login}" method="post">
                            <div class="field">
                                <label>Username</label>
                                <div class="ui left icon input">
                                    <input type="text" placeholder="Username" name="username">
                                    <i class="user icon"></i>
                                </div>
                            </div>
                            <div class="field">
                                <label>Password</label>
                                <div class="ui left icon input">
                                    <input type="password" name="password">
                                    <i class="lock icon"></i>
                                </div>
                            </div>
                            <div class="field">
                                <input type="checkbox" name="remember"> 记住我
                            </div>

                            <input type="submit" class="ui blue submit button"/>
                        </form>
                    </div>
                </div>
            </div>
        </div>

        <div style="text-align: center">
            <div class="ui label">
                </i>注册
            </div>
            <br><br>
            <small>blog.kuangstudy.com</small>
        </div>
        <div class="ui segment" style="text-align: center">
            <h3>Spring Security Study by 秦疆</h3>
        </div>
    </div>


</div>

<script th:src="@{/qinjiang/js/jquery-3.1.1.min.js}"></script>
<script th:src="@{/qinjiang/js/semantic.min.js}"></script>

</body>
</html>
<!DOCTYPE html>
<html lang="en" xmlns:th="http://www.thymeleaf.org"
      xmlns:sec="http://www.thymeleaf.org/thymeleaf-extras-springsecurity5">
<head>
    <meta charset="UTF-8">
    <meta name="viewport" content="width=device-width, initial-scale=1, maximum-scale=1">
    <title>首页</title>
    <!--semantic-ui-->
    <link href="https://cdn.bootcss.com/semantic-ui/2.4.1/semantic.min.css" rel="stylesheet">
    <link th:href="@{/qinjiang/css/qinstyle.css}" rel="stylesheet">
</head>
<body>

<!--主容器-->
<div class="ui container">

    <div class="ui segment" id="index-header-nav" th:fragment="nav-menu">
        <div class="ui secondary menu">
            <a class="item"  th:href="@{/index}">首页</a>

            <!--登录注销-->
            <div class="right menu">

                <!--  如果未登录  用户名,注销-->
                <div sec:authorize="!isAuthenticated()">
                    <a class="item" th:href="@{/toLogin}">
                        <i class="address card icon"></i> 登录
                    </a>
                </div>

                <!--如果登录了: 用户名 注销-->
                <div sec:authorize="isAuthenticated()">
                    <a class="item">
                        用户名: <span sec:authentication="name"></span>
                        角色: <span sec:authentication="principal.authorities"></span>
                    </a>
                    <a class="item" th:href="@{/logout}">
                        <i class="sign-out icon"></i> 注销
                    </a>
                </div>

                <!--已登录
                <a th:href="@{/usr/toUserCenter}">
                    <i class="address card icon"></i> admin
                </a>
                -->
            </div>
        </div>
    </div>

    <div class="ui segment" style="text-align: center">
        <h3>Spring Security Study by 秦疆</h3>
    </div>

    <div>
        <br>
        <div class="ui three column stackable grid">
            <div class="column" sec:authorize="hasRole('vip1')">
                <div class="ui raised segment">
                    <div class="ui">
                        <div class="content">
                            <h5 class="content">Level 1</h5>
                            <hr>
                            <div><a th:href="@{/level1/1}"><i class="bullhorn icon"></i> Level-1-1</a></div>
                            <div><a th:href="@{/level1/2}"><i class="bullhorn icon"></i> Level-1-2</a></div>
                            <div><a th:href="@{/level1/3}"><i class="bullhorn icon"></i> Level-1-3</a></div>
                        </div>
                    </div>
                </div>
            </div>

            <div class="column" sec:authorize="hasRole('vip3')">
                <div class="ui raised segment">
                    <div class="ui">
                        <div class="content">
                            <h5 class="content">Level 2</h5>
                            <hr>
                            <div><a th:href="@{/level2/1}"><i class="bullhorn icon"></i> Level-2-1</a></div>
                            <div><a th:href="@{/level2/2}"><i class="bullhorn icon"></i> Level-2-2</a></div>
                            <div><a th:href="@{/level2/3}"><i class="bullhorn icon"></i> Level-2-3</a></div>
                        </div>
                    </div>
                </div>
            </div>

            <div class="column" sec:authorize="hasRole('vip3')">
                <div class="ui raised segment">
                    <div class="ui">
                        <div class="content">
                            <h5 class="content">Level 3</h5>
                            <hr>
                            <div><a th:href="@{/level3/1}"><i class="bullhorn icon"></i> Level-3-1</a></div>
                            <div><a th:href="@{/level3/2}"><i class="bullhorn icon"></i> Level-3-2</a></div>
                            <div><a th:href="@{/level3/3}"><i class="bullhorn icon"></i> Level-3-3</a></div>
                        </div>
                    </div>
                </div>
            </div>

        </div>
    </div>

</div>


<script th:src="@{/qinjiang/js/jquery-3.1.1.min.js}"></script>
<script th:src="@{/qinjiang/js/semantic.min.js}"></script>

</body>
</html>
@Controller
public class RouterController {

    //首页
    @RequestMapping({"/","/index"})
    public String index(){
        return "index";
    }

    //登录
    @RequestMapping("/toLogin")
    public String toLogin(){
        return "views/login";
    }

    //level1 权限才可以访问
    @RequestMapping("/level1/{id}")
    public String leave1(@PathVariable("id") int id){
        return "views/level1/"+id;
    }

    //level2 权限才可以访问
    @RequestMapping("/level2/{id}")
    public String leave2(@PathVariable("id") int id){
        return "views/level2/"+id;
    }

    //level3 权限才可以访问
    @RequestMapping("/level3/{id}")
    public String leave3(@PathVariable("id") int id){
        return "views/level3/"+id;
    }

}
//AOP : 拦截器
@EnableWebSecurity
public class SecurityConfig extends WebSecurityConfigurerAdapter {

    //授权
    @Override
    protected void configure(HttpSecurity http) throws Exception {
        //首页所有人可以访问,功能页只有对应权限的人才能访问
        //请求授权的规则
        http.authorizeRequests()
                .antMatchers("/").permitAll()  //所有的人可以访问
                .antMatchers("/level1/**").hasRole("vip1")   //有相对的权限才可以访问
                .antMatchers("/level2/**").hasRole("vip2")
                .antMatchers("/level3/**").hasRole("vip3");

        //没有权限默认会到登录页面
        //  /login
        http.formLogin()
                .loginPage("/toLogin") //走的登录页面
                .usernameParameter("username").passwordParameter("password") //默认的帮我们写的登录验真参数为username,password,通过这个可以改变参数名字,例如user,pwd
                .loginProcessingUrl("/login");  //真正的登录页面

        //防止网站工具: get post
        http.csrf().disable(); //关闭csrf功能 防止攻击  登录失败可能存在的原因

        //注销,开启了注销功能,跳到首页
        http.logout()
                .deleteCookies("remove")  //移除cookies
                .invalidateHttpSession(true)  //清除session
                .logoutSuccessUrl("/");

        //开启记住我功能
        http.rememberMe()  //默认保存两周  //这些直接开启的都是自动配置里面的那个登录页面,只需要开启就可以;
        .rememberMeParameter("remember"); //自定义接收前端的参数  //这些需要自定义参数的都是我们自己写的登录页面
    }


    //认证 , springboot 2.1.x可以使用
    //密码编码: PasswowrdEncoder   报错: 密码前面直接加{noop},就可以了 password("{noop}123456")
    //在Spring Secutiry 5.0+ 新增了很多的加密方法
    //定义认证规则
    @Override
    protected void configure(AuthenticationManagerBuilder auth) throws Exception {
        //这些数据正常应该从数据库中读
        auth
//                .jdbcAuthentication() //从数据库中读数据
                .inMemoryAuthentication().passwordEncoder(new BCryptPasswordEncoder())
                .withUser("kuangshen").password(new BCryptPasswordEncoder().encode("123456")).roles("vip2","vip3")
                .and()
                .withUser("root").password(new BCryptPasswordEncoder().encode("123456")).roles("vip1","vip2","vip3")
                .and()
                .withUser("guest").password(new BCryptPasswordEncoder().encode("123456")).roles("vip1");
    }

}
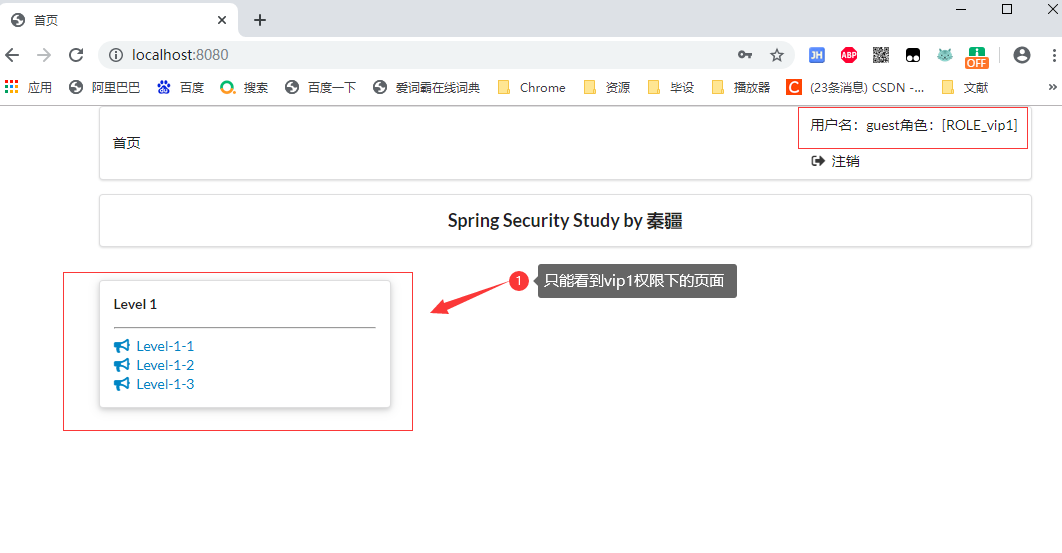
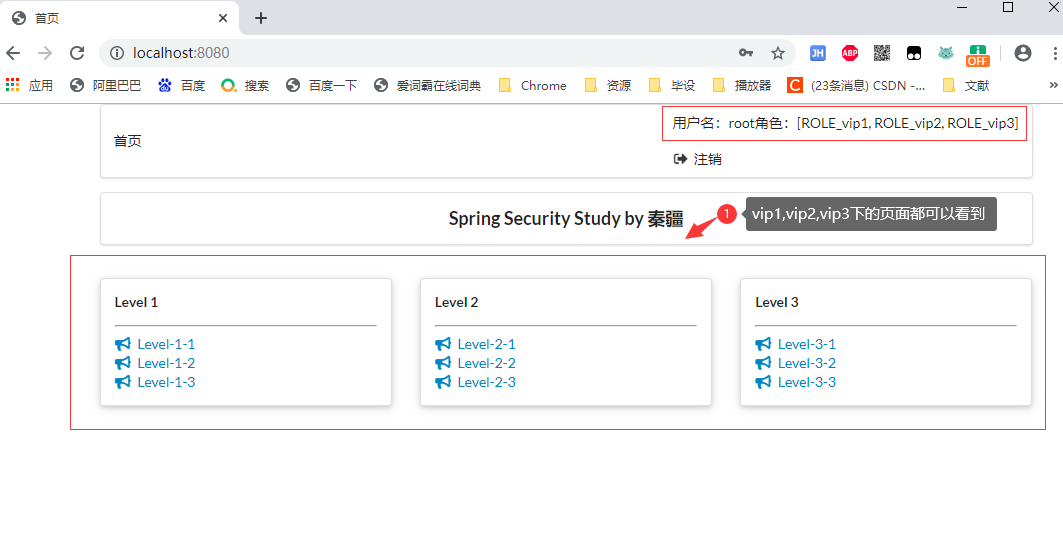
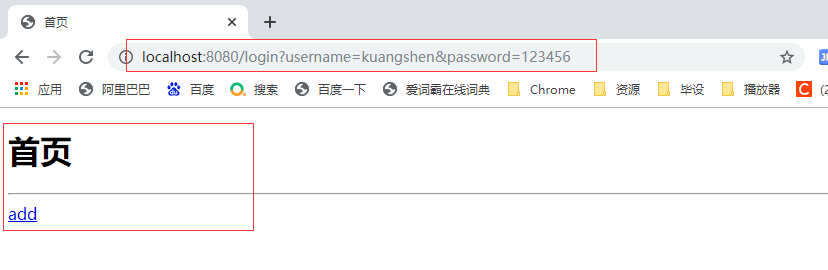
登录:guest 用户
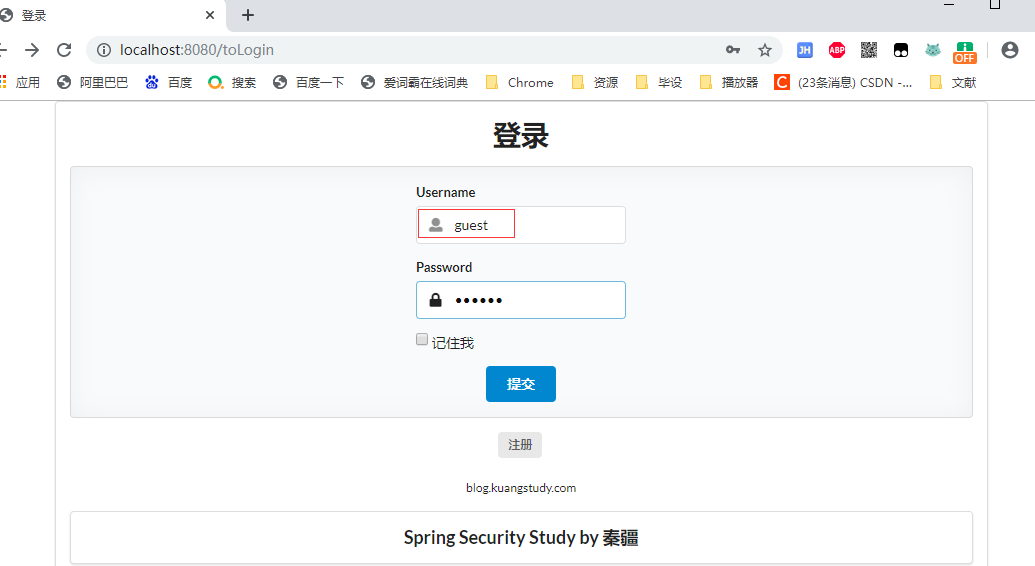
登录成功:
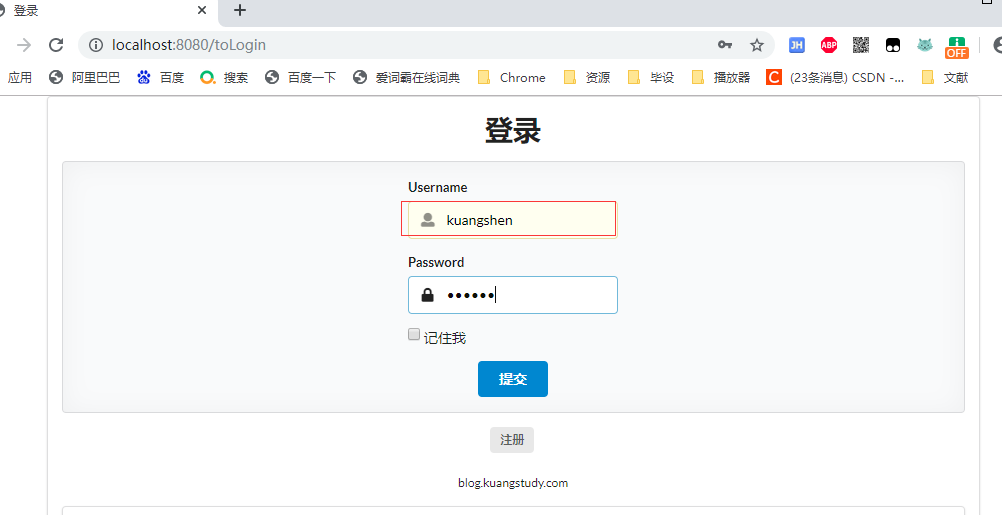
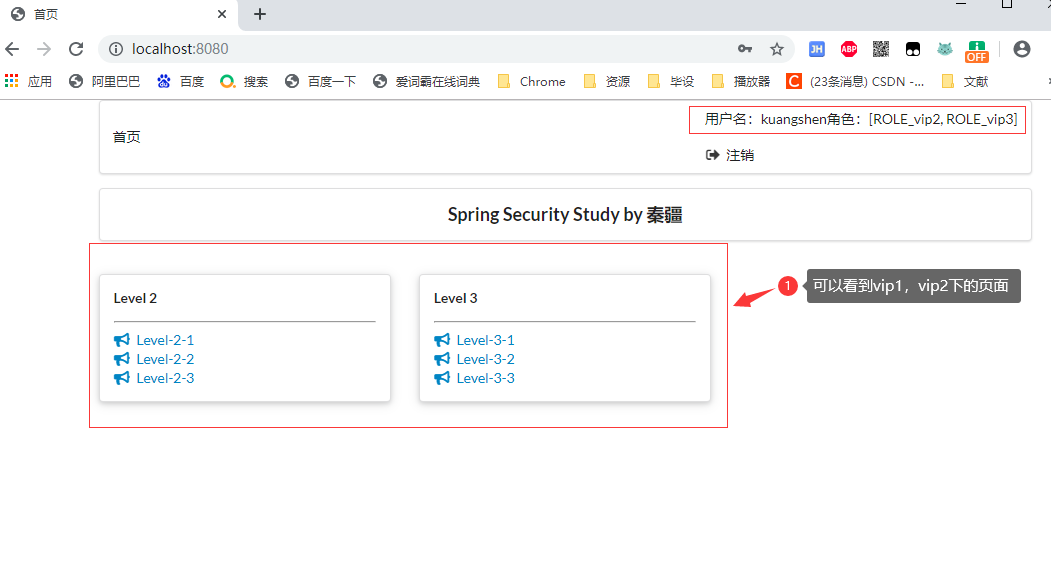
登录:kuangshen 用户
登陆成功:
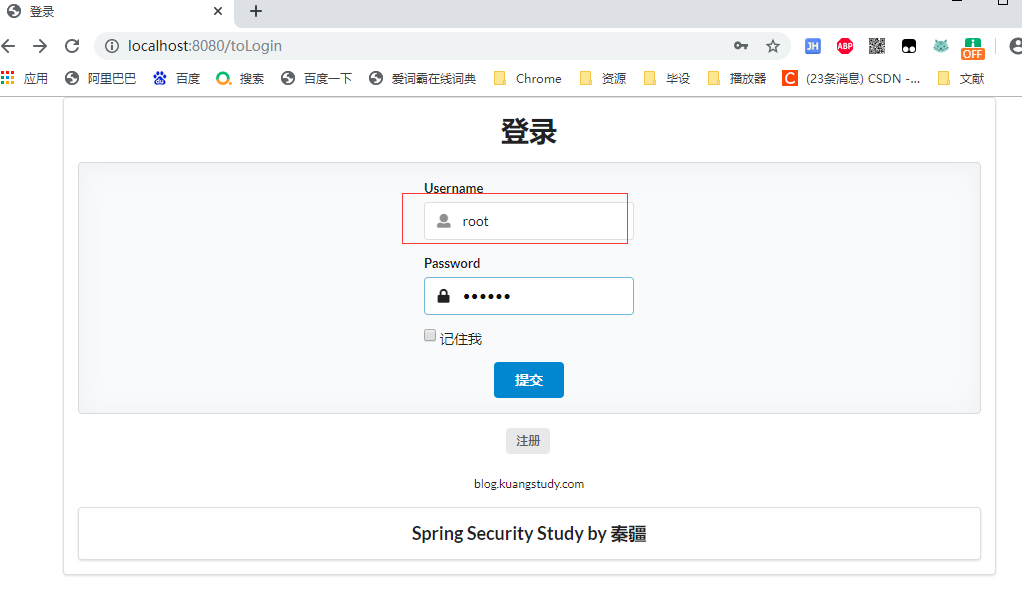
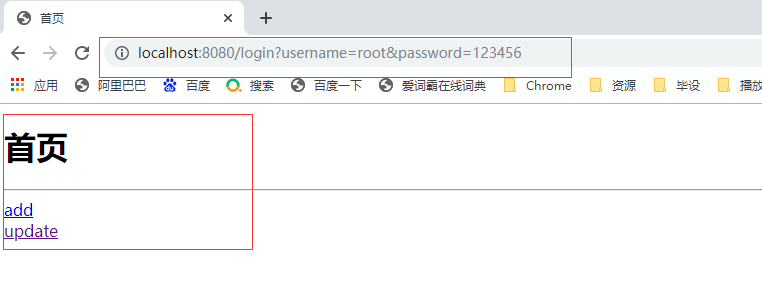
登录:root 用户
登陆成功
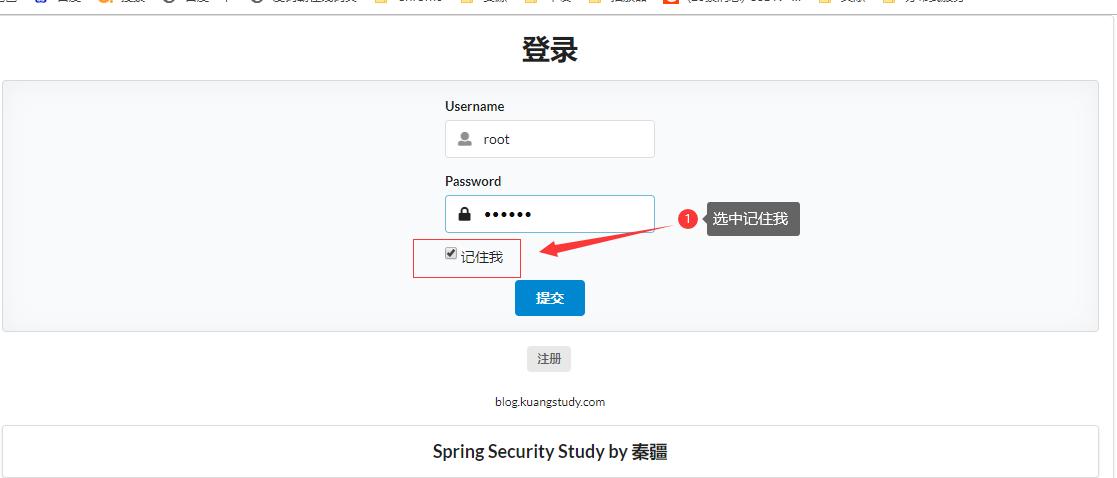
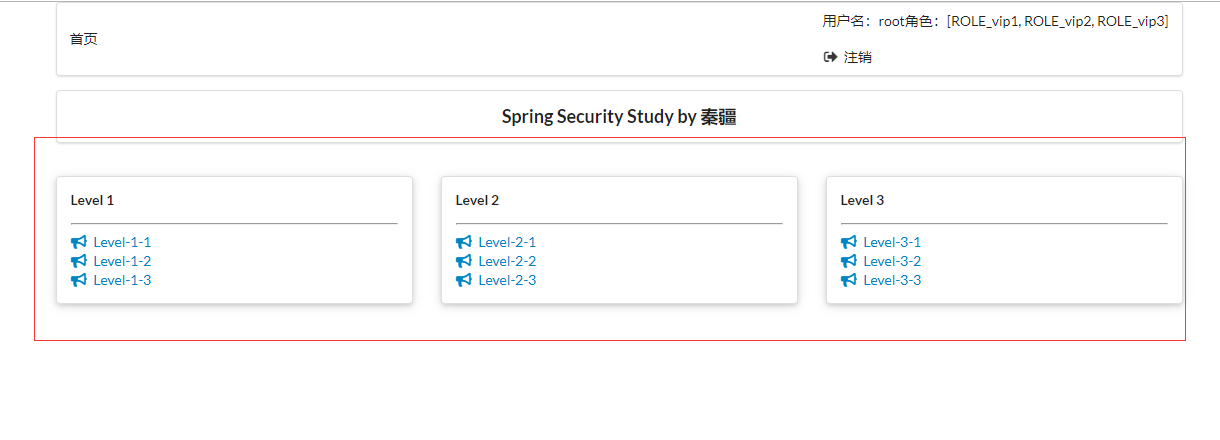
登录成功
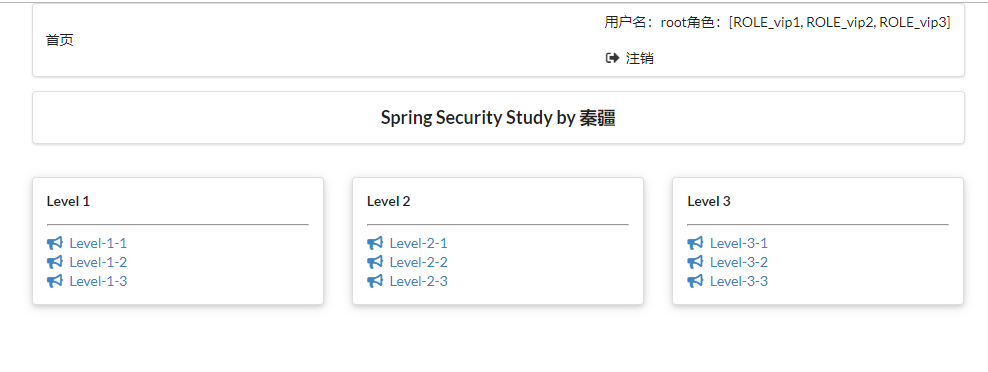
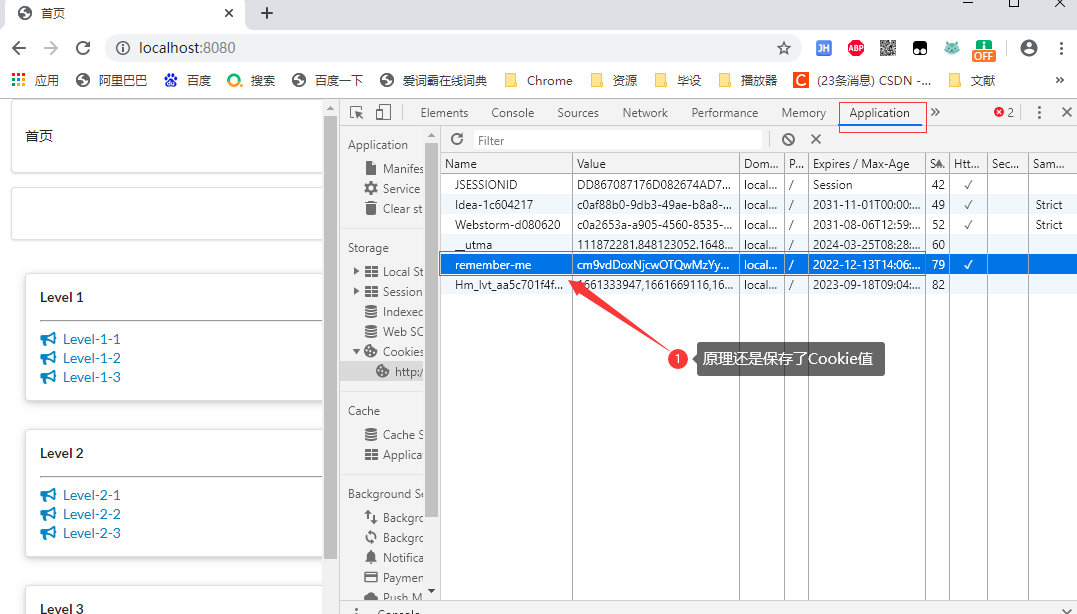
检查Cookie
参考博客地址:https://mp.weixin.qq.com/s/FLdC-24_pP8l5D-i7kEwcg
视频地址:https://www.bilibili.com/video/BV1PE411i7CV/?p=34
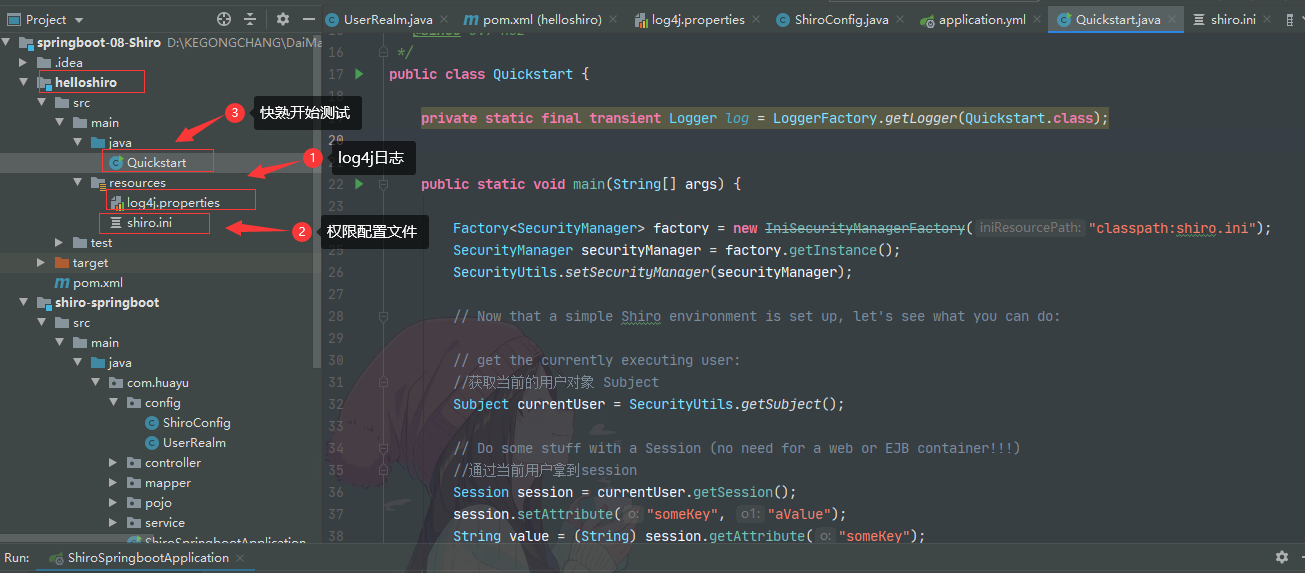
<!-- shiro-core  -->
<dependency>
    <groupId>org.apache.shiro</groupId>
    <artifactId>shiro-core</artifactId>
    <version>1.7.1</version>
</dependency>

<!-- configure logging -->
<dependency>
    <groupId>org.slf4j</groupId>
    <artifactId>jcl-over-slf4j</artifactId>
    <version>1.7.21</version>
</dependency>
<dependency>
    <groupId>org.slf4j</groupId>
    <artifactId>slf4j-log4j12</artifactId>
    <version>1.7.21</version>
</dependency>
<dependency>
    <groupId>log4j</groupId>
    <artifactId>log4j</artifactId>
    <version>1.2.17</version>
</dependency>
log4j.rootLogger=INFO, stdout

log4j.appender.stdout=org.apache.log4j.ConsoleAppender
log4j.appender.stdout.layout=org.apache.log4j.PatternLayout
log4j.appender.stdout.layout.ConversionPattern=%d %p [%c] - %m %n

# General Apache libraries
log4j.logger.org.apache=WARN

# Spring
log4j.logger.org.springframework=WARN

# Default Shiro logging
log4j.logger.org.apache.shiro=INFO

# Disable verbose logging
log4j.logger.org.apache.shiro.util.ThreadContext=WARN
log4j.logger.org.apache.shiro.cache.ehcache.EhCache=WARN
[users]
# user 'root' with password 'secret' and the 'admin' role
root = secret, admin
# user 'guest' with the password 'guest' and the 'guest' role
guest = guest, guest
# user 'presidentskroob' with password '12345' ("That's the same combination on
# my luggage!!!" ;)), and role 'president'
presidentskroob = 12345, president
# user 'darkhelmet' with password 'ludicrousspeed' and roles 'darklord' and 'schwartz'
darkhelmet = ludicrousspeed, darklord, schwartz
# user 'lonestarr' with password 'vespa' and roles 'goodguy' and 'schwartz'
lonestarr = vespa, goodguy, schwartz

# -----------------------------------------------------------------------------
# Roles with assigned permissions
#
# Each line conforms to the format defined in the
# org.apache.shiro.realm.text.TextConfigurationRealm#setRoleDefinitions JavaDoc
# -----------------------------------------------------------------------------
[roles]
# 'admin' role has all permissions, indicated by the wildcard '*'
admin = *
# The 'schwartz' role can do anything (*) with any lightsaber:
schwartz = lightsaber:*
# The 'goodguy' role is allowed to 'drive' (action) the winnebago (type) with
# license plate 'eagle5' (instance specific id)
goodguy = winnebago:drive:eagle5
/**
 * Simple Quickstart application showing how to use Shiro's API.
 *
 * @since 0.9 RC2
 */
public class Quickstart {

    private static final transient Logger log = LoggerFactory.getLogger(Quickstart.class);


    public static void main(String[] args) {

        Factory<SecurityManager> factory = new IniSecurityManagerFactory("classpath:shiro.ini");
        SecurityManager securityManager = factory.getInstance();
        SecurityUtils.setSecurityManager(securityManager);

        // Now that a simple Shiro environment is set up, let's see what you can do:

        // get the currently executing user:
        //获取当前的用户对象 Subject
        Subject currentUser = SecurityUtils.getSubject();

        // Do some stuff with a Session (no need for a web or EJB container!!!)
        //通过当前用户拿到session
        Session session = currentUser.getSession();
        session.setAttribute("someKey", "aValue");
        String value = (String) session.getAttribute("someKey");
        if (value.equals("aValue")) {
            log.info("Retrieved the correct value! [" + value + "]");
        }

        //判断当前用户是否被认证
        //Token:没有获取,直接设置令牌
        if (!currentUser.isAuthenticated()) {
            UsernamePasswordToken token = new UsernamePasswordToken("lonestarr", "vespa");
            token.setRememberMe(true);//设置记住我
            try {
                currentUser.login(token);//执行登录操作
            } catch (UnknownAccountException uae) {
                log.info("There is no user with username of " + token.getPrincipal());
            } catch (IncorrectCredentialsException ice) {
                log.info("Password for account " + token.getPrincipal() + " was incorrect!");
            } catch (LockedAccountException lae) {
                log.info("The account for username " + token.getPrincipal() + " is locked.  " +
                        "Please contact your administrator to unlock it.");
            }
            // ... catch more exceptions here (maybe custom ones specific to your application?
            catch (AuthenticationException ae) {
                //unexpected condition?  error?
            }
        }

        //say who they are:
        //print their identifying principal (in this case, a username):
        log.info("User [" + currentUser.getPrincipal() + "] logged in successfully.");

        //test a role:
        if (currentUser.hasRole("schwartz")) {
            log.info("May the Schwartz be with you!");
        } else {
            log.info("Hello, mere mortal.");
        }
        //粗粒度
        //test a typed permission (not instance-level)
        if (currentUser.isPermitted("lightsaber:wield")) {
            log.info("You may use a lightsaber ring.  Use it wisely.");
        } else {
            log.info("Sorry, lightsaber rings are for schwartz masters only.");
        }
        //细粒度
        //a (very powerful) Instance Level permission:
        if (currentUser.isPermitted("winnebago:drive:eagle5")) {
            log.info("You are permitted to 'drive' the winnebago with license plate (id) 'eagle5'.  " +
                    "Here are the keys - have fun!");
        } else {
            log.info("Sorry, you aren't allowed to drive the 'eagle5' winnebago!");
        }
        //注销
        //all done - log out!
        currentUser.logout();
        //结束
        System.exit(0);
    }
}


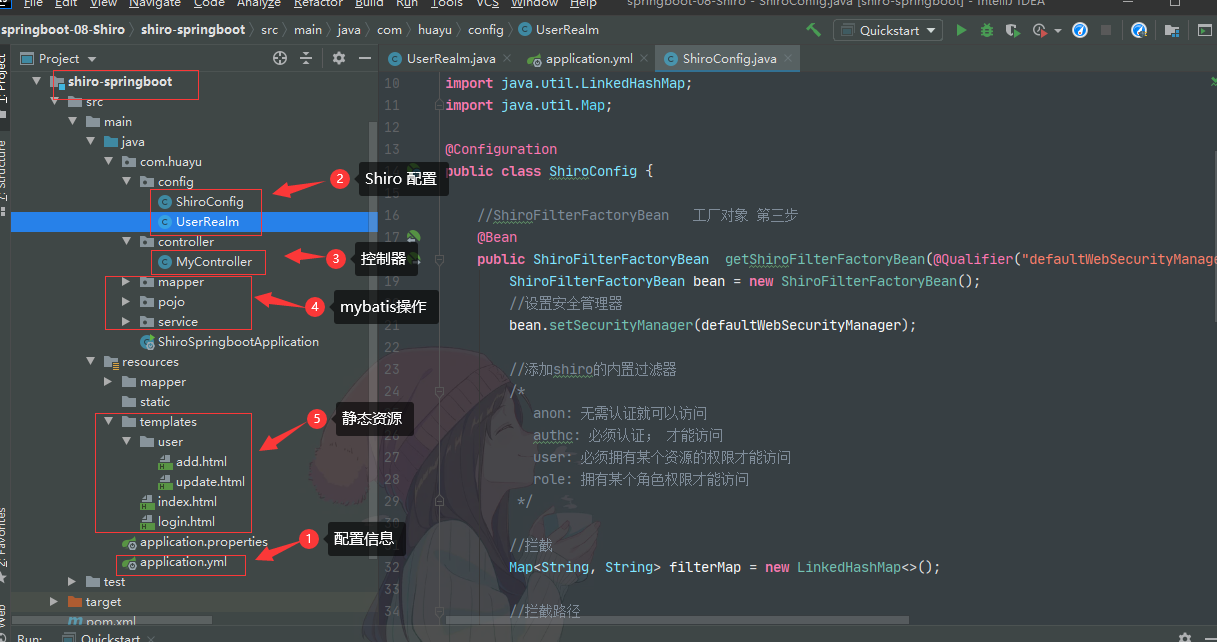
<!--
    Subject 用户
    SecurityManger 管理所有用户和
    Realm 连接数据库
 -->
<!--shiro整合包-->
<dependency>
    <groupId>org.apache.shiro</groupId>
    <artifactId>shiro-spring</artifactId>
    <version>1.7.1</version>
</dependency>

<!--        thymeleaf模板  -->
<dependency>
    <groupId>org.thymeleaf</groupId>
    <artifactId>thymeleaf-spring5</artifactId>
</dependency>
<dependency>
    <groupId>org.thymeleaf.extras</groupId>
    <artifactId>thymeleaf-extras-java8time</artifactId>
</dependency>

<!--    log4j     -->
<dependency>
    <groupId>org.slf4j</groupId>
    <artifactId>slf4j-log4j12</artifactId>
    <version>1.7.21</version>
</dependency>
<dependency>
    <groupId>log4j</groupId>
    <artifactId>log4j</artifactId>
    <version>1.2.17</version>
</dependency>

<!-- druid -->
<dependency>
    <groupId>com.alibaba</groupId>
    <artifactId>druid</artifactId>
    <version>1.1.21</version>
</dependency>

<!-- mysql-connector-java -->
<dependency>
    <groupId>mysql</groupId>
    <artifactId>mysql-connector-java</artifactId>
    <scope>runtime</scope>
</dependency>

<!-- spring-boot-starter-jdbc -->
<dependency>
    <groupId>org.springframework.boot</groupId>
    <artifactId>spring-boot-starter-jdbc</artifactId>
</dependency>

<!-- mybatis-spring-boot-starter -->
<dependency>
    <groupId>org.mybatis.spring.boot</groupId>
    <artifactId>mybatis-spring-boot-starter</artifactId>
    <version>2.1.4</version>
</dependency>

<dependency>
    <groupId>org.projectlombok</groupId>
    <artifactId>lombok</artifactId>
    <version>1.18.22</version>
</dependency>

<!--  shiro-thymeleaf 整合-->
<!--导入thymeleaf依赖-->
<dependency>
    <groupId>org.thymeleaf</groupId>
    <artifactId>thymeleaf-spring5</artifactId>
    <version>3.0.11.RELEASE</version>
</dependency>
<dependency>
    <groupId>org.thymeleaf.extras</groupId>
    <artifactId>thymeleaf-extras-java8time</artifactId>
    <version>3.0.4.RELEASE</version>
</dependency>

<!--shiro-thymeleaf整合-->
<dependency>
    <groupId>com.github.theborakompanioni</groupId>
    <artifactId>thymeleaf-extras-shiro</artifactId>
    <version>2.0.0</version>
</dependency>
spring:
  datasource:
    username: root
    password: 17585273765
    url: jdbc:mysql://localhost:3306/mybatis?serverTimezone=GMT&useUnicode=true&characterEncoding=utf-8
    driver-class-name: com.mysql.cj.jdbc.Driver
    type: com.alibaba.druid.pool.DruidDataSource

    #Spring Boot 默认是不注入这些属性值的,需要自己绑定
    #druid 数据源专有配置
    initialSize: 5
    minIdle: 5
    maxActive: 20
    maxWait: 60000
    timeBetweenEvictionRunsMillis: 60000
    minEvictableIdleTimeMillis: 300000
    validationQuery: SELECT 1 FROM DUAL
    testWhileIdle: true
    testOnBorrow: false
    testOnReturn: false
    poolPreparedStatements: true

    #配置监控统计拦截的filters,stat:监控统计、log4j:日志记录、wall:防御sql注入
    #如果允许时报错  java.lang.ClassNotFoundException: org.apache.log4j.Priority
    #则导入 log4j 依赖即可,Maven 地址:https://mvnrepository.com/artifact/log4j/log4j
    filters: stat,wall,log4j
    maxPoolPreparedStatementPerConnectionSize: 20
    useGlobalDataSourceStat: true
    connectionProperties: druid.stat.mergeSql=true;druid.stat.slowSqlMillis=500

  thymeleaf:
    cache: false
<!DOCTYPE html>
<html lang="en" xmlns:th="http://www.themeleaf.org">
<head>
    <meta charset="UTF-8">
    <title>登录页面</title>
</head>
<body>

<h1>登录</h1>

<p th:text="${msg}" style="color: red"></p>
<form th:action="@{/login}">
    <p>用户名: <input type="text" name="username"></p>
    <p>密码: <input type="text" name="password"></p>
    <p><input type="submit"></p>
</form>

</body>
</html>
<!DOCTYPE html>
<html lang="en" xmlns:th="http://www.themeleaf.org"
      xmlns:shiro="http://www.thymeleaf.org/thymeleaf-extras-shiro" >
<head>
    <meta charset="UTF-8">
    <title>首页</title>
</head>
<body>

<h1>首页</h1>
<p th:if="${session.loginUser} == null" >
    <a th:href="@{/toLogin}">登录</a>
</p>

<p th:text="${msg}"></p>
<hr>

<div shiro:hasPermission="user:add">
    <a th:href="@{/user/add}">add</a>
</div>

<div shiro:hasPermission="user:update">
    <a th:href="@{/user/update}">update</a>
</div>


</body>
</html>
<!DOCTYPE html>
<html lang="en">
<head>
    <meta charset="UTF-8">
    <title>添加页面</title>
</head>
<body>

<h1>add</h1>

</body>
</html>
<!DOCTYPE html>
<html lang="en">
<head>
    <meta charset="UTF-8">
    <title>修改页面</title>
</head>
<body>

<h1>update</h1>

</body>
</html>

//自定义的 UserRealm  extends AuthorizingRealm
public class UserRealm extends AuthorizingRealm {

    @Autowired
    UserService userService;

    //授权
    @Override
    protected AuthorizationInfo doGetAuthorizationInfo(PrincipalCollection principalCollection) {
        System.out.println("执行了=>授权doGetAuthorizationInfo");

        SimpleAuthorizationInfo info = new SimpleAuthorizationInfo();

        //info.addStringPermission("user:add");  //给用户添加add权限

        //拿到当前登录的这个对象
        Subject subject = SecurityUtils.getSubject();
        User currentUser  = (User)subject.getPrincipal();  //Shiro取出当前对象   拿到user对象

        //设置当前用户的权限
        info.addStringPermission(currentUser.getPerms());

        return info;
    }

    //认证
    @Override
    protected AuthenticationInfo doGetAuthenticationInfo(AuthenticationToken token) throws AuthenticationException {
        System.out.println("执行了=>认证doGetAuthenticationInfo");

        //用户名 密码  模拟 数据库中取
//        String name = "root";
//        String password = "123456";


        UsernamePasswordToken userToken = (UsernamePasswordToken)token;

        //连接真实数据库
        User user = userService.queryUserByName(userToken.getUsername());


        //模拟判断
/*       if (!userToken.getUsername().equals(name)){
            return null; //抛出异常 UnknownAccountException
        }

        //密码认证 shiro
        return new SimpleAuthenticationInfo("",user.password,"");
*/

        //数据库判断
        if(user == null){ //没有这个人
            return  null;
        }

        //获取session对象,保存user对象
        Subject currentSubject = SecurityUtils.getSubject();
        Session session = currentSubject.getSession();
        session.setAttribute("loginUser",user);

        //可以加密:md5  md5盐值加密
        //密码认证 shiro
        //第一个参数user是为了传递参数
        return new SimpleAuthenticationInfo(user,user.getPwd(),"");
    }
}
@Configuration
public class ShiroConfig {

    //ShiroFilterFactoryBean   工厂对象 第三步
    @Bean
    public ShiroFilterFactoryBean  getShiroFilterFactoryBean(@Qualifier("defaultWebSecurityManager") DefaultWebSecurityManager defaultWebSecurityManager){
        ShiroFilterFactoryBean bean = new ShiroFilterFactoryBean();
        //设置安全管理器
        bean.setSecurityManager(defaultWebSecurityManager);

        //添加shiro的内置过滤器
        /*
           anon: 无需认证就可以访问
           authc: 必须认证; 才能访问
           user: 必须拥有某个资源的权限才能访问
           role: 拥有某个角色权限才能访问
         */

        //拦截
        Map<String, String> filterMap = new LinkedHashMap<>();

        //拦截路径
//        filterMap.put("/user/add","authc");
//        filterMap.put("/user/update","authc");

        //授权 ,正常情况下,没有授权会跳到未授权页面
        filterMap.put("/user/add","perms[user:add]"); //有add权限的user才可以访问/user/add
        filterMap.put("/user/update","perms[user:update]");

        bean.setFilterChainDefinitionMap(filterMap);

        bean.setLoginUrl("/toLogin"); //设置登录的请求

        //未授权页面
        bean.setUnauthorizedUrl("/noauth");

        return bean;
    }

    //DefaultWebSecurityManger  安全对象  第二步
    @Bean("defaultWebSecurityManager")
    public DefaultWebSecurityManager getDefaultWebSecurityManager(@Qualifier("userRealm") UserRealm userRealm){
        DefaultWebSecurityManager securityManager = new DefaultWebSecurityManager();
        //关联 userRealm
        securityManager.setRealm(userRealm);
        return securityManager;
    }

    //创建 realm 对象  ,需要自定义类  第一步
    @Bean(name = "userRealm")
    public UserRealm userRealm(){
        return  new UserRealm();
    }

    //整合ShiroDialect:用来整合 Shiro
    @Bean
    public ShiroDialect getShiroDialect(){
        return new ShiroDialect();
    }

}
@Controller
public class MyController {

    //index
    @GetMapping({"/","/index"})
    public String toIndex(Model model){
        model.addAttribute("msg","hello,shiro");
        return "index";
    }

    //add
    @RequestMapping("/user/add")
    public String add(){
        return "user/add";
    }

    //update
    @RequestMapping("/user/update")
    public String update(){
        return "user/update";
    }

    //去登录
    @RequestMapping("/toLogin")
    public String toLogin(){
        return "login";
    }

    //登录
    @RequestMapping("/login")
    public String login( String username, String password,Model model){
        //获取当前的用户
        Subject subject = SecurityUtils.getSubject();
        //封装用户的登陆数据
        UsernamePasswordToken token = new UsernamePasswordToken(username, password);

        try {
            subject.login(token); //执行登陆方法,如果没有异常就说明Ok
            return "index";  //登录成功,返回首页
        }catch (UnknownAccountException e){ //用户名bu存在
            model.addAttribute("msg","用户名错误");
            return "login";
        }catch (IncorrectCredentialsException e){  //密码不存在
            model.addAttribute("msg","密码错误");
            return "login";
        }
    }

    //未授权
    @RequestMapping("/noauth")
    @ResponseBody
    public String unauthorized(){
        return "未经授权无法访问此页面!!!";
    }


}

Shiro可以帮助我们完成认证、授权、加密、会话管理、与Web集成、缓存等Shiro的使用方法基本功能模块内部结构使用方法认证与授权认证流程授权流程测试认证与授权:基于配置的授权基于注解的授权Realm域SecurityManager过滤器会话管理SessionManager自定义会话管理器配置基于redis的会话管理使用细节从redis获取session数据基本功能模块Authentication:身份认证/登录,验证用户是不是拥有相应的身份。Authorization:授权,即权限验证,验证某个已认证的用户是否拥有某个权限;即判断用户是否能做事情。SessionManagement:会话管
本篇博文目录:一.SpringSecurity简介1.SpringSecurity2.SpringSecurity相关概念二.认证和授权1.认证(1)使用SpringSecurity进行简单的认证(SpringBoot项目中)(2)SpringSecurity的原理(3)SpringSecurity核心类(4)认证登入案例(JWT+SpringSecurity实现登入案例)2.授权(1)加入权限到Authentication中(2)SecurityConfig配置文件中开启注解权限配置(3)给接口中的方法添加访问权限(4)用户权限表的建立3.自定义失败处理(1)创建异常处理类(2)配置移除处理
目录springSecurity授权权限管理策略基于url的权限管理基于方法的权限管理将url权限管理设为动态会话管理会话并发管理会话失效处理禁止再次登录会话共享源码分析CSRF跨站请求伪造开启CSRF防御传统web开发前后端分离开启CSRF防护csrf防御过程CORS跨域问题springBoot解决跨域的三种方式springSecurity解决跨域springSecurity授权认证与授权解耦授权:据系统提前设置好的规则,给用户分配可以访问某一个资源的权限,用户根据自己所具有权限,去执行相应操作。GrantedAuthority应该如何理解呢?是角色还是权限?权限是具体一些操作,角色是一些权
问题描述在做项目的时候,使用SpringSecurity配置完系统的访问权限时,进行测试的时候,发现明明携带了访问该路径需要的权限标志,会一直提示说我们权限不足。这里我配置了AccessDeniedHandler,当SpringSecurity判断我们权限不足时,会抛出AccessDeniedException异常,然后执行AccessDeniedHandler中我们重写的的handle方法。解决实在想不出原因的时候,我开始着手从源码去探究报错的原因,于是我从网上找来了这张图,授权测试流程:如图所示,首页请求先会进入FilterSecurityInterceptor过滤器,将它作为断点的入口。
文章目录前言一、项目地址二、工具特点三、使用教程四、已知问题但目前无法解决前言 shiro反序列化漏洞综合利用,包含(回显执行命令/注入内存马)修复原版中NoCC的问题。作者为SummerSec。一、项目地址 1)https://github.com/SummerSec/ShiroAttack2。二、工具特点javafx处理没有第三方依赖的情况支持多版本CommonsBeanutils的gadget支持内存马采用直接回显执行命令添加了更多的CommonsBeanutils版本gadget支持修改rememberMe关键词支持直接爆破利用gadget和key支持代理添加修改sh
我想知道是否可以在没有shiro.ini文件的情况下配置Shiro,我的意思是,如果我需要将Shiro配置硬编码到Java类中而不是使用INI文件怎么办? 最佳答案 是的,这是可能的。文档说明了如何操作:http://shiro.apache.org/configuration.html#Configuration-ProgrammaticConfiguration 关于java-Shiro.ini文件配置但在Java类中?,我们在StackOverflow上找到一个类似的问题:
我正在为我的应用程序开发一个身份验证组件。我正在使用带有加盐密码的ApacheShiroAPI。我在这个例子中使用盐创建了一个新用户:ByteSourcesalt=randomNumberGenerator.nextBytes(32);byte[]byteTabSalt=salt.getBytes();StringstrSalt=byteArrayToHexString(byteTabSalt);StringhashedPasswordBase64=newSha256Hash(inPassword,salt,512).toBase64();但我不明白我应该如何在doGetAuthent
博主:👍不许代码码上红欢迎:🐋点赞、收藏、关注、评论。格言:大鹏一日同风起,扶摇直上九万里。文章目录一、关于微信小程序的登录界面制作1.1、wxml代码1.2、checkbox标签1.2.1、color属性1.2.2、disabled属性1.2.4、value属性1.3、wxss画一个区域1.3.1、bindsubmit属性1.3.2、placeholder属性二、登录界面逻辑实现2.1、将数据提交给后台2.1.1、success属性2.1.2、url属性2.1.3、data属性2.1.4、header属性2.1.5、method属性三、后端接收小程序提交的表单四、shiro框架简介核心一、关
SpringCloudAlibaba全集文章目录:零、手把手教你搭建SpringCloudAlibaba项目一、手把手教你搭建SpringCloudAlibaba之生产者与消费者二、手把手教你搭建SpringCloudAlibaba之Nacos服务注册中心三、手把手教你搭建SpringCloudAlibaba之Nacos服务配置中心四、手把手教你搭建SpringCloudAlibaba之Nacos服务集群配置五、手把手教你搭建SpringCloudAlibaba之Nacos服务持久化配置六、手把手教你搭建SpringCloudAlibaba之Sentinel实现流量实时监控七、手把手教你
我发现ApacheShiro确实是一个灵活的安全框架。我使用Shiro成功实现了身份验证和授权。该框架的一个吸引人的特性是基于实例的安全性。我刚刚从Shiro网站复制了示例。以下权限存储在数据库中。printer:query:lp7200printer:print:epsoncolor以下代码检查对于给定的打印机实例,当前经过身份验证的用户是否具有权限。if(SecurityUtils.getSubject().isPermitted("printer:query:lp7200"){//Returnthecurrentjobsonprinterlp7200}我的问题是“这就是权限在数据
