GT库在很早的版本里就有出 通知栏封装方法,但使用起来非常有局限性,接下来咋们来看看新版GT库里的8种通知栏,是如何实现的。


目录
通知栏效果图:(博主真机 一加10T pro Adnroid版本12)
第八种:完全 自定义通知栏 (轻松定制音乐播放器~~~重磅来袭!!!)
下面我们来正文,重头戏是最后一种通知栏 “完全自定义通知栏”
实现代码:
GT.GT_Notification.createNotificationForNormal(
this,
R.mipmap.gt_logo,//通知栏图标
R.drawable.aaa,//通知栏 右下角图片
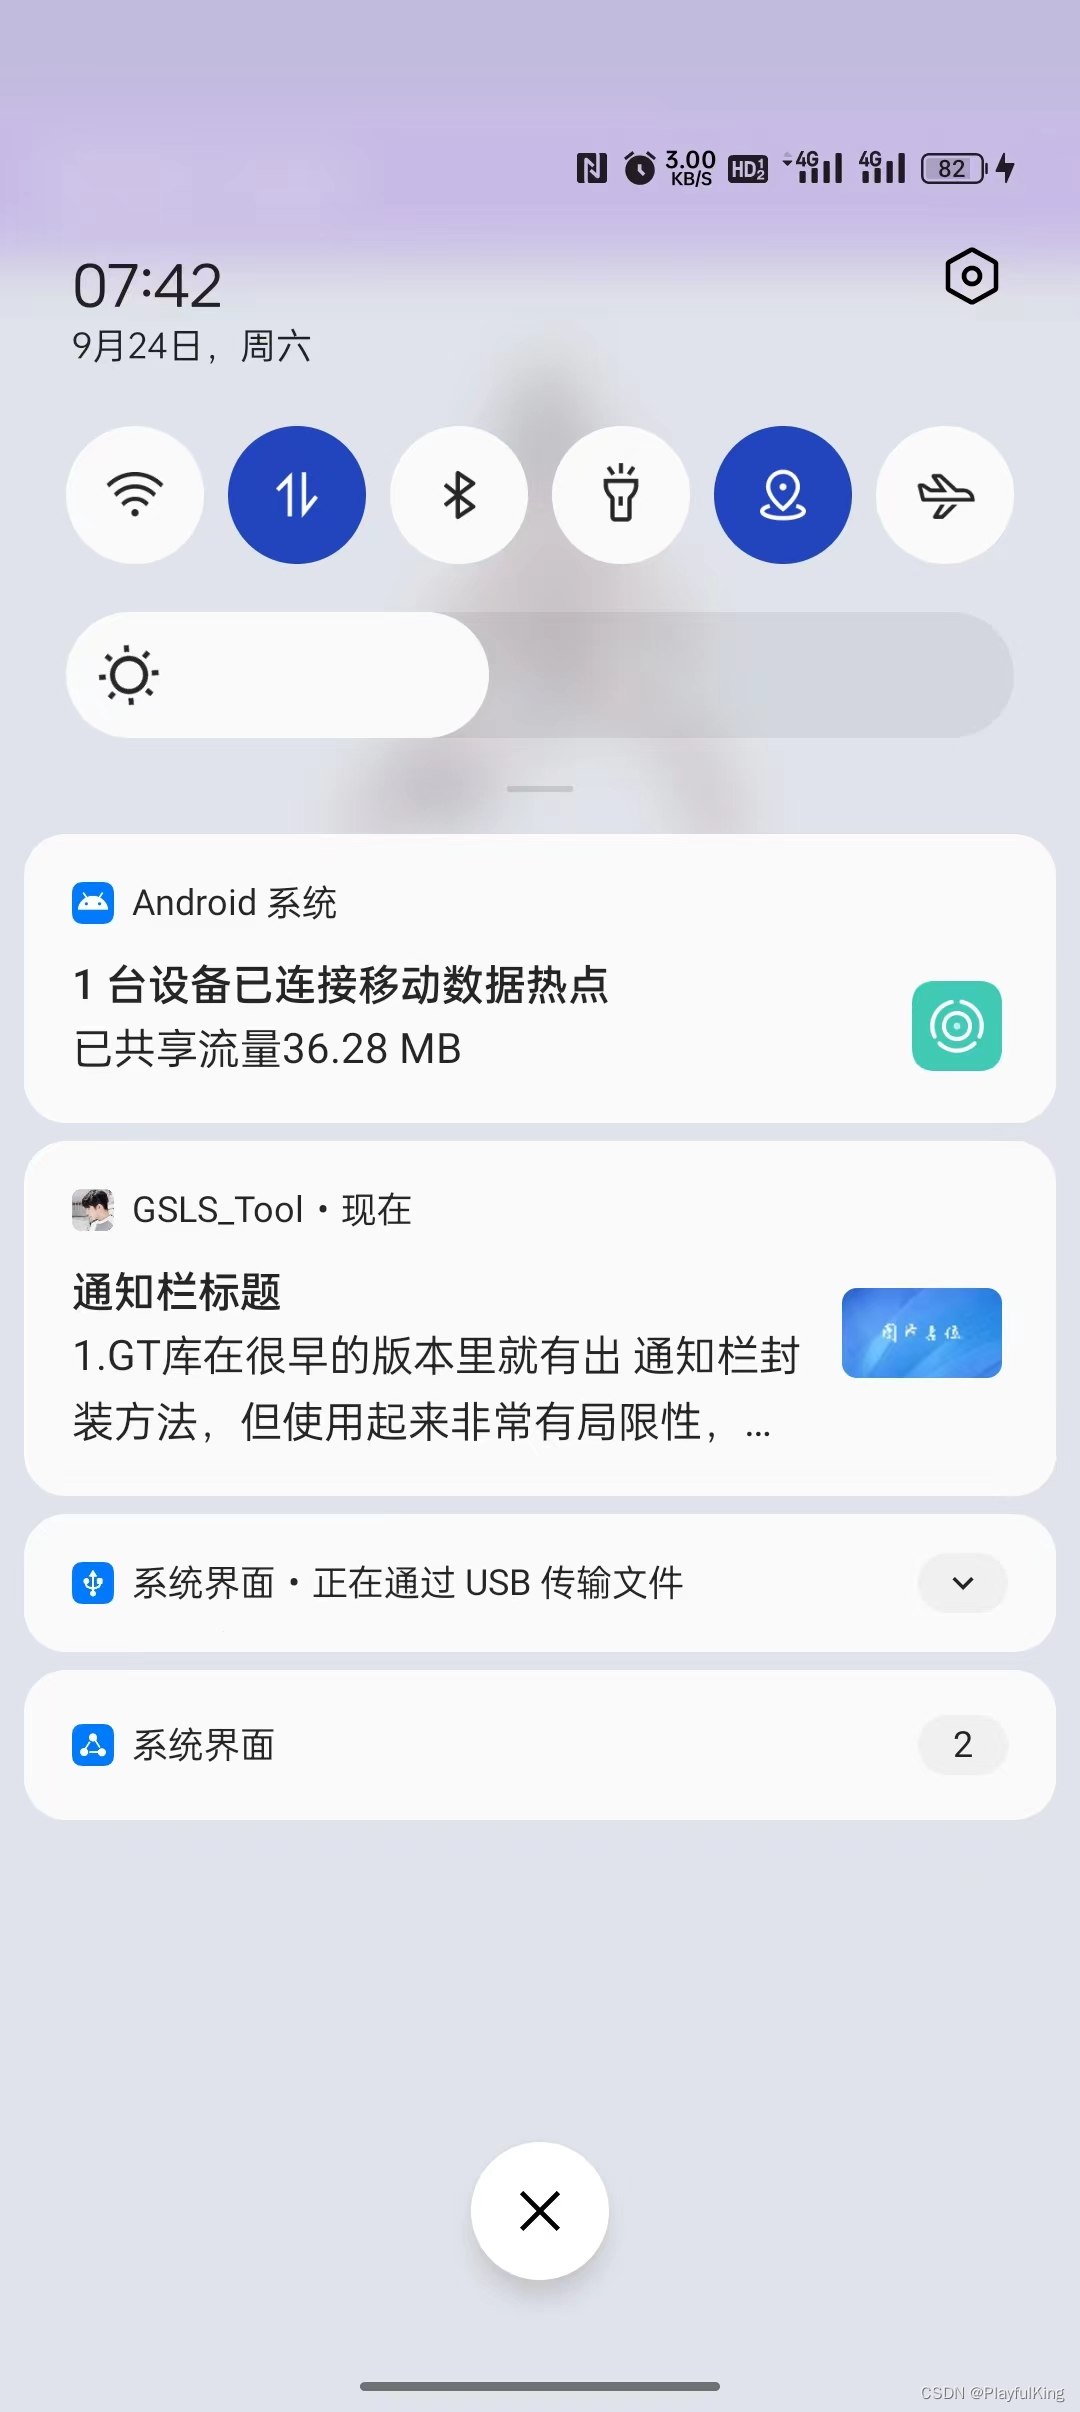
"通知栏标题",//通知栏标题
//通知栏内容
"1.GT库在很早的版本里就有出 " +
"通知栏封装方法,但使用起来非常有局限性," +
"接下来咋们来看看新版GT库里的8种通知栏,是如何实现的",
true,//通知栏单击是否自动取消
true,//锁屏后是否弹出
new Intent(this, MainActivity.class),//单击跳转的页面
0,//发送通知栏的时间
true,//是否 直接启动通知栏
222//当前通知的 Id编号
);里面有个 是否直接启动的 参数,如果填 true,创建就会自动启动通知栏,如果填 false ,就还可以自定义属性,类似于这样:
NotificationCompat.Builder builder = GT.GT_Notification.createNotificationForNormal(
                this,
                R.mipmap.gt_logo,//通知栏图标
                R.drawable.aaa,//通知栏 右下角图片
                "通知栏标题",//通知栏标题
                //通知栏内容
                "1.GT库在很早的版本里就有出 " +
                        "通知栏封装方法,但使用起来非常有局限性," +
                        "接下来咋们来看看新版GT库里的8种通知栏,是如何实现的",
                true,//通知栏单击是否自动取消
                true,//锁屏后是否弹出
                new Intent(this, MainActivity.class),//单击跳转的页面
                0,//发送通知栏的时间
                false,//是否 直接启动通知栏
                222//当前通知的 Id编号
        );

        //设置自定义属性
        builder.setAutoCancel(false);//取消单击自动隐藏

        //启动最终的通知栏
        GT.GT_Notification.startNotification(builder,222);
实现代码:
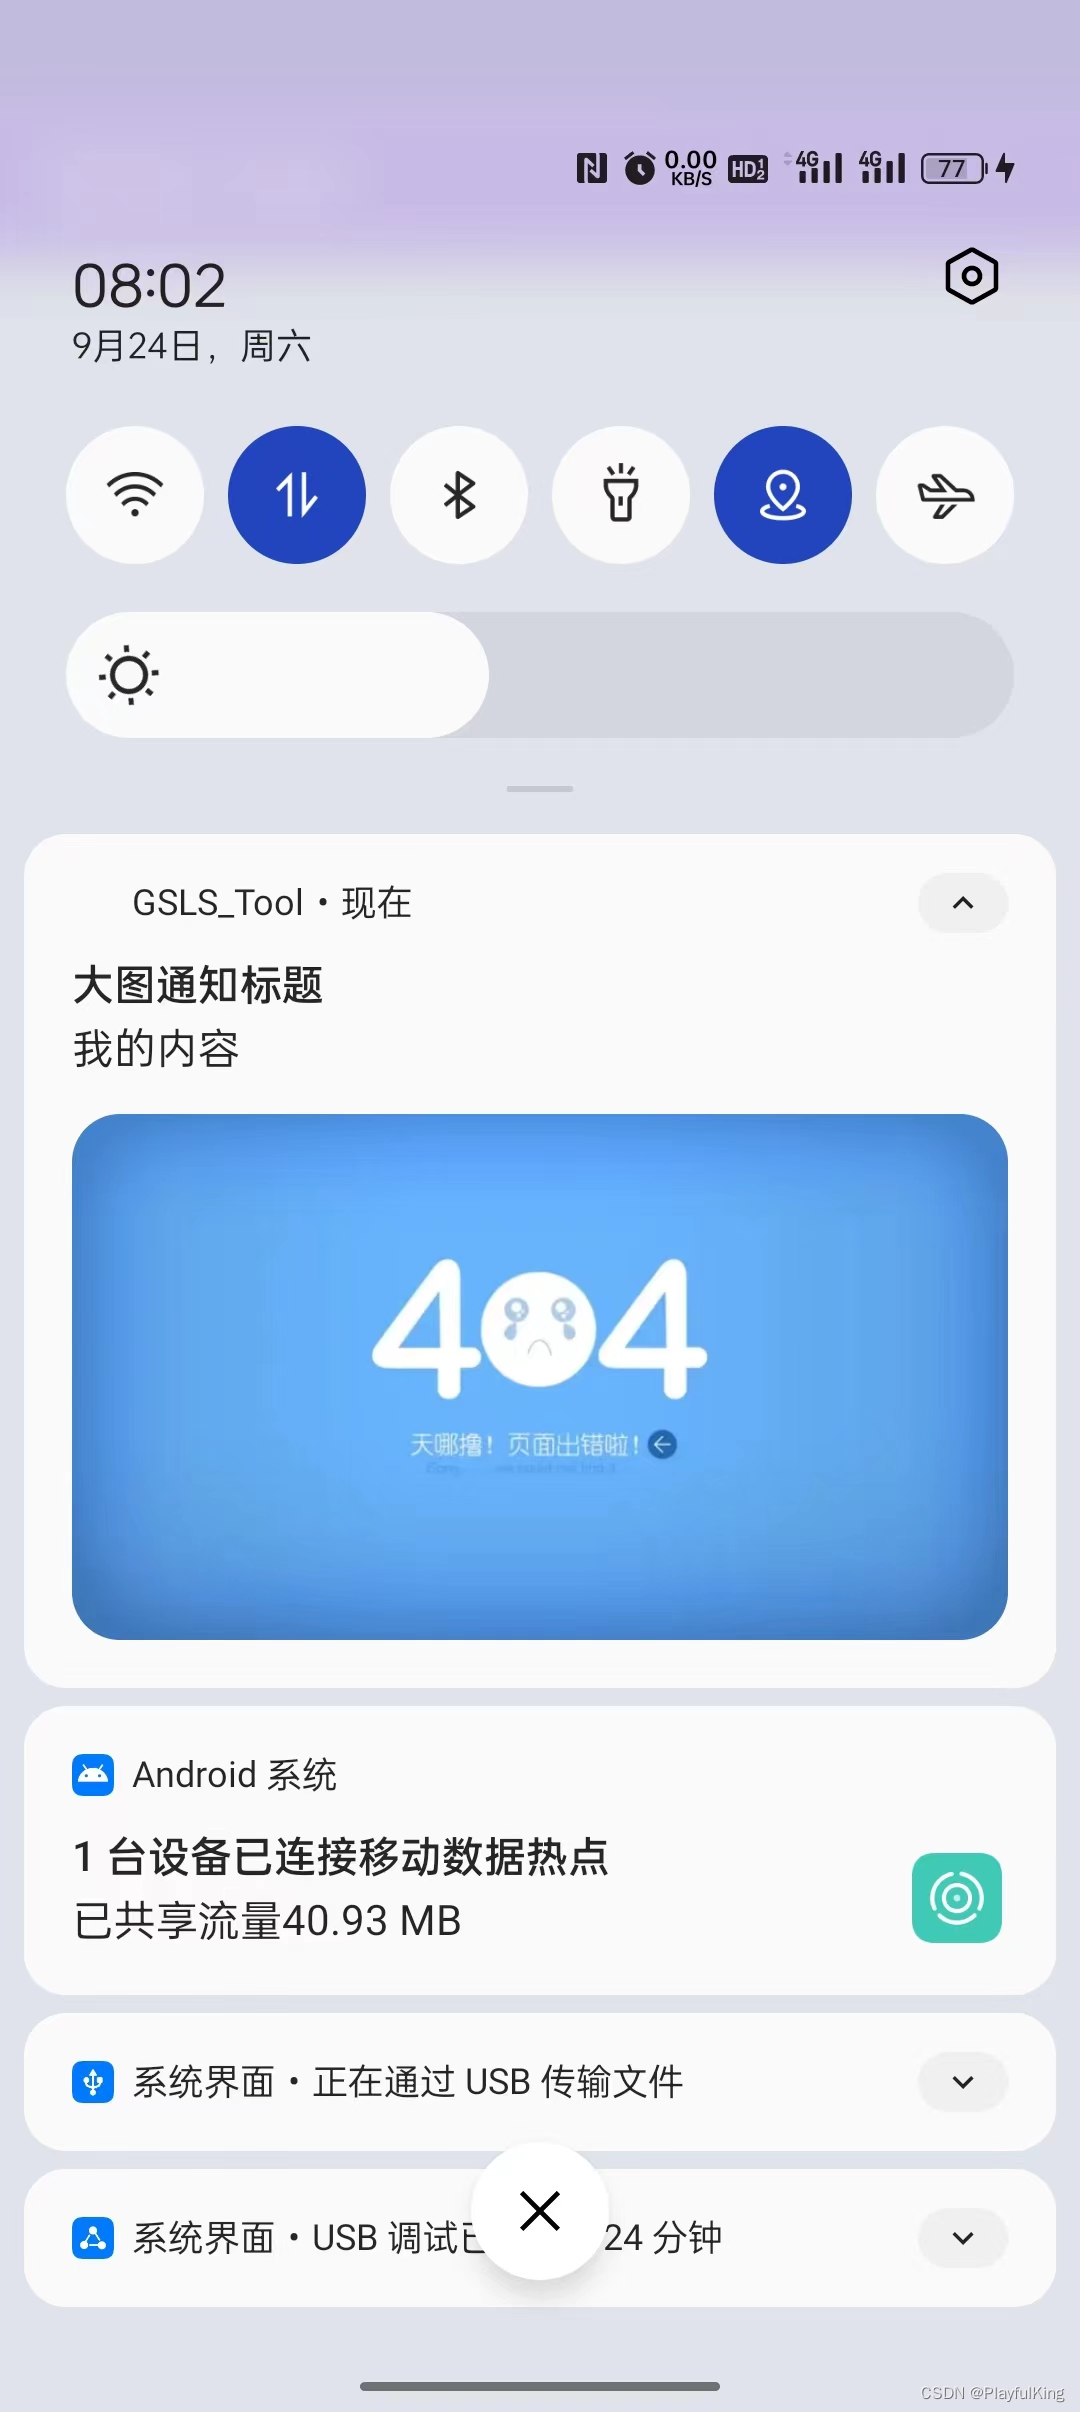
//创建大图通知栏
NotificationCompat.Builder notificationImg = GT.GT_Notification.createNotificationImg(
this,
R.mipmap.gt_logo,//通知栏图标
R.drawable.aaa,//通知栏 右下角图片
R.drawable.eee,//通知栏大图
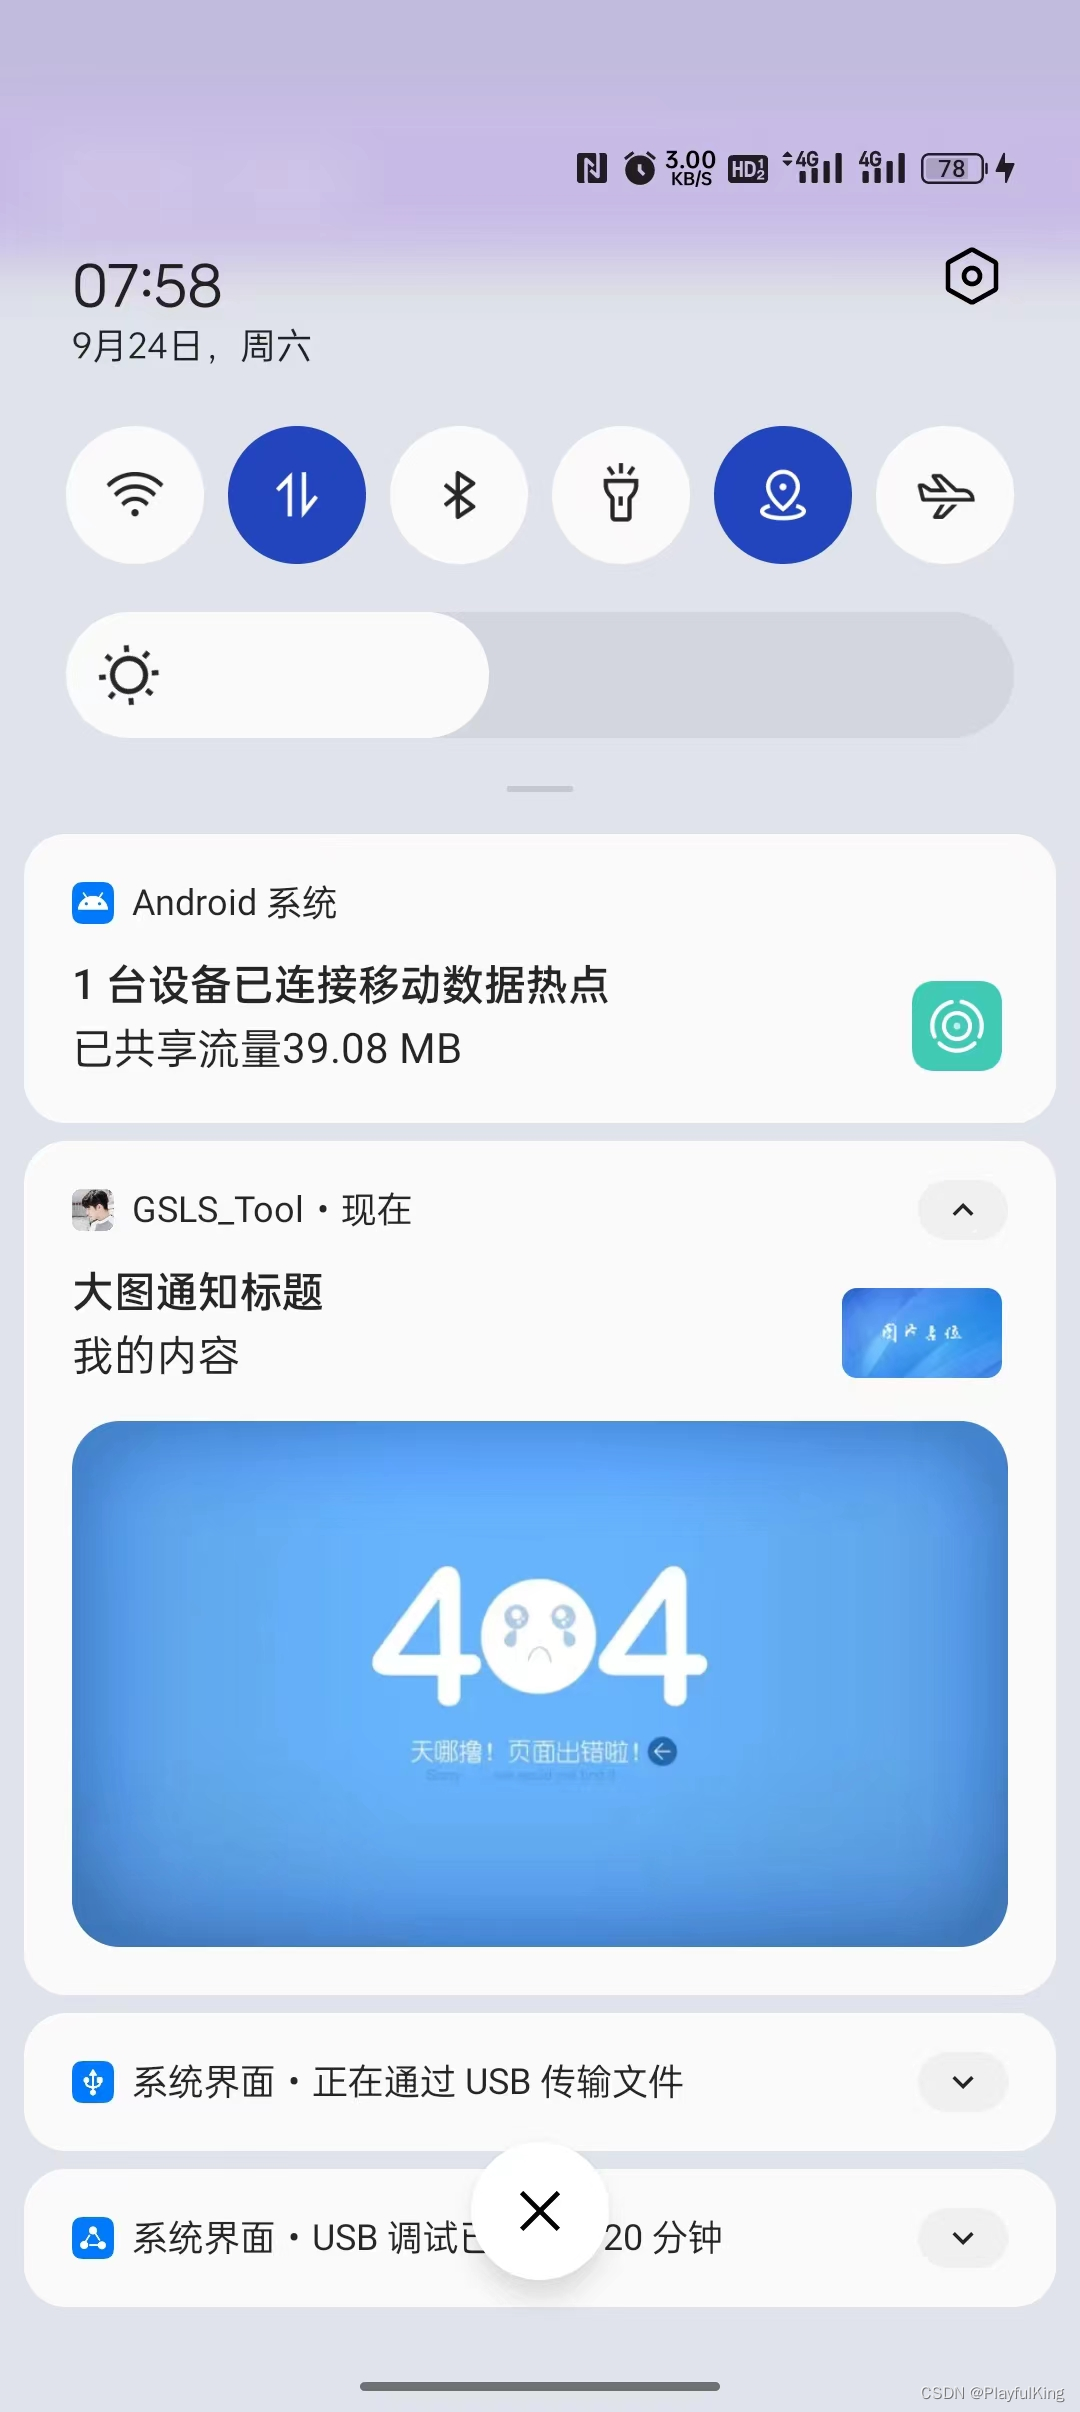
"大图通知标题",//通知栏标题
"我的内容",//通知栏内容
true,//是否单击后取消通知
true,//是否锁屏弹出
new Intent(this, MainActivity.class),//单击意图
-1//发送通知栏时间
);
//启动最终的通知栏
GT.GT_Notification.startNotification(notificationImg, 222);如果你不想右上角有图片可以这么写:
//启动大图通知栏
        NotificationCompat.Builder notificationImg = GT.GT_Notification.createNotificationImg(
                this,
                -1,//取消通知栏图片
                -1,//取消通知栏右下角图片
                R.drawable.eee,//通知栏大图
                "大图通知标题",//通知栏标题
                "我的内容",//通知栏内容
                true,//是否单击后取消通知
                true,//是否锁屏弹出
                new Intent(this, MainActivity.class),//单击意图
                -1,//发送通知栏时间
                222//通知栏编号ID
        );

        GT.GT_Notification.startNotification(notificationImg, 222);
效果图:
是不是使用起来很简单~
实现代码:
//创建长文字通知栏
        NotificationCompat.Builder notificationImg =
                GT.GT_Notification.createNotificationText(
                this,
                R.mipmap.gt_logo,//通知栏图标
                R.drawable.aaa,//通知栏 右下角图片
                "大图通知标题",//通知栏标题
                "GT库在很早的版本里就有出 通知栏封装方法,但使用起来非常有局限性," +
                        "接下来咋们来看看新版GT库里的8种通知栏,是如何实现的。" +
                        "GT库目前总共封装了8种通知栏,每一个通知栏使用起来都特别简单的," +
                        "最主要的还支持完全自定义通知栏。\nGT库不止这一个好用的库~",
                true,//是否单击后取消通知
                true,//是否锁屏弹出
                new Intent(this, MainActivity.class),//单击意图
                -1//发送通知栏时间
        );

        //启动最终的通知栏
        GT.GT_Notification.startNotification(notificationImg, 222);
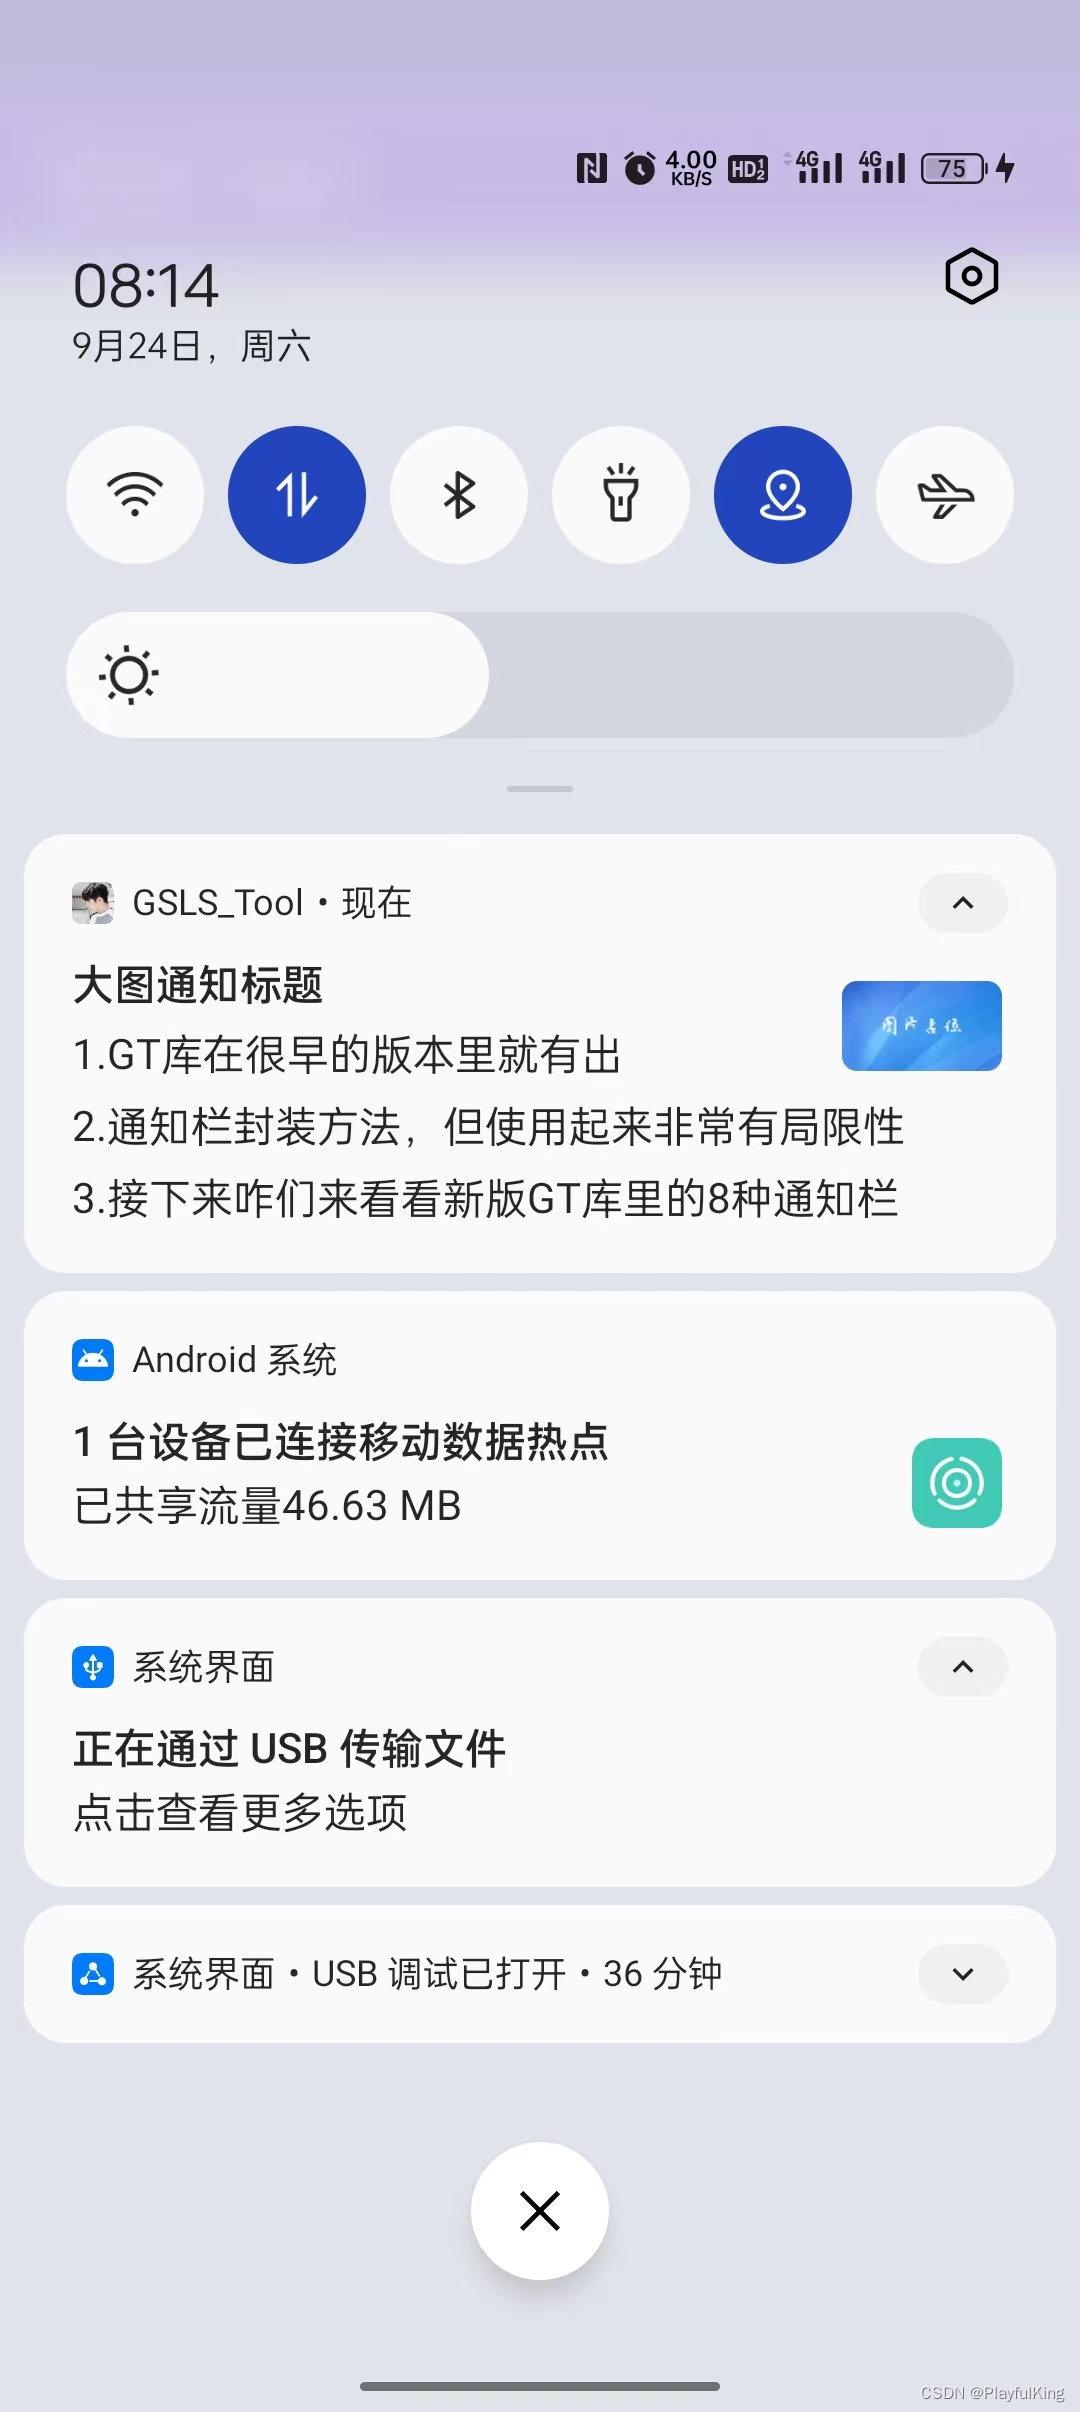
实现代码:
//创建长文字通知栏
        NotificationCompat.Builder notificationImg =
                GT.GT_Notification.createNotificationTexts(
                        this,
                        R.mipmap.gt_logo,//通知栏图标
                        R.drawable.aaa,//通知栏 右下角图片
                        "大图通知标题",//通知栏标题
                        false,//是否单击后取消通知
                        true,//是否锁屏弹出
                        new Intent(this, MainActivity.class),//单击意图
                        -1,//发送通知栏时间
                        222,
                        "1.GT库在很早的版本里就有出",
                        "2.通知栏封装方法,但使用起来非常有局限性",
                        "3.接下来咋们来看看新版GT库里的8种通知栏"
                );

        //启动最终的通知栏
        GT.GT_Notification.startNotification(notificationImg, 222);
目前我们是直接在创建的时候就添加了3条文本,如果我们想创建后添加并更新通知栏UI怎么做呢?我们可以这么操作:
//创建长文字通知栏
        NotificationCompat.Builder notificationImg =
                GT.GT_Notification.createNotificationTexts(
                        this,
                        R.mipmap.gt_logo,//通知栏图标
                        R.drawable.aaa,//通知栏 右下角图片
                        "大图通知标题",//通知栏标题
                        false,//是否单击后取消通知
                        true,//是否锁屏弹出
                        new Intent(this, MainActivity.class),//单击意图
                        -1,//发送通知栏时间
                        222,
                        "1.GT库在很早的版本里就有出",
                        "2.通知栏封装方法,但使用起来非常有局限性",
                        "3.接下来咋们来看看新版GT库里的8种通知栏"
                );

        //启动最终的通知栏
        GT.GT_Notification.startNotification(notificationImg, 222);

        //创建后动态添加文本
        GT.GT_Notification.addLineText(notificationImg,222,
                "4.GT库目前总共封装了8种通知栏,",
                "5.每一个通知栏使用起来都特别简单的,",
                "6.最主要的还支持完全自定义通知栏。",
                "7.GT库不止这一个好用的库~"
                );

        //更新最终修改的通知栏
        GT.GT_Notification.startNotification(notificationImg, 222);
效果图:
实现代码:
//创建消息通知栏
        NotificationCompat.Builder notificationImg =
                GT.GT_Notification.createNotificationMsgs(
                        this,
                        R.mipmap.gt_logo,//通知栏图标
                        -1,//通知栏 右下角图片
                        "大图通知标题",//通知栏标题
                        false,//是否单击后取消通知
                        true,//是否锁屏弹出
                        new Intent(this, MainActivity.class),//单击意图
                        -1,//发送通知栏时间
                        222,
                        "王重阳" + GT.GT_Notification.SEPARATOR + "大清早是习武最好的时间!",
                        "郭靖" + GT.GT_Notification.SEPARATOR + "前辈的武功真是登峰造极呀!",
                        "周伯通" + GT.GT_Notification.SEPARATOR + "练武有什么好玩的",
                        "周伯通" + GT.GT_Notification.SEPARATOR + "大兄弟,你来啦!快来看看我这秀字的蜜蜂"

                );

        //启动最终的通知栏
GT.GT_Notification.startNotification(notificationImg, 222);注意:GT.GT_Notification.SEPARATOR 字段是消息的分隔符,一定要用这个用于区分。
当然,消息通知栏也支持创建后再动态添加消息:
//创建消息通知栏
        NotificationCompat.Builder notificationImg =
                GT.GT_Notification.createNotificationMsgs(
                        this,
                        R.mipmap.gt_logo,//通知栏图标
                        -1,//通知栏 右下角图片
                        "大图通知标题",//通知栏标题
                        false,//是否单击后取消通知
                        true,//是否锁屏弹出
                        new Intent(this, MainActivity.class),//单击意图
                        -1,//发送通知栏时间
                        222,
                        "王重阳" + GT.GT_Notification.SEPARATOR + "大清早是习武最好的时间!",
                        "郭靖" + GT.GT_Notification.SEPARATOR + "前辈的武功真是登峰造极呀!",
                        "周伯通" + GT.GT_Notification.SEPARATOR + "练武有什么好玩的",
                        "周伯通" + GT.GT_Notification.SEPARATOR + "大兄弟,你来啦!快来看看我这秀字的蜜蜂"

                );

        //启动最终的通知栏
        GT.GT_Notification.startNotification(notificationImg, 222);


        //创建后动态添加消息
        GT.GT_Notification.addLineMsg(notificationImg,222,
                "郭靖" + GT.GT_Notification.SEPARATOR + "我不玩,华山论剑就只剩下2年了,我要继续加油。",
                "周伯通" + GT.GT_Notification.SEPARATOR + "华山论剑有什么好玩的,你不陪我玩,那我找小黄蓉玩去了。",
                "黄蓉" + GT.GT_Notification.SEPARATOR + "老顽童!真是调皮,别去打扰靖哥哥习武了!",
                "黄蓉" + GT.GT_Notification.SEPARATOR + "走!我带你尝尝我最新研究出来的菜品!"
                );

        //更新最终修改的通知栏
        GT.GT_Notification.startNotification(notificationImg, 222);
效果图:
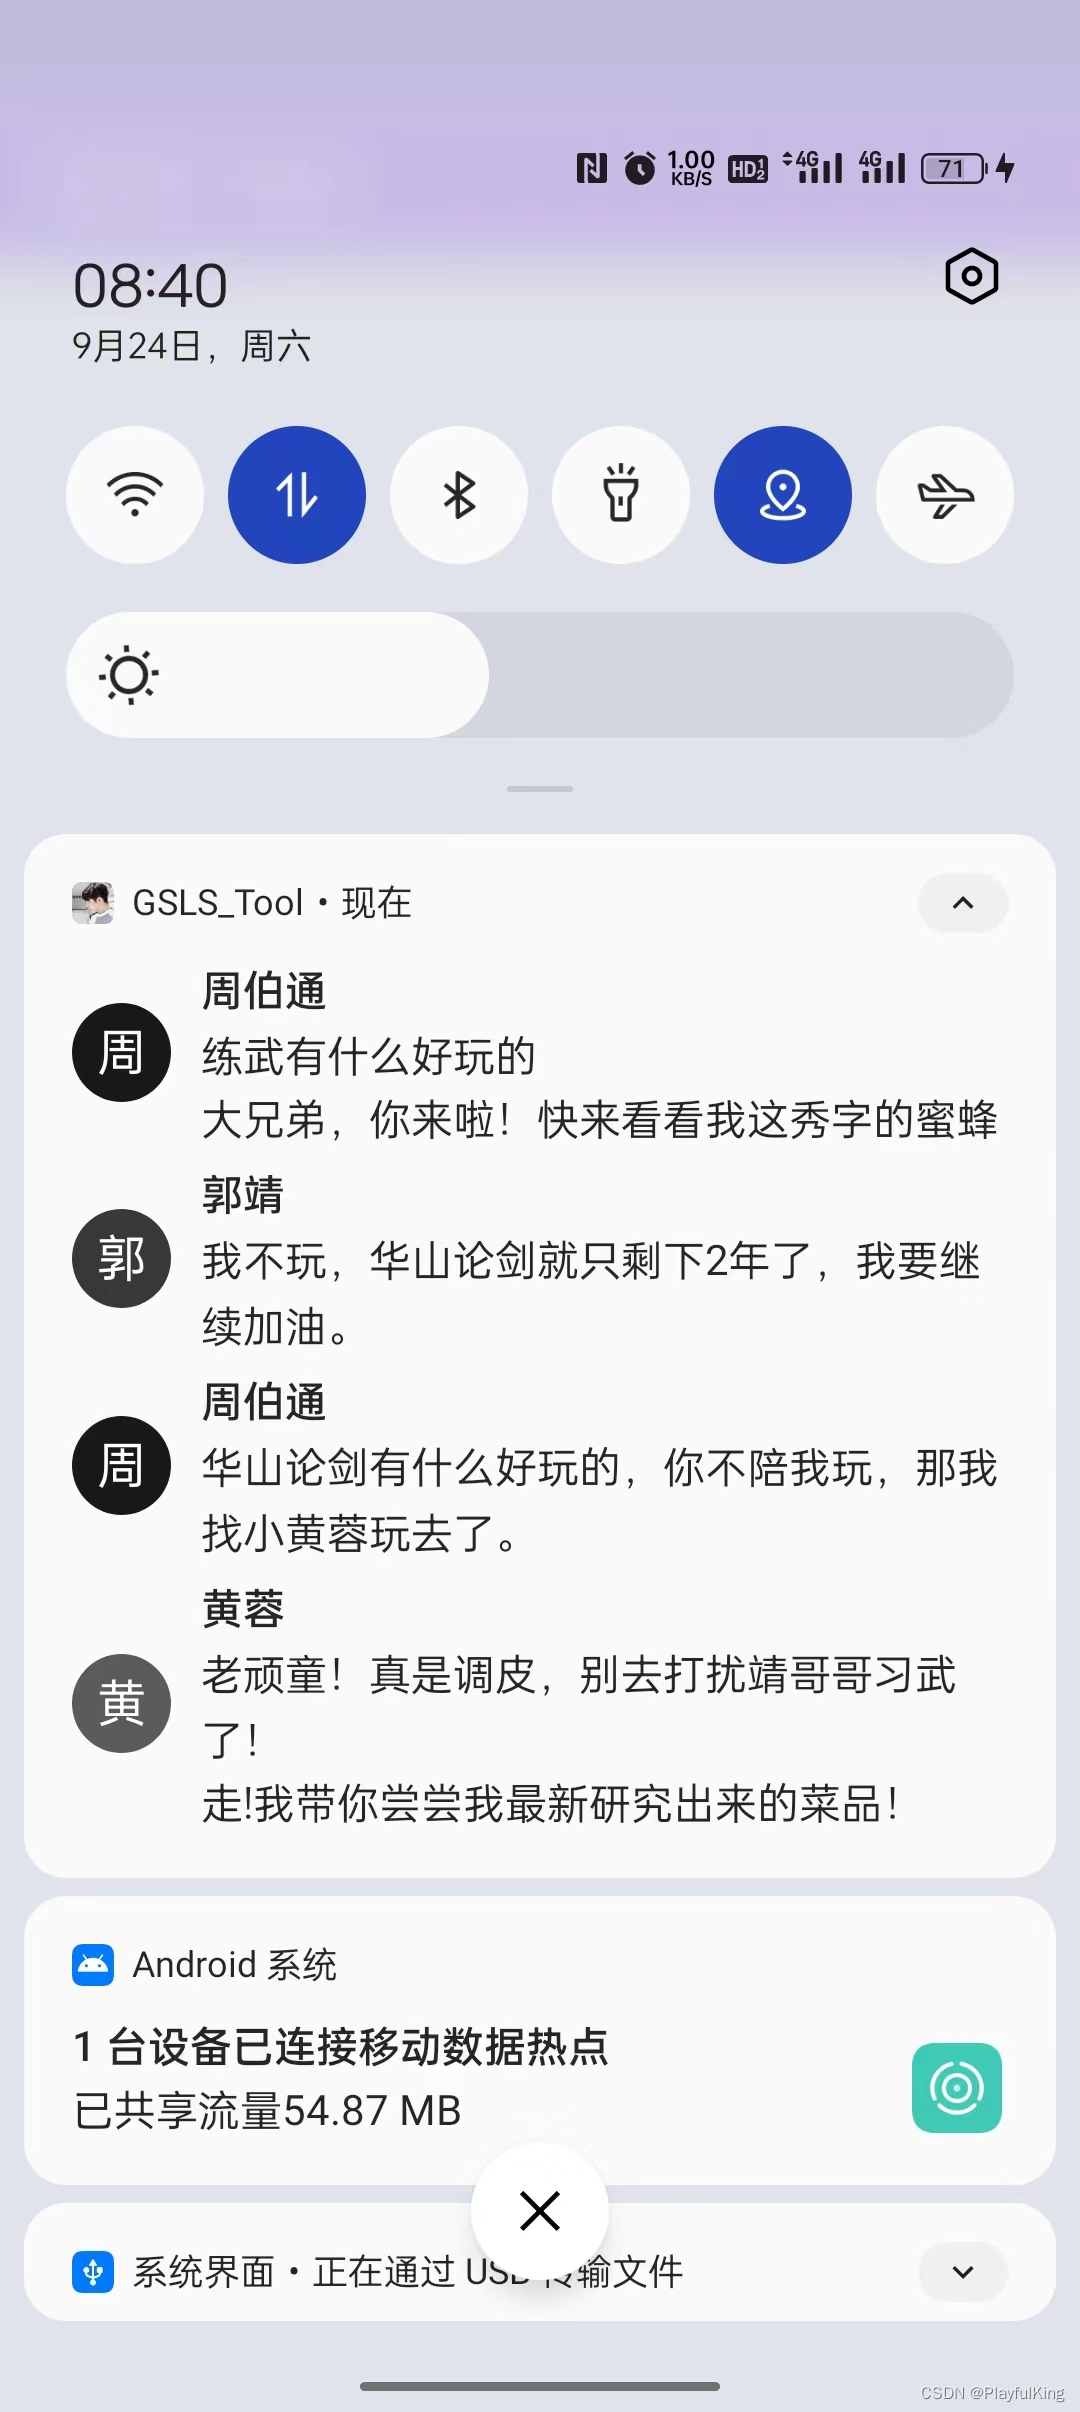
注意:发送的消息通知栏里是会有显示限制的。

实现代码:
//创建进度条知栏
        NotificationCompat.Builder builder =
                GT.GT_Notification.createNotificationProgress(
                        this,
                        R.mipmap.gt_logo,//通知栏图标
                        R.drawable.aaa,
                        "检测到最新版本",
                        "正在更新中,请稍后...",
                        false,//单击后是否自动隐藏
                        true,//是否会悬浮状态展示
                        true,//锁屏是否显示
                        new Intent(this, MainActivity.class),//单击意图
                        -1,//发送通知时间
                        100,//进度最大值
                        0//当前进度
                );

        //启动最终的通知栏
        GT.GT_Notification.startNotification(builder, 222);
既然是进度条,那么怎么更新进度条呢,没错,更新进度条方法也是特别简单:
//创建进度条知栏
        NotificationCompat.Builder builder =
                GT.GT_Notification.createNotificationProgress(
                        this,
                        R.mipmap.gt_logo,//通知栏图标
                        R.drawable.aaa,
                        "检测到最新版本",
                        "正在更新中,请稍后...",
                        false,//单击后是否自动隐藏
                        true,//是否会悬浮状态展示
                        true,//锁屏是否显示
                        new Intent(this, MainActivity.class),//单击意图
                        -1,//发送通知时间
                        100,//进度最大值
                        0//当前进度
                );

        //启动最终的通知栏
        GT.GT_Notification.startNotification(builder, 222);

        //模拟网络下载
        new Thread(new Runnable() {
            @Override
            public void run() {

                for (int progress = 0; progress <= 100; progress++) {
                    GT.Thread.sleep(50);//GT库的延迟函数,模拟网络下载的速度
                    GT.GT_Notification.updateNotificationProgress(
                            builder,//修改该进度条通知栏的进度
                            "正在下载中..." + progress + "%",//进度显示
                            100,//进度条最大值
                            progress,//进度条当前进度
                            true,//是否隐藏在通知栏里进行更新进度
                            true,//完成后是否自动隐藏
                            "下载完毕,正在安装中!",//完成后显示的文字
                            3000,//完成后等待3秒后取消通知
                            222//通知栏 编号ID
                    );
                }

            }
        }).start();
效果图:
总结:这个使用起来 与 更新起来 方便吧,把建议都打在评论区吧~~
实现代码:
//创建进自定义知栏
        NotificationCompat.Builder builder =
                GT.GT_Notification.createNotificationFoldView(
                        this,
                        R.mipmap.gt_logo,//通知栏图标
                        R.layout.item_notification,//折叠布局
                        R.layout.item_notification2,//展开布局
                        true,//单击是否取消通知
                        true,//是锁屏显示
                        new Intent(this, MainActivity.class),//单击意图
                        -1,//发送通知时间
                        222//通知Id
                );

        //启动最终的通知栏
        GT.GT_Notification.startNotification(builder, 222);
折叠布局:R.layout.item_notification
<?xml version="1.0" encoding="utf-8"?>
<LinearLayout xmlns:android="http://schemas.android.com/apk/res/android"
    android:layout_width="match_parent"
    android:layout_height="wrap_content"
    android:orientation="vertical">

    <LinearLayout
        android:layout_width="match_parent"
        android:layout_height="wrap_content"
        android:orientation="horizontal">

        <ImageView
            android:layout_width="50dp"
            android:layout_height="50dp"
            android:scaleType="fitXY"
            android:src="@drawable/music_head" />

        <LinearLayout
            android:layout_width="0dp"
            android:layout_height="wrap_content"
            android:layout_marginStart="10dp"
            android:layout_weight="1"
            android:orientation="vertical">

            <TextView
                android:id="@+id/Notification2Activity_music_name"
                android:layout_width="match_parent"
                android:layout_height="wrap_content"
                android:text="歌曲名:最伟大的作品"
                android:textColor="#000000"
                android:textSize="16sp" />

            <TextView
                android:layout_width="match_parent"
                android:layout_height="wrap_content"
                android:text="歌手名:周杰伦"
                android:textSize="12sp"
                android:textColor="#000000" />
        </LinearLayout>

        <LinearLayout
            android:layout_width="wrap_content"
            android:layout_height="match_parent"
            android:gravity="center"
            android:padding="10dp">

            <ImageButton
                android:id="@+id/Notification2Activity_music_left"
                android:layout_width="26dp"
                android:layout_height="26dp"
                android:background="@null"
                android:scaleType="fitCenter"
                android:src="@drawable/music_left" />

            <ImageButton
                android:id="@+id/Notification2Activity_music_play"
                android:layout_width="26dp"
                android:layout_height="26dp"
                android:layout_marginStart="10dp"
                android:background="@null"
                android:scaleType="fitCenter"
                android:src="@drawable/music_play" />

            <ImageButton
                android:id="@+id/Notification2Activity_music_right"
                android:layout_width="26dp"
                android:layout_height="26dp"
                android:layout_marginStart="10dp"
                android:background="@null"
                android:scaleType="fitCenter"
                android:src="@drawable/music_right" />
        </LinearLayout>

    </LinearLayout>

</LinearLayout>
展开布局:R.layout.item_notification2
<?xml version="1.0" encoding="utf-8"?>
<LinearLayout xmlns:android="http://schemas.android.com/apk/res/android"
    android:layout_width="match_parent"
    android:layout_height="wrap_content"
    android:orientation="vertical">

    <LinearLayout
        android:layout_width="match_parent"
        android:layout_height="wrap_content"
        android:orientation="horizontal">

        <ImageView
            android:layout_width="50dp"
            android:layout_height="50dp"
            android:scaleType="fitXY"
            android:src="@drawable/music_head" />

        <LinearLayout
            android:layout_width="0dp"
            android:layout_height="wrap_content"
            android:layout_marginStart="10dp"
            android:layout_weight="1"
            android:orientation="vertical">

            <TextView
                android:id="@+id/Notification2Activity_music_name"
                android:layout_width="match_parent"
                android:layout_height="wrap_content"
                android:text="歌曲名:最伟大的作品"
                android:textColor="#000000"
                />

            <TextView
                android:layout_width="match_parent"
                android:layout_height="wrap_content"
                android:text="歌手名:周杰伦"
                android:textSize="12sp"
                android:textColor="#000000" />
        </LinearLayout>

        <LinearLayout
            android:layout_width="wrap_content"
            android:layout_height="match_parent"
            android:gravity="center"
            android:padding="10dp">

            <ImageButton
                android:id="@+id/Notification2Activity_music_left"
                android:layout_width="26dp"
                android:layout_height="26dp"
                android:background="@null"
                android:scaleType="fitCenter"
                android:src="@drawable/music_left" />

            <ImageButton
                android:id="@+id/Notification2Activity_music_play"
                android:layout_width="26dp"
                android:layout_height="26dp"
                android:layout_marginStart="10dp"
                android:background="@null"
                android:scaleType="fitCenter"
                android:src="@drawable/music_play" />

            <ImageButton
                android:id="@+id/Notification2Activity_music_right"
                android:layout_width="26dp"
                android:layout_height="26dp"
                android:layout_marginStart="10dp"
                android:background="@null"
                android:scaleType="fitCenter"
                android:src="@drawable/music_right" />
        </LinearLayout>

    </LinearLayout>

    <LinearLayout
        android:layout_width="match_parent"
        android:layout_height="wrap_content"
        android:orientation="horizontal">

        <ImageView
            android:layout_width="match_parent"
            android:layout_height="110dp"
            android:src="@drawable/ic_main2"
            android:scaleType="fitXY"
            />

    </LinearLayout>

</LinearLayout>
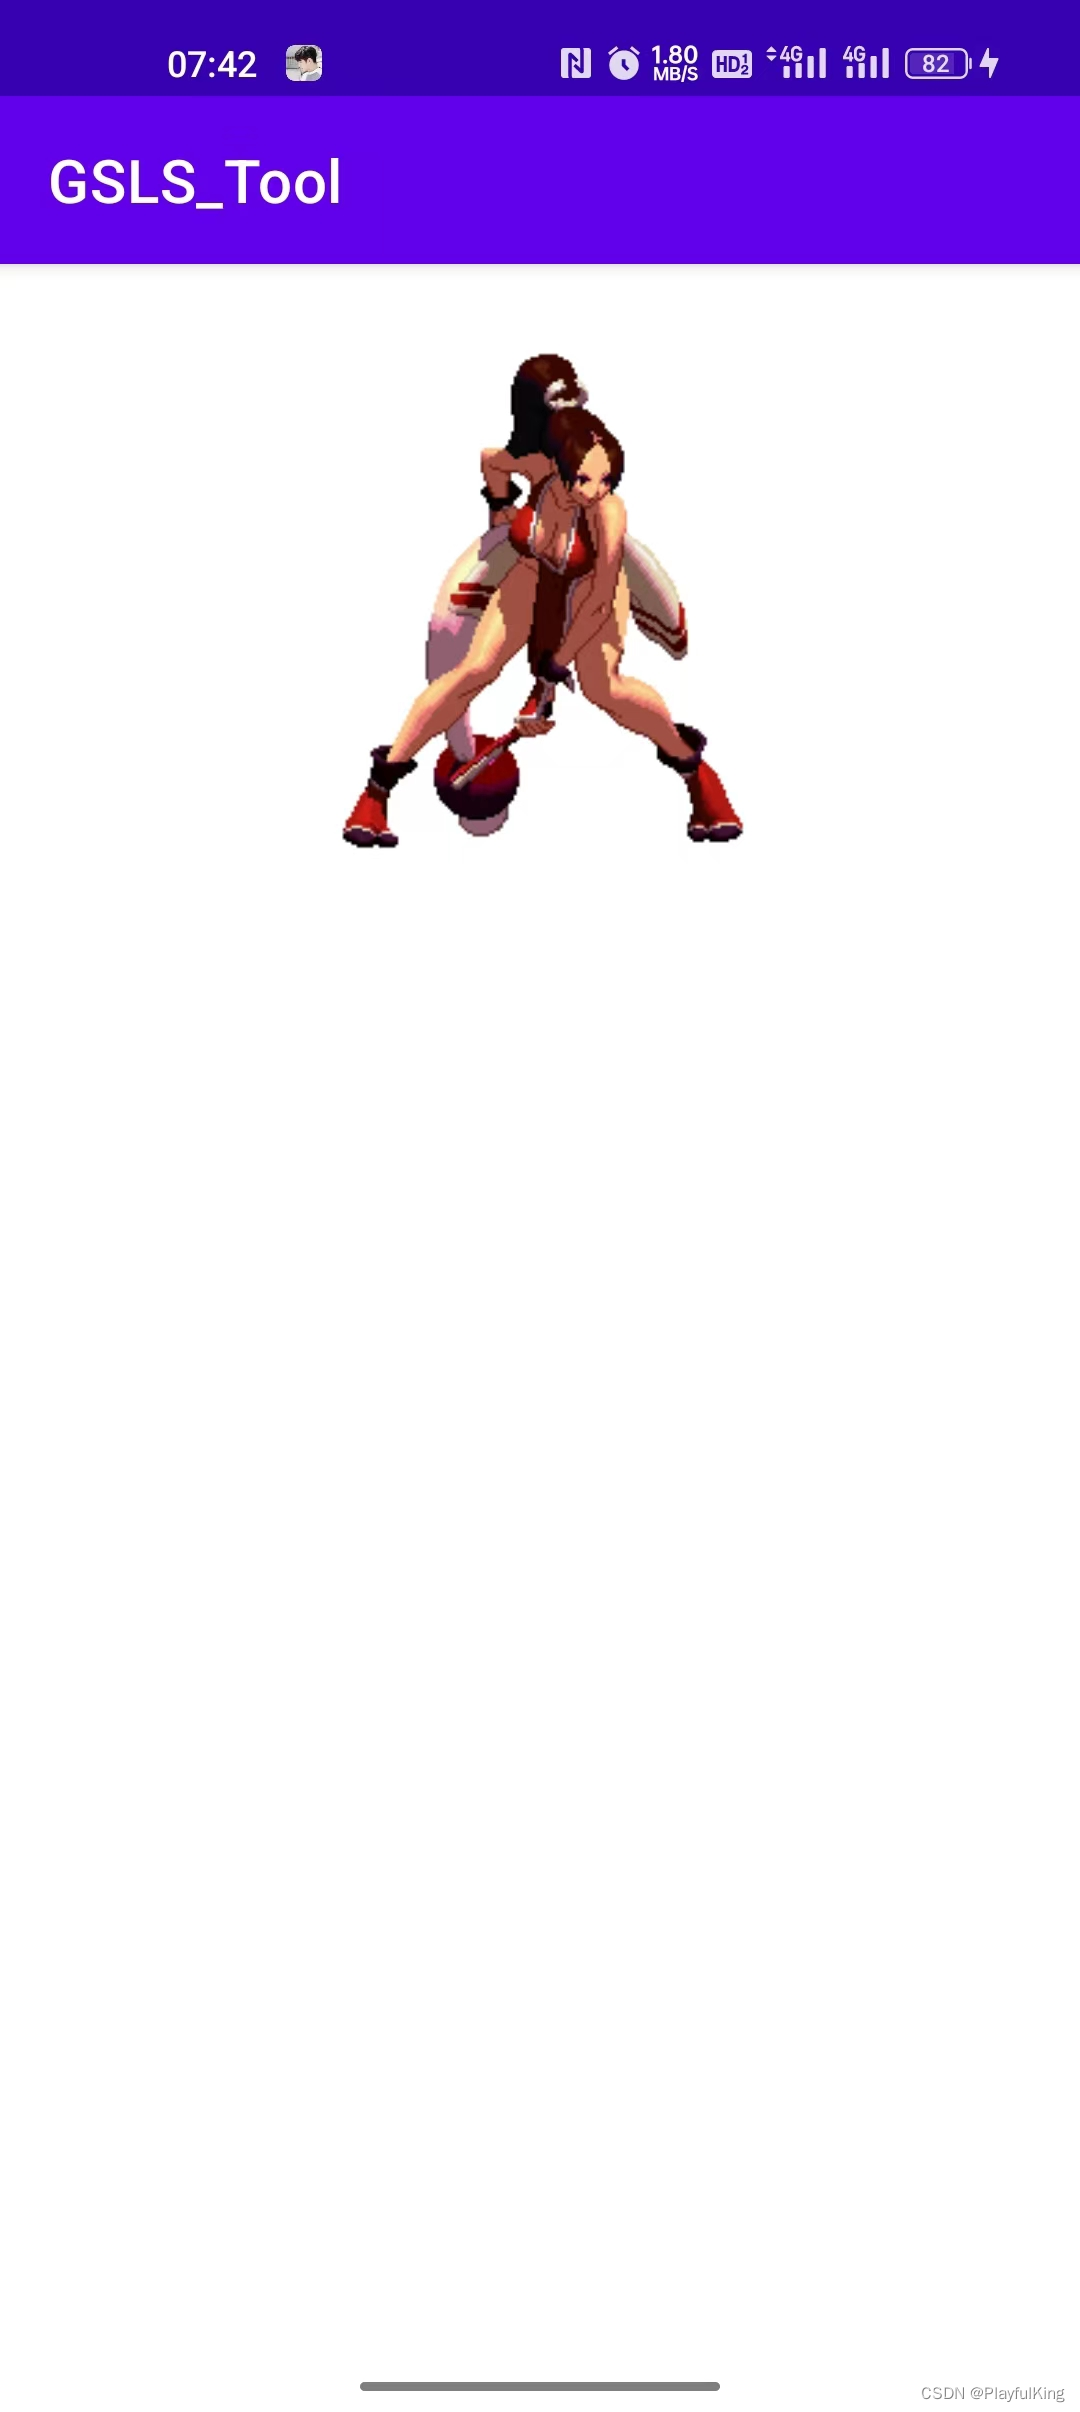
所用到的资源图片:


注意:目前自定义通知栏,无法实现 切换歌曲,暂停歌曲,只能单击后直接跳转到 相应的Activity中而已,想要真正的实现这些单击切换音乐、暂停音乐功能,
请看最后一种方法,“完全自定义通知栏”。
下面博主用了 第四版 加载布局,各位也要添加哦
供复制:
//注册 gt-DataBinding 功能
annotationProcessor 'com.github.1079374315:GSLS_Tool:v1.4.2.4'
将红色框框里的复制粘贴注册好就可以使用第四版 加载布局了

为了降低GIF大小,所有录制的GIF有点模糊,但实际效果是静态图这般。
实现基础代码:(去掉所有逻辑,仅仅保留UI层面的东西,为了让伙伴们更好的理解)
//加载 折叠通知栏 与 展开通知栏
@GT.Annotations.GT_Notification(value = R.layout.item_notification, value2 = R.layout.item_notification2)
public class NotificationDemo extends GT.GT_Notification.AnnotationNotification {

    //必要的重写 构造方法
    public NotificationDemo(Context context) {
        super(context);
    }

    @Override
    protected void initView(Context context) {
        super.initView(context);
        //初始化通知栏 必要属性
        setInitData(
                R.mipmap.gt_logo, //设置通知图标
                false,//单击是否取消通知
                true,//锁屏是否显示
                true,//是否用户不可取消通知
                null,//单击意图
                -1,//发送通知时间
                222);//通知栏编号Id
    }

}
建议 发布通知栏 代码:
    //创建通知栏
    NotificationDemo notificationDemo = new NotificationDemo(this);
    GT.GT_Notification.startNotification(notificationDemo);//发送通知栏
还有另一种 发布通知栏 代码:(如果你确定不需要再自定义什么了,就可以使用这种简短的方式)
//创建并发布 通知栏
new NotificationDemo(this).commit();
够简短吧!xml布局用的是 简易 自定义通知栏 里的 折叠布局 与 展开布局 可直接从上面复制下来即可。GT库为简单而生
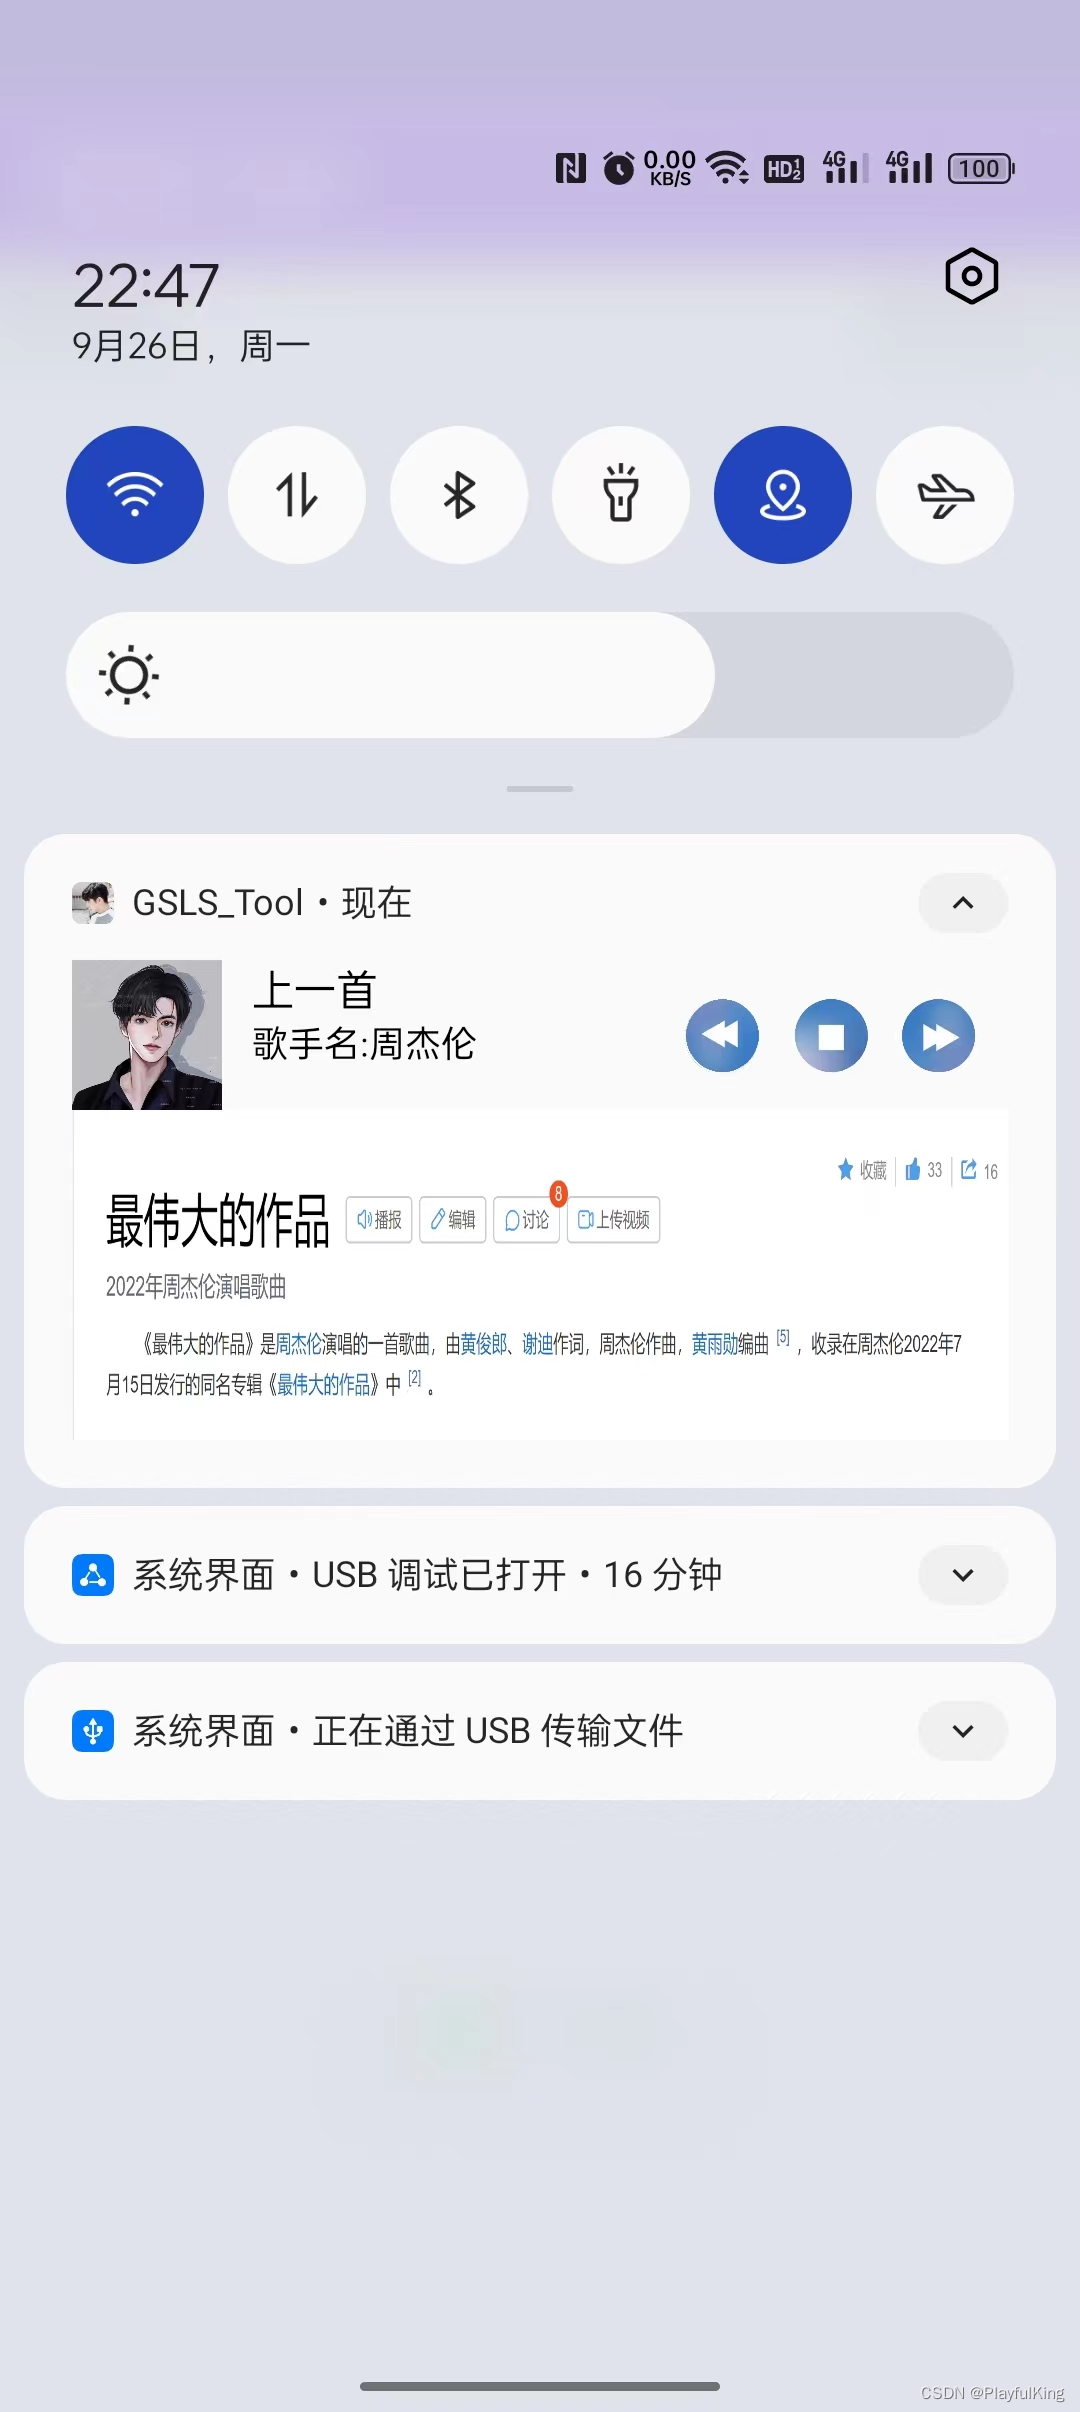
目前咋们这点代码写的音乐播放器,运行起来仅仅是个丑不拉几的静态UI,效果图如下:
接下来咋们来各个设置上默认的美术图片:
//加载 折叠通知栏 与 展开通知栏
@GT.Annotations.GT_Notification(value = R.layout.item_notification, value2 = R.layout.item_notification2)
public class NotificationDemo extends GT.GT_Notification.AnnotationNotification {

    //必要的重写 构造方法
    public NotificationDemo(Context context) {
        super(context);
    }

    //重写必要的初始化方法
    @Override
    protected void initView(Context context) {
        super.initView(context);
        //初始化通知栏 必要属性
        setInitData(
                R.mipmap.gt_logo, //设置通知图标
                false,//单击是否取消通知
                true,//锁屏是否显示
                true,//是否用户不可取消通知
                null,//单击意图
                -1,//发送通知时间
                222);//通知栏编号Id

        //初始化UI属性(博主建议:在初始化UI里的尽量使用本地资源)
        setImageRes(R.id.iv_head, R.drawable.music_head);//设置头像图片
        setImageRes(R.id.iv_main2, R.drawable.ic_main2);//设置展开的解释图
        setTextViewText(R.id.tv_name, "歌曲名:最伟大的作品");//设置歌曲名
        setTextViewText(R.id.tv_author, "歌手名:周杰伦");//设置歌手

        //设置网络图片(当然也是可以在初始化UI里设置网络资源的,可以自行解开注释看看效果)
//        setImageUrl(R.id.ib_left, "http://t13.baidu.com/it/u=2287545062,2949645413&fm=224&app=112&f=JPEG?w=500&h=499");

    }

}
此时运行效果图:

此时效果图,就有点儿 美哒哒了,注意:必须要使用GT库封装好的API去设置资源 不然在频繁更新网络图会遇见大坑。(要么全使用 GT库API去设置资源,要么全部使用系统封装的 API)
如果使用系统原生的设置资源就可以这样:(若使用系统原生提供的,后续在频繁更新网络图会有问题)
        //初始化 折叠 UI属性(使用系统原生设置资源)
        remoteViews1.setImageViewResource(R.id.iv_head,R.drawable.music_head);
        remoteViews1.setImageViewResource(R.id.iv_main2,R.drawable.ic_main2);
        remoteViews1.setTextViewText(R.id.tv_name,"歌曲名:最伟大的作品");
        remoteViews1.setTextViewText(R.id.tv_author,"歌手名:周杰伦");
        //初始化 展开 UI属性
        remoteViews2.setImageViewResource(R.id.iv_head,R.drawable.music_head);
        remoteViews2.setImageViewResource(R.id.iv_main2,R.drawable.ic_main2);
        remoteViews2.setTextViewText(R.id.tv_name,"歌曲名:最伟大的作品");
        remoteViews2.setTextViewText(R.id.tv_author,"歌手名:周杰伦");
使用系统原生的一般都要设置两份代码,因为一份布局 remoteViews1 是折叠布局的,另一份布局 remoteViews2 是展开布局的。
此时的 音乐播放器 做的已经是有模有样了,接下来该怎么切换歌曲,暂停歌曲呢?
相信看过其他博主写的 通知栏教程的朋友们肯定会知道有这么一个方法
先是一个个添加Intent 的活动标识,然后再通过发送广播的方式进行实现单击切换歌曲
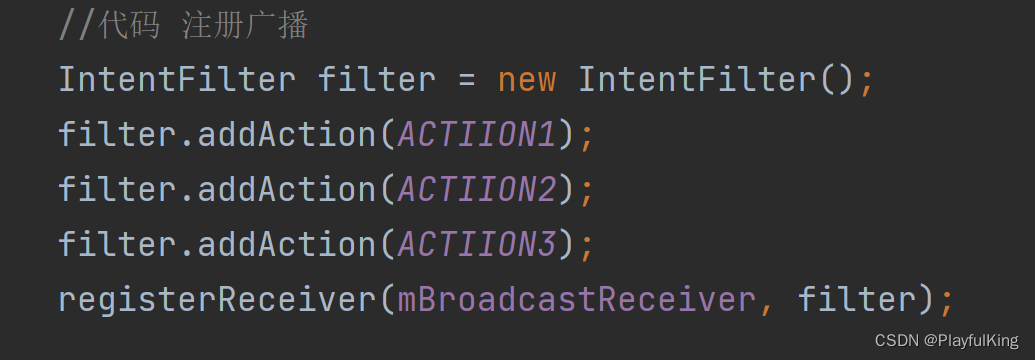

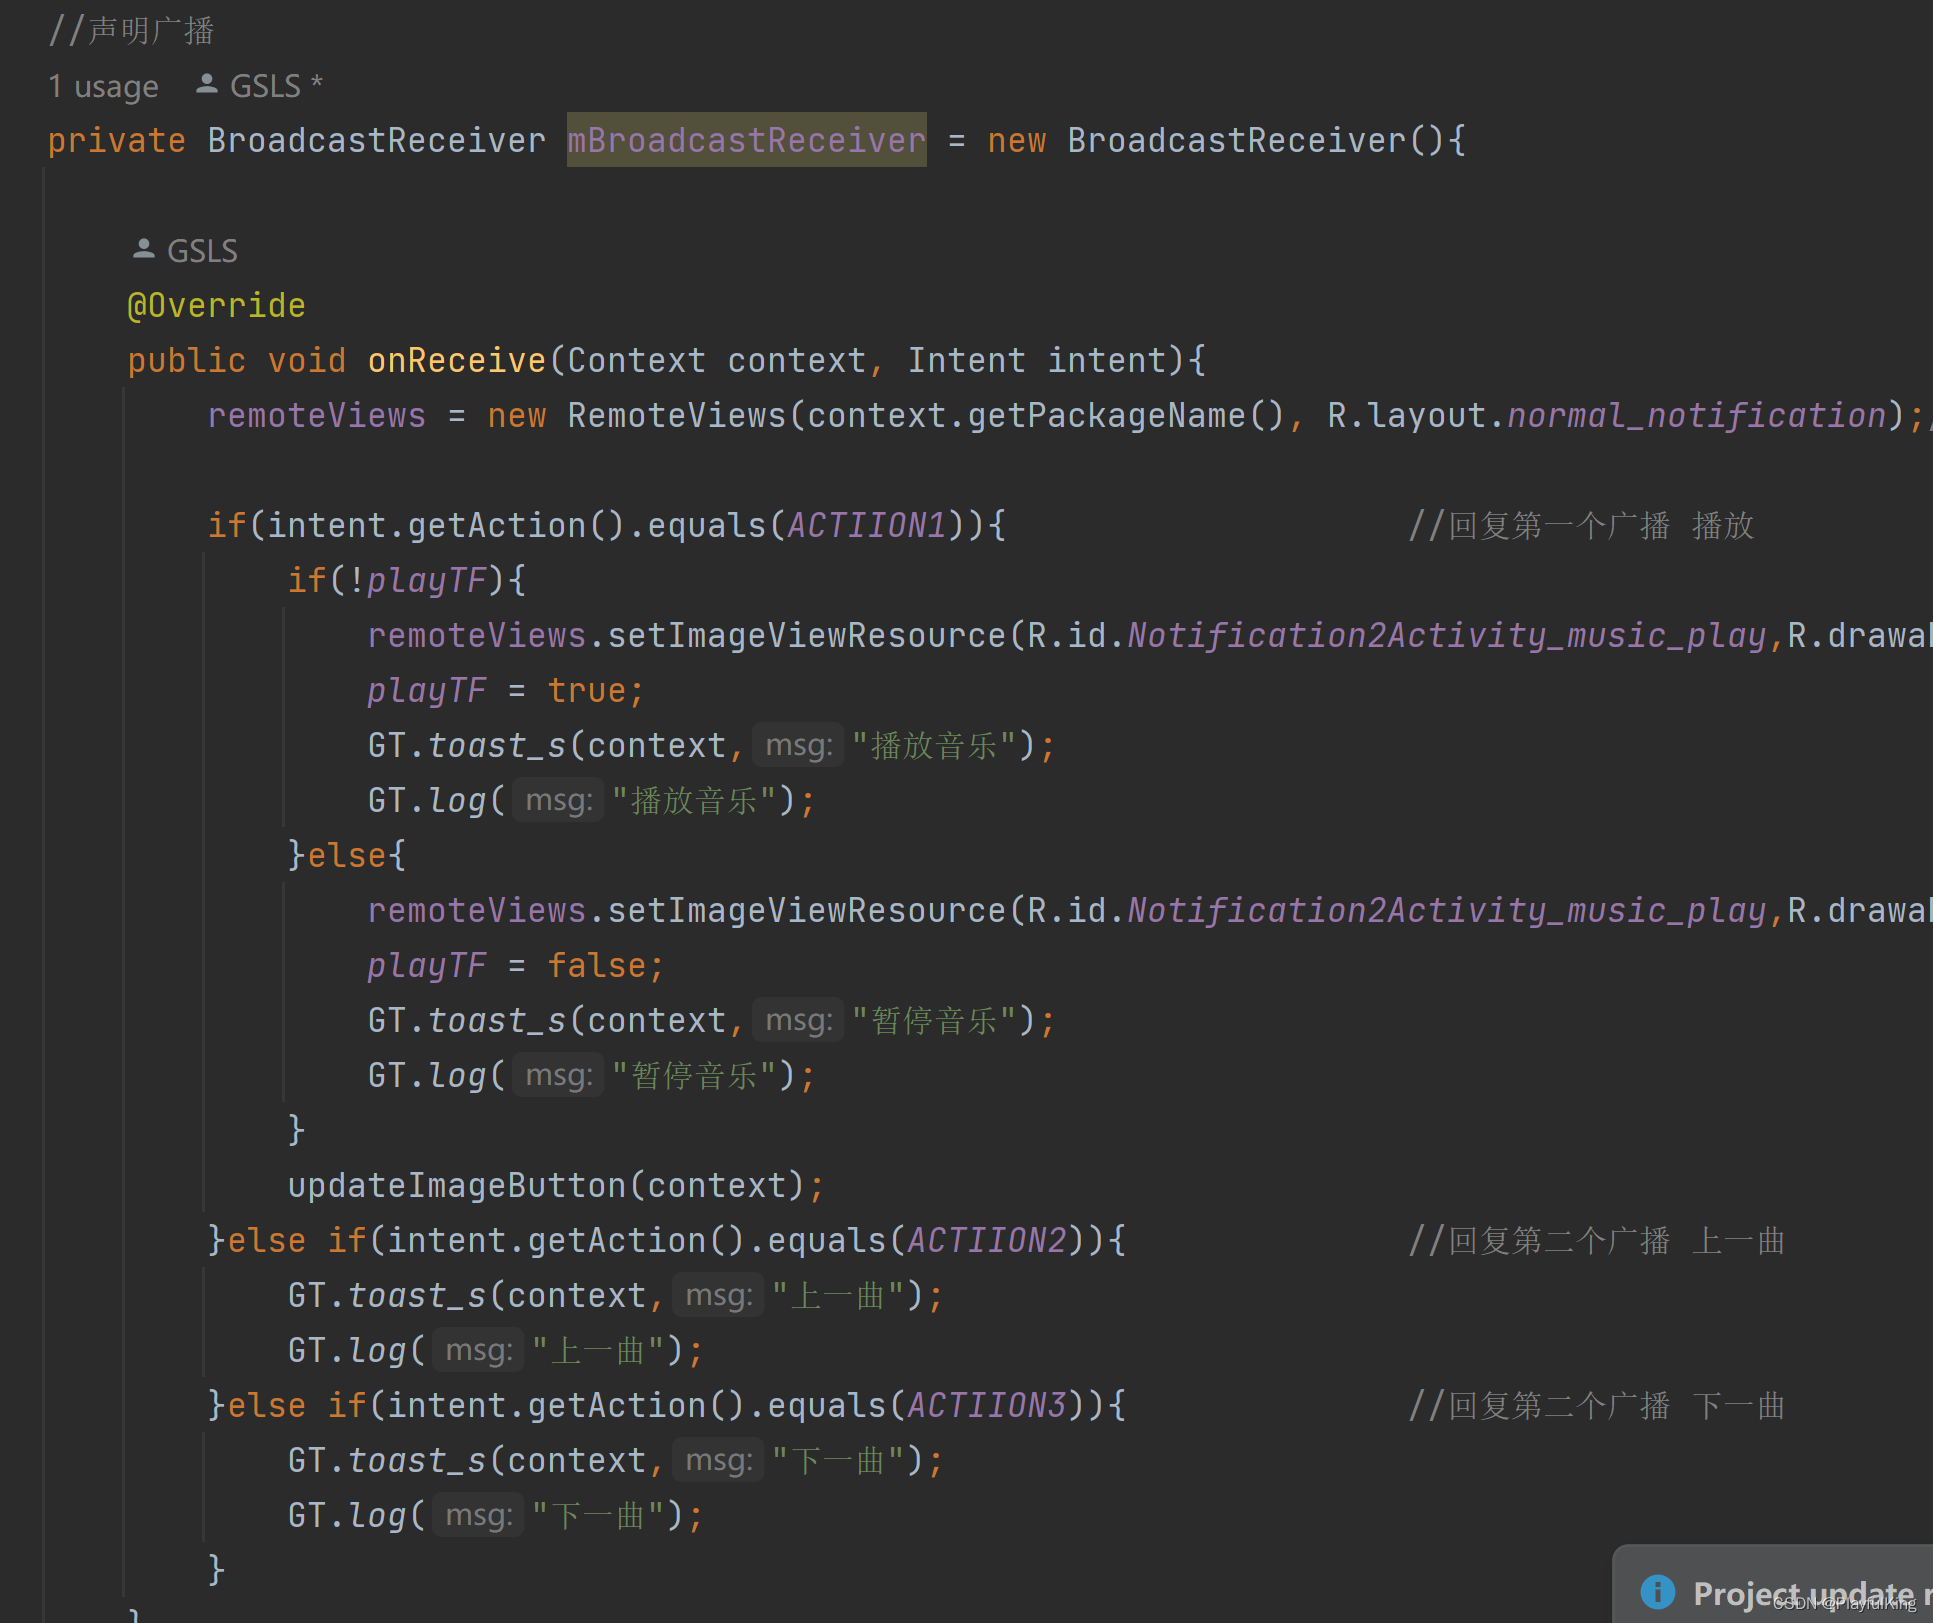
这样确实是可以做到切换歌曲的功能,但要是把这些添加到GT库里来,博主第一个会奔溃,尤其是 通知栏稍微复杂点的,会让今后的代码及其难以维护。我们来看看GT库是怎么解决这一问题的。
GT库 实现的单击事件:
//加载 折叠通知栏 与 展开通知栏
@GT.Annotations.GT_Notification(value = R.layout.item_notification, value2 = R.layout.item_notification2)
public class NotificationDemo extends GT.GT_Notification.AnnotationNotification {
//必要的重写 构造方法
public NotificationDemo(Context context) {
super(context);
}
//重写必要的初始化方法
@Override
protected void initView(Context context) {
super.initView(context);
//初始化通知栏 必要属性
setInitData(
R.mipmap.gt_logo, //设置通知图标
false,//单击是否取消通知
true,//锁屏是否显示
true,//是否用户不可取消通知
null,//单击意图
-1,//发送通知时间
222);//通知栏编号Id
//初始化UI属性(博主建议:在初始化UI里的尽量使用本地资源)
setImageRes(R.id.iv_head, R.drawable.music_head);//设置头像图片
setImageRes(R.id.iv_main2, R.drawable.ic_main2);//设置展开的解释图
setTextViewText(R.id.tv_name, "歌曲名:最伟大的作品");//设置歌曲名
setTextViewText(R.id.tv_author, "歌手名:周杰伦");//设置歌手
}
//重写单击方法,实现单击事件
@GT.Annotations.GT_Click({R.id.ib_left, R.id.ib_PauseRestore, R.id.ib_right})
public void onClick(View view) {
super.onClick(view);
switch (view.getId()) {
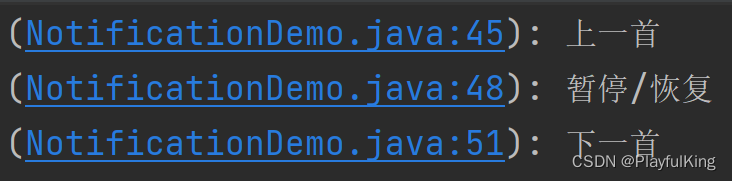
case R.id.ib_left://上一首
GT.logt("上一首");
break;
case R.id.ib_PauseRestore://暂停/恢复
GT.logt("暂停/恢复");
break;
case R.id.ib_right://下一首
GT.logt("下一首");
break;
}
}
}哦呦呦,这代码熟悉不,如果去掉 @GT.Annotations.GT_Click 注解,那你肯定会直接秒懂这代码,怕不就是直接在xml布局中 onClick 设置的单击事件吧。重写一个单击方法后只需要将你想要单击的组件注入注解中,再在下面的 switch 语句中写好执行的逻辑,整个单击事件就完成了。
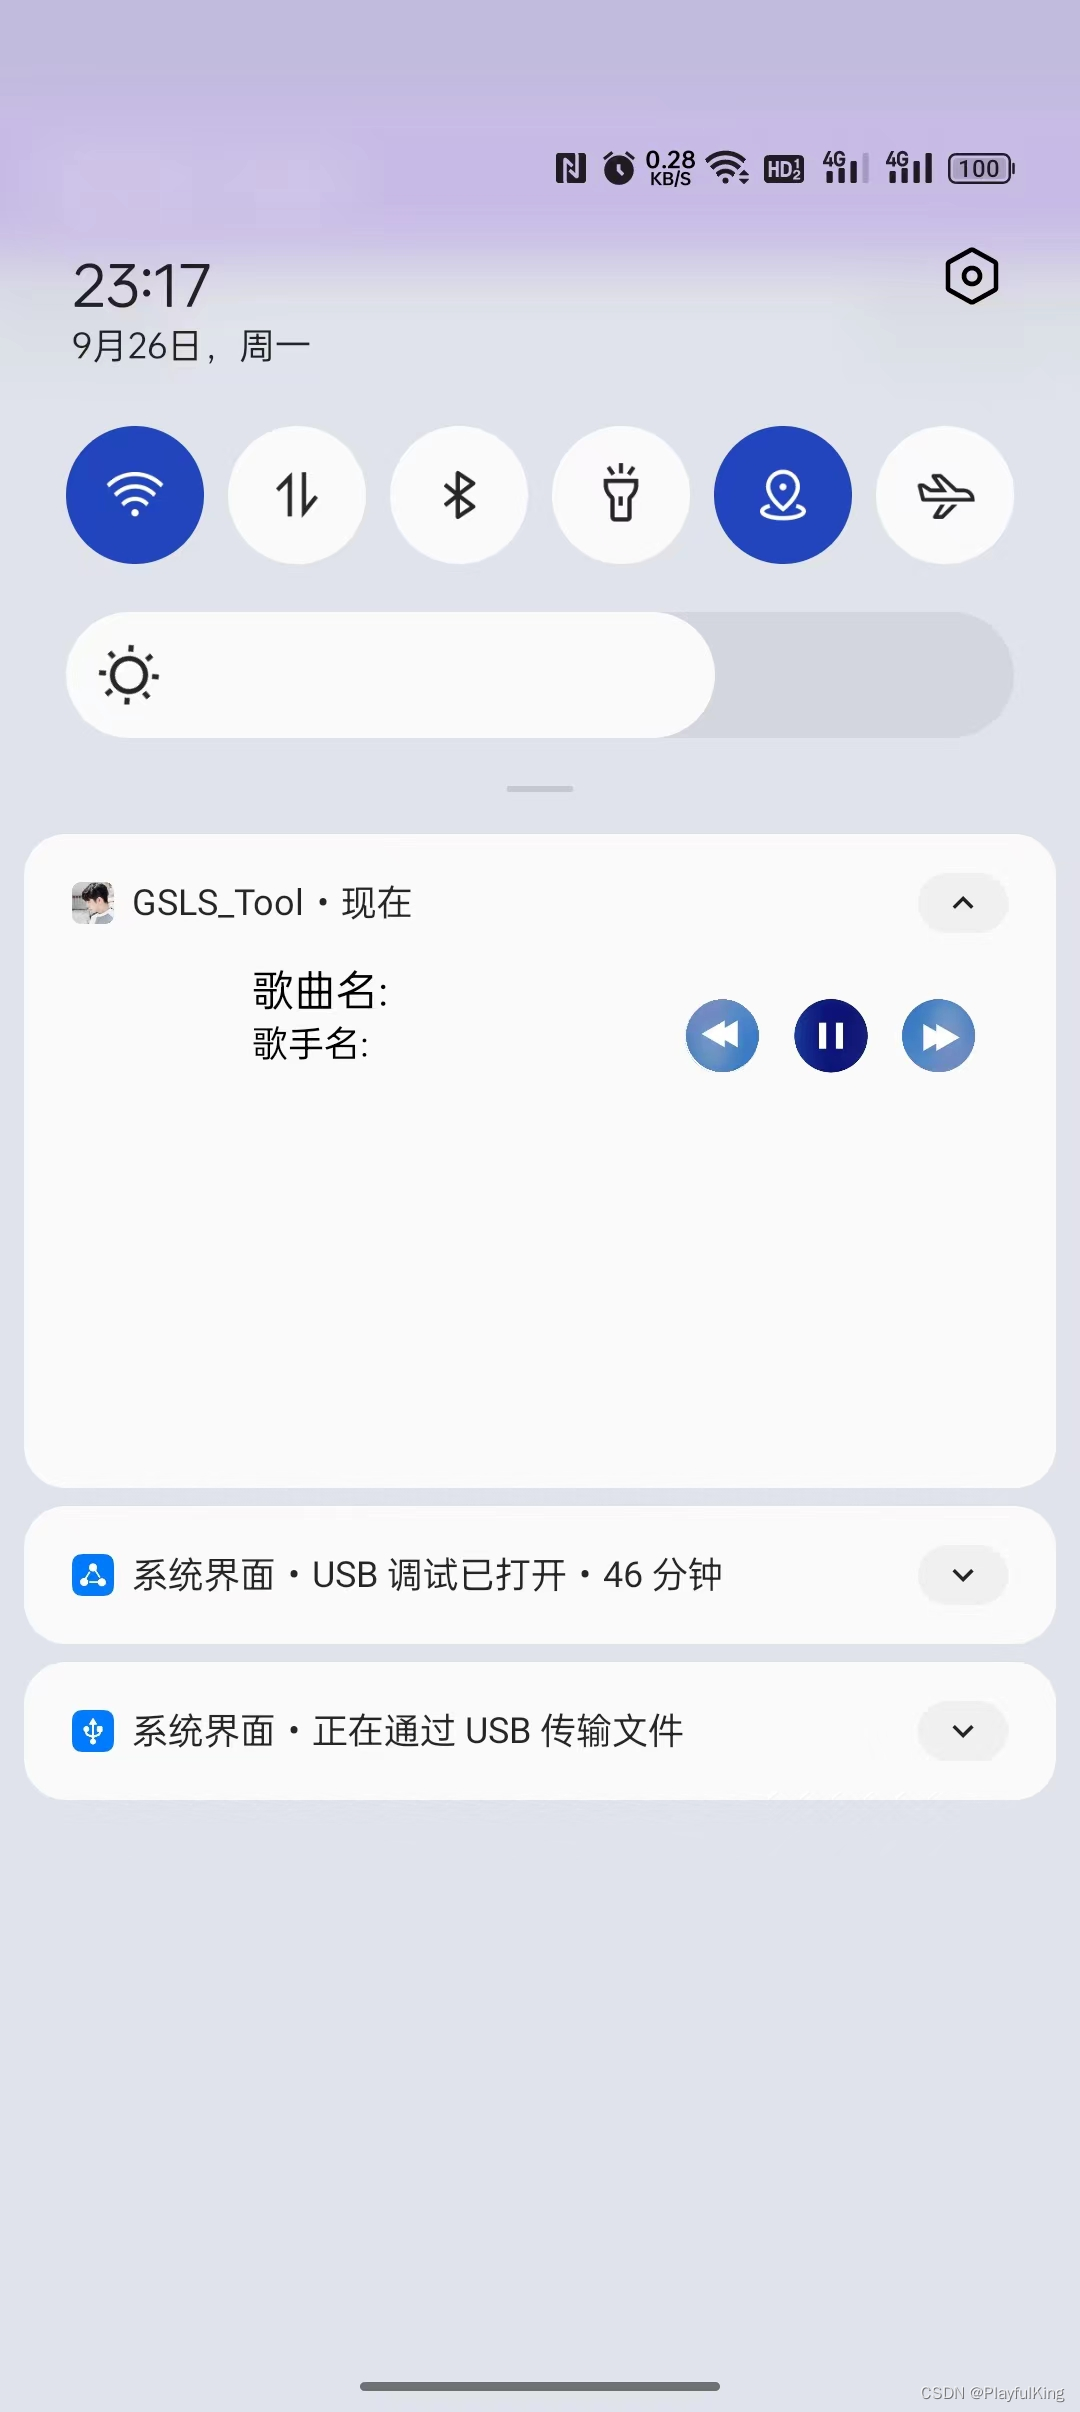
接下来,你运行起来,再单击里面的切换歌曲/暂停恢复这些功能,就都有了反应。
接下来我们再来学习最后一个环节,暂停音乐 与 恢复音乐 音乐功能
GT库封装的通知栏设置布局,其实规则类似于 事务提交一样的方式去设计的,怎么理解呢,我们到实际代码中去看看。
    private boolean isPause = false;//暂停状态

    //重写单击方法,实现单击事件
    @GT.Annotations.GT_Click({R.id.ib_left, R.id.ib_PauseRestore, R.id.ib_right})
    public void onClick(View view) {
        super.onClick(view);
        switch (view.getId()) {
            case R.id.ib_left://上一首
                GT.logt("上一首");
                break;
            case R.id.ib_PauseRestore://暂停/恢复
                GT.logt("暂停/恢复");
                if (isPause) {
                    isPause = false;
                    GT.logt("点击了暂停");
                    setTextViewText(R.id.tv_name, "暂停");//设置 歌曲名为 暂停
                } else {
                    isPause = true;
                    GT.logt("点击了恢复");
                    setTextViewText(R.id.tv_name, "恢复");//设置 歌曲名为 恢复
                }
                break;
            case R.id.ib_right://下一首
                GT.logt("下一首");
                break;
        }
    }
我们在单击事件中加入了一个 boolean 值用来存储 暂停恢复状态,然后没点击暂停或恢复就设置 歌曲名文本显示为 暂停或恢复 文字,其实这段代码是 设置无效的 因为他虽然确实是设置了但没有去提交事务,所以并不会真正的让UI更新。想让UI设置起效,必须要在每次设置的最后加上一个 commit(); 方法进行提交事务进行更新。
如这样:
private boolean isPause = false;//暂停状态
    //重写单击方法,实现单击事件
    @GT.Annotations.GT_Click({R.id.ib_left, R.id.ib_PauseRestore, R.id.ib_right})
    public void onClick(View view) {
        super.onClick(view);
        switch (view.getId()) {
            case R.id.ib_left://上一首
                GT.logt("上一首");
                break;
            case R.id.ib_PauseRestore://暂停/恢复
                GT.logt("暂停/恢复");
                if (isPause) {
                    isPause = false;
                    GT.logt("点击了暂停");
                    //设置 歌曲名为 暂停 并提交事务更新UI
                    setTextViewText(R.id.tv_name, "暂停").commit();
                } else {
                    isPause = true;
                    GT.logt("点击了恢复");
                    //设置 歌曲名为 恢复 并提交事务更新UI
                    setTextViewText(R.id.tv_name, "恢复").commit();
                }
                break;
            case R.id.ib_right://下一首
                GT.logt("下一首");
                break;
        }
    }
那为啥之前咋们在 初始化 方法里就不需要写 commit(); 去提交事务更新UI呢?
第一种,发布通知方法,会默认提交更新
    //创建通知栏
    NotificationDemo notificationDemo = new NotificationDemo(this);
    GT.GT_Notification.startNotification(notificationDemo);//发送通知栏
第二种,创建这个通知栏的时候,后面写了一个 commit(); 提交更新方法
//创建并发布 通知栏
new NotificationDemo(this).commit();
所以咋们在写切换 暂停 与 恢复 图片切换的时候,就可以这么写:
private boolean isPause = false;//暂停状态
    //重写单击方法,实现单击事件
    @GT.Annotations.GT_Click({R.id.ib_left, R.id.ib_PauseRestore, R.id.ib_right})
    public void onClick(View view) {
        super.onClick(view);
        switch (view.getId()) {
            case R.id.ib_left://上一首
                GT.logt("上一首");
                break;
            case R.id.ib_PauseRestore://暂停/恢复
                GT.logt("暂停/恢复");
                if (isPause) {
                    isPause = false;
                    GT.logt("点击了暂停");
                    //设置 歌曲名为 暂停 并提交事务更新UI
                    setTextViewText(R.id.tv_name, "暂停");
                    setImageRes(R.id.ib_PauseRestore, R.drawable.music_play)
                            .commit();//提交事务进行更新UI
                } else {
                    isPause = true;
                    GT.logt("点击了恢复");
                    //设置 歌曲名为 恢复 并提交事务更新UI
                    setTextViewText(R.id.tv_name, "恢复");
                    setImageRes(R.id.ib_PauseRestore, R.drawable.music_pause)
                            .commit();//提交事务进行更新UI
                }
                break;
            case R.id.ib_right://下一首
                GT.logt("下一首");
                break;
        }
    }
此时加上这个,你的暂停 与 恢复功能就可以高兴的使用了,接下来就是一些其他的音乐播放器 处理逻辑了,博主不再详细介绍,直接下面贴出整个源码,
//加载 折叠通知栏 与 展开通知栏
@GT.Annotations.GT_Notification(value = R.layout.item_notification, value2 = R.layout.item_notification2)
public class NotificationDemo extends GT.GT_Notification.AnnotationNotification {

    //必要的重写 构造方法
    public NotificationDemo(Context context) {
        super(context);
    }

    private static List<String> urlList = new ArrayList<>();

    //重写必要的初始化方法
    @Override
    protected void initView(Context context) {
        super.initView(context);
        //初始化通知栏 必要属性
        setInitData(
                R.mipmap.gt_logo, //设置通知图标
                false,//单击是否取消通知
                true,//锁屏是否显示
                true,//是否用户不可取消通知
                null,//单击意图
                -1,//发送通知时间
                222);//通知栏编号Id

        //初始化UI属性(博主建议:在初始化UI里的尽量使用本地资源)
        setImageRes(R.id.iv_head, R.drawable.music_head);//设置头像图片
        setImageRes(R.id.iv_main2, R.drawable.ic_main2);//设置展开的解释图
        setTextViewText(R.id.tv_name, "歌曲名:最伟大的作品");//设置歌曲名
        setTextViewText(R.id.tv_author, "歌手名:周杰伦");//设置歌手


        //添加要切换的网图,模拟后台数据集
        urlList.add("http://t13.baidu.com/it/u=2287545062,2949645413&fm=224&app=112&f=JPEG?w=500&h=499");
        urlList.add("http://t15.baidu.com/it/u=4211663368,2899541822&fm=224&app=112&f=JPEG?w=500&h=500");
        urlList.add("https://pics0.baidu.com/feed/3ac79f3df8dcd10005cb97e31d637c17bb122f88.jpeg?token=78ac62753e80c3ef5412d819fcccbc79");
        urlList.add("https://pics3.baidu.com/feed/2e2eb9389b504fc23061ab7576c6381790ef6da2.jpeg?token=8216bfa1363a0759d3bbdc25cb374375");
        urlList.add("http://t13.baidu.com/it/u=349678387,2420348846&fm=224&app=112&f=JPEG?w=500&h=496");
        urlList.add("https://gimg2.baidu.com/image_search/src=http%3A%2F%2Fm.imeitou.com%2Fuploads%2Fallimg%2F2021063011%2Fsmnbeds3emy.jpg&refer=http%3A%2F%2Fm.imeitou.com&app=2002&size=f9999,10000&q=a80&n=0&g=0n&fmt=auto?sec=1666713574&t=78c5cf5ee2963136113e0c6d4d642c0e");
        urlList.add("https://gimg2.baidu.com/image_search/src=http%3A%2F%2Ftupian.qqw21.com%2Farticle%2FUploadPic%2F2020-12%2F20201292249990938.png&refer=http%3A%2F%2Ftupian.qqw21.com&app=2002&size=f9999,10000&q=a80&n=0&g=0n&fmt=auto?sec=1666713574&t=8a69c695b4fccee28b5025a7e2c4e317");
        urlList.add("https://gimg2.baidu.com/image_search/src=http%3A%2F%2Fc-ssl.duitang.com%2Fuploads%2Fitem%2F201701%2F01%2F20170101135434_X8G2S.thumb.400_0.jpeg&refer=http%3A%2F%2Fc-ssl.duitang.com&app=2002&size=f9999,10000&q=a80&n=0&g=0n&fmt=auto?sec=1666713574&t=3f97a60a9e7e087a2ad0faefd9e84ca5");
        urlList.add("https://gimg2.baidu.com/image_search/src=http%3A%2F%2Fm.imeitou.com%2Fuploads%2Fallimg%2F2021042707%2F0ptsf4fx1oj.jpg&refer=http%3A%2F%2Fm.imeitou.com&app=2002&size=f9999,10000&q=a80&n=0&g=0n&fmt=auto?sec=1666713574&t=c21977cf83c5b76483cc5580fddb83dc");
        urlList.add("http://t14.baidu.com/it/u=1260861628,2207488479&fm=224&app=112&f=JPEG?w=500&h=458");
        urlList.add("https://gimg2.baidu.com/image_search/src=http%3A%2F%2Flmg.jj20.com%2Fup%2Fallimg%2Ftx28%2F480113243956.jpg&refer=http%3A%2F%2Flmg.jj20.com&app=2002&size=f9999,10000&q=a80&n=0&g=0n&fmt=auto?sec=1666713574&t=c84634b546d8a7ac2128bb025cff975b");
        urlList.add("https://gimg2.baidu.com/image_search/src=http%3A%2F%2Fwww.kamvic.net%2F%3Fcloud-js_2BkkhZZ4_2BFzqXzongtB_2BlVXJv0LkIcLHyFeaaAXpCrqni48qXxxXF7xK73Y9Nts3aV8s2yUkpw2wEYMTR06vC0VPN0QuSTF_2BYP9_2F8v3_2BCDxofTvgBmEMf5CEDcnoGrkkoNwyA_3D_3D.jpeg&refer=http%3A%2F%2Fwww.kamvic.net&app=2002&size=f9999,10000&q=a80&n=0&g=0n&fmt=auto?sec=1666713574&t=85fb6d3a54515761b699747c927c224d");
        urlList.add("https://gimg2.baidu.com/image_search/src=http%3A%2F%2Fc-ssl.duitang.com%2Fuploads%2Fitem%2F202004%2F12%2F20200412094704_opltk.thumb.1000_0.jpg&refer=http%3A%2F%2Fc-ssl.duitang.com&app=2002&size=f9999,10000&q=a80&n=0&g=0n&fmt=auto?sec=1666713574&t=60c19ab04af1b79e87787b6661b5188a");
        urlList.add("https://gimg2.baidu.com/image_search/src=http%3A%2F%2Fi.qqkou.com%2Fi%2F2a1256161489x2361038368b26.jpg&refer=http%3A%2F%2Fi.qqkou.com&app=2002&size=f9999,10000&q=a80&n=0&g=0n&fmt=auto?sec=1666713574&t=63f20b0e33c2aa34a11e71b5b2e9d763");
        urlList.add("http://t15.baidu.com/it/u=617242831,2889192098&fm=224&app=112&f=JPEG?w=500&h=500");
        urlList.add("https://gimg2.baidu.com/image_search/src=http%3A%2F%2Fp6.itc.cn%2Fq_70%2Fimages03%2F20201027%2F4f33d716ff6a44a080ffde0c079bd957.png&refer=http%3A%2F%2Fp6.itc.cn&app=2002&size=f9999,10000&q=a80&n=0&g=0n&fmt=auto?sec=1666713574&t=b6e29bcdef8c777f9cd98959e9b238ce");
        urlList.add("https://pics1.baidu.com/feed/3bf33a87e950352a3425aa83b99932f4b0118bd3.jpeg?token=9a31cb5f5aba256b22a7db3d1508354a");
        urlList.add("https://gimg2.baidu.com/image_search/src=http%3A%2F%2Fc-ssl.duitang.com%2Fuploads%2Fitem%2F201810%2F19%2F20181019002107_UGJGG.thumb.1000_0.jpeg&refer=http%3A%2F%2Fc-ssl.duitang.com&app=2002&size=f9999,10000&q=a80&n=0&g=0n&fmt=auto?sec=1666713574&t=78fa536079979d013dce86a1f720f24a");
        urlList.add("https://gimg2.baidu.com/image_search/src=http%3A%2F%2Fc-ssl.duitang.com%2Fuploads%2Fitem%2F201712%2F27%2F20171227193652_BWRSm.thumb.1000_0.jpeg&refer=http%3A%2F%2Fc-ssl.duitang.com&app=2002&size=f9999,10000&q=a80&n=0&g=0n&fmt=auto?sec=1666713574&t=928599cfeac3febccc3e8eda783900ea");
        urlList.add("https://gimg2.baidu.com/image_search/src=http%3A%2F%2Fc-ssl.duitang.com%2Fuploads%2Fitem%2F20181%2F27%2F201812719314_ZtWds.thumb.1000_0.jpeg&refer=http%3A%2F%2Fc-ssl.duitang.com&app=2002&size=f9999,10000&q=a80&n=0&g=0n&fmt=auto?sec=1666713574&t=f37ddbbe9c3c716da45b5109443eede5");
        urlList.add("https://gimg2.baidu.com/image_search/src=http%3A%2F%2Fc-ssl.duitang.com%2Fuploads%2Fitem%2F201711%2F16%2F20171116104013_dy4Qt.thumb.1000_0.jpeg&refer=http%3A%2F%2Fc-ssl.duitang.com&app=2002&size=f9999,10000&q=a80&n=0&g=0n&fmt=auto?sec=1666713574&t=8e742025cdd0d6b95c35518123d5c168");
        urlList.add("https://gimg2.baidu.com/image_search/src=http%3A%2F%2Fp8.itc.cn%2Fq_70%2Fimages03%2F20200930%2F6a1cbc2ff8cf4fcca518880c9e423dcf.jpeg&refer=http%3A%2F%2Fp8.itc.cn&app=2002&size=f9999,10000&q=a80&n=0&g=0n&fmt=auto?sec=1666713754&t=dca3470056c15a650320ebc5a645e352");
        urlList.add("https://gimg2.baidu.com/image_search/src=http%3A%2F%2Fc-ssl.duitang.com%2Fuploads%2Fitem%2F201708%2F17%2F20170817193017_xnvPj.thumb.1000_0.jpeg&refer=http%3A%2F%2Fc-ssl.duitang.com&app=2002&size=f9999,10000&q=a80&n=0&g=0n&fmt=auto?sec=1666713754&t=fdcd4ee94d008c4e4f96f4972c61f894");

    }

    private boolean isPause = false;//暂停状态
    private int page = 0;
    //重写单击方法
    @GT.Annotations.GT_Click({R.id.ib_left, R.id.ib_PauseRestore, R.id.ib_right})
    public void onClick(View view) {
        super.onClick(view);
        switch (view.getId()) {
            case R.id.ib_left://上一首
                GT.toast("上一首");
                --page;
                if(page < 0){
                    page = 0;
                    return;
                }
                setTextViewText(R.id.tv_name, "上一首");
                setImageUrl(R.id.iv_head, urlList.get(page)).commit();
                break;
            case R.id.ib_PauseRestore://暂停/恢复
                if (isPause) {
                    isPause = false;
                    setTextViewText(R.id.tv_name, "暂停");
                    setImageRes(R.id.ib_PauseRestore, R.drawable.music_play)
                            .commit();
                } else {
                    isPause = true;
                    setTextViewText(R.id.tv_name, "恢复");
                    setImageRes(R.id.ib_PauseRestore, R.drawable.music_pause)
                            .commit();
                }
                break;
            case R.id.ib_right://下一首
                GT.toast("下一首");
                ++page;
                if(page > urlList.size()-1){
                    page = urlList.size()-1;
                    return;
                }
                setTextViewText(R.id.tv_name, "下一首");
                setImageUrl(R.id.iv_head, urlList.get(page)).commit();
                break;
        }
    }
}
满满干货,本文总字数 好了,又要秃了,拜了个拜~~~
点个关注点个赞呗(〃'▽'〃) 关注博主最新发布库:GitHub - 1079374315/GT
大约一年前,我决定确保每个包含非唯一文本的Flash通知都将从模块中的方法中获取文本。我这样做的最初原因是为了避免一遍又一遍地输入相同的字符串。如果我想更改措辞,我可以在一个地方轻松完成,而且一遍又一遍地重复同一件事而出现拼写错误的可能性也会降低。我最终得到的是这样的:moduleMessagesdefformat_error_messages(errors)errors.map{|attribute,message|"Error:#{attribute.to_s.titleize}#{message}."}enddeferror_message_could_not_find(obje
有人知道在发布新版本的Ruby和Rails时收到电子邮件的方法吗?他们有邮件列表,RubyonRails有一个推特,但我不想听到那些随之而来的喧嚣,我只想知道什么时候发布新版本,尤其是那些有安全修复的版本。 最佳答案 从therailsblog获取提要.http://weblog.rubyonrails.org/feed/atom.xml 关于ruby-on-rails-如何在发布新的Ruby或Rails版本时收到通知?,我们在StackOverflow上找到一个类似的问题:
最近因为项目需要,需要将Android手机系统自带的某个系统软件反编译并更改里面某个资源,并重新打包,签名生成新的自定义的apk,下面我来介绍一下我的实现过程。APK修改,分为以下几步:反编译解包,修改,重打包,修改签名等步骤。安卓apk修改准备工作1.系统配置好JavaJDK环境变量2.需要root权限的手机(针对系统自带apk,其他软件免root)3.Auto-Sign签名工具4.apktool工具安卓apk修改开始反编译本文拿Android系统里面的Settings.apk做demo,具体如何将apk获取出来在此就不过多介绍了,直接进入主题:按键win+R输入cmd,打开命令窗口,并将路
深度学习12.CNN经典网络VGG16一、简介1.VGG来源2.VGG分类3.不同模型的参数数量4.3x3卷积核的好处5.关于学习率调度6.批归一化二、VGG16层分析1.层划分2.参数展开过程图解3.参数传递示例4.VGG16各层参数数量三、代码分析1.VGG16模型定义2.训练3.测试一、简介1.VGG来源VGG(VisualGeometryGroup)是一个视觉几何组在2014年提出的深度卷积神经网络架构。VGG在2014年ImageNet图像分类竞赛亚军,定位竞赛冠军;VGG网络采用连续的小卷积核(3x3)和池化层构建深度神经网络,网络深度可以达到16层或19层,其中VGG16和VGG
这个问题在这里已经有了答案:Unabletoinstallgem-Failedtobuildgemnativeextension-cannotloadsuchfile--mkmf(LoadError)(17个答案)关闭9年前。嘿,我正在尝试在一台新的ubuntu机器上安装rails。我安装了ruby和rvm,但出现“无法构建gemnative扩展”错误。这是什么意思?$sudogeminstallrails-v3.2.9(没有sudo表示我没有权限)然后它会输出很多“获取”命令,最终会出现这个错误:Buildingnativeextensions.Thiscouldtakeawhi
我们正在开发一个需要推送通知的WP8应用程序。为了测试它,我们使用CURL命令行运行推送通知POST请求,确保它实际连接,使用客户端SSL证书进行身份验证并发送正确的数据。我们确实知道,当我们收到对设备的推送时,这项工作是有效的。这是我们一直用于测试目的的CURL命令:curl--certclient_cert.pem-v-H"Content-Type:text/xml"-H"X-WindowsPhone-Target:Toast"-H"X-NotificationClass:2"-XPOST-d"MytitleMysubtitle"https://db3.notify.live.ne
我想知道如何从Apple.p12文件中提取key。根据我有限的理解,.p12文件是X504证书和私钥的组合。我看到我遇到的每个.p12文件都有一个X504证书和至少一个key,在某些情况下有两个key。这是因为每个.p12都有一个Apple开发人员key,有些还有一个额外的key(可能是Appleroot授权key)。我只考虑那些具有两个key的.p12文件是有效的。我的目标是区分具有一个key的.p12文件和具有两个key的.p12文件。到目前为止,我已经使用OpenSSL来检查X504文件和任何.p12的key。例如,我有这段代码可以检查目录中的所有.p12文件:Dir.glob(
一些我找到的选项是ActiveCouchCouchRESTCouchPotatoRelaxDBcouch_foo我更喜欢GitHub上的项目,因为这让我更容易fork和推送修复。所有这些都符合该要求。我习惯了Rails,所以我喜欢像ActiveRecord模型一样工作的东西。另一方面,我也不希望我和Couch之间太多--毕竟我使用它作为我的数据库是有原因的。最后,它们似乎都得到了相当积极的维护(couch_foo可能是个异常(exception))。所以我想这归结为(不可否认和不幸的)主观:有没有人对他们有过好的或坏的经历? 最佳答案
我在nginx+unicorn后面运行一系列Rails/Sinatra应用程序,零停机部署。我喜欢这个设置,但Unicorn需要一段时间才能完成重新启动,所以我想在完成时发送某种通知。我能在Unicorn文档中找到的唯一回调与workerfork相关,但我认为这些回调对此不起作用。这是我从赏金中寻找的东西:老unicorn主人启动新主人,然后新主人开始它的worker,然后旧主人停止它的worker并让新主人接管。我想在交接完成后执行一些ruby代码。理想情况下,我不想为此实现任何复杂的流程监控。如果这是唯一的方法,那就这样吧。但在走那条路之前,我正在寻找更简单的选择。
我尝试用Ruby设计一个基于Web的应用程序。我开发了一个简单的核心应用程序,在没有框架和数据库的情况下在六边形架构中实现DCI范例。核心六边形中有小六边形和网络,数据库,日志等适配器。每个六边形都在没有数据库和框架的情况下自行运行。在这种方法中,我如何提供与数据库模型和实体类的关系作为独立于数据库的关系。我想在将来将框架从Rails更改为Sinatra或数据库。事实上,我如何在这个核心Hexagon中实现完全隔离的rails和mongodb的数据库适配器或框架适配器。有什么想法吗? 最佳答案 ROM呢?(Ruby对象映射器)。还有
 https://github.com/1079374315/GT