最近学习了SpringBoot分页查询的两种写法,一种是手动实现,另一种是使用框架实现。现在我将具体的实现流程分享一下。
先复习一下,SQL中的limit关键字,下面一行sql语句的意思是从第二个数据开始查,查询出两条数据
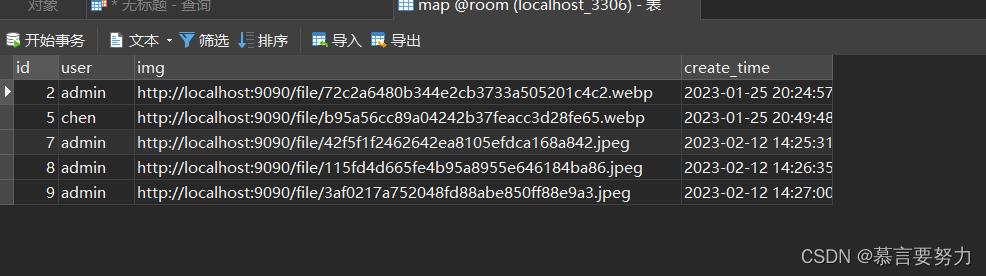
SELECT * FROM map limit 1,2;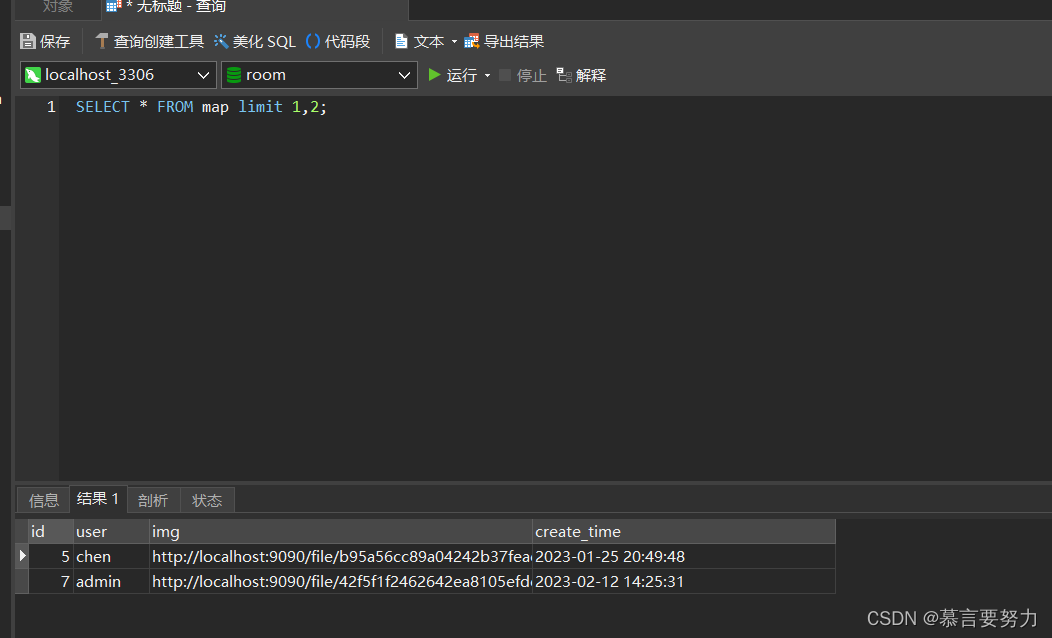
使用limit前一个参数pageNum是从第几个数据开始查,后一个参数pageSize是查询多少条数据,注意数据库查询pageNum=0代表第一个数据。
那么在Springboot中该如何写呢?
1.什么是@RequestParam
2.语法
语法:@RequestParam(value=”参数名”,required=”true/false”,defaultValue=””)

value:参数名

required:是否包含该参数,默认为true,表示该请求路径中必须包含该参数,如果不包含就报错。

defaultValue:默认参数值,如果设置了该值,required=true将失效,自动为false,如果没有传该参数,就使用默认值
3.测试环境
环境:jdk1.8 Tomcat8.5  idea2018  manven父工程子模块

步骤:
1、创建web工程、引入依赖
2、配置SpringMvc入口文件 --DispatcherServlet--为总调度、web.xml里配置
3、创建Springmvc.xml文件--理解为:适配器(这里不需要自已指定适配、springmvc会自动指定)--视图解析器
4、创建 业务处理器 Controller类
5、测试
1.QueryWrapper是什么?
QueryWrapper就是在使用Mybatis-plus中真实用到的一种技术,也叫作构造器,能简化sql的操作。
2.常用方法总结
代码如下(示例):我要查询姓名、班级、年龄符合前端传过来参数的数据并进行排序。
@GetMapping("/list")
public TableDataInfo list(Student student){
	LambdaQueryWrapper<Student> lqw = new LambdaQueryWrapper<Student>();
	lqw.eq(Student::getName, student.getName());
	lqw.like(Student::getClass,student.getClass());
	lqw.between("age",student.getAge1(),student.getAge2());
	lqw.orderByAsc("age");
	List<Student> list = studentService.list(lqw);
}
以上代码对应的sql为:
select * from student where name = '?' and class like '%?%' and age between '?' and '?' order by '?' asc
由此可以看出,QueryWrapper其实可以理解成一个放查询条件的盒子,我们把查询条件放在里面,他就会自动按照对应的条件进行查询数据。
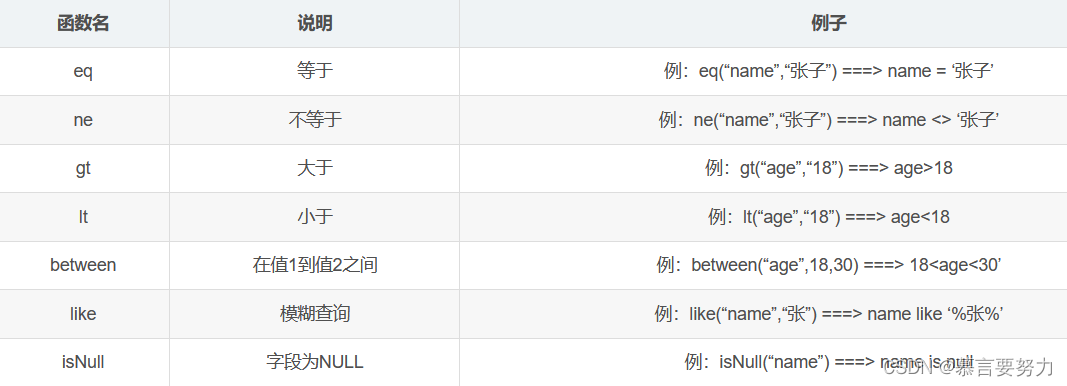
根据不同的查询要求,有不同的用法,常用到的比如:eq、like、and、or、isNull、isNotNull、ne、likeRight、between等;使用方法及说明见下图。
2、多表操作
//Controller
@GetMapping("/listAndClass")
public TableDataInfo listAndClass(Student student)
{
    QueryWrapper<Student > qw = new QueryWrapper<Student >();
    if(StringUtils.isNotBlank(student.getName())){
        qw.eq("s.name",student.getName());
    }
    if(StringUtils.isNotBlank(student.getClassName())){
        qw.like("c.name",student.getClassName());
    }
    startPage();
    List<Student > list = studentService.listAndClass(qw);
    return getDataTable(list);
}

//Service
 List<Student> listAndClass(QueryWrapper<Student> qw);

//Service impl
@Override
public List<Student> listAndClass(QueryWrapper<Student> qw) {
    return this.getBaseMapper().listAndClass(qw);
}

//Mapper
@Select("select s.*,c.name from student s left join class c on s.id = c.student_id "+
        "${ew.customSqlSegment}")
List<YwSpaqjgDj> listAndClass(@Param(Constants.WRAPPER) QueryWrapper<Student> qw);
1.创建UserController
import cn.hutool.core.util.StrUtil;
import com.baomidou.mybatisplus.core.conditions.query.QueryWrapper;
import com.baomidou.mybatisplus.extension.plugins.pagination.Page;
import com.example.demo.common.Constants;
import com.example.demo.common.Result;
import com.example.demo.controller.dto.UserDTO;
import com.example.demo.entity.User;
import com.example.demo.service.IUserService;
import com.example.demo.utils.TokenUtils;
import org.springframework.web.bind.annotation.*;
import javax.annotation.Resource;
import java.util.List;
@CrossOrigin
@RestController
@RequestMapping("/user")
public class UserController {
@Resource
private IUserService userService;
@PostMapping("/login")
public Result login(@RequestBody UserDTO userDTO) {
String username = userDTO.getUsername();
String password = userDTO.getPassword();
if (StrUtil.isBlank(username) || StrUtil.isBlank(password)) {
return Result.error(Constants.CODE_400,"参数错误");
}
UserDTO dto = userService.login(userDTO);
return Result.success(dto);
}
@PostMapping("/register")
public Result register(@RequestBody UserDTO userDTO) {
String username = userDTO.getUsername();
String password = userDTO.getPassword();
if (StrUtil.isBlank(username) || StrUtil.isBlank(password)) {
return Result.error(Constants.CODE_400,"参数错误");
}
return Result.success(userService.register(userDTO));
}
//新增或者更新
@PostMapping
public Result save(@RequestBody User user) {
String username = user.getUsername();
if (StrUtil.isBlank(username)) {
return Result.error(Constants.CODE_400, "参数错误");
}
if (user.getId() != null) {
user.setPassword(null);
} else {
user.setNickname(user.getUsername());
if (user.getPassword() == null) {
user.setPassword("123456");
}
}
return Result.success(userService.saveOrUpdate(user));
}
//删除
@DeleteMapping("/{id}")
public Result delete(@PathVariable Integer id) {
return Result.success(userService.removeById(id));
}
@PostMapping("/del/batch")
public Result deleteBatch(@RequestBody List<Integer> ids) {//批量删除
return Result.success(userService.removeByIds(ids));
}
@GetMapping("/{id}")
public Result findOne(@PathVariable Integer id) {
return Result.success(userService.getById(id));
}
@GetMapping("/username/{username}")
public Result findOne(@PathVariable String username) {
QueryWrapper<User> queryWrapper = new QueryWrapper<>();
queryWrapper.eq("username", username);
return Result.success(userService.getOne(queryWrapper));
}
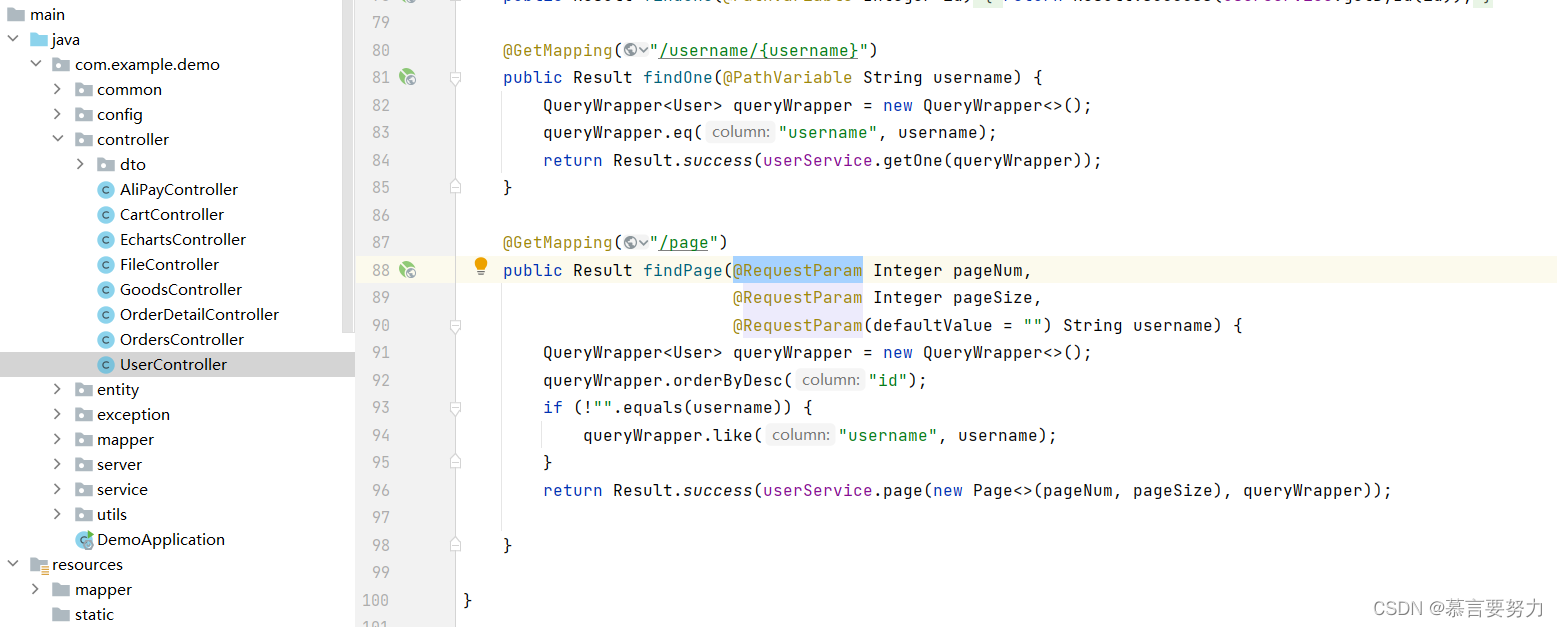
}并在Controller里面写好page接口
@GetMapping("/page")
    public Result findPage(@RequestParam Integer pageNum,
                           @RequestParam Integer pageSize,
                           @RequestParam(defaultValue = "") String username) {
        QueryWrapper<User> queryWrapper = new QueryWrapper<>();
        queryWrapper.orderByDesc("id");
        if (!"".equals(username)) {
            queryWrapper.like("username", username);
        }
        return Result.success(userService.page(new Page<>(pageNum, pageSize), queryWrapper));

    }
不难看出我们是根据数据库的id进行查询出数据库的数据
queryWrapper.orderByDesc("id")1.什么是equals
equals():equals是Object中的方法,用于检测一个对象是否等于另一个对象,在Object中equals方法实际"ruturn (this==obj)",用到的还是"==",说明如果对象不重写equals方法,实际该对象的equals和"=="作用是一样的,都是比较的地址值(因为"=="比较的就是地址值),但是大部分类都会重写父类的equals方法,用来检测两个对象是否相等,即两个对象的内容是否相等,例如String就重写了equals方法,用来比较两个字符串内容是否相同。看以下代码:
public static void main(String[] args) {
    Object o = new Object();
    Object o1 = o;
    Object o2 = o;
    System.out.println(o3.equals(o2));
}
代码输出:true
所以我们是使用 equals来确定我们查询数据的对象,所以我们这里选择使用username来查询数据库里面的具体数据
if (!"".equals(username)) {
            queryWrapper.like("username", username);
}1.前端技术栈
对于前端,我们使用的是Vue+Element来进行功能实现,对于跨域的处理我使用的是axios进行处理,并且对axios进行了封装,具体步骤请查看:解决SpringBoot和前端Vue的跨域问题_慕言要努力的博客-CSDN博客
2.组件使用
我选用的是Element官网的组件来进行数据渲染
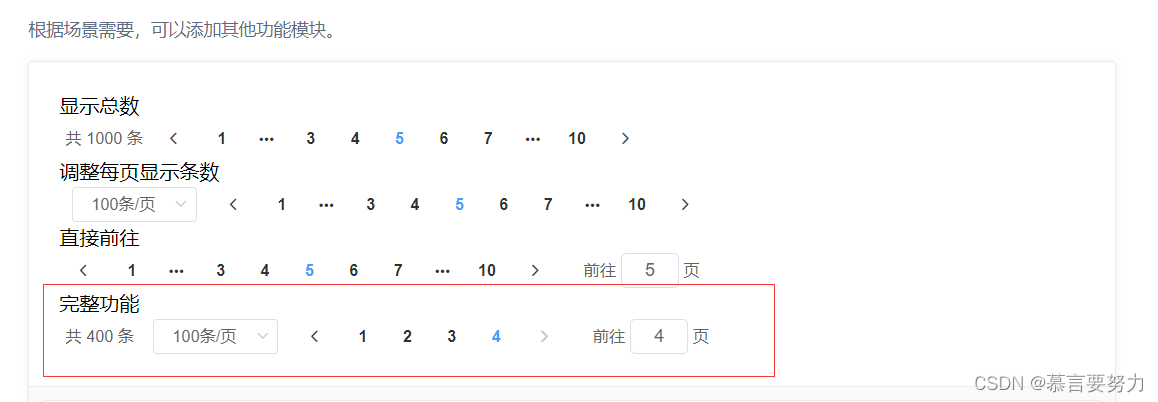
我们进行组件使用,并且设置分页的数据数量,数据可分为一页5条、10条以及15条

<div style="padding: 10px 0">
      <el-pagination
          @size-change="handleSizeChange"
          @current-change="handleCurrentChange"
          :current-page="pageNum"
          :page-sizes="[ 5, 10, 15]"
          :page-size="pageSize"
          layout="total, sizes, prev, pager, next, jumper"
          :total="total">
      </el-pagination>
    </div>
3.数据渲染
我们默认查询处理的数据是0,设置页数为一页,一页为5条数据

data() {
    return {
      tableData: [],
      total: 0,
      pageNum: 1,
      pageSize: 5,
      username: "",
      form: {},
      dialogFormVisible: false,
      multipleSelection: [],
      headerBg: "headerBg",
      roles: []
    }
  }
最后进行数据请求,请求后台写好的page接口

methods: {
    load: function () {
      this.request.get("/user/page", {
        params: {
          pageNum: this.pageNum,
          pageSize: this.pageSize,
          username: this.username,
        }
      }).then(res => {
        this.tableData = res.data.records
        this.total = res.data.total
      })
      this.request.get("/role").then(res => {
        this.roles = res.data
      })
    }
}
最后附上前端完整代码
<template>
  <div>
    <div style="margin: 10px 0">
      <el-input style="width: 200px; margin-left: 10px" placeholder="请输入用户名" clearable suffix-icon="el-icon-user" v-model="username" ></el-input>
      <el-button class="ml-5" type="primary" @click="load"><i class="el-icon-search" />搜索</el-button>
      <el-button type="warning" @click="reset"><i class="el-icon-refresh" />刷新</el-button>
    </div>
    <div style="margin: 10px 0">
      <el-button type="primary" @click="handleAdd" class="ml-10"><i class="el-icon-circle-plus-outline" />新增</el-button>
      <el-popconfirm
          class="ml-5"
          confirm-button-text='确认'
          cancel-button-text='取消'
          icon="el-icon-info"
          icon-color="red"
          title="确定批量删除这些信息吗?"
          @confirm="delBatch">
        <el-button type="danger" slot="reference" ><i class="el-icon-remove-outline" />删除</el-button>
      </el-popconfirm>
      <el-upload action="http://localhost:9090/user/import" :show-file-list="false" accept=".xlsx"
                 :on-success="handleExcelImportSuccess" style="display: inline-block">
        <el-button type="primary" class="ml-5"><i class="el-icon-upload"></i>导入</el-button>
      </el-upload>
      <el-button type="primary" class="ml-5" @click="exp"><i class="el-icon-download" />导出</el-button>
    </div>
    <el-table :data="tableData" border stripe :header-cell-class-name="headerBg"
              @selection-change="handleSelectionChange">
      <el-table-column type="selection" width="55"></el-table-column>
      <el-table-column prop="username" label="用户名" ></el-table-column>
      <el-table-column prop="nickname" label="昵称" ></el-table-column>
      <el-table-column prop="email" label="邮箱" ></el-table-column>
      <el-table-column prop="phone" label="联系方式" ></el-table-column>
      <el-table-column prop="address" label="地址"></el-table-column>
<!--      <el-table-column prop="role" label="身份"></el-table-column>-->
      <el-table-column label="操作">
        <template slot-scope="scope">
          <el-button type="success" @click="handleEdit(scope.row)"><i class="el-icon-edit-outline" />编辑</el-button>
        </template>
      </el-table-column>
    </el-table>
    <div style="padding: 10px 0">
      <el-pagination
          @size-change="handleSizeChange"
          @current-change="handleCurrentChange"
          :current-page="pageNum"
          :page-sizes="[ 5, 10, 15]"
          :page-size="pageSize"
          layout="total, sizes, prev, pager, next, jumper"
          :total="total">
      </el-pagination>
    </div>
    <el-dialog title="用户信息" :visible.sync="dialogFormVisible" width="30%">
      <el-form :model="form" label-width="100px" size="small">
        <el-form-item label="用户名" >
          <el-input v-model="form.username" autocomplete="off"></el-input>
        </el-form-item>
        <el-form-item label="昵称" >
          <el-input v-model="form.nickname" autocomplete="off"></el-input>
        </el-form-item>
        <el-form-item label="邮箱" >
          <el-input v-model="form.email" autocomplete="off"></el-input>
        </el-form-item>
        <el-form-item label="联系方式" >
          <el-input v-model="form.phone" autocomplete="off"></el-input>
        </el-form-item>
        <el-form-item label="地址" >
          <el-input v-model="form.address" autocomplete="off"></el-input>
        </el-form-item>
      </el-form>
      <div slot="footer" class="dialog-footer">
        <el-button @click="dialogFormVisible = false">取 消</el-button>
        <el-button type="primary" @click="save">确 定</el-button>
      </div>
    </el-dialog>
  </div>
</template>

<script>
export default {
  name: "User",
  data() {
    return {
      tableData: [],
      total: 0,
      pageNum: 1,
      pageSize: 5,
      username: "",
      form: {},
      dialogFormVisible: false,
      multipleSelection: [],
      headerBg: "headerBg",
      roles: []
    }
  },
  created() {
    this.load()
  },
  methods: {
    load: function () {
      this.request.get("/user/page", {
        params: {
          pageNum: this.pageNum,
          pageSize: this.pageSize,
          username: this.username,
        }
      }).then(res => {
        this.tableData = res.data.records
        this.total = res.data.total
      })
      this.request.get("/role").then(res => {
        this.roles = res.data
      })
    },
    home() {
      this.$router.push("/")
    },
    save() {
      this.request.post("/user", this.form).then(res => {
        if (res.code === '200') {
          this.$message.success("保存成功")
          this.dialogFormVisible = false
          this.load()
        } else {
          this.$message.error("保存失败")
        }
      })
    },
    handleAdd() {
      this.dialogFormVisible = true
      this.form = {}
    },
    handleEdit(row) {
      this.form = row
      this.dialogFormVisible = true
    },
    handleSelectionChange(val) {
      console.log(val)
      this.multipleSelection = val;
    },
    exp() {
      window.open("http://localhost:9090/user/export")
    },
    handleExcelImportSuccess() {
      this.$message.success("文件导入成功")
      this.load()
    },
    delBatch() {
      let ids = this.multipleSelection.map(v => v.id)  //[{}, {}, {}] => [1,2,3]
      this.request.post("/user/del/batch", ids).then(res => {
        if (res.code === '200') {
          this.$message.success("删除用户成功")
          this.load()
        } else {
          this.$message.error("删除用户失败")
        }
      })
    },
    reset() {
      this.username = ""
      this.load()
    },
    handleSizeChange(pageSize) {
      console.log(pageSize)
      this.pageSize = pageSize
      this.load()
    },
    handleCurrentChange(pageNum) {
      console.log(pageNum)
      this.pageNum = pageNum
      this.load()
    },
  }
}
</script>

<style>
.headerBg {
  background: #eee!important;
}
</style>以上就是对SpringBoot整合mybatis-plus实现分页查询简单的概述,现在我们的项目就更加的趋于完美了,也提升了我们对于编程的能力和思维!
如果这篇文章有帮助到你,希望可以给作者点个赞👍,创作不易,如果有对后端技术、前端领域感兴趣的,也欢迎关注 ,我将会给你带来巨大的收获与惊喜💝💝💝!
我正在用Ruby编写一个简单的程序来检查域列表是否被占用。基本上它循环遍历列表,并使用以下函数进行检查。require'rubygems'require'whois'defcheck_domain(domain)c=Whois::Client.newc.query("google.com").available?end程序不断出错(即使我在google.com中进行硬编码),并打印以下消息。鉴于该程序非常简单,我已经没有什么想法了-有什么建议吗?/Library/Ruby/Gems/1.8/gems/whois-2.0.2/lib/whois/server/adapters/base.
我希望将Favorite模型添加到我的User和Link模型。业务逻辑用户可以有多个链接(即可以添加多个链接)用户可以收藏多个链接(他们自己的或其他用户的)一个链接可以被多个用户收藏,但只有一个所有者我对如何为这种关联建模以及在模型就位后如何创建用户收藏夹感到困惑?classUser 最佳答案 下面的数据模型怎么样:classUser:destroyhas_many:favorite_links,:through=>:favorites,:source=>:linkendclassLink:destroyhas_many:favor
我有一个用户工厂。我希望默认情况下确认用户。但是鉴于unconfirmed特征,我不希望它们被确认。虽然我有一个基于实现细节而不是抽象的工作实现,但我想知道如何正确地做到这一点。factory:userdoafter(:create)do|user,evaluator|#unwantedimplementationdetailshereunlessFactoryGirl.factories[:user].defined_traits.map(&:name).include?(:unconfirmed)user.confirm!endendtrait:unconfirmeddoenden
我知道我可以指定某些字段来使用pluck查询数据库。ids=Item.where('due_at但是我想知道,是否有一种方法可以指定我想避免从数据库查询的某些字段。某种反拔?posts=Post.where(published:true).do_not_lookup(:enormous_field) 最佳答案 Model#attribute_names应该返回列/属性数组。您可以排除其中一些并传递给pluck或select方法。像这样:posts=Post.where(published:true).select(Post.attr
华为OD机试题本篇题目:明明的随机数题目输入描述输出描述:示例1输入输出说明代码编写思路最近更新的博客华为od2023|什么是华为od,od薪资待遇,od机试题清单华为OD机试真题大全,用Python解华为机试题|机试宝典【华为OD机试】全流程解析+经验分享,题型分享,防作弊指南华为o
C#实现简易绘图工具一.引言实验目的:通过制作窗体应用程序(C#画图软件),熟悉基本的窗体设计过程以及控件设计,事件处理等,熟悉使用C#的winform窗体进行绘图的基本步骤,对于面向对象编程有更加深刻的体会.Tutorial任务设计一个具有基本功能的画图软件**·包括简单的新建文件,保存,重新绘图等功能**·实现一些基本图形的绘制,包括铅笔和基本形状等,学习橡皮工具的创建**·设计一个合理舒适的UI界面**注明:你可能需要先了解一些关于winform窗体应用程序绘图的基本知识,以及关于GDI+类和结构的知识二.实验环境Windows系统下的visualstudio2017C#窗体应用程序三.
MIMO技术的优缺点优点通过下面三个增益来总体概括:阵列增益。阵列增益是指由于接收机通过对接收信号的相干合并而活得的平均SNR的提高。在发射机不知道信道信息的情况下,MIMO系统可以获得的阵列增益与接收天线数成正比复用增益。在采用空间复用方案的MIMO系统中,可以获得复用增益,即信道容量成倍增加。信道容量的增加与min(Nt,Nr)成正比分集增益。在采用空间分集方案的MIMO系统中,可以获得分集增益,即可靠性性能的改善。分集增益用独立衰落支路数来描述,即分集指数。在使用了空时编码的MIMO系统中,由于接收天线或发射天线之间的间距较远,可认为它们各自的大尺度衰落是相互独立的,因此分布式MIMO
遍历文件夹我们通常是使用递归进行操作,这种方式比较简单,也比较容易理解。本文为大家介绍另一种不使用递归的方式,由于没有使用递归,只用到了循环和集合,所以效率更高一些!一、使用递归遍历文件夹整体思路1、使用File封装初始目录,2、打印这个目录3、获取这个目录下所有的子文件和子目录的数组。4、遍历这个数组,取出每个File对象4-1、如果File是否是一个文件,打印4-2、否则就是一个目录,递归调用代码实现publicclassSearchFile{publicstaticvoidmain(String[]args){//初始目录Filedir=newFile("d:/Dev");Datebeg
Region是HBase数据管理的基本单位,region有一点像关系型数据的分区。region中存储这用户的真实数据,而为了管理这些数据,HBase使用了RegionSever来管理region。Region的结构hbaseregion的大小设置默认情况下,每个Table起初只有一个Region,随着数据的不断写入,Region会自动进行拆分。刚拆分时,两个子Region都位于当前的RegionServer,但处于负载均衡的考虑,HMaster有可能会将某个Region转移给其他的RegionServer。RegionSplit时机:当1个region中的某个Store下所有StoreFile
我正在尝试查询我的Rails数据库(Postgres)中的购买表,我想查询时间范围。例如,我想知道在所有日期的下午2点到3点之间进行了多少次购买。此表中有一个created_at列,但我不知道如何在不搜索特定日期的情况下完成此操作。我试过:Purchases.where("created_atBETWEEN?and?",Time.now-1.hour,Time.now)但这最终只会搜索今天与那些时间的日期。 最佳答案 您需要使用PostgreSQL'sdate_part/extractfunction从created_at中提取小时