 2.点击显示二维码调用子组件海报方法
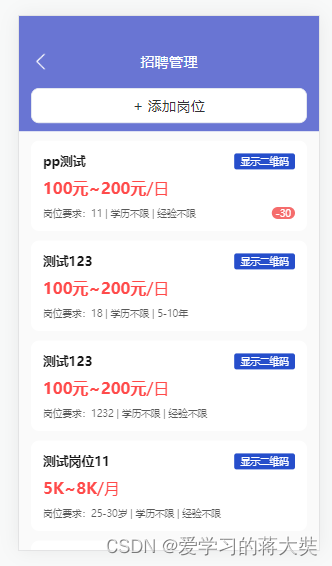
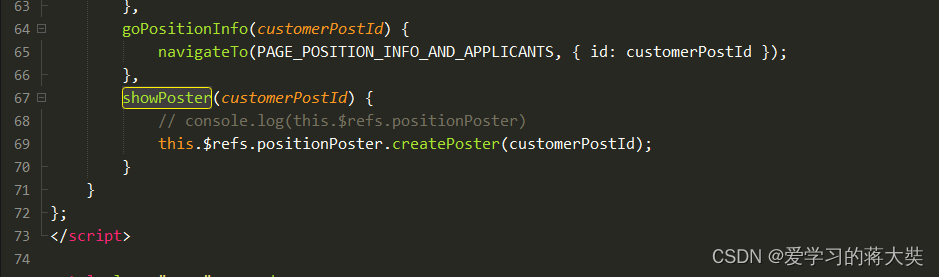
showPoster(customerPostId) {
// console.log(this.$refs.positionPoster)
this.$refs.positionPoster.createPoster(customerPostId);
}
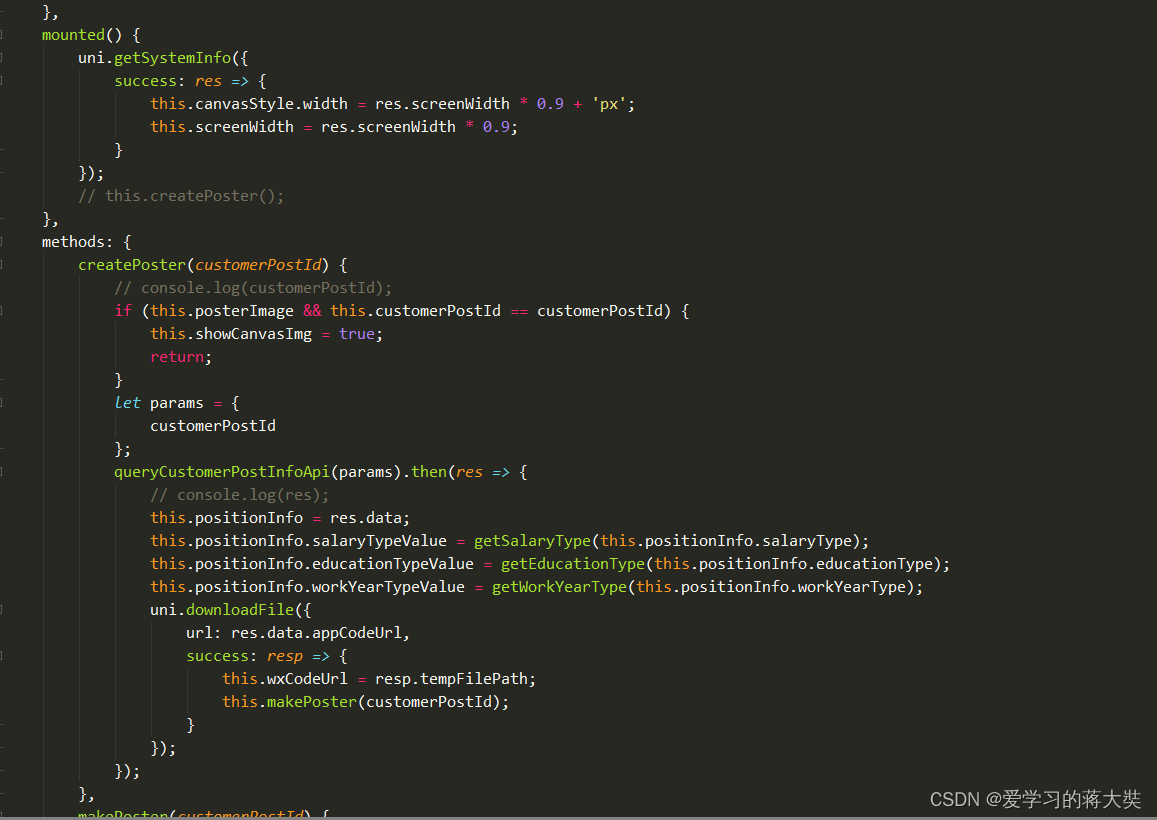
uni.getSystemInfo({
success: res => {
this.canvasStyle.width = res.screenWidth * 0.9 + 'px';
this.screenWidth = res.screenWidth * 0.9;
}
});
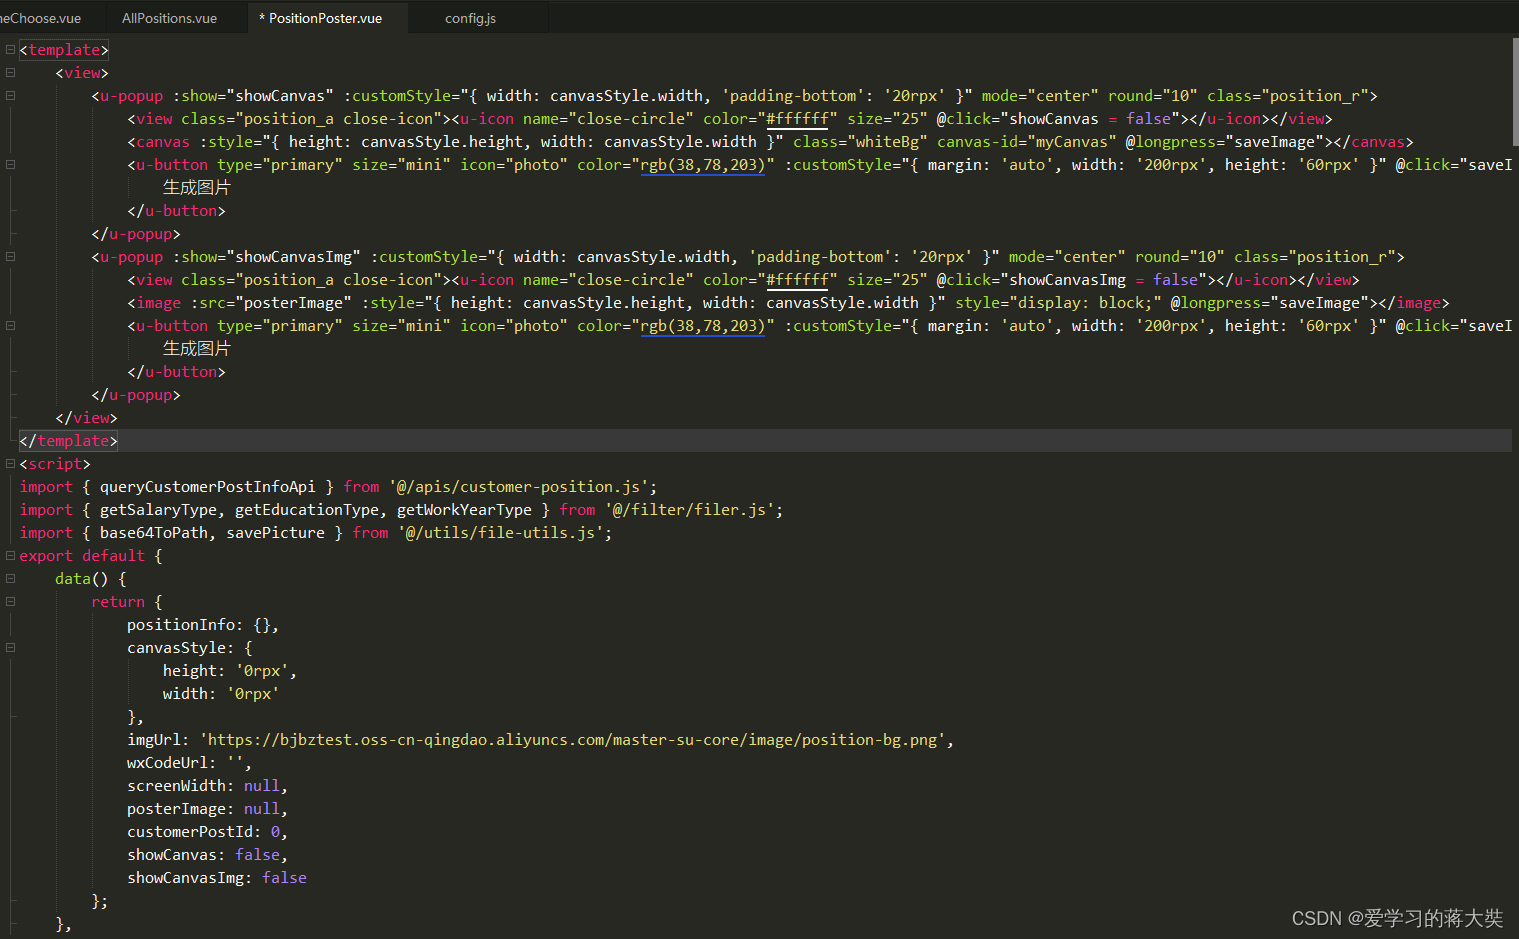
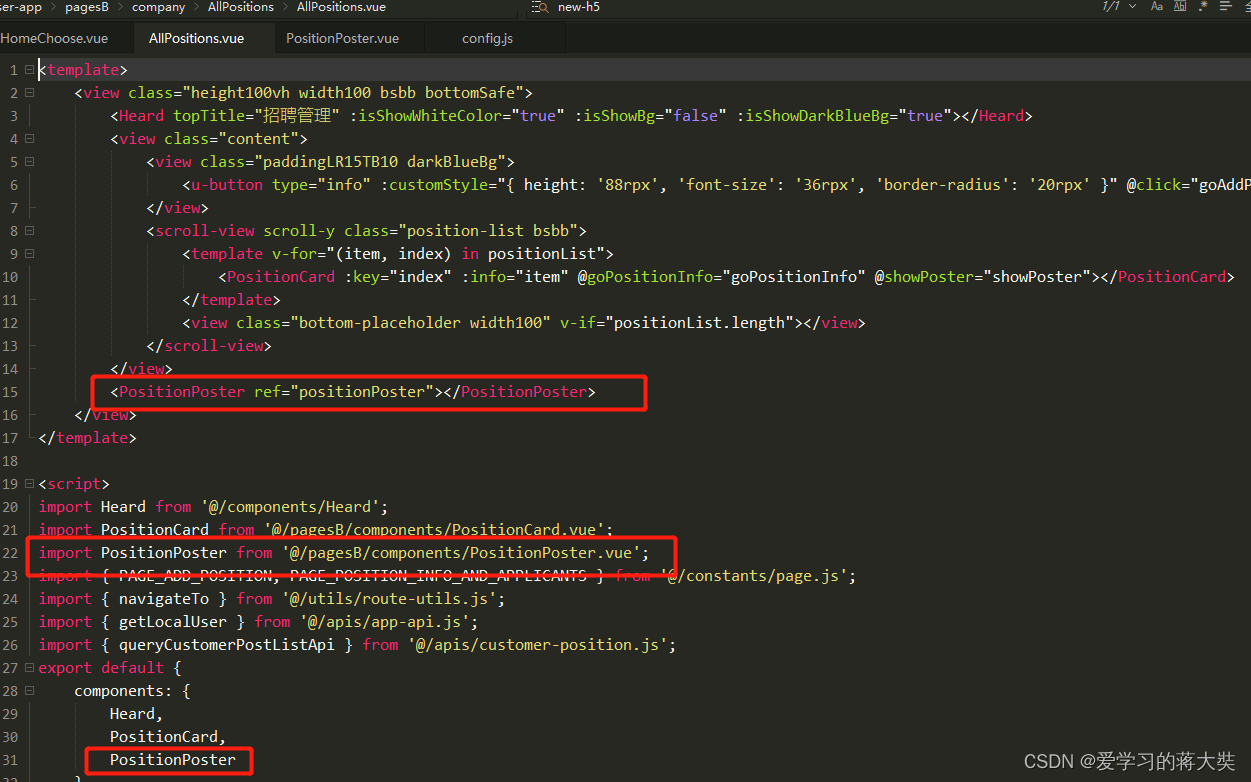
<template>
<view>
<u-popup :show="showCanvas" :customStyle="{ width: canvasStyle.width, 'padding-bottom': '20rpx' }" mode="center" round="10" class="position_r">
<view class="position_a close-icon"><u-icon name="close-circle" color="#ffffff" size="25" @click="showCanvas = false"></u-icon></view>
<canvas :style="{ height: canvasStyle.height, width: canvasStyle.width }" class="whiteBg" canvas-id="myCanvas" @longpress="saveImage"></canvas>
<u-button type="primary" size="mini" icon="photo" color="rgb(38,78,203)" :customStyle="{ margin: 'auto', width: '200rpx', height: '60rpx' }" @click="saveImage">
生成图片
</u-button>
</u-popup>
<u-popup :show="showCanvasImg" :customStyle="{ width: canvasStyle.width, 'padding-bottom': '20rpx' }" mode="center" round="10" class="position_r">
<view class="position_a close-icon"><u-icon name="close-circle" color="#ffffff" size="25" @click="showCanvasImg = false"></u-icon></view>
<image :src="posterImage" :style="{ height: canvasStyle.height, width: canvasStyle.width }" style="display: block;" @longpress="saveImage"></image>
<u-button type="primary" size="mini" icon="photo" color="rgb(38,78,203)" :customStyle="{ margin: 'auto', width: '200rpx', height: '60rpx' }" @click="saveImage">
生成图片
</u-button>
</u-popup>
</view>
</template>
<script>
import { queryCustomerPostInfoApi } from '@/apis/customer-position.js';
import { getSalaryType, getEducationType, getWorkYearType } from '@/filter/filer.js';
import { base64ToPath, savePicture } from '@/utils/file-utils.js';
export default {
data() {
return {
positionInfo: {},
canvasStyle: {
height: '0rpx',
width: '0rpx'
},
imgUrl: 'https://bjbztest.oss-cn-qingdao.aliyuncs.com/master-su-core/image/position-bg.png',
wxCodeUrl: '',
screenWidth: null,
posterImage: null,
customerPostId: 0,
showCanvas: false,
showCanvasImg: false
};
},
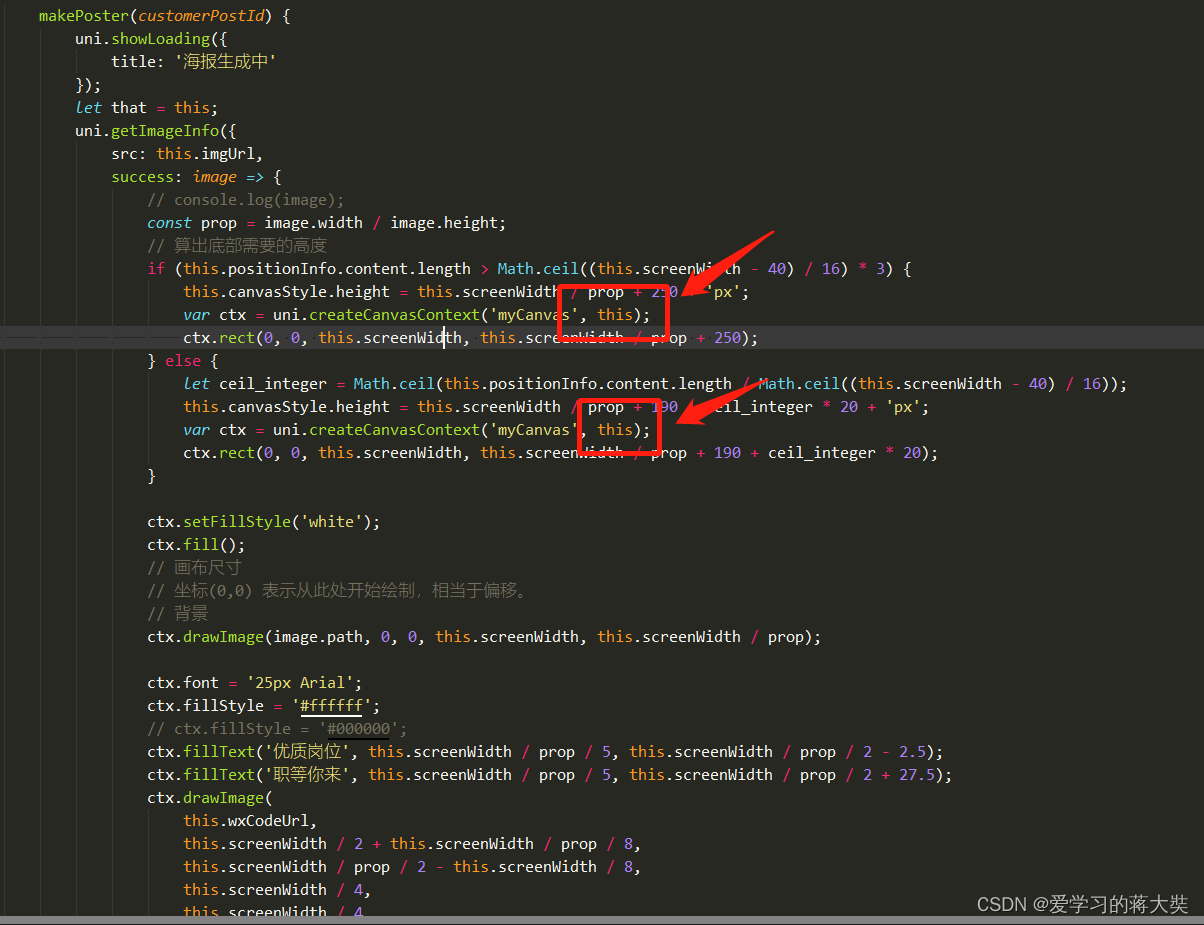
makePoster(customerPostId) {
uni.showLoading({
title: '海报生成中'
});
let that = this;
uni.getImageInfo({
src: this.imgUrl,
success: image => {
// console.log(image);
const prop = image.width / image.height;
// 算出底部需要的高度
if (this.positionInfo.content.length > Math.ceil((this.screenWidth - 40) / 16) * 3) {
this.canvasStyle.height = this.screenWidth / prop + 250 + 'px';
var ctx = uni.createCanvasContext('myCanvas', this);
ctx.rect(0, 0, this.screenWidth, this.screenWidth / prop + 250);
} else {
let ceil_integer = Math.ceil(this.positionInfo.content.length / Math.ceil((this.screenWidth - 40) / 16));
this.canvasStyle.height = this.screenWidth / prop + 190 + ceil_integer * 20 + 'px';
var ctx = uni.createCanvasContext('myCanvas', this);
ctx.rect(0, 0, this.screenWidth, this.screenWidth / prop + 190 + ceil_integer * 20);
}
ctx.setFillStyle('white');
ctx.fill();
// 画布尺寸
// 坐标(0,0) 表示从此处开始绘制,相当于偏移。
// 背景
ctx.drawImage(image.path, 0, 0, this.screenWidth, this.screenWidth / prop);
ctx.font = '25px Arial';
ctx.fillStyle = '#ffffff';
// ctx.fillStyle = '#000000';
ctx.fillText('优质岗位', this.screenWidth / prop / 5, this.screenWidth / prop / 2 - 2.5);
ctx.fillText('职等你来', this.screenWidth / prop / 5, this.screenWidth / prop / 2 + 27.5);
ctx.drawImage(
this.wxCodeUrl,
this.screenWidth / 2 + this.screenWidth / prop / 8,
this.screenWidth / prop / 2 - this.screenWidth / 8,
this.screenWidth / 4,
this.screenWidth / 4
);
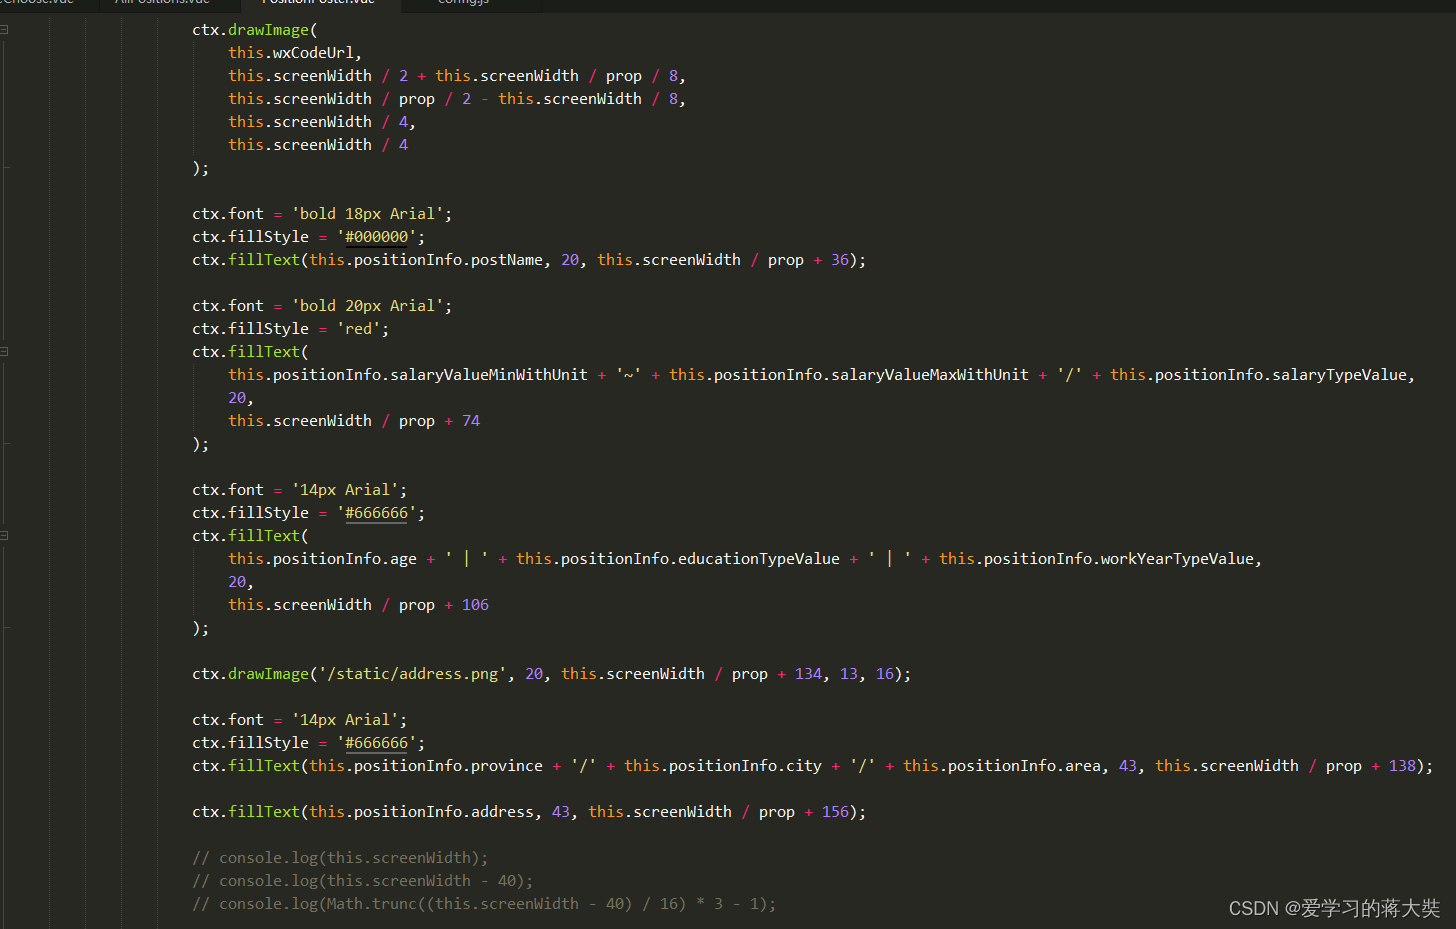
ctx.font = 'bold 18px Arial';
ctx.fillStyle = '#000000';
ctx.fillText(this.positionInfo.postName, 20, this.screenWidth / prop + 36);
ctx.font = 'bold 20px Arial';
ctx.fillStyle = 'red';
ctx.fillText(
this.positionInfo.salaryValueMinWithUnit + '~' + this.positionInfo.salaryValueMaxWithUnit + '/' + this.positionInfo.salaryTypeValue,
20,
this.screenWidth / prop + 74
);
ctx.font = '14px Arial';
ctx.fillStyle = '#666666';
ctx.fillText(
this.positionInfo.age + ' | ' + this.positionInfo.educationTypeValue + ' | ' + this.positionInfo.workYearTypeValue,
20,
this.screenWidth / prop + 106
);
ctx.drawImage('/static/address.png', 20, this.screenWidth / prop + 134, 13, 16);
ctx.font = '14px Arial';
ctx.fillStyle = '#666666';
ctx.fillText(this.positionInfo.province + '/' + this.positionInfo.city + '/' + this.positionInfo.area, 43, this.screenWidth / prop + 138);
ctx.fillText(this.positionInfo.address, 43, this.screenWidth / prop + 156);
// console.log(this.screenWidth);
// console.log(this.screenWidth - 40);
// console.log(Math.trunc((this.screenWidth - 40) / 16) * 3 - 1);
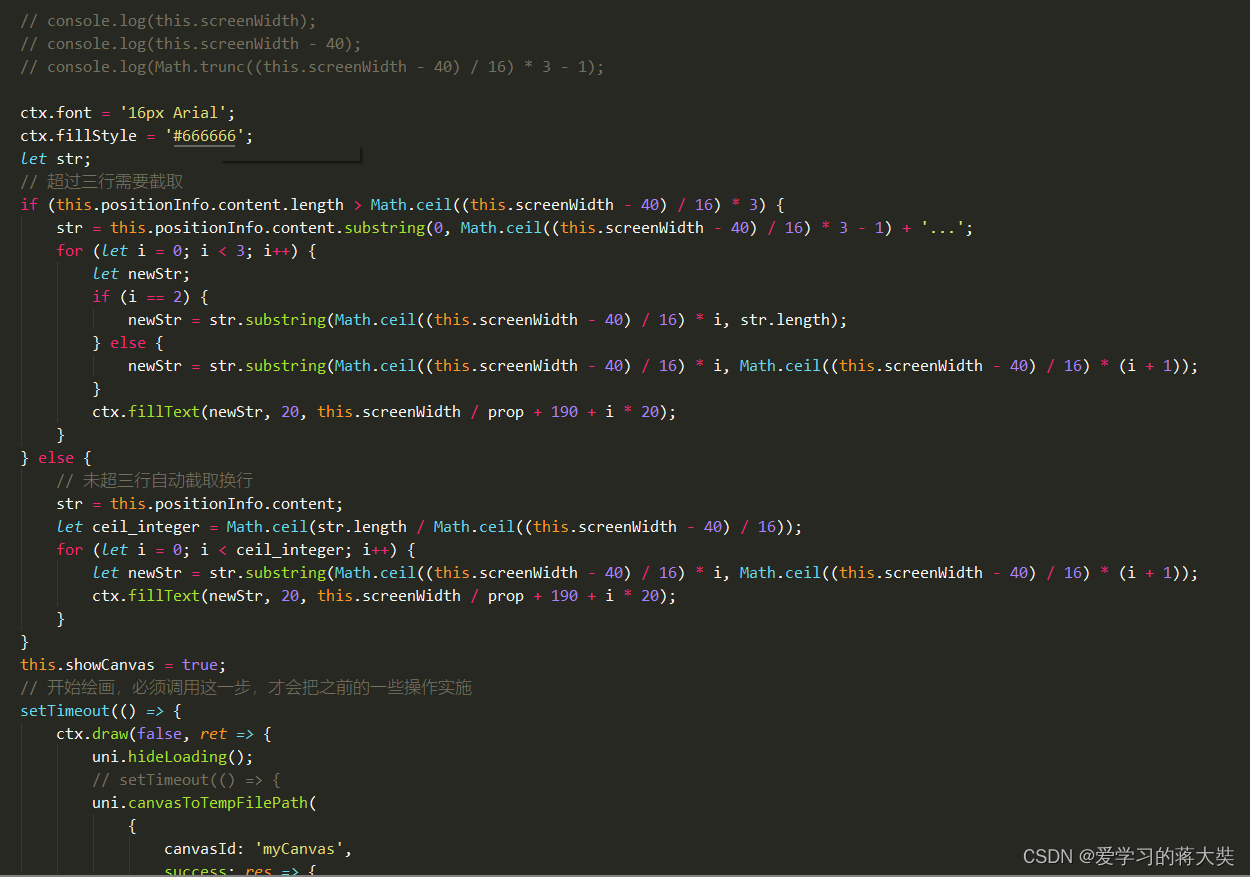
ctx.font = '16px Arial';
ctx.fillStyle = '#666666';
let str;
// 超过三行需要截取
if (this.positionInfo.content.length > Math.ceil((this.screenWidth - 40) / 16) * 3) {
str = this.positionInfo.content.substring(0, Math.ceil((this.screenWidth - 40) / 16) * 3 - 1) + '...';
for (let i = 0; i < 3; i++) {
let newStr;
if (i == 2) {
newStr = str.substring(Math.ceil((this.screenWidth - 40) / 16) * i, str.length);
} else {
newStr = str.substring(Math.ceil((this.screenWidth - 40) / 16) * i, Math.ceil((this.screenWidth - 40) / 16) * (i + 1));
}
ctx.fillText(newStr, 20, this.screenWidth / prop + 190 + i * 20);
}
} else {
// 未超三行自动截取换行
str = this.positionInfo.content;
let ceil_integer = Math.ceil(str.length / Math.ceil((this.screenWidth - 40) / 16));
for (let i = 0; i < ceil_integer; i++) {
let newStr = str.substring(Math.ceil((this.screenWidth - 40) / 16) * i, Math.ceil((this.screenWidth - 40) / 16) * (i + 1));
ctx.fillText(newStr, 20, this.screenWidth / prop + 190 + i * 20);
}
}
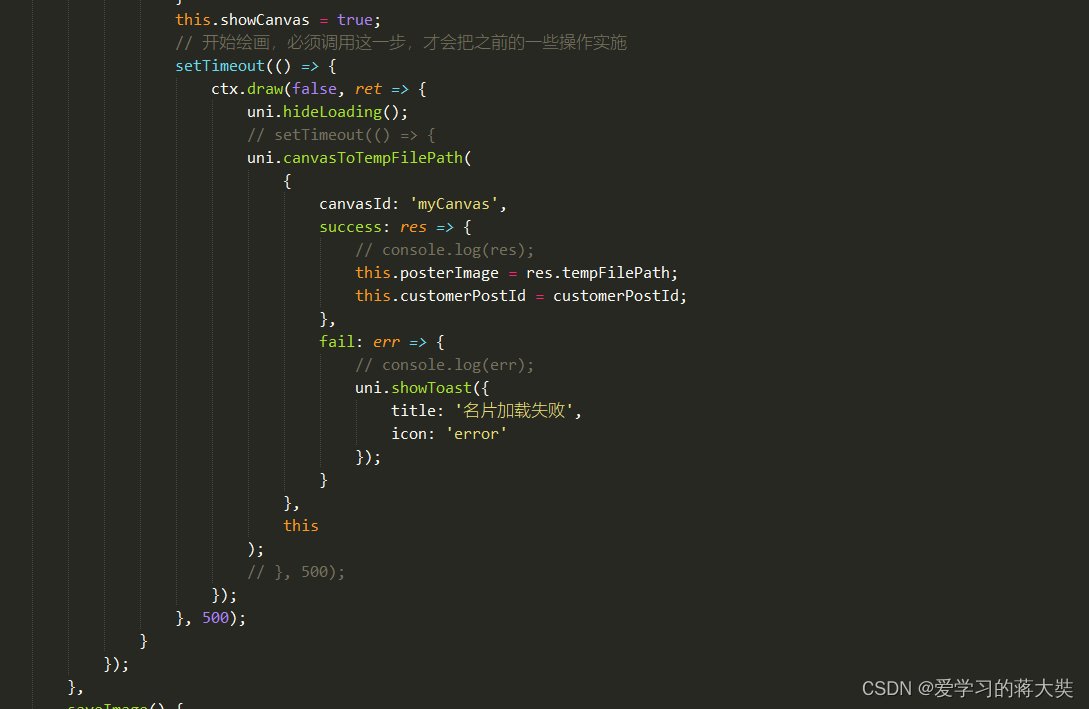
this.showCanvas = true;
// 开始绘画,必须调用这一步,才会把之前的一些操作实施
setTimeout(() => {
ctx.draw(false, ret => {
uni.hideLoading();
// setTimeout(() => {
uni.canvasToTempFilePath(
{
canvasId: 'myCanvas',
success: res => {
// console.log(res);
this.posterImage = res.tempFilePath;
this.customerPostId = customerPostId;
},
fail: err => {
// console.log(err);
uni.showToast({
title: '名片加载失败',
icon: 'error'
});
}
},
this
);
// }, 500);
});
}, 500);
}
});
},
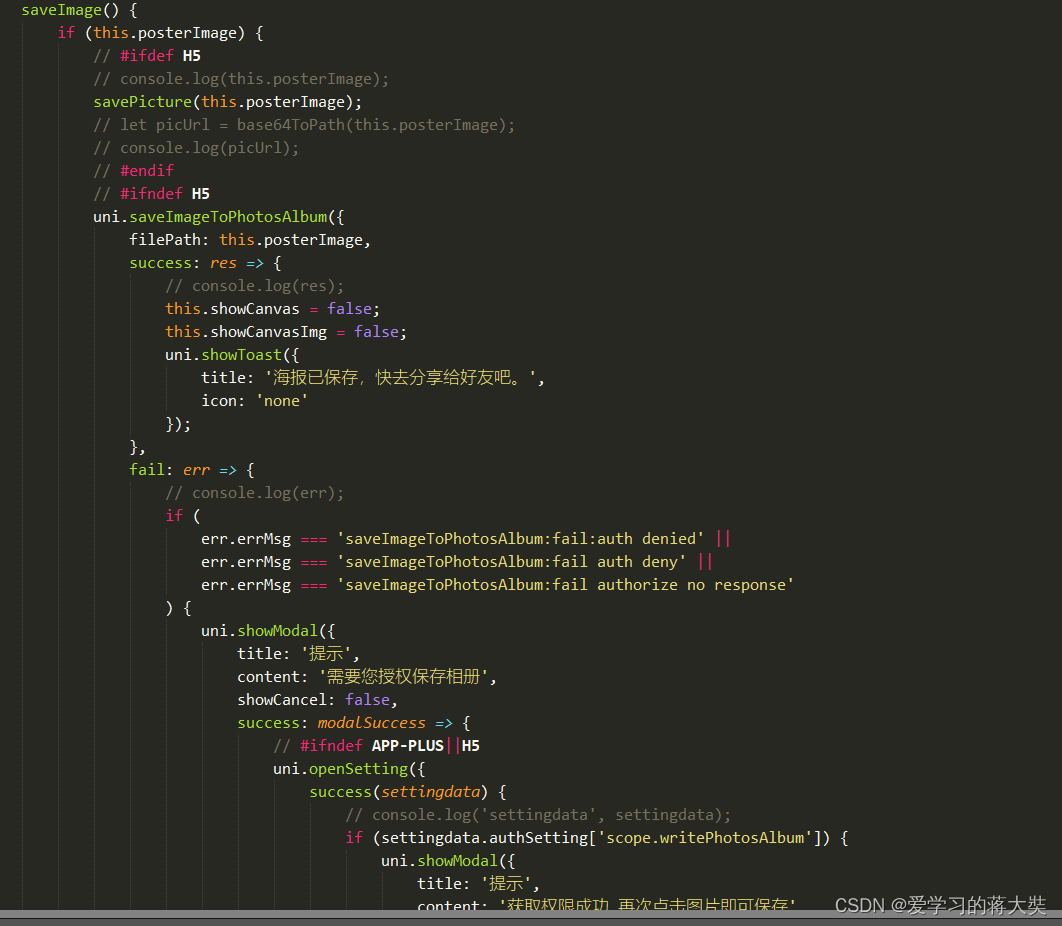

saveImage() {
if (this.posterImage) {
// #ifdef H5
// console.log(this.posterImage);
savePicture(this.posterImage);
// let picUrl = base64ToPath(this.posterImage);
// console.log(picUrl);
// #endif
// #ifndef H5
uni.saveImageToPhotosAlbum({
filePath: this.posterImage,
success: res => {
// console.log(res);
this.showCanvas = false;
this.showCanvasImg = false;
uni.showToast({
title: '海报已保存,快去分享给好友吧。',
icon: 'none'
});
},
fail: err => {
// console.log(err);
if (
err.errMsg === 'saveImageToPhotosAlbum:fail:auth denied' ||
err.errMsg === 'saveImageToPhotosAlbum:fail auth deny' ||
err.errMsg === 'saveImageToPhotosAlbum:fail authorize no response'
) {
uni.showModal({
title: '提示',
content: '需要您授权保存相册',
showCancel: false,
success: modalSuccess => {
// #ifndef APP-PLUS||H5
uni.openSetting({
success(settingdata) {
// console.log('settingdata', settingdata);
if (settingdata.authSetting['scope.writePhotosAlbum']) {
uni.showModal({
title: '提示',
content: '获取权限成功,再次点击图片即可保存',
showCancel: false
});
} else {
uni.showModal({
title: '提示',
content: '获取权限失败,将无法保存到相册哦~',
showCancel: false
});
}
}
});
// #endif
}
});
}
}
});
// #endif
} else {
uni.showToast({
title: '海报生成有误!',
icon: 'error'
});
}
}
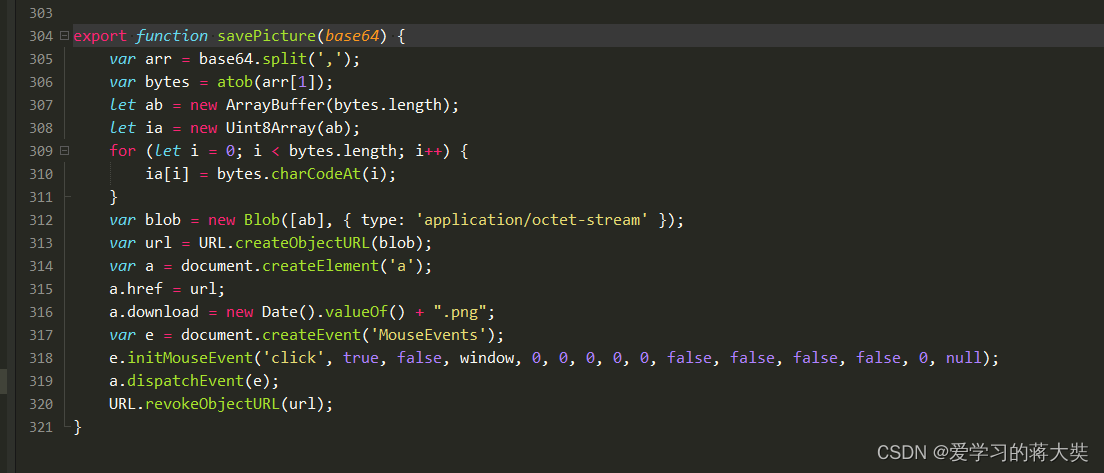
export function savePicture(base64) {
var arr = base64.split(',');
var bytes = atob(arr[1]);
let ab = new ArrayBuffer(bytes.length);
let ia = new Uint8Array(ab);
for (let i = 0; i < bytes.length; i++) {
ia[i] = bytes.charCodeAt(i);
}
var blob = new Blob([ab], { type: 'application/octet-stream' });
var url = URL.createObjectURL(blob);
var a = document.createElement('a');
a.href = url;
a.download = new Date().valueOf() + ".png";
var e = document.createEvent('MouseEvents');
e.initMouseEvent('click', true, false, window, 0, 0, 0, 0, 0, false, false, false, false, 0, null);
a.dispatchEvent(e);
URL.revokeObjectURL(url);
}
.close-icon {
/* #ifdef APP-PLUS||H5 */
right: 20rpx;
top: 20rpx;
/* #endif */
/* #ifndef APP-PLUS||H5 */
right: 0;
top: -60rpx;
/* #endif */
z-index: 9;
}
.safe-button {
background-color: rgb(38, 78, 203);
border-radius: 6rpx;
padding: 4rpx 16rpx;
}
这里有一个很好的答案解释了如何在Ruby中下载文件而不将其加载到内存中:https://stackoverflow.com/a/29743394/4852737require'open-uri'download=open('http://example.com/image.png')IO.copy_stream(download,'~/image.png')我如何验证下载文件的IO.copy_stream调用是否真的成功——这意味着下载的文件与我打算下载的文件完全相同,而不是下载一半的损坏文件?documentation说IO.copy_stream返回它复制的字节数,但是当我还没有下
我正在尝试解析一个文本文件,该文件每行包含可变数量的单词和数字,如下所示:foo4.500bar3.001.33foobar如何读取由空格而不是换行符分隔的文件?有什么方法可以设置File("file.txt").foreach方法以使用空格而不是换行符作为分隔符? 最佳答案 接受的答案将slurp文件,这可能是大文本文件的问题。更好的解决方案是IO.foreach.它是惯用的,将按字符流式传输文件:File.foreach(filename,""){|string|putsstring}包含“thisisanexample”结果的
在应用开发中,有时候我们需要获取系统的设备信息,用于数据上报和行为分析。那在鸿蒙系统中,我们应该怎么去获取设备的系统信息呢,比如说获取手机的系统版本号、手机的制造商、手机型号等数据。1、获取方式这里分为两种情况,一种是设备信息的获取,一种是系统信息的获取。1.1、获取设备信息获取设备信息,鸿蒙的SDK包为我们提供了DeviceInfo类,通过该类的一些静态方法,可以获取设备信息,DeviceInfo类的包路径为:ohos.system.DeviceInfo.具体的方法如下:ModifierandTypeMethodDescriptionstatic StringgetAbiList()Obt
1.错误信息:Errorresponsefromdaemon:Gethttps://registry-1.docker.io/v2/:net/http:requestcanceledwhilewaitingforconnection(Client.Timeoutexceededwhileawaitingheaders)或者:Errorresponsefromdaemon:Gethttps://registry-1.docker.io/v2/:net/http:TLShandshaketimeout2.报错原因:docker使用的镜像网址默认为国外,下载容易超时,需要修改成国内镜像地址(首先阿里
前言一般来说,前端根据后台返回code码展示对应内容只需要在前台判断code值展示对应的内容即可,但要是匹配的code码比较多或者多个页面用到时,为了便于后期维护,后台就会使用字典表让前端匹配,下面我将在微信小程序中通过wxs的方法实现这个操作。为什么要使用wxs?{{method(a,b)}}可以看到,上述代码是一个调用方法传值的操作,在vue中很常见,多用于数据之间的转换,但由于微信小程序诸多限制的原因,你并不能优雅的这样操作,可能有人会说,为什么不用if判断实现呢?但是if判断的局限性在于如果存在数据量过大时,大量重复性操作和if判断会让你的代码显得异常冗余。wxswxs相当于是一个独立
项目介绍随着我国经济迅速发展,人们对手机的需求越来越大,各种手机软件也都在被广泛应用,但是对于手机进行数据信息管理,对于手机的各种软件也是备受用户的喜爱小学生兴趣延时班预约小程序的设计与开发被用户普遍使用,为方便用户能够可以随时进行小学生兴趣延时班预约小程序的设计与开发的数据信息管理,特开发了小程序的设计与开发的管理系统。小学生兴趣延时班预约小程序的设计与开发的开发利用现有的成熟技术参考,以源代码为模板,分析功能调整与小学生兴趣延时班预约小程序的设计与开发的实际需求相结合,讨论了小学生兴趣延时班预约小程序的设计与开发的使用。开发环境开发说明:前端使用微信微信小程序开发工具:后端使用ssm:VU
@作者:SYFStrive @博客首页:HomePage📜:微信小程序📌:个人社区(欢迎大佬们加入)👉:社区链接🔗📌:觉得文章不错可以点点关注👉:专栏连接🔗💃:感谢支持,学累了可以先看小段由小胖给大家带来的街舞👉微信小程序(🔥)目录自定义组件-behaviors 1、什么是behaviors 2、behaviors的工作方式 3、创建behavior 4、导入并使用behavior 5、behavior中所有可用的节点 6、同名字段的覆盖和组合规则总结最后自定义组件-behaviors 1、什么是behaviorsbehaviors是小程序中,用于实现
最近因为项目需要,需要将Android手机系统自带的某个系统软件反编译并更改里面某个资源,并重新打包,签名生成新的自定义的apk,下面我来介绍一下我的实现过程。APK修改,分为以下几步:反编译解包,修改,重打包,修改签名等步骤。安卓apk修改准备工作1.系统配置好JavaJDK环境变量2.需要root权限的手机(针对系统自带apk,其他软件免root)3.Auto-Sign签名工具4.apktool工具安卓apk修改开始反编译本文拿Android系统里面的Settings.apk做demo,具体如何将apk获取出来在此就不过多介绍了,直接进入主题:按键win+R输入cmd,打开命令窗口,并将路
print"Enteryourpassword:"pass=STDIN.noecho(&:gets)puts"Yourpasswordis#{pass}!"输出:Enteryourpassword:input.rb:2:in`':undefinedmethod`noecho'for#>(NoMethodError) 最佳答案 一开始require'io/console'后来的Ruby1.9.3 关于ruby-为什么不能使用类IO的实例方法noecho?,我们在StackOverflow上
为了在我的mac上为一个rails项目安装mysql,我遵循了安装Homebrew软件和删除mac端口的在线建议。这是问题开始的地方。rails项目不会构建,我得到这个:[rake--prereqs]rakeaborted!dlopen(/Users/Parker/.rvm/gems/ruby-1.9.3-p448/gems/nokogiri-1.6.0/lib/nokogiri/nokogiri.bundle,9):Librarynotloaded:/opt/local/lib/libiconv.2.dylibReferencedfrom:/Users/Parker/.rvm/gem