LeNet-5网络的激活函数是双曲正切函数(TanH),项目中tanh函数模块由完整的层UsingTheTanh构成,该层由较小的处理单元HyperBolicTangent组成
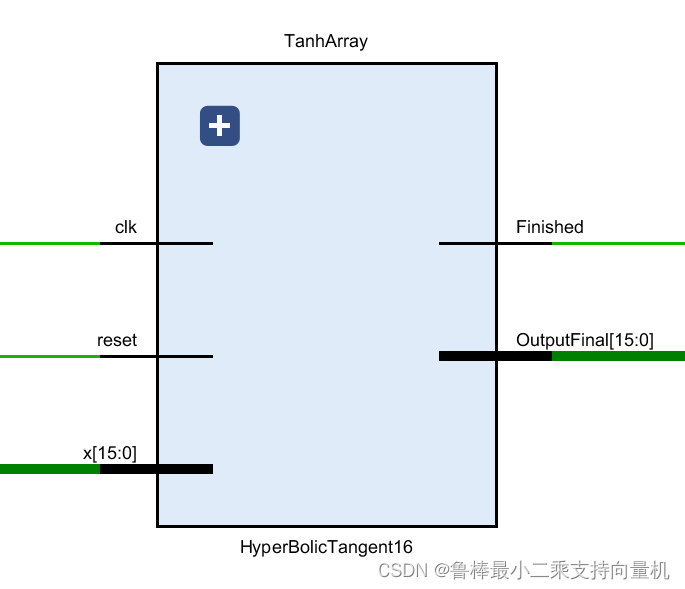
处理单元HyperBolicTangent,对每个输入执行Tanh操作,原理图如图所示,输入为位宽16的数,输出位宽也是16。该单元将Tanh运算分为3个乘法操作和1个加法操作:
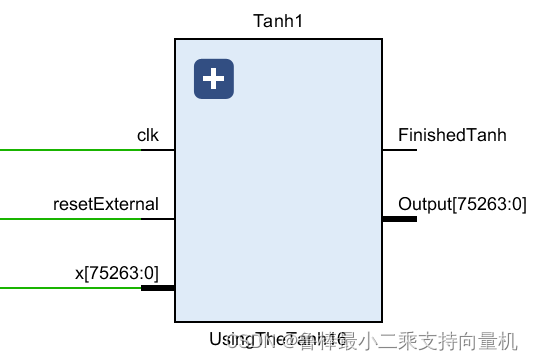
UsingTheTanh是Tanh层,由HyperBolicTangent单元组成,原理图如图所示。Tanh层的输入数据位宽为75264,即为卷积层的输出数据
一起学习用Verilog在FPGA上实现CNN----(二)卷积层设计已经完成卷积层的设计,下面我们继续激活层的代码实现
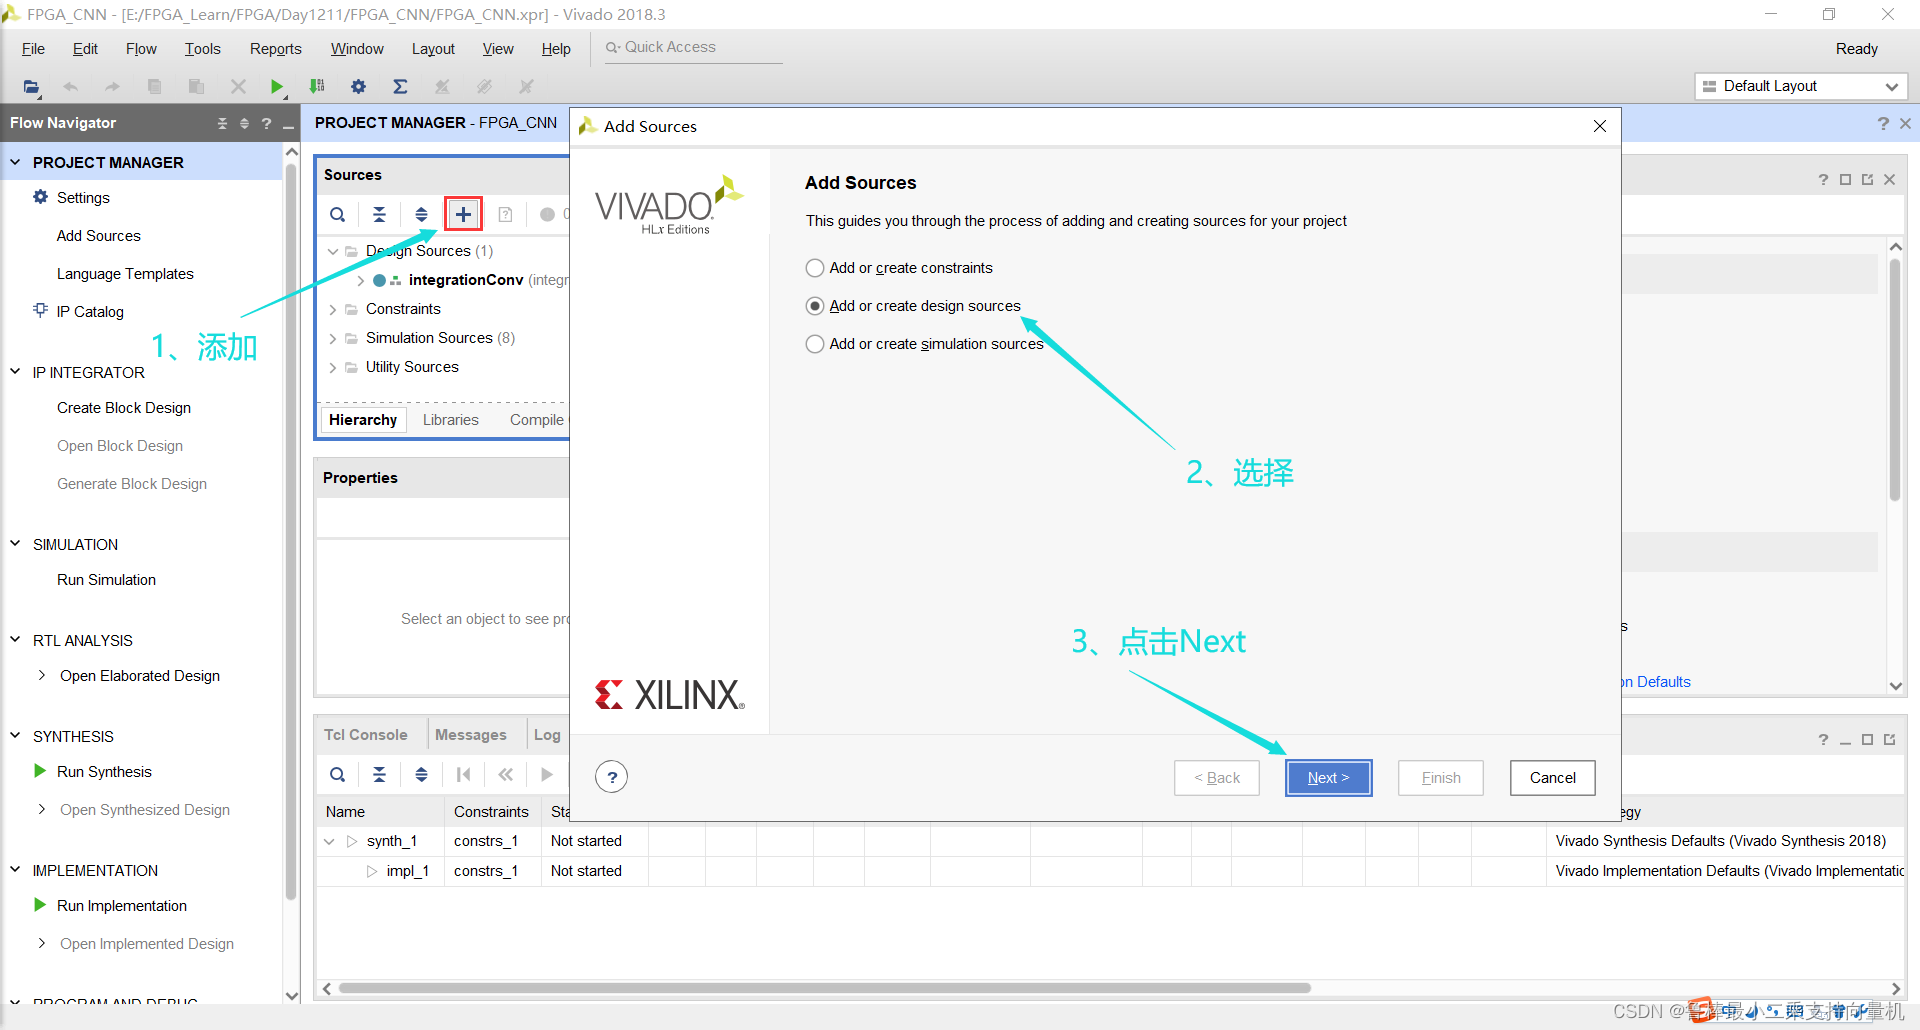
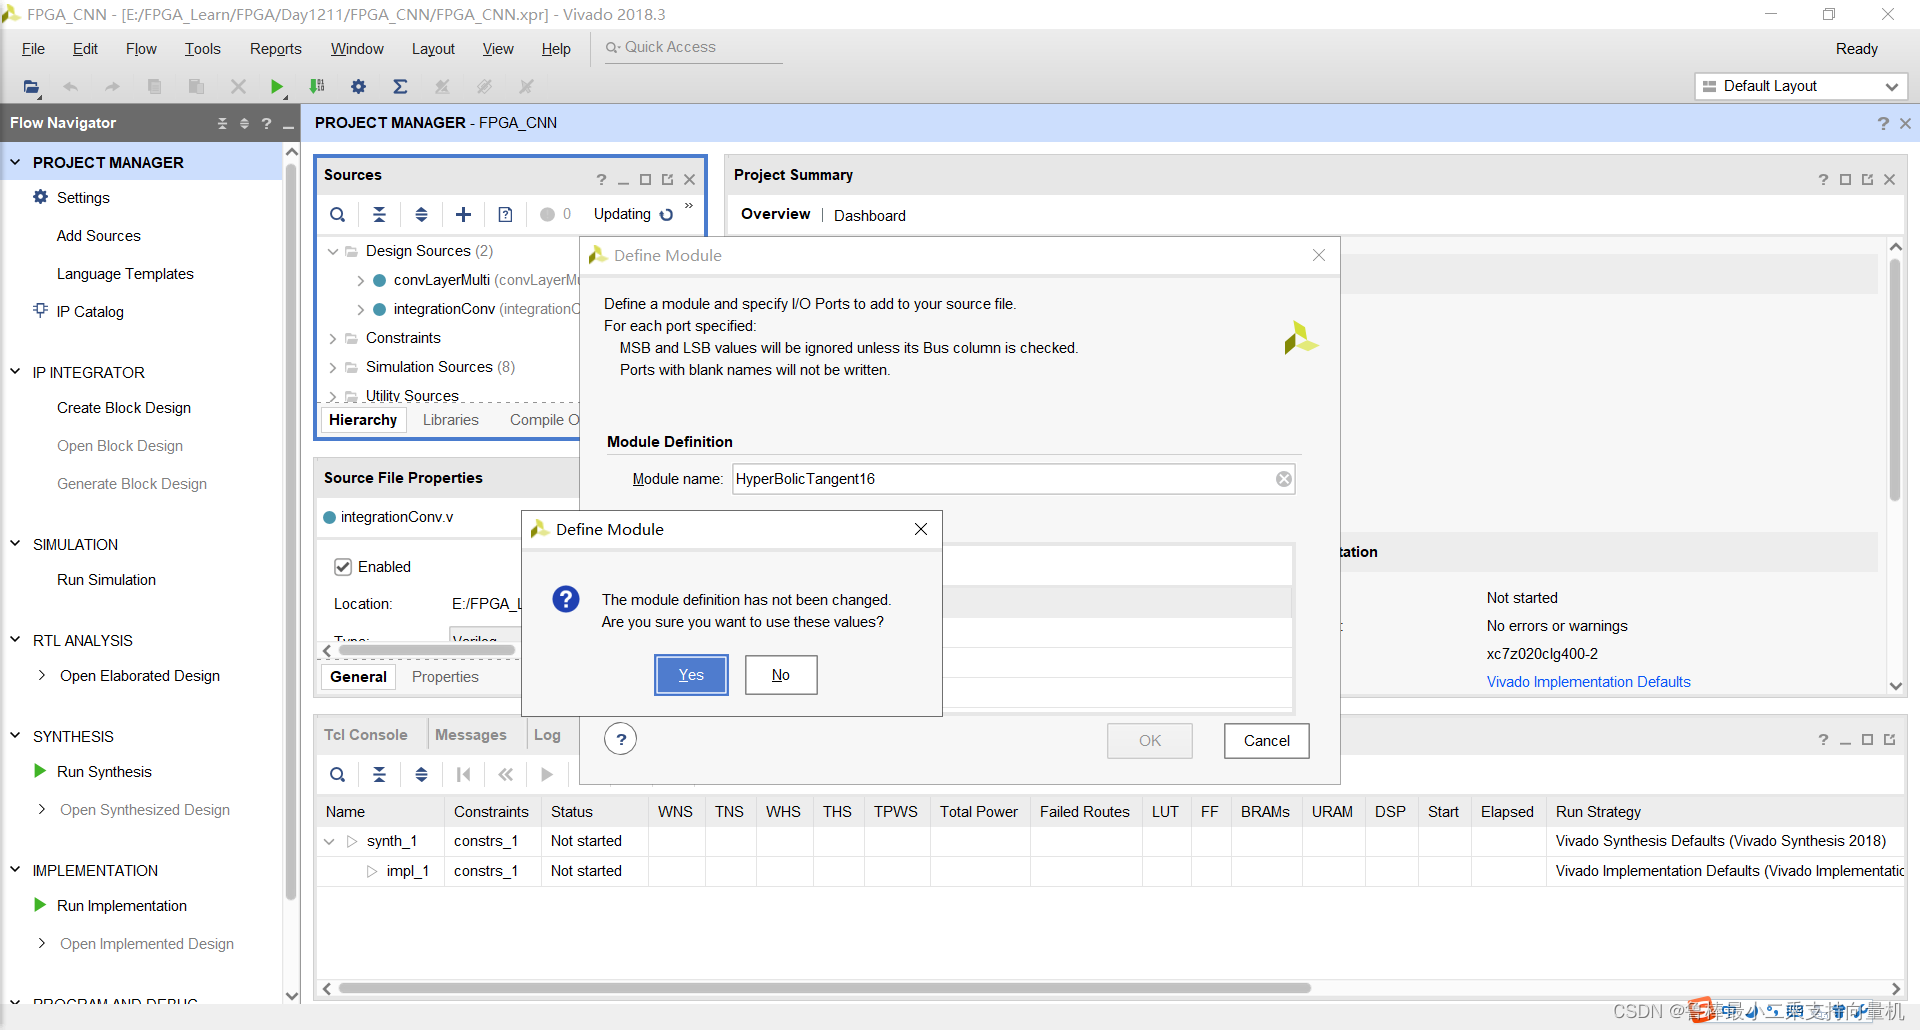
创建HyperBolicTangent16文件,操作如图:
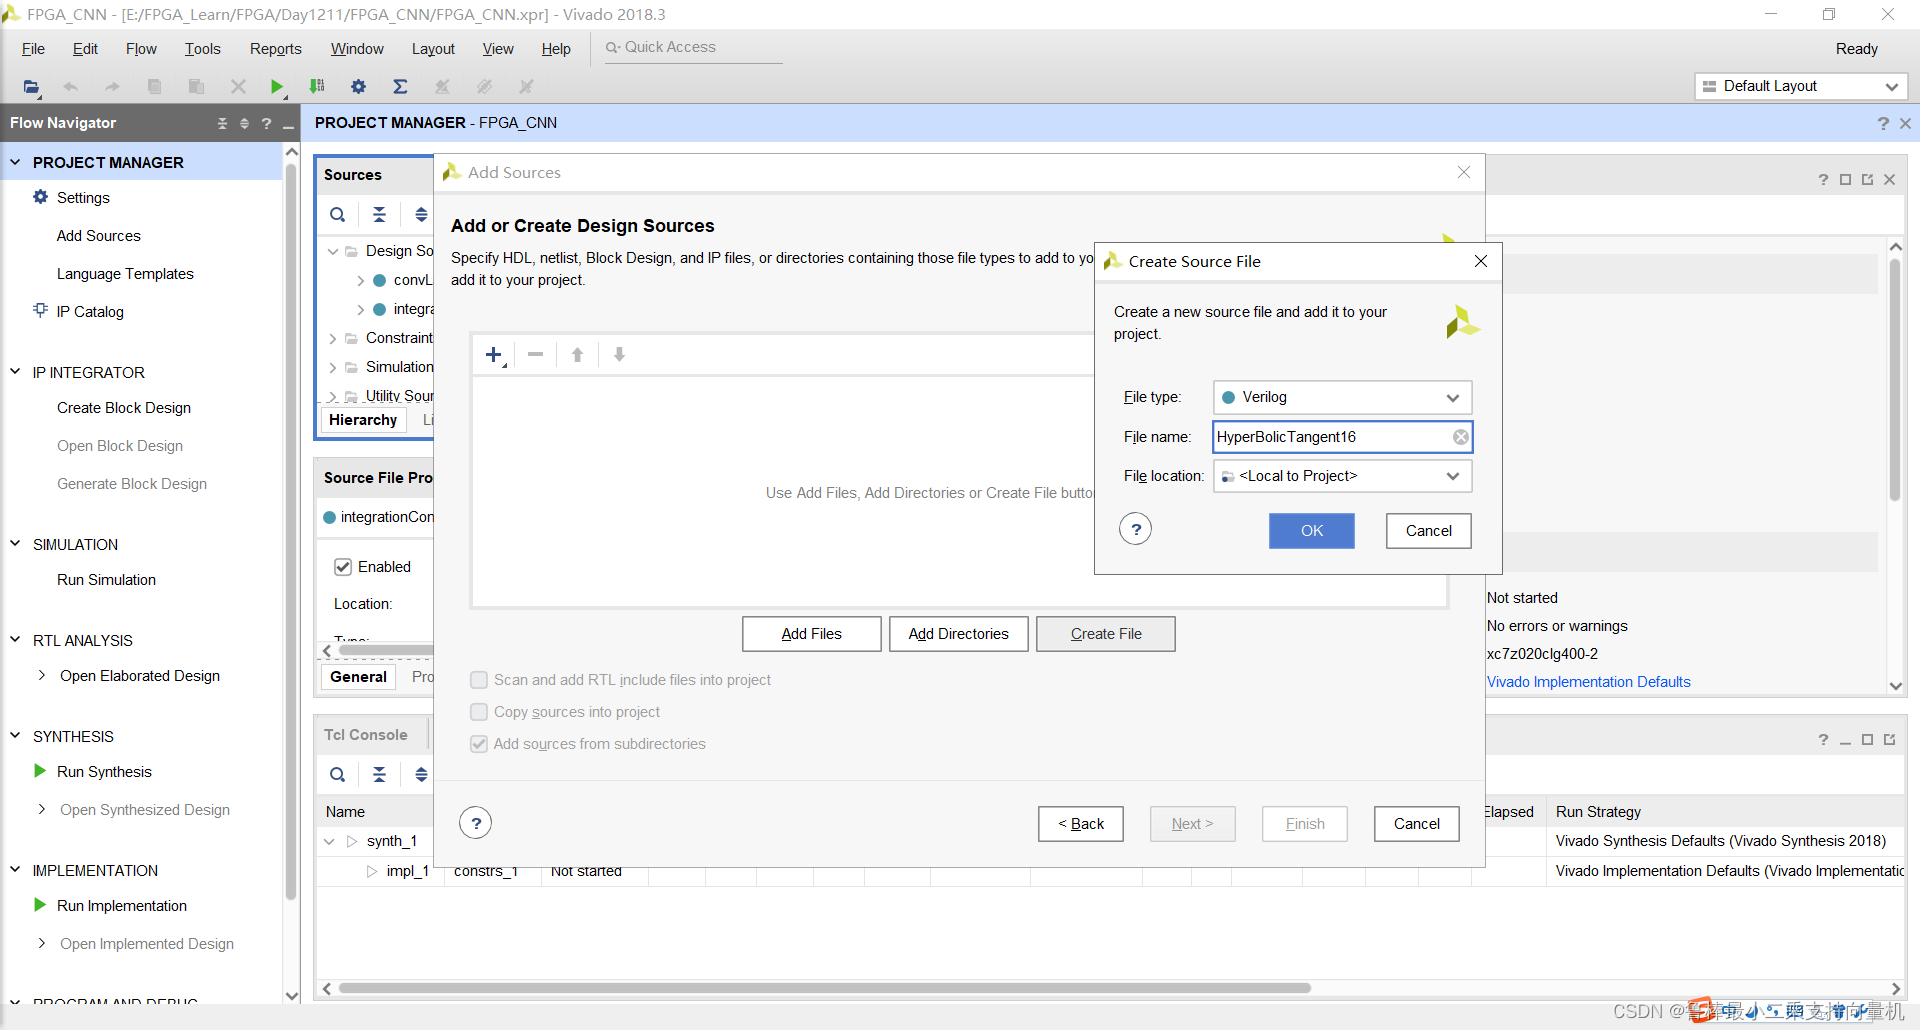
输入文件名:
确认创建:
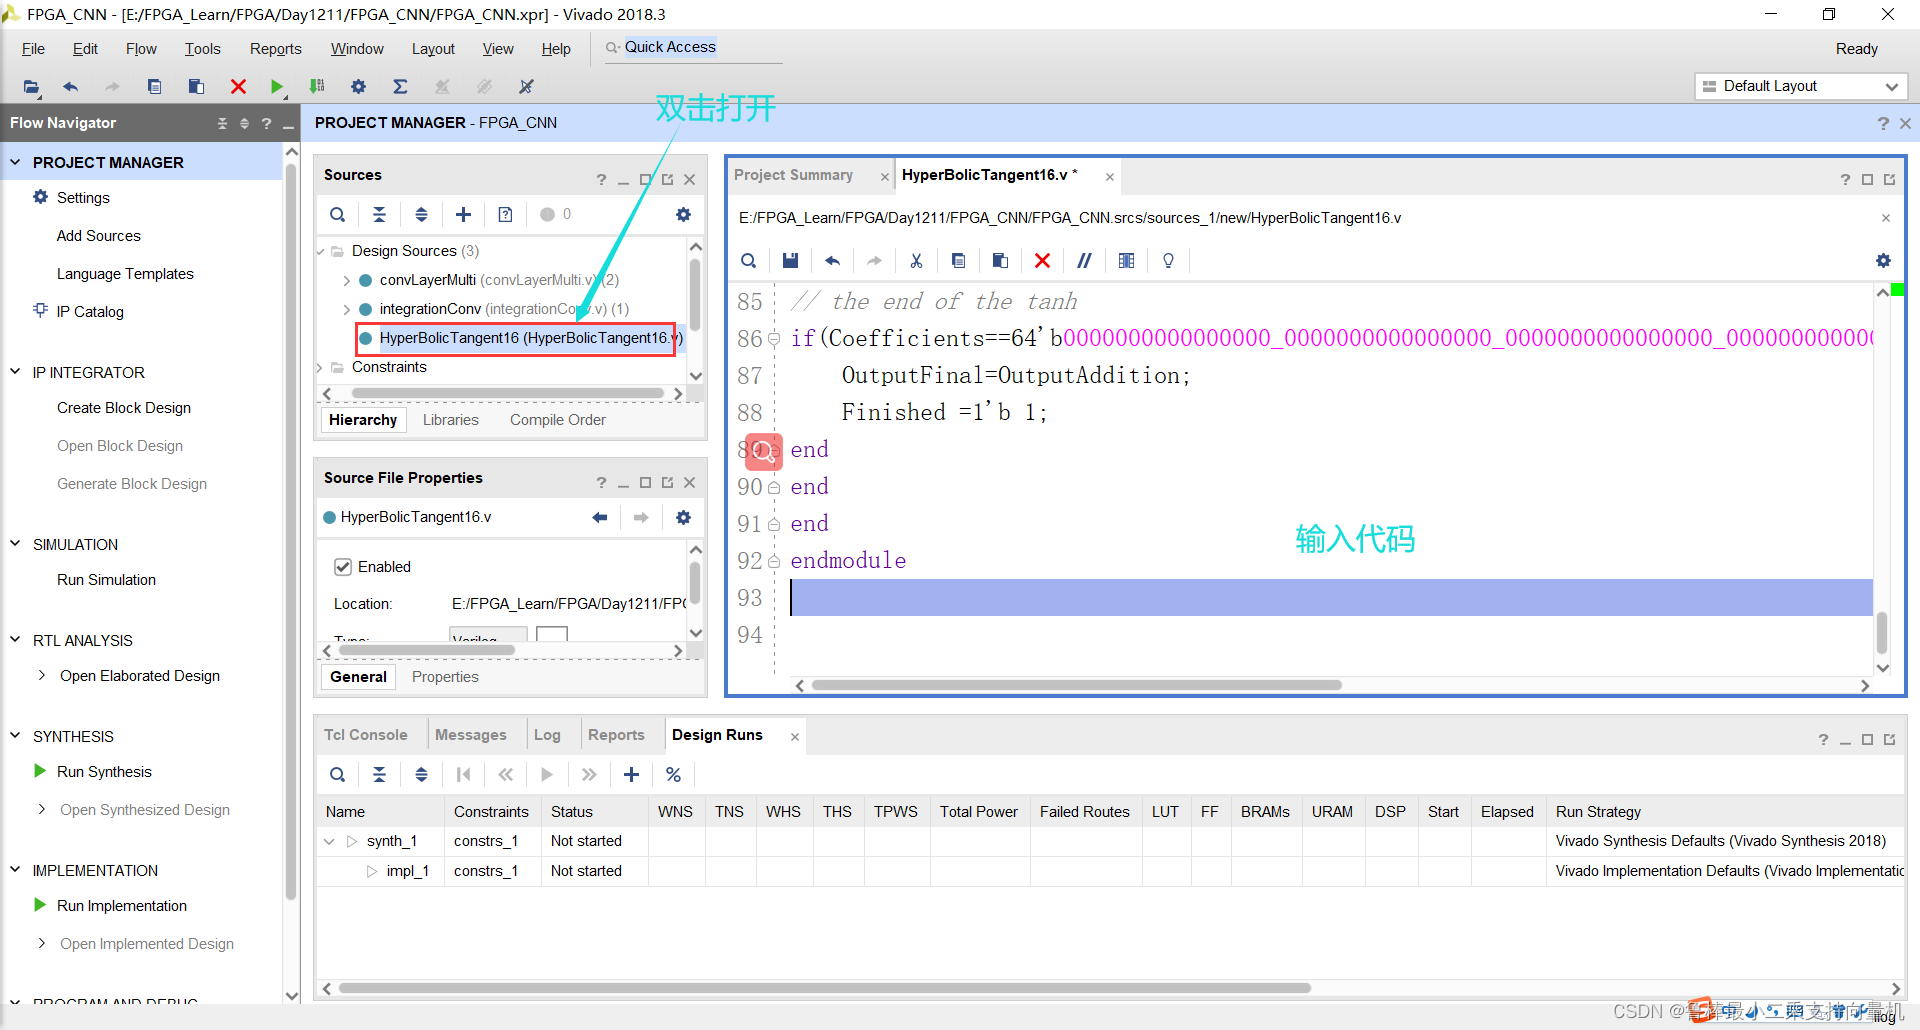
双击打开,输入如下代码:
module HyperBolicTangent16 (x,reset,clk,OutputFinal,Finished);
parameter DATA_WIDTH=16;
localparam taylor_iter=4;//I chose 4 Taylor Coefficients to undergo my tanh operation
input signed [DATA_WIDTH-1:0] x;

input clk;
input reset;
output reg Finished;
output reg[DATA_WIDTH-1:0]  OutputFinal;
reg [DATA_WIDTH*taylor_iter-1:0] Coefficients ; //-17/315 2/15 -1/3 1
wire [DATA_WIDTH-1:0] Xsquared; //To always generate a squared version of the input to increment the power by 2 always.
reg [DATA_WIDTH-1:0] ForXSqOrOne; //For Multiplying The power of X(1 or X^2)
reg [DATA_WIDTH-1:0] ForMultPrevious; //output of the first multiplication which is either with 1 or x(X or Output1)
wire [DATA_WIDTH-1:0] OutputOne; //the output of Mulitplying the X term with its corresponding power coeff.
wire [DATA_WIDTH-1:0] OutOfCoeffMult; //the output of Mulitplying the X term with its corresponding power coeff.
reg  [DATA_WIDTH-1:0] OutputAdditionInAlways;
wire [DATA_WIDTH-1:0] OutputAddition; //the output of the Addition each cycle

floatMult16 MSquaring (x,x,Xsquared);//Generating x^2   得到x项的增量项,即x^2
floatMult16 MGeneratingXterm (ForXSqOrOne,ForMultPrevious,OutputOne); //Generating the X term [x,x^3,x^5,...]  将当前x项与下一项相乘
floatMult16 MTheCoefficientTerm (OutputOne,Coefficients[DATA_WIDTH-1:0],OutOfCoeffMult); //Multiplying the X term by its corresponding coeff. 将每个相应的最终x项与其系数相乘
floatAdd16 FADD1 (OutOfCoeffMult,OutputAdditionInAlways,OutputAddition); //Adding the new term to the previous one     ex: x-1/3*(x^3) 将每个结果项与前一项相加
reg [DATA_WIDTH-1:0] AbsFloat; //To generate an absolute value of the input[For Checking the convergence]

always @ (posedge clk) begin
AbsFloat=x;//Here i hold the input then i make it positive whatever its sign to be able to compare to implement the rule |x|>pi/2   which is the convergence rule
AbsFloat[15]=0;
if(AbsFloat>16'sb0011111001001000)begin
  //The Finished bit is for letting the bigger module know that the tanh is finished
  if (x[15]==0)begin
    OutputFinal= 16'b0011110000000000;Finished =1'b 1;//here i assign it an immediate value of Positive Floating one
  end
    if (x[15]==1)begin
    OutputFinal= 16'b1011110000000000;Finished =1'b 1;//here i assign it an immediate value of Negative Floating one
    end
end
//here i handle the case of it equals +- pi/2    so i got the exact value and handle it also immediately
else if (AbsFloat==16'sb0011111001001000)
  begin
    if (x[15]==0)begin
  OutputFinal=16'b0011110000000000;Finished=1'b 1;
  end
  else begin
  OutputFinal=16'b1011110000000000;Finished=1'b 1;
  end
  end
else begin
  //First instance of the tanh
if(reset==1'b1)begin
	Coefficients=64'b1010101011101000_0011000001000100_1011010101010101_0011110000000000;//the 4 coefficients of taylor expansion
	ForXSqOrOne=16'b0011110000000000; //initially 1
	OutputAdditionInAlways=16'b0000000000000000; //initially 0
	ForMultPrevious=x;
Finished=0;
end
else begin
 	ForXSqOrOne=Xsquared;
	ForMultPrevious=OutputOne; //get the output of the second multiplication to multiply with x
	Coefficients=Coefficients>>DATA_WIDTH; //shift 32 bit to divide the out_m1 with the new number to compute the factorial
  OutputAdditionInAlways=OutputAddition;
  Finished=0;
end
// the end of the tanh
if(Coefficients==64'b0000000000000000_0000000000000000_0000000000000000_0000000000000000)begin
	OutputFinal=OutputAddition;
	Finished =1'b 1;
end
end
end
endmodule
如图所示:
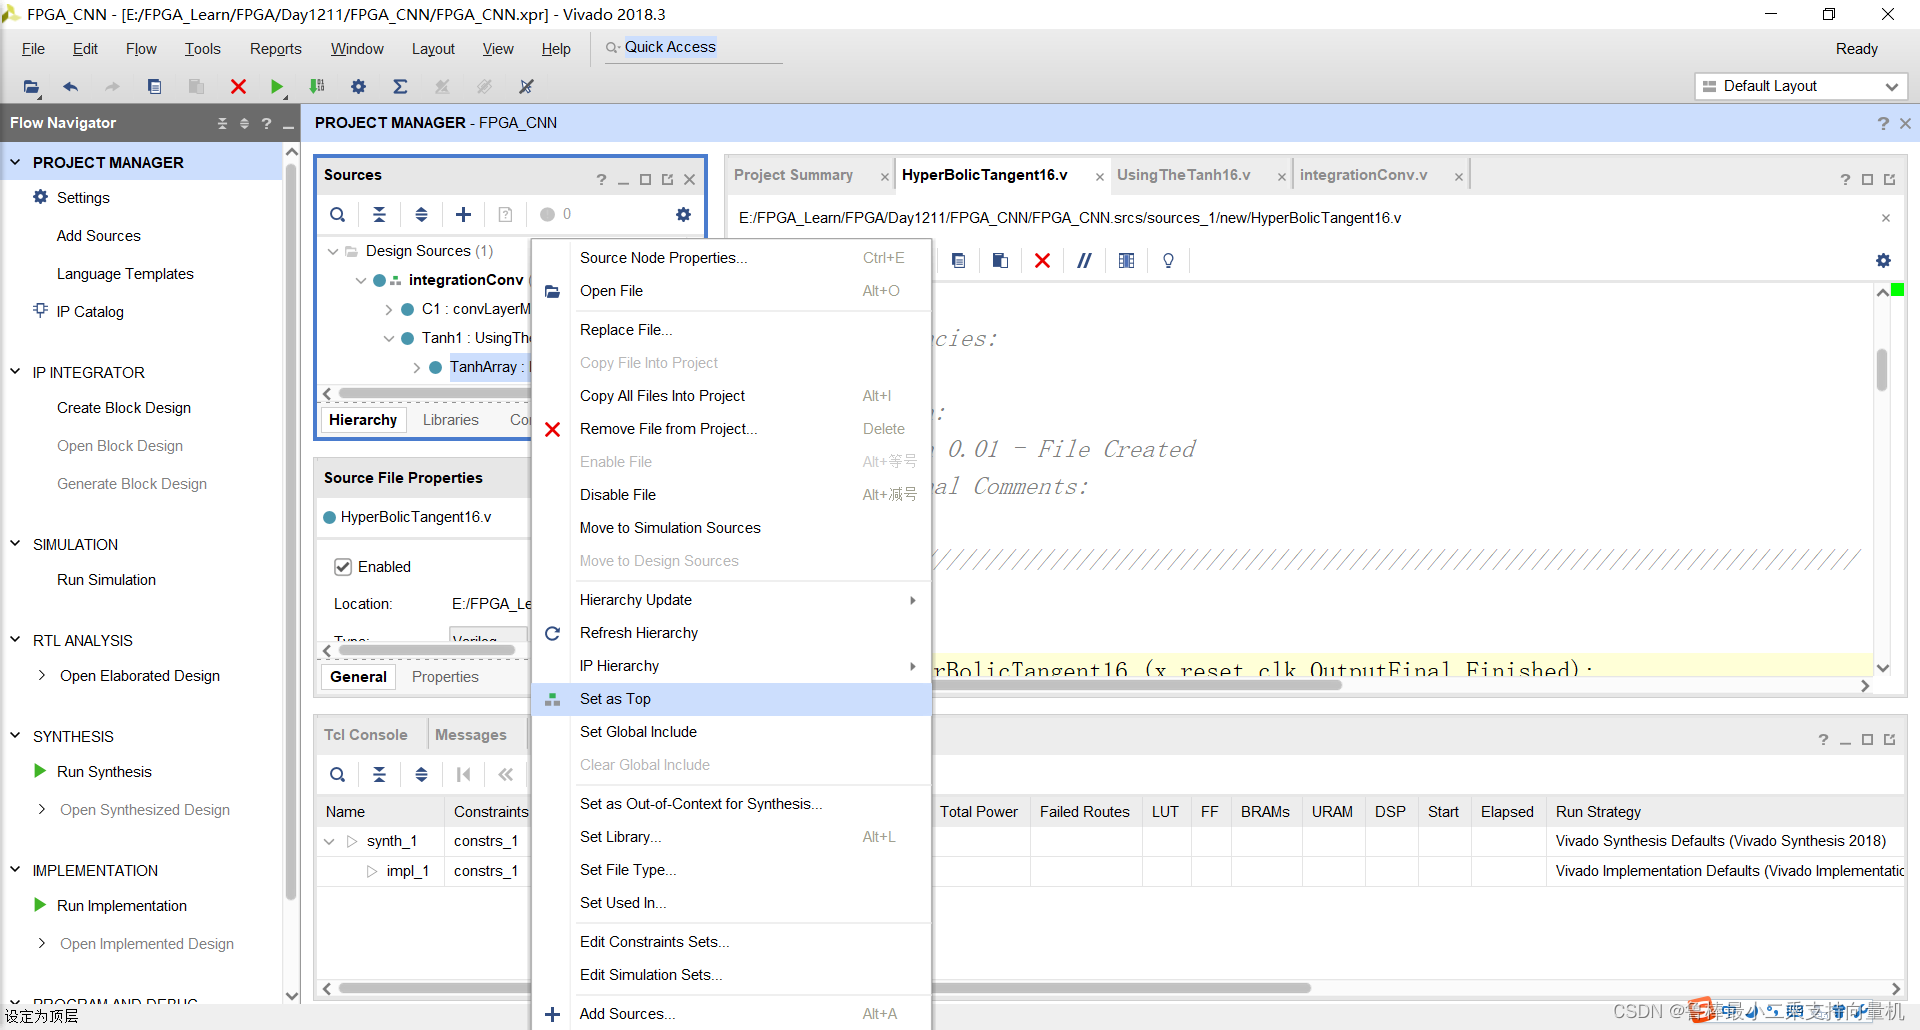
将HyperBolicTangent16设置为顶层:
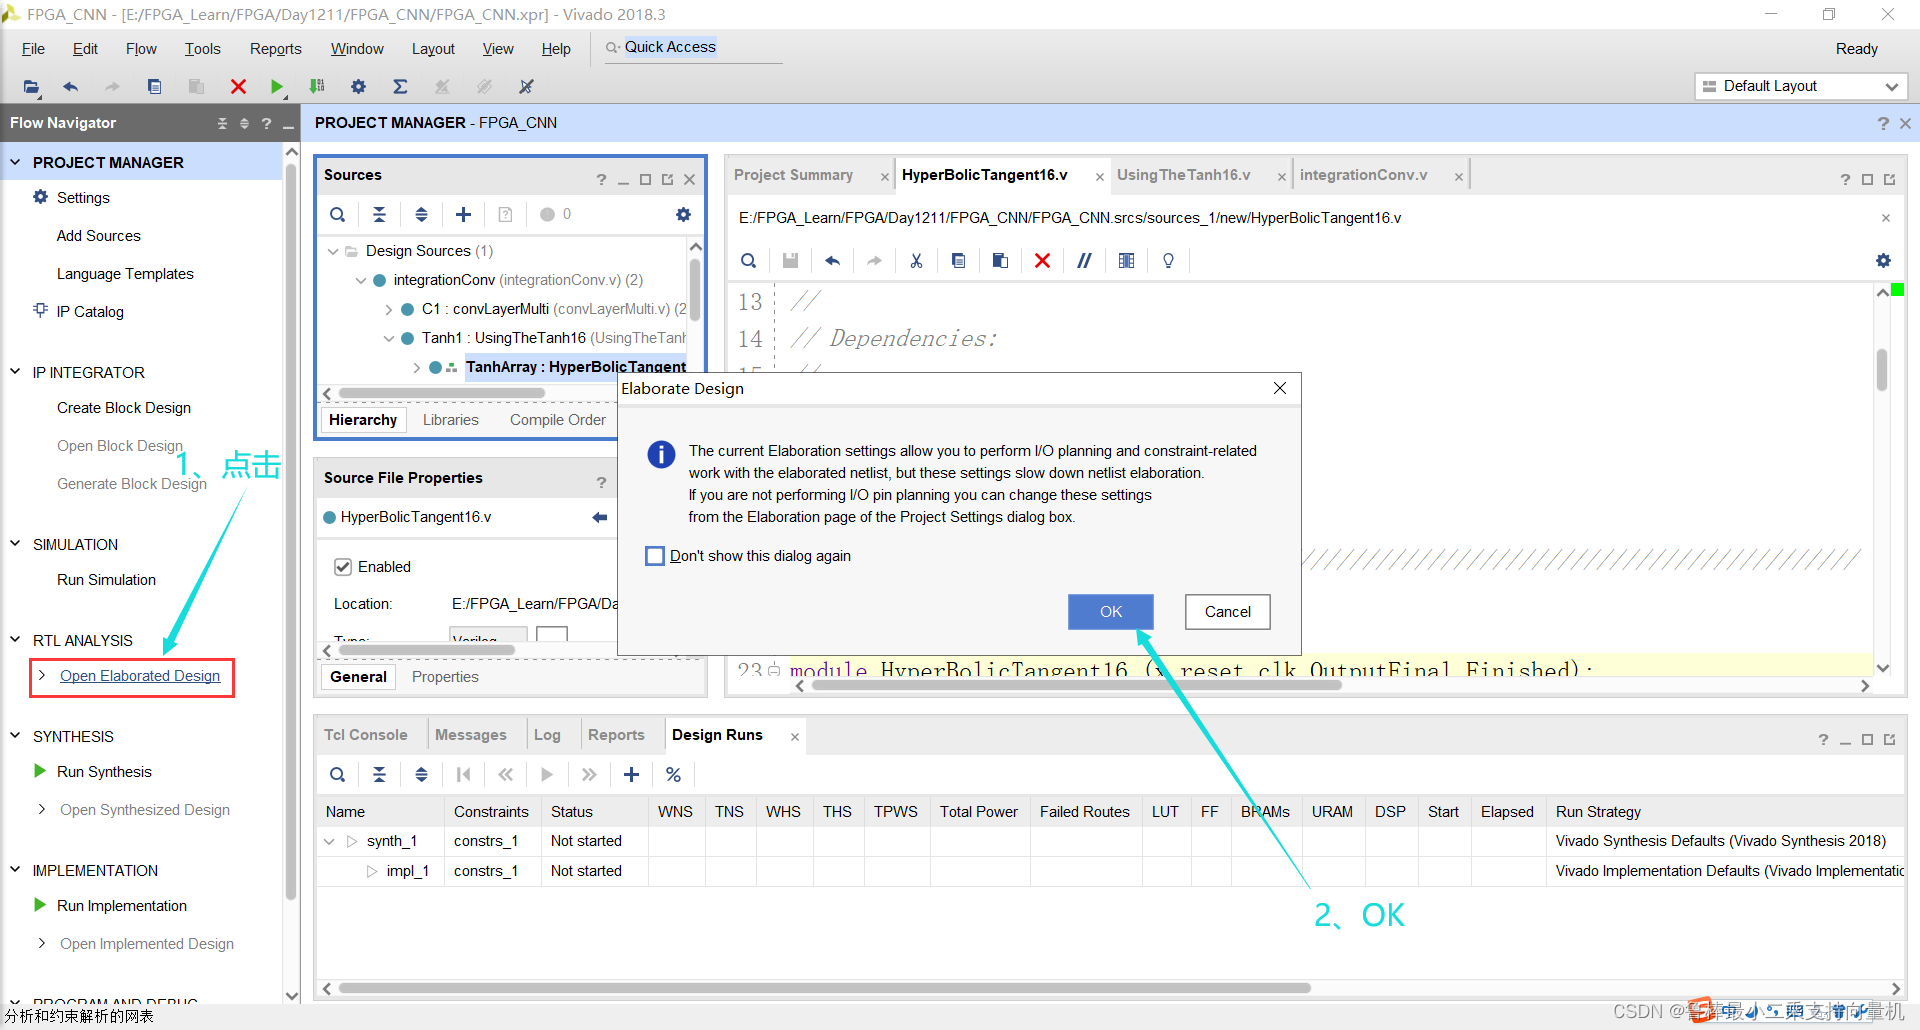
对设计进行分析,操作如图:
分析后的设计,Vivado自动生成原理图,如图:

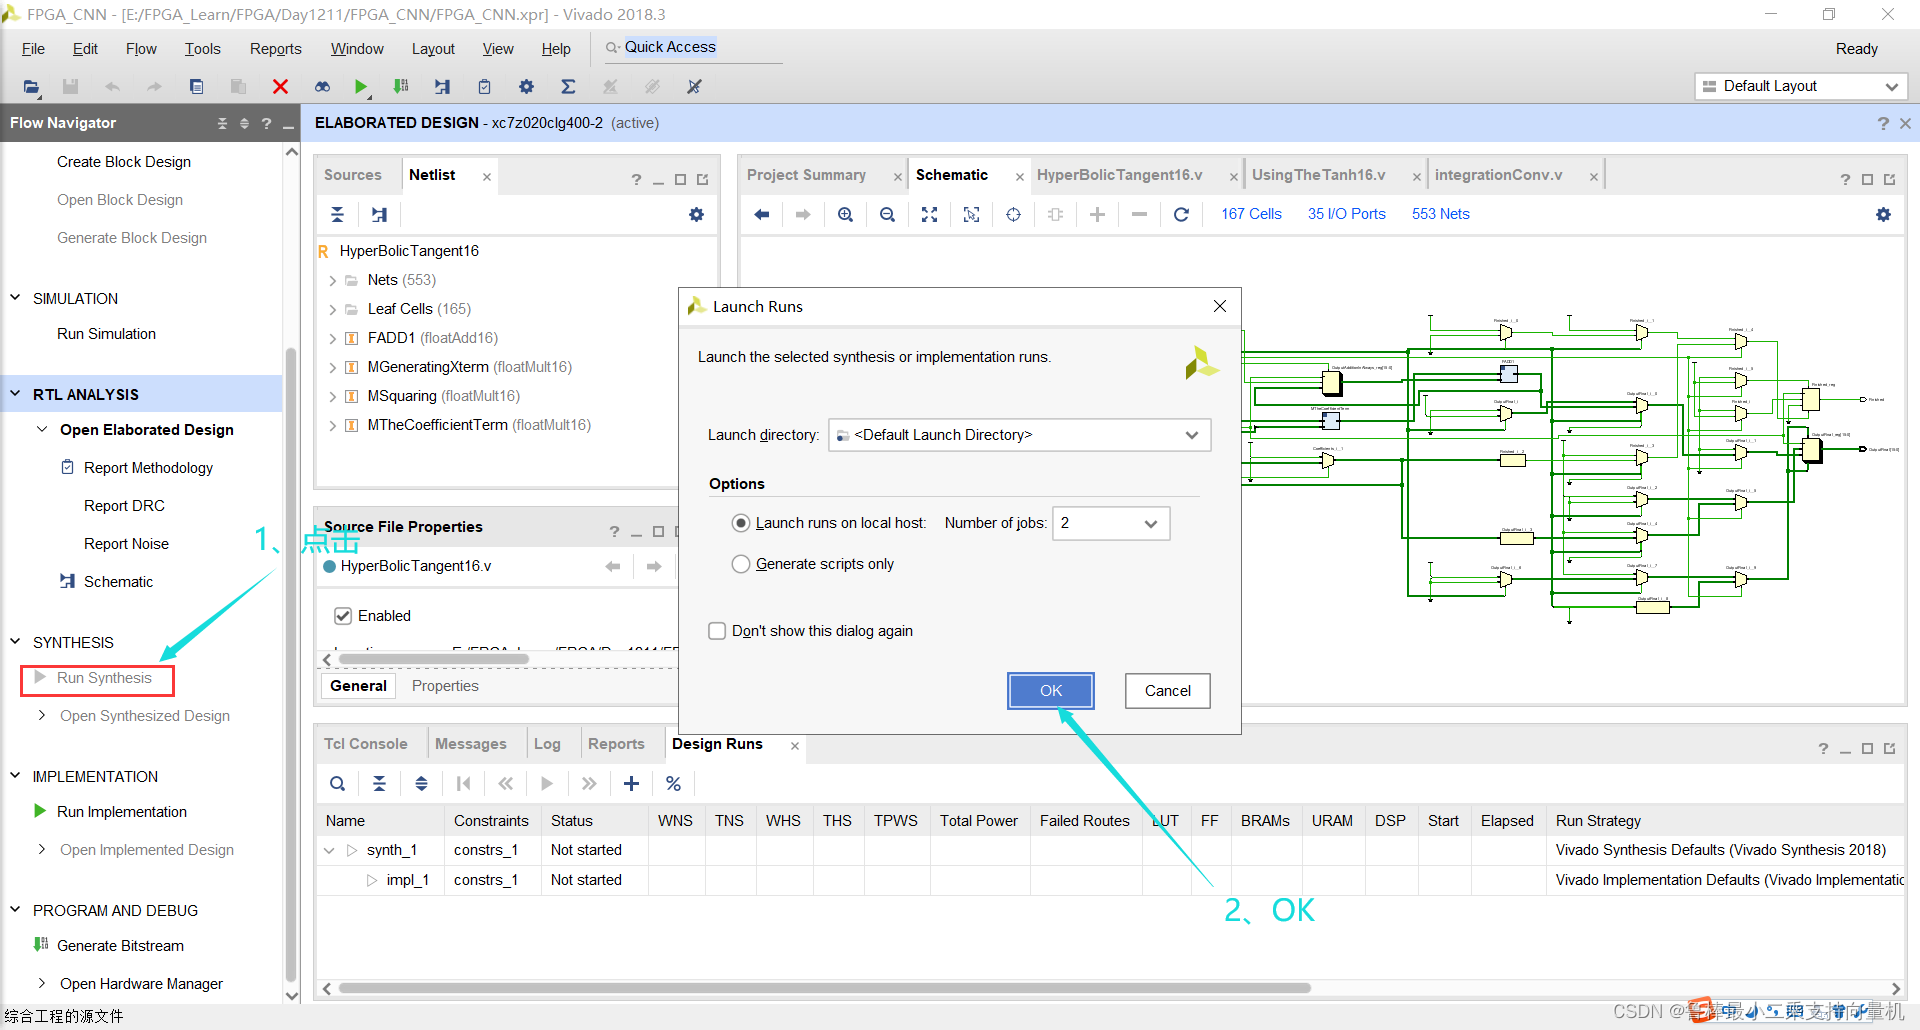
对设计进行综合,操作如图:
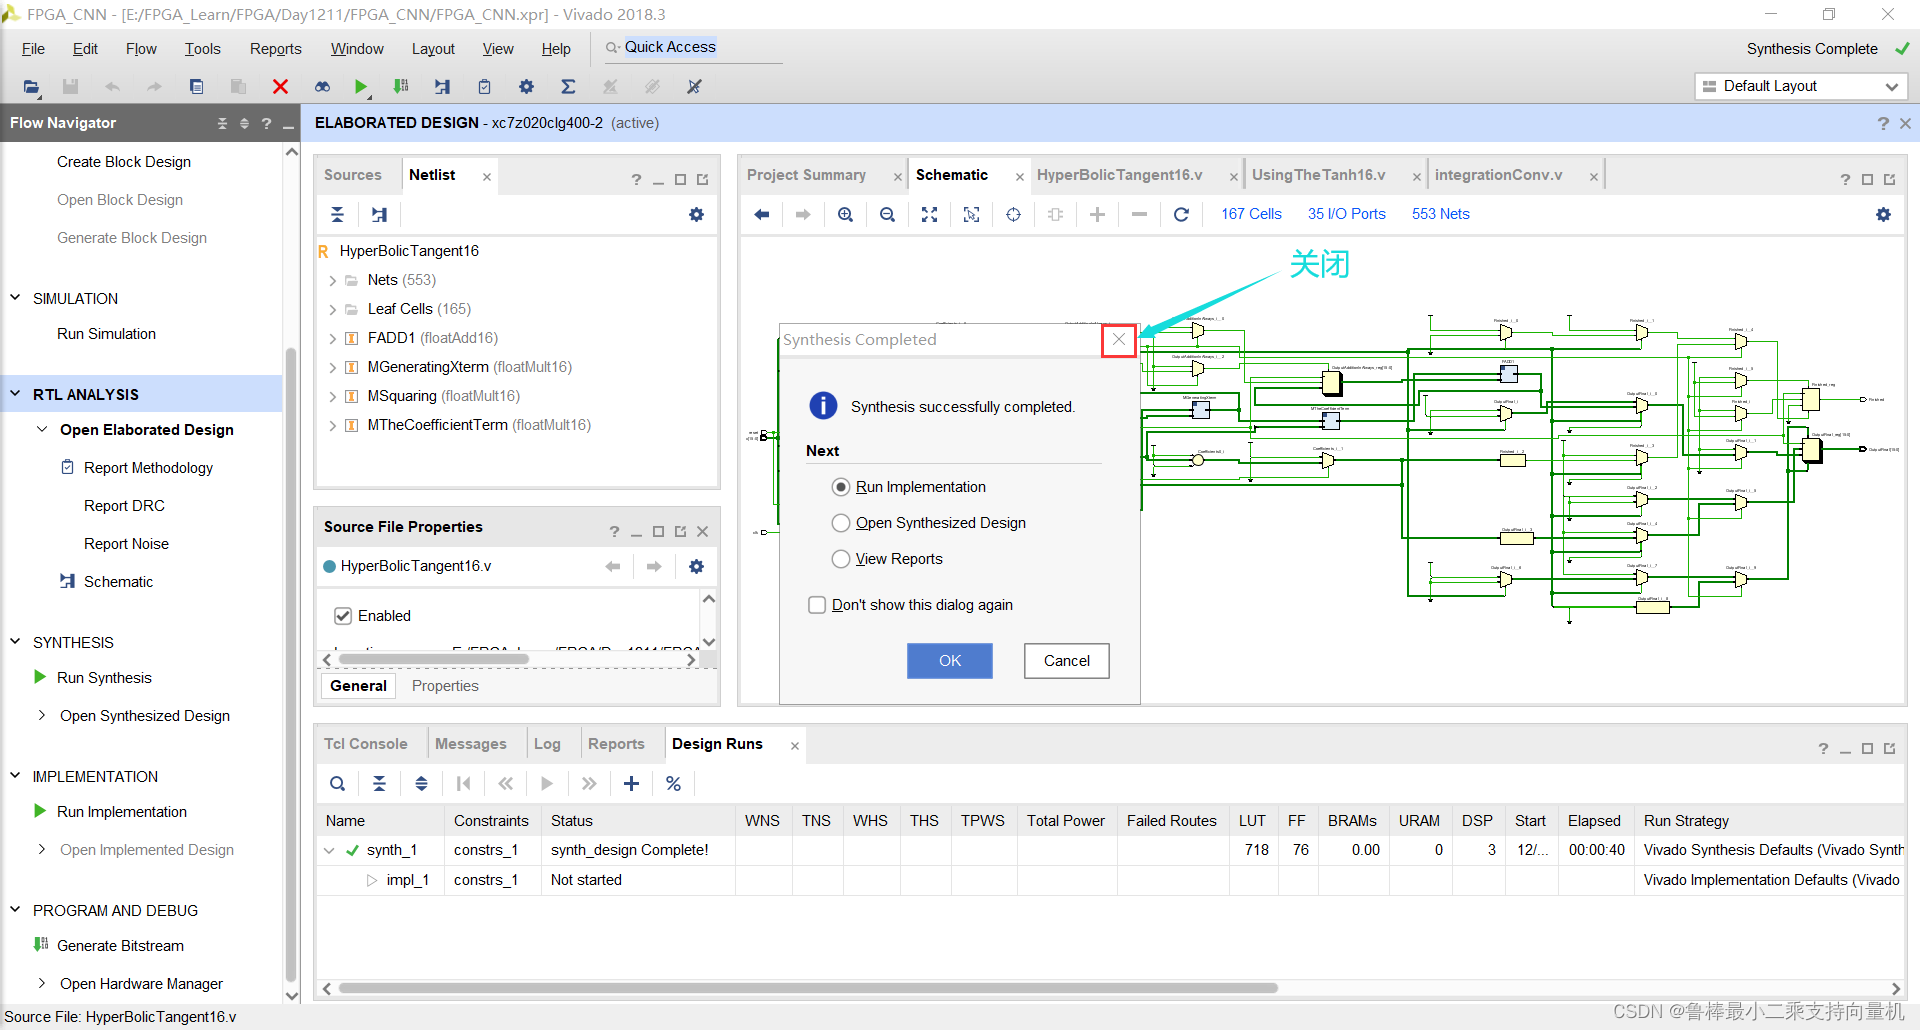
综合完成,关闭即可:
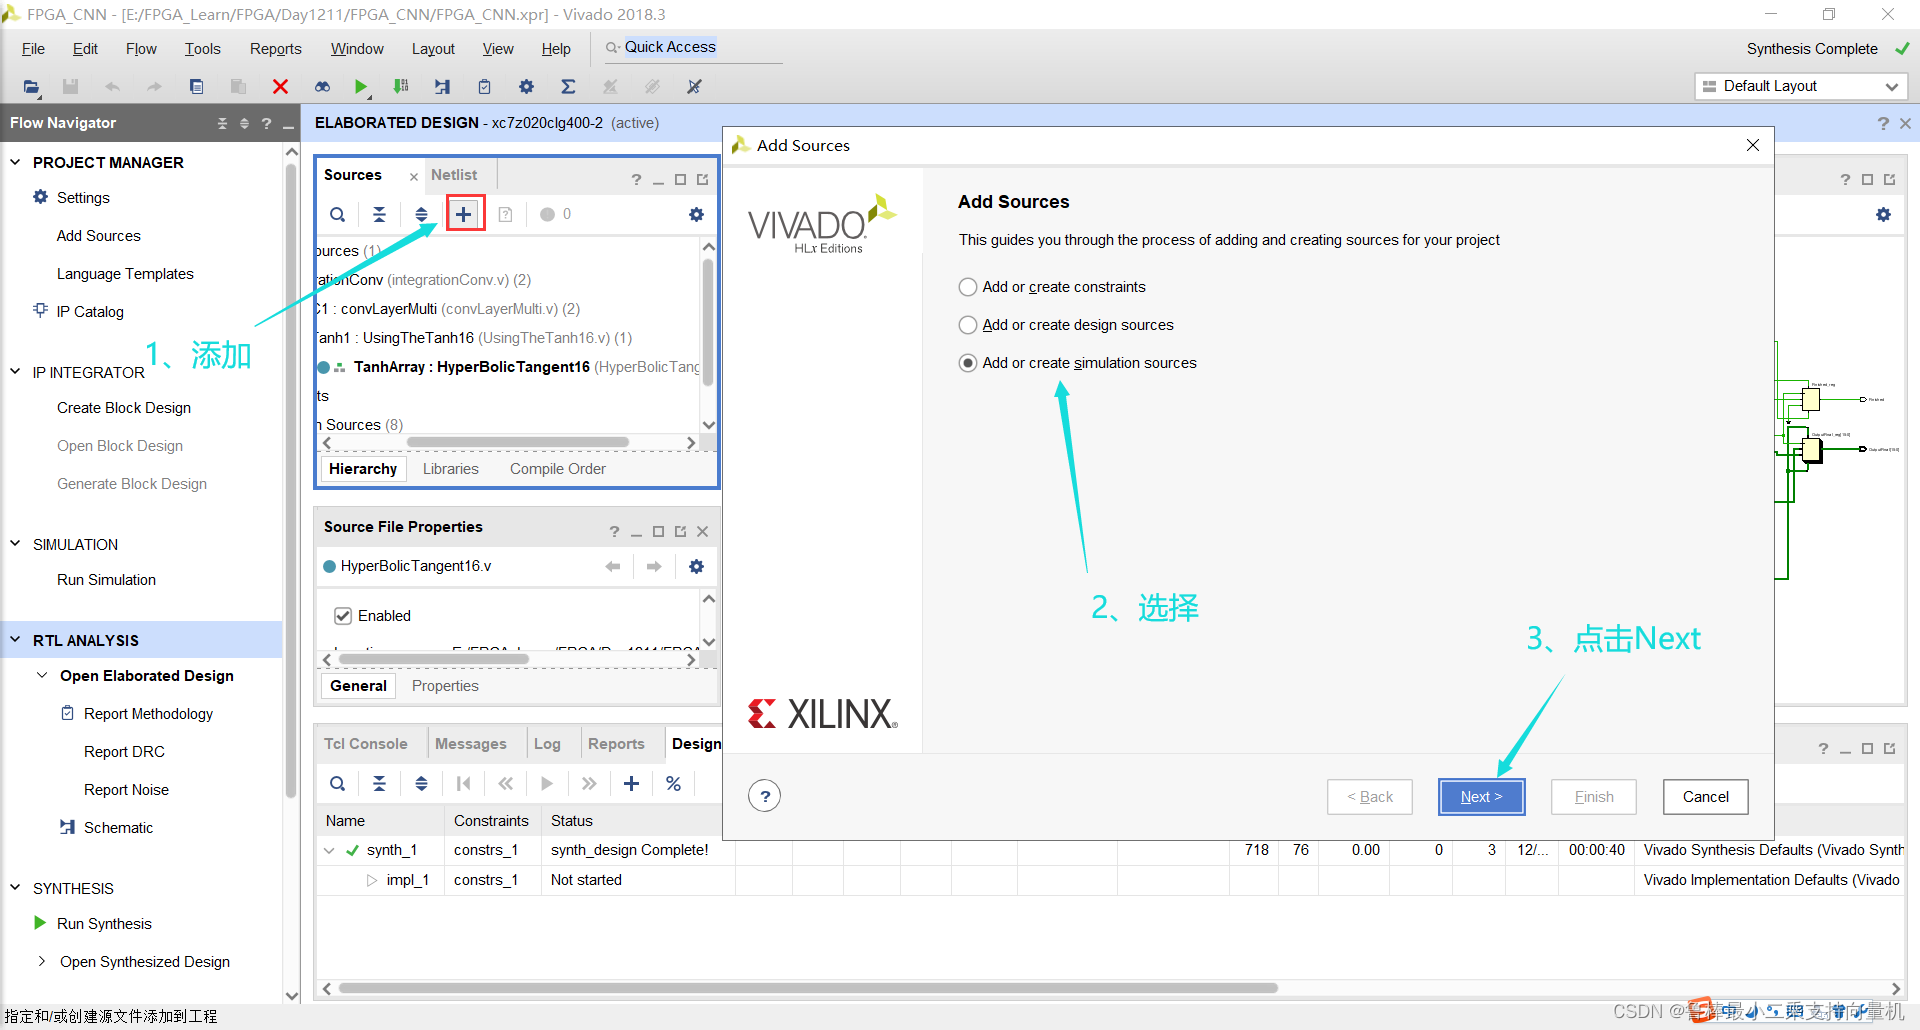
创建TestBench,操作如图所示:
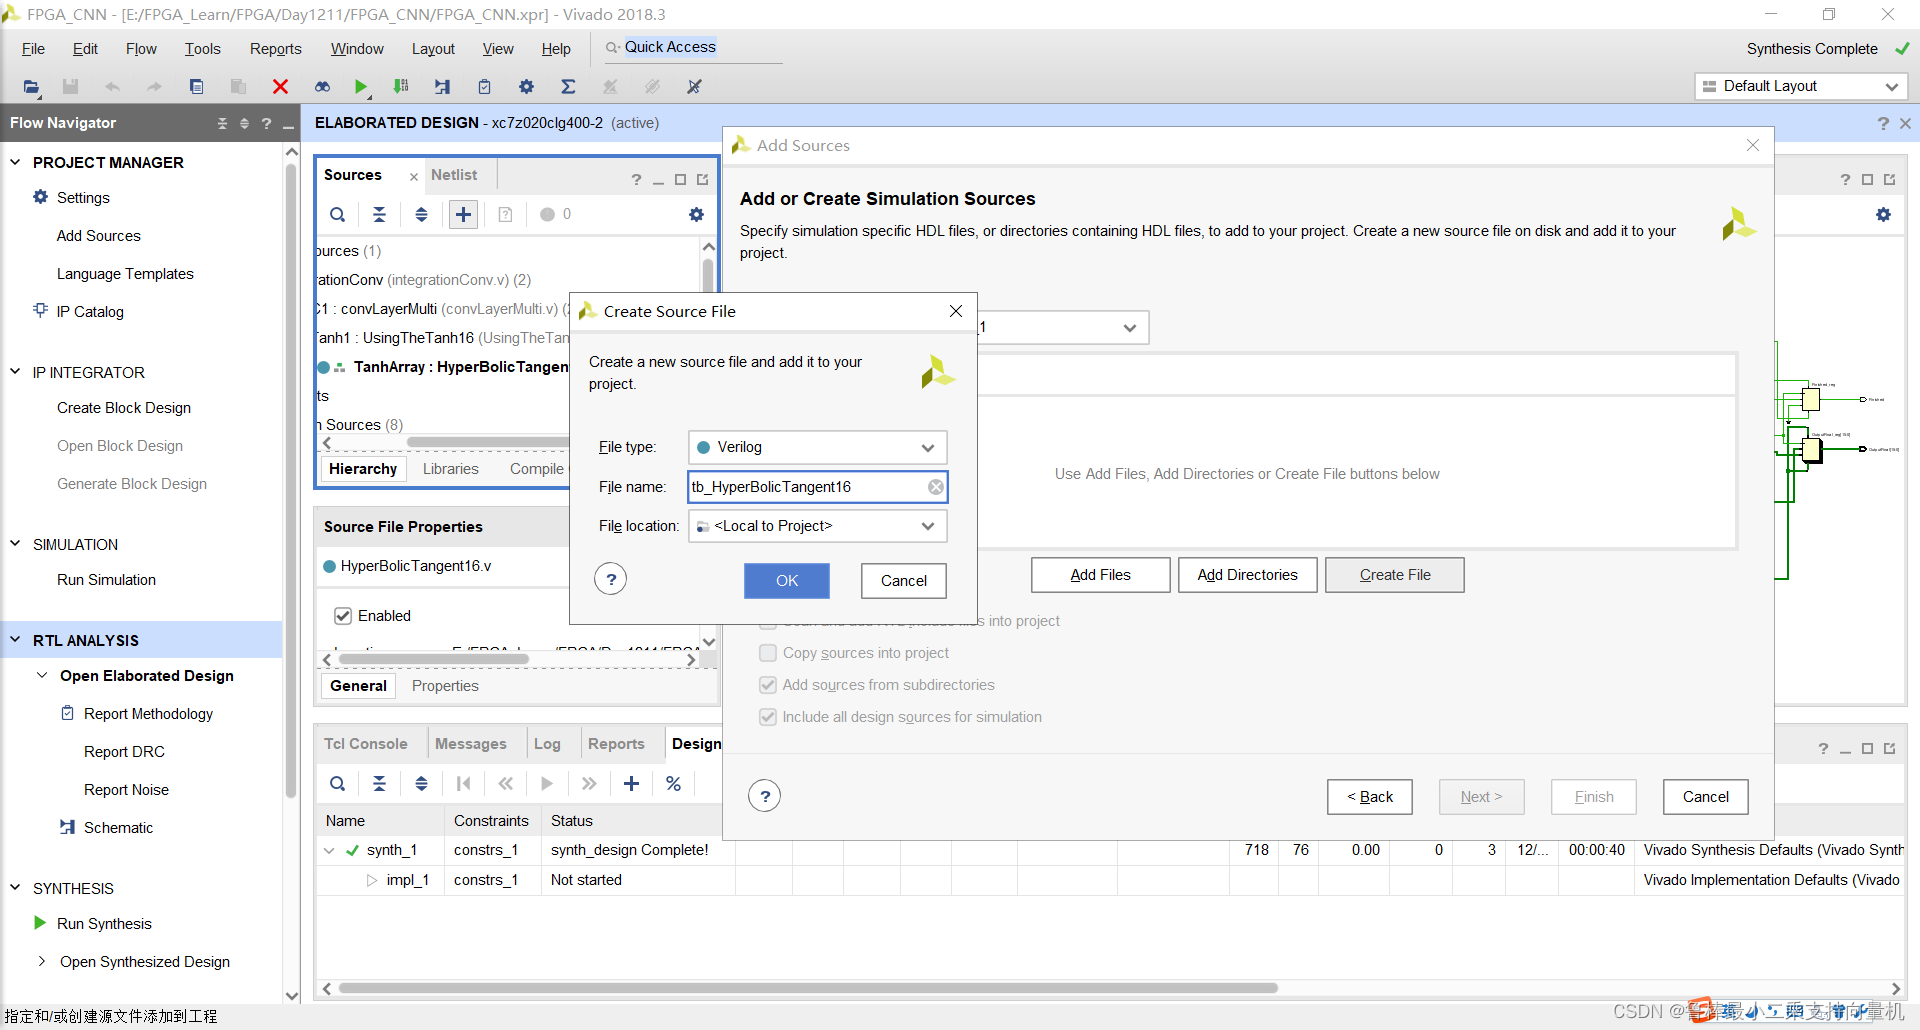
输入激励文件名:
双击打开,输入激励代码:
`timescale 1ns / 1ps
module tb_HyperBolicTangent16();
reg clk, reset;
reg [15:0]x;
wire [15:0]OutputFinal;
wire Finished;

localparam PERIOD = 100;

always
	#(PERIOD/2) clk = ~clk;

initial begin
	#0 //starting the tanh
	clk = 1'b1;
	reset = 1'b1;
	// trying a random input(0.600000023842)     where tanh(0.600000023842)=0.53704958
	x=16'b0011100011001101;

	#(PERIOD/2)
	reset = 0;

	#400
	// waiting for 4 clock cycles then checking the output with approx.(0.53685)
	if(OutputFinal==32'b00111111000010010110111101111011 && Finished==1'b1)begin
	 $display("Result is Right [Not in convergence region]");
	  end
	  else begin
	 $display("Result is Wrong");
	    end
	    //trying another input which will be in the convergence region(3)  the output will be converged to 1    and reseting the function again
	    x=16'b0100001000000000;

		reset = 1'b1;
		#(PERIOD/2)
		reset=1'b0;
		#200
		// checking if the output is 1
		if(OutputFinal==32'b00111111100000000000000000000000)begin
	 $display("Result is Right [ convergence region]");
	  end
	  else begin
	 $display("Result is Wrong ");
	    end
	$stop;
end

HyperBolicTangent16 UUT
(
  .x(x),
	.clk(clk),
	.reset(reset),
	.OutputFinal(OutputFinal),
	.Finished(Finished)
);
endmodule
如图所示:
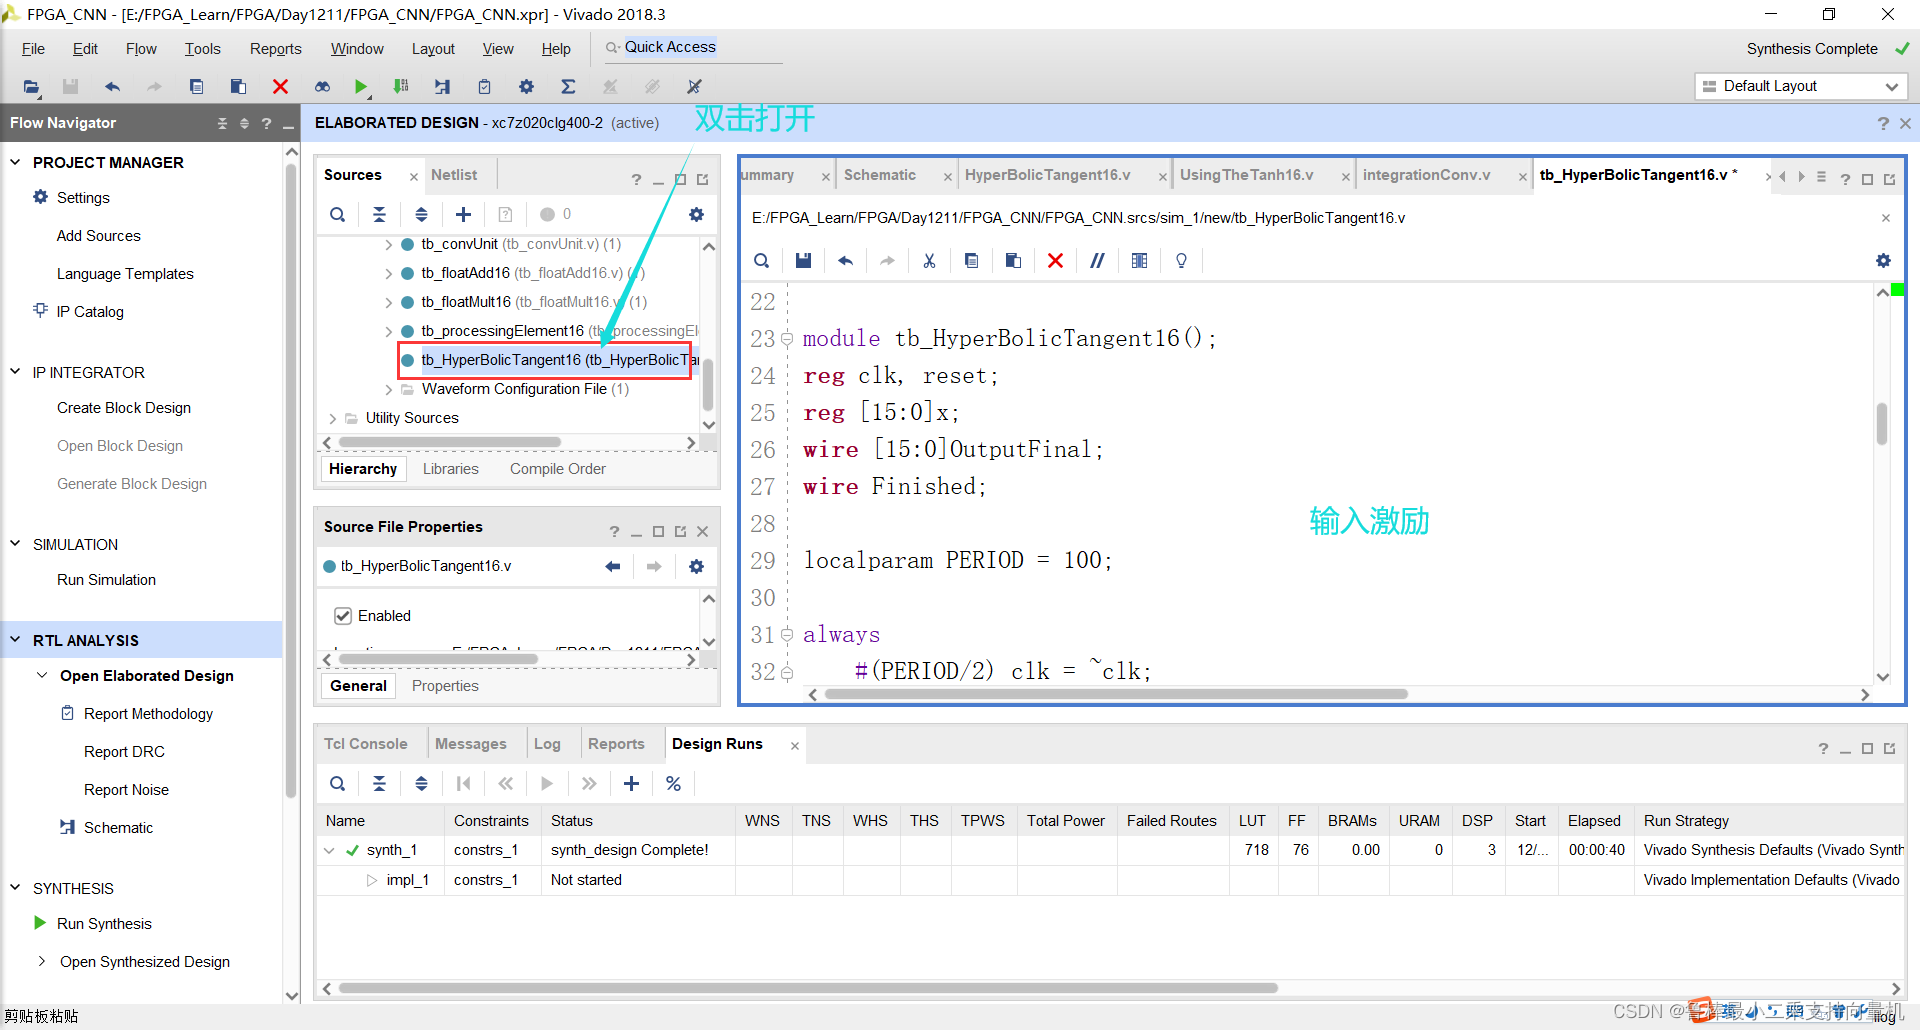
将tb_HyperBolicTangent16设置为顶层:
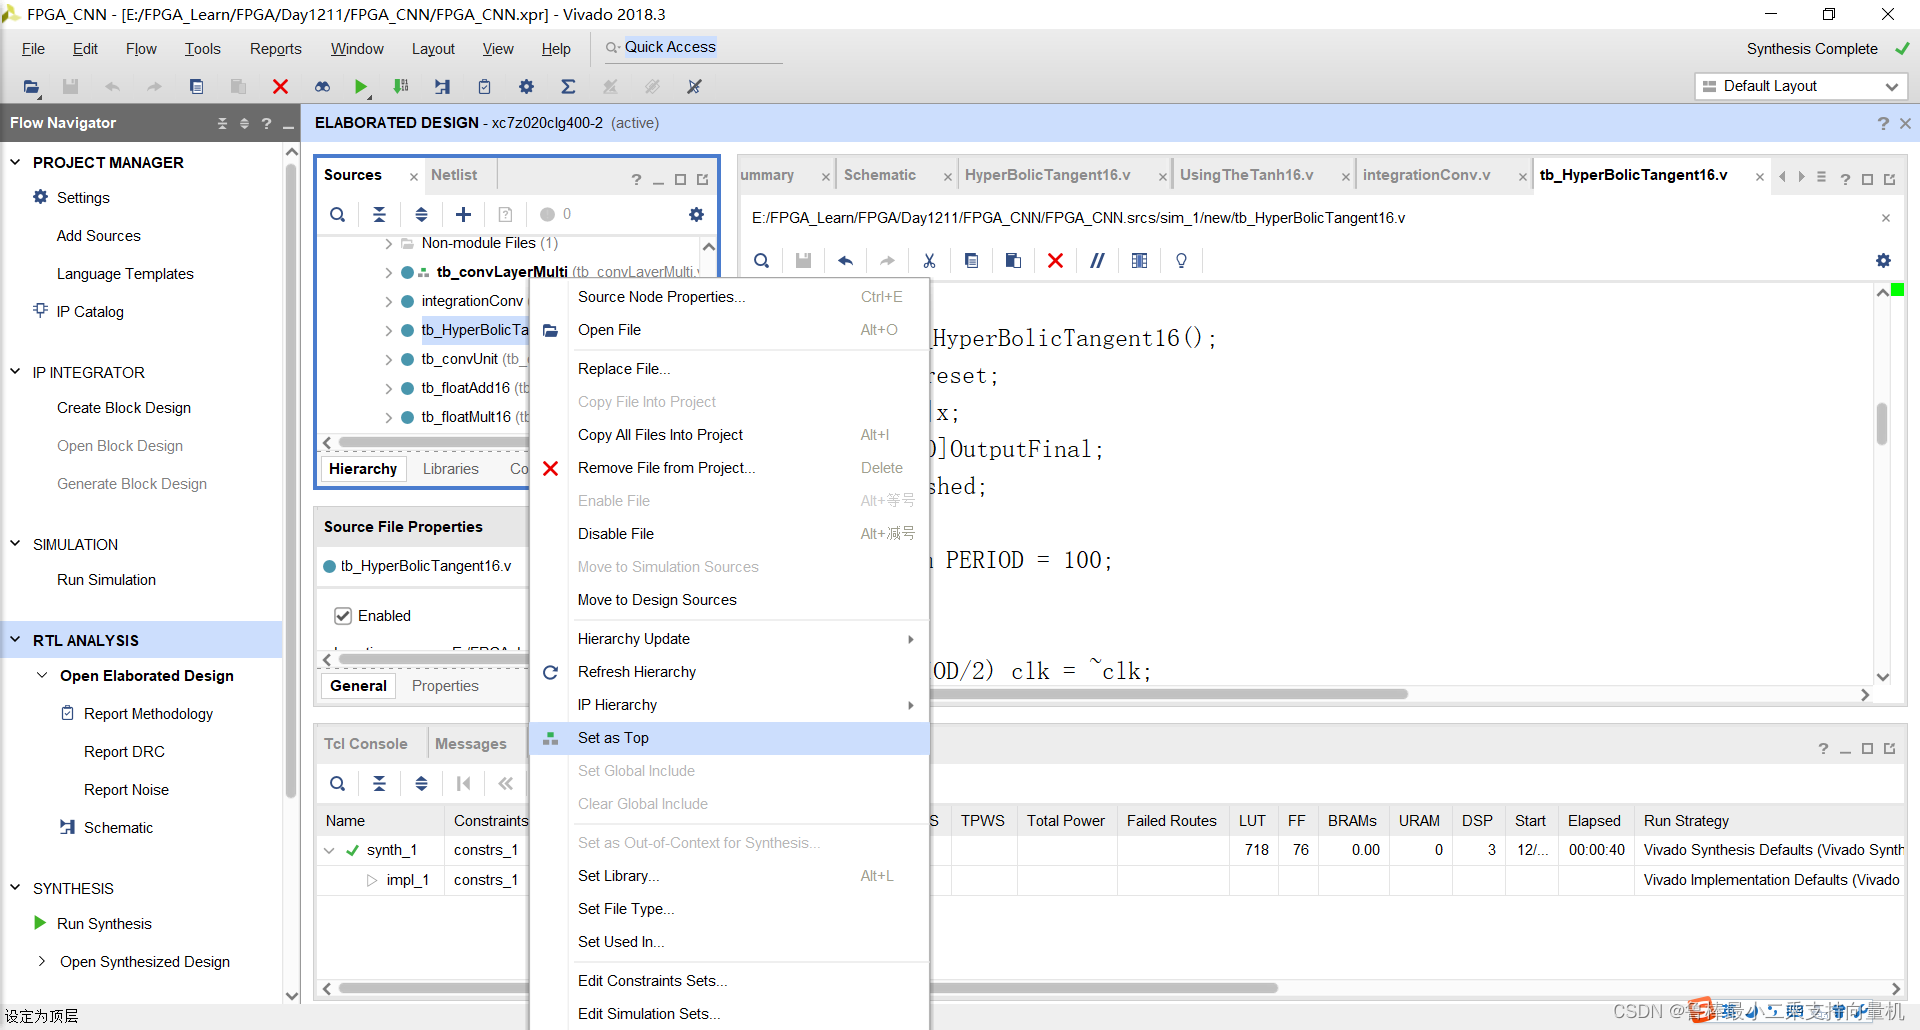
开始进行仿真,操作如下:
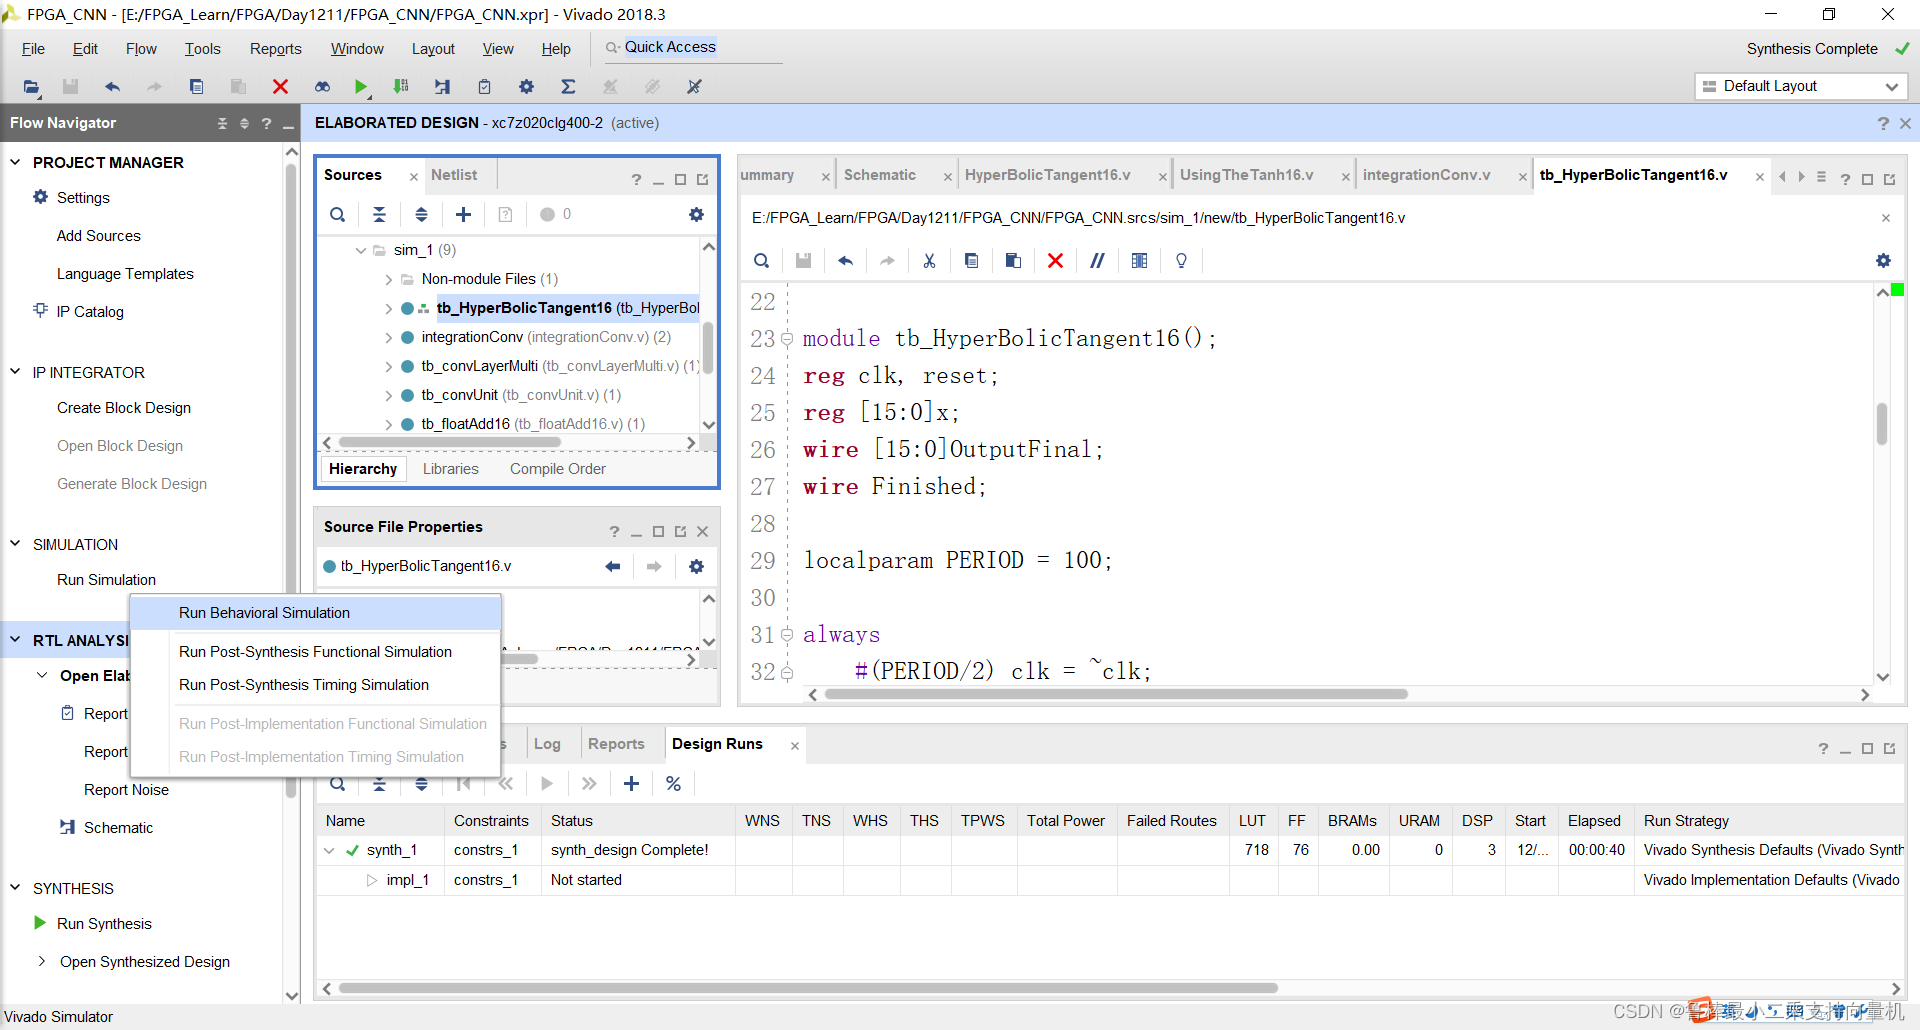
开始仿真,如图:
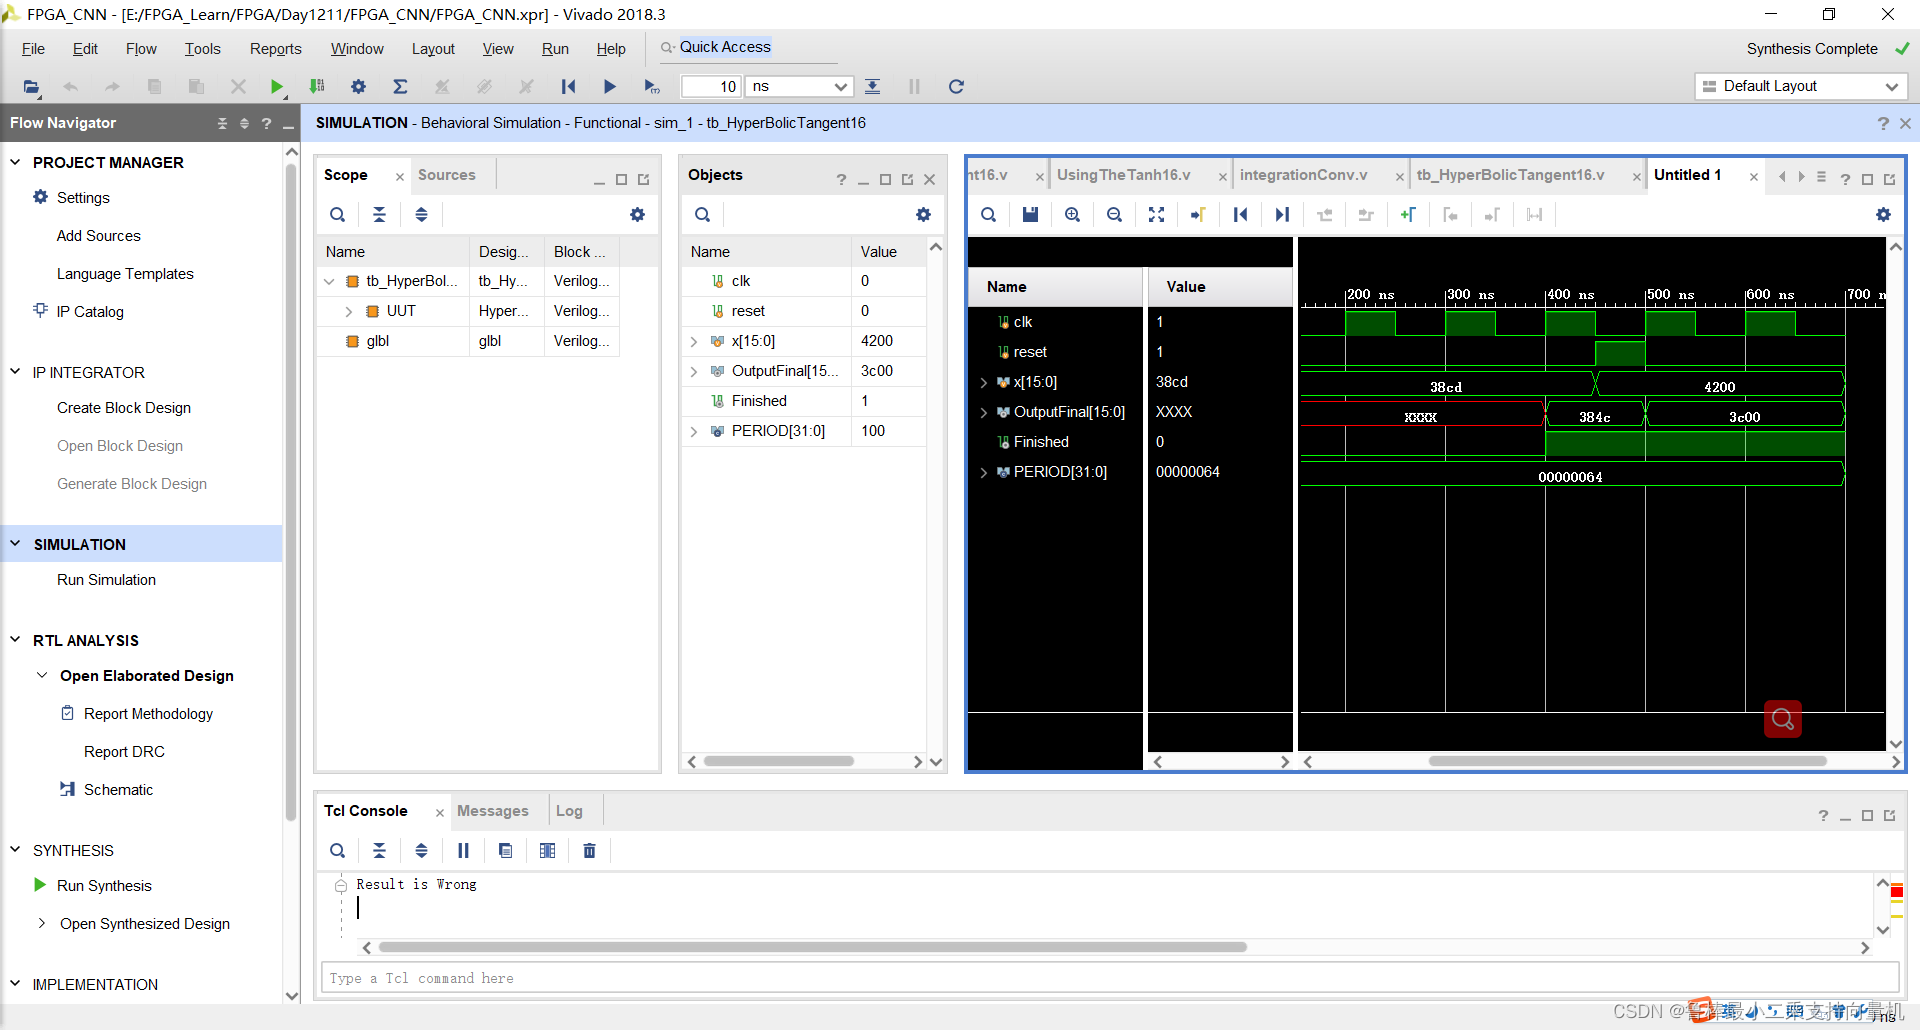
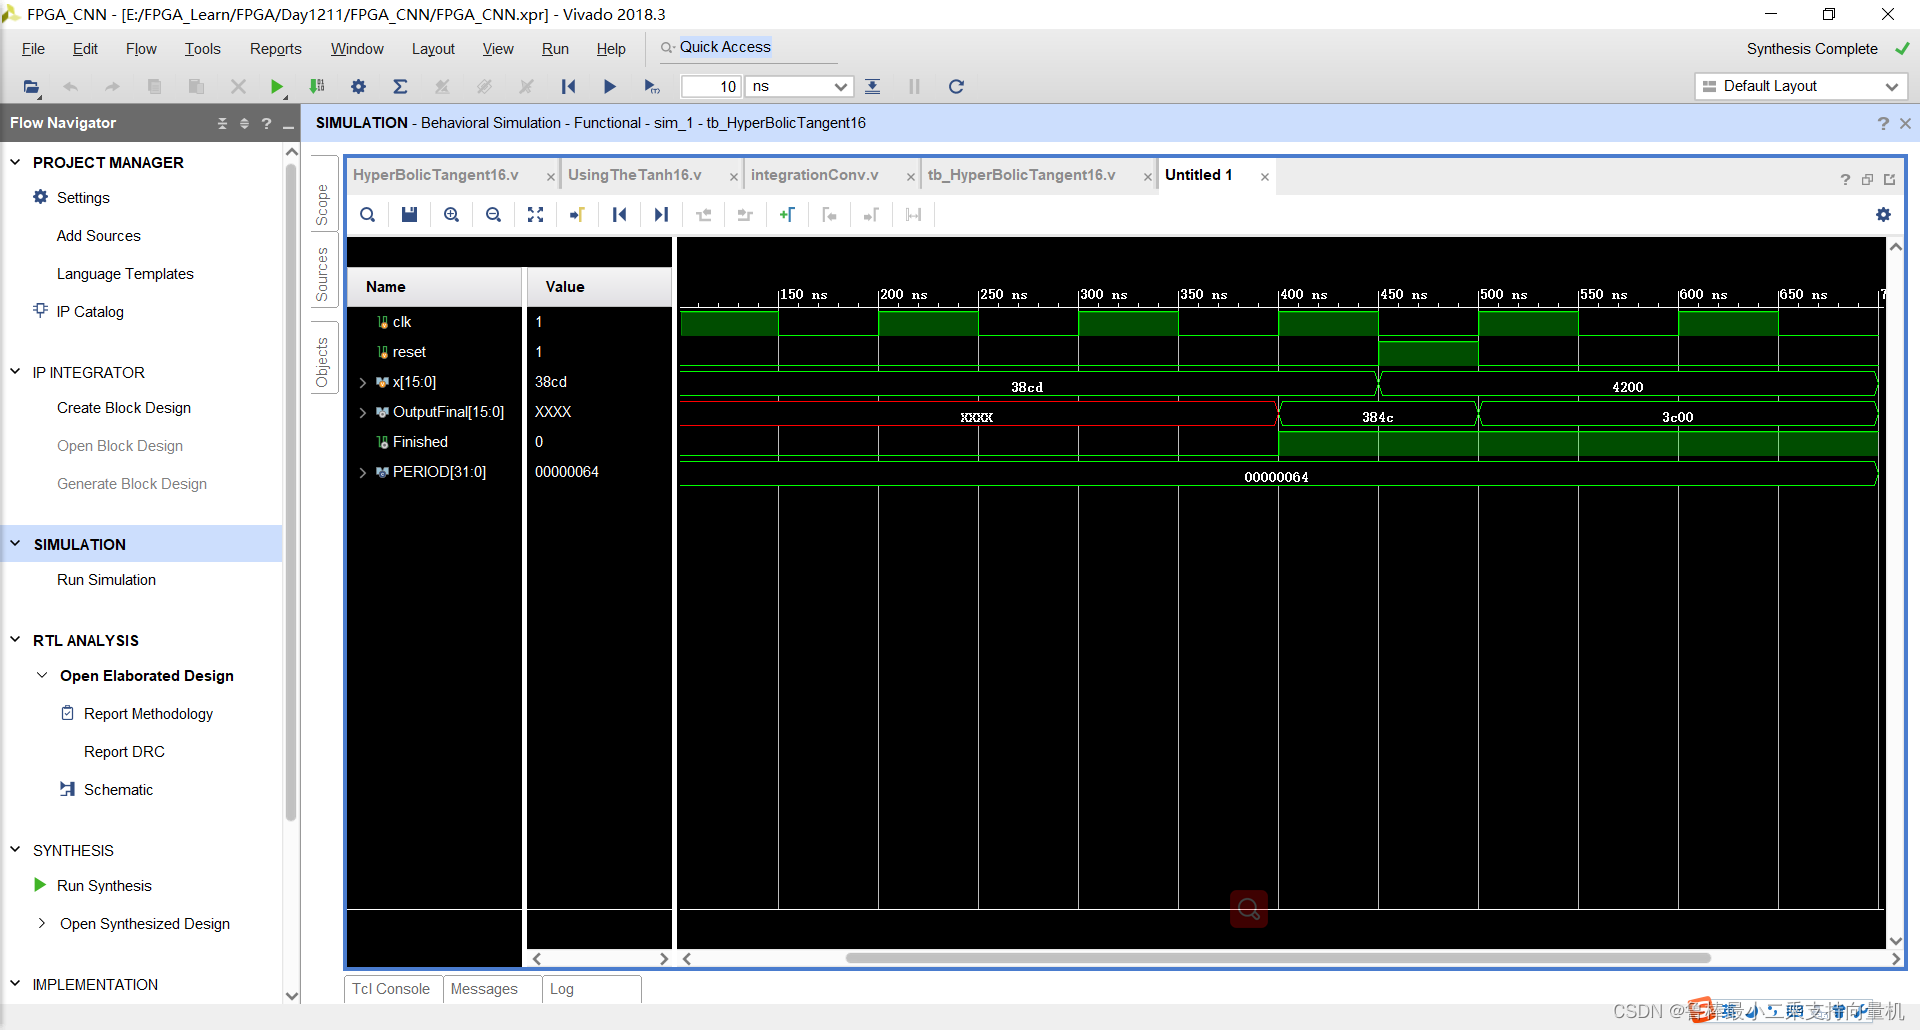
仿真波形,如图:
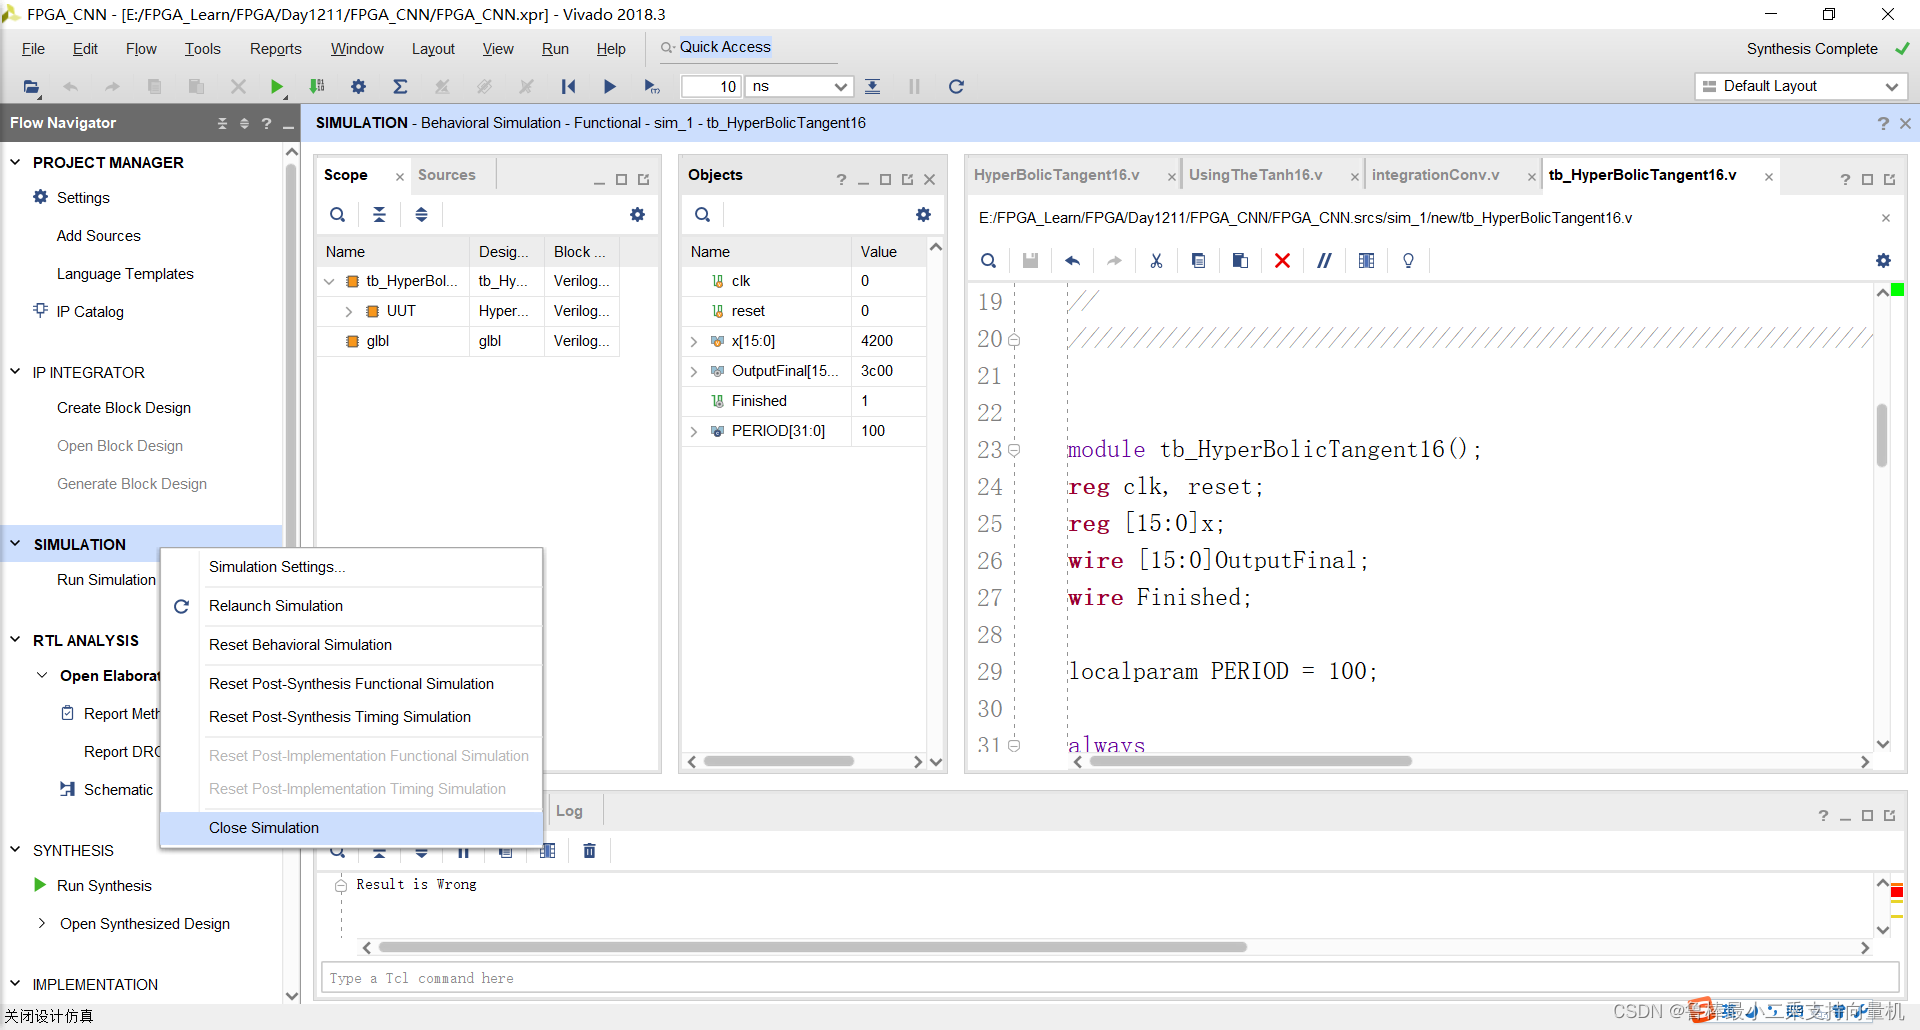
关闭仿真:
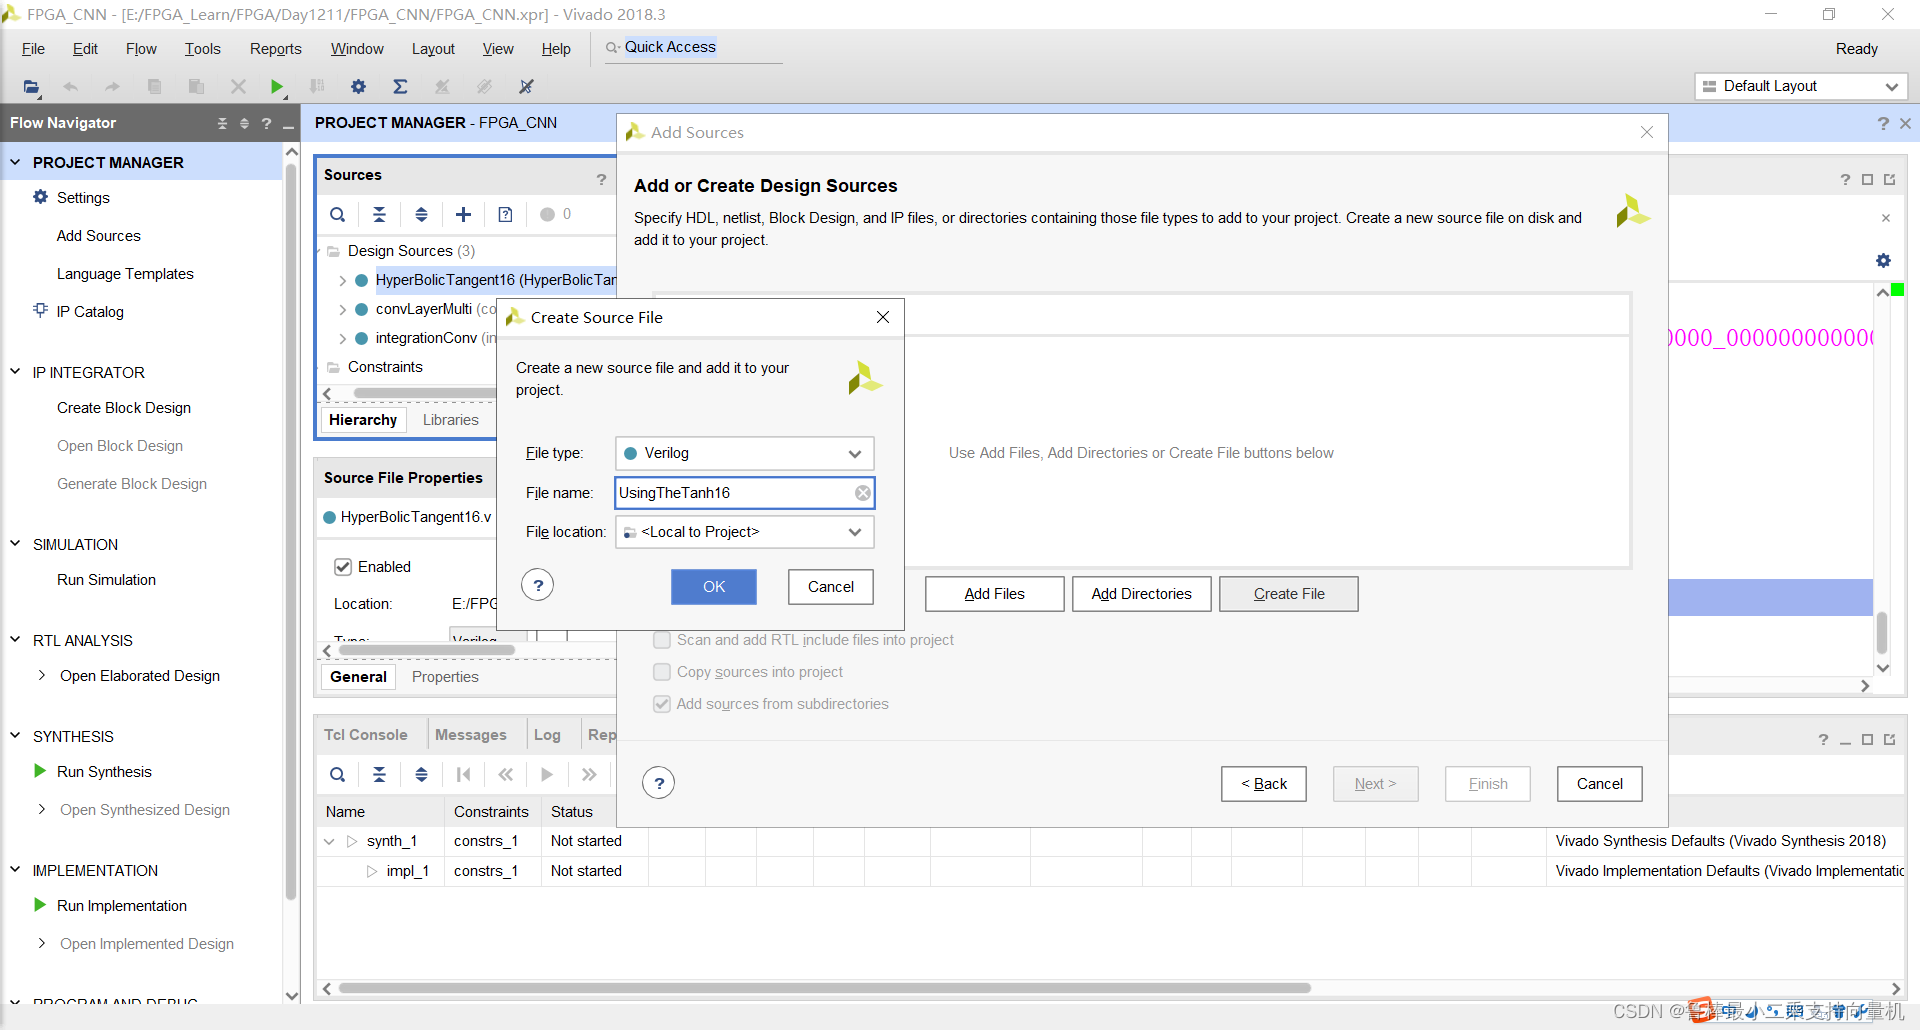
创建UsingTheTanh16文件,如图:
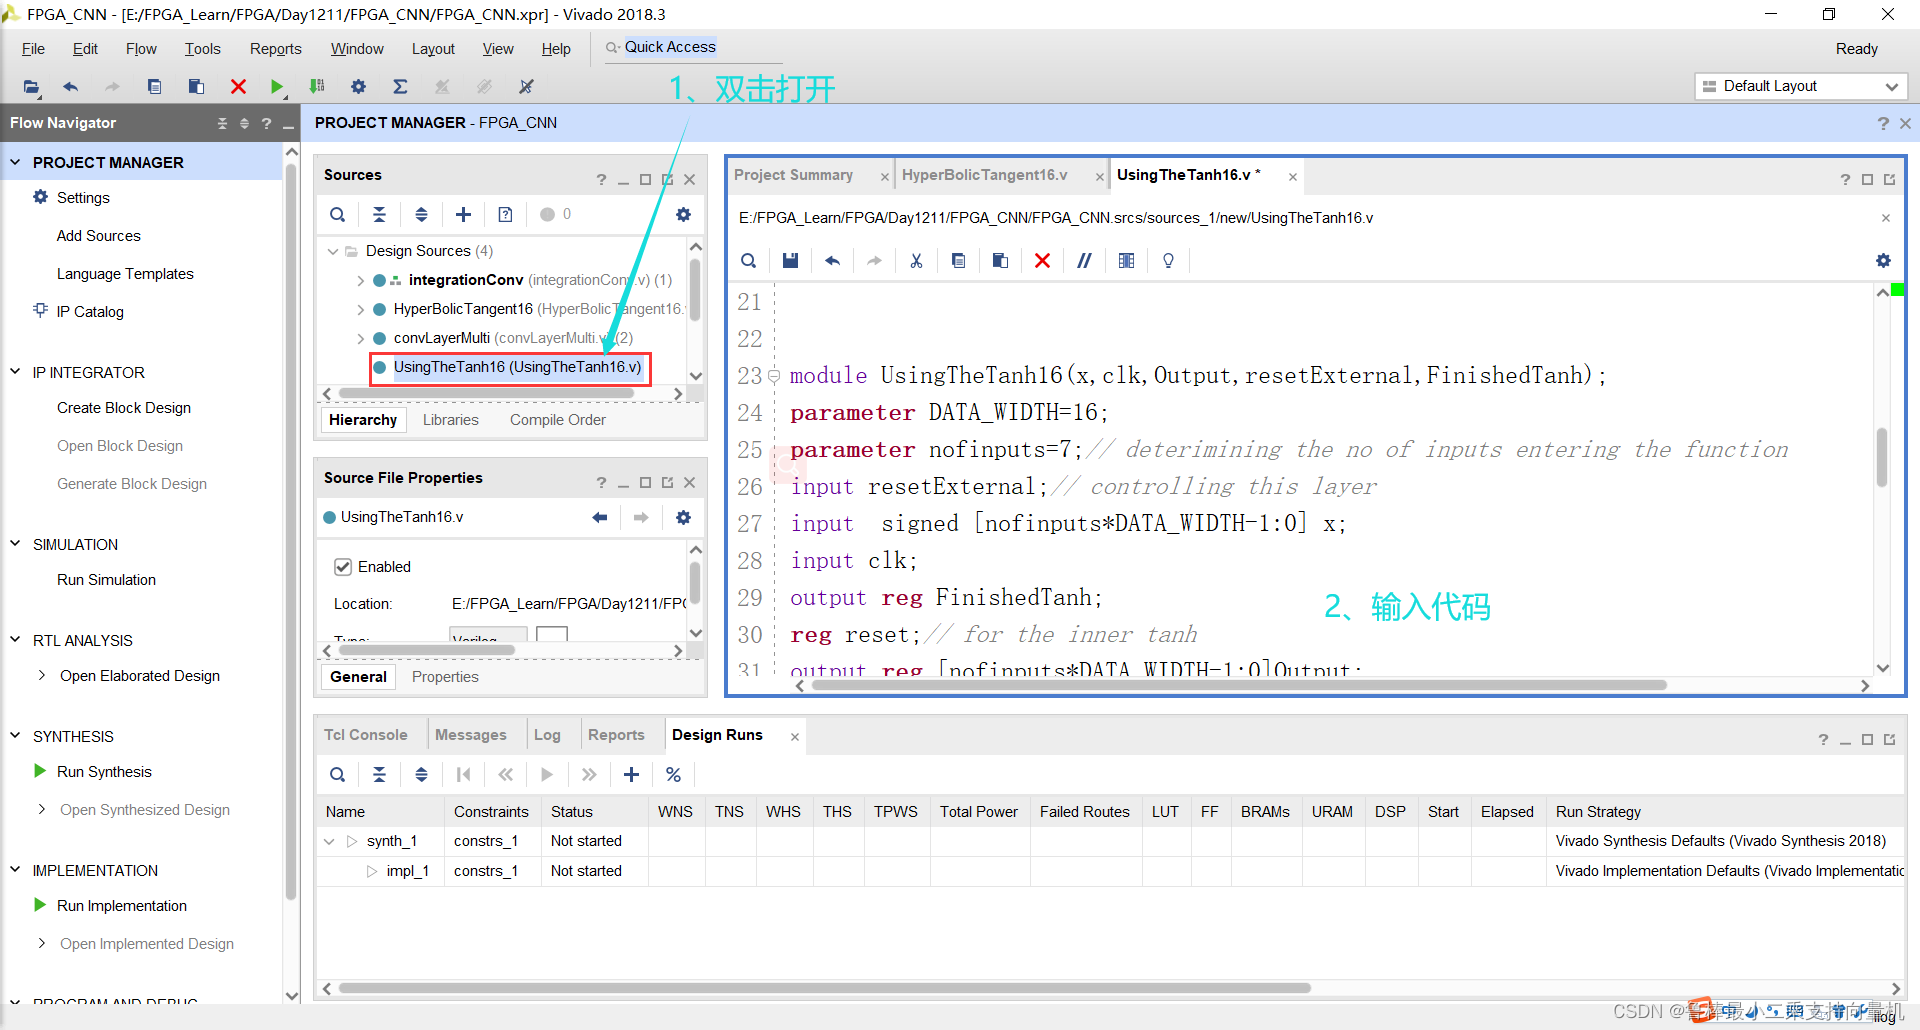
双击打开,输入代码:
module UsingTheTanh16(x,clk,Output,resetExternal,FinishedTanh);
parameter DATA_WIDTH=16;
parameter nofinputs=7;// deterimining the no of inputs entering the function
input resetExternal;// controlling this layer
input  signed [nofinputs*DATA_WIDTH-1:0] x;
input clk;
output reg FinishedTanh;
reg reset;// for the inner tanh
output reg [nofinputs*DATA_WIDTH-1:0]Output;
wire [DATA_WIDTH-1:0]OutputTemp;
reg [7:0]counter=0;
wire Finished;
reg [7:0]i;
// the inner tanh taking inputs in 32 bits and then increment using the i operator
HyperBolicTangent16 TanhArray (x[DATA_WIDTH*i+:DATA_WIDTH],reset,clk,OutputTemp,Finished);


always@(posedge clk)
begin
  counter=counter+1;
// if the external reset =1 then make everything to 0
if(resetExternal==1) begin reset=1;i=0;FinishedTanh=0; end
//checking if the tanh is not finished so continue your operation and low down the reset to continue
  else if(FinishedTanh==0) begin
    if(reset==1)begin reset=0; end
    // if it is finished then store the output of the tanh and increment the input forward
      else if (Finished==1)begin Output[DATA_WIDTH*i+:DATA_WIDTH]=OutputTemp;reset=1;i=i+1;end
// check if all the inputs are finished then the layer is OK
if(i==nofinputs)
  begin FinishedTanh=1;end
end

end
endmodule
如图所示:
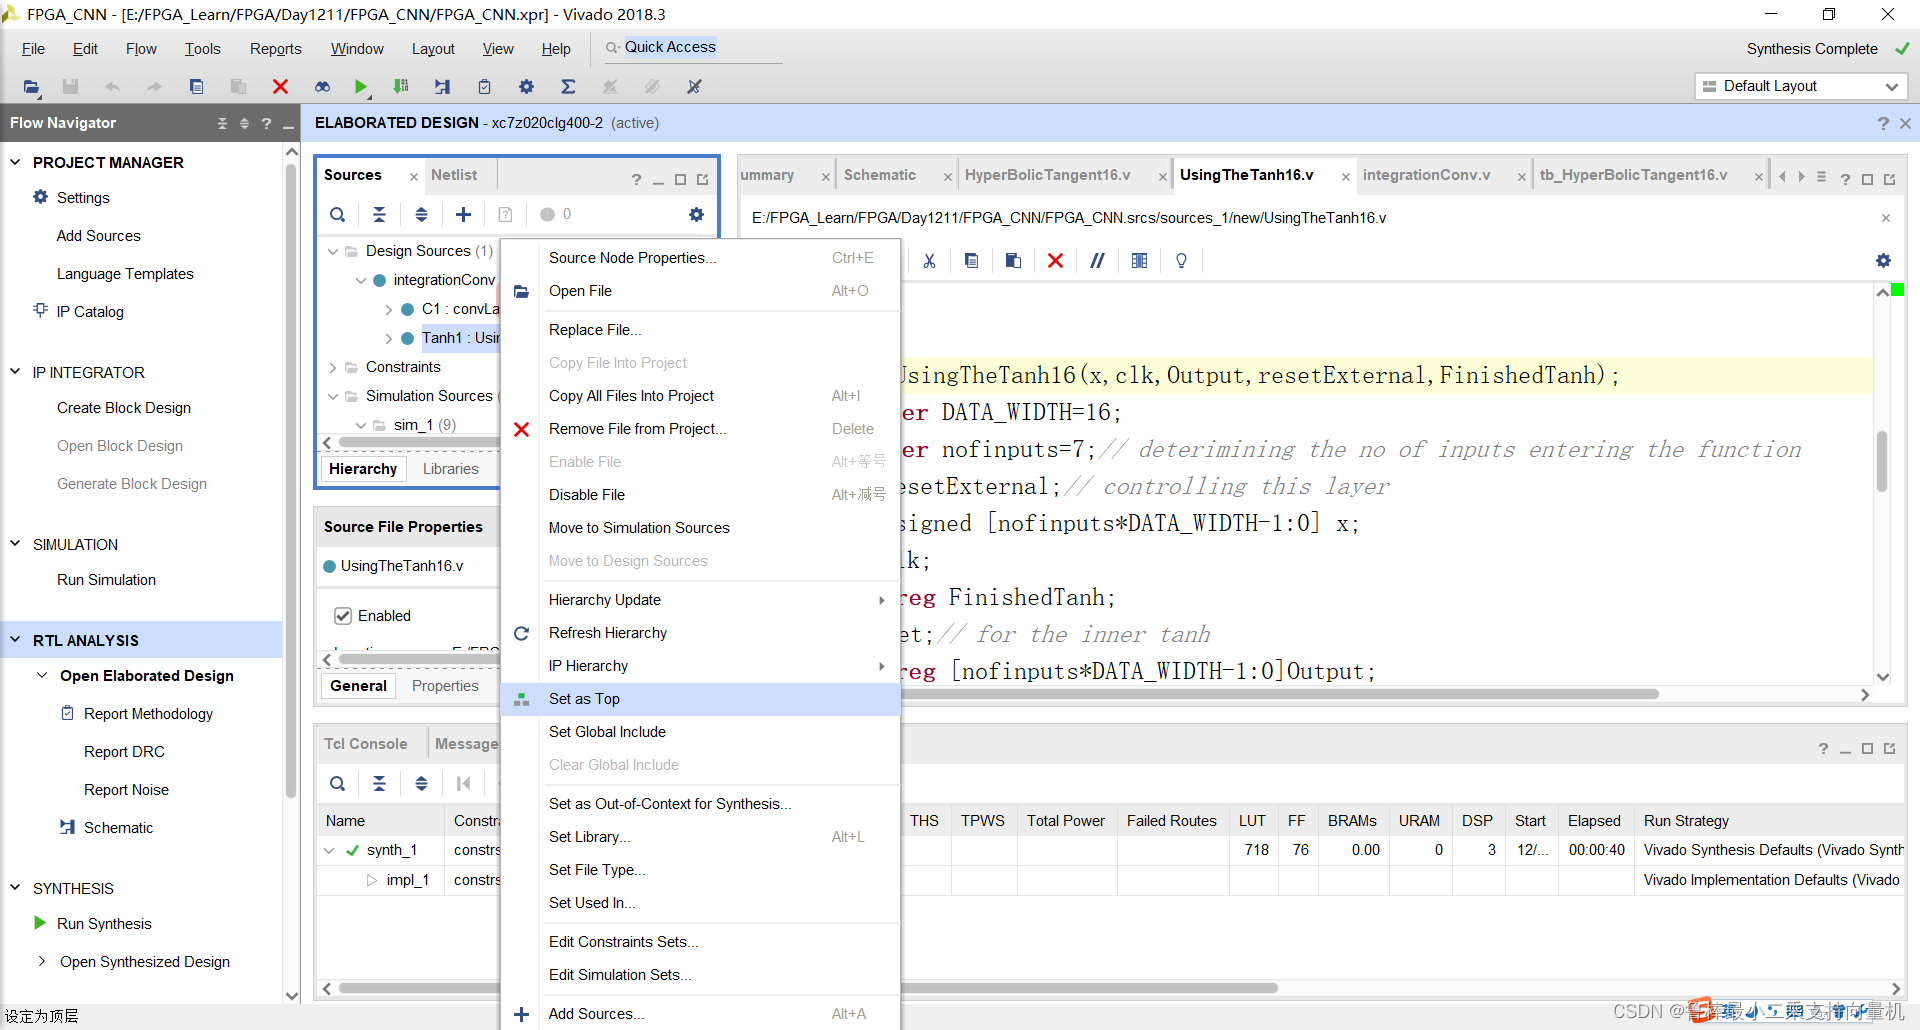
将UsingTheTanh16设置为顶层:
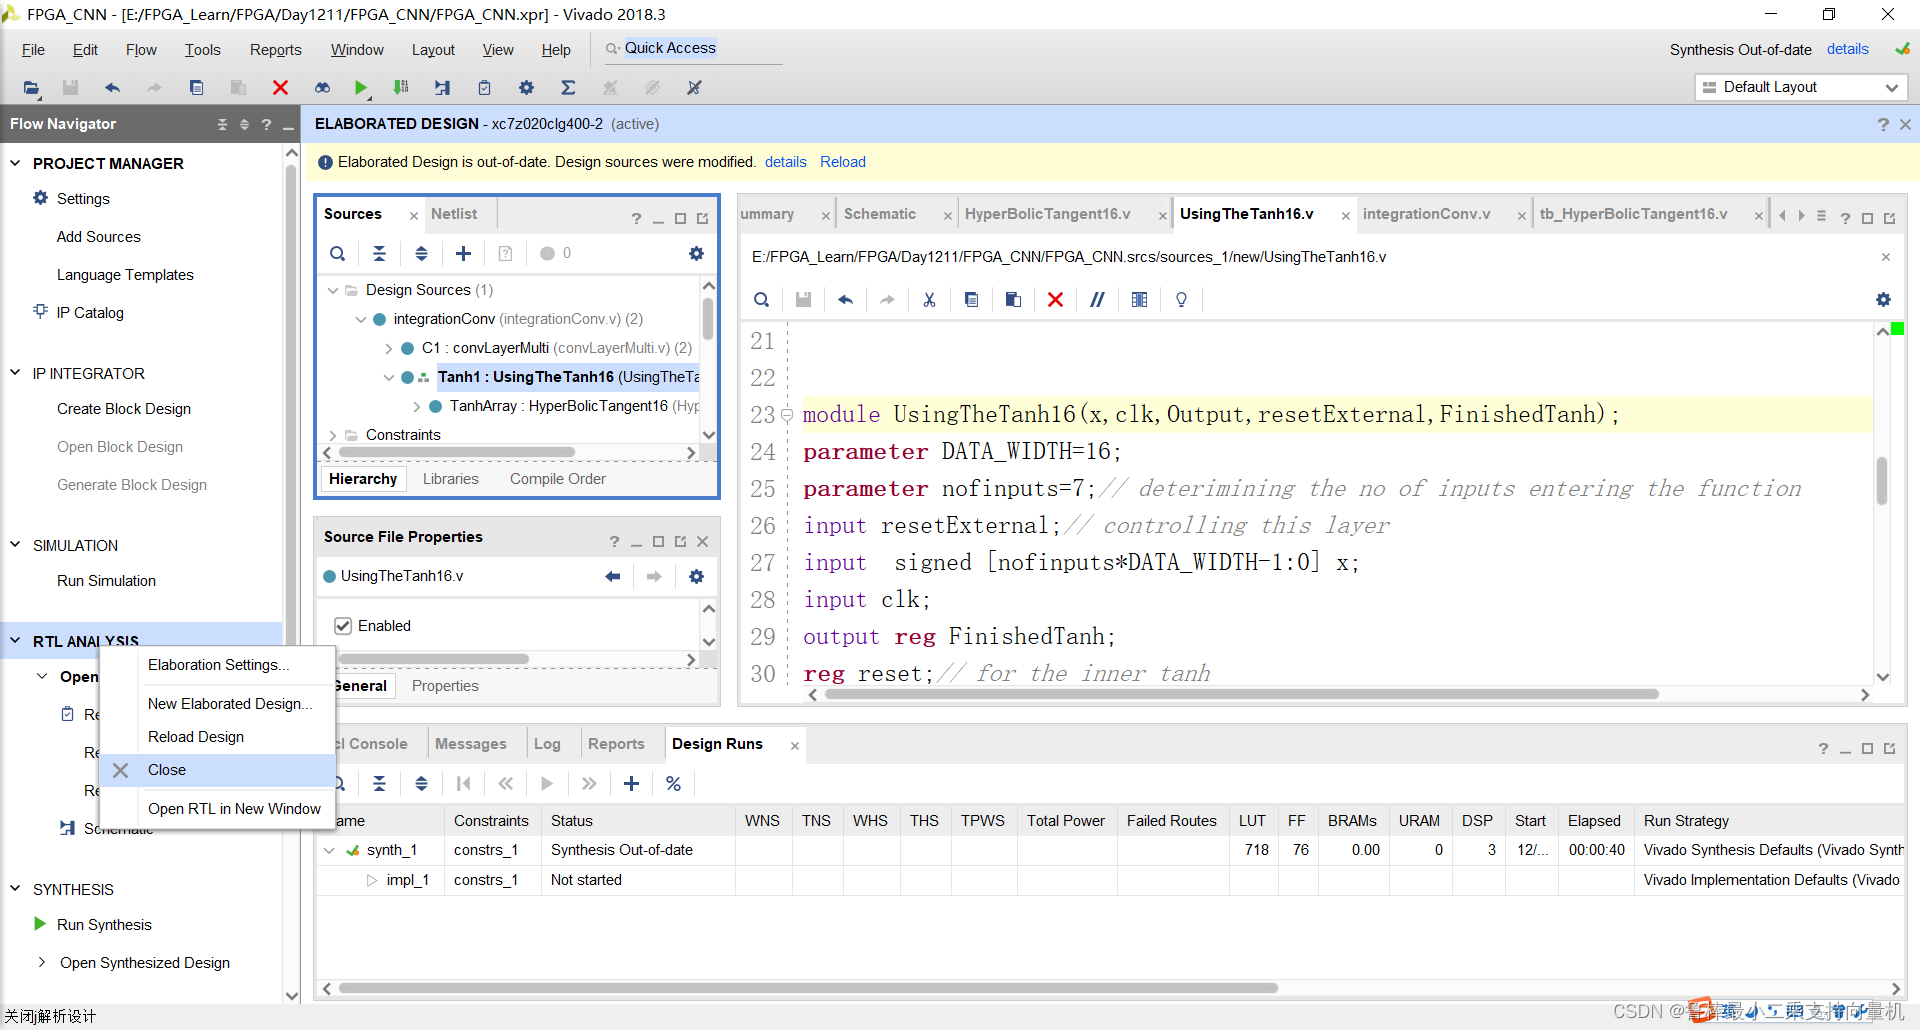
关闭上次的分析文件:
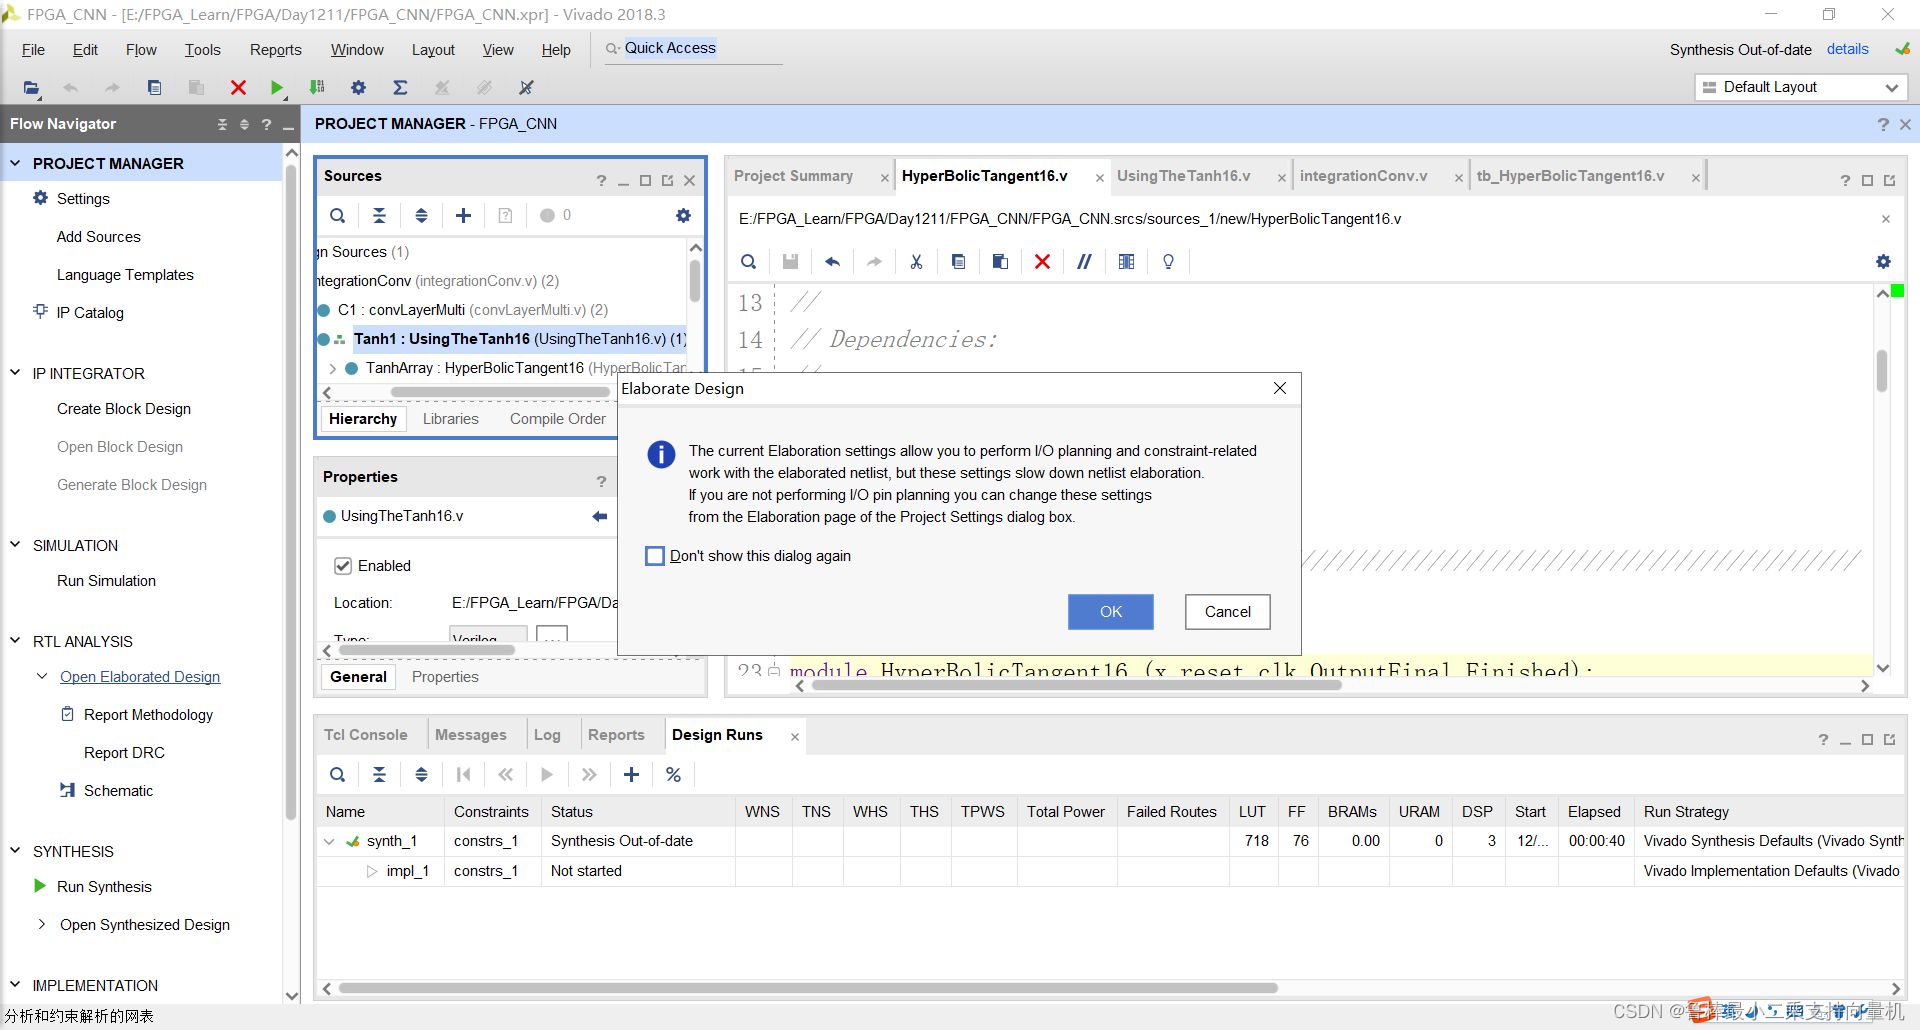
对设计进行分析,操作如图:
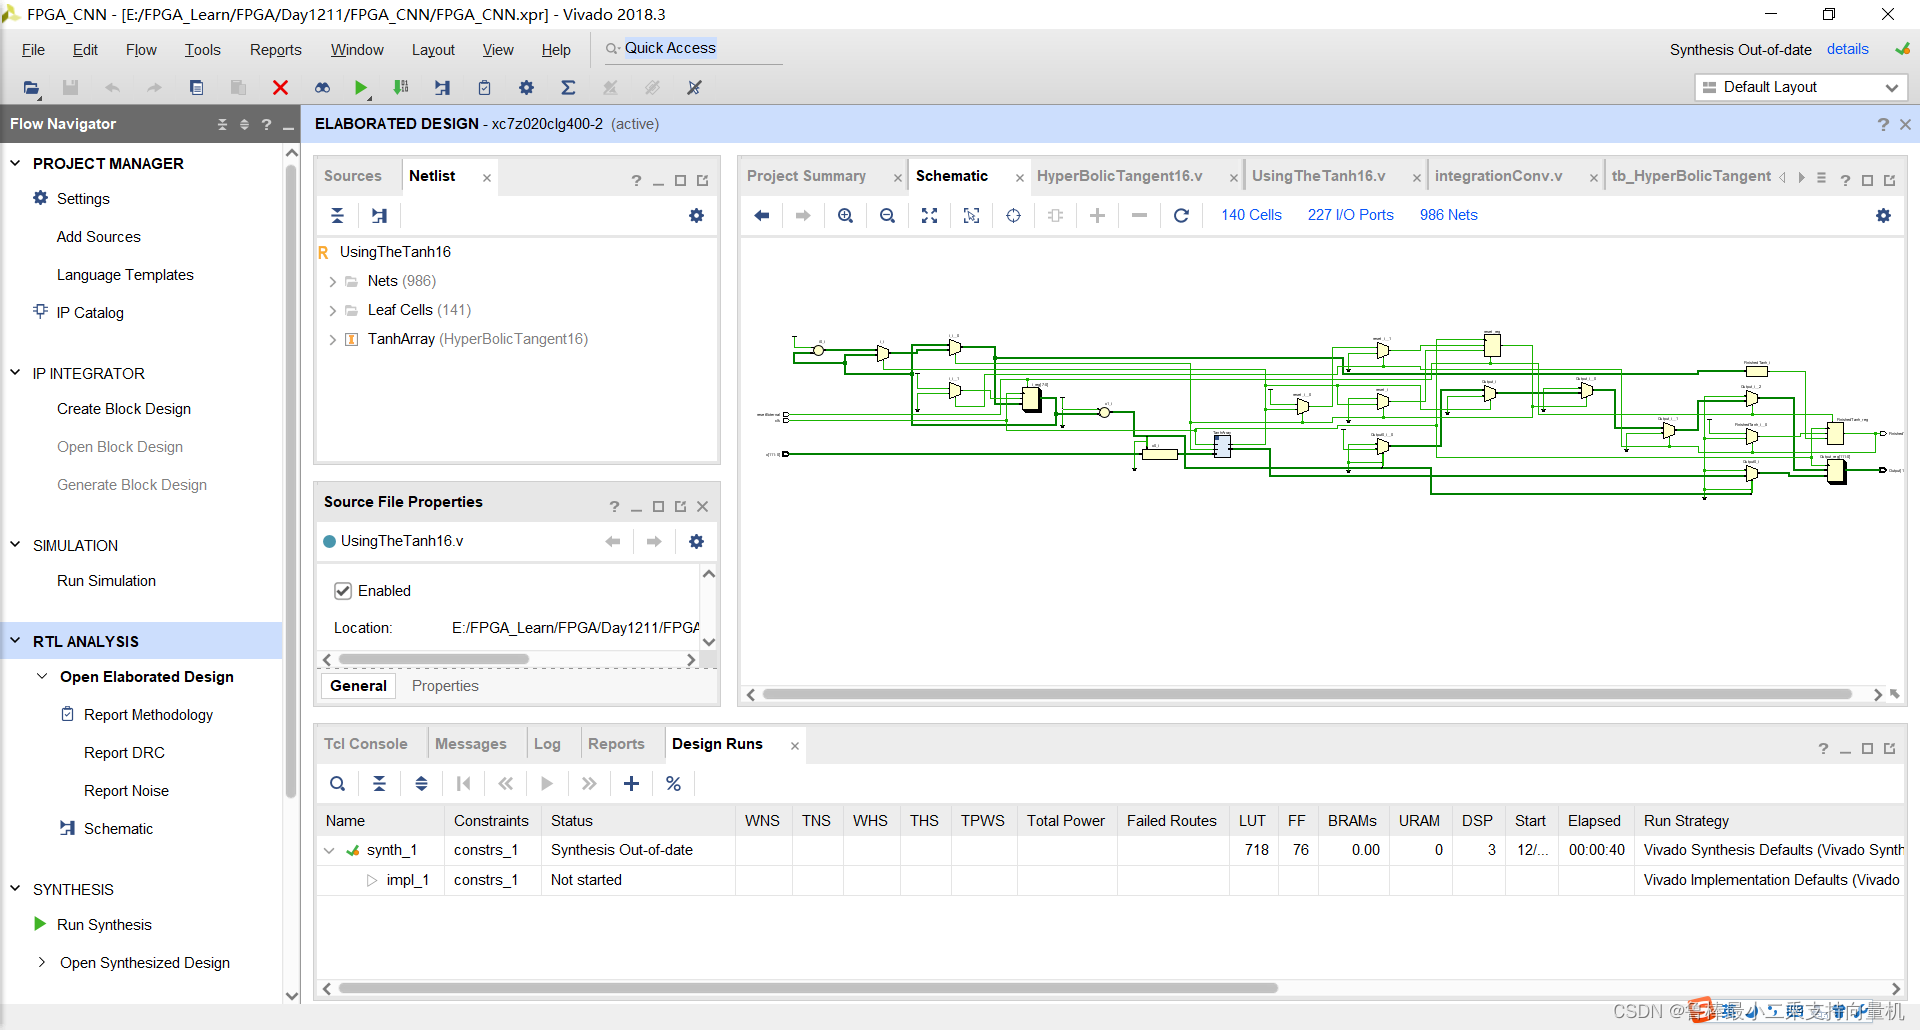
分析后的设计,Vivado自动生成原理图,如图:
对设计进行综合,操作如图:
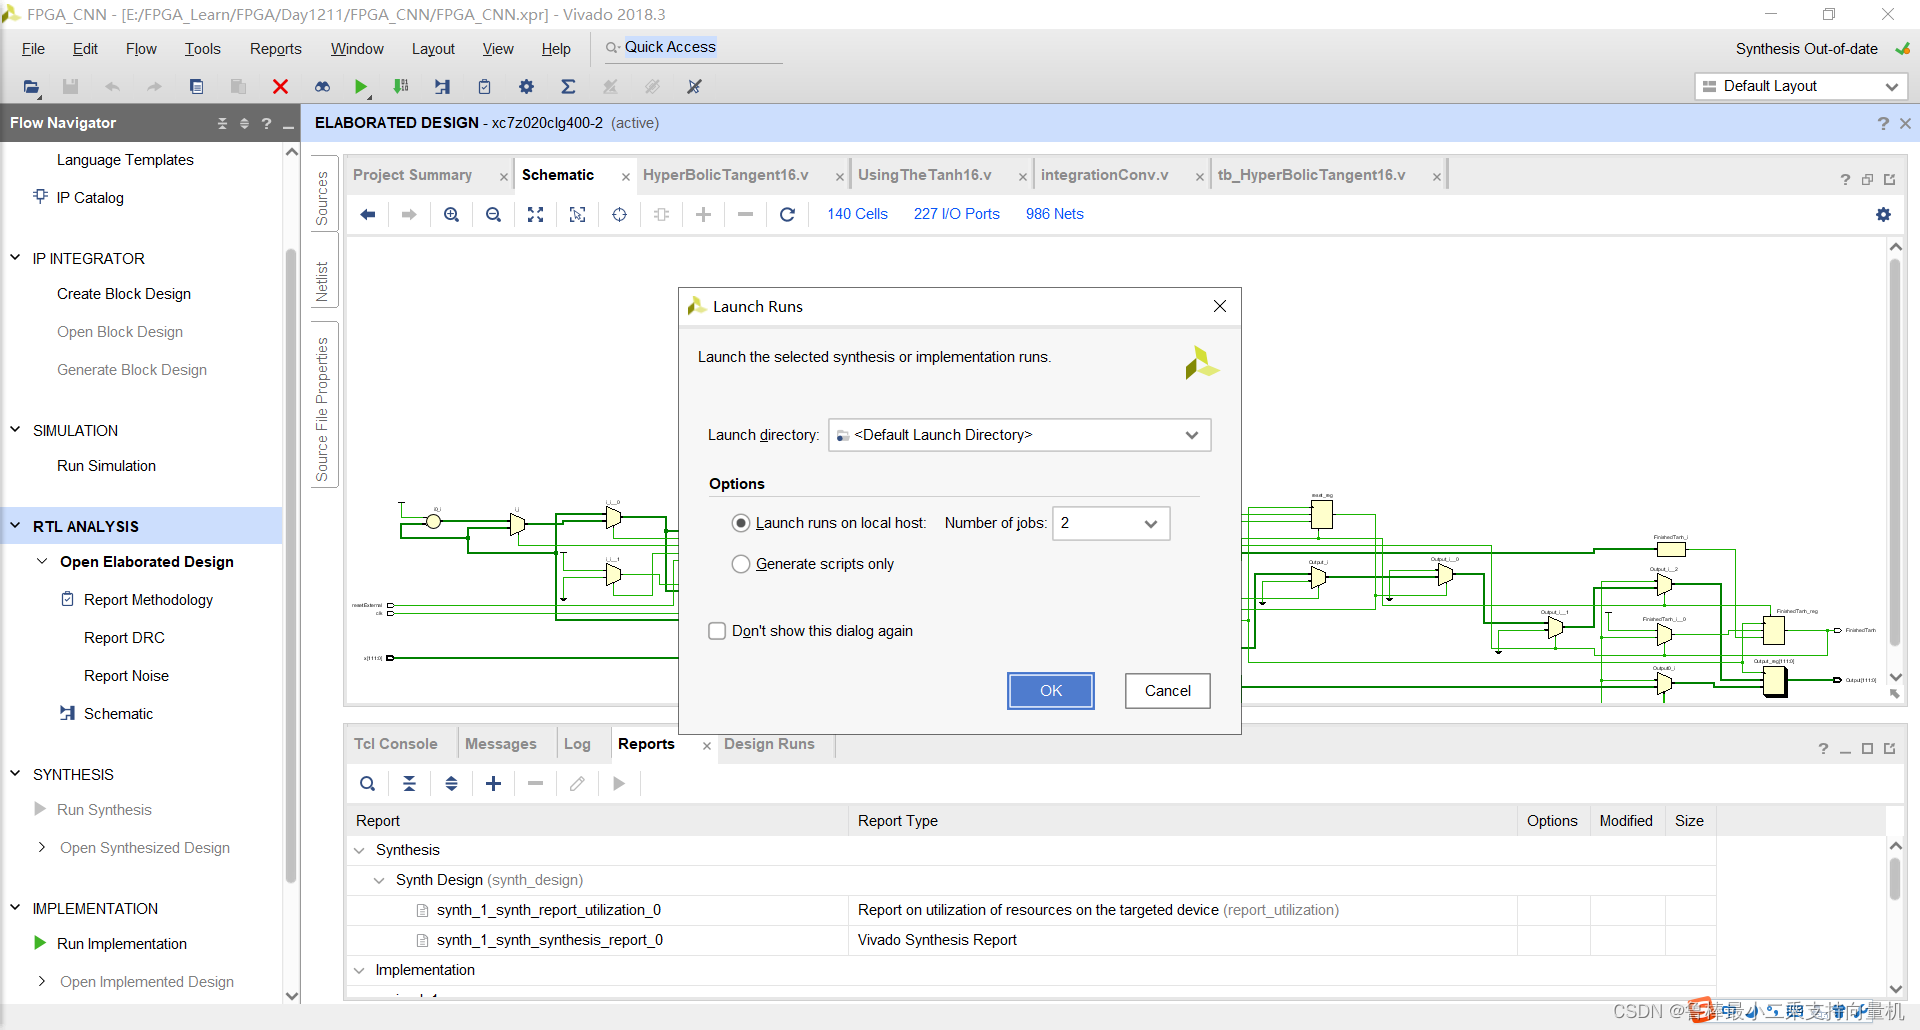
创建TestBench,操作如图所示:
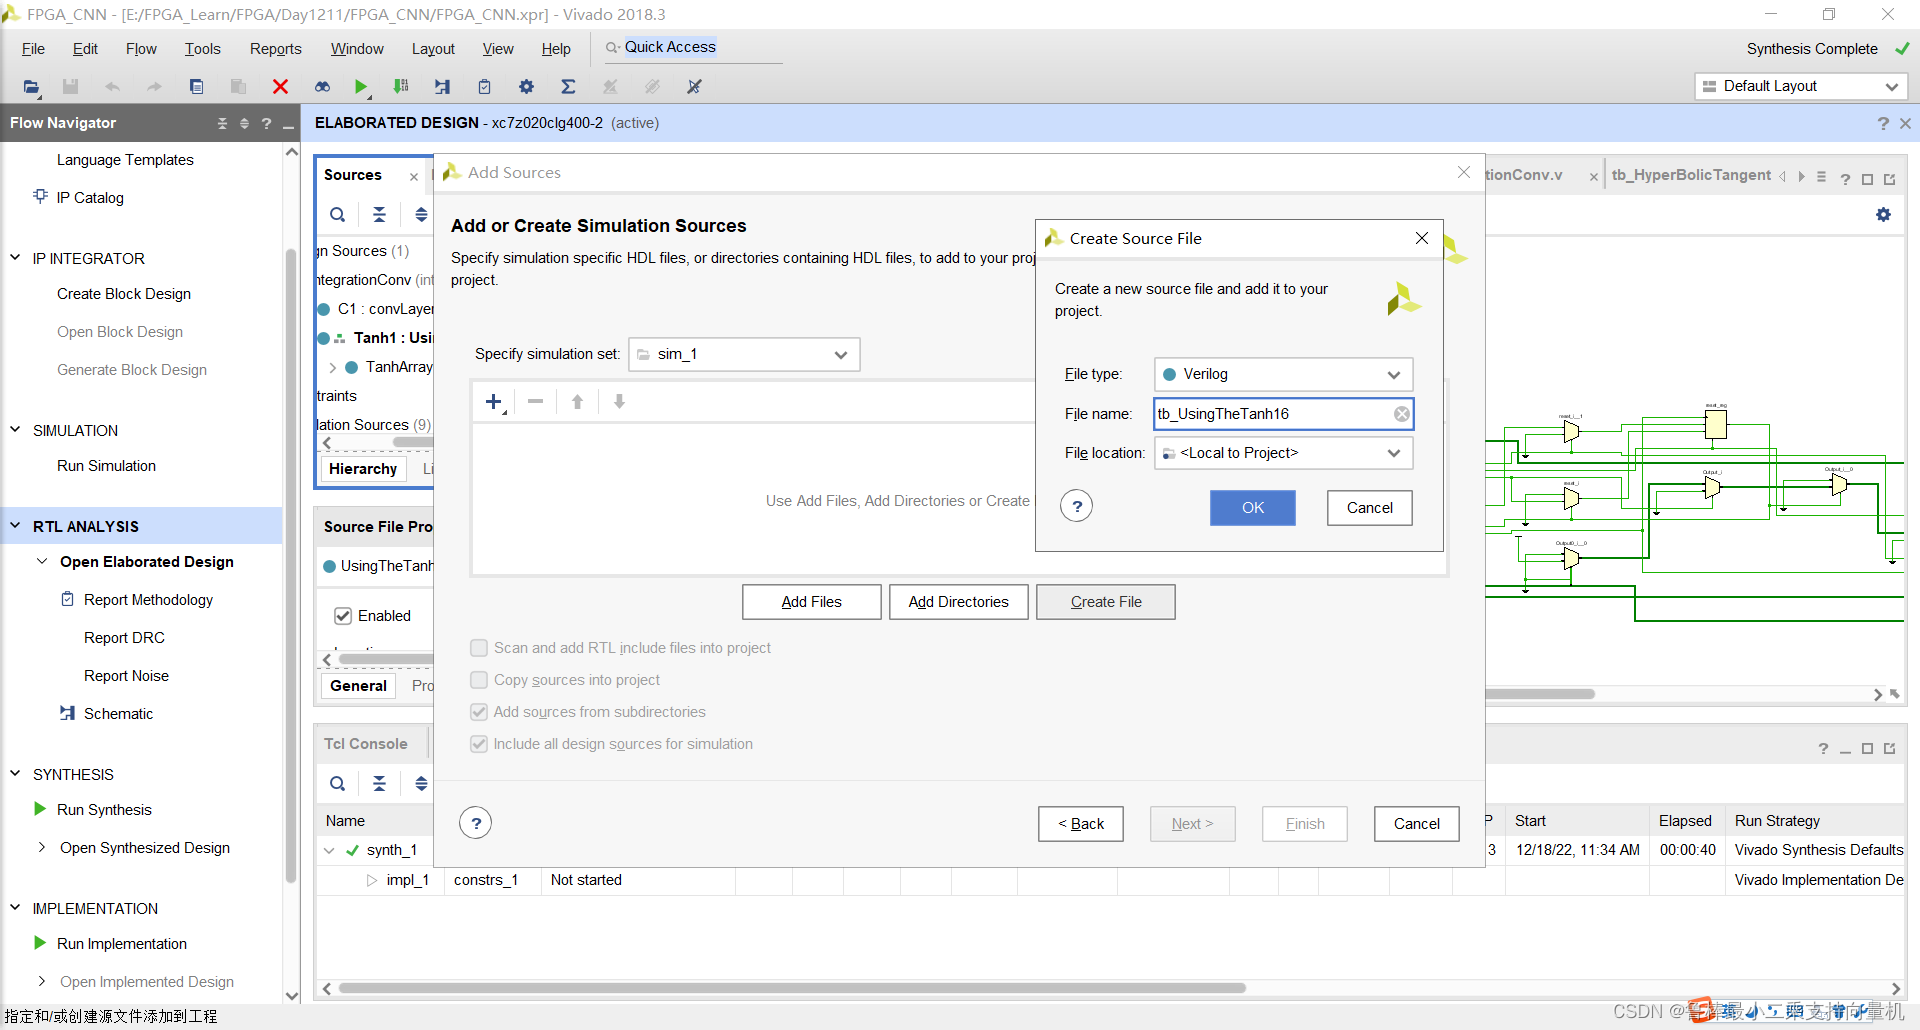
双击打开,输入激励代码:
module tb_UsingTheTanh16();
reg clk, resetExternal;
reg [63:0]x;
wire [63:0]Output;
wire FinishedTanh;

localparam PERIOD = 100;

always
	#(PERIOD/2) clk = ~clk;

initial begin
	#0 //starting the tanh
	clk = 1'b1;
	resetExternal = 1'b1;
	// trying a random input(0.6,3)     where tanh(0.600000023842)=0.53704958, tanh(3)~=1
	x=64'b00111111000110011001100110011010_01000000010000000000000000000000;

	#(PERIOD/2)
	resetExternal = 1'b0;

	#800
	// waiting for The final output which will be (0.57,1)
	if(Output==64'b00111111000010010110111101111011_00111111100000000000000000000000 && FinishedTanh==1'b1)begin
	 $display("Result is right (for the full array of inputs)");
	  end
	  else begin
	 $display("Result is Wrong");
	    end
	$stop;
end

UsingTheTanh16 UUT
(
  .x(x),
	.clk(clk),
	.Output(Output),
	.resetExternal(resetExternal),
	.FinishedTanh(FinishedTanh)
);

endmodule
如图所示:
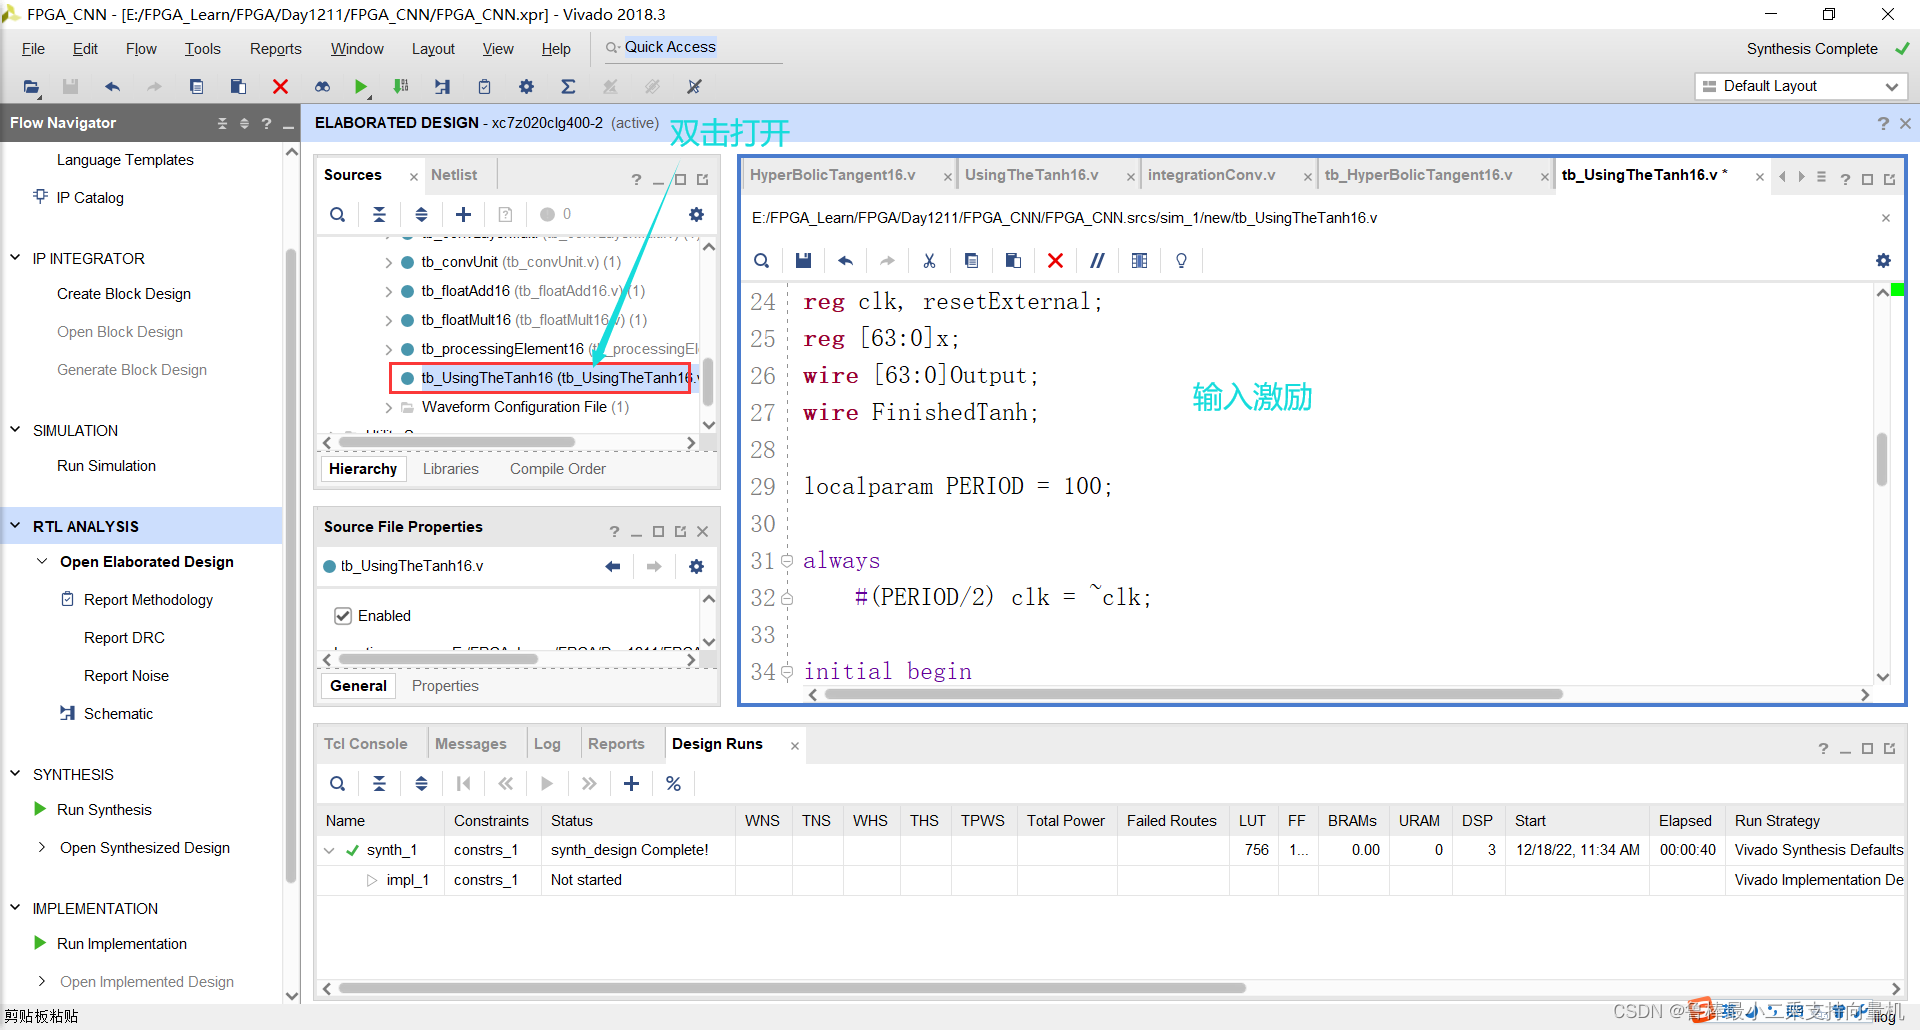
将tb_UsingTheTanh16文件设置为顶层:
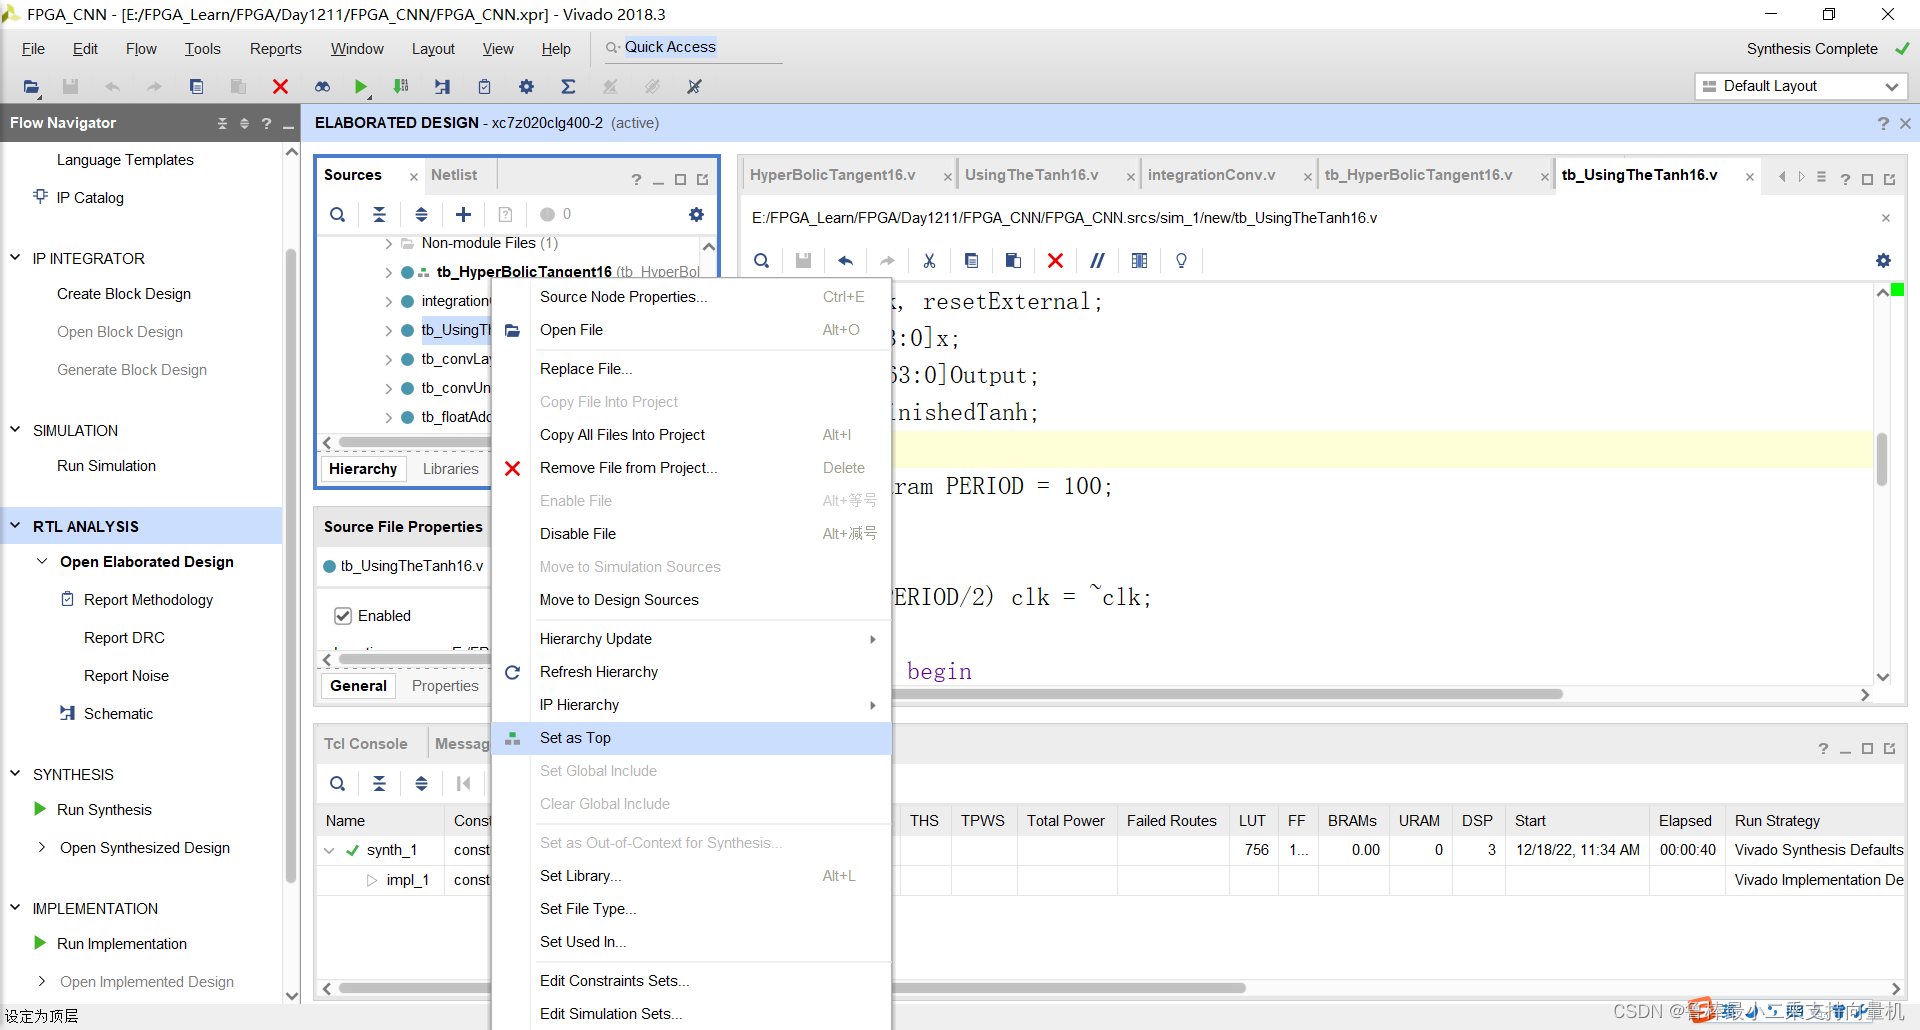
开始进行仿真,操作如下:
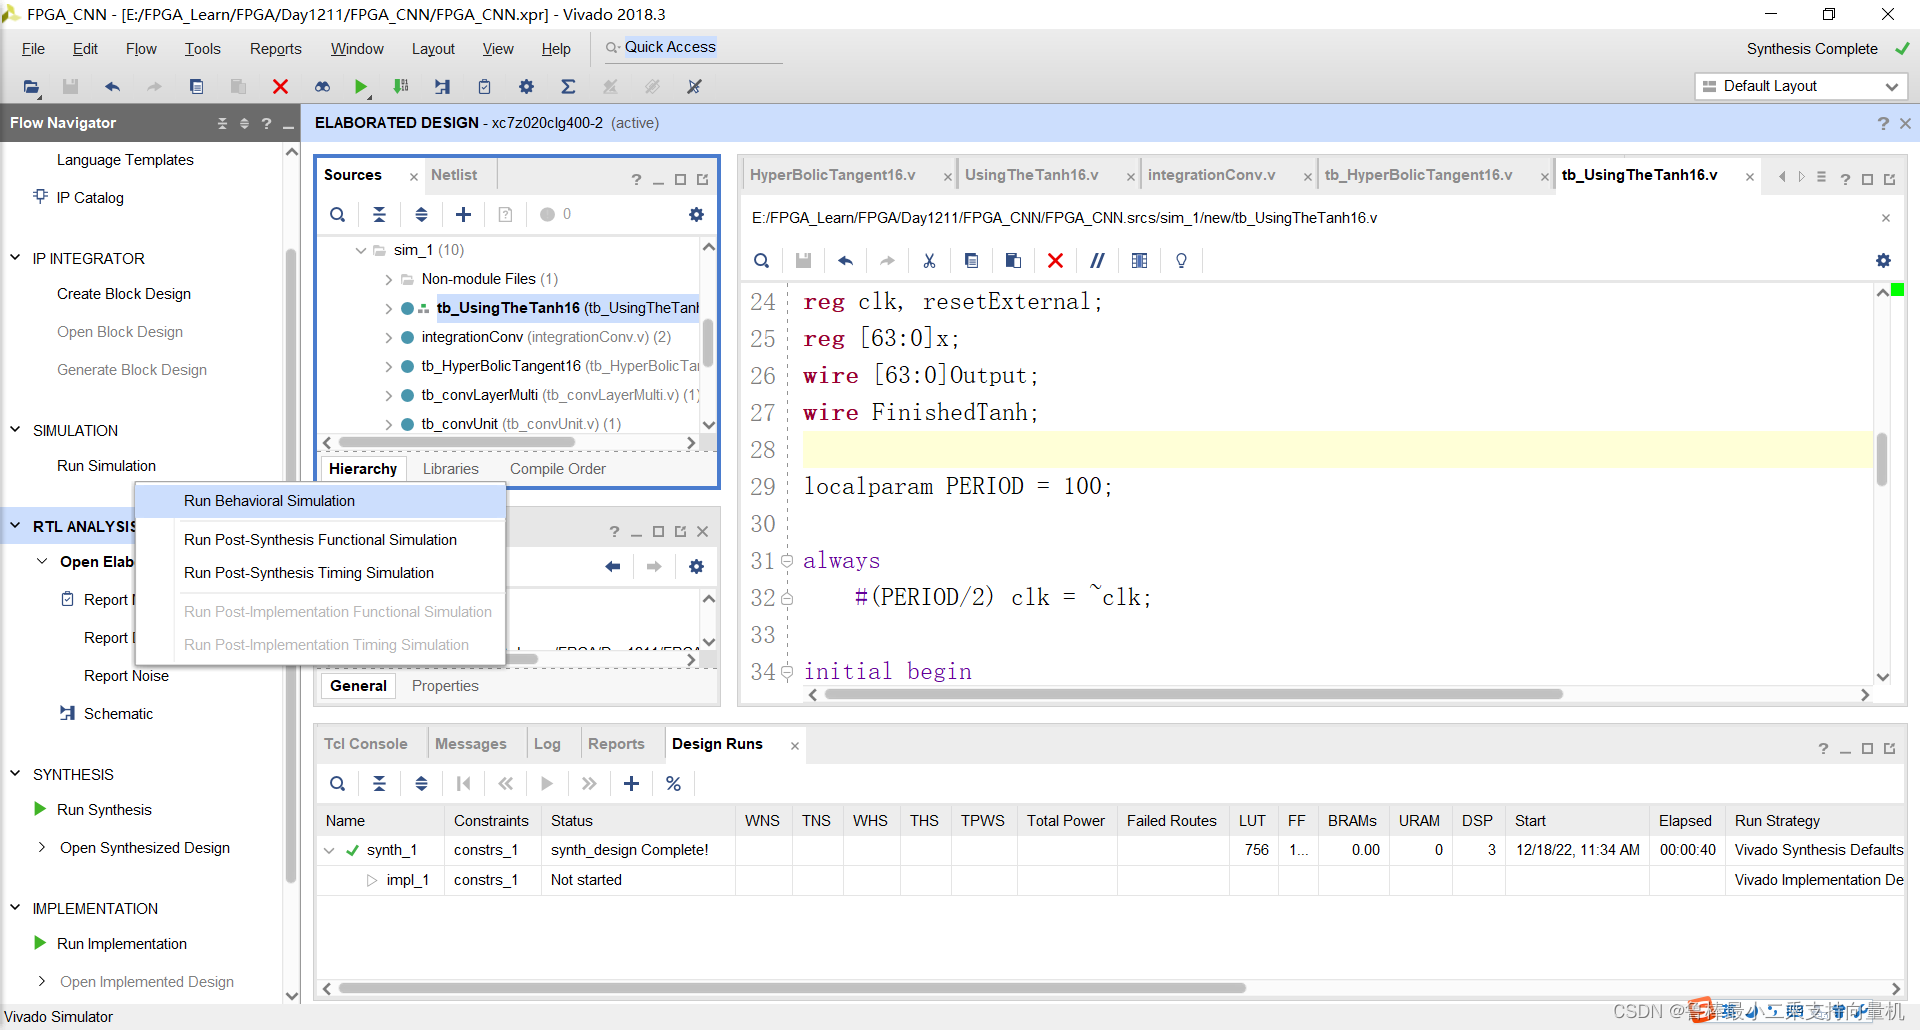
开始仿真,如图:
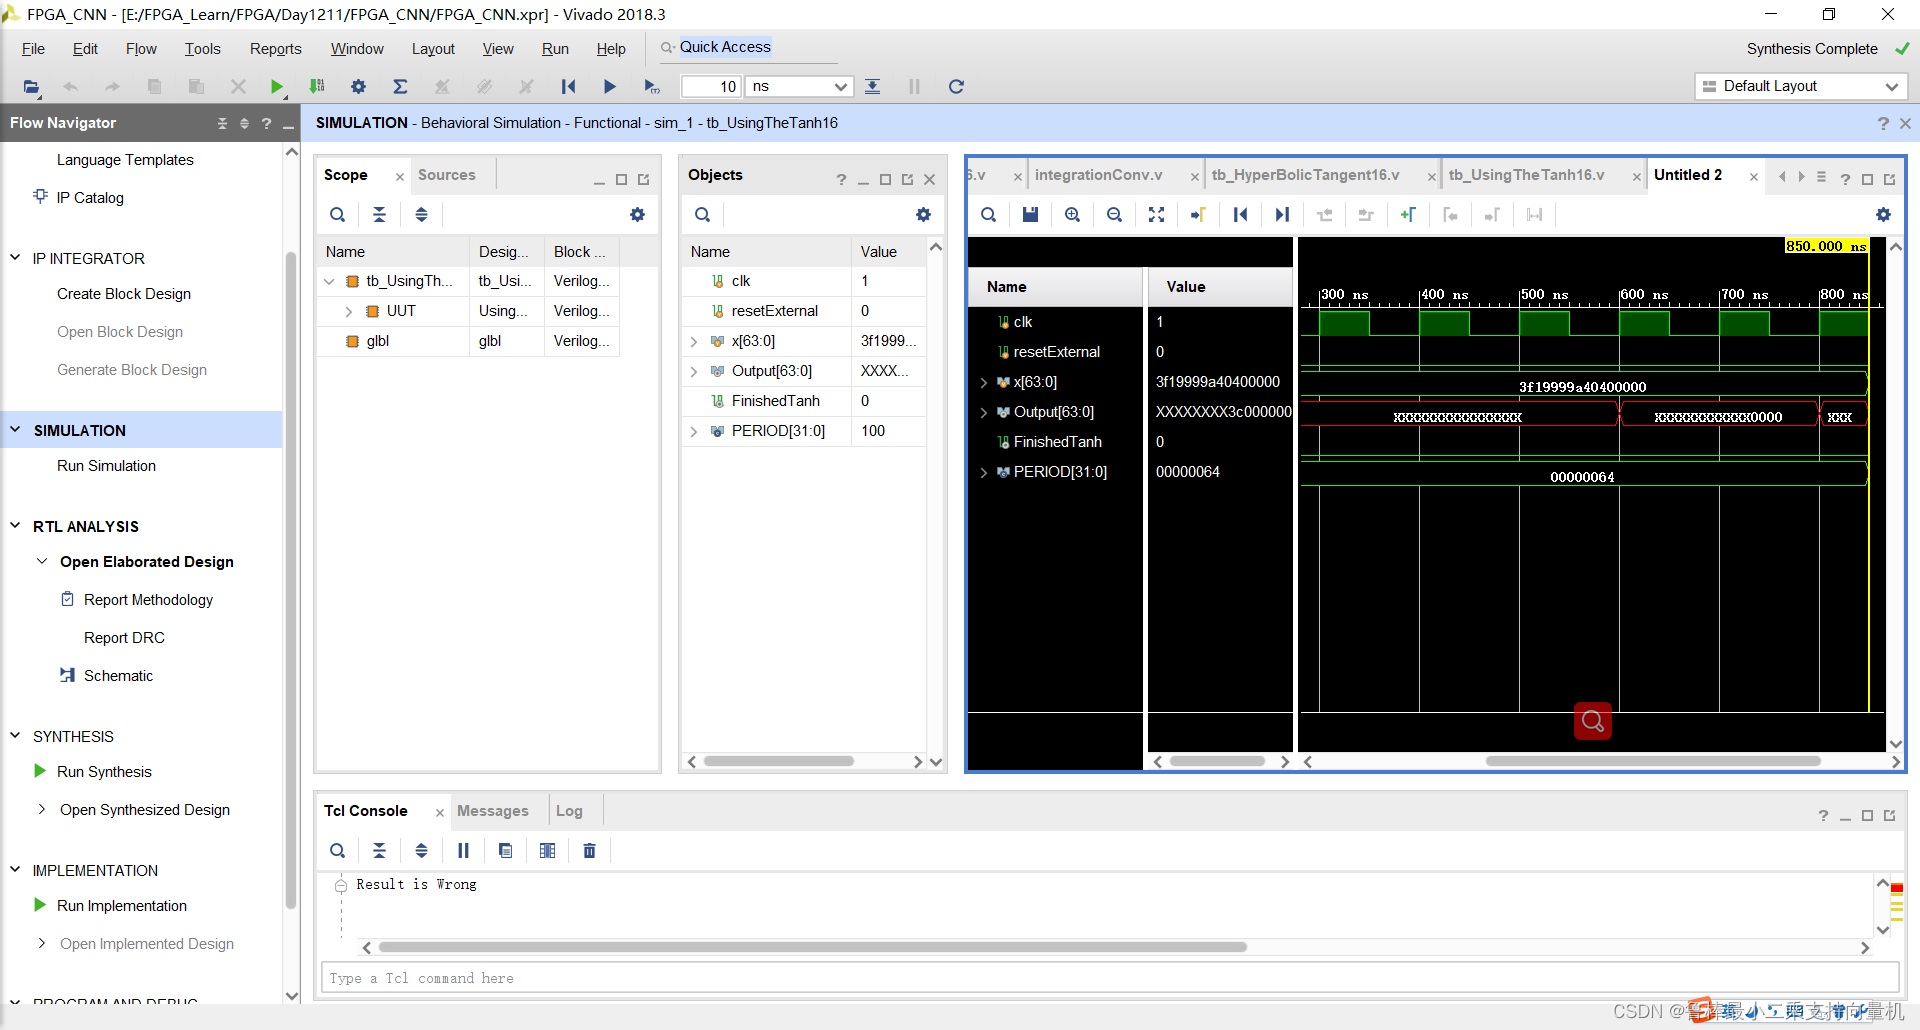
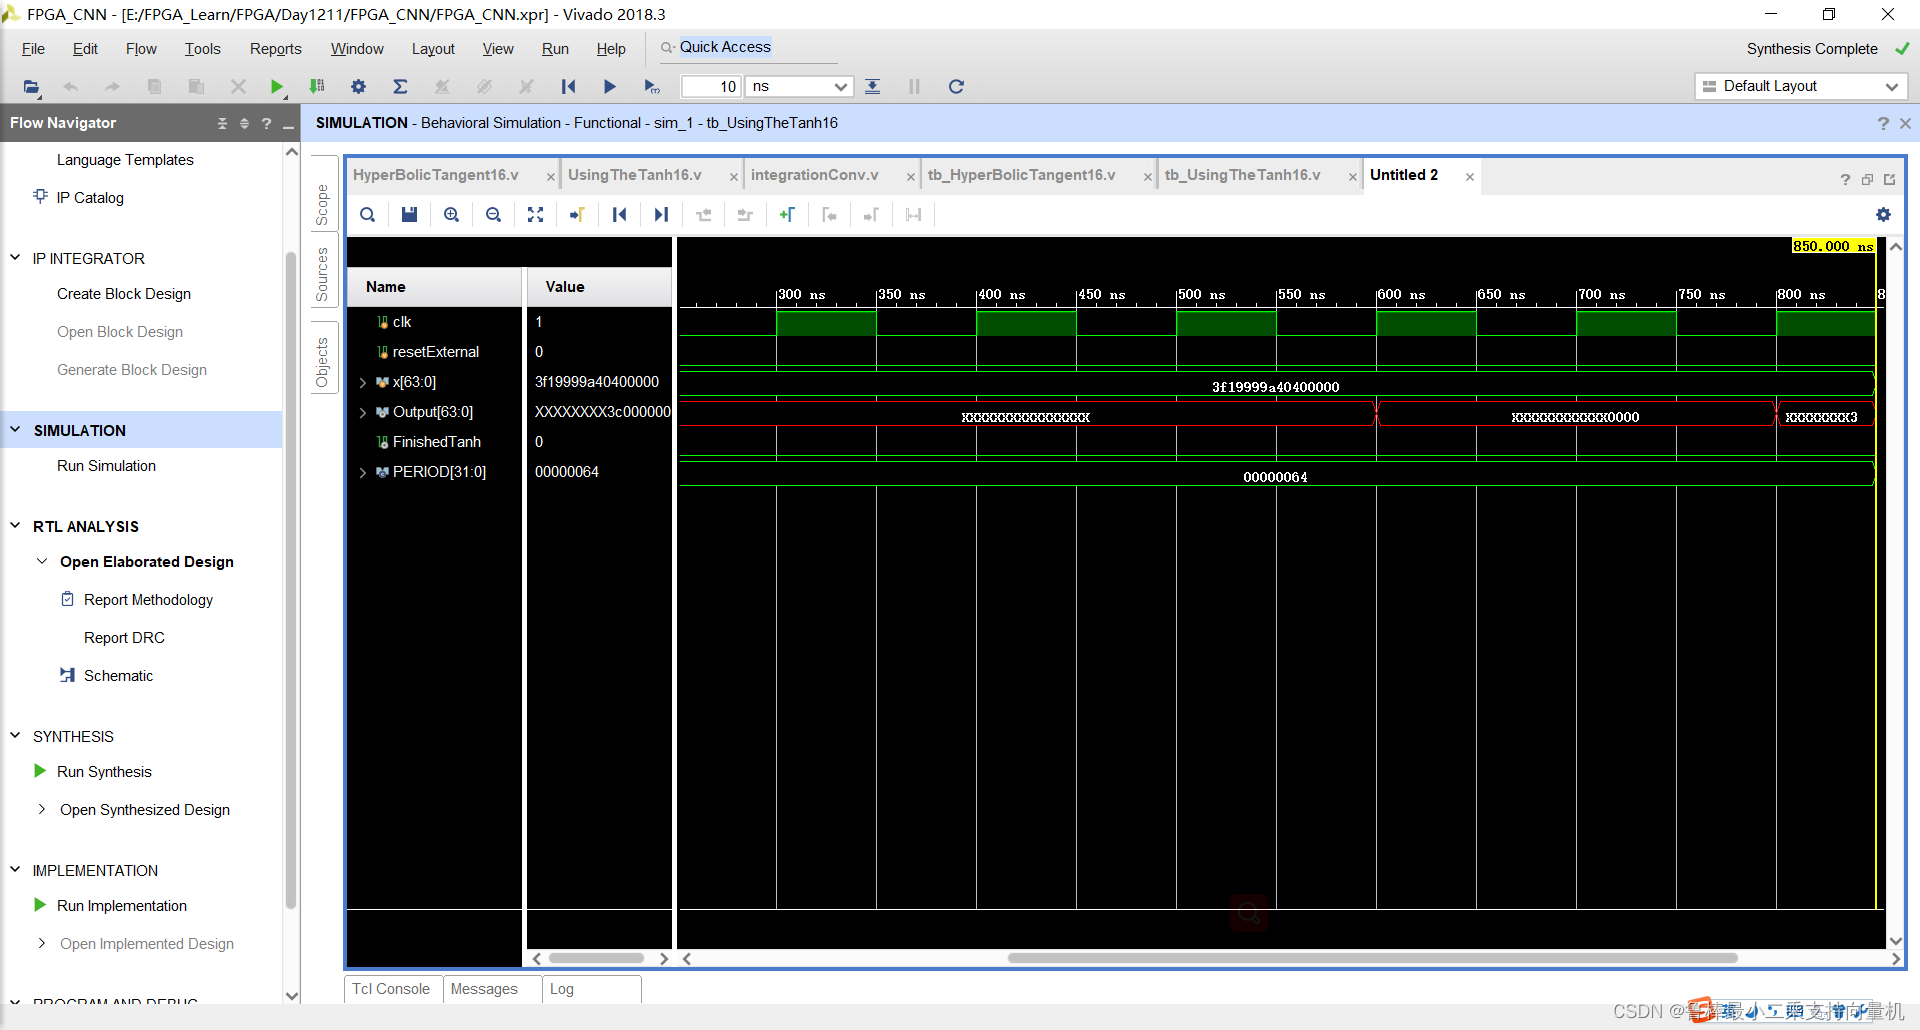
仿真波形,如图:
双击打开integrationConv文件,修改代码为:
module integrationConv (clk,reset,CNNinput,Conv,ConvOutput);

parameter DATA_WIDTH = 16;
parameter ImgInW = 32;
parameter ImgInH = 32;
parameter ConvOut = 28;
parameter Kernel = 5;
parameter DepthC = 6;


input clk, reset;
input [ImgInW*ImgInH*DATA_WIDTH-1:0] CNNinput;
input [Kernel*Kernel*DepthC*DATA_WIDTH-1:0] Conv;
output [ConvOut*ConvOut*DepthC*DATA_WIDTH-1:0] ConvOutput;

reg TanhReset;
wire TanhFlag;

wire [ConvOut*ConvOut*DepthC*DATA_WIDTH-1:0] Cout;
wire [ConvOut*ConvOut*DepthC*DATA_WIDTH-1:0] CoutTanH;

convLayerMulti C1
(
	.clk(clk),
	.reset(reset),
	.image(CNNinput),
	.filters(Conv),
	.outputConv(ConvOutput)
);
UsingTheTanh16
#(.nofinputs(ConvOut*ConvOut*DepthC))
Tanh1(
      .x(Cout),
      .clk(clk),
      .Output(CoutTanH),
      .resetExternal(TanhReset),
      .FinishedTanh(TanhFlag)
      );
endmodule
如图所示:
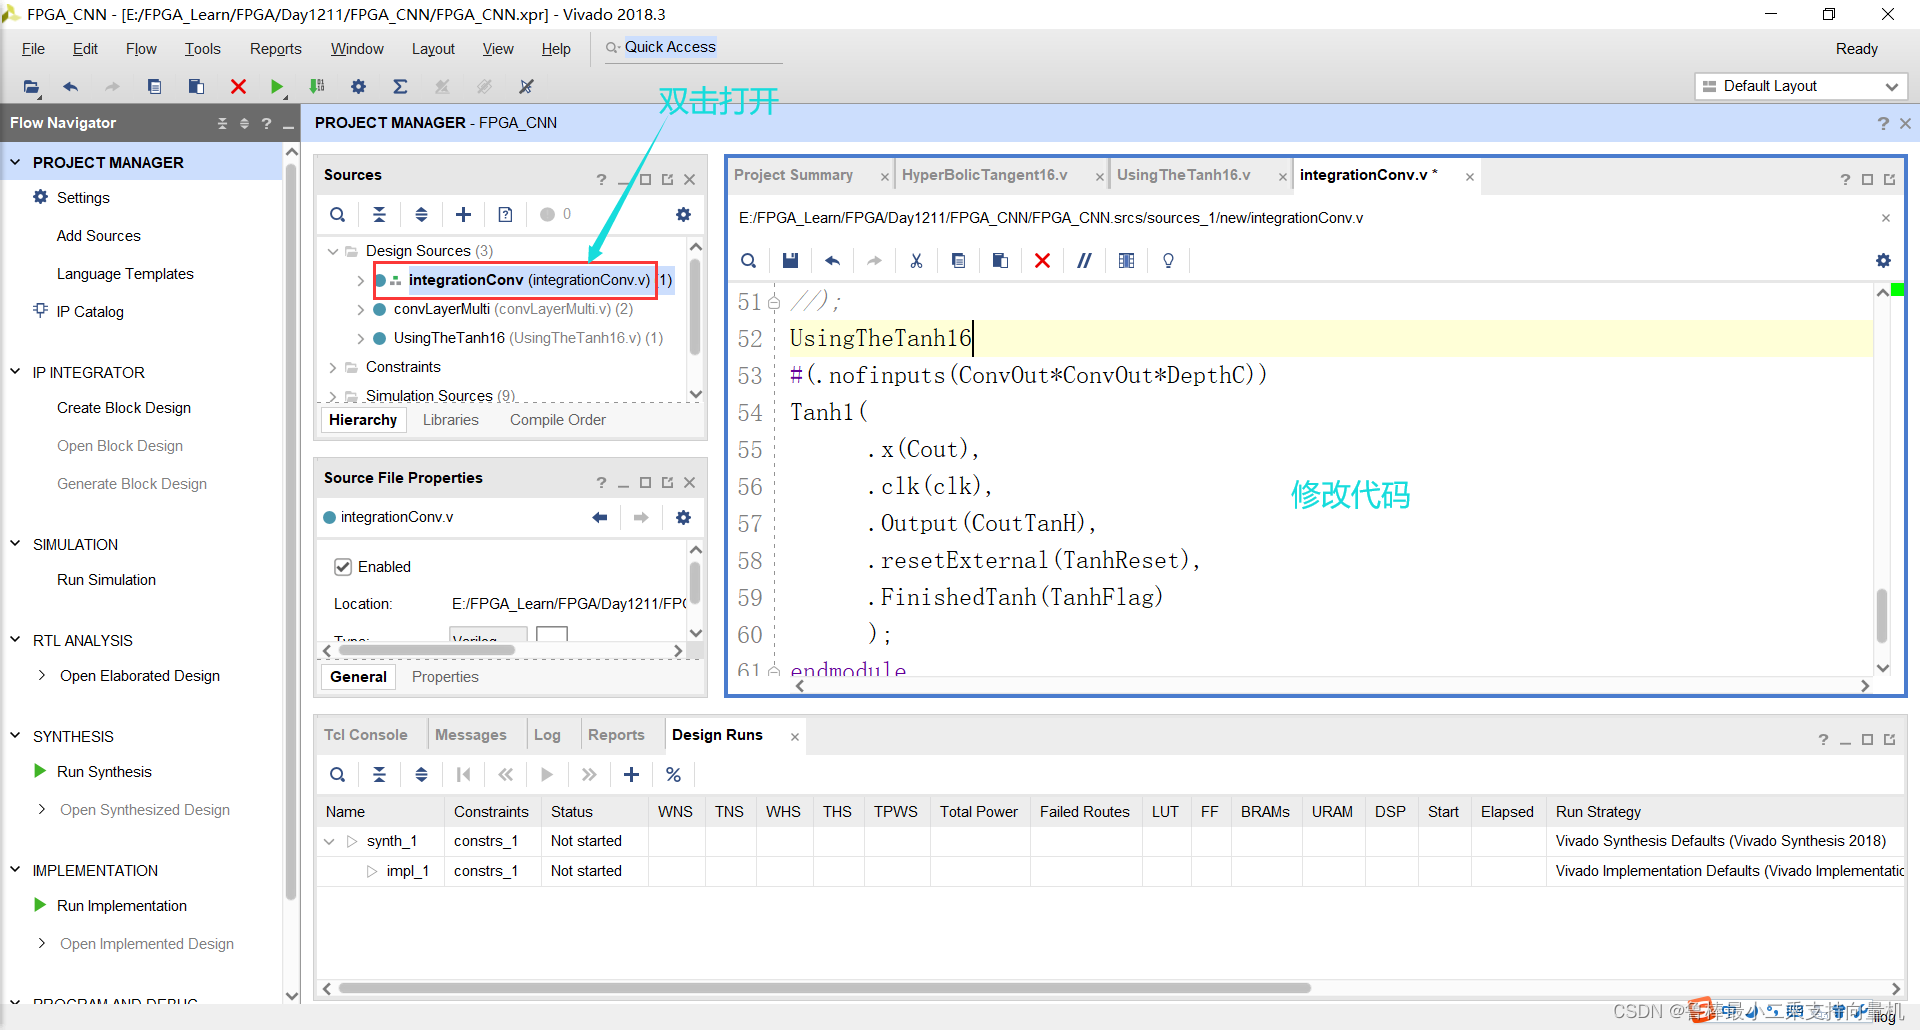
将integrationConv设置为顶层:
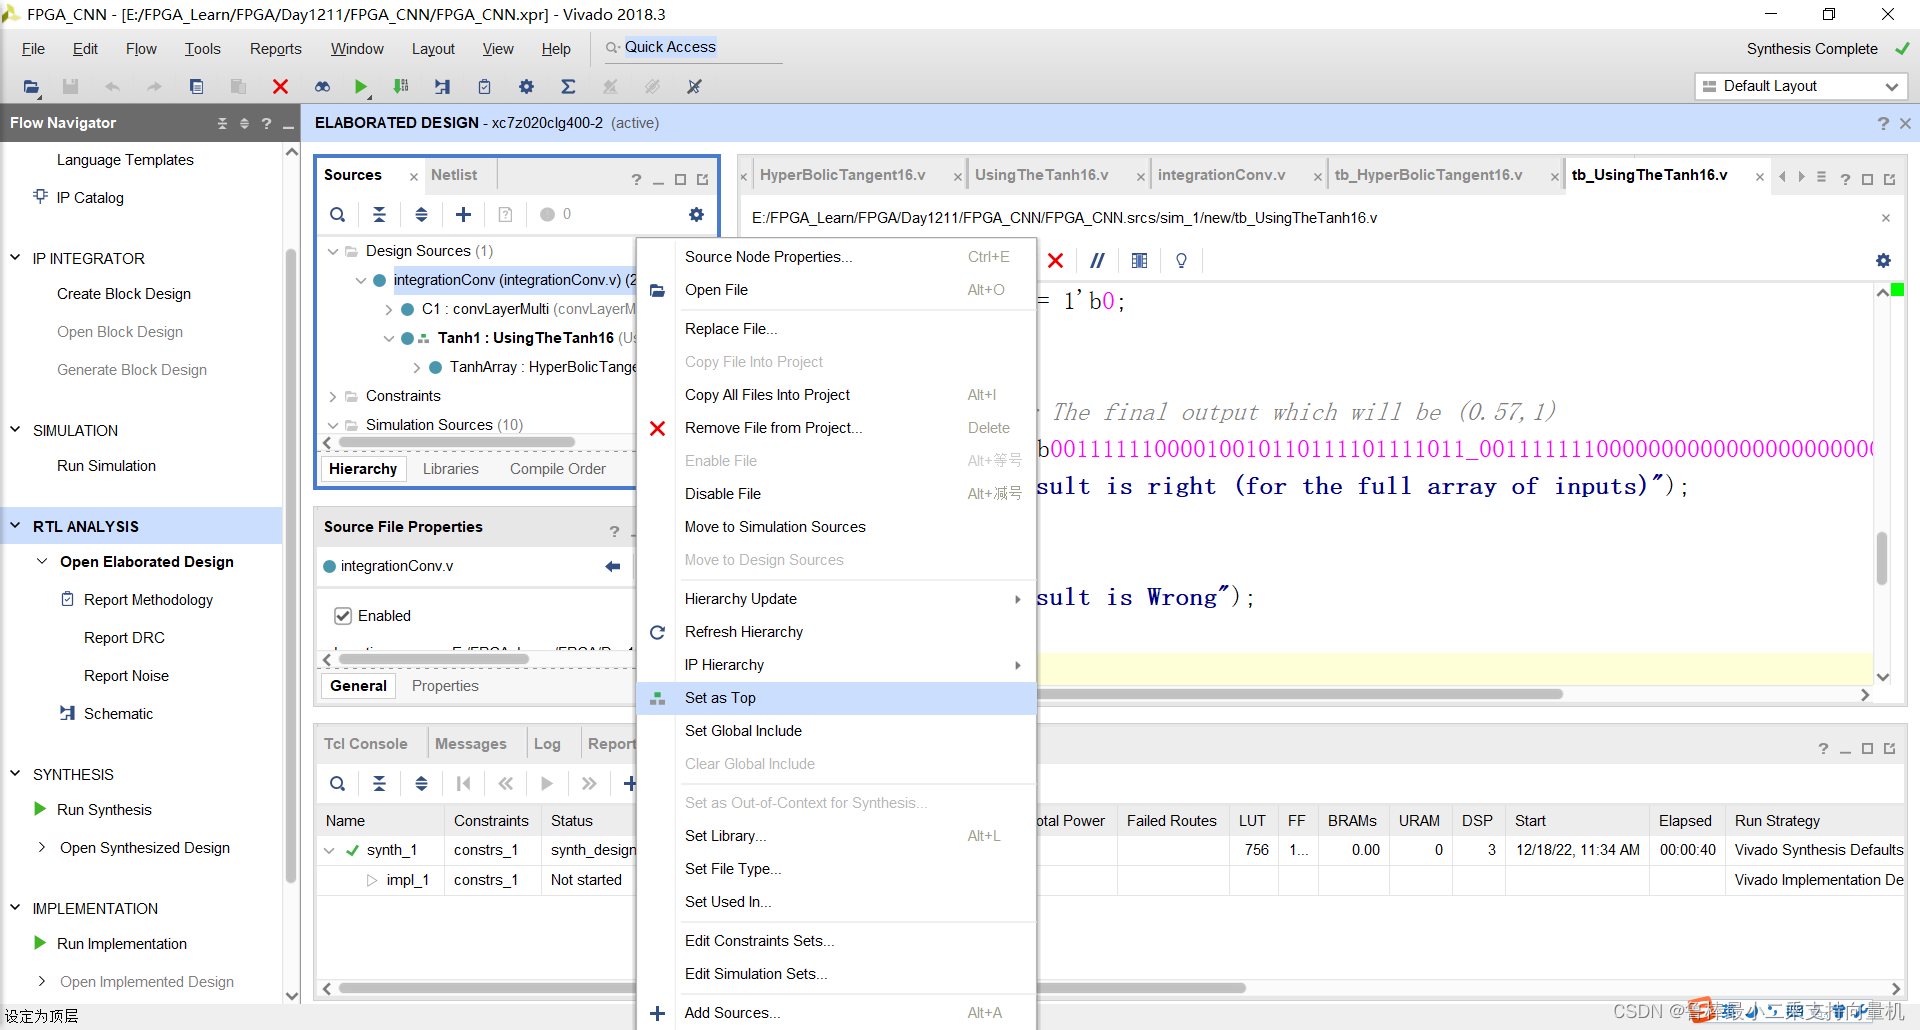
关闭上次的分析文件:
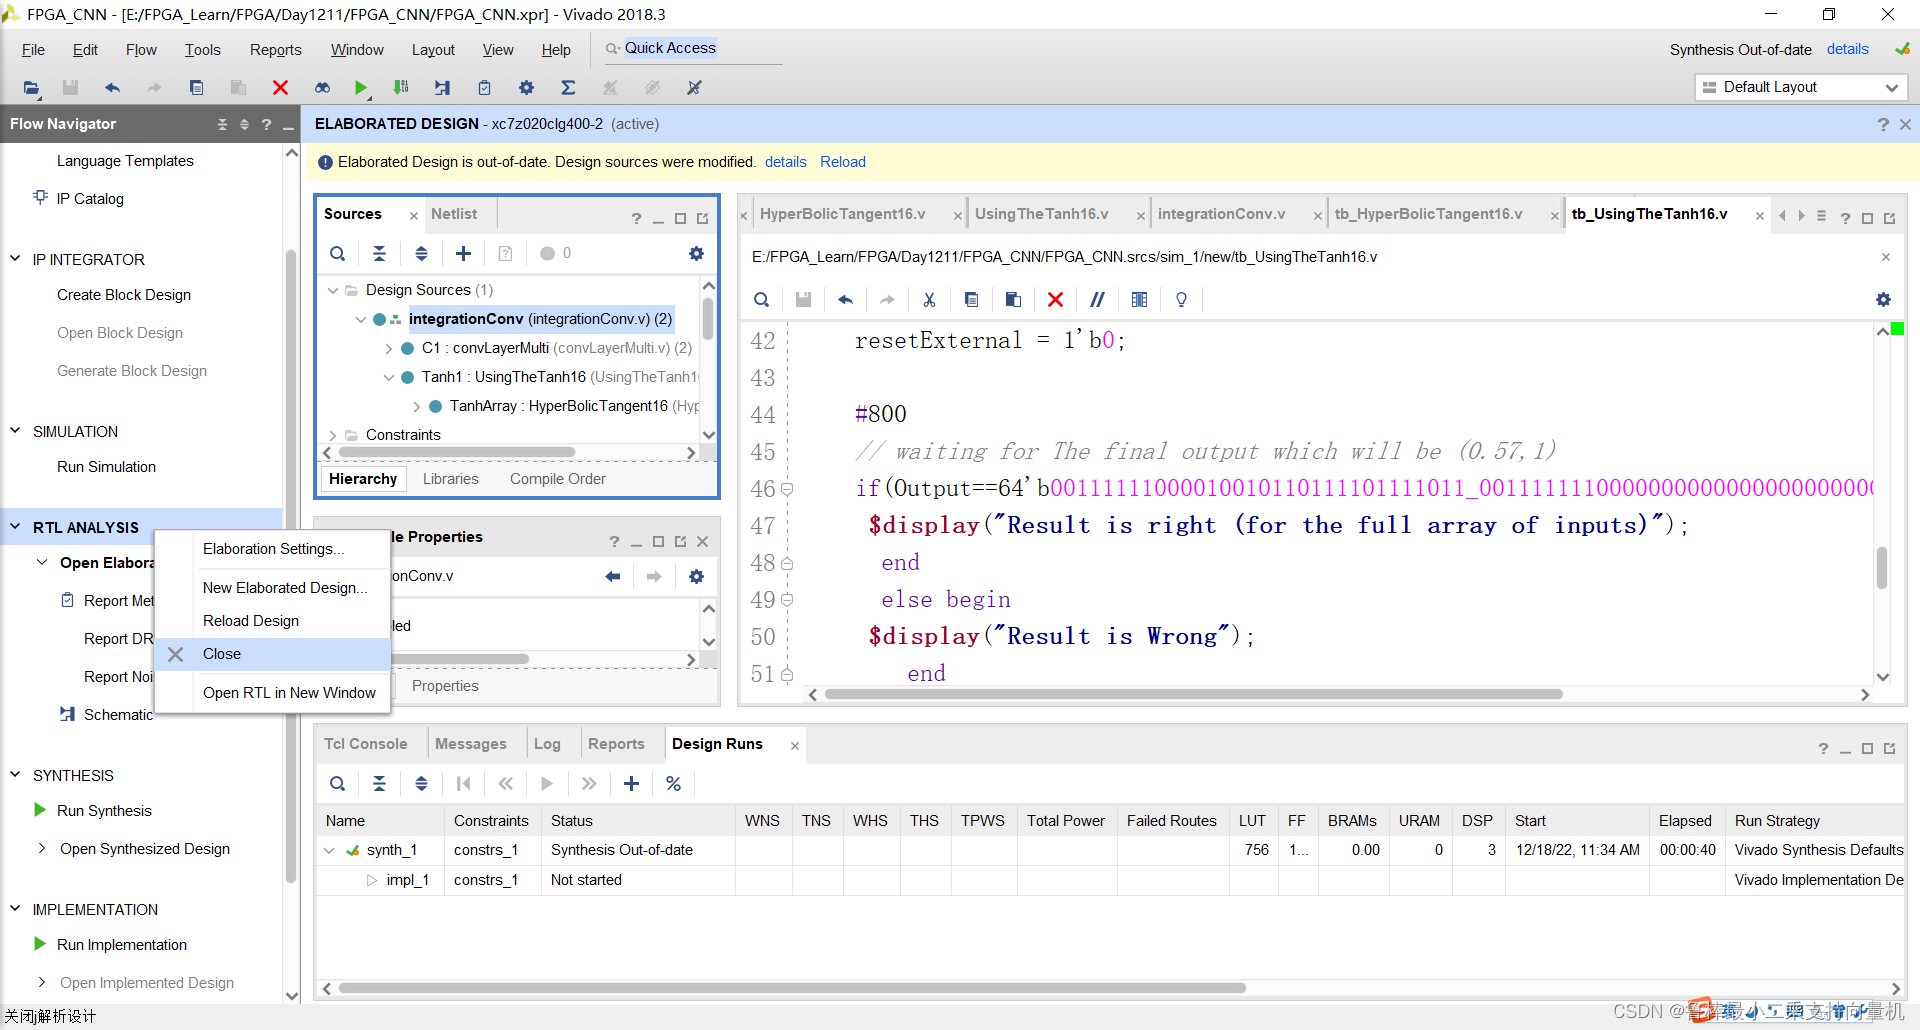
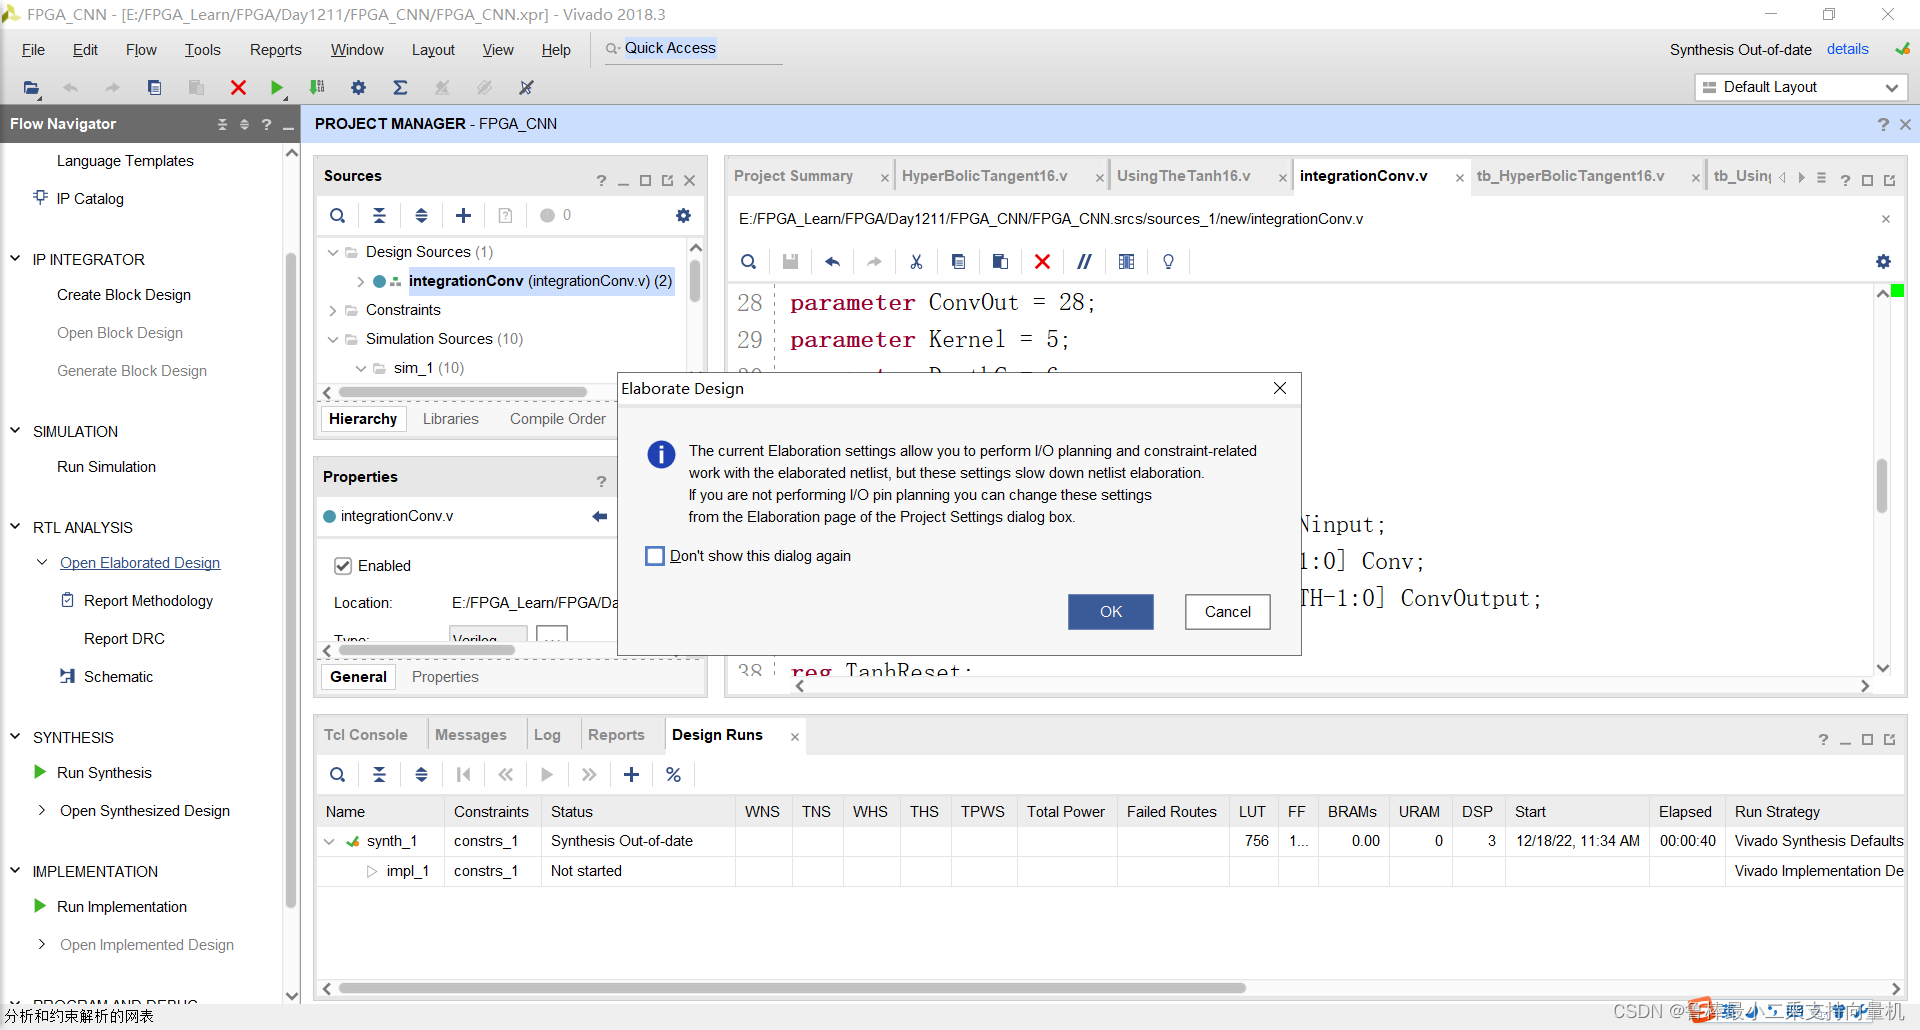
对设计进行分析,操作如图:
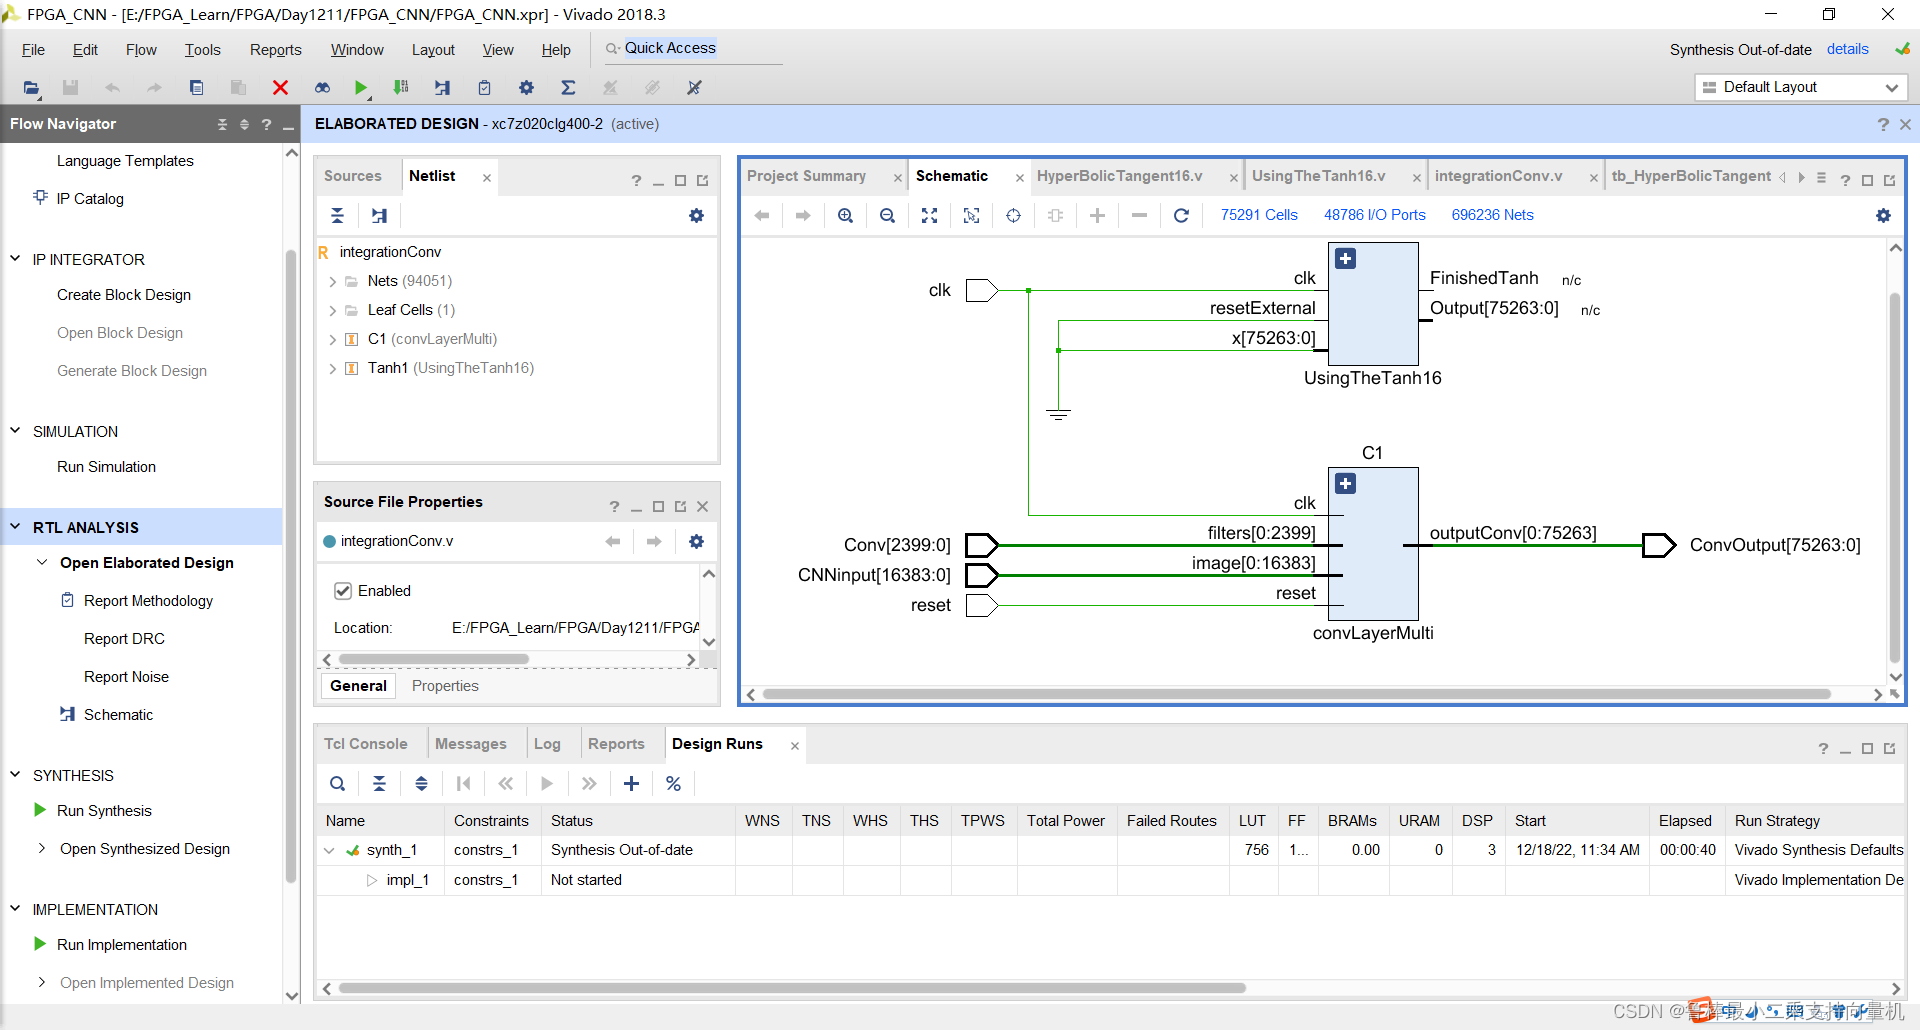
分析后的设计,Vivado自动生成原理图,如图:
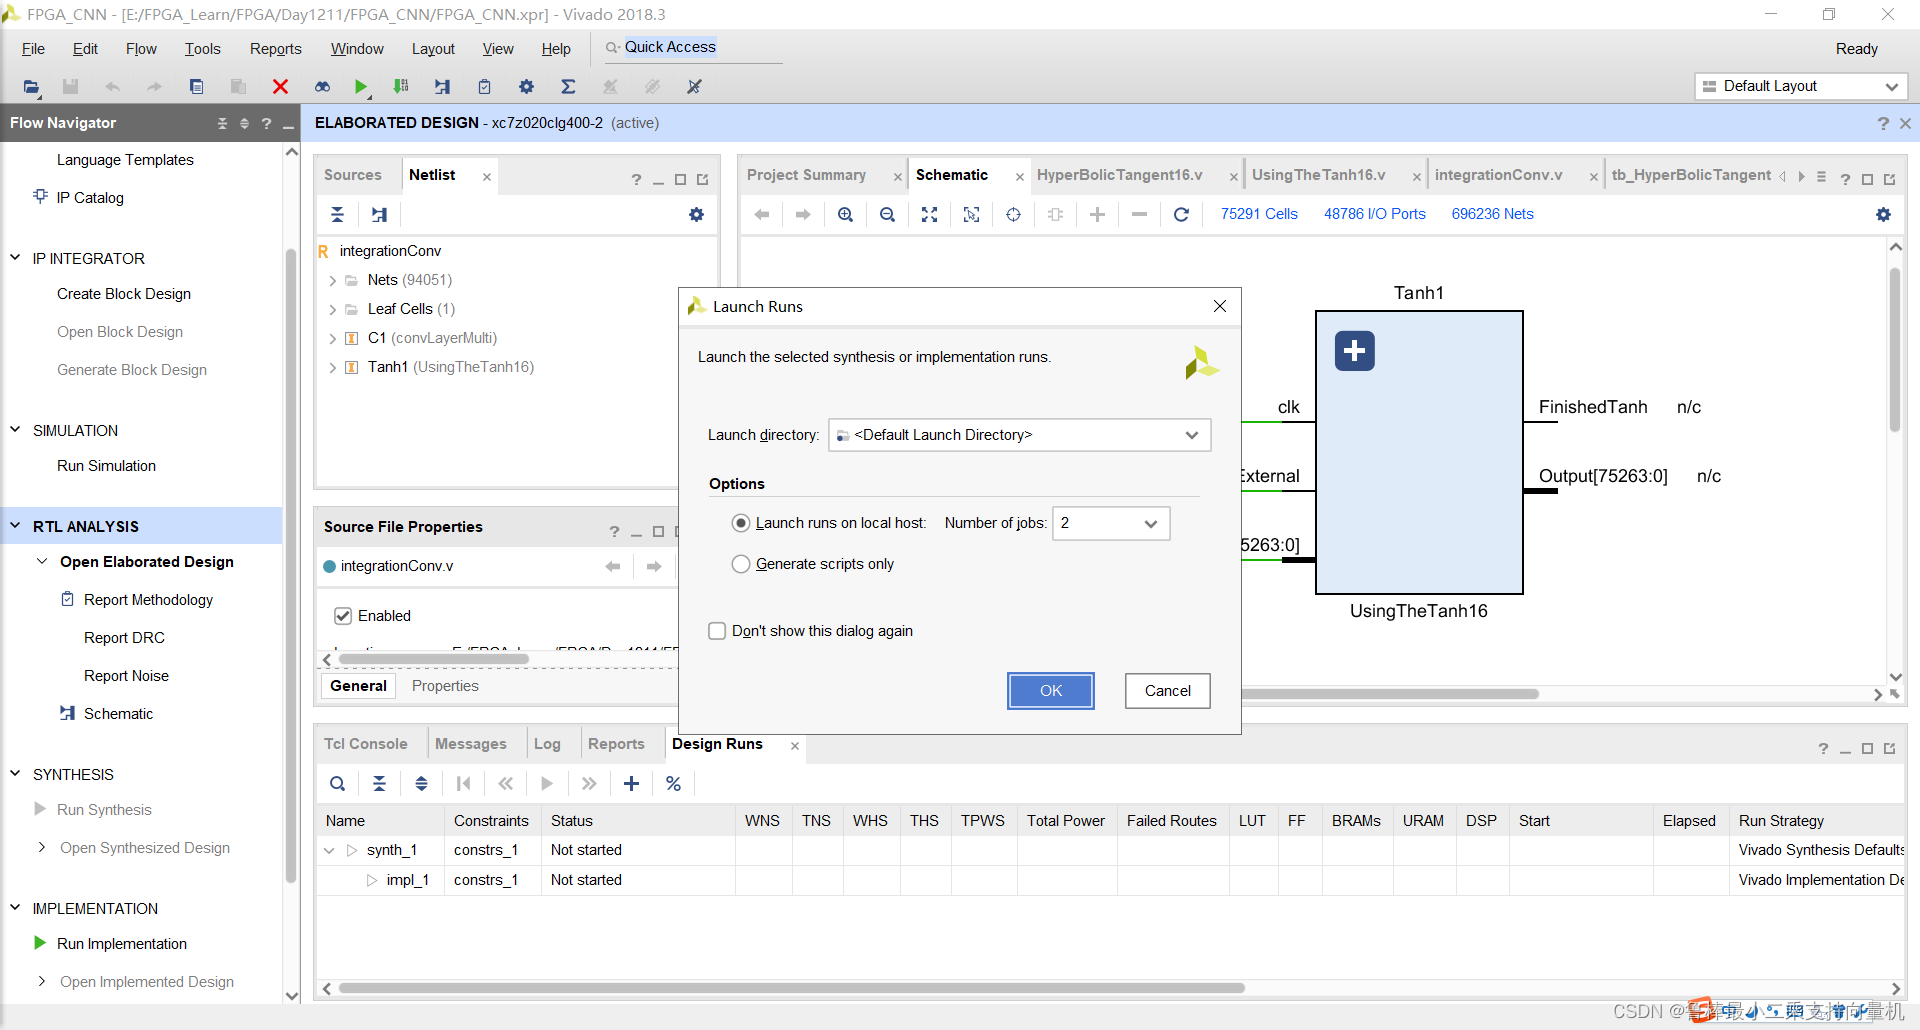
对设计进行综合,操作如图:
纪念一下,2022卡塔尔世界杯,阿根廷捧起大力神杯,梅西圆梦

希望本文对大家有帮助,上文若有不妥之处,欢迎指正
分享决定高度,学习拉开差距
我有一个模型:classItem项目有一个属性“商店”基于存储的值,我希望Item对象对特定方法具有不同的行为。Rails中是否有针对此的通用设计模式?如果方法中没有大的if-else语句,这是如何干净利落地完成的? 最佳答案 通常通过Single-TableInheritance. 关于ruby-on-rails-Rails-子类化模型的设计模式是什么?,我们在StackOverflow上找到一个类似的问题: https://stackoverflow.co
我在我的项目目录中完成了compasscreate.和compassinitrails。几个问题:我已将我的.sass文件放在public/stylesheets中。这是放置它们的正确位置吗?当我运行compasswatch时,它不会自动编译这些.sass文件。我必须手动指定文件:compasswatchpublic/stylesheets/myfile.sass等。如何让它自动运行?文件ie.css、print.css和screen.css已放在stylesheets/compiled。如何在编译后不让它们重新出现的情况下删除它们?我自己编译的.sass文件编译成compiled/t
我将应用程序升级到Rails4,一切正常。我可以登录并转到我的编辑页面。也更新了观点。使用标准View时,用户会更新。但是当我添加例如字段:name时,它不会在表单中更新。使用devise3.1.1和gem'protected_attributes'我需要在设备或数据库上运行某种更新命令吗?我也搜索过这个地方,找到了许多不同的解决方案,但没有一个会更新我的用户字段。我没有添加任何自定义字段。 最佳答案 如果您想允许额外的参数,您可以在ApplicationController中使用beforefilter,因为Rails4将参数
如果我使用ruby版本2.5.1和Rails版本2.3.18会怎样?我有基于rails2.3.18和ruby1.9.2p320构建的rails应用程序,我只想升级ruby的版本,而不是rails,这可能吗?我必须面对哪些挑战? 最佳答案 GitHub维护apublicfork它有针对旧Rails版本的分支,有各种变化,它们一直在运行。有一段时间,他们在较新的Ruby版本上运行较旧的Rails版本,而不是最初支持的版本,因此您可能会发现一些关于需要向后移植的有用提示。不过,他们现在已经有几年没有使用2.3了,所以充其量只能让更
目录前言滤波电路科普主要分类实际情况单位的概念常用评价参数函数型滤波器简单分析滤波电路构成低通滤波器RC低通滤波器RL低通滤波器高通滤波器RC高通滤波器RL高通滤波器部分摘自《LC滤波器设计与制作》,侵权删。前言最近需要学习放大电路和滤波电路,但是由于只在之前做音乐频谱分析仪的时候简单了解过一点点运放,所以也是相当从零开始学习了。滤波电路科普主要分类滤波器:主要是从不同频率的成分中提取出特定频率的信号。有源滤波器:由RC元件与运算放大器组成的滤波器。可滤除某一次或多次谐波,最普通易于采用的无源滤波器结构是将电感与电容串联,可对主要次谐波(3、5、7)构成低阻抗旁路。无源滤波器:无源滤波器,又称
项目介绍随着我国经济迅速发展,人们对手机的需求越来越大,各种手机软件也都在被广泛应用,但是对于手机进行数据信息管理,对于手机的各种软件也是备受用户的喜爱小学生兴趣延时班预约小程序的设计与开发被用户普遍使用,为方便用户能够可以随时进行小学生兴趣延时班预约小程序的设计与开发的数据信息管理,特开发了小程序的设计与开发的管理系统。小学生兴趣延时班预约小程序的设计与开发的开发利用现有的成熟技术参考,以源代码为模板,分析功能调整与小学生兴趣延时班预约小程序的设计与开发的实际需求相结合,讨论了小学生兴趣延时班预约小程序的设计与开发的使用。开发环境开发说明:前端使用微信微信小程序开发工具:后端使用ssm:VU
Transformers开始在视频识别领域的“猪突猛进”,各种改进和魔改层出不穷。由此作者将开启VideoTransformer系列的讲解,本篇主要介绍了FBAI团队的TimeSformer,这也是第一篇使用纯Transformer结构在视频识别上的文章。如果觉得有用,就请点赞、收藏、关注!paper:https://arxiv.org/abs/2102.05095code(offical):https://github.com/facebookresearch/TimeSformeraccept:ICML2021author:FacebookAI一、前言Transformers(VIT)在图
我在我的项目中有一个用户和一个管理员角色。我使用Devise创建了身份验证。在我的管理员角色中,我没有任何确认。在我的用户模型中,我有以下内容:devise:database_authenticatable,:confirmable,:recoverable,:rememberable,:trackable,:validatable,:timeoutable,:registerable#Setupaccessible(orprotected)attributesforyourmodelattr_accessible:email,:username,:prename,:surname,:
我已经找到了几个使用datamapper的示例,并且能够让它们正常工作。不过,所有这些示例都是针对sqlite数据库的。我正在尝试将数据映射器与postgresql一起使用。我将datamapper中的调用从sqlite3更改为postgres,并且我已经安装了dm-postgres-adapter。但它仍然不起作用。我还需要做什么? 最佳答案 与SQLite不同,PostgreSQL不将数据库存储在单个文件中。在你拥有createdyourdatabase之后,尝试这样的事情:DataMapper.setup:default,{:
我经常将预配置的lambda插入可枚举的方法中,例如“map”、“select”等。但是“注入(inject)”的行为似乎有所不同。例如与mult4=lambda{|item|item*4}然后(5..10).map&mult4给我[20,24,28,32,36,40]但是,如果我制作一个2参数lambda用于像这样的注入(inject),multL=lambda{|product,n|product*n}我想说(5..10).inject(2)&multL因为“inject”有一个可选的单个初始值参数,但这给了我......irb(main):027:0>(5..10).inject
