本篇为蓝牙HID系列篇章之一,本篇以红米K30(MIUI13即Android 12)手机作为蓝牙HID设备,可以与电脑、手机、平板等其他蓝牙主机进行配对从而实现鼠标触控板的功能。
蓝牙HID系列篇章:
蓝牙HID——将android设备变成蓝牙键盘(BluetoothHidDevice)
蓝牙HID——android利用手机来解锁电脑/平板/iPhone
蓝牙HID——Android手机注册HID时出现 Could not bind to Bluetooth (HID Device) Service with Intent * 的问题分析
Android 9开放了 BluetoothHidDevice 等HID相关的API,通过与系统蓝牙HID服务通信注册成蓝牙HID设备。首先通过 BluetoothProfile.HID_DEVICE 的描述类型得到 BluetoothHidDevice 抽象实例:
    private BluetoothAdapter mBtAdapter;
    private BluetoothHidDevice mHidDevice;

    private void callBluetooth() {
        Log.d(TAG, "callBluetooth");
        mBtAdapter = BluetoothAdapter.getDefaultAdapter();
        mBtAdapter.getProfileProxy(mContext, new BluetoothProfile.ServiceListener() {
            @Override
            public void onServiceConnected(int i, BluetoothProfile bluetoothProfile) {
                Log.d(TAG, "onServiceConnected:" + i);
                if (i == BluetoothProfile.HID_DEVICE) {
                    if (!(bluetoothProfile instanceof BluetoothHidDevice)) {
                        Log.e(TAG, "Proxy received but it's not BluetoothHidDevice");
                        return;
                    }
                    mHidDevice = (BluetoothHidDevice) bluetoothProfile;
                    registerBluetoothHid();
                }
            }

            @Override
            public void onServiceDisconnected(int i) {
                Log.d(TAG, "onServiceDisconnected:" + i);
            }
        }, BluetoothProfile.HID_DEVICE);
    }
再调用 BluetoothHidDevice.registerApp() 将 Android 设备注册成蓝牙HID设备:
    private BluetoothDevice mHostDevice;

    private final BluetoothHidDeviceAppQosSettings qosSettings
            = new BluetoothHidDeviceAppQosSettings(BluetoothHidDeviceAppQosSettings.SERVICE_BEST_EFFORT,
            800, 9, 0, 11250, BluetoothHidDeviceAppQosSettings.MAX
    );

    private final BluetoothHidDeviceAppSdpSettings mouseSdpSettings = new BluetoothHidDeviceAppSdpSettings(
            HidConfig.MOUSE_NAME, HidConfig.DESCRIPTION, HidConfig.PROVIDER,
            BluetoothHidDevice.SUBCLASS1_MOUSE, HidConfig.MOUSE_COMBO);

    private void registerBluetoothHid() {
        if (mHidDevice == null) {
            Log.e(TAG, "hid device is null");
            return;
        }

        mHidDevice.registerApp(mouseSdpSettings, null, qosSettings, Executors.newCachedThreadPool(), new BluetoothHidDevice.Callback() {
            @Override
            public void onAppStatusChanged(BluetoothDevice pluggedDevice, boolean registered) {
                Log.d(TAG, "onAppStatusChanged:" + (pluggedDevice != null ? pluggedDevice.getName() : "null") + " registered:" + registered);
                if (registered) {
                    Log.d(TAG, "paired devices: " + mHidDevice.getConnectionState(pluggedDevice));
                    if (pluggedDevice != null && mHidDevice.getConnectionState(pluggedDevice) != BluetoothProfile.STATE_CONNECTED) {
                        boolean result = mHidDevice.connect(pluggedDevice);
                        Log.d(TAG, "hidDevice connect:" + result);
                    }
                }
                if (mBluetoothHidStateListener != null) {
                    mBluetoothHidStateListener.onRegisterStateChanged(registered, pluggedDevice != null);
                }
            }

            @Override
            public void onConnectionStateChanged(BluetoothDevice device, int state) {
                Log.d(TAG, "onConnectionStateChanged:" + device + "  state:" + state);
                if (state == BluetoothProfile.STATE_CONNECTED) {
                    mHostDevice = device;
                }
                if (state == BluetoothProfile.STATE_DISCONNECTED) {
                    mHostDevice = null;
                }
                if (mBluetoothHidStateListener != null) {
                    mBluetoothHidStateListener.onConnectionStateChanged(state);
                }
            }
        });
    }
蓝牙鼠标Mouse的描述信息如下,主要 为 MOUSE_COMBO 的描述协议,正确的描述协议才能成功与其他设备通信。
public class HidConfig {
    public final static String MOUSE_NAME = "VV Mouse";

    public final static String DESCRIPTION = "VV for you";

    public final static String PROVIDER = "VV";

    public static final byte[] MOUSE_COMBO = {
            (byte) 0x05, (byte) 0x01,              // USAGE_PAGE (Generic Desktop)
            (byte) 0x09, (byte) 0x02,              // USAGE (Mouse)
            (byte) 0xa1, (byte) 0x01,              // COLLECTION (Application)
            (byte) 0x85, (byte) 0x04,              // REPORT_ID (4)
            (byte) 0x09, (byte) 0x01,              //  USAGE (Pointer)
            (byte) 0xa1, (byte) 0x00,              //  COLLECTION (Physical)
            (byte) 0x05, (byte) 0x09,              //   USAGE_PAGE (Button)
            (byte) 0x19, (byte) 0x01,              //   USAGE_MINIMUM (Button 1)
            (byte) 0x29, (byte) 0x02,              //   USAGE_MAXIMUM (Button 2)
            (byte) 0x15, (byte) 0x00,              //   LOGICAL_MINIMUM (0)
            (byte) 0x25, (byte) 0x01,              //   LOGICAL_MAXIMUM (1)
            (byte) 0x95, (byte) 0x03,              //   REPORT_COUNT (3)
            (byte) 0x75, (byte) 0x01,              //   REPORT_SIZE (1)
            (byte) 0x81, (byte) 0x02,              //   INPUT (Data,Var,Abs)
            (byte) 0x95, (byte) 0x01,              //   REPORT_COUNT (1)
            (byte) 0x75, (byte) 0x05,              //   REPORT_SIZE (5)
            (byte) 0x81, (byte) 0x03,              //   INPUT (Cnst,Var,Abs)
            (byte) 0x05, (byte) 0x01,              //   USAGE_PAGE (Generic Desktop)
            (byte) 0x09, (byte) 0x30,              //   USAGE (X)
            (byte) 0x09, (byte) 0x31,              //   USAGE (Y)
            (byte) 0x09, (byte) 0x38,              //   USAGE (Wheel)
            (byte) 0x15, (byte) 0x81,              //   LOGICAL_MINIMUM (-127)
            (byte) 0x25, (byte) 0x7F,              //   LOGICAL_MAXIMUM (127)
            (byte) 0x75, (byte) 0x08,              //   REPORT_SIZE (8)
            (byte) 0x95, (byte) 0x03,              //   REPORT_COUNT (3)
            (byte) 0x81, (byte) 0x06,              //   INPUT (Data,Var,Rel)
            //水平滚轮
            (byte) 0x05, (byte) 0x0c,              //   USAGE_PAGE (Consumer Devices)
            (byte) 0x0a, (byte) 0x38, (byte) 0x02, //   USAGE (AC Pan)
            (byte) 0x15, (byte) 0x81,              //   LOGICAL_MINIMUM (-127)
            (byte) 0x25, (byte) 0x7f,              //   LOGICAL_MAXIMUM (127)
            (byte) 0x75, (byte) 0x08,              //   REPORT_SIZE (8)
            (byte) 0x95, (byte) 0x01,              //   REPORT_COUNT (1)
            (byte) 0x81, (byte) 0x06,              //   INPUT (Data,Var,Rel)

            (byte) 0xc0,                           //  END_COLLECTION
            (byte) 0xc0,                           // END_COLLECTION
    };
在注册完成后启动设备发现,让HID能被其他设备发现,下面ActivityResultLauncher.launch(new Intent(BluetoothAdapter.ACTION_REQUEST_DISCOVERABLE) 相当于调用 BluetoothAdapter.setScanMode() 的隐藏API
    private ActivityResultLauncher<Intent> mActivityResultLauncher;
    @Override
    protected void onCreate(Bundle savedInstanceState) {
        super.onCreate(savedInstanceState);
        setContentView(R.layout.activity_mouse);

        mActivityResultLauncher = registerForActivityResult(new ActivityResultContracts.StartActivityForResult(), result -> {
            Log.d(TAG, "onActivityResult:" + result.toString());
        });
    }

   @Override
    public void onRegisterStateChanged(boolean registered, boolean hasDevice) {
        if (registered) {
            if (!hasDevice) {
                // startActivityForResult(new Intent(BluetoothAdapter.ACTION_REQUEST_DISCOVERABLE), 1);
                mActivityResultLauncher.launch(new Intent(BluetoothAdapter.ACTION_REQUEST_DISCOVERABLE));
            }
        }
    }
ActivityResultLauncher 的相关方法也可用 startActivityForResult(new Intent(BluetoothAdapter.ACTION_REQUEST_DISCOVERABLE), REQUEST_CODE) 来替代,但 startActivityForResult() 是废弃的方法,不建议使用。
接下来与蓝牙主机(电脑、手机等)进行蓝牙配对,已配对过需要取消配对。配对完成即可实现对蓝牙主机的鼠标触摸控制。
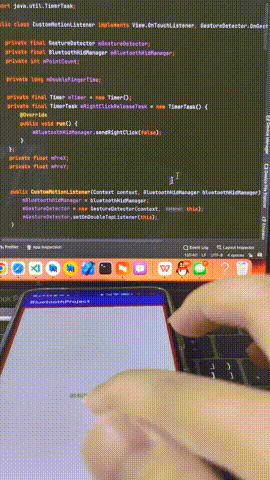
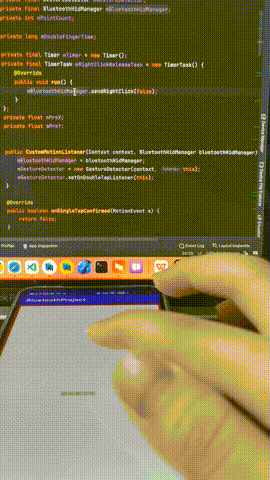
手势识别通过对触摸事件以及手势监听进行各种手势的判断(移动鼠标、左键单击、左键双击、右键双指单击、双指垂直/水平滚动)。
CustomMotionListener customMotionListener = new CustomMotionListener(this, mBluetoothHidManager);
findViewById(R.id.layout_touch).setOnTouchListener(customMotionListener);
手势逻辑处理代码如下:
package com.example.bluetoothproject;

import android.content.Context;
import android.view.GestureDetector;
import android.view.MotionEvent;
import android.view.View;
import android.view.ViewConfiguration;

import org.apache.commons.lang3.concurrent.BasicThreadFactory;

import java.util.concurrent.ScheduledExecutorService;
import java.util.concurrent.ScheduledThreadPoolExecutor;
import java.util.concurrent.TimeUnit;

public class CustomMotionListener implements View.OnTouchListener, GestureDetector.OnGestureListener, GestureDetector.OnDoubleTapListener {

    private final GestureDetector mGestureDetector;
    private BluetoothHidManager mBluetoothHidManager;
    private int mPointCount;

    private long mDoubleFingerTime;

    private final ScheduledExecutorService mExecutorService;

    private float mPreX;
    private float mPreY;
    private boolean mLongPress;

    public CustomMotionListener(Context context, BluetoothHidManager bluetoothHidManager) {
        mBluetoothHidManager = bluetoothHidManager;
        mGestureDetector = new GestureDetector(context, this);
        mGestureDetector.setOnDoubleTapListener(this);
        mExecutorService = new ScheduledThreadPoolExecutor(1,
                new BasicThreadFactory.Builder().namingPattern("mouse-schedule-pool-%d").daemon(true).build());
    }

    @Override
    public boolean onSingleTapConfirmed(MotionEvent e) {
        return false;
    }

    @Override
    public boolean onDoubleTap(MotionEvent e) {
        return false;
    }

    @Override
    public boolean onDoubleTapEvent(MotionEvent e) {
        //左键单指双击(选中文本的效果)
        if (e.getAction() == MotionEvent.ACTION_DOWN) {
            mBluetoothHidManager.sendLeftClick(true);
        } else if (e.getAction() == MotionEvent.ACTION_UP) {
            mBluetoothHidManager.sendLeftClick(false);
        }
        return true;
    }

    @Override
    public boolean onDown(MotionEvent e) {
        return false;
    }

    @Override
    public void onShowPress(MotionEvent e) {
    }

    @Override
    public boolean onSingleTapUp(MotionEvent e) {
        //左键单击
        mBluetoothHidManager.sendLeftClick(true);
        mBluetoothHidManager.sendLeftClick(false);
        return true;
    }

    @Override
    public boolean onScroll(MotionEvent e1, MotionEvent e2, float distanceX, float distanceY) {
        //双指滚动,x为水平滚动,y为垂直滚动,消抖处理
        if (mPointCount == 2) {
            if (Math.abs(distanceX) > Math.abs(distanceY))  {
                distanceX = distanceX > 0 ? 1 : distanceX < 0 ? -1 : 0;
                distanceY = 0;
            } else {
                distanceY = distanceY > 0 ? -1 : distanceY < 0 ? 1 : 0;
                distanceX = 0;
            }

            mBluetoothHidManager.sendWheel((byte) (distanceX), (byte) (distanceY));
        }
        return false;
    }

    @Override
    public void onLongPress(MotionEvent e) {
        //单键长按效果
        mBluetoothHidManager.sendLeftClick(true);
        mLongPress = true;
    }

    @Override
    public boolean onFling(MotionEvent e1, MotionEvent e2, float velocityX, float velocityY) {
        return false;
    }

    @Override
    public boolean onTouch(View v, MotionEvent event) {
        float x = event.getX();
        float y = event.getY();
        if (mGestureDetector.onTouchEvent(event)) {
            return true;
        }
        mPointCount = event.getPointerCount();

        switch (event.getActionMasked()) {
            case MotionEvent.ACTION_POINTER_DOWN:
                //双指单击代表右键记录时间
                if (event.getPointerCount() == 2) {
                    mDoubleFingerTime = System.currentTimeMillis();
                }
                break;
            case MotionEvent.ACTION_MOVE:
                //单指代表移动鼠标
                if (event.getPointerCount() == 1) {
                    float dx = x - mPreX;
                    if (dx > 127) dx = 127;
                    if (dx < -128) dx = -128;

                    float dy = y - mPreY;
                    if (dy > 127) dy = 127;
                    if (dy < -128) dy = -128;

                    mBluetoothHidManager.senMouse((byte) dx, (byte) dy);
                } else {
                    mBluetoothHidManager.senMouse((byte) 0, (byte) 0);
                }
                break;
            case MotionEvent.ACTION_UP:
                if (mLongPress) {
                    mBluetoothHidManager.sendLeftClick(false);
                    mLongPress = false;
                }
                break;
            case MotionEvent.ACTION_POINTER_UP:
                //双指按下代表右键
                if (event.getPointerCount() == 2 && System.currentTimeMillis() - mDoubleFingerTime < ViewConfiguration.getDoubleTapTimeout()) {
                    mBluetoothHidManager.sendRightClick(true);
                    //延时释放避免无效
                    mExecutorService.scheduleWithFixedDelay(new Runnable() {
                        @Override
                        public void run() {
                            mBluetoothHidManager.sendRightClick(false);
                        }
                    }, 0, 50, TimeUnit.MILLISECONDS);                }
                break;
            default:
                break;
        }
        mPreX = x;
        mPreY = y;
        return true;
    }
}
向蓝牙主机发送的鼠标触摸按键的报告如下:
    private boolean mLeftClick;
    private boolean mRightClick;

    public void sendLeftClick(boolean click) {
        mLeftClick = click;
        senMouse((byte) 0x00, (byte) 0x00);
    }

    public void sendRightClick(boolean click) {
        mRightClick = click;
        senMouse((byte) 0x00, (byte) 0x00);
    }

    public void senMouse(byte dx, byte dy) {
        if (mHidDevice == null) {
            Log.e(TAG, "senMouse failed,  hid device is null!");
            return;
        }
        if (mHostDevice == null) {
            Log.e(TAG, "senMouse failed,  hid device is not connected!");
            return;
        }

        byte[] bytes = new byte[5];
        //bytes[0]字节:bit0: 1表示左键按下 0表示左键抬起 | bit1: 1表示右键按下 0表示右键抬起 | bit2: 1表示中键按下 | bit7~3:补充的常数,无意义,这里为0即可
        bytes[0] = (byte) (bytes[0] | (mLeftClick ? 1 : 0));
        bytes[0] = (byte) (bytes[0] | (mRightClick ? 1 : 0) << 1);
        bytes[1] = dx;
        bytes[2] = dy;
        Log.d(TAG, "senMouse   Left:" + mLeftClick+ ",Right:" + mRightClick + ",bytes: " + BluetoothUtils.bytesToHexString(bytes));
        mHidDevice.sendReport(mHostDevice, 4, bytes);
    }

    public void sendWheel(byte hWheel, byte vWheel) {
        if (mHidDevice == null) {
            Log.e(TAG, "sendWheel failed,  hid device is null!");
            return;
        }
        if (mHostDevice == null) {
            Log.e(TAG, "sendWheel failed,  hid device is not connected!");
            return;
        }

        byte[] bytes = new byte[5];
        bytes[3] = vWheel; //垂直滚轮
        bytes[4] = hWheel; //水平滚轮
        Log.d(TAG, "sendWheel vWheel:" + vWheel + ",hWheel:" + hWheel);
        mHidDevice.sendReport(mHostDevice, 4, bytes);
    }
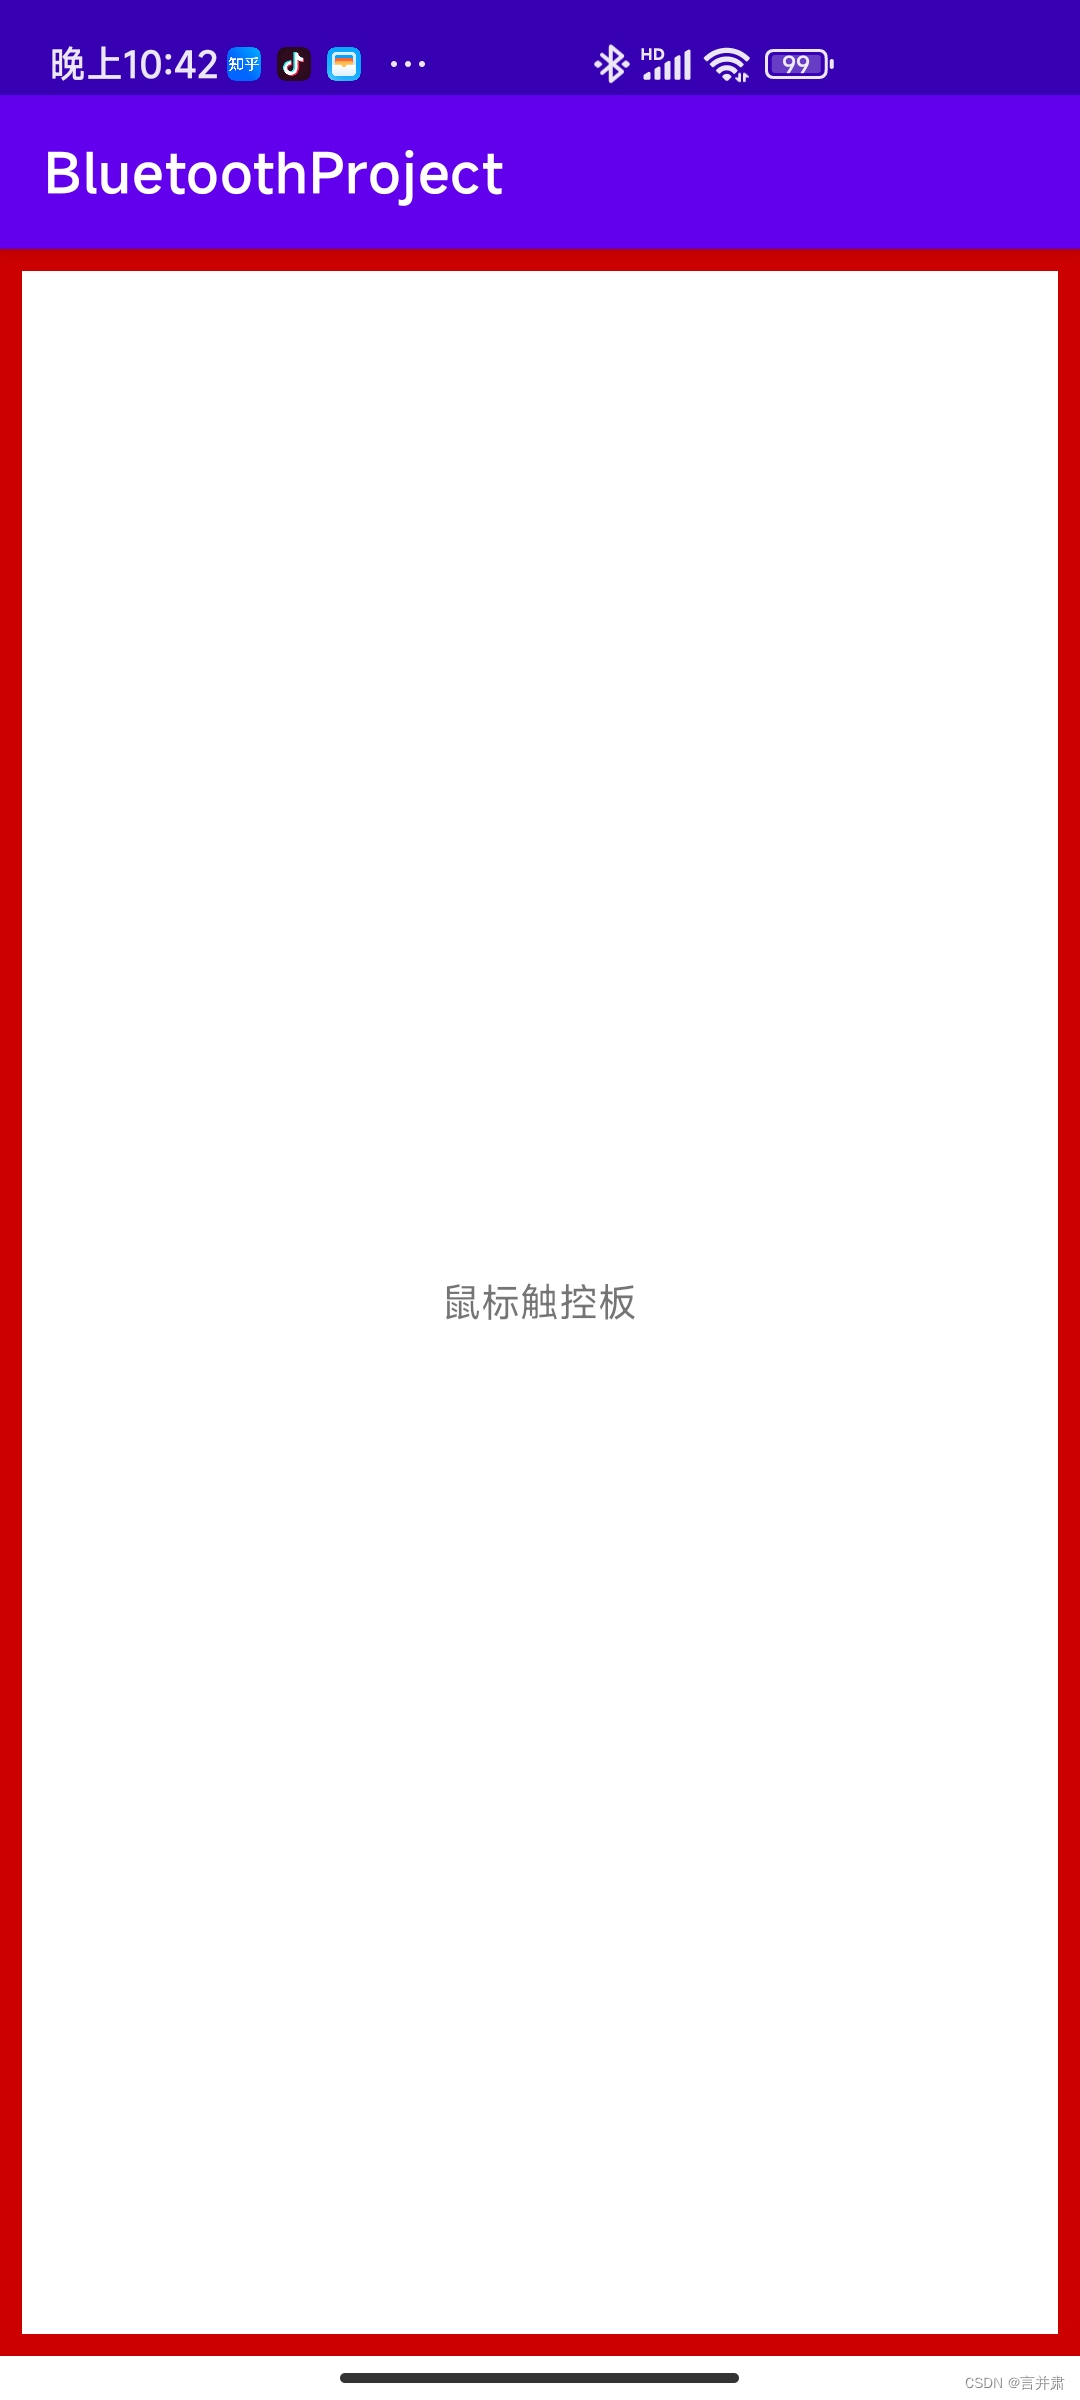
实现以上步骤即可将手机变成蓝牙鼠标/触控板,下面是实现的效果:
鼠标移动:
左键单击:
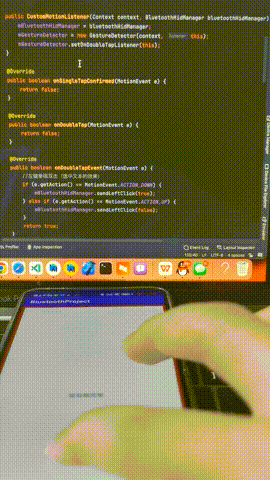
左键单指快速双击:
右键双指单击:
双指水平左右滚动:
双指垂直上下滚动:
完整视频效果展示:
蓝牙HID——将android设备变成蓝牙鼠标/触控板
在应用开发中,有时候我们需要获取系统的设备信息,用于数据上报和行为分析。那在鸿蒙系统中,我们应该怎么去获取设备的系统信息呢,比如说获取手机的系统版本号、手机的制造商、手机型号等数据。1、获取方式这里分为两种情况,一种是设备信息的获取,一种是系统信息的获取。1.1、获取设备信息获取设备信息,鸿蒙的SDK包为我们提供了DeviceInfo类,通过该类的一些静态方法,可以获取设备信息,DeviceInfo类的包路径为:ohos.system.DeviceInfo.具体的方法如下:ModifierandTypeMethodDescriptionstatic StringgetAbiList()Obt
最近因为项目需要,需要将Android手机系统自带的某个系统软件反编译并更改里面某个资源,并重新打包,签名生成新的自定义的apk,下面我来介绍一下我的实现过程。APK修改,分为以下几步:反编译解包,修改,重打包,修改签名等步骤。安卓apk修改准备工作1.系统配置好JavaJDK环境变量2.需要root权限的手机(针对系统自带apk,其他软件免root)3.Auto-Sign签名工具4.apktool工具安卓apk修改开始反编译本文拿Android系统里面的Settings.apk做demo,具体如何将apk获取出来在此就不过多介绍了,直接进入主题:按键win+R输入cmd,打开命令窗口,并将路
Devise是一个Ruby库,它为我提供了这个User类:classUser当写入:confirmable时,注册时会发送一封确认邮件。上周我不得不批量创建300个用户,所以我在恢复之前注释掉了:confirmable几分钟。现在我正在为用户批量创建创建一个UI,因此我需要即时添加/删除:confirmable。(我也可以直接修改Devise的源码,但我宁愿不去调和它)问题:如何即时添加/删除:confirmable? 最佳答案 WayneConrad的解决方案:user=User.newuser.skip_confirmation
我有一个Ruby文件,我将它作为rubyfile.rb"parameters"运行。我更喜欢将它作为regtask参数运行,而不必每次都包含ruby和文件名。我希望它与ls处于同一级别。我将如何做到这一点? 最佳答案 编辑你的文件,确保这是第一行,这样你的系统就知道如何执行你的文件:#!/usr/bin/envruby接下来,更改文件的权限以使其可执行:chmoda+xfile.rb最后,重命名并将其移动到将要执行的位置,而无需编写其完整路径:mkdir-p~/binmvfile.rb~/bin/regtask(如果~/bin存在,
我正在尝试使用Ruby中的SeleniumWebDriver2.4模拟鼠标移动如果我运行测试,是否应该看到鼠标在我的屏幕上移动?我很困惑。我试过很多不同的方法示例代码:require'selenium-webdriver'driver=Selenium::WebDriver.for:firefoxdriver.navigate.to'http://www.google.com'element=driver.find_element(:id,'gbqfba')那我试过了driver.action.move_to(element).performdriver.mouse.move_to(e
有人知道如何在SeleniumRubyWebdriver中将鼠标悬停在元素上吗?我的代码是这样的:el=driver.find_element(:css=>"#foo")driver.move_toel#HowdoItriggeramouseovereventonthiselement?我在Linux32位的Firefox中使用selenium-webdrivergem。 最佳答案 我使用了driver.action.move_to(el).perform,它与其他答案略有不同,所以我想为了完整起见我会把它包括在内。
我正在使用Gosugem进行一些图形编程。问题是,当我创建一个窗口时,我的鼠标指针被隐藏了。我可以猜到鼠标在某个时刻的位置,我可以凭直觉点击,但我的用户可能不会。如何显示指针? 最佳答案 如果你想使用系统光标你可以这样做classWindow查看libgosu的文档RubyGosurdocReference/Window 关于ruby-为什么Gosu隐藏我的鼠标指针?,我们在StackOverflow上找到一个类似的问题: https://stackoverf
我有一个问题,当我将一些Date对象作为参数传递给不同的方法时,它们会变成String。在我的Rails应用程序中,有一项服务调用Sidekiqworker来执行模型中的方法。初始化服务对象时,它具有Date实例方法。我已经使用调试器确认了它们的类型。它使用perform_async将实例方法传递给Sidekiqworker。perform方法是Sidekiq的一种单行方法,它调用模型中的方法,将从服务接收的参数传递给模型。在模型端,从Sidekiqworker传入的参数不再是Date类型。它们是String(例如“2015-01-20”)。我已经使用degugger确认了这一点。关于
第一章Selenium+WebDriver环境搭建第二章Selenium定位方式第三章元素常用属性第四章自动化中的三种等待第五章自动化浏览器设置及句柄、窗口切换操作第六章鼠标、键盘操作第七章javascript在自动化中的应用第八章unittest&断言第九章ddt数据驱动第十章测试框架搭建过程Python+Selenium+BeautifulReport文章目录一、鼠标操作二、键盘操作一、鼠标操作1、在web测试中,鼠标的操作包含在ActionChains类中,经常用到的有单击、双击、右击、拖动等操作。2、在使用鼠标操作前需要先导入ActionChains类包:fromselenium.we
运行有问题或需要源码请点赞关注收藏后评论区留言一、利用ContentResolver读写联系人在实际开发中,普通App很少会开放数据接口给其他应用访问。内容组件能够派上用场的情况往往是App想要访问系统应用的通讯数据,比如查看联系人,短信,通话记录等等,以及对这些通讯数据及逆行增删改查。首先要给AndroidMaifest.xml中添加响应的权限配置 下面是往手机通讯录添加联系人信息的例子效果如下分成三个步骤先查出联系人的基本信息,然后查询联系人号码,再查询联系人邮箱代码 ContactAddActivity类packagecom.example.chapter07;importandroid