GPT想必是最近互联网最火的话题了,作为一个Unity开发者,今天来介绍一下如何在Unity中使用GPT。
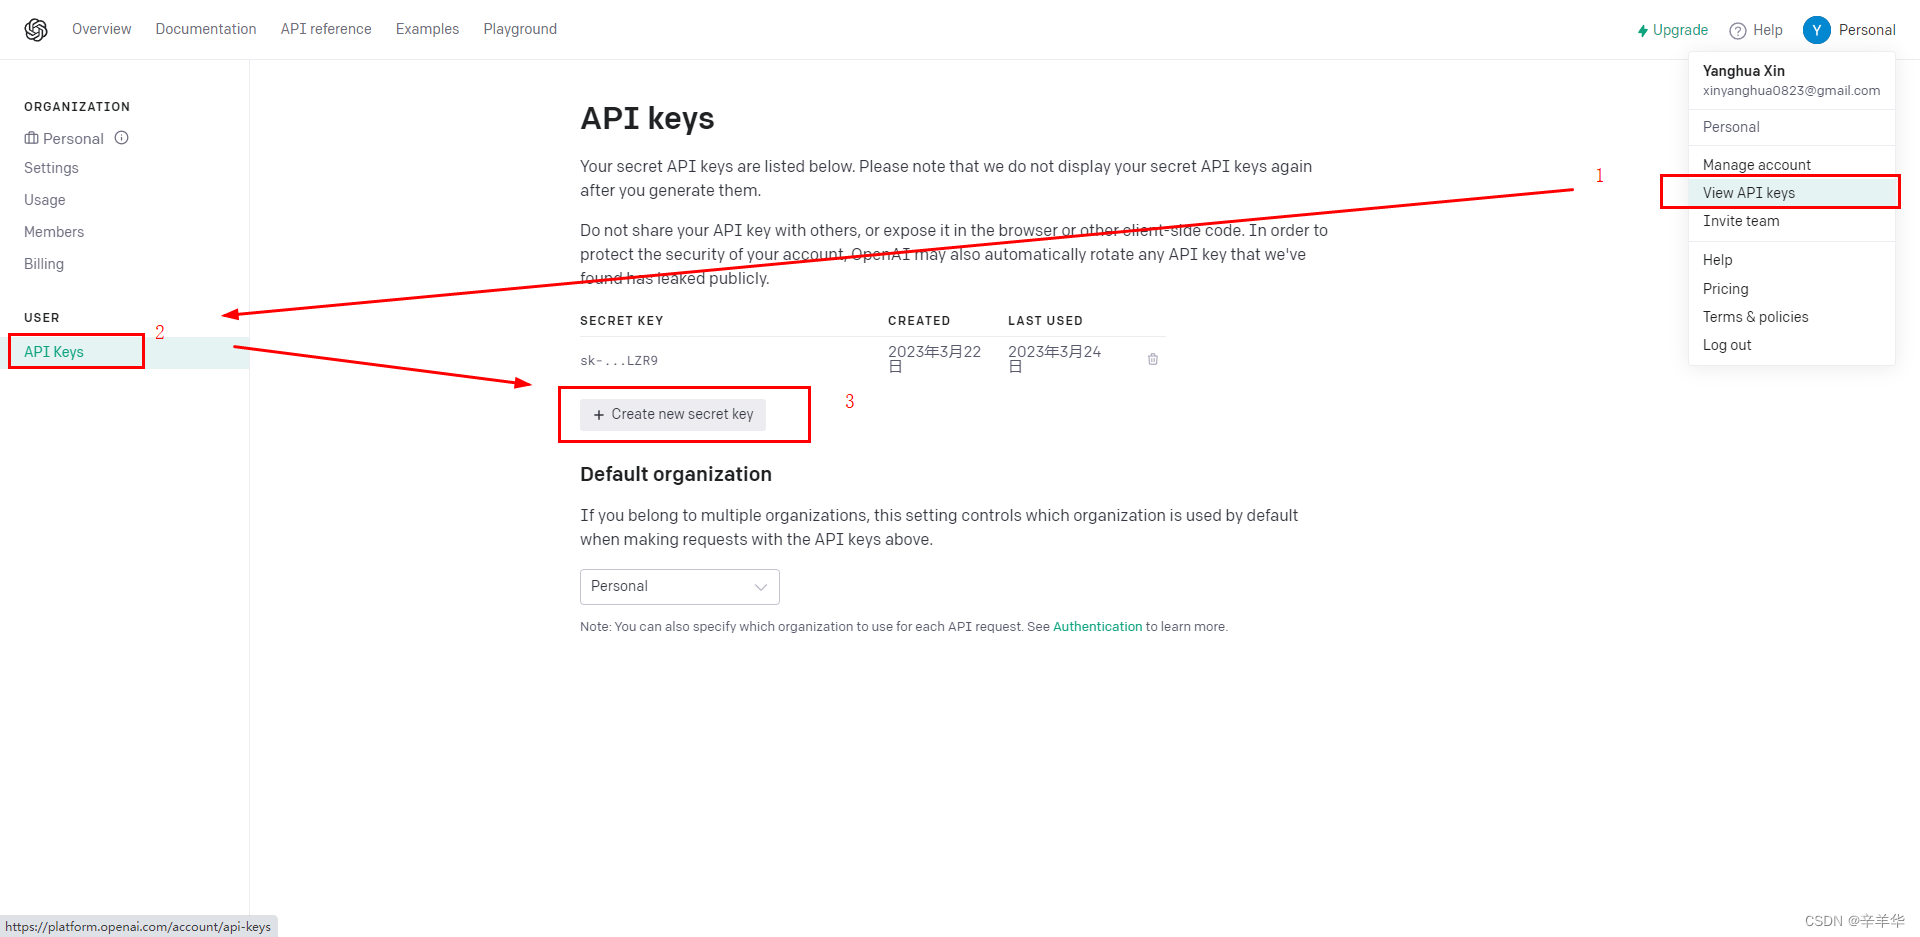
使用GPT的API首先要获得密钥,如下进入OpenAI官网(https://platform.openai.com/account/api-keys)–>选择自己的账号–>查看API密钥,然后创建一个自己的密钥(创建的后要记得复制好密钥)。
进入OpenAI文档(https://platform.openai.com/docs/models)页面可以看到目前主要可以使用的AI模型,如下从GPT3.0到GPT4.0。
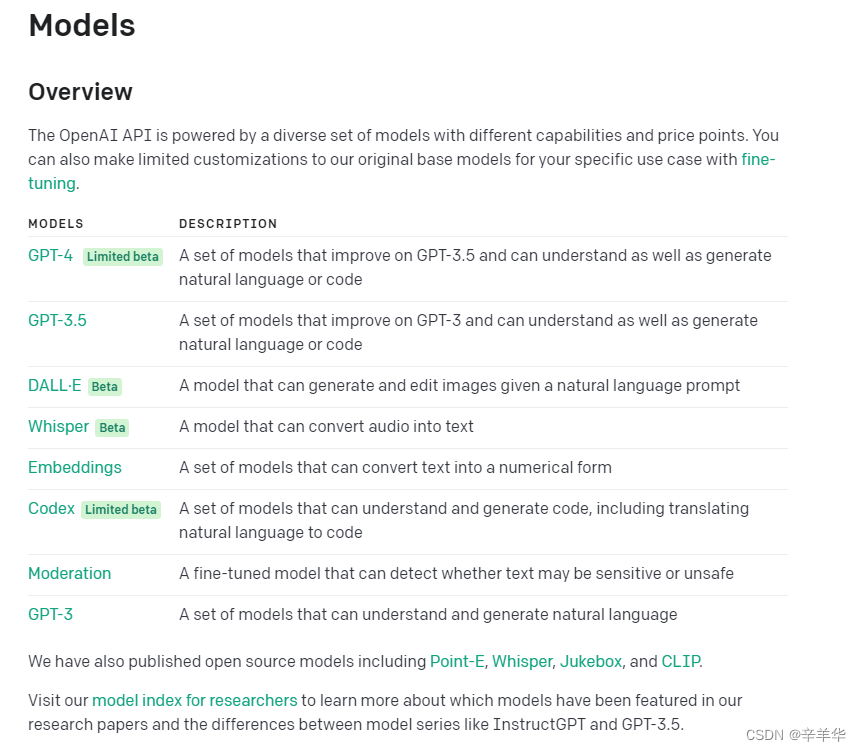
目前可以免费使用的最高版本就是GPT-3.5,所以这里主要来介绍一下如何集成 gpt-3.5-turbo。
三、gpt-3.5-turbo 集成
进入API文档(https://platform.openai.com/docs/api-reference/chat/create)选择Chat,就是gpt-3.5-turbo的使用文档。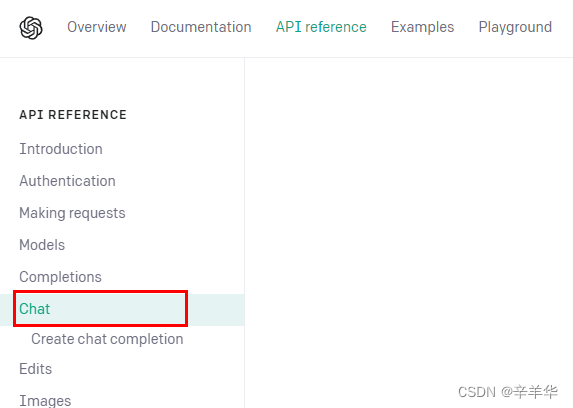
OpenAI的接口访问主要都是使用Post请求,这里gpt-3.5-turbo的Post地址是:
https://api.openai.com/v1/chat/completions
请求与回调内容都是Json。
发送请求格式Request:
{
  "model": "gpt-3.5-turbo",
  "messages": [{"role": "user", "content": "Hello!"}]
}
回调相应格式Respond:
{
  "id": "chatcmpl-123",
  "object": "chat.completion",
  "created": 1677652288,
  "choices": [{
    "index": 0,
    "message": {
      "role": "assistant",
      "content": "\n\nHello there, how may I assist you today?",
    },
    "finish_reason": "stop"
  }],
  "usage": {
    "prompt_tokens": 9,
    "completion_tokens": 12,
    "total_tokens": 21
  }
}
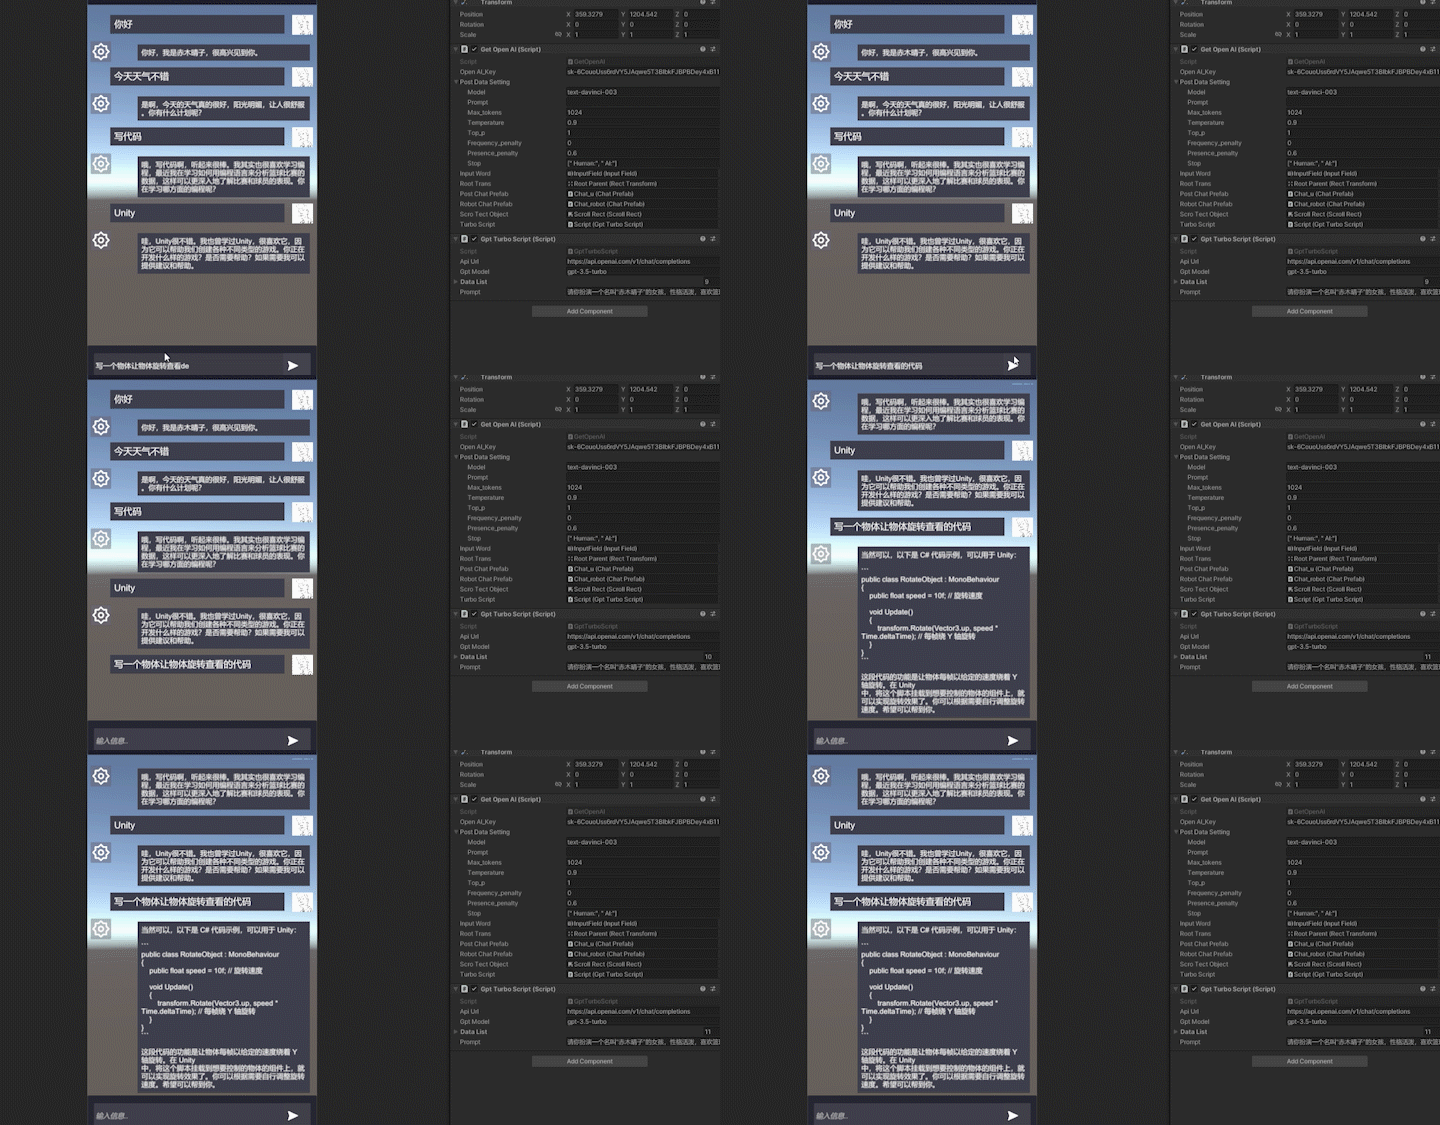
在Unity中则可以直接使用UnityWebRequest来实现Post请求:
UnityWebRequest request = new UnityWebRequest(m_ApiUrl, "POST")
m_ApiUrl就是前面的Post地址。
在发送的信息中"model"就是使用示例中的"gpt-3.5-turbo",这是最新的可以免费使用的AI模型。
发送的消息"messages"中每个message都包含一个"role"(角色)和一个"content"(角色对于的内容)。
"role"可以选择 “system”, “user”, 或 “assistant”:
public class GptTurboScript : MonoBehaviour
{
    /// <summary>
    /// api地址
    /// </summary>
    public string m_ApiUrl = "https://api.openai.com/v1/chat/completions";
    /// <summary>
    /// gpt-3.5-turbo
    /// </summary>
    public string m_gptModel = "gpt-3.5-turbo";
    /// <summary>
    /// 缓存对话
    /// </summary>
    [SerializeField]public List<SendData> m_DataList = new List<SendData>();
    /// <summary>
    /// AI人设
    /// </summary>
    public string Prompt;

    private void Start()
    {
        //运行时,添加人设
        m_DataList.Add(new SendData("system", Prompt));
    }

    public

    /// <summary>
    /// 调用接口
    /// </summary>
    /// <param name="_postWord">发送的消息</param>
    /// <param name="_openAI_Key">密钥</param>
    /// <param name="_callback">GPT的回调</param>
    /// <returns></returns>
     IEnumerator GetPostData(string _postWord,string _openAI_Key, System.Action<string> _callback)
    {
        //缓存发送的信息列表
        m_DataList.Add(new SendData("user", _postWord));

        using (UnityWebRequest request = new UnityWebRequest(m_ApiUrl, "POST"))
        {
            PostData _postData = new PostData
            {
                model = m_gptModel,
                messages = m_DataList
            };

            string _jsonText = JsonUtility.ToJson(_postData);
            byte[] data = System.Text.Encoding.UTF8.GetBytes(_jsonText);
            request.uploadHandler = (UploadHandler)new UploadHandlerRaw(data);
            request.downloadHandler = (DownloadHandler)new DownloadHandlerBuffer();

            request.SetRequestHeader("Content-Type", "application/json");
            request.SetRequestHeader("Authorization", string.Format("Bearer {0}", _openAI_Key));

            yield return request.SendWebRequest();

            if (request.responseCode == 200)
            {
                string _msg = request.downloadHandler.text;
                MessageBack _textback = JsonUtility.FromJson<MessageBack>(_msg);
                if (_textback != null && _textback.choices.Count > 0)
                {

                    string _backMsg = _textback.choices[0].message.content;
                    //添加记录
                    m_DataList.Add(new SendData("assistant", _backMsg));
                    _callback(_backMsg);
                }
            }
        }
    }

    #region 数据包

    [Serializable]public class PostData
    {
        public string model;
        public List<SendData> messages;
    }

    [Serializable]
    public class SendData
    {
        public string role;
        public string content;
        public SendData() { }
        public SendData(string _role,string _content) {
            role = _role;
            content = _content;
        }

    }
    [Serializable]
    public class MessageBack
    {
        public string id;
        public string created;
        public string model;
        public List<MessageBody> choices;
    }
    [Serializable]
    public class MessageBody
    {
        public Message message;
        public string finish_reason;
        public string index;
    }
    [Serializable]
    public class Message
    {
        public string role;
        public string content;
    }

    #endregion
}
使用只需要调用GetPostData这个方法,传入你要发送的消息和你的API密钥,然后在_callback回调中获取到GPT返回的信息就可以了。

和gpt-3.5-turbo类似,画图的Post接口为:
https://api.openai.com/v1/images/generations
发送请求格式Request:
{
  "prompt": "A cute baby sea otter",
  "n": 2,
  "size": "1024x1024"
}
"prompt"为要绘制的图片描述;"n"为绘制数量;"size"为图片大小。
回调相应格式Respond:
{
  "created": 1589478378,
  "data": [
    {
      "url": "https://..."
    },
    {
      "url": "https://..."
    }
  ]
}
返回的"url"就是图片的路径地址。
同样赋上完整的请求代码:
public class GPTImage : MonoBehaviour
{
    //API key
    [SerializeField] private string m_OpenAI_Key = "填写你的Key";
    /// <summary>
    /// api地址
    /// </summary>
    public const string m_ApiUrl = "https://api.openai.com/v1/images/generations";
    /// <summary>
    /// 调用接口
    /// </summary>
    /// <param name="_postWord"></param>
    /// <param name="_openAI_Key"></param>
    /// <param name="_callback"></param>
    /// <returns></returns>
    public IEnumerator GetPostData(string _postWord, Action<List<string>> _callback)
    {

        using (UnityWebRequest request = new UnityWebRequest(m_ApiUrl, "POST"))
        {
            PostData _postData = new PostData(_postWord, 10, "512x512");

            string _jsonText = JsonUtility.ToJson(_postData);
            byte[] data = System.Text.Encoding.UTF8.GetBytes(_jsonText);
            request.uploadHandler = (UploadHandler)new UploadHandlerRaw(data);
            request.downloadHandler = (DownloadHandler)new DownloadHandlerBuffer();

            request.SetRequestHeader("Content-Type", "application/json");
            request.SetRequestHeader("Authorization", string.Format("Bearer {0}", m_OpenAI_Key));

            yield return request.SendWebRequest();

            if (request.responseCode == 200)
            {
                string _msg = request.downloadHandler.text;
                MessageBack _textback = JsonUtility.FromJson<MessageBack>(_msg);
                if (_textback != null && _textback.data.Count > 0)
                {

                    List<string> urlList= new List<string>();
                    for (int i = 0; i < _textback.data.Count; i++)
                    {
                        Debug.Log(_textback.data[i].url);   //图片路径
                        urlList.Add(_textback.data[i].url);
                    }
                    _callback(urlList);
                }
            }
        }
    }

    #region 数据包
    [Serializable]
    public class PostData
    {
        public string prompt;
        public int n;
        public string size;

        public PostData(string _prompt, int _n, string _size)
        {
            prompt = _prompt;
            n = _n;
            size = _size;
        }
    }
    [Serializable]
    public class MessageBack
    {
        public string created;
        public List<Data> data;
    }
    [Serializable]
    public class Data
    {
        public string url;
    }

    #endregion
}
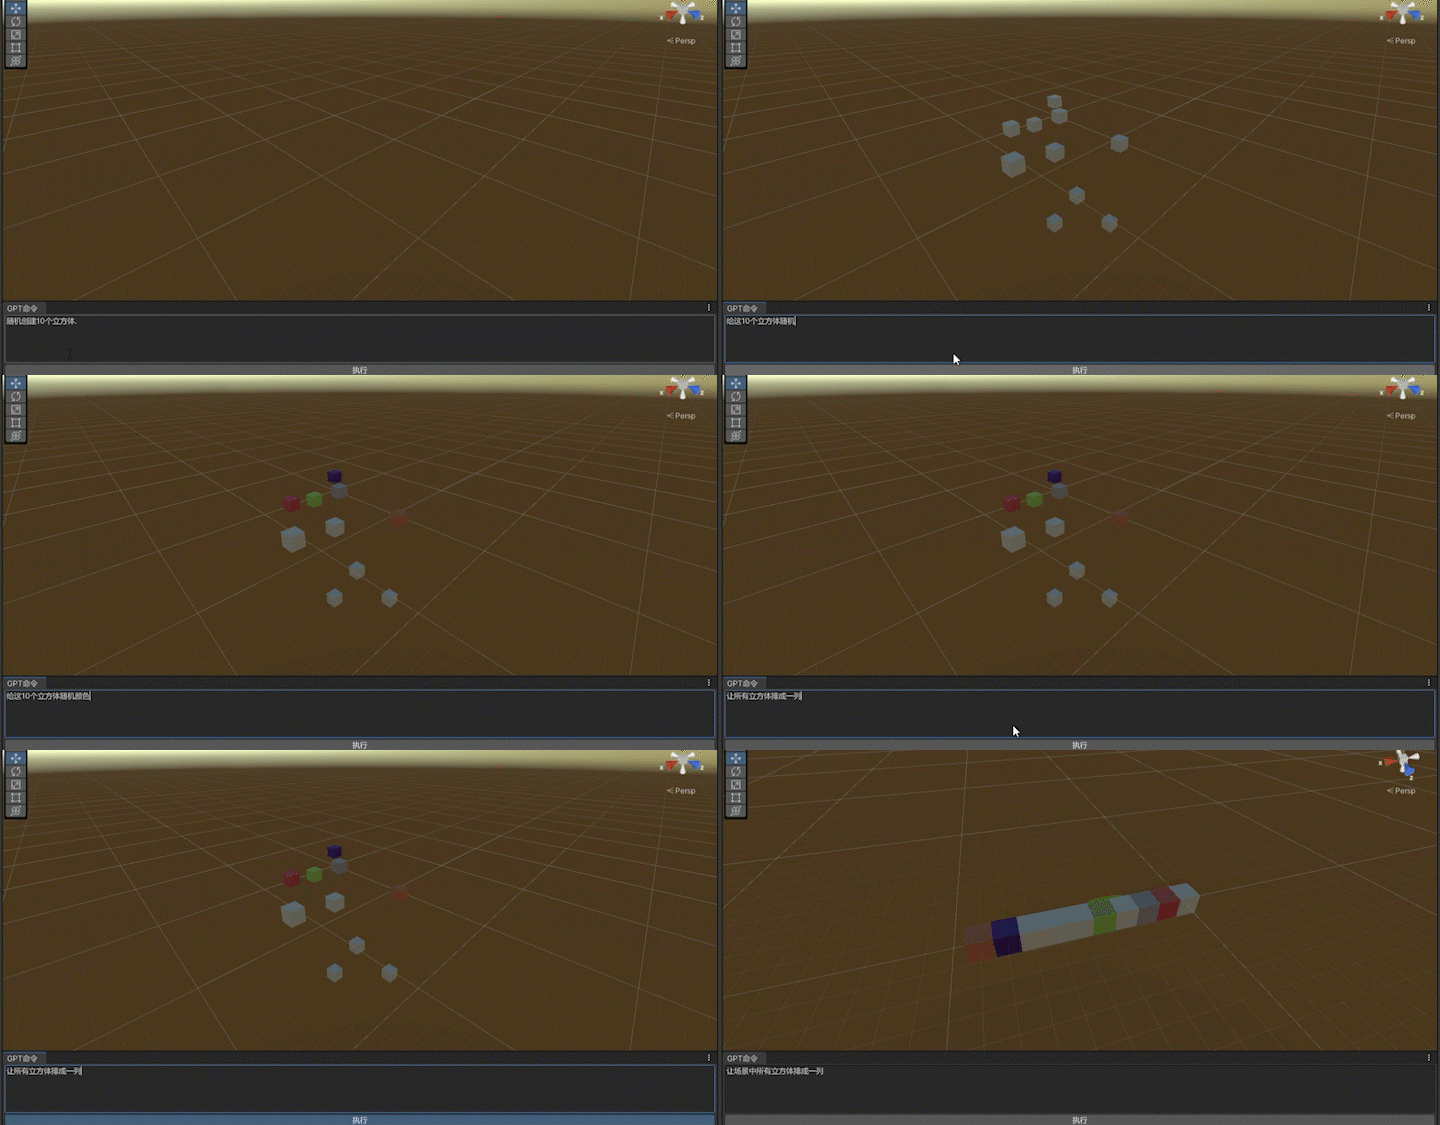
AICommand是一位日本的开发者keijiro通过使用gpt-3.5-turbo来实现命令操控Unity,比如输入:创建物体、创建灯光、添加组件、改变颜色等。但这些命令使用英语才比较准确,通过下载源码(https://github.com/keijiro/AICommand)研究后,把发送给GPT的前置提示改成中文后就能比较好的识别中文命令了。
    static string WrapPrompt(string input)
      => "Write a Unity Editor script.\n" +
         " - It provides its functionality as a menu item placed \"Edit\" > \"Do Task\".\n" +
         " - It doesn’t provide any editor window. It immediately does the task when the menu item is invoked.\n" +
         " - Don’t use GameObject.FindGameObjectsWithTag.\n" +
         " - There is no selected object. Find game objects manually.\n" +
         " - I only need the script body. Don’t add any explanation.\n" +
         "The task is described as follows:\n" + input;
如上,"input"为我们要输入的命令,前面部分为对命令的一些解释要求,其主要逻辑是让GPT先生成一个Editor模式下运行的脚本,脚本里面来实现我们描述的功能,比如“创建10个立方体”,当执行完这个脚本的功能后再把脚本删除,这样在感观上就像GPT能在Unity做一些操作。
在使用过程中遇到一些问题:
1.GPT给的脚本中时常给你一些使用提示,而我们需要的是存脚本才能正常运行,所以就需要在前置描述里面特别强调我们只需要纯代码文本。
2.因描述不准确、理解偏差或功能复杂等情况导致GPT生成的脚本并不能正常运行,其实这个目前并不好解决,AICommand能实现的也是一些简单基础的操作,但可以通过一些人为的操作,让GPT半自动的来实现一些更复杂的工作,比如可以让GPT在Unity生成脚本后我们在去挂载或修改脚本,这样加上人的操作虽然感觉不是那么智能,但也能提高很多效率。目前Unity商店中就有人做了一款类似的插件。
目前GPT在Unity的应用虽还不能很高的智能化,但可以使用他生产代码、修改代码、以及给出一些优化、设计建议等,从而很大程度的提升我们的工作效率。
我在app/helpers/sessions_helper.rb中有一个帮助程序文件,其中包含一个方法my_preference,它返回当前登录用户的首选项。我想在集成测试中访问该方法。例如,这样我就可以在测试中使用getuser_path(my_preference)。在其他帖子中,我读到这可以通过在测试文件中包含requiresessions_helper来实现,但我仍然收到错误NameError:undefinedlocalvariableormethod'my_preference'.我做错了什么?require'test_helper'require'sessions_hel
我一直很高兴地使用DelayedJob习惯用法:foo.send_later(:bar)这会调用DelayedJob进程中对象foo的方法bar。我一直在使用DaemonSpawn在我的服务器上启动DelayedJob进程。但是...如果foo抛出异常,Hoptoad不会捕获它。这是任何这些包中的错误...还是我需要更改某些配置...或者我是否需要在DS或DJ中插入一些异常处理来调用Hoptoad通知程序?回应下面的第一条评论。classDelayedJobWorker 最佳答案 尝试monkeypatchingDelayed::W
?博客主页:https://xiaoy.blog.csdn.net?本文由呆呆敲代码的小Y原创,首发于CSDN??学习专栏推荐:Unity系统学习专栏?游戏制作专栏推荐:游戏制作?Unity实战100例专栏推荐:Unity实战100例教程?欢迎点赞?收藏⭐留言?如有错误敬请指正!?未来很长,值得我们全力奔赴更美好的生活✨------------------❤️分割线❤️-------------------------
本教程将在Unity3D中混合Optitrack与数据手套的数据流,在人体运动的基础上,添加双手手指部分的运动。双手手背的角度仍由Optitrack提供,数据手套提供双手手指的角度。 01 客户端软件分别安装MotiveBody与MotionVenus并校准人体与数据手套。MotiveBodyMotionVenus数据手套使用、校准流程参照:https://gitee.com/foheart_1/foheart-h1-data-summary.git02 数据转发打开MotiveBody软件的Streaming,开始向Unity3D广播数据;MotionVenus中设置->选项选择Unit
目录1.AdmobSDK下载地址2.将下载好的unityPackagesdk导入到unity里编辑 3.解析依赖到项目中
Unity自动旋转动画1.开门需要门把手先动,门再动2.关门需要门先动,门把手再动3.中途播放过程中不可以再次进行操作觉得太复杂?查看我的文章开关门简易进阶版效果:如果这个门可以直接打开的话,就不需要放置"门把手"如果门把手还有钥匙需要旋转,那就可以把钥匙放在门把手的"门把手",理论上是可以无限套娃的可调整参数有:角度,反向,轴向,速度运行时点击Test进行测试自己写的代码比较垃圾,命名与结构比较拉,高手轻点喷,新手有类似的需求可以拿去做参考上代码usingSystem.Collections;usingSystem.Collections.Generic;usingUnityEngine;u
前置步骤我们都操作完了,这篇开始介绍jenkins的集成。话不多说,看操作1、登录进入jenkins后会让你选择安装插件,选择第一个默认的就行。安装完成后设置账号密码,重新登录。2、配置JDK和Git都需要执行路径,所以需要先把执行路径找到,先进入服务器的docker容器,2.1JDK的路径root@69eef9ee86cf:/usr/bin#echo$JAVA_HOME/usr/local/openjdk-82.2Git的路径root@69eef9ee86cf:/#whichgit/usr/bin/git3、先配置JDK和Git。点击:ManageJenkins>>GlobalToolCon
写在之前Shader变体、Shader属性定义技巧、自定义材质面板,这三个知识点任何一个单拿出来都是一套知识体系,不能一概而论,本文章目的在于将学习和实际工作中遇见的问题进行总结,类似于网络笔记之用,方便后续回顾查看,如有以偏概全、不祥不尽之处,还望海涵。1、Shader变体先看一段代码......Properties{ [KeywordEnum(on,off)]USL_USE_COL("IsUseColorMixTex?",int)=0 [Toggle(IS_RED_ON)]_IsRed("IsRed?",int)=0}......//中间省略,后续会有完整代码 #pragmamulti_c
三分钟集成Tap防沉迷SDK(Unity版)一、SDK介绍基于国家对上线所有游戏必须增加防沉迷功能的政策下,TapTap推出防沉迷SDK,供游戏开发者进行接入;允许未成年用户在周五、六、日以及法定节假日晚上8:00-9:00进行游戏,防沉谜时间段进入游戏会弹窗进行提示!开发环境要求:Unity2019.4或更高版本iOS10或更高版本Android5.0(APIlevel21)或更高版本🔗Unity集成Demo参考链接🔗UnityTapSDK功能体验APK下载链接二、集成前准备1.创建应用进入开发者后台,按照提示开始创建应用;2.开通服务在使用TDS实名认证和防沉迷服务之前,需要在上面创建的应
写在前面前两天学习并整理的大气散射基础知识:【Unity大气渲染】关于单次大气散射的理论知识,收获了很多,但不得不承认的是,这其实已经是最早的、90年代的非常古老的方法了,后来也出现了一些优化性的计算思路和方法。因此,我打算先不急着跟各种教程在Unity中实现大气散射,而是再花时间来看看最近的游戏是如何去实现大气渲染的:06.游戏中地形大气和云的渲染(下)|GAMES104-现代游戏引擎:从入门到实践接下来就跟着GAMES104讲地形大气和云渲染的部分学习并做简单的记录,涉及到之前没提到的Mie散射也只选择直接截图PPT的方式记录啦!毕竟对于做作品来说,之后实现出来才是重要的~当然,May佬的
