文章目录
最近做的项目中需要实现文字+图片等信息的发布,由于UEditor不怎么维护了,想换一种,于是找到了vue-quill-editor这款富文本编辑器,展示出来的效果还是不错的。开干!
安装 quill-editor
cnpm install vue-quill-editor --save
//安装quill,这个要安装,否则报错 Cannot read property 'imports' of undefined
cnpm install quill --save

安装拖动和缩放的依赖,当上传的图片过大时,可以通过缩放变换大小。
cnpm install quill-image-drop-module --save     //拖动
cnpm install quill-image-resize-module --save //缩放
插件需要webpack的支持!!!!!!别问我是怎么知道的😭
编辑 vue.config.js 文件:
var webpack = require('webpack');
module.exports = {
    devServer: {
        proxy: process.env.VUE_APP_BASEURL
    },
    configureWebpack:{
        plugins:[new webpack.ProvidePlugin({
            'window.Quill':'quill/dist/quill.js',
            'Quill':'quill/dist/quill.js'
        }),]
    }
}
}
进入main.js文件
//引入quill-editor编辑器
 import VueQuillEditor from 'vue-quill-editor'
 import 'quill/dist/quill.core.css'
 import 'quill/dist/quill.snow.css'
 import 'quill/dist/quill.bubble.css'
 Vue.use(VueQuillEditor)

 //实现quill-editor编辑器拖拽上传图片
 import * as Quill from 'quill'
 import { ImageDrop } from 'quill-image-drop-module'
 Quill.register('modules/imageDrop', ImageDrop)

 //实现quill-editor编辑器调整图片尺寸
 import ImageResize from 'quill-image-resize-module'
 Quill.register('modules/imageResize', ImageResize)
import 'quill/dist/quill.core.css'
import 'quill/dist/quill.snow.css'
import 'quill/dist/quill.bubble.css'

import { quillEditor } from 'vue-quill-editor'

export default {
  components: {
    quillEditor
  }
}
本项目中用的是全局挂载
当前文件为Editor.vue
实现图片和视频的上传功能
<!-- 基于elementUi的上传组件 el-upload begin-->
  <el-upload
      class="avatar-uploader"
      :action="uploadImgUrl"
      :accept="'image/*,video/*'"
      :show-file-list="false"
      :on-success="uploadEditorSuccess"
      :on-error="uploadEditorError"
      :before-upload="beforeEditorUpload"
      :headers="headers">
  </el-upload>
  <!-- 基于elementUi的上传组件 el-upload end-->
注 accept:接受上传的文件类型
.avatar-uploader-editor{
    display: inline-block;
  }
  .avatar-uploader-editor-video{
    display: inline-block;
  }
  .avatar-uploader-editor-voice{
    display: inline-block;
  }
vue-quill-editor 默认是以 iframe 保存的,插入到编辑器中的标签是 iframe,而我们真正需要的是video标签
修改视频 <iframe> 标签为 <video>同目录下,创建video.js
import { Quill } from 'vue-quill-editor'

// 源码中是import直接倒入,这里要用Quill.import引入
const BlockEmbed = Quill.import('blots/block/embed')
const Link = Quill.import('formats/link')

const ATTRIBUTES = ['height', 'width']

class Video extends BlockEmbed {
  static create (value) {
    const node = super.create(value)
    // 添加video标签所需的属性
    node.setAttribute('controls', 'controls') // 控制播放器
    //删除原生video的控制条的下载或者全屏按钮的方法
    //<video controls controlsList='nofullscreen nodownload noremote footbar' ></video>
    //不用哪个在下面加上哪个
    node.setAttribute('controlsList', 'nofullscreen') // 控制删除
    node.setAttribute('type', 'video/mp4')
    node.setAttribute('style', 'object-fit:fill;width: 100%;')
    node.setAttribute('preload', 'auto')    // auto - 当页面加载后载入整个视频  meta - 当页面加载后只载入元数据  none - 当页面加载后不载入视频
    node.setAttribute('playsinline', 'true')
    node.setAttribute('x-webkit-airplay', 'allow')
    // node.setAttribute('x5-video-player-type', 'h5') // 启用H5播放器,是wechat安卓版特性
    node.setAttribute('x5-video-orientation', 'portraint') // 竖屏播放 声明了h5才能使用  播放器支付的方向,landscape横屏,portraint竖屏,默认值为竖屏
    node.setAttribute('x5-playsinline', 'true') // 兼容安卓 不全屏播放
    node.setAttribute('x5-video-player-fullscreen', 'true')    // 全屏设置,设置为 true 是防止横屏
    node.setAttribute('src', this.sanitize(value))
    return node
  }

  static formats (domNode) {
    return ATTRIBUTES.reduce((formats, attribute) => {
      if (domNode.hasAttribute(attribute)) {
        formats[attribute] = domNode.getAttribute(attribute)
      }
      return formats
    }, {})
  }

  static sanitize (url) {
    return Link.sanitize(url) // eslint-disable-line import/no-named-as-default-member
  }

  static value (domNode) {
    return domNode.getAttribute('src')
  }

  format (name, value) {
    if (ATTRIBUTES.indexOf(name) > -1) {
      if (value) {
        this.domNode.setAttribute(name, value)
      } else {
        this.domNode.removeAttribute(name)
      }
    } else {
      super.format(name, value)
    }
  }

  html () {
    const { video } = this.value()
    return `<a href="${video}">${video}</a>`
  }
}
Video.blotName = 'video' // 这里不用改,楼主不用iframe,直接替换掉原来,如果需要也可以保留原来的,这里用个新的blot
Video.className = 'ql-video'
Video.tagName = 'video' // 用video标签替换iframe

export default Video
在Editor.vue中加入
import * as Quill from 'vue-quill-editor'
// 这里引入修改过的video模块并注册
import Video from "@/components/Editor/video";
Quill.register(Video, true)
/*加上height和滚动属性就可以,滚动条样式是系统默认样式,可能不同*/
.ql-toolbar.ql-snow .ql-picker.ql-expanded .ql-picker-options {
  border-color: #ccc;
  height: 125px;
  overflow: auto;
}
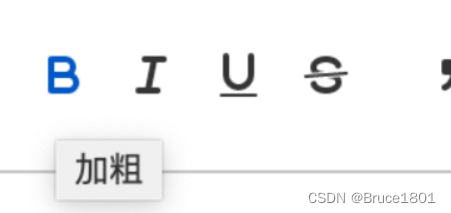
每一个tool都有一个class, 可以把所有的class列出来,然后根据class获取元素,给它加上title属性就可以了
先定义一个数组,把所有的工具放在里面
// toolbar标题
const titleConfig = [
  { Choice: '.ql-insertMetric', title: '跳转配置' },
  { Choice: '.ql-bold', title: '加粗' },
  { Choice: '.ql-italic', title: '斜体' },
  { Choice: '.ql-underline', title: '下划线' },
  { Choice: '.ql-header', title: '段落格式' },
  { Choice: '.ql-strike', title: '删除线' },
  { Choice: '.ql-blockquote', title: '块引用' },
  { Choice: '.ql-code', title: '插入代码' },
  { Choice: '.ql-code-block', title: '插入代码段' },
  { Choice: '.ql-font', title: '字体' },
  { Choice: '.ql-size', title: '字体大小' },
  { Choice: '.ql-list[value="ordered"]', title: '编号列表' },
  { Choice: '.ql-list[value="bullet"]', title: '项目列表' },
  { Choice: '.ql-direction', title: '文本方向' },
  { Choice: '.ql-header[value="1"]', title: 'h1' },
  { Choice: '.ql-header[value="2"]', title: 'h2' },
  { Choice: '.ql-align', title: '对齐方式' },
  { Choice: '.ql-color', title: '字体颜色' },
  { Choice: '.ql-background', title: '背景颜色' },
  { Choice: '.ql-image', title: '图像' },
  { Choice: '.ql-video', title: '视频' },
  { Choice: '.ql-link', title: '添加链接' },
  { Choice: '.ql-formula', title: '插入公式' },
  { Choice: '.ql-clean', title: '清除字体格式' },
  { Choice: '.ql-emoji', title: '表情包' },
  { Choice: '.ql-script[value="sub"]', title: '下标' },
  { Choice: '.ql-script[value="super"]', title: '上标' },
  { Choice: '.ql-indent[value="-1"]', title: '向左缩进' },
  { Choice: '.ql-indent[value="+1"]', title: '向右缩进' },
  { Choice: '.ql-header .ql-picker-label', title: '标题大小' },
  { Choice: '.ql-header .ql-picker-item[data-value="1"]', title: '标题一' },
  { Choice: '.ql-header .ql-picker-item[data-value="2"]', title: '标题二' },
  { Choice: '.ql-header .ql-picker-item[data-value="3"]', title: '标题三' },
  { Choice: '.ql-header .ql-picker-item[data-value="4"]', title: '标题四' },
  { Choice: '.ql-header .ql-picker-item[data-value="5"]', title: '标题五' },
  { Choice: '.ql-header .ql-picker-item[data-value="6"]', title: '标题六' },
  { Choice: '.ql-header .ql-picker-item:last-child', title: '标准' },
  { Choice: '.ql-size .ql-picker-item[data-value="small"]', title: '小号' },
  { Choice: '.ql-size .ql-picker-item[data-value="large"]', title: '大号' },
  { Choice: '.ql-size .ql-picker-item[data-value="huge"]', title: '超大号' },
  { Choice: '.ql-size .ql-picker-item:nth-child(2)', title: '标准' },
  { Choice: '.ql-align .ql-picker-item:first-child', title: '居左对齐' },
  { Choice: '.ql-align .ql-picker-item[data-value="center"]', title: '居中对齐' },
  { Choice: '.ql-align .ql-picker-item[data-value="right"]', title: '居右对齐' },
  { Choice: '.ql-align .ql-picker-item[data-value="justify"]', title: '两端对齐' }
]
在页面上已经渲染好元素之后,执行存放该内容的函数,不然会获取不到元素,可以直接放在@ready的函数里面
for (let item of titleConfig) {
        let tip = document.querySelector('.quill-editor ' + item.Choice)
        if (!tip) continue
        tip.setAttribute('title', item.title)
      }
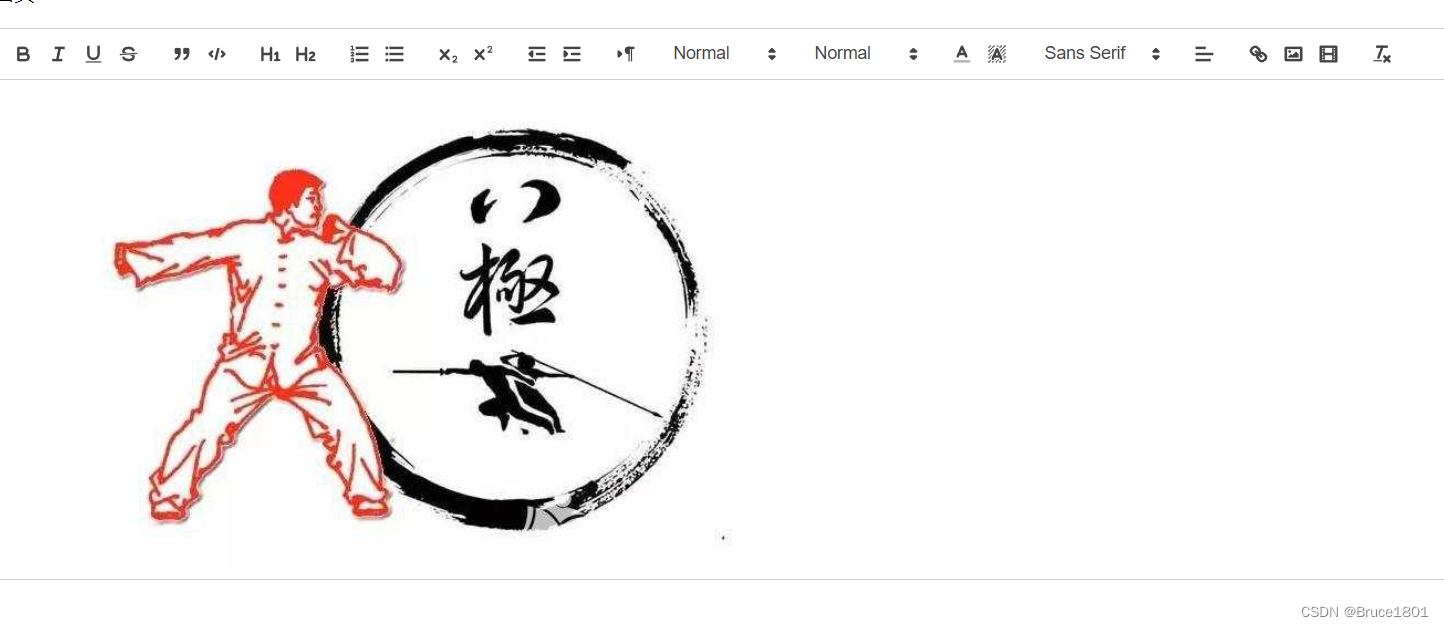
<template>
  <div id='quillEditorQiniu'>
    <!-- 基于elementUi的上传组件 el-upload begin-->
    <el-upload
        class="avatar-uploader"
        :action="uploadImgUrl"
        :accept="'image/*,video/*'"
        :show-file-list="false"
        :on-success="uploadEditorSuccess"
        :on-error="uploadEditorError"
        :before-upload="beforeEditorUpload"
        :headers="headers">
    </el-upload>
    <!-- 基于elementUi的上传组件 el-upload end-->
    <quill-editor   class="editor"  v-model="content" ref="customQuillEditor"
                   @change="onEditorChange($event)"
                   :options="editorOption" @ready="onEditorReady($event)" >
    </quill-editor>
  </div>
</template>

<script>
import * as Quill from 'quill'
import Video from "@/components/Editor/video";
Quill.register(Video, true)
import {getToken} from "@/utils/auth";
const toolbarOptions = [
  ['bold', 'italic', 'underline', 'strike'],        // toggled buttons
  ['blockquote', 'code-block'],

  [{'header': 1}, {'header': 2}],               // custom button values
  [{'list': 'ordered'}, {'list': 'bullet'}],
  [{'script': 'sub'}, {'script': 'super'}],      // superscript/subscript
  [{'indent': '-1'}, {'indent': '+1'}],          // outdent/indent
  [{'direction': 'rtl'}],                         // text direction

  [{'size': ['small', false, 'large', 'huge']}],  // custom dropdown
  [{'header': [1, 2, 3, 4, 5, 6, false]}],

  [{'color': []}, {'background': []}],          // dropdown with defaults from theme
  [{'font': []}],
  [{'align': []}],
  ['link', 'image', 'video'],
  ['clean']                                         // remove formatting button
];
const titleConfig = [
  { Choice: '.ql-insertMetric', title: '跳转配置' },
  { Choice: '.ql-bold', title: '加粗' },
  { Choice: '.ql-italic', title: '斜体' },
  { Choice: '.ql-underline', title: '下划线' },
  { Choice: '.ql-header', title: '段落格式' },
  { Choice: '.ql-strike', title: '删除线' },
  { Choice: '.ql-blockquote', title: '块引用' },
  { Choice: '.ql-code', title: '插入代码' },
  { Choice: '.ql-code-block', title: '插入代码段' },
  { Choice: '.ql-font', title: '字体' },
  { Choice: '.ql-size', title: '字体大小' },
  { Choice: '.ql-list[value="ordered"]', title: '编号列表' },
  { Choice: '.ql-list[value="bullet"]', title: '项目列表' },
  { Choice: '.ql-direction', title: '文本方向' },
  { Choice: '.ql-header[value="1"]', title: 'h1' },
  { Choice: '.ql-header[value="2"]', title: 'h2' },
  { Choice: '.ql-align', title: '对齐方式' },
  { Choice: '.ql-color', title: '字体颜色' },
  { Choice: '.ql-background', title: '背景颜色' },
  { Choice: '.ql-image', title: '图像' },
  { Choice: '.ql-video', title: '视频' },
  { Choice: '.ql-link', title: '添加链接' },
  { Choice: '.ql-formula', title: '插入公式' },
  { Choice: '.ql-clean', title: '清除字体格式' },
  { Choice: '.ql-emoji', title: '表情包' },
  { Choice: '.ql-script[value="sub"]', title: '下标' },
  { Choice: '.ql-script[value="super"]', title: '上标' },
  { Choice: '.ql-indent[value="-1"]', title: '向左缩进' },
  { Choice: '.ql-indent[value="+1"]', title: '向右缩进' },
  { Choice: '.ql-header .ql-picker-label', title: '标题大小' },
  { Choice: '.ql-header .ql-picker-item[data-value="1"]', title: '标题一' },
  { Choice: '.ql-header .ql-picker-item[data-value="2"]', title: '标题二' },
  { Choice: '.ql-header .ql-picker-item[data-value="3"]', title: '标题三' },
  { Choice: '.ql-header .ql-picker-item[data-value="4"]', title: '标题四' },
  { Choice: '.ql-header .ql-picker-item[data-value="5"]', title: '标题五' },
  { Choice: '.ql-header .ql-picker-item[data-value="6"]', title: '标题六' },
  { Choice: '.ql-header .ql-picker-item:last-child', title: '标准' },
  { Choice: '.ql-size .ql-picker-item[data-value="small"]', title: '小号' },
  { Choice: '.ql-size .ql-picker-item[data-value="large"]', title: '大号' },
  { Choice: '.ql-size .ql-picker-item[data-value="huge"]', title: '超大号' },
  { Choice: '.ql-size .ql-picker-item:nth-child(2)', title: '标准' },
  { Choice: '.ql-align .ql-picker-item:first-child', title: '居左对齐' },
  { Choice: '.ql-align .ql-picker-item[data-value="center"]', title: '居中对齐' },
  { Choice: '.ql-align .ql-picker-item[data-value="right"]', title: '居右对齐' },
  { Choice: '.ql-align .ql-picker-item[data-value="justify"]', title: '两端对齐' }
]
export default {
  name: "Editor",
  props:{
    /*编辑器内容*/
    value:{
      type:String
    },
  },
  data(){
    return{
      content:this.value,
      uploadImgUrl:"/beidauser/upload",// 上传的图片服务器地址,
      headers: {
        Authorization: "Bearer " + getToken(),
      },
      quillUpdateImg:false,
      editorOption:{
        placeholder:'你想说什么?',
        modules: {
          imageResize: {
            displayStyles:{
              backgroundColor:'black',
              border:'none',
              color:'white'
            },
            modules:['Resize','DisplaySize'],
          },
          toolbar: {
            container: toolbarOptions,  // 工具栏
            handlers: {
              'image': function (value) {
                if (value) {
                  document.querySelector('#quillEditorQiniu .avatar-uploader input').click()
                } else {
                  this.quill.format('image', false);
                }
              },
              'video': function (value) {
                if (value) {
                  document.querySelector('#quillEditorQiniu .avatar-uploader input').click()
                } else {
                  this.quill.format('video', false);
                }
              }
            }
          }
        }
      },
    }
  },
  methods:{
    onEditorReady(quill){
      console.log(quill);
      for (let item of titleConfig) {
        let tip = document.querySelector('.quill-editor ' + item.Choice)
        if (!tip) continue
        tip.setAttribute('title', item.title)
      }
    },
    onEditorChange(){
      console.log(this.content);
      this.$emit('input',this.content);//将修改后的内容传到父组件
    },
    //上传图片之前async
    beforeEditorUpload(res, file){
      //显示上传动画
      console.log(res);
      console.log(file);
      this.quillUpdateImg = true;
      //  const res1 = await uploadImage()
      // console.log(res1,'=====');
      // this.$emit('before',res, file)
    },

    // 上传图片成功
    uploadEditorSuccess(res, file) {
      console.log(res, file);
      let imgUrl=res.data.url;
      let type=imgUrl.substring(imgUrl.lastIndexOf(".")+1);
      // 获取富文本组件实例
      let quill = this.$refs.customQuillEditor.quill;
      console.log(quill);
      // 获取光标所在位置
      let length = quill.getSelection().index;
      if(type==='mp4'){
        window.jsValue=imgUrl;
        // 插入视频  res.info为服务器返回的图片地址
        quill.insertEmbed(length, 'video', res.data.url);
      }else {
        // 插入图片  res.info为服务器返回的图片地址
        quill.insertEmbed(length, 'image', res.data.url);
      }

      // 调整光标到最后
      quill.setSelection(length + 1);

      //取消上传动画
      this.quillUpdateImg = false;

    },

    // 上传图片失败
    uploadEditorError(res, file) {
      console.log(res,'====44444');
      console.log(file,'====44444');
      //页面提示
      this.$message.error('上传失败')

      //取消上传动画
      this.quillUpdateImg = false;
    },
  },
  created () {
    /*if(this.oldContent){
      this.content = this.oldContent
    }*/
  },
  mounted () {
   console.log("开始")
  },
  watch:{
    value(newVal) {
      console.log(newVal);

        this.content=newVal;
    }
  },
}
</script>

<style scoped>

.editor {
  line-height: normal !important;
  height: 120px;
  margin-bottom: 50px;
}
.ql-snow .ql-tooltip[data-mode="link"]::before {
  content: "请输入链接地址:";
}
.ql-snow .ql-tooltip.ql-editing a.ql-action::after {
  border-right: 0px;
  content: "保存";
  padding-right: 0px;
}

.ql-snow .ql-tooltip[data-mode="video"]::before {
  content: "请输入视频地址:";
}

.ql-snow .ql-picker.ql-size .ql-picker-label::before,
.ql-snow .ql-picker.ql-size .ql-picker-item::before {
  content: "14px";
}
.ql-snow .ql-picker.ql-size .ql-picker-label[data-value="small"]::before,
.ql-snow .ql-picker.ql-size .ql-picker-item[data-value="small"]::before {
  content: "10px";
}
.ql-snow .ql-picker.ql-size .ql-picker-label[data-value="large"]::before,
.ql-snow .ql-picker.ql-size .ql-picker-item[data-value="large"]::before {
  content: "18px";
}
.ql-snow .ql-picker.ql-size .ql-picker-label[data-value="huge"]::before,
.ql-snow .ql-picker.ql-size .ql-picker-item[data-value="huge"]::before {
  content: "32px";
}

.ql-snow .ql-picker.ql-header .ql-picker-label::before,
.ql-snow .ql-picker.ql-header .ql-picker-item::before {
  content: "文本";
}
.ql-snow .ql-picker.ql-header .ql-picker-label[data-value="1"]::before,
.ql-snow .ql-picker.ql-header .ql-picker-item[data-value="1"]::before {
  content: "标题1";
}
.ql-snow .ql-picker.ql-header .ql-picker-label[data-value="2"]::before,
.ql-snow .ql-picker.ql-header .ql-picker-item[data-value="2"]::before {
  content: "标题2";
}
.ql-snow .ql-picker.ql-header .ql-picker-label[data-value="3"]::before,
.ql-snow .ql-picker.ql-header .ql-picker-item[data-value="3"]::before {
  content: "标题3";
}
.ql-snow .ql-picker.ql-header .ql-picker-label[data-value="4"]::before,
.ql-snow .ql-picker.ql-header .ql-picker-item[data-value="4"]::before {
  content: "标题4";
}
.ql-snow .ql-picker.ql-header .ql-picker-label[data-value="5"]::before,
.ql-snow .ql-picker.ql-header .ql-picker-item[data-value="5"]::before {
  content: "标题5";
}
.ql-snow .ql-picker.ql-header .ql-picker-label[data-value="6"]::before,
.ql-snow .ql-picker.ql-header .ql-picker-item[data-value="6"]::before {
  content: "标题6";
}

.ql-snow .ql-picker.ql-font .ql-picker-label::before,
.ql-snow .ql-picker.ql-font .ql-picker-item::before {
  content: "标准字体";
}
.ql-snow .ql-picker.ql-font .ql-picker-label[data-value="serif"]::before,
.ql-snow .ql-picker.ql-font .ql-picker-item[data-value="serif"]::before {
  content: "衬线字体";
}
.ql-snow .ql-picker.ql-font .ql-picker-label[data-value="monospace"]::before,
.ql-snow .ql-picker.ql-font .ql-picker-item[data-value="monospace"]::before {
  content: "等宽字体";
}
</style>

<el-form-item prop="content" label="消息内容" :label-width="dialogFormLabelWidth">
        <Editor v-model="dialogForm.content"/>
 </el-form-item>
我想将html转换为纯文本。不过,我不想只删除标签,我想智能地保留尽可能多的格式。为插入换行符标签,检测段落并格式化它们等。输入非常简单,通常是格式良好的html(不是整个文档,只是一堆内容,通常没有anchor或图像)。我可以将几个正则表达式放在一起,让我达到80%,但我认为可能有一些现有的解决方案更智能。 最佳答案 首先,不要尝试为此使用正则表达式。很有可能你会想出一个脆弱/脆弱的解决方案,它会随着HTML的变化而崩溃,或者很难管理和维护。您可以使用Nokogiri快速解析HTML并提取文本:require'nokogiri'h
我发现ActiveRecord::Base.transaction在复杂方法中非常有效。我想知道是否可以在如下事务中从AWSS3上传/删除文件:S3Object.transactiondo#writeintofiles#raiseanexceptionend引发异常后,每个操作都应在S3上回滚。S3Object这可能吗?? 最佳答案 虽然S3API具有批量删除功能,但它不支持事务,因为每个删除操作都可以独立于其他操作成功/失败。该API不提供任何批量上传功能(通过PUT或POST),因此每个上传操作都是通过一个独立的API调用完成的
我是Rails的新手,所以请原谅简单的问题。我正在为一家公司创建一个网站。那家公司想在网站上展示它的客户。我想让客户自己管理这个。我正在为“客户”生成一个表格,我想要的三列是:公司名称、公司描述和Logo。对于名称,我使用的是name:string但不确定如何在脚本/生成脚手架终端命令中最好地创建描述列(因为我打算将其设置为文本区域)和图片。我怀疑描述(我想成为一个文本区域)应该仍然是描述:字符串,然后以实际形式进行调整。不确定如何处理图片字段。那么……说来话长:我在脚手架命令中输入什么来生成描述和图片列? 最佳答案 对于“文本”数
我有带有Logo图像的公司模型has_attached_file:logo我用他们的Logo创建了许多公司。现在,我需要添加新样式has_attached_file:logo,:styles=>{:small=>"30x15>",:medium=>"155x85>"}我是否应该重新上传所有旧数据以重新生成新样式?我不这么认为……或者有什么rake任务可以重新生成样式吗? 最佳答案 参见Thumbnail-Generation.如果rake任务不适合你,你应该能够在控制台中使用一个片段来调用重新处理!关于相关公司
我在Rails应用程序中使用CarrierWave/Fog将视频上传到AmazonS3。有没有办法判断上传的进度,让我可以显示上传进度如何? 最佳答案 CarrierWave和Fog本身没有这种功能;你需要一个前端uploader来显示进度。当我不得不解决这个问题时,我使用了jQueryfileupload因为我的堆栈中已经有jQuery。甚至还有apostonCarrierWaveintegration因此您只需按照那里的说明操作即可获得适用于您的应用的进度条。 关于ruby-on-r
文章目录1.开发板选择*用到的资源2.串口通信(个人理解)3.代码分析(注释比较详细)1.主函数2.串口1配置3.串口2配置以及中断函数4.注意问题5.源码链接1.开发板选择我用的是STM32F103RCT6的板子,不过代码大概在F103系列的板子上都可以运行,我试过在野火103的霸道板上也可以,主要看一下串口对应的引脚一不一样就行了,不一样的就更改一下。*用到的资源keil5软件这里用到了两个串口资源,采集数据一个,串口通信一个,板子对应引脚如下:串口1,TX:PA9,RX:PA10串口2,TX:PA2,RX:PA32.串口通信(个人理解)我就从串口采集传感器数据这个过程说一下我自己的理解,
动漫制作技巧是很多新人想了解的问题,今天小编就来解答与大家分享一下动漫制作流程,为了帮助有兴趣的同学理解,大多数人会选择动漫培训机构,那么今天小编就带大家来看看动漫制作要掌握哪些技巧?一、动漫作品首先完成草图设计和原型制作。设计草图要有目的、有对象、有步骤、要形象、要简单、符合实际。设计图要一致性,以保证制作的顺利进行。二、原型制作是根据设计图纸和制作材料,可以是手绘也可以是3d软件创建。在此步骤中,要注意的问题是色彩和平面布局。三、动漫制作制作完成后,加工成型。完成不同的表现形式后,就要对设计稿进行加工处理,使加工的难易度降低,并得到一些基本准确的概念,以便于后续的大样、准确的尺寸制定。四、
2022/8/4更新支持加入水印水印必须包含透明图像,并且水印图像大小要等于原图像的大小pythonconvert_image_to_video.py-f30-mwatermark.pngim_dirout.mkv2022/6/21更新让命令行参数更加易用新的命令行使用方法pythonconvert_image_to_video.py-f30im_dirout.mkvFFMPEG命令行转换一组JPG图像到视频时,是将这组图像视为MJPG流。我需要转换一组PNG图像到视频,FFMPEG就不认了。pyav内置了ffmpeg库,不需要系统带有ffmpeg工具因此我使用ffmpeg的python包装p
Transformers开始在视频识别领域的“猪突猛进”,各种改进和魔改层出不穷。由此作者将开启VideoTransformer系列的讲解,本篇主要介绍了FBAI团队的TimeSformer,这也是第一篇使用纯Transformer结构在视频识别上的文章。如果觉得有用,就请点赞、收藏、关注!paper:https://arxiv.org/abs/2102.05095code(offical):https://github.com/facebookresearch/TimeSformeraccept:ICML2021author:FacebookAI一、前言Transformers(VIT)在图
我有这个代码:context"Visitingtheusers#indexpage."dobefore(:each){visitusers_path}subject{page}pending('iii'){shouldhave_no_css('table#users')}pending{shouldhavecontent('Youhavereachedthispageduetoapermissionic错误')}它会导致几个待处理,例如ManagingUsersGivenapractitionerloggedin.Visitingtheusers#indexpage.#Noreason